How do you adjust the positioning of bra straps? Today, we’re showing you how to adjust your straps on your me-made bra.
Jump to another post in this series:
- Bra fitting guide overview
- How to choose your bra size
- How to make a test bra
- How to adjust the back band
- How to adjust the gore/bridge (Willowdale only)
- How to adjust the cups
- How to adjust the center insert (Loftus only)
- How to adjust the side seam angle
- How to adjust the straps
- How to adjust the underwires (Willowdale only)
- Adjusting the level of support and comfort
- How to make an asymmetrical bra
- Additional bra making resources
Cashmerette has two bra patterns designed to support and lift big boobs in band sizes 28-54 and cups C-J, all while looking absolutely fabulous (It’s a lot to ask of a bra, but they are up to the task!)
The Willowdale is a full frame, underwire bra sewing pattern while the Loftus is a non-underwire bralette sewing pattern.
Start your bra fitting journey with the Cashmerette Bra Fitting Guide
To help you sew and fit your dream bra, we’ve put together the Cashmerette Bra Fitting Guide! This post is one of the many tutorials you’ll find there, and if you haven’t yet checked out the main guide page, we recommend starting there. So much of bra fitting is interconnected, and the guide provides a checklist and order to work through the adjustments.
In this post, we’re covering how to adjust the bra’s straps to achieve a better fit. Let’s get started! To jump to the instructions for the Loftus, click here.
For the Willowdale Bra:

How to tell if you need to adjust the bra straps
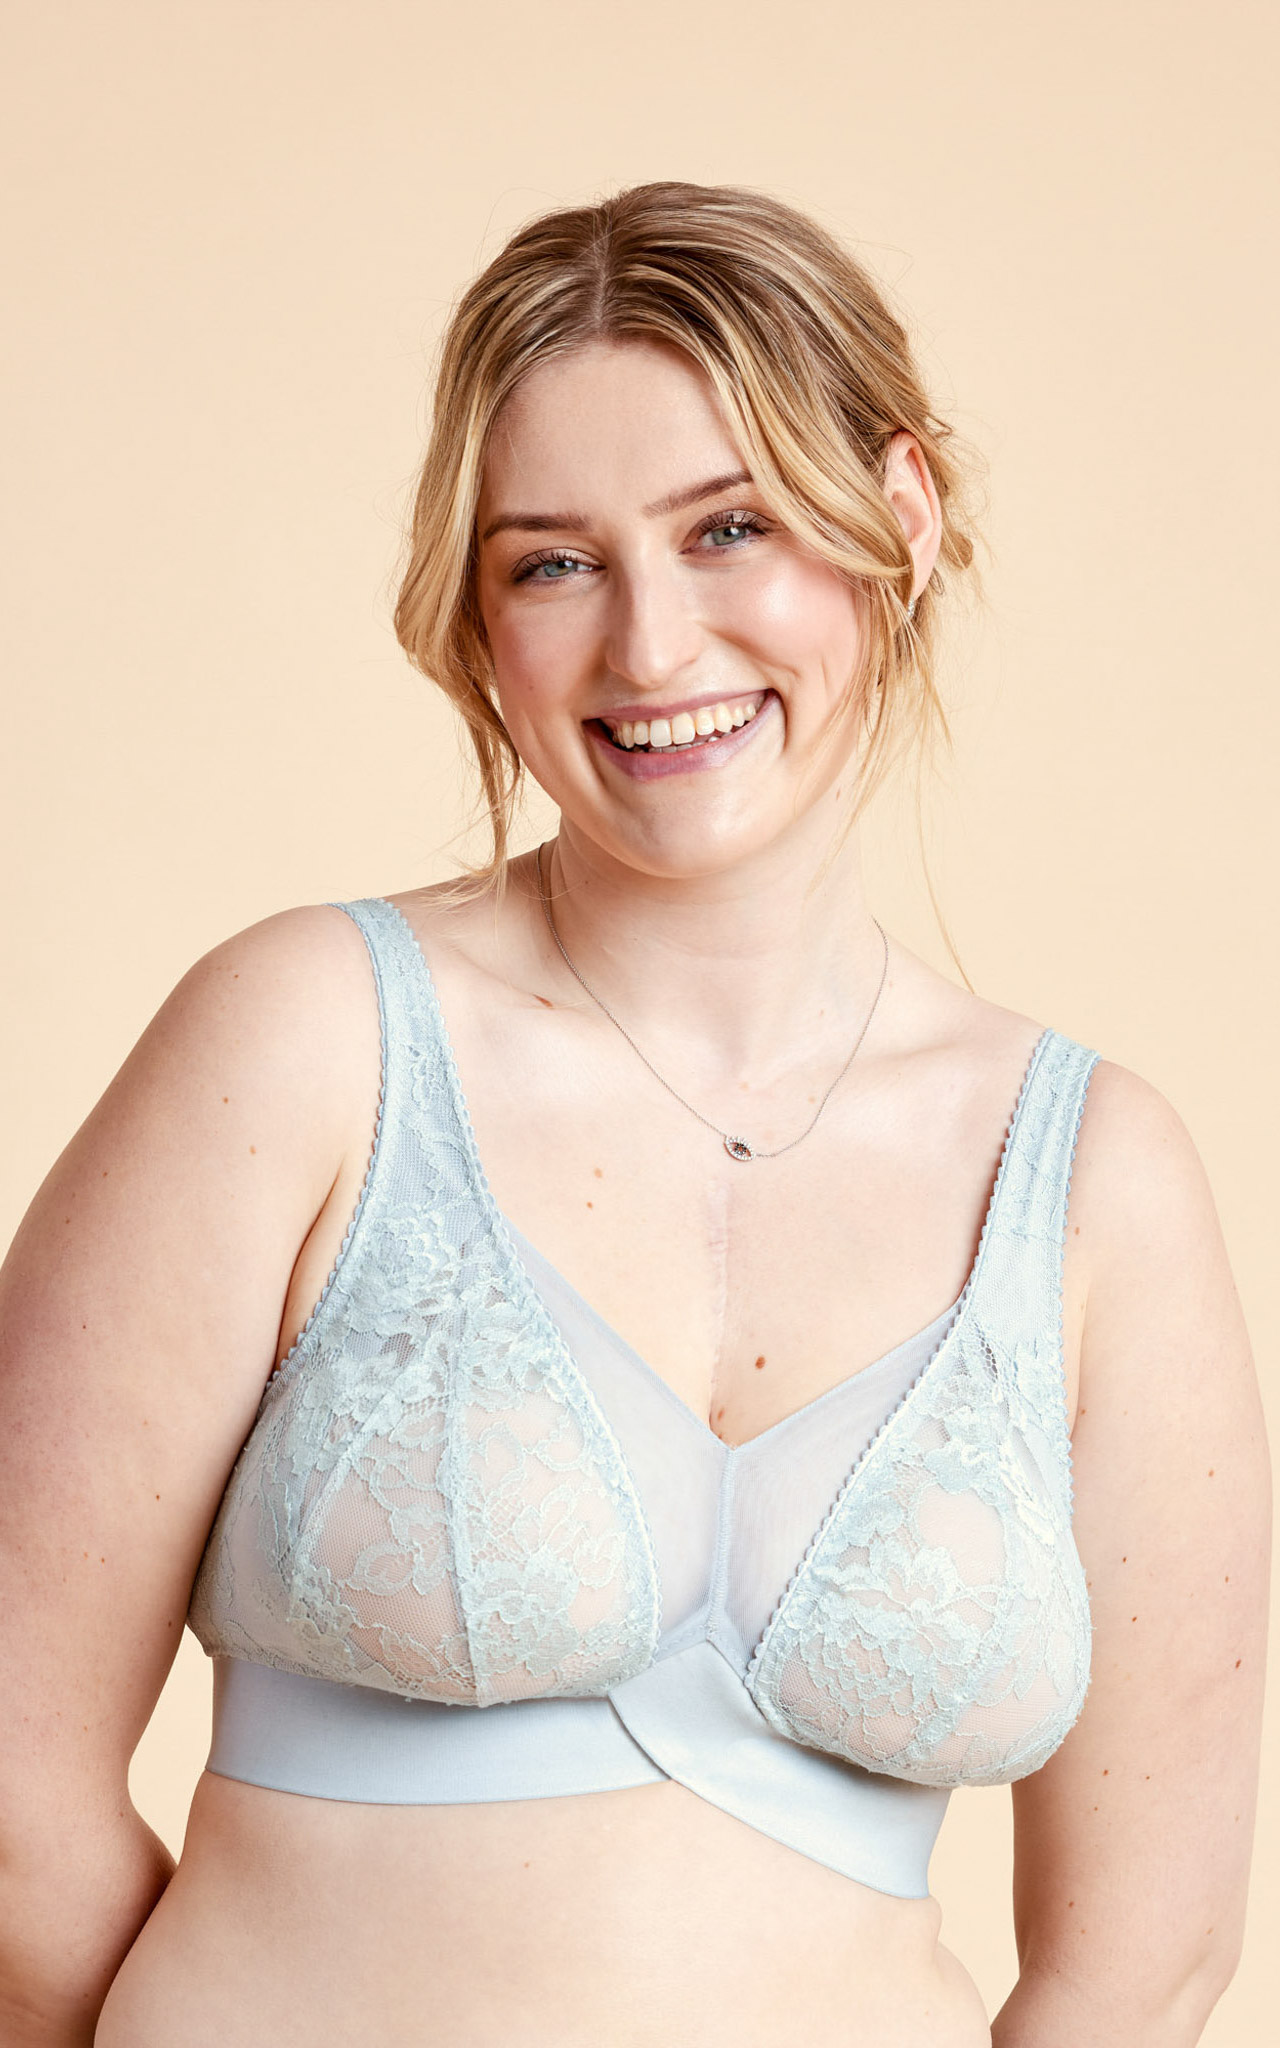
Bra straps should sit comfortably on your shoulder without digging in or falling off of your shoulders. If the straps are positioned too wide on your body, this could result in straps that are constantly falling off or cups that dig into the flesh under your arm.
Keep in mind that bra fitting is interconnected, and if the overall bra is not fitting properly, you may need a different size. (Head to the Bra Fitting Guide for a fitting checklist.)
How to move the strap position in
Start by determining how far inward you want to move the straps. We generally don’t recommend trying to move them by more than half an inch.
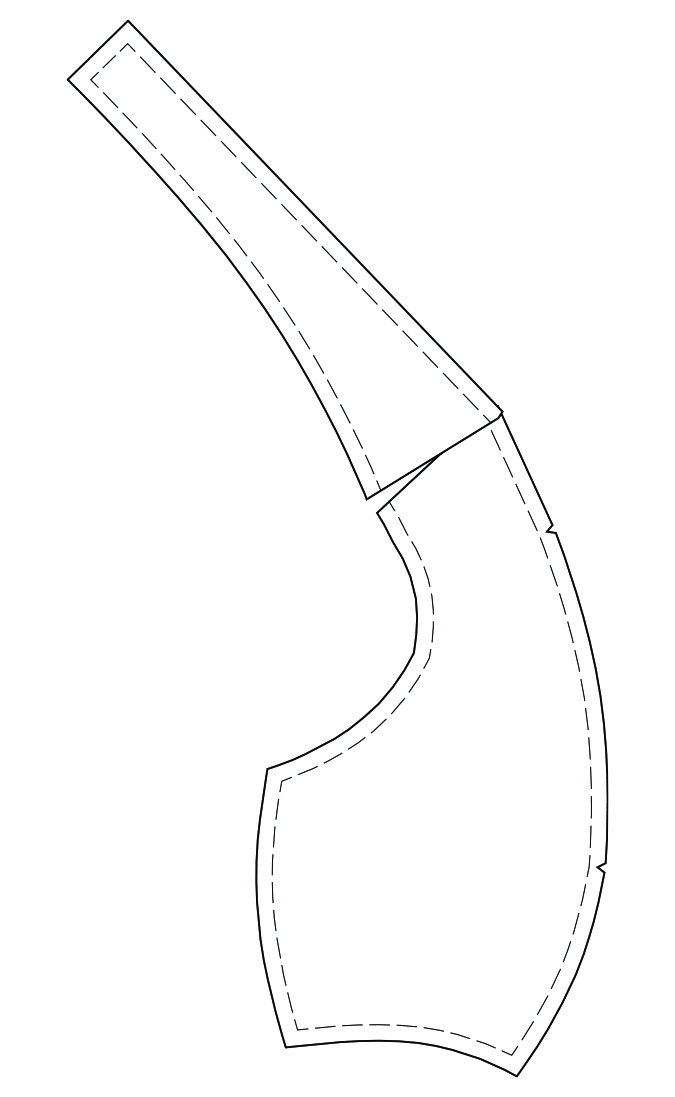
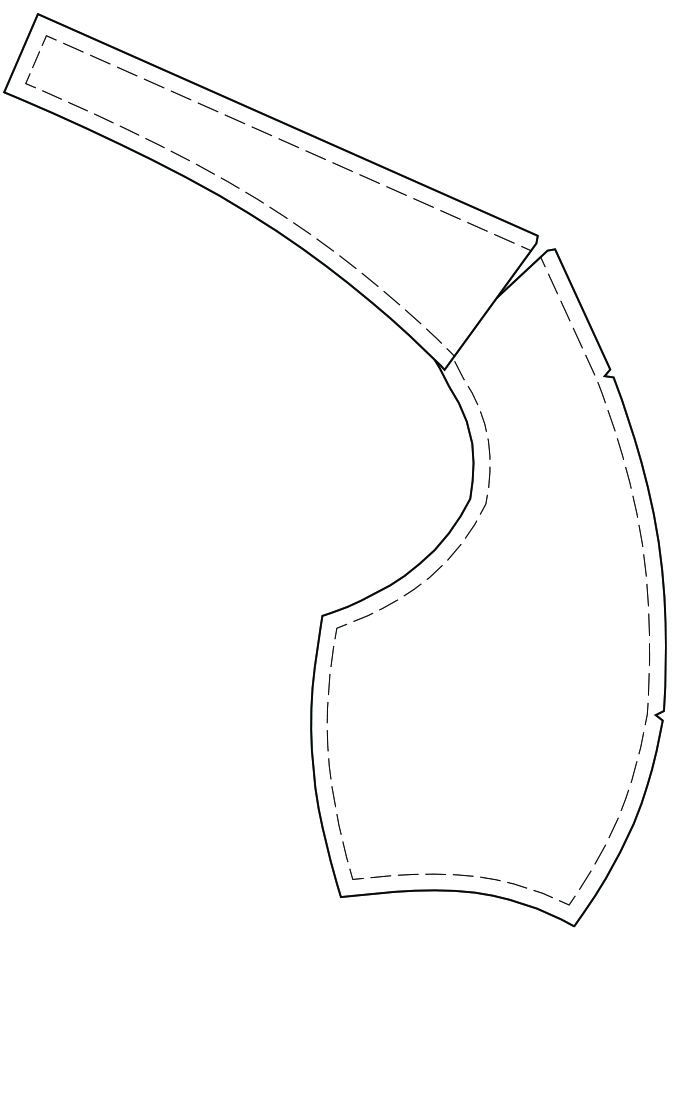
Draw a line through the power bar pattern piece at the middle notch.
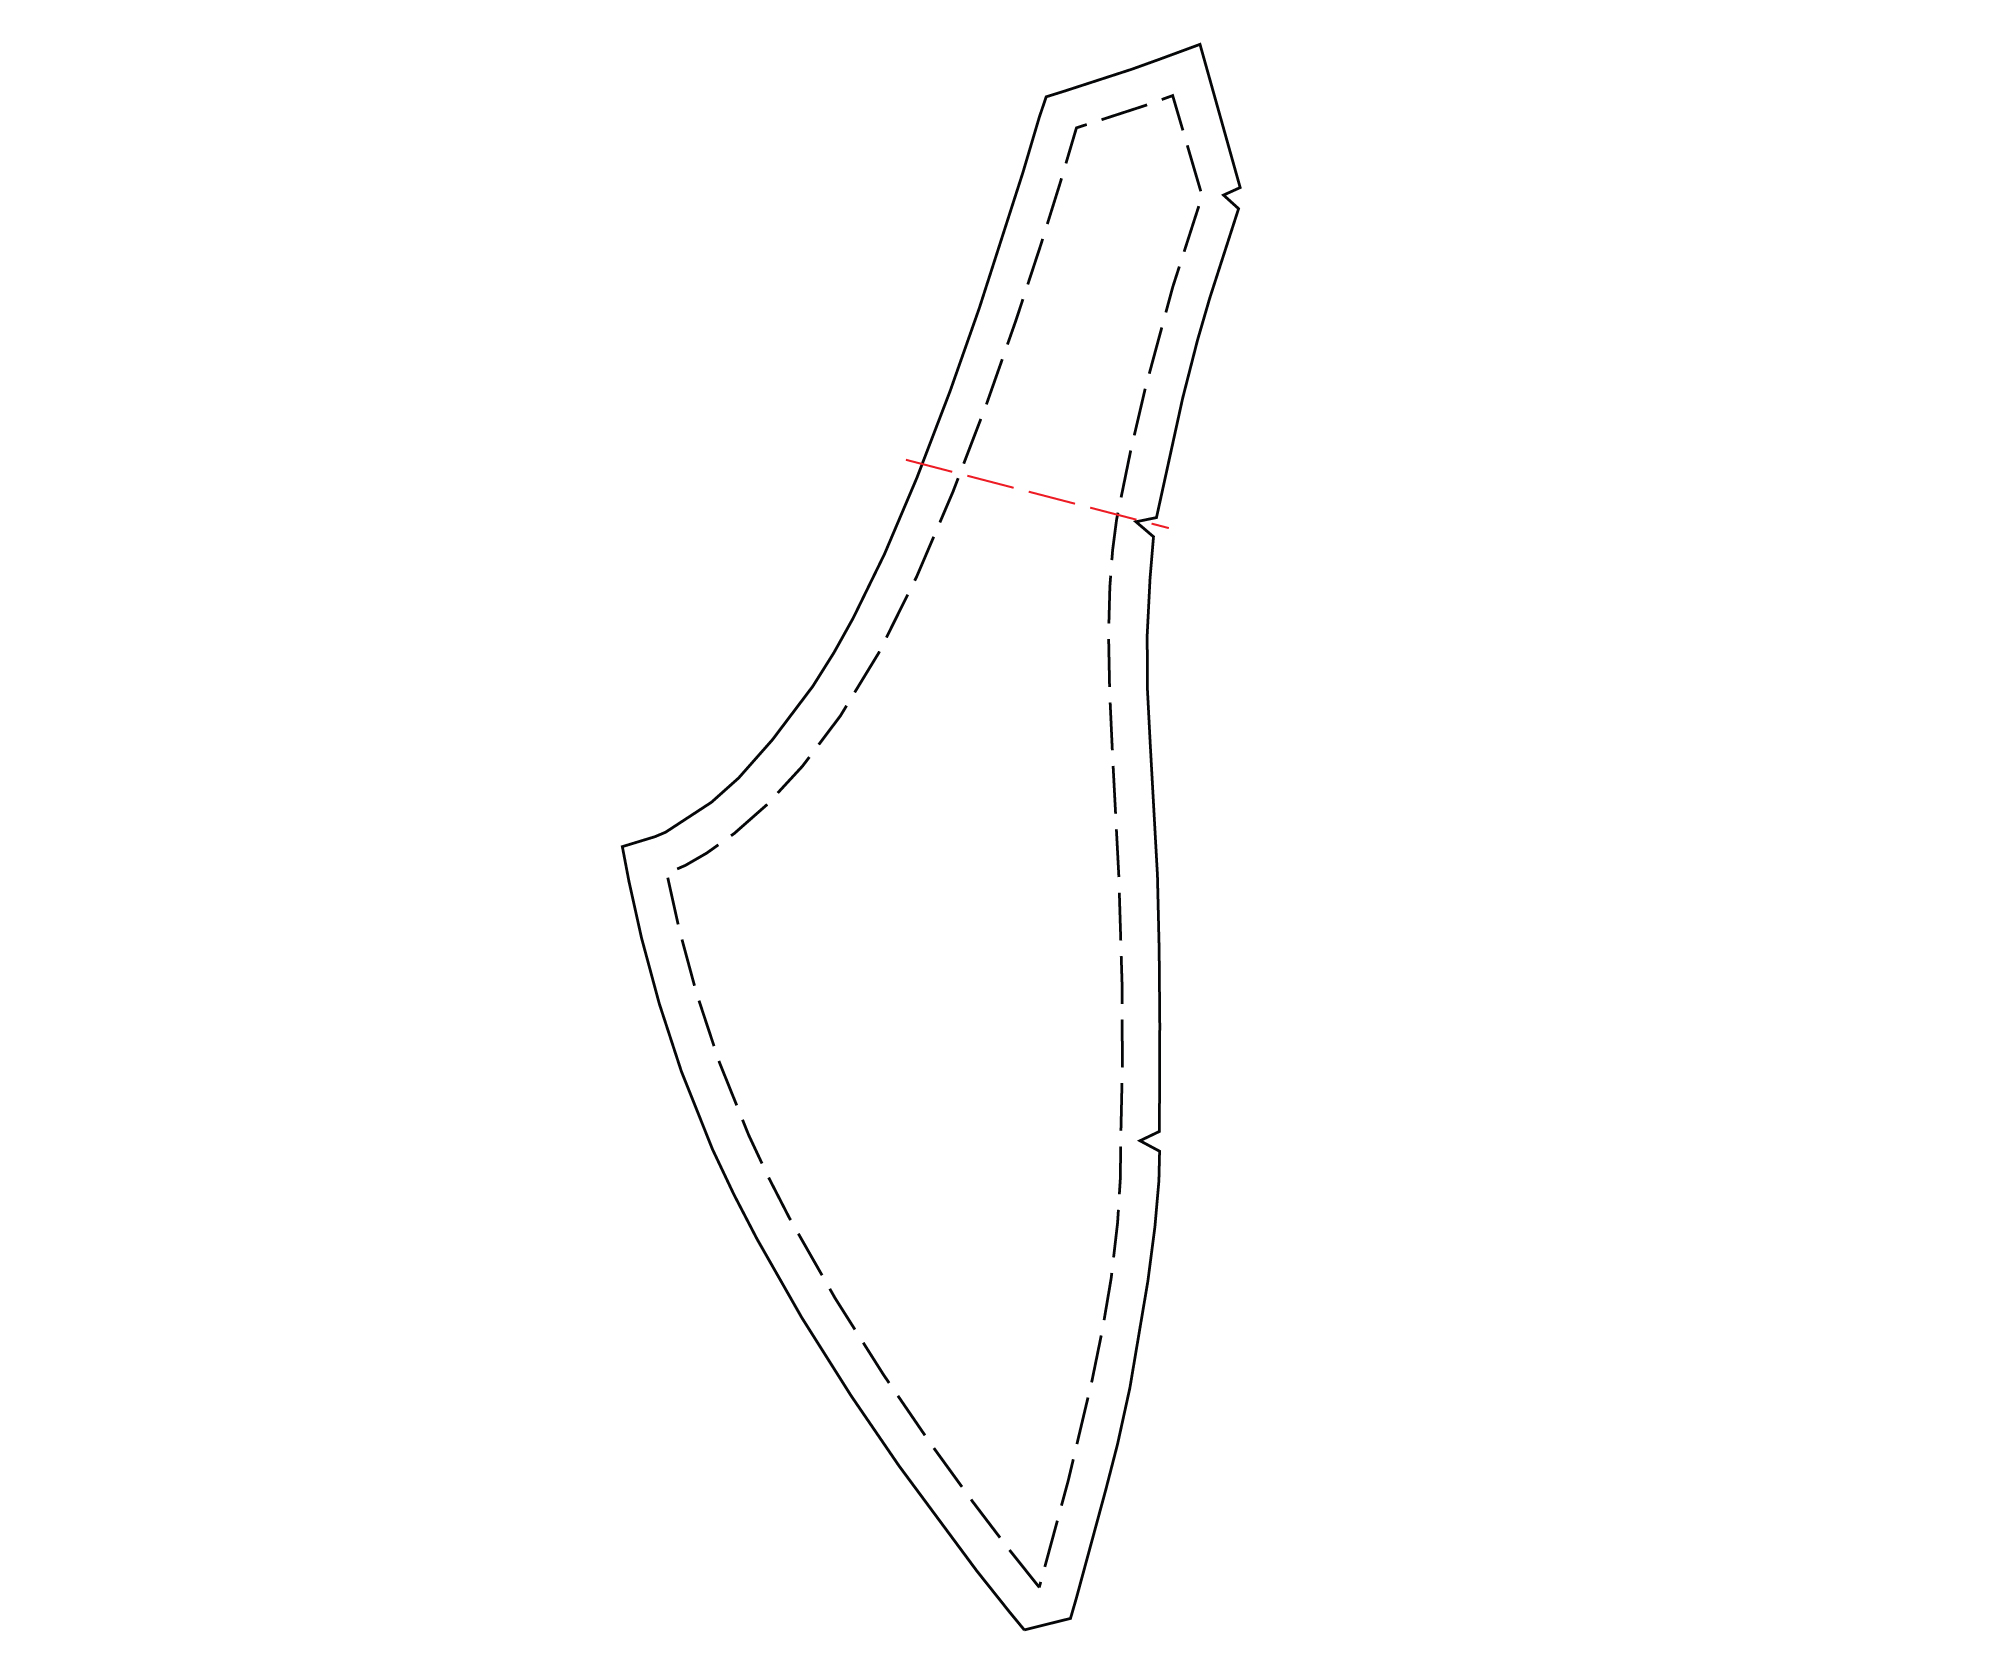
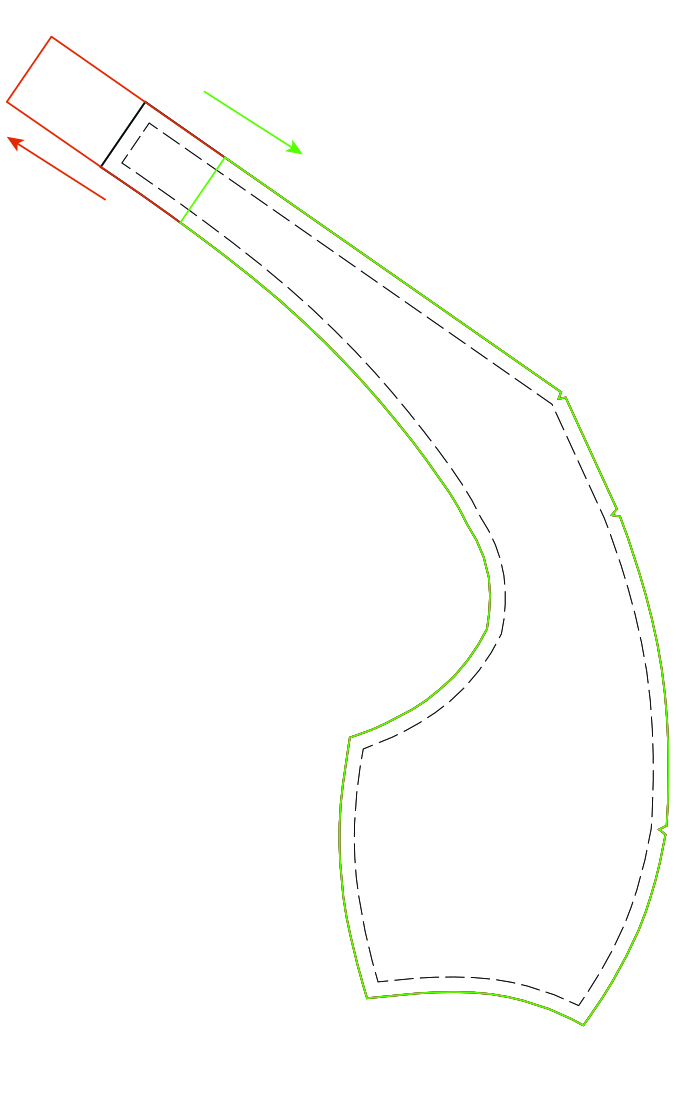
Cut along this line and then slide the top of the pattern inwards by the amount desired.
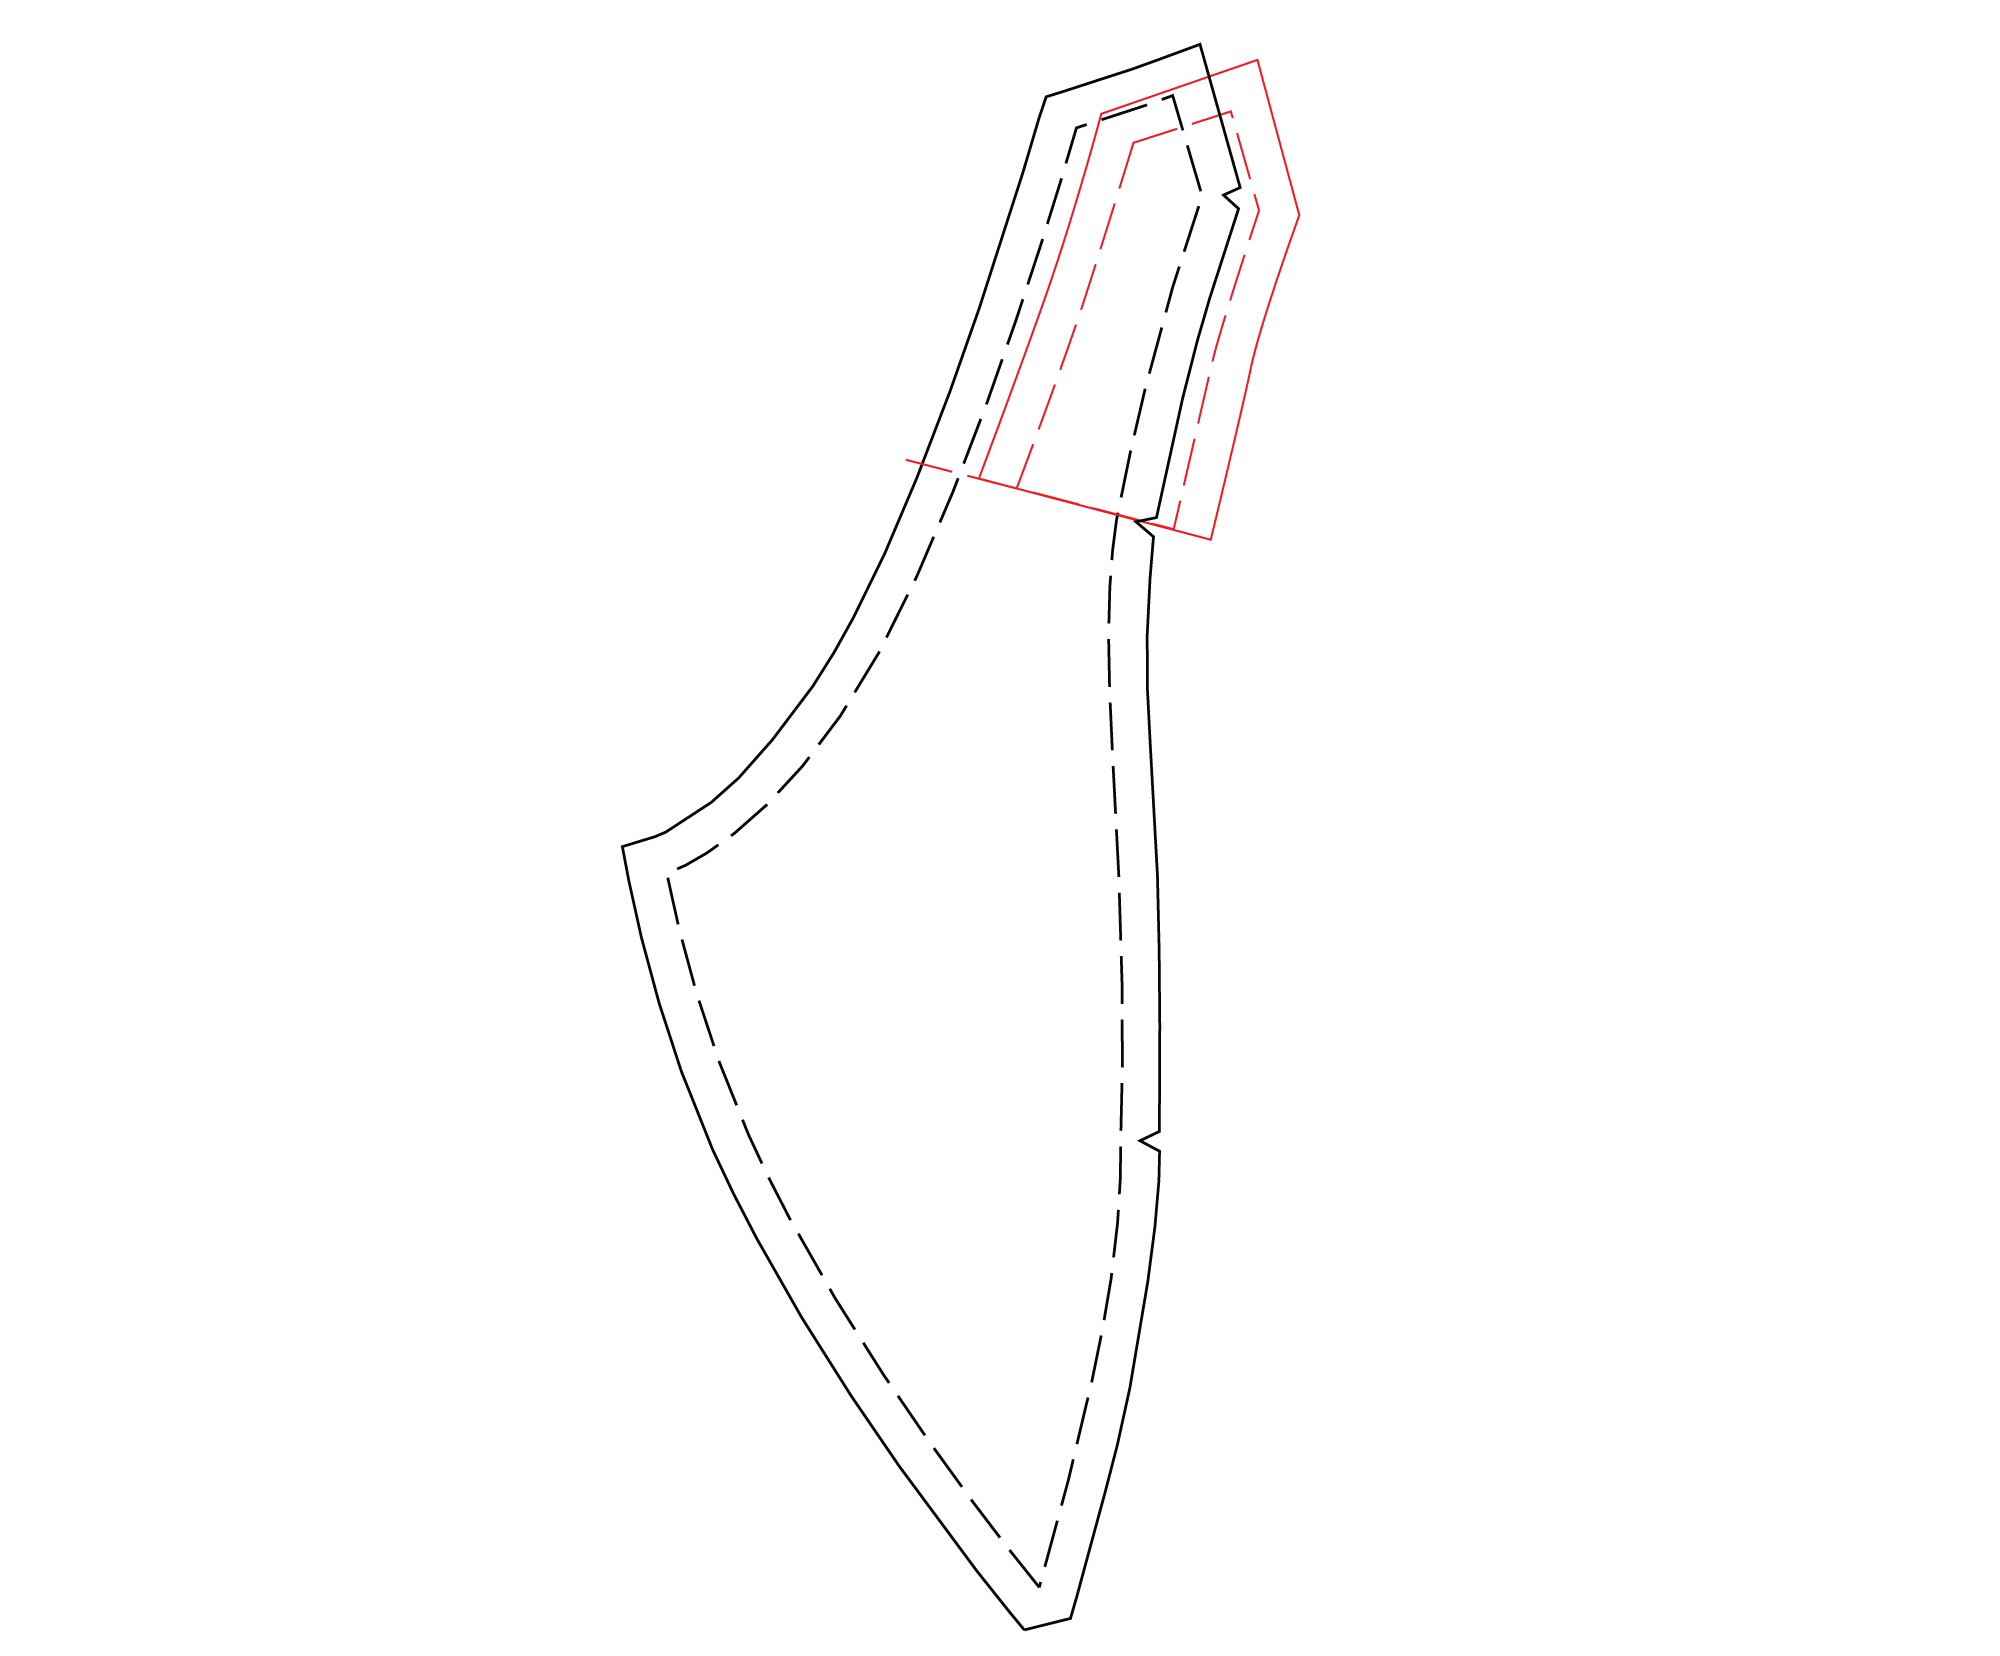
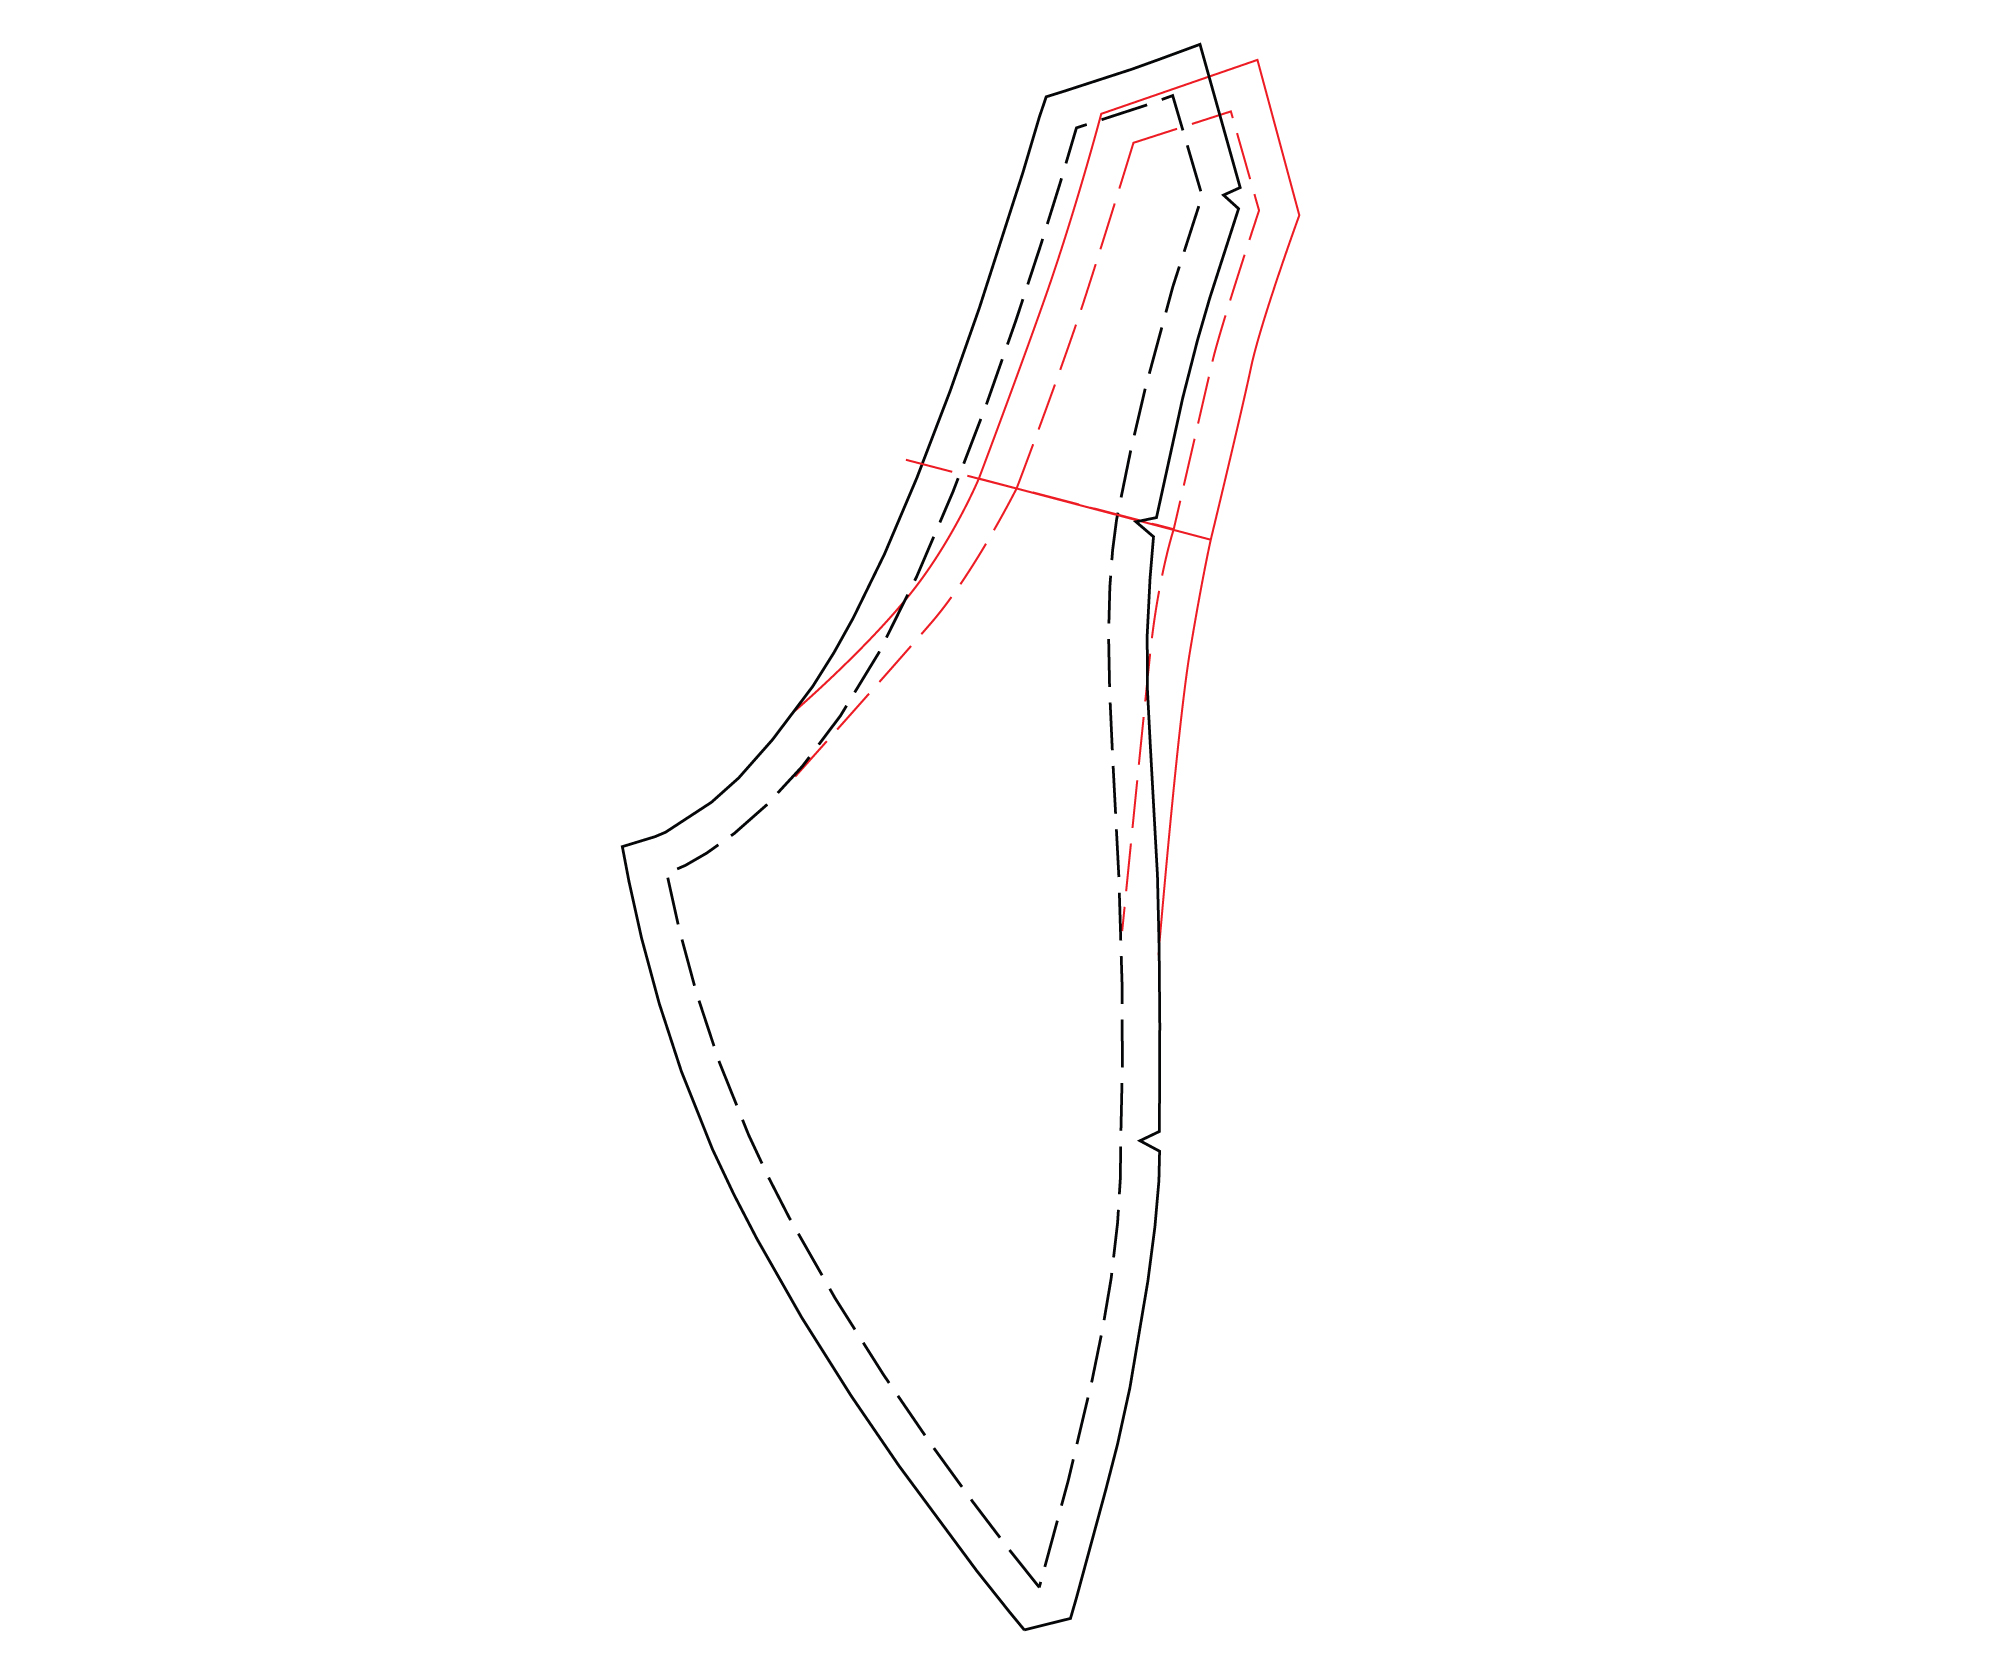
Blend the top half of the pattern back into the bottom half of the pattern.
We then need to remove the same amount of fabric from the upper cup as we moved the top of the power bar.
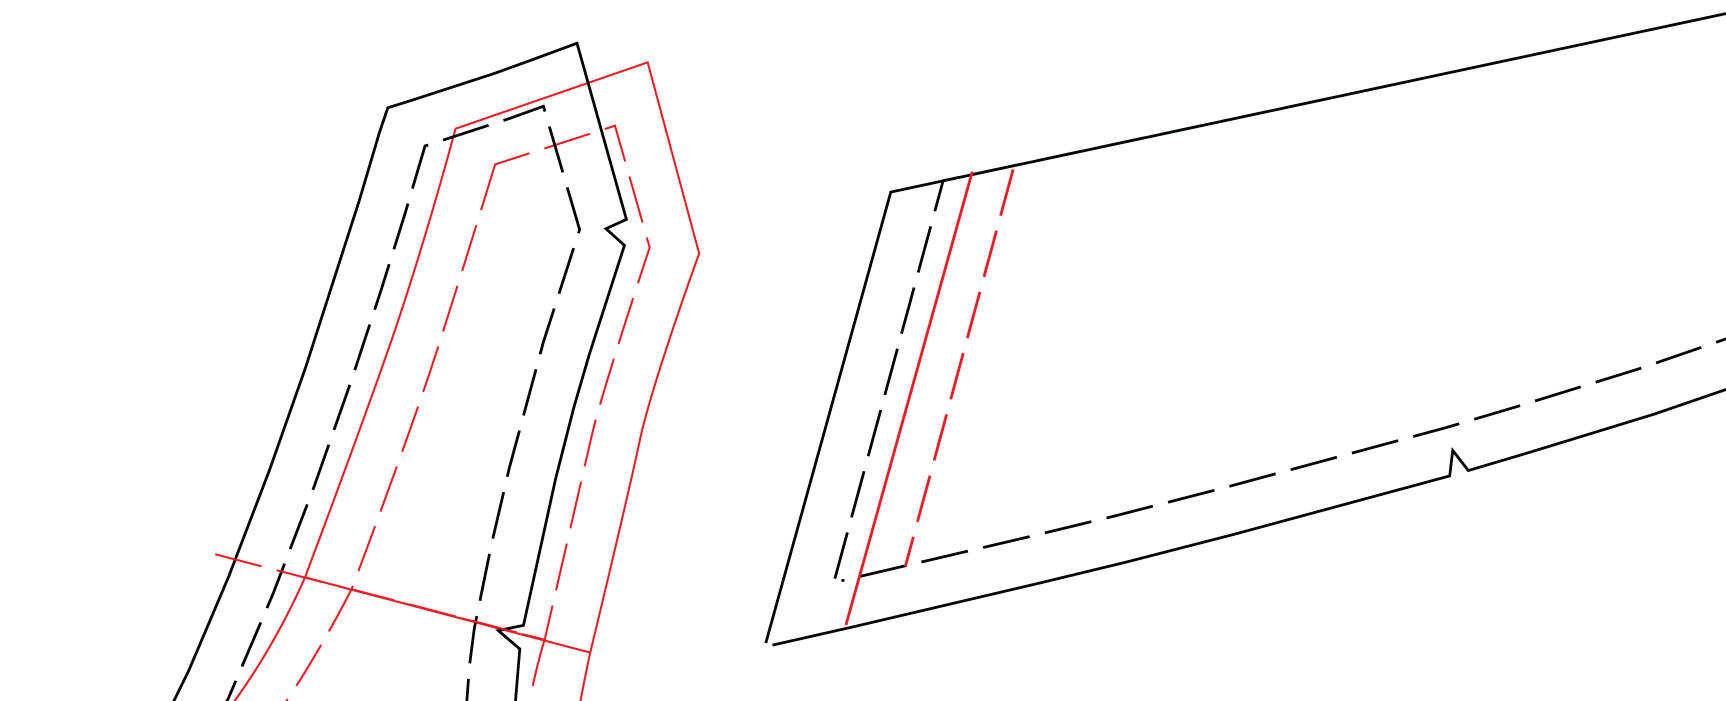
Finally we need to remove fabric from the lower cup that is now being covered by the power bar.

Now that you have adjusted pattern pieces, you can make a new muslin and check the fit.
How to adjust the strap width
The Willowdale Bra uses 1/2″ wide bra straps for wire sizes 26-38 and 3/4″ wide bra straps for wire sizes 40-68. Depending on your personal preference or what strap widths are accessible to you, you may want to use wider or narrower straps than the pattern was designed for. This is a simple and straightforward change to make!
Let’s say that you’re making a size that is designed for 3/4″ straps but you’d like to use 1″ straps. All you need to do is lengthen the top edge of the power bar so that the seam line is 1″, then taper it back to the top notch.
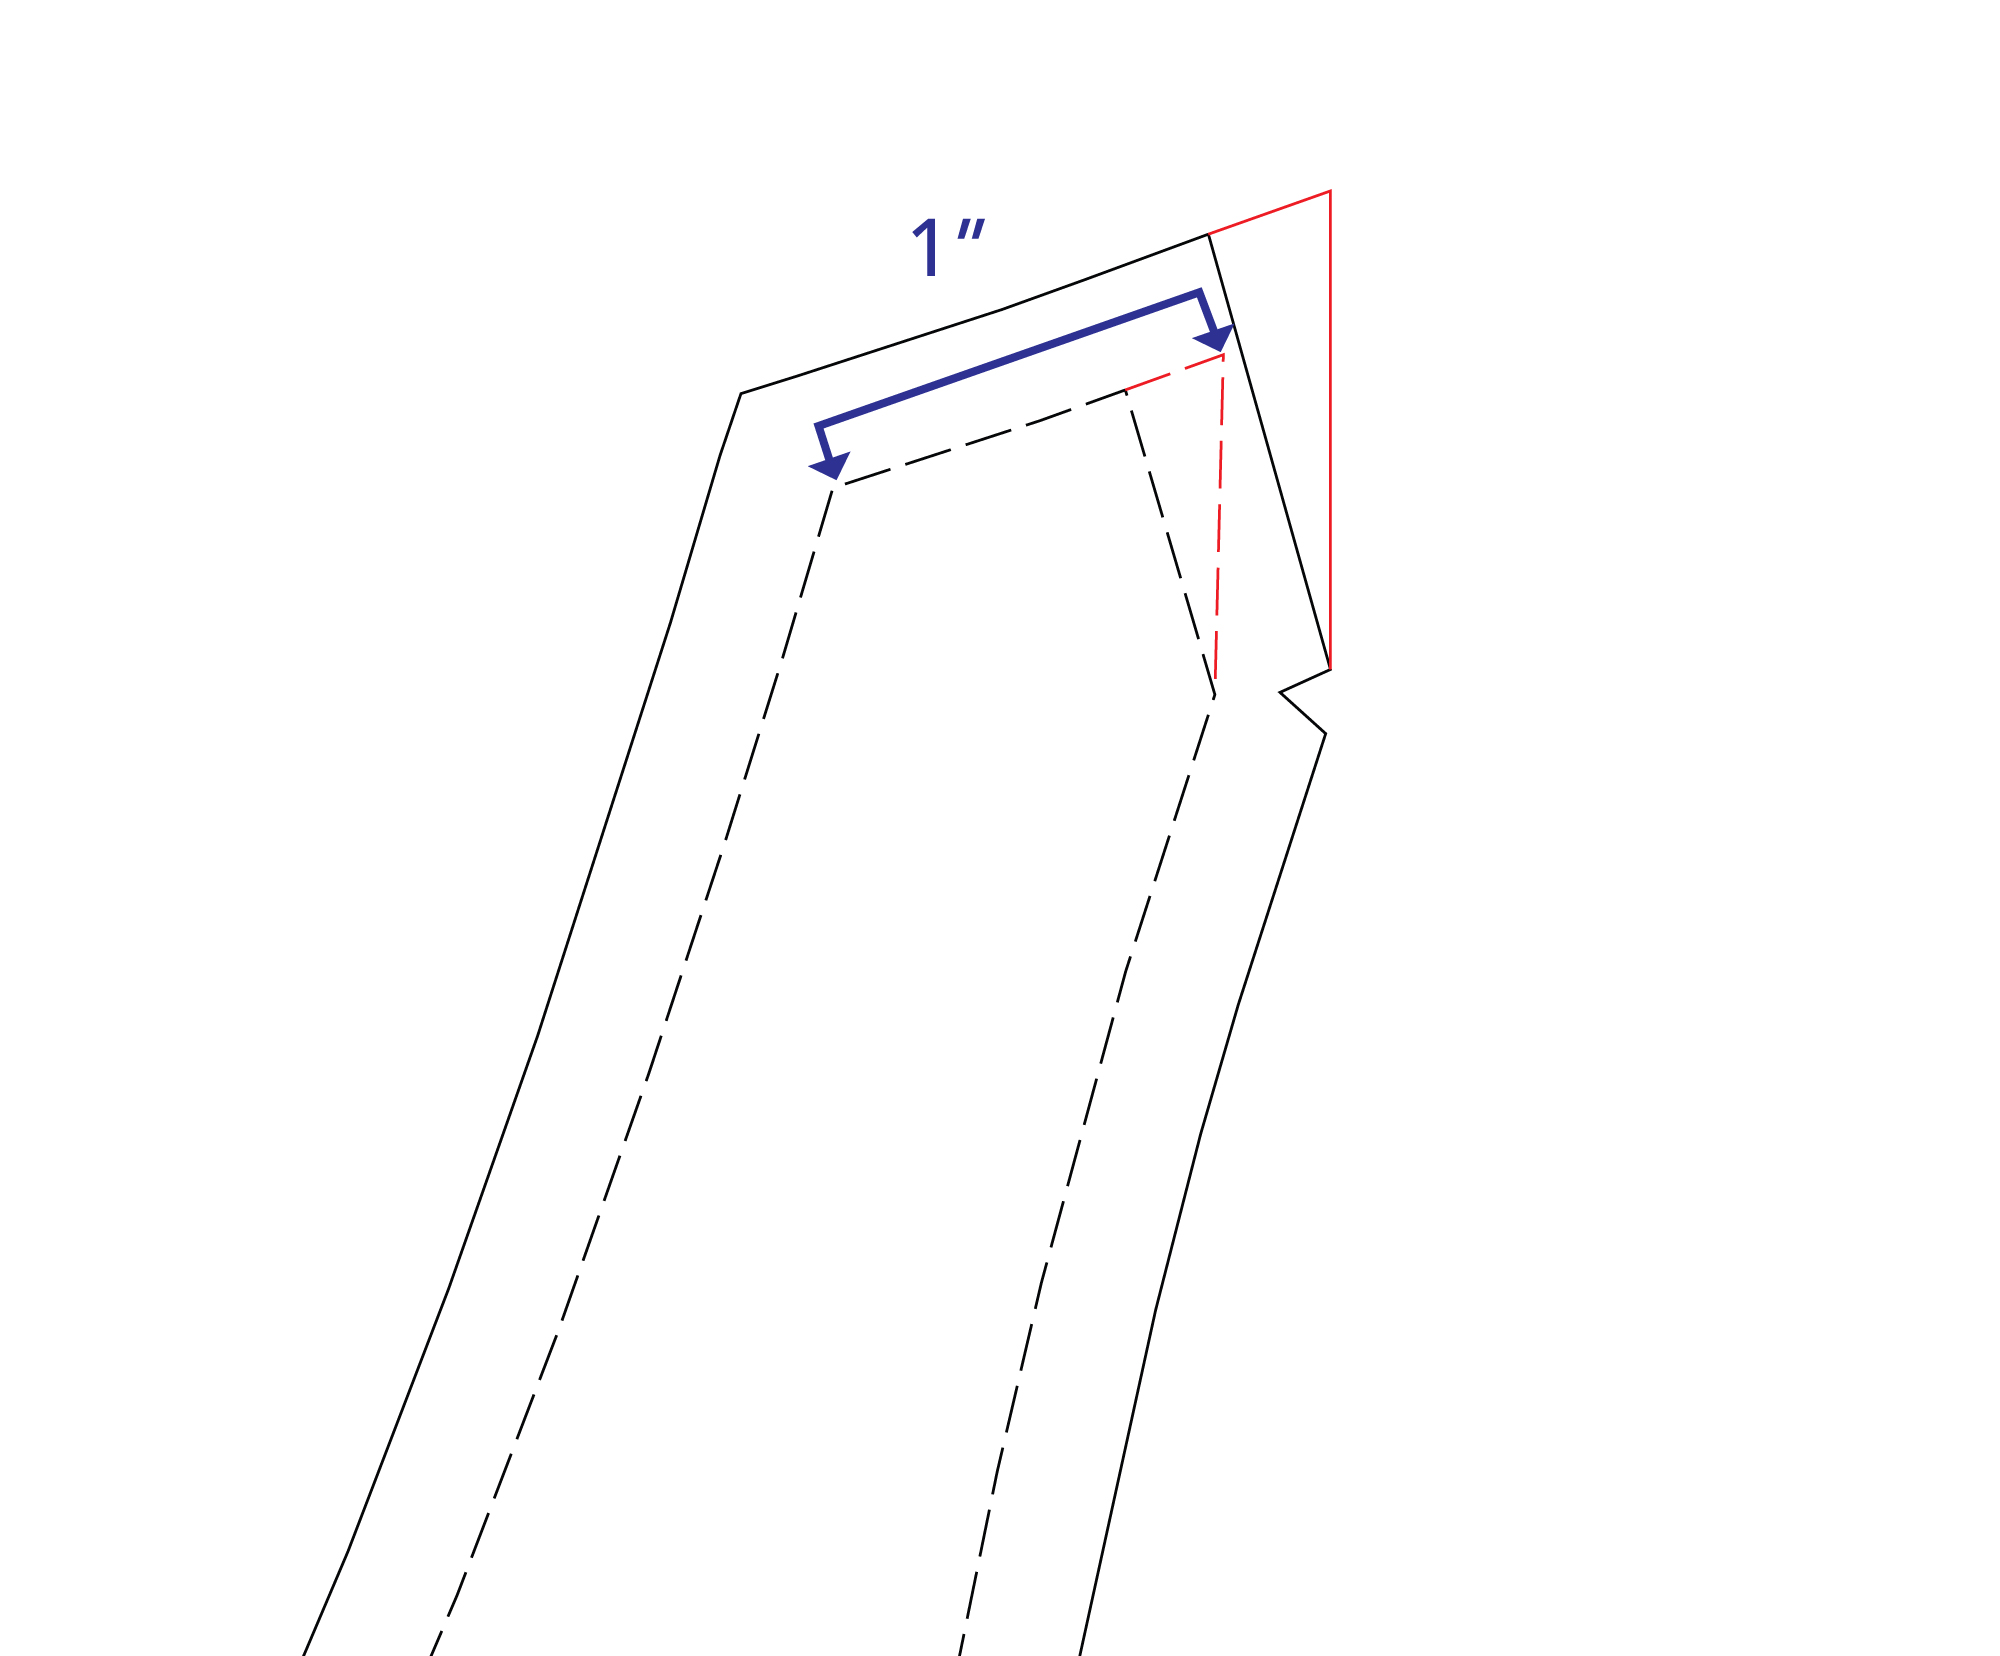
No adjustments are needed to the back piece—you would simply use the 1″ strap instead of the 3/4″ strap, along with 1″ rings and sliders.
For the Loftus Bralette:
Change strap position by shortening the neckline
While wearing your muslin, check the center insert to determine if there is any gaping at the neckline, this may be contributing to the strap position being incorrect. Adjust the neckline first using the how to adjust the center insert tutorial and then assess the strap position again.
Adjusting the angle of the straps
You can change the angle of the strap by drawing a line through the side cup piece at the upper notch. Cut from both the inner and outer edges leaving a pivot point in the center.
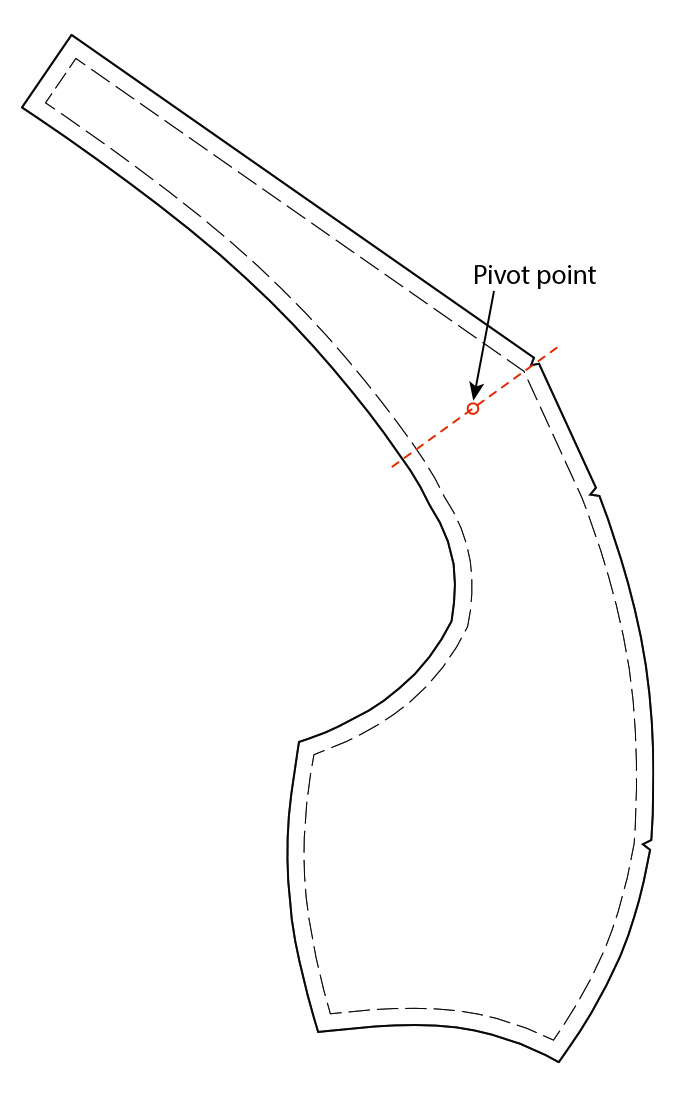
Pivot the strap around this point, angling the strap inwards or outwards by the amount you require.
 |
 |
| Strap angled inward | Strap angled outward |
This modification affects both the neckline and the underarm edges of the bra, shortening one and lengthening the other by the same amount. Measure this amount and then increase/decrease the length of the neckline and underarm elastics by the same amount.
You will also need to adjust the powerbar using the same modification.
Adjusting the length of the straps
While the back straps do have sliders to adjust the length, the range of adjustment is limited, and you may find that even on the longest/shortest length the strap length is not correct. There are a couple of ways you can fix this.
Shortening/lengthening the front strap
The ring that attaches the front and the back strap should sit just behind the shoulder in a comfortable position. If you find that the ring is positioned too far down the back, or sitting too high – close to your shoulder, you may want to lengthen or shorten the front strap. This is as simple as adding or removing length to the strap on the front cup and powerbar pattern pieces.
Shortening/lengthening the back strap
Shortening/lengthening the back strap is difficult once your bra is fully made due to the fact that it is attached directly to the back band. If you do find that you need to shorten or lengthen the back strap elastic you will need to remove the hook and eye, remove the elastic from the back band and then shorten or lengthen (using a new longer piece of elastic) the elastic as required.
In order to avoid having to do this, make sure you determine on your muslin exactly how long the back strap elastic needs to be, taking in account the doubling of the elastic around the ring and slider so that when you come to making your final bra you will not need to make any further changes to the back strap length.
We hope this tutorial was helpful! Check out the full Cashmerette Bra Fitting Guide for more on sewing and fitting your dream bra with the Willowdale Bra.
Jump to another post in this series:
- Bra fitting guide overview
- How to choose your bra size
- How to make a test bra
- How to adjust the back band
- How to adjust the gore/bridge (Willowdale only)
- How to adjust the cups
- How to adjust the center insert (Loftus only)
- How to adjust the side seam angle
- How to adjust the straps
- How to adjust the underwires (Willowdale only)
- Adjusting the level of support and comfort
- How to make an asymmetrical bra
- Additional bra making resource