If a bra fits you well in the band or cup but the underwire is digging in or standing away from your body, you may need a different wire size. Today, we’re showing you how to adjust the Willowdale Bra pattern for a different underwire size.
Note: This is not required for the Loftus Bralette
Jump to another post in this series:
- Bra fitting guide overview
- How to choose your bra size
- How to make a test bra
- How to adjust the back band
- How to adjust the gore/bridge (Willowdale only)
- How to adjust the cups
- How to adjust the center insert (Loftus only)
- How to adjust the side seam angle
- How to adjust the straps
- How to adjust the underwires (Willowdale only)
- Adjusting the level of support and comfort
- How to make an asymmetrical bra
- Additional bra making resources
The Cashmerette Willowdale Bra is a full frame underwire bra sewing pattern for large busts in sizes 28C-54J with a 4-piece cup design for vital support and lift in a beautifully rounded shape—the perfect bra if you have big boobs.
Start your bra fitting journey with the Cashmerette Bra Fitting Guide
To help you sew and fit your dream Willowdale, we’ve put together the Cashmerette Bra Fitting Guide! This post is one of the many tutorials you’ll find there, and if you haven’t yet checked out the main guide page, we recommend starting there. So much of bra fitting is interconnected, and the guide provides a checklist and order to work through the adjustments.
In this post, we’re covering how to use a different wire size to achieve a better fit. Let’s get started!
How to tell if you need to use a different wire size
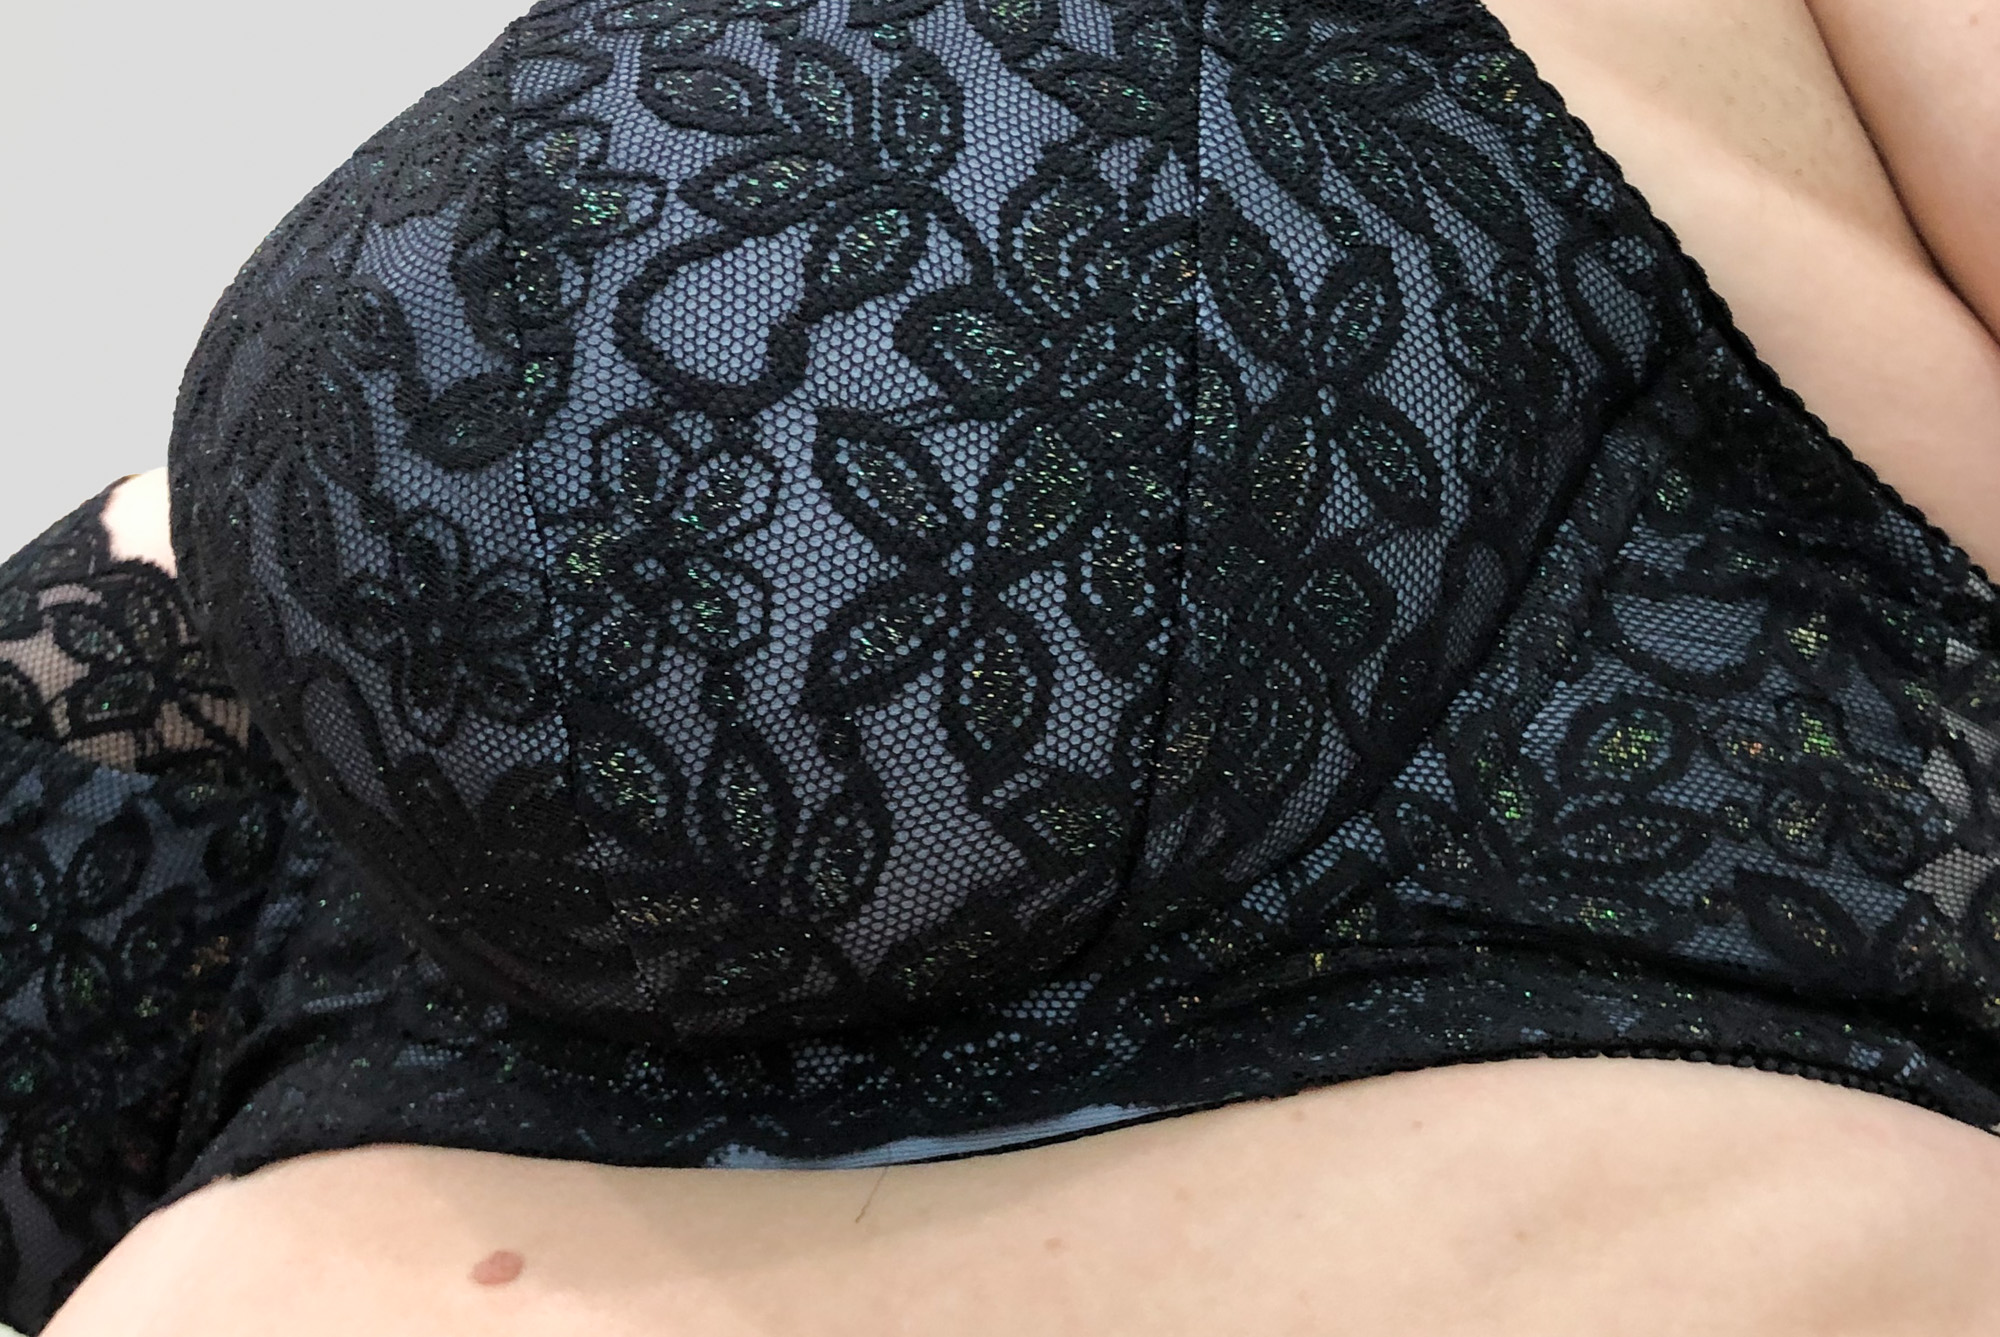
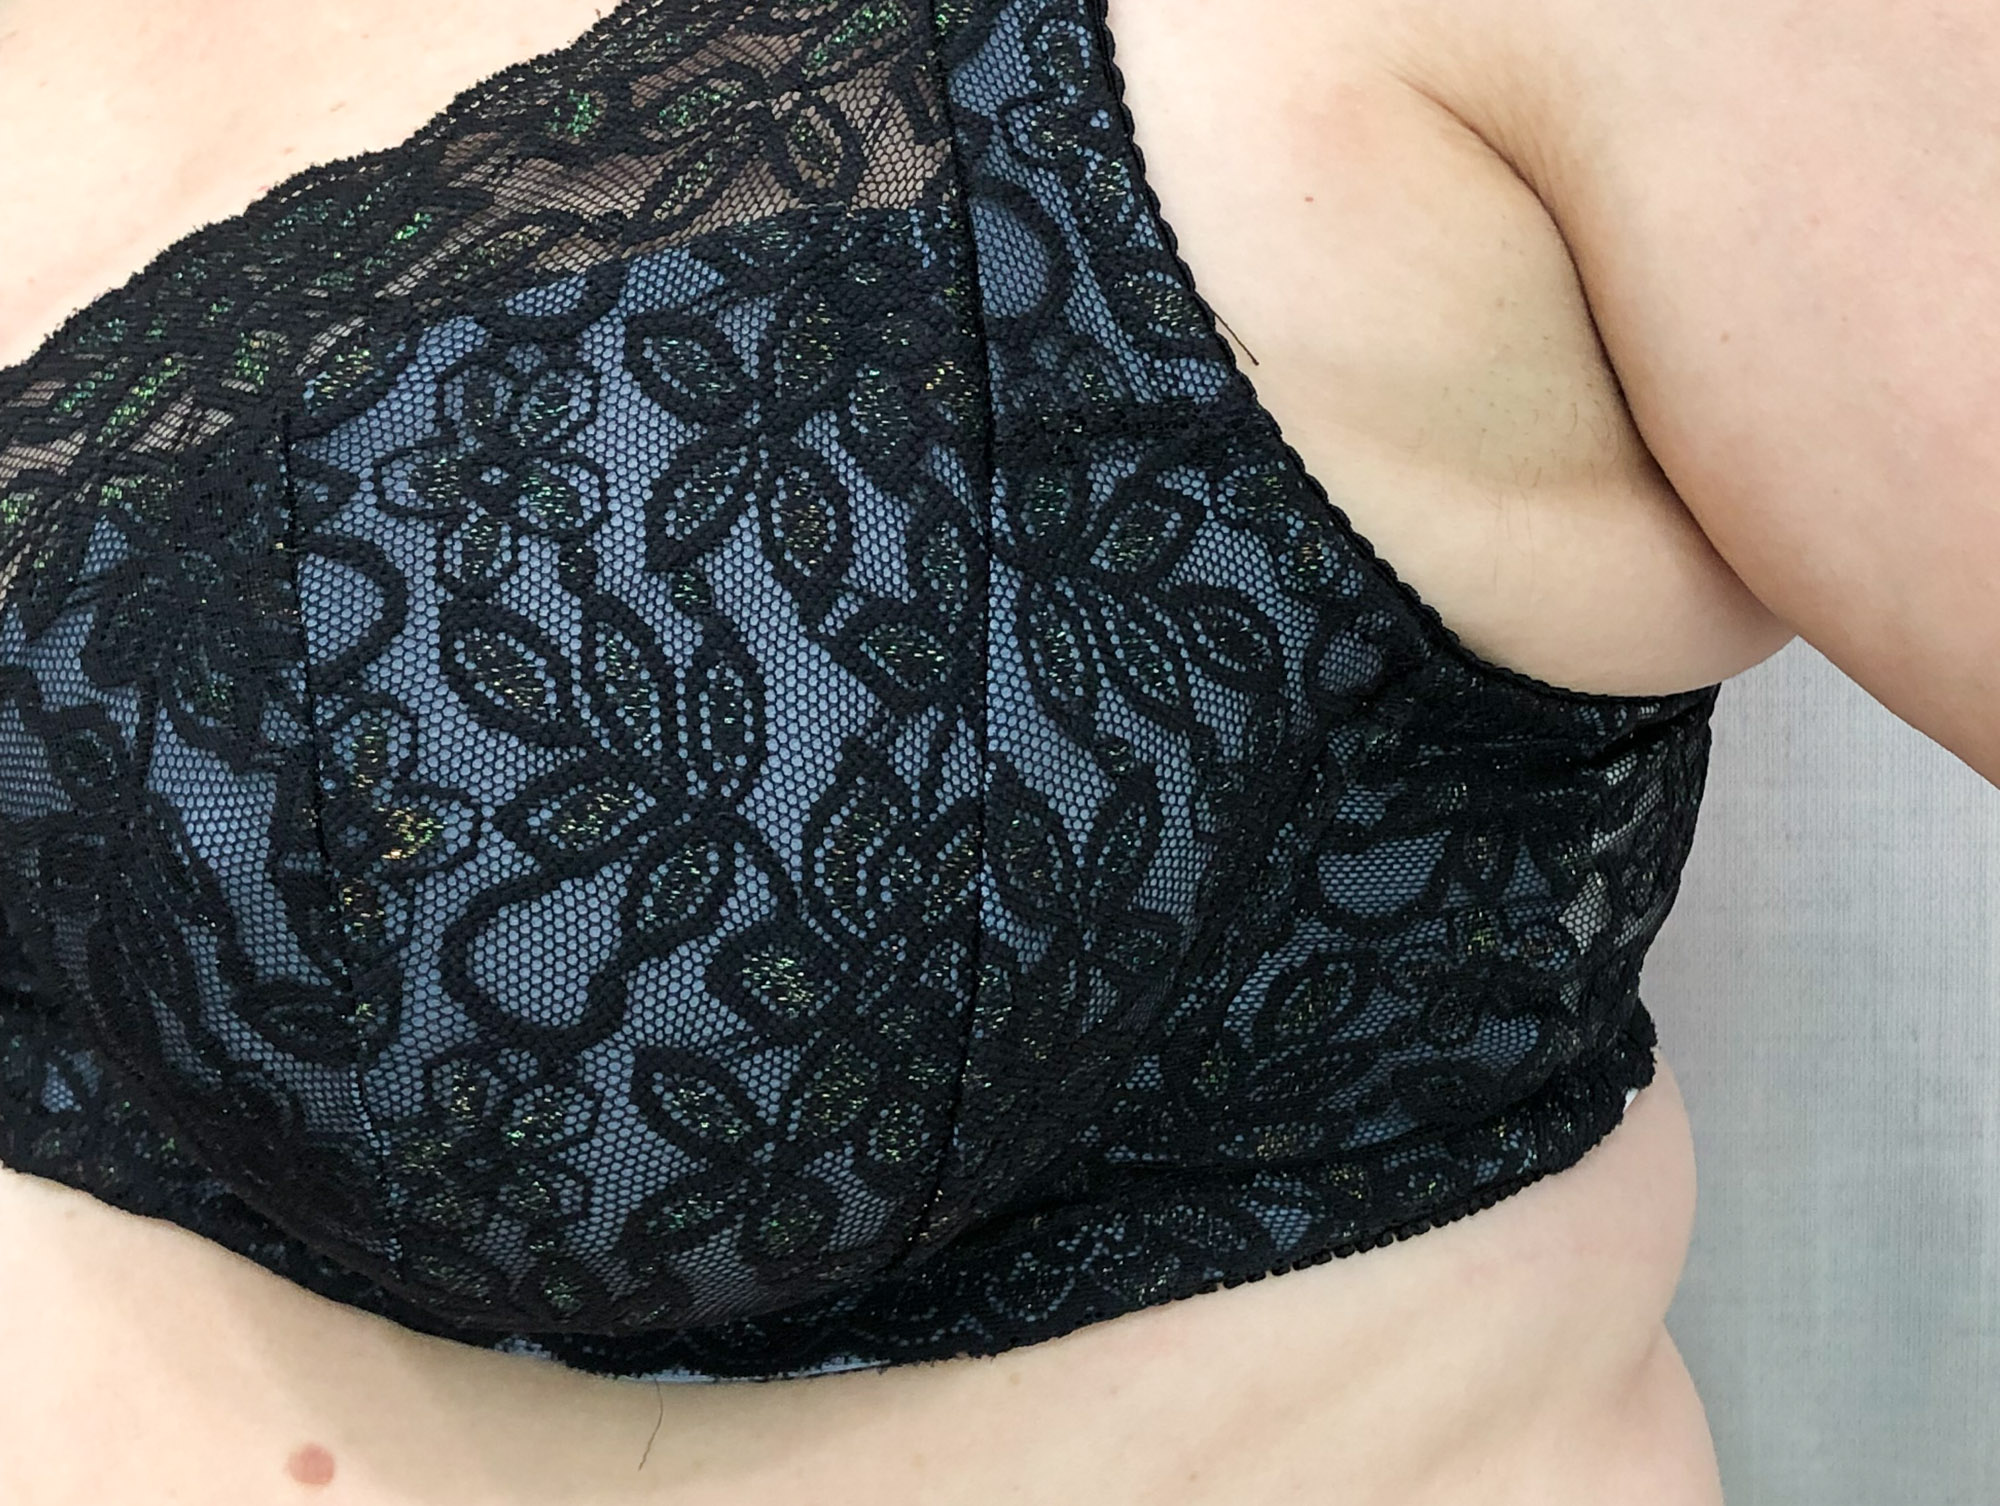
Part of bra fitting is finding the right underwire for your unique boobs. Each bra size is designed for a particular underwire size, but that may not be the best one for you. If you find that your underwire is digging into your body or standing away from your chest (at either the center or the underarm), you may need to try a different underwire size.
(Not sure what wire size to try initially? Start here.)
Important note: some of these fitting issues may indicate that you need a different bra size altogether. We recommend working through your bra fitting in the order we outline here.
Here is how your bra may look if your underwire is too short and digging in at the side:
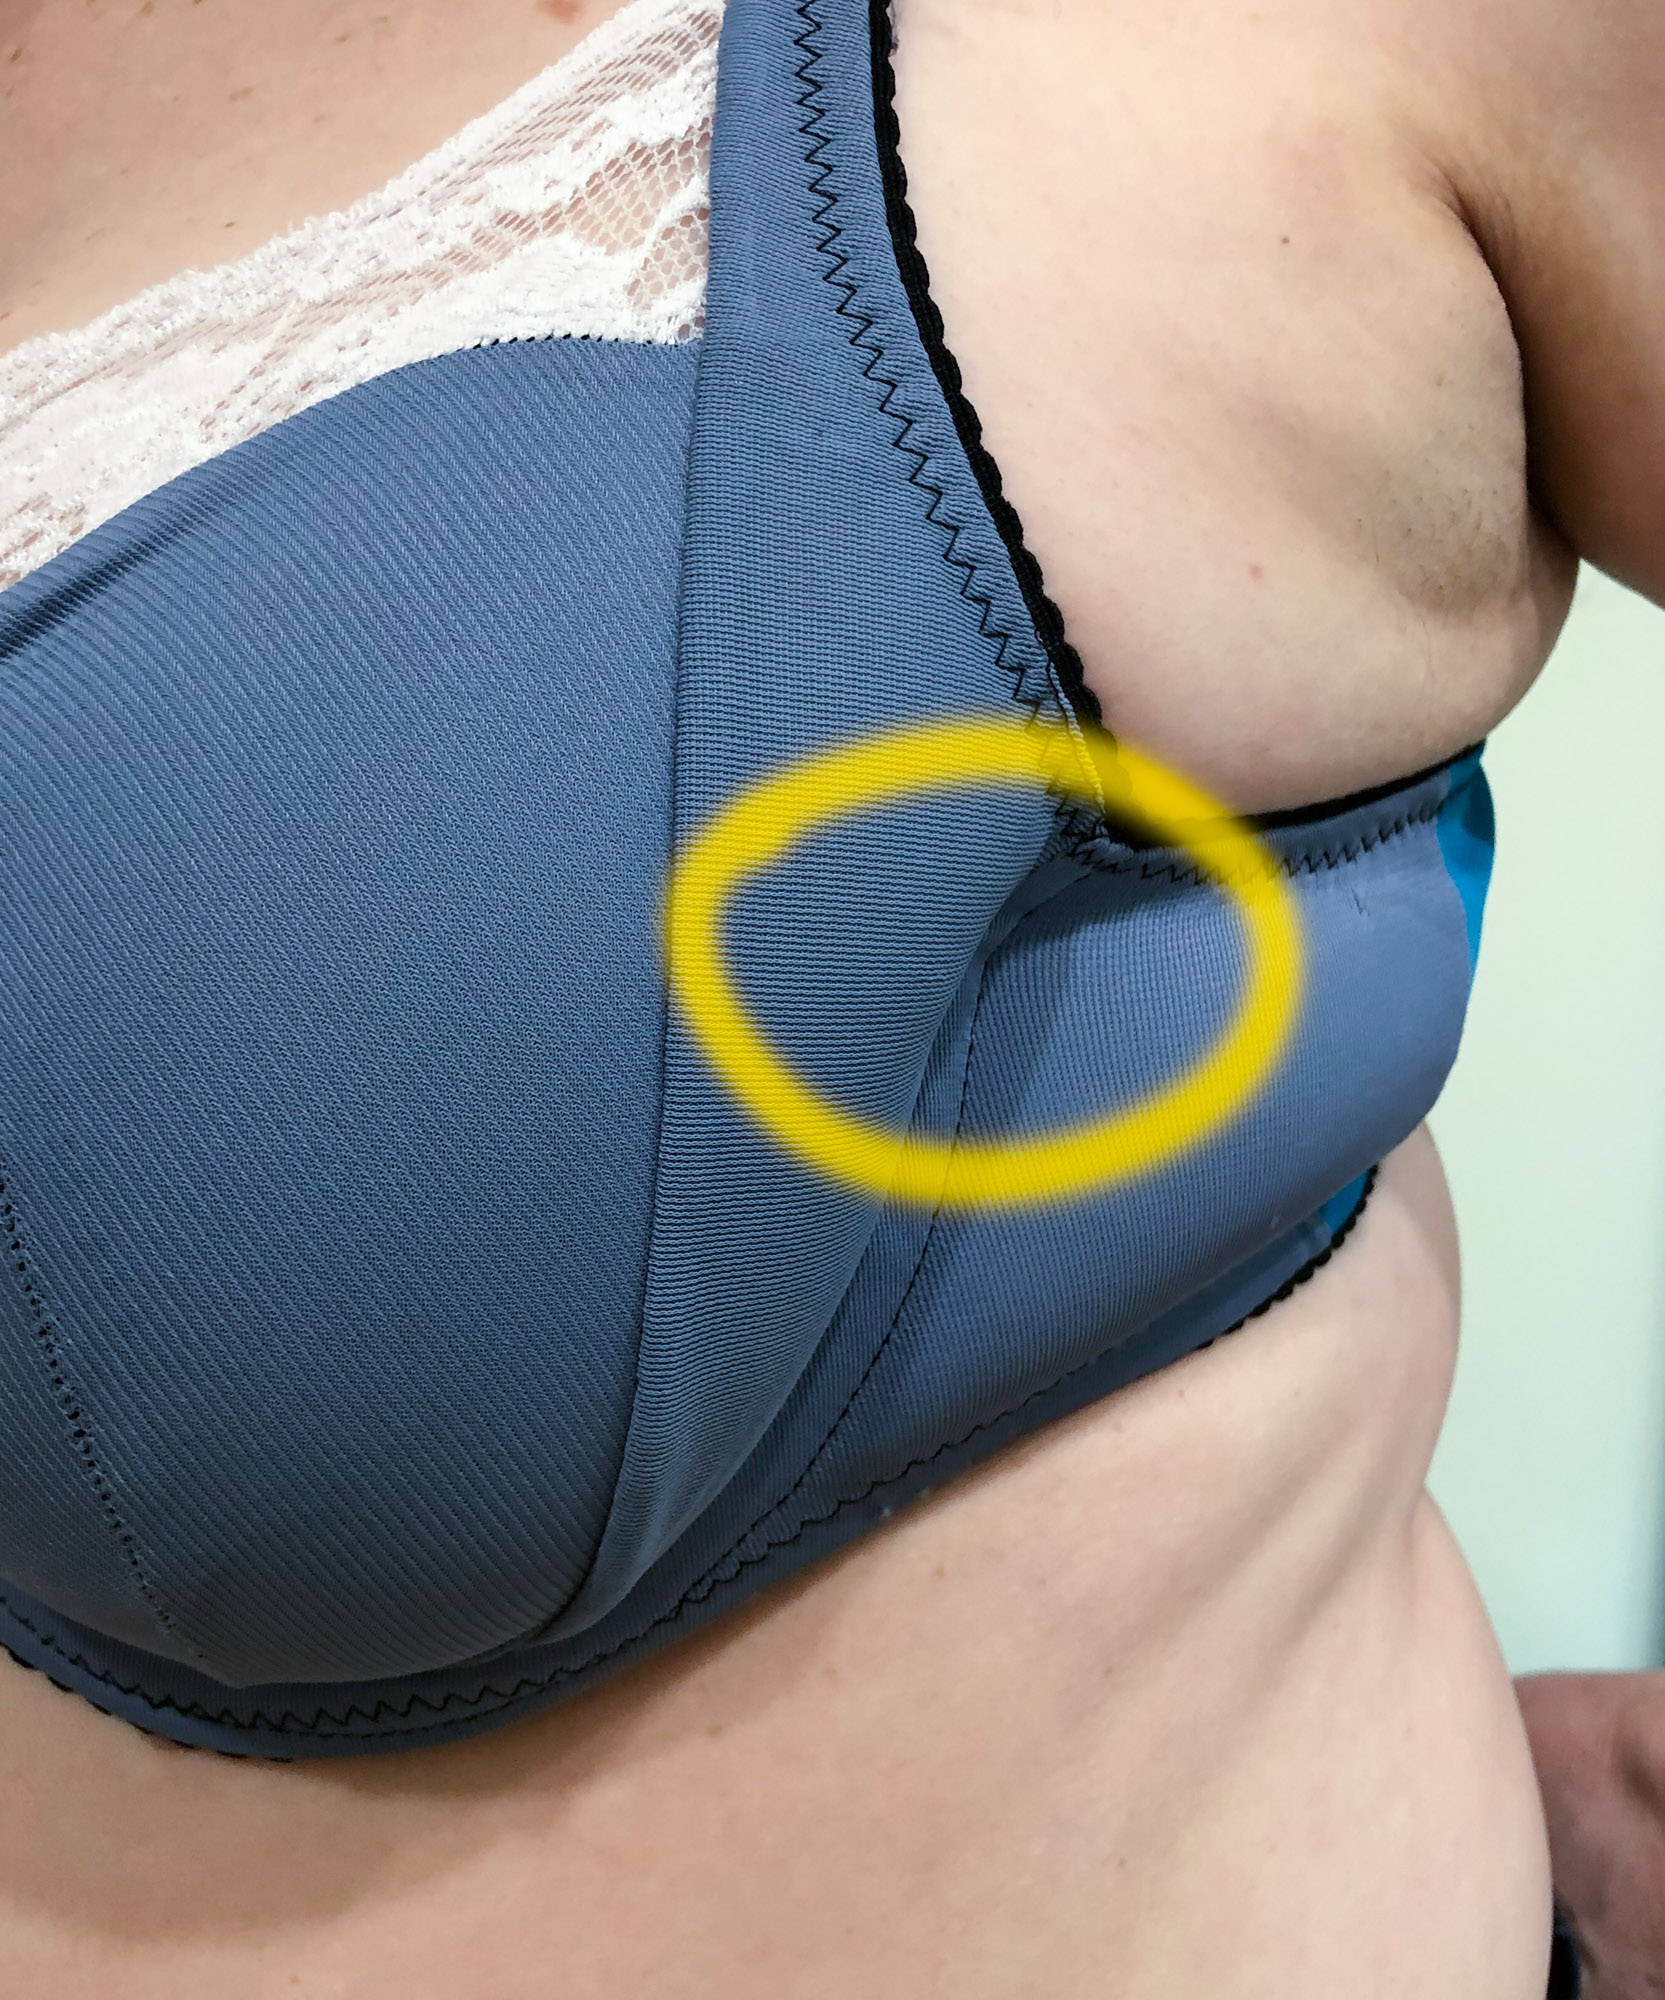
A well-fitting wire size will sit neatly at your breast root in the center, run directly under your breast and end right at the outer edge of your chest at the boundary where breast tissue stops and chest wall begins.

The Willowdale Bra has been designed for use with a regular rounded underwires, like the ones from Porcelynne here. That’s the basic shape for underwires.
When ordering your underwires, we recommend also getting one size up and one size down from the size assigned to your Willowdale size. That allows you to try different options and see which you like best.
How to trace your breast root
For most sewists, selecting the wire size from the wire chart will result in a well-fitting wire. However, if that doesn’t work for you, you can try determining your wire size by tracing your breast root.
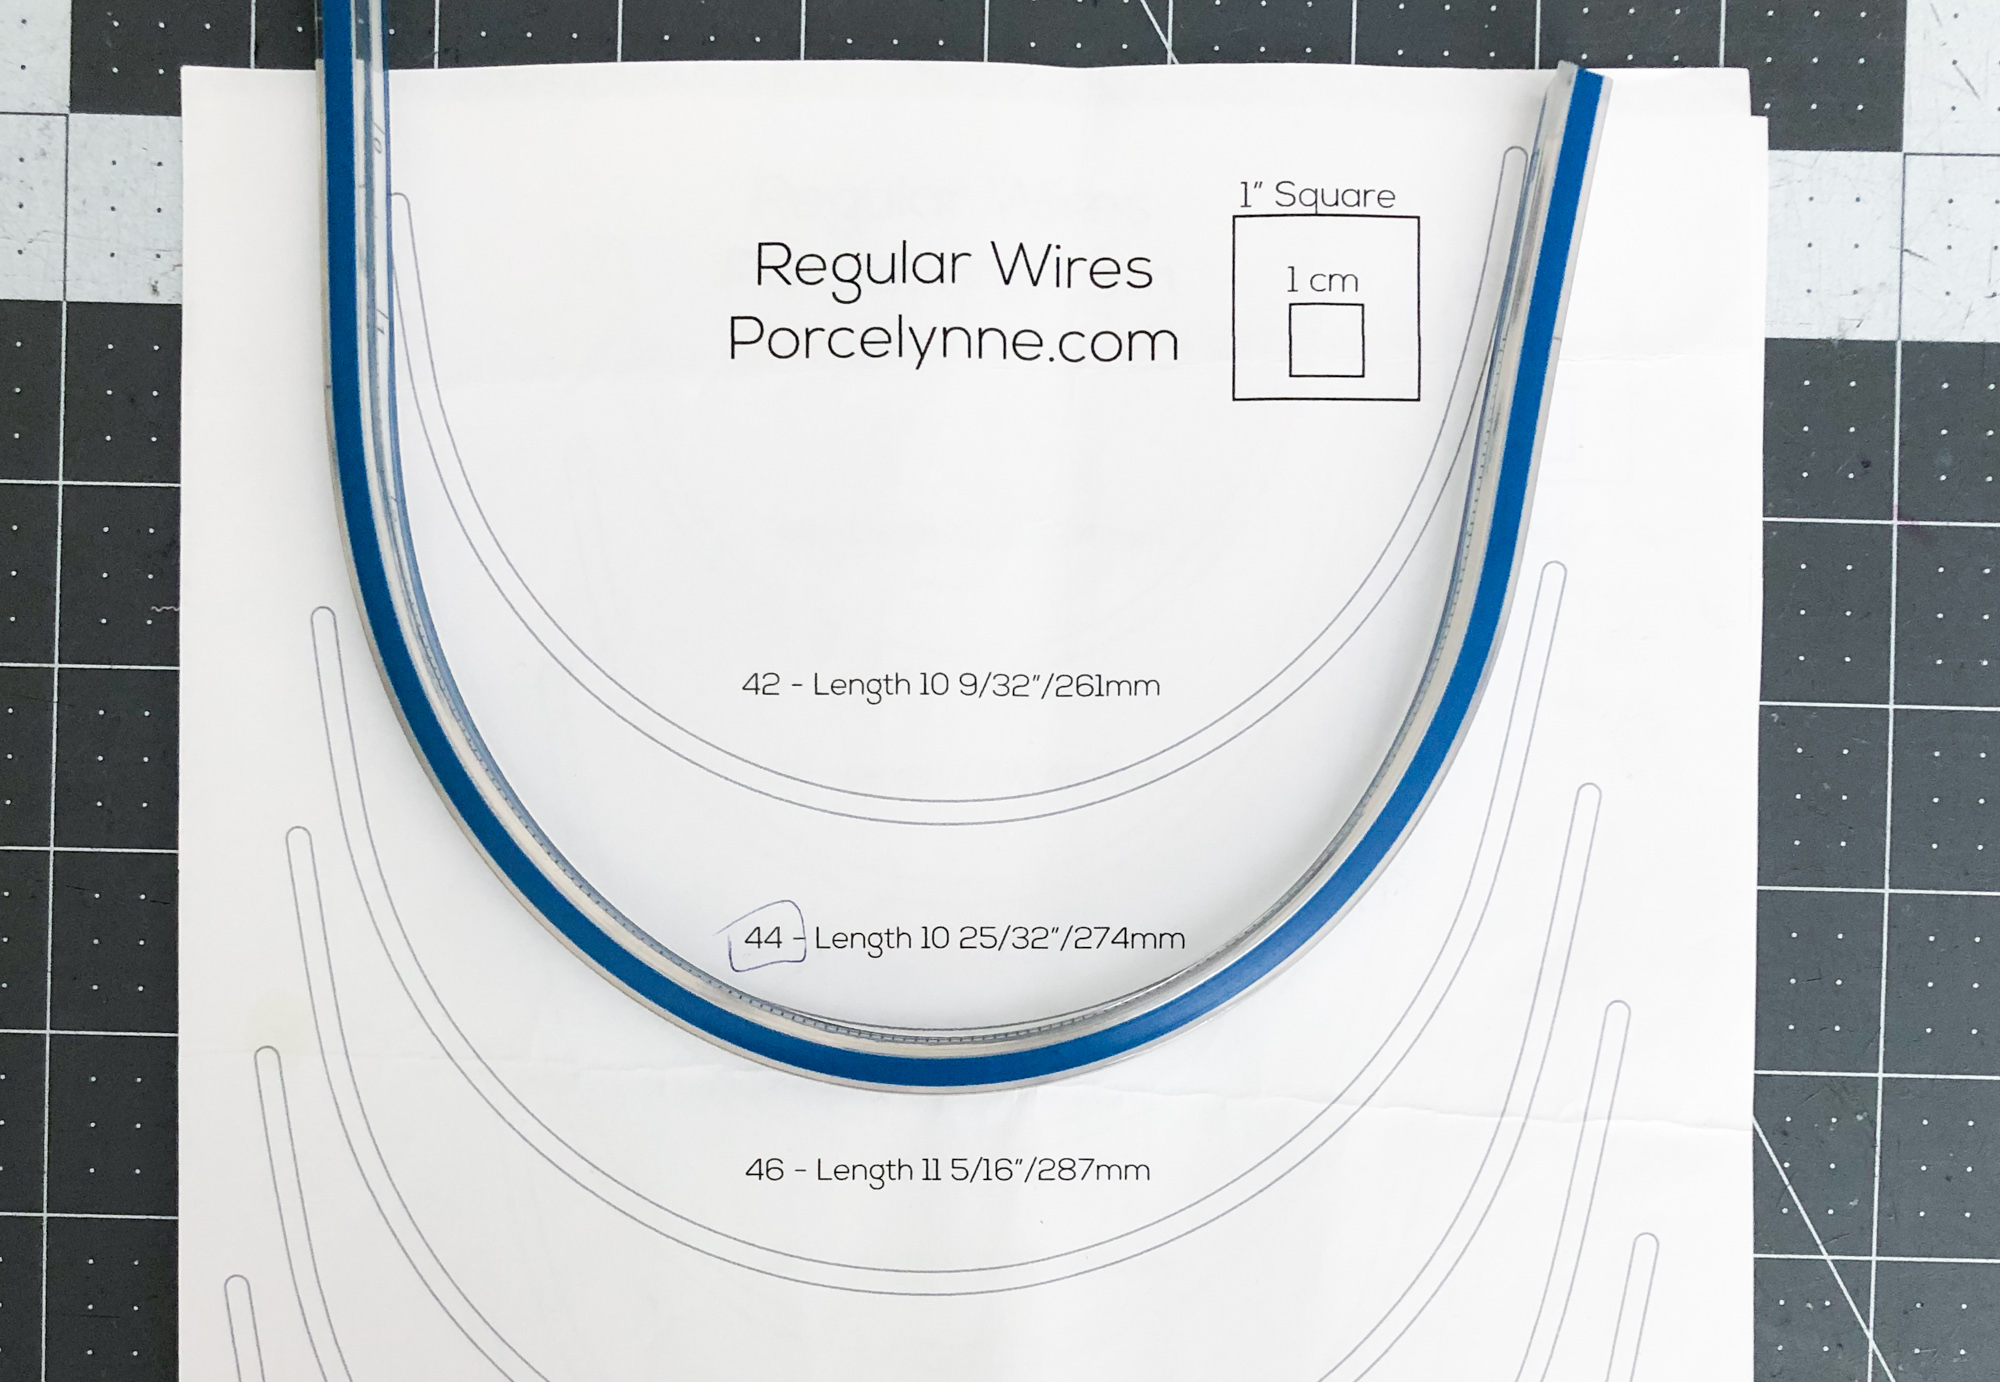
To do this, you’ll need a flexible ruler and a wire size diagram like the one here (be sure to print it at exactly 100%).
Position the ruler with the 0 mark between your breasts at the point where your breasts start.
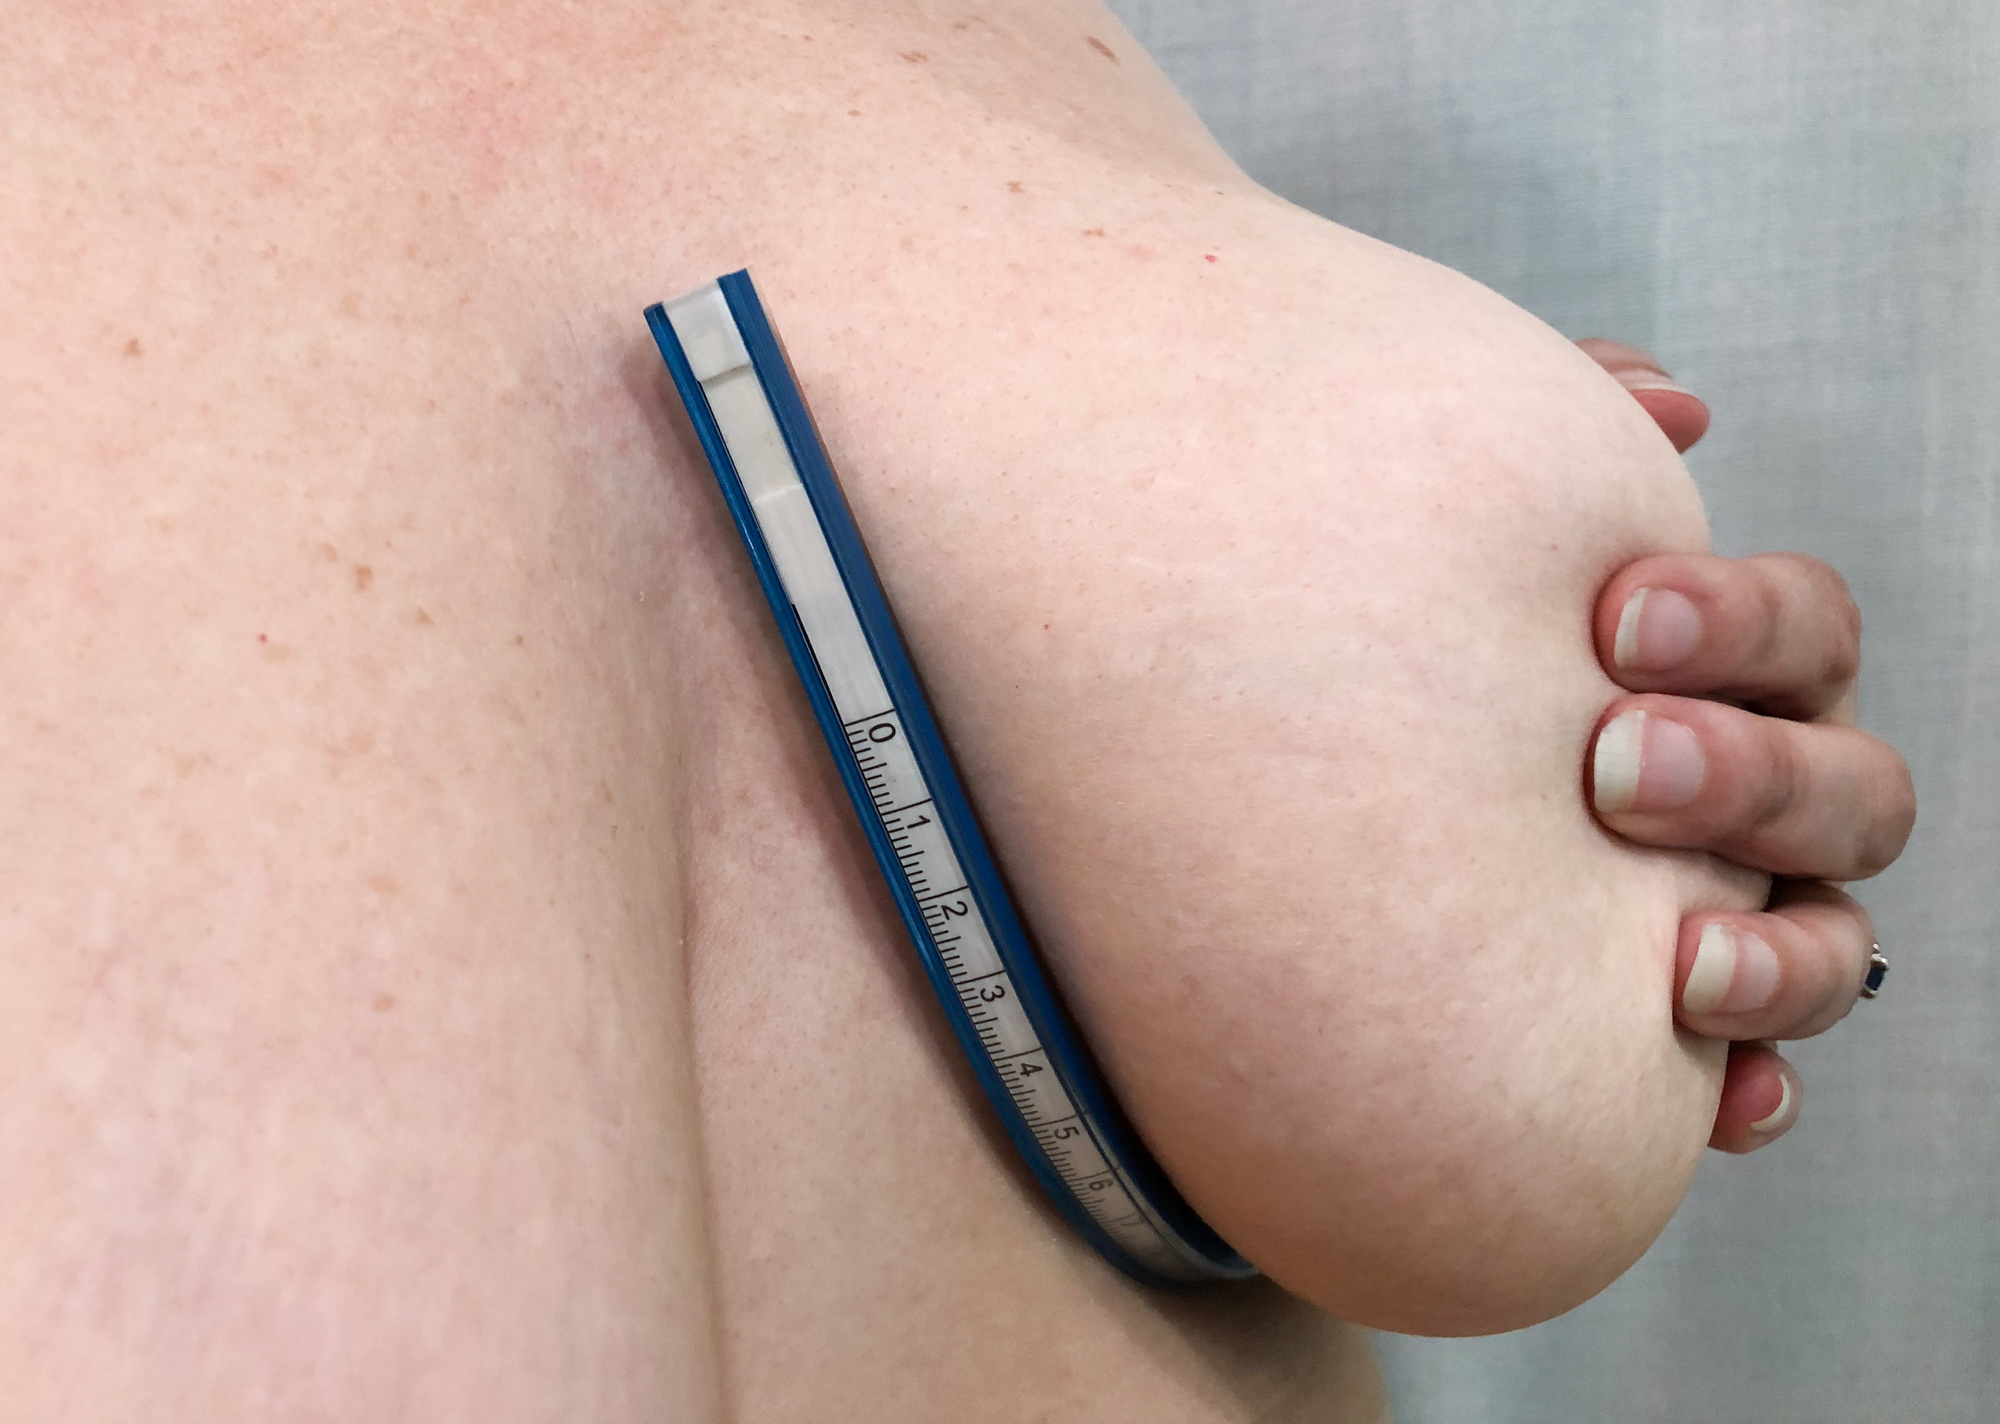
Wrap the ruler underneath your breast, molding it to the shape of your breast root.
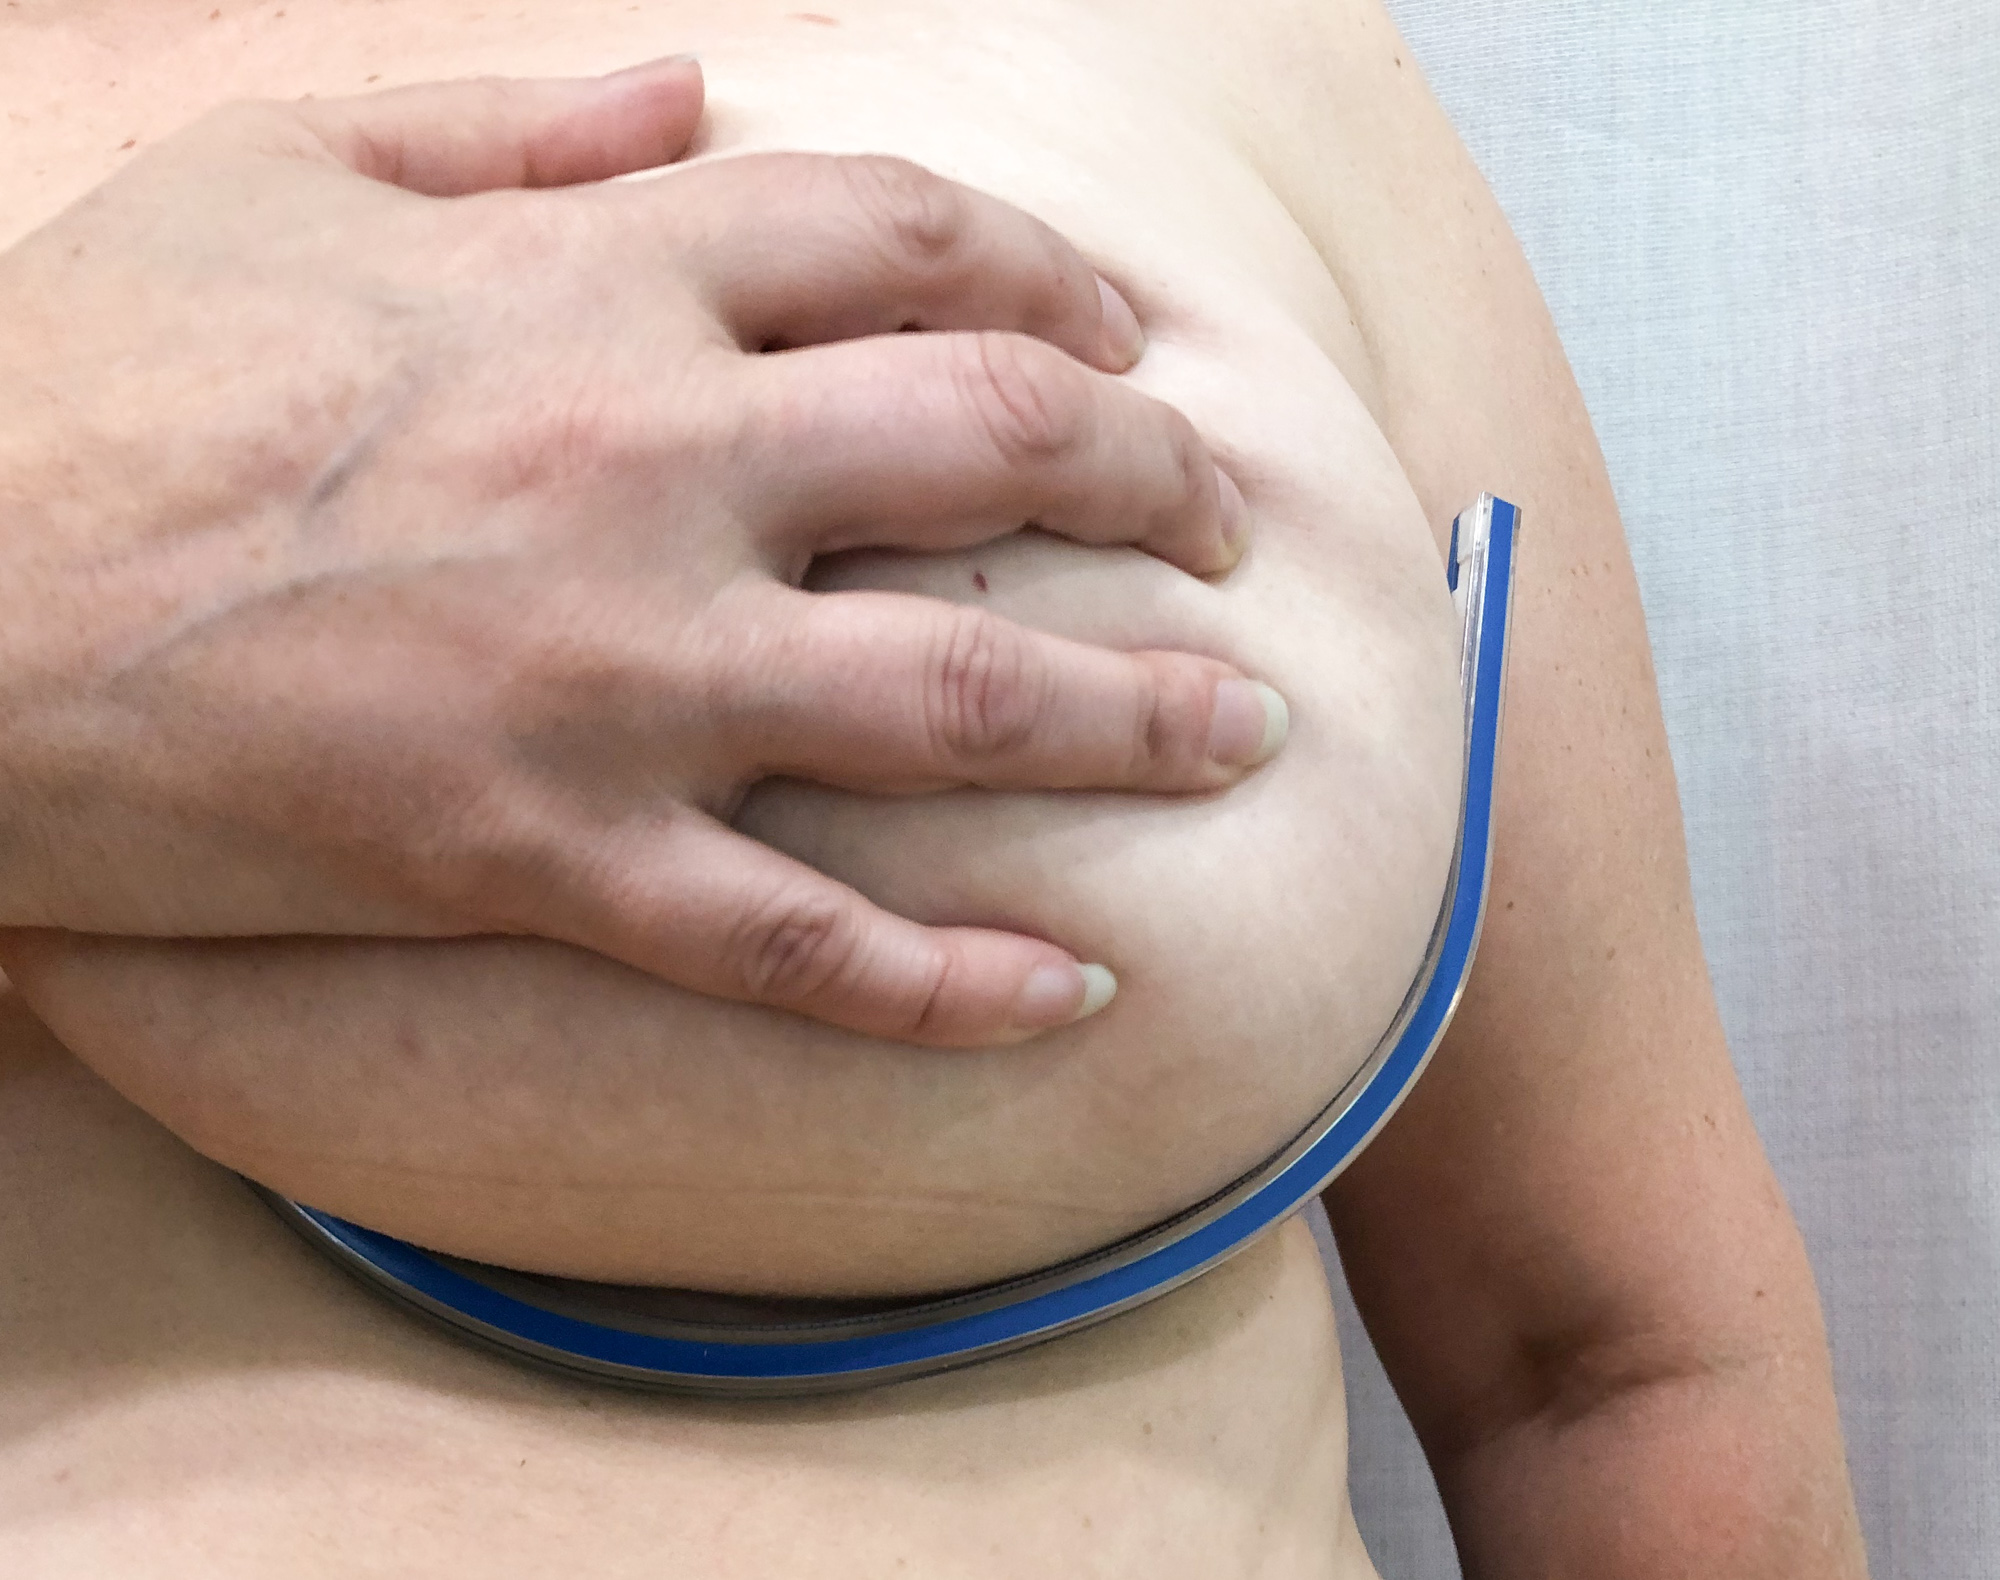
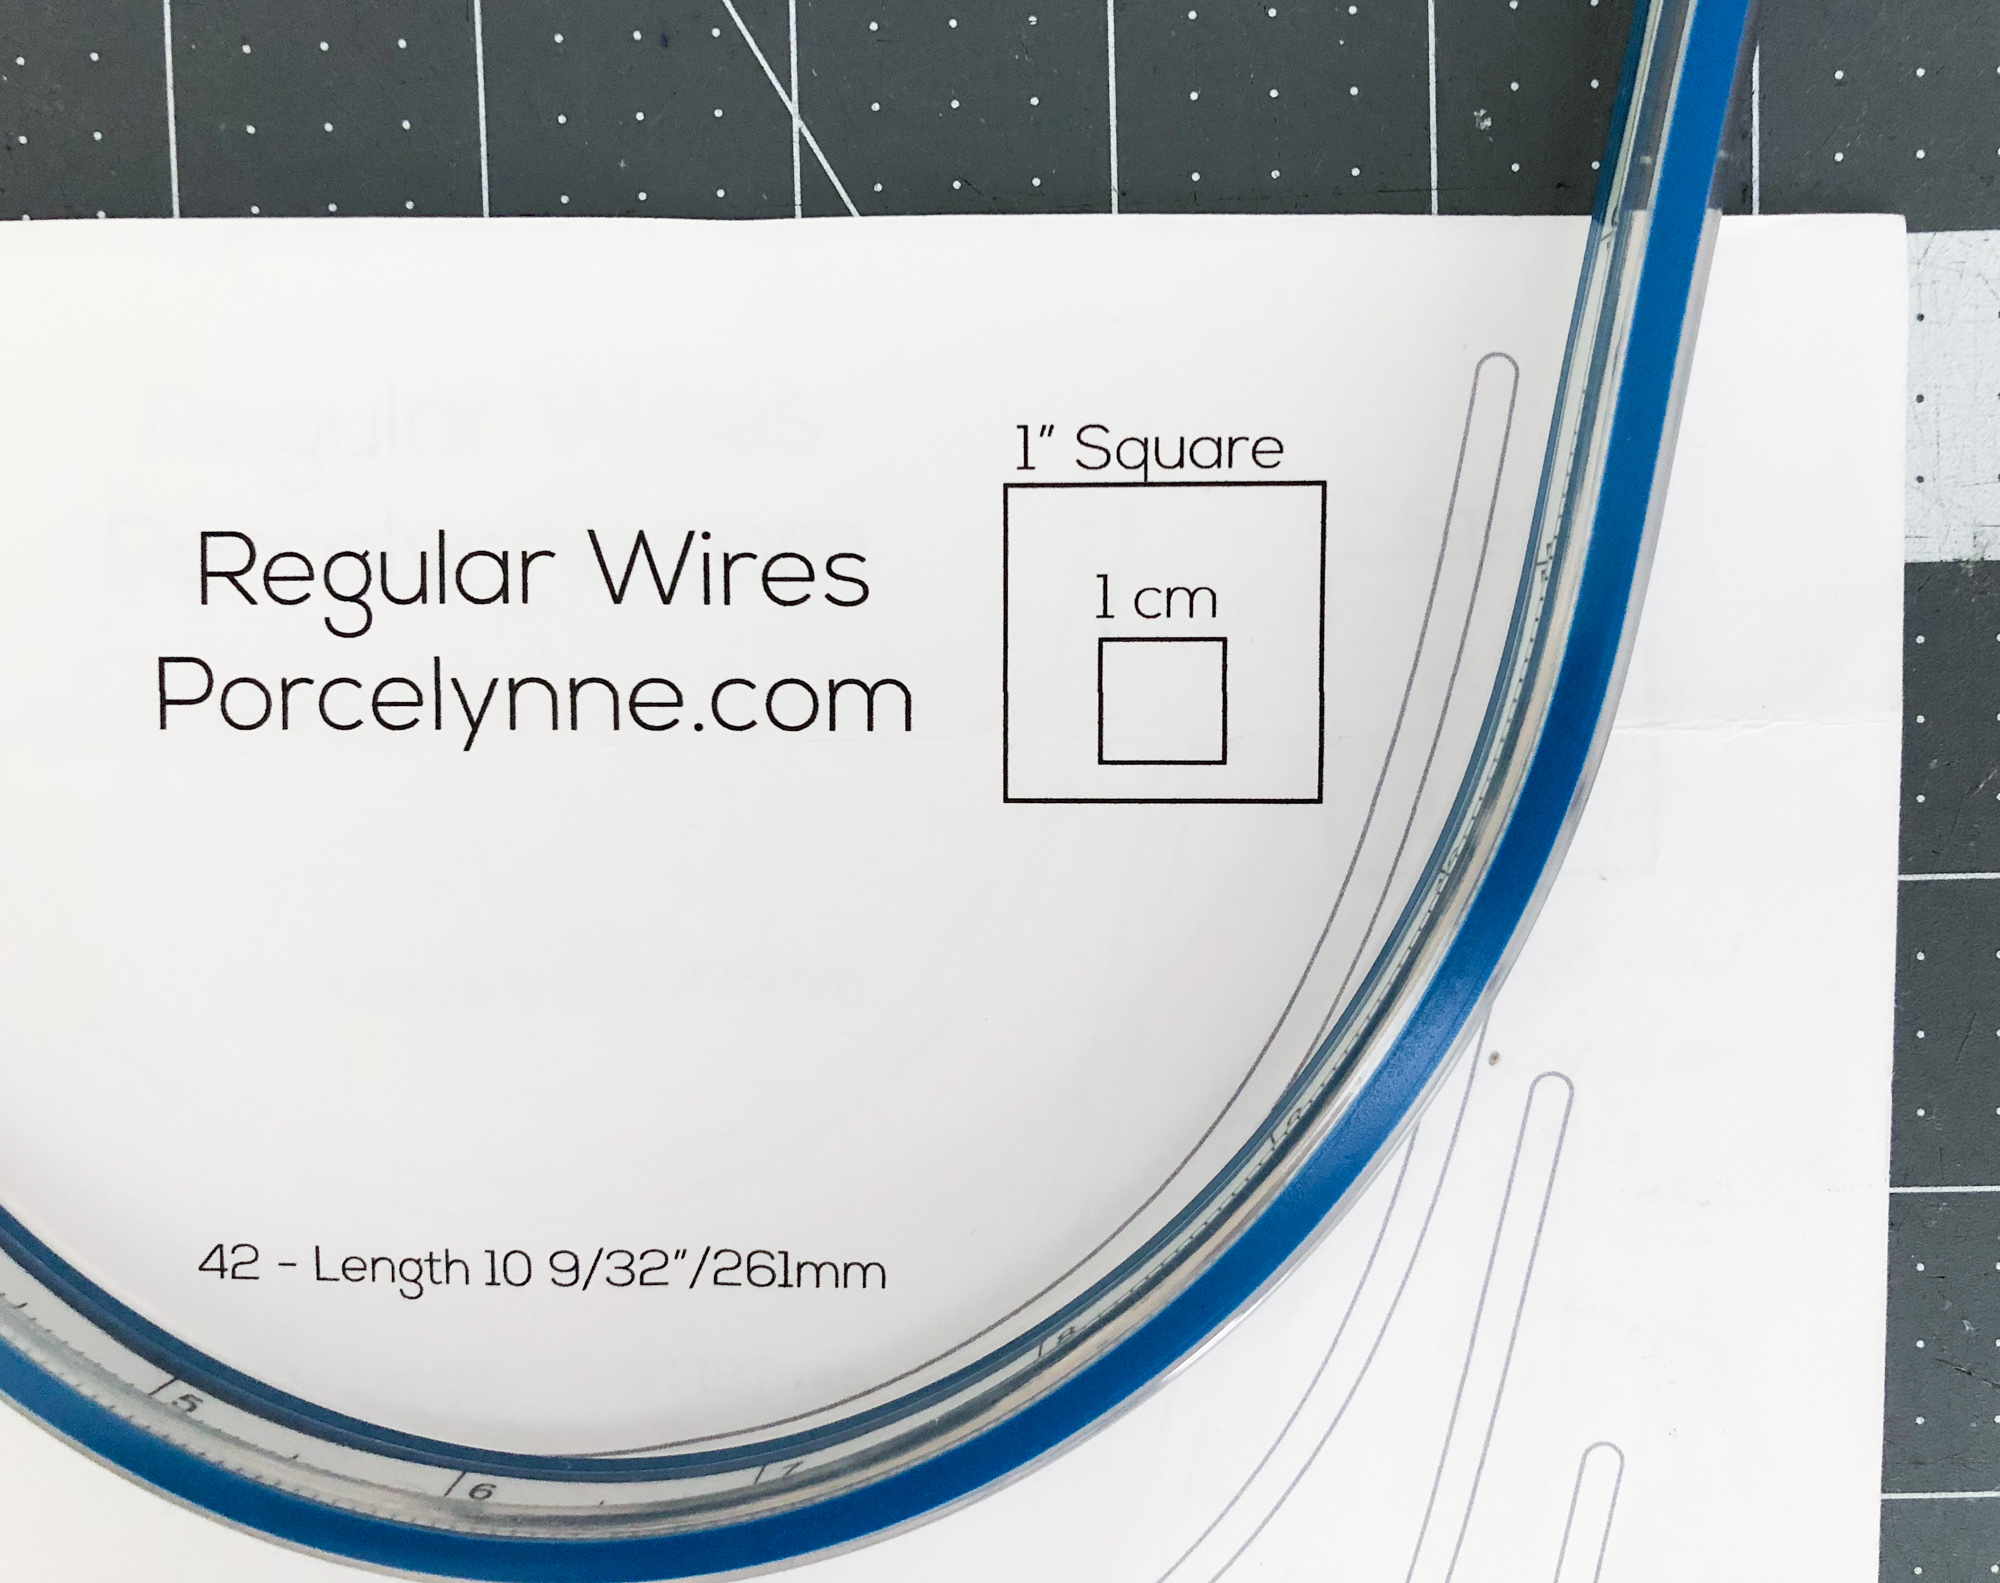
Carefully remove the ruler and lay it over the wire size chart, lining up the 0 mark with one edge of the wire. Compare it with the different sizes to see which one matches your shape most closely.
You can see in this example that the size 42 wire has a narrower curve than the ruler. If you were to use the size 42, it would dig in at the side.
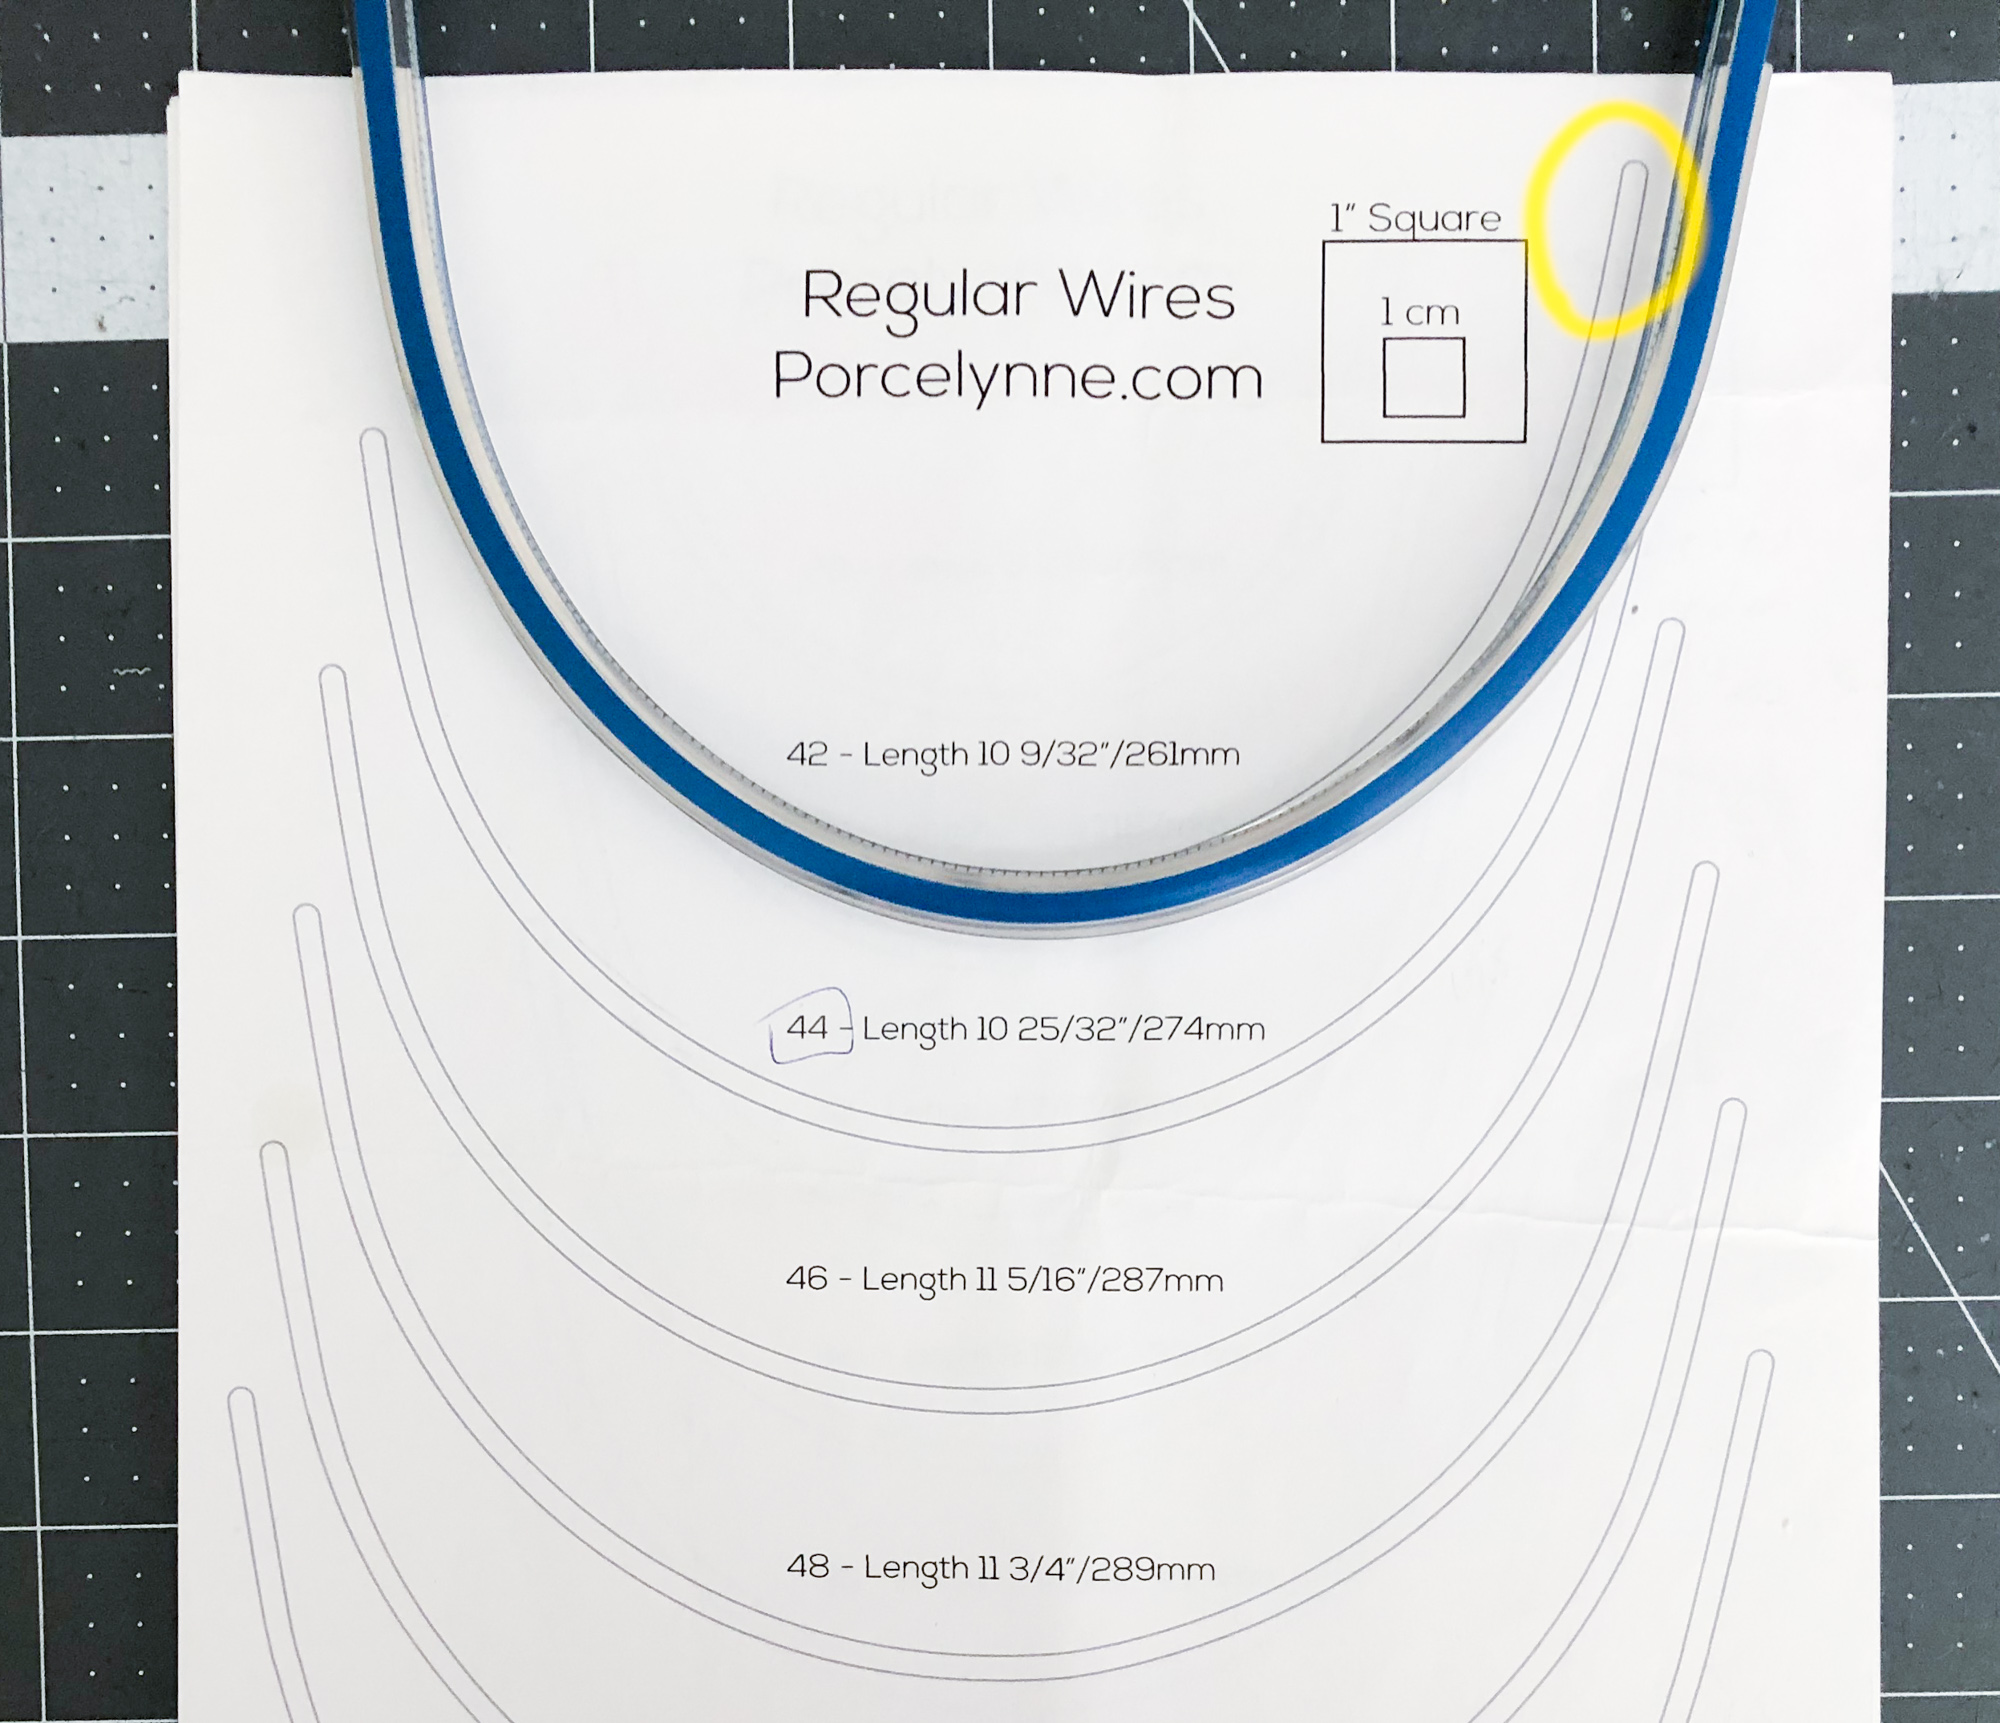
Conversely, the 46 wire has a wider curve. If you were to use the size 46 wire, it would stick out away from the body.

The size 44 wire most closely matches the shape and length of the wire needed.
Depending on the shape of your breasts, the regular underwire may or may not be the best underwire shape for you. If you find that you need a different style of wire altogether, it may be best to work from a different pattern that is designed for that type of wire, as adjusting a pattern to accommodate a different wire style can be a complex process.
How to modify your pattern for a different underwire size
Once you’ve determined what wire size you need, take a look at the wire size chart and find the bra size within the same band size that matches the wire size you need.
For example, if the size 40E fits you well but you need a size 42 wire, that would be the 40DD.
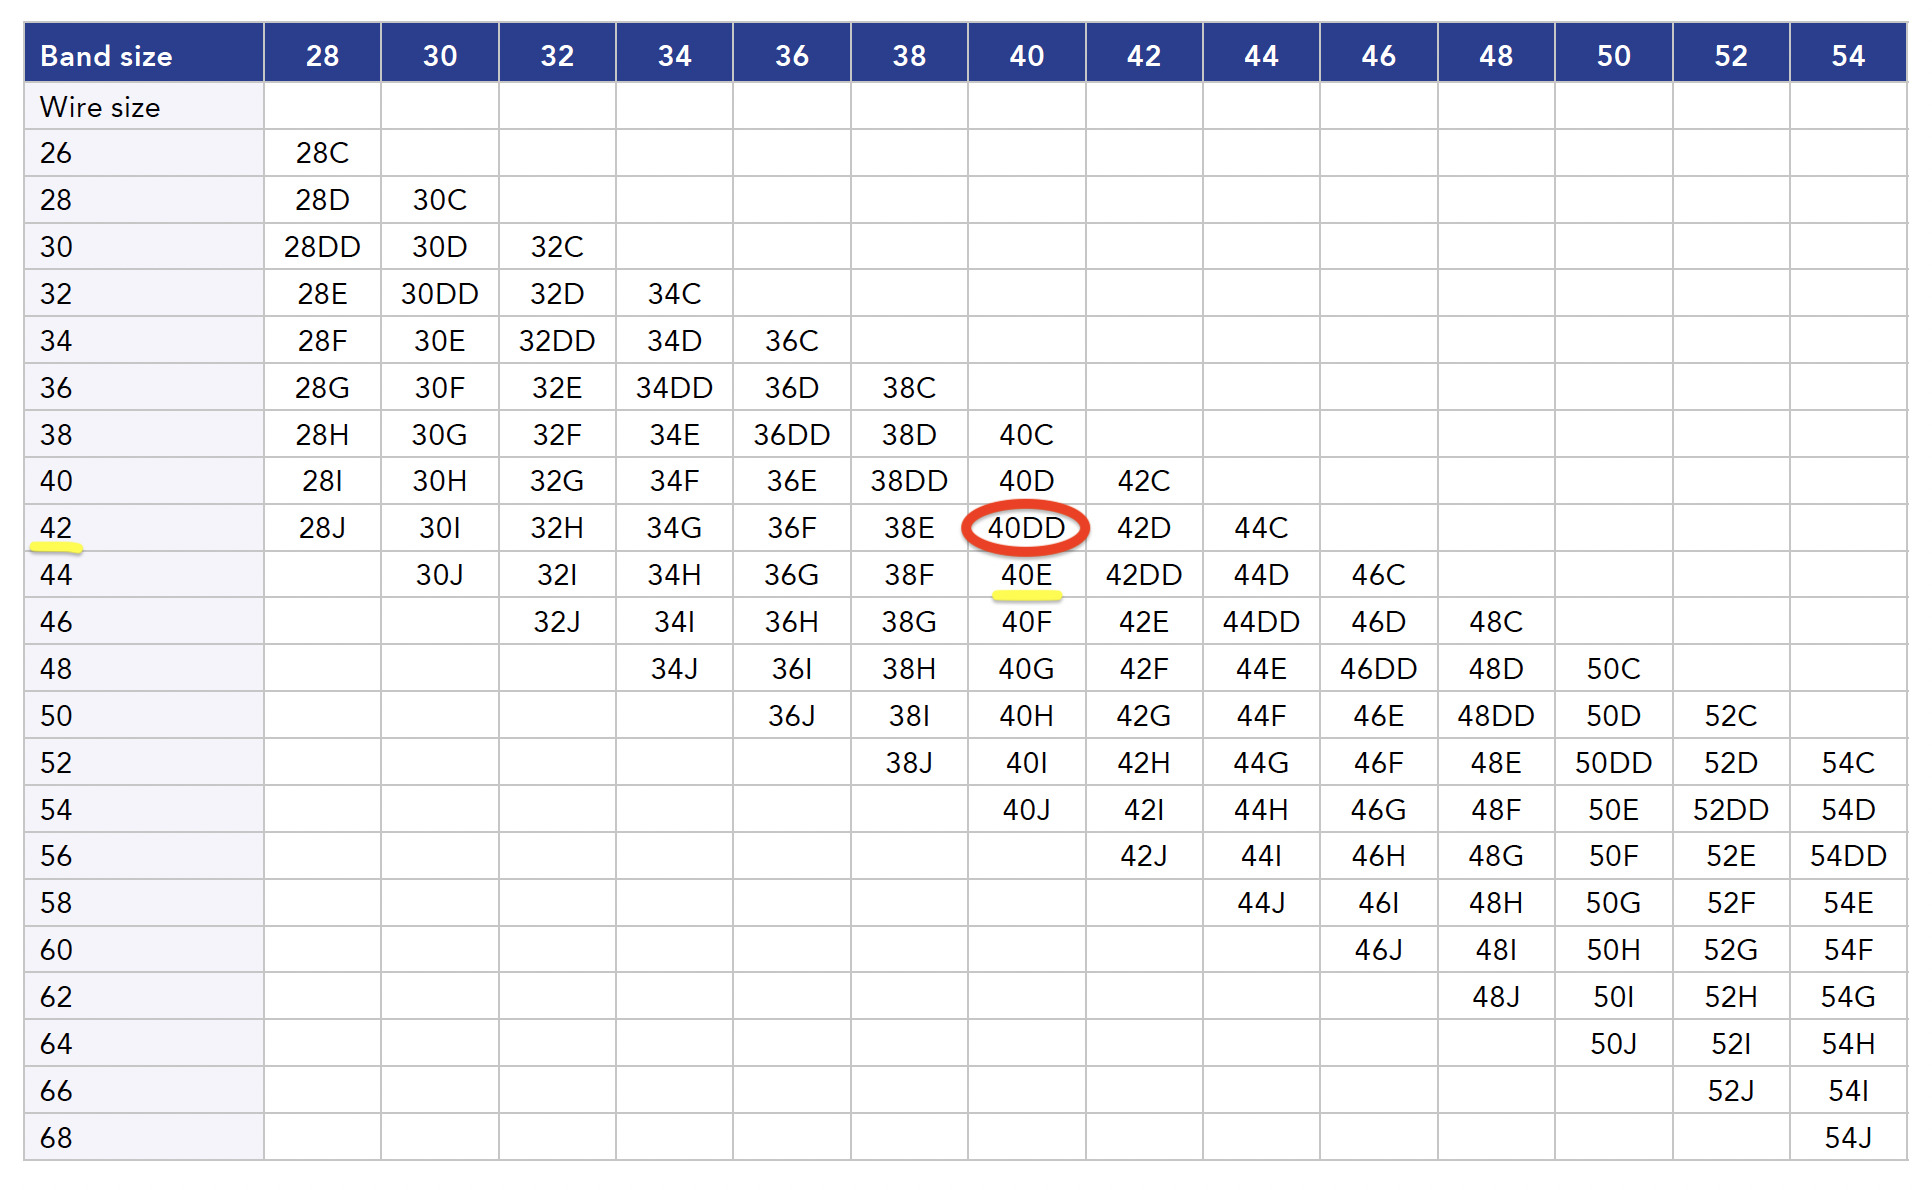
We’re going to use the cup pieces from the 40E and the band pieces from the 40DD.
To do that, we need to make some adjustments to the 40E cup pieces to get them to fit in the 40DD band.
What if you are on the cusp of the cup sizes and don’t have a size to compare to? (For example, if you are using a 40J but need a 56 wire.) You may still be able to make these adjustments, but you will first need to create the size to compare to by finding the nearest sister size of the size you need (in this case, the 42J) and reducing or increasing the band width.
Adjust the band
To modify the band from one band size to another, add or remove 1/2″ per band size at the side seam of the front band and 3/8” at the side seam of the back band. For example if you need to modify a band down two sizes, remove 1″ from the the front band and 3/4″from the back band.
Adjust the cups
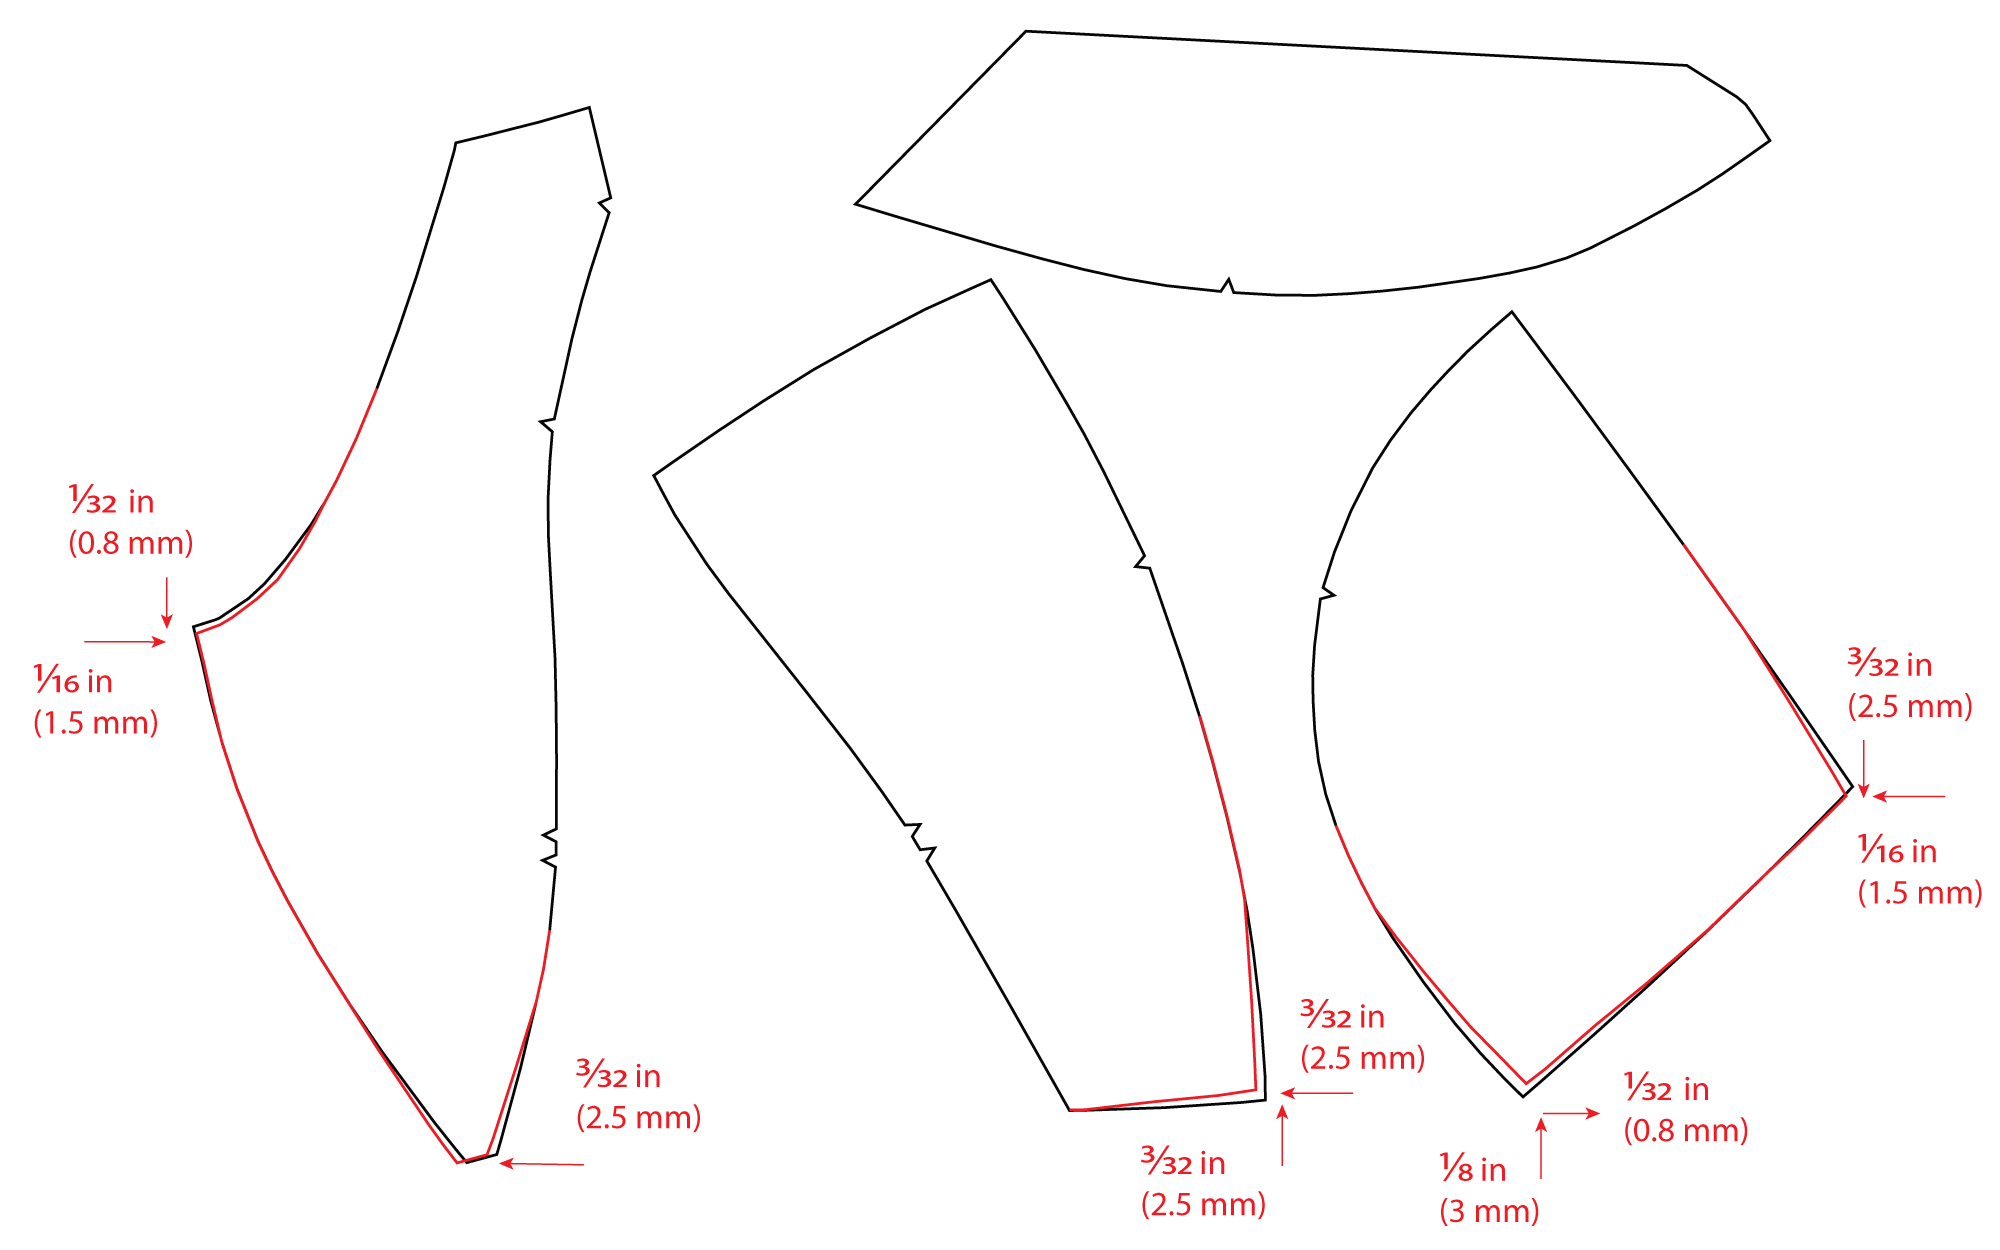
To fit a cup into a different wire size, make the modifications shown in the diagrams below in red. To change 1 wire size, move the points specified in the diagrams below by the amounts shown and then blend from the new points back into the original pattern. If you need to change more than 1 size, multiply the dimensions by the number of wire sizes required.
To fit a larger cup into a smaller wire:
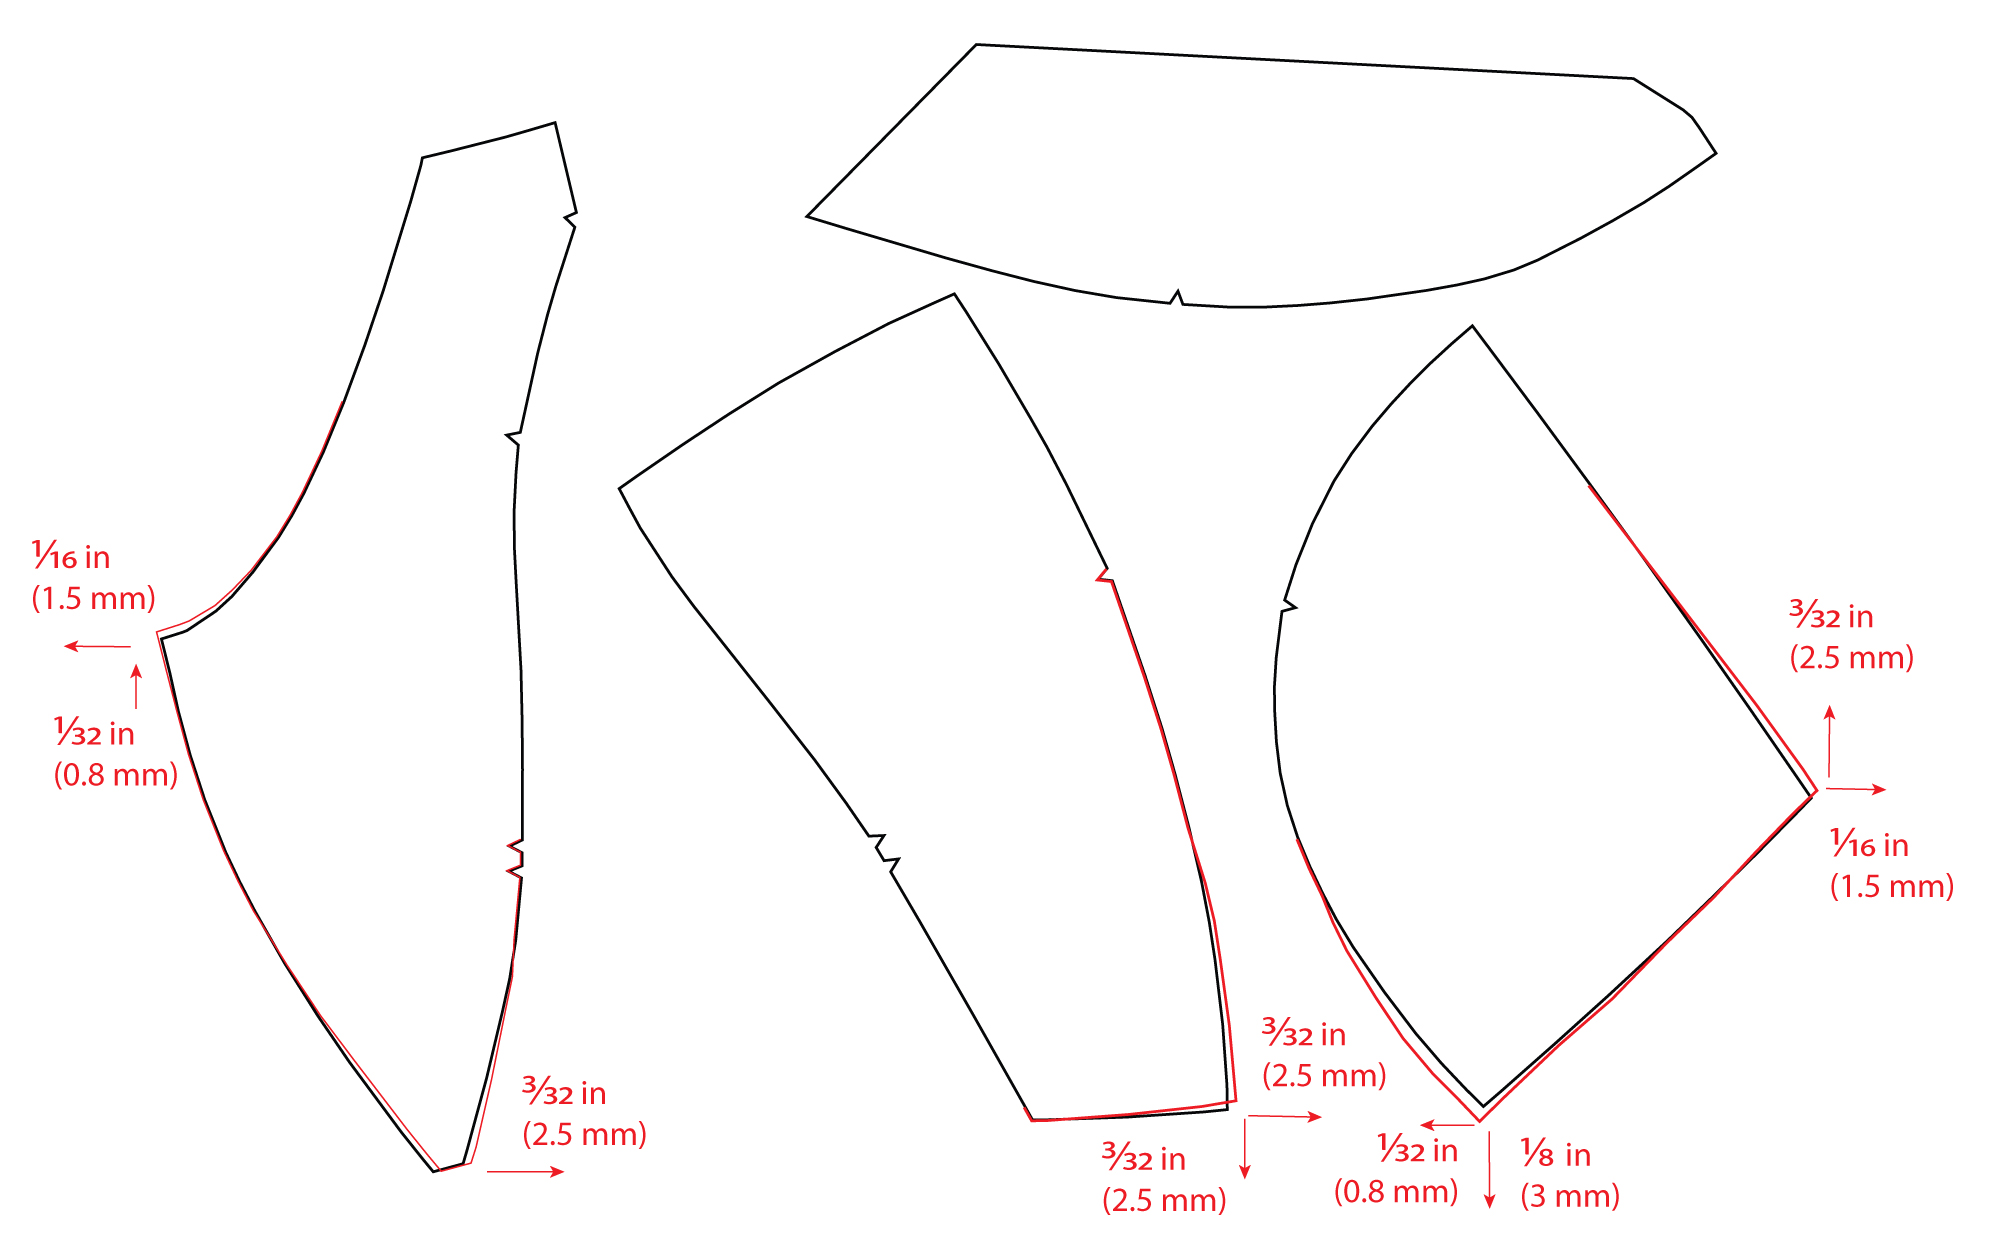
To fit a smaller cup into a larger wire:
For our example, use the 40E cup pieces and use the first diagram above to modify them to fit into a smaller wire. You can then use these modified cup pieces with the 40DD band to create your bra.
We hope this tutorial helped you identify your wire size and adjust your pattern pieces accordingly! Check out the full Cashmerette Bra Fitting Guide for more on sewing and fitting your dream bra with the Willowdale Bra.
Jump to another post in this series:
- Bra fitting guide overview
- How to choose your bra size
- How to make a test bra
- How to adjust the back band
- How to adjust the gore/bridge (Willowdale only)
- How to adjust the cups
- How to adjust the center insert (Loftus only)
- How to adjust the side seam angle
- How to adjust the straps
- How to adjust the underwires (Willowdale only)
- Adjusting the level of support and comfort
- How to make an asymmetrical bra
- Additional bra making resources