A tried-and-true pattern combined with a luxurious mikado fabric and a dash of vintage inspiration made for matrimonial magic in the form of a breathtaking wedding dress for bride Chantal. Keep reading for all the glorious details of how she made it!

Making your own clothes is incredibly empowering, but making your own wedding dress? There is nothing quite like that feeling of accomplishment! (Especially when you’ve painstakingly sewn the lace on by hand…)
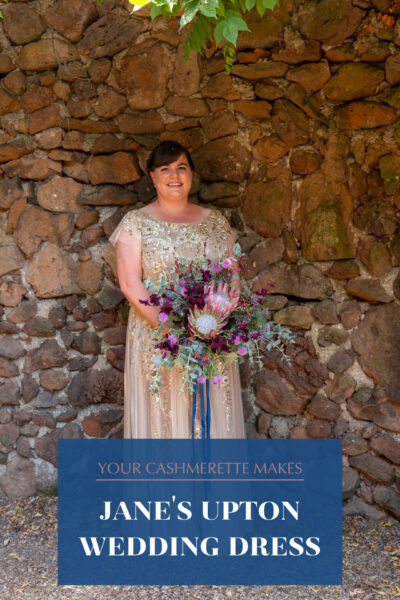
When we saw Chantal’s wedding dress that she made with our Upton Dress pattern, we just had to know every last detail about how she made it. So without any further ado, here’s Chantal to tell you all about the inspiration, the fabric, the adjustments, and so much binding that resulted in the vintage wedding dress of her dreams.
Chantal’s Upton Wedding Dress
CHANTAL: When I got engaged I knew straight away that I would be making my own dress. I’m 5’ 10” and wear 36H (UK) bras, which makes it incredibly hard to find well fitting clothes. In recent years it has gotten slightly easier to find clothes for tall women, or busty women, but not both, and many of the options are poorly made, unethical fast fashion. Making my own clothes has revolutionized my wardrobe, there was no way I was going back to ready to wear for one of the most important dresses I’d ever own! As a seasoned bridesmaid I’d seen enough of bridal shops to know trying to buy a dress would be a miserable experience for me, so I never even contemplated trying any dresses on.
As easy as it was to make the decision to make my own wedding dress, I knew it was the kind of project which could easily get overwhelming, so I laid out some guiding principles for deciding on the design:
- I would use a tried and tested pattern with straightforward construction (Hello Cashmerette!)
- An important part of making my own clothes is sustainability, so I wanted the dress to be re-wearable for other occasions, which influenced a few more criteria:
- The dress would not be floor length
- The dress would not be white (which is not my style anyway!)
- And, perhaps most importantly, the dress would be machine washable!
I drew my inspiration from Dior’s “New Look” silhouette, with it’s fitted bodices and voluminous skirts. I’ve always loved 50’s style dresses, so I wanted a skirt which would look great with petticoats on the dance floor. I also love the luxury and detail of lace, so wanted a sheer overlay with intricate lacework which would complement the lines of the dress.
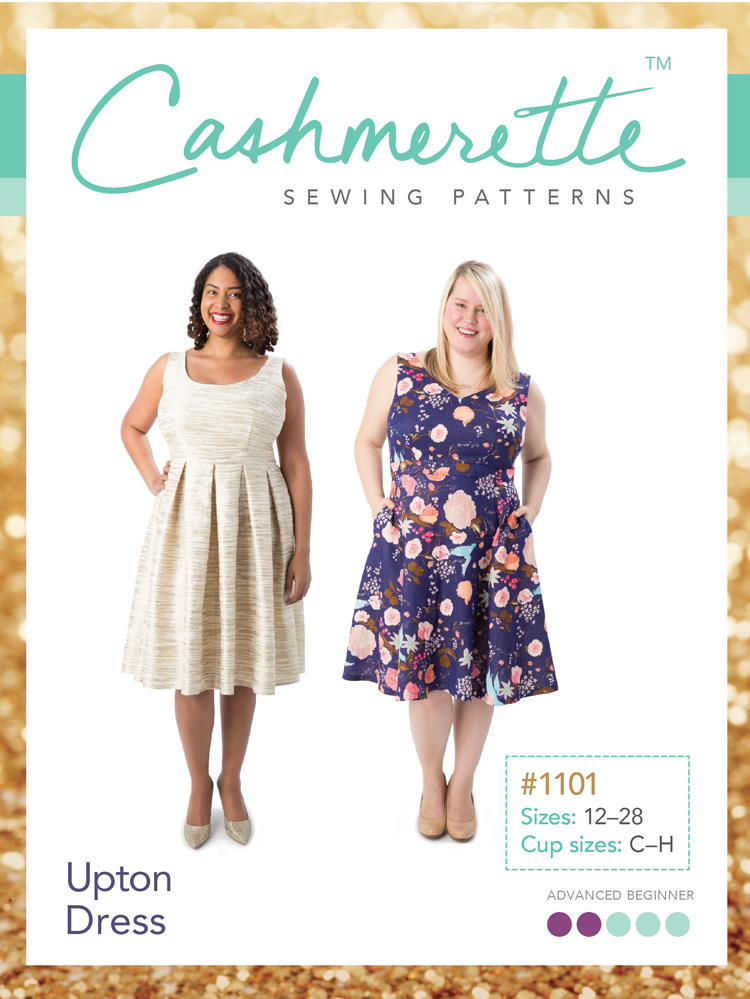
The pattern
This was very easy decision to make, I’d already made the Upton dress with a princess seam bodice, and it fitted me perfectly with no adjustments. The Gilmore skirt provided the full circle skirt I wanted, and the two patterns being interchangeable made things very straightforward.
The fabric
I knew I wanted a yellow dress, as it’s my favourite colour, and I didn’t want it to be too shiny. I looked at a lot of different fabrics from Bridal Fabrics and settled on a polyester mikado. Mikado has a luxurious feel, with a soft sheen, and lovely balance of structure and drape. It gave the bodice structure, but was light enough to let the skirt twirl. It was also considerably cheaper than the equivalent silk mikado, and fulfilled the machine washable requirement!
For the lace overlay I wanted a design that was intricate, but sculptural. I didn’t want a ditsy, romantic floral, or a geometric modern design, and I was really happy to find the perfect lace which was somewhere in between, also from Bridal Fabrics.
The adjustments
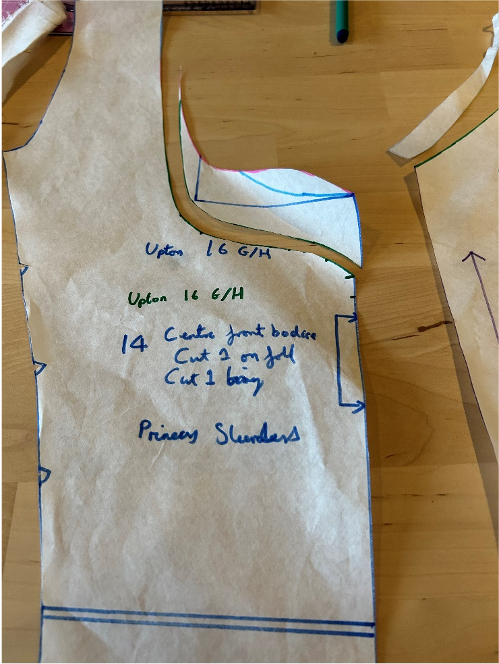
The Upton Dress & Skirt plus Mix and Match Pack has pretty much every combination you could want, except for a sweetheart neckline! Luckily this is a pretty straightforward change to make, and drafting it myself meant I could get it exactly where I wanted. I started off by tracing the neckline from another pattern over the curved Upton neckline, then blending the lines. After my first toile I decided to lower the neckline considerably to get to the final pattern.

My first toile (made from bedsheets!) The overall fit was good, but the sweetheart neckline I drafted was too high and puckered.
I took a couple of inches off the neckline to get to the final pattern piece.
Despite my height I didn’t make any height adjustments in the traditional sense, all my height is in my legs, so any bodice length issues I had in the past don’t happen with Cashmerette patterns as there’s enough fabric to get over my bust without it riding up. That said, I finished the skirt hem with satin bias binding instead of turning it up, so technically there’s a bit of extra length there.
The construction
Being very familiar with the Upton pattern, I didn’t think I’d have any issues with construction, but the fabric frayed so much. This was especially bad on curved edges, of which a princess seamed bodice with a sweetheart neckline has many…
I had to scrap my first bodice after the seam allowances frayed away, so for the second attempt I decided to block interface all the bodice pieces with a very lightweight interfacing, and also interface the seam allowances on the right side of the fabric. This made construction so much easier, but it did add bulk to the princess seams, which made them difficult to press. While I know that no-one else really noticed this, it was the one thing about the dress that I really wished I’d been able to do better. It just goes to show that even when you try to keep thing simple, a wedding dress will throw up challenges!
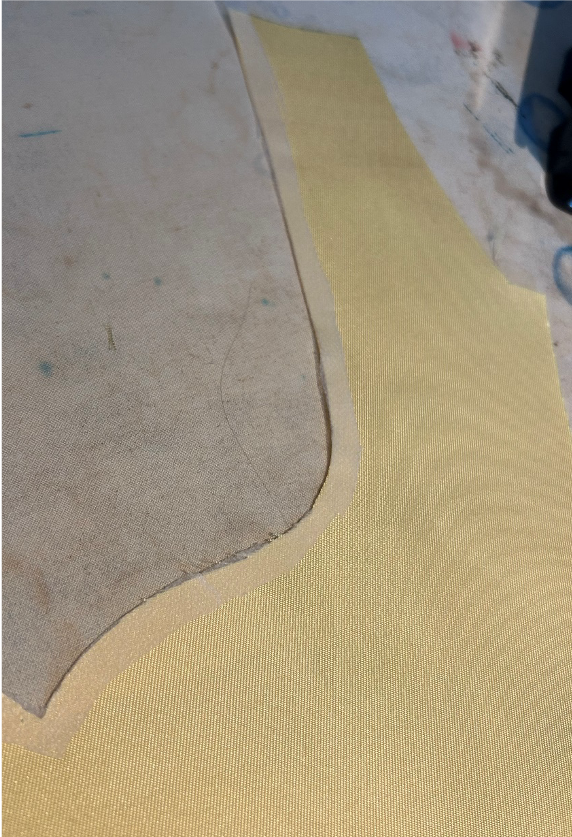
The right side of the bodice piece with the seam allowances interfaced (and my filthy ironing board).
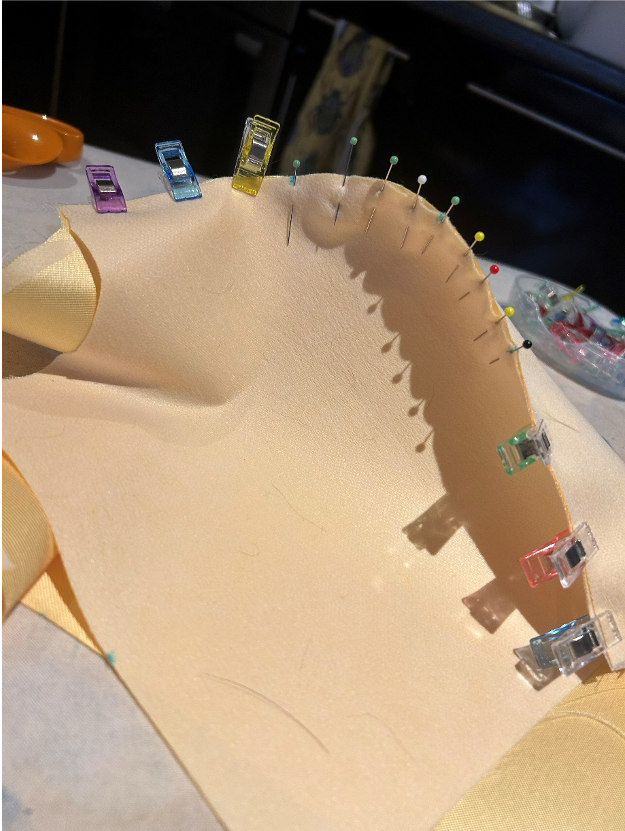
The block interfaced bodice pieces. Lots of pins on that curve for accuracy! Also, some cat hair.
I hand stitched the bodice lining and seams at the top of the invisible zip, and added poppers to keep the sleeves in place by attaching them to my bra straps.

Popper and thread chain to keep my sleeves in place.
The circle skirt construction went more smoothly. I created full mirrored pattern pieces because the fabric was too bouncy to accurately cut on the fold, which made cutting out much easier. I debated putting pockets in, as I’d seen some great pictures of modern wedding dresses with pockets, but decided against it in the end to keep the line of the skirt as clean as possible.
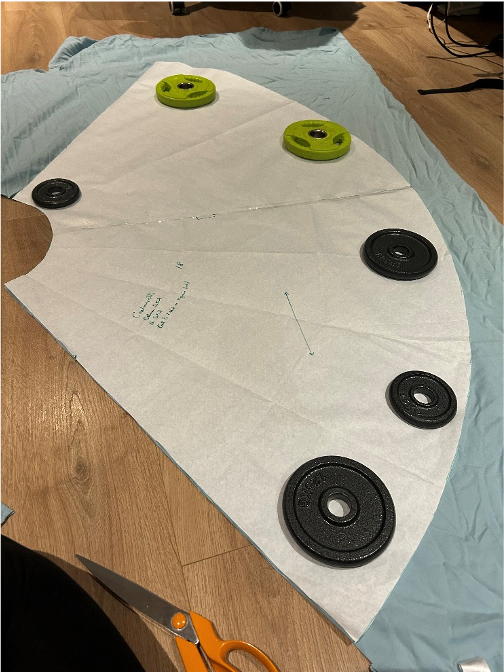
Full pattern piece for cutting out the circle skirt, it was so big I had to do it on the floor!
I decided not to line the skirt as the fabric was so weighty, and I’d be wearing petticoats, so I did French seams for a neat finish. I then applied almost 6 meters of satin bias binding to the hem, which looked so lovely.
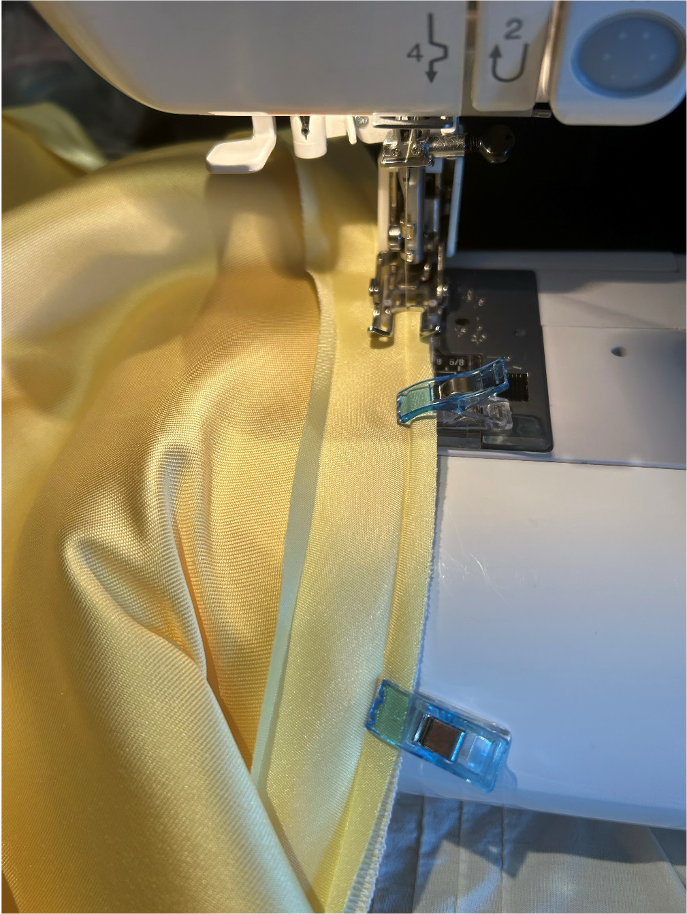
So much binding… I had to concentrate hard to stay focused and not start thinking about other things!

The finished hem.
I had originally intended to make the lace overlay from organza, but after making a toile it became clear that this would be too restrictive to provide the close fitting look I wanted. I switched to a stretch mesh, which worked much better. Placing and sewing the lace was the most painstaking part of the whole construction, and I had to enlist the help of a friend. We cut motifs out of the lace and spent a lot of time working out where to place them to best complement the lines of the dress. I had to do a lot of standing still while things were pinned and tacked on to me! I then hand sewed all the motifs on and removed the tacking.
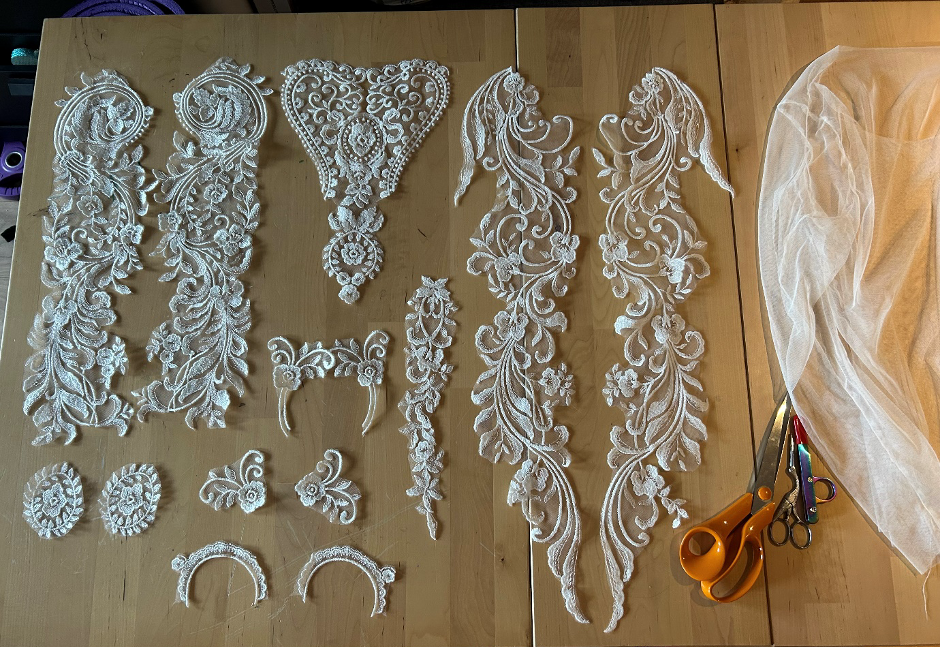
Lots of time was spent finding mirrored motifs in the lace and cutting them out.
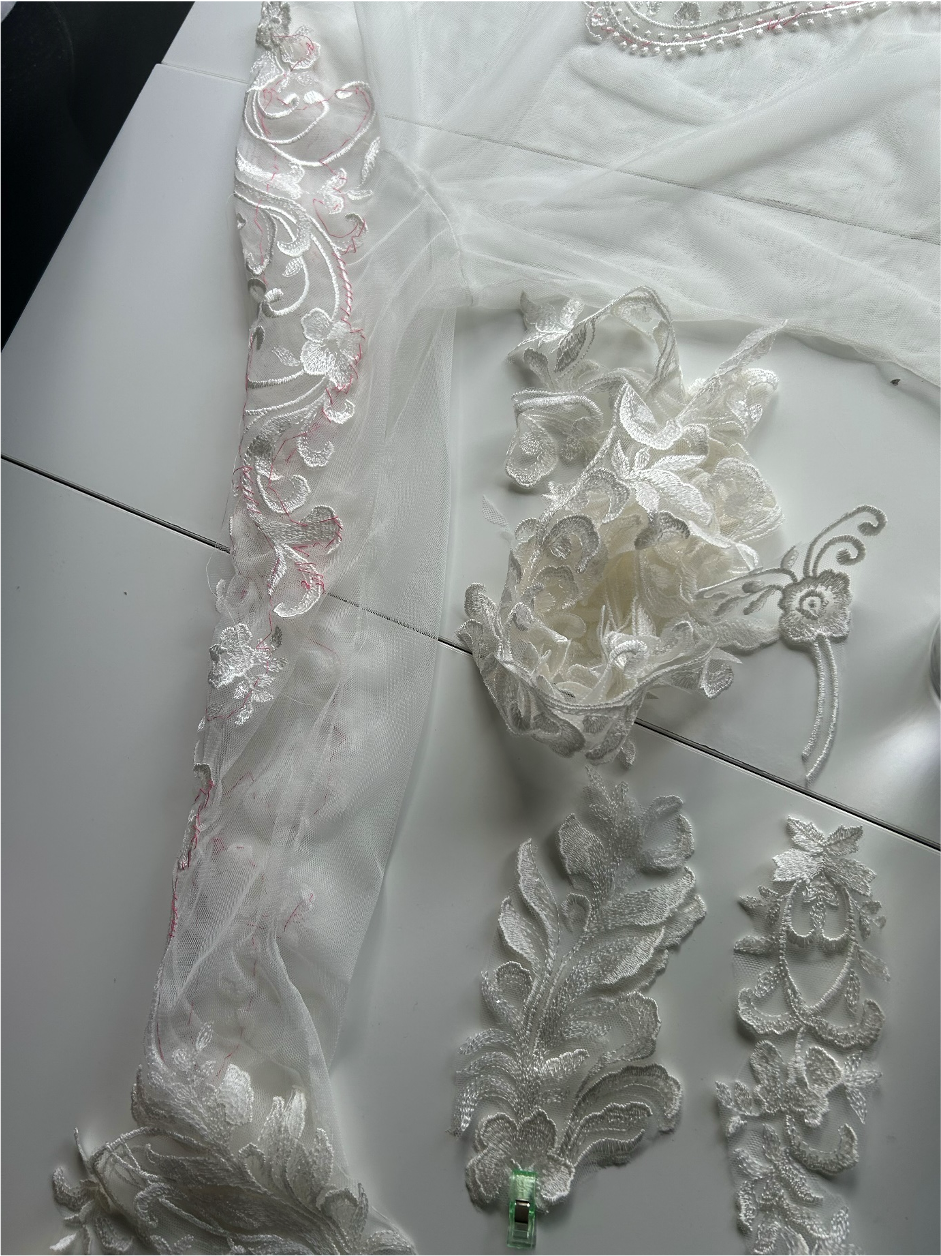
Everything was pinned on and checked for symmetry, then tacked with bright thread so it would be easy to remove later.
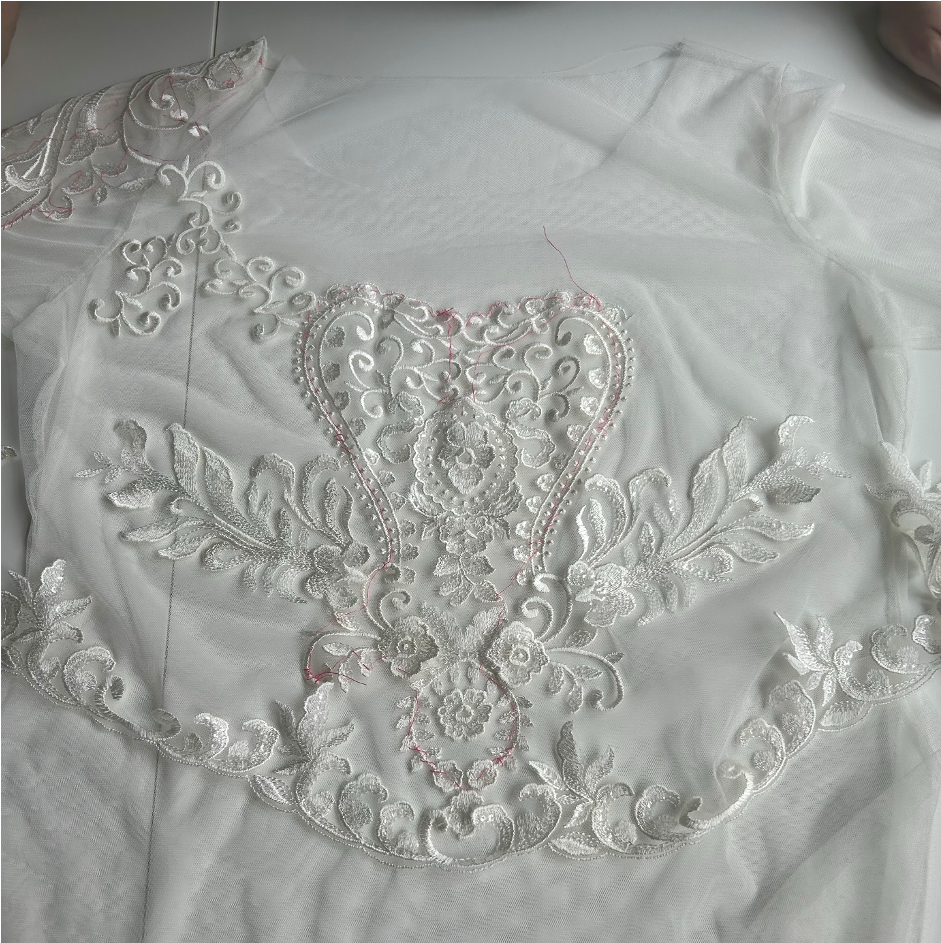
Placing and tacking everything by hand allowed us to work round the natural asymmetry of my body to create a symmetrical look.
Then, after all that work, it was done! On the day I wore two petticoats to make most of the circle skirt, and a beautiful floral veil from Meadowsweet Bridal to add some extra colour. The dress was so comfortable, and I felt amazing all day, from the ceremony to dancing the night away. I learnt so much through this process, and I’m so proud of what I achieved. Our amazing photographer (Blue Lily Weddings) captured the some wonderful shots of the dress in action, so I will leave you with those!
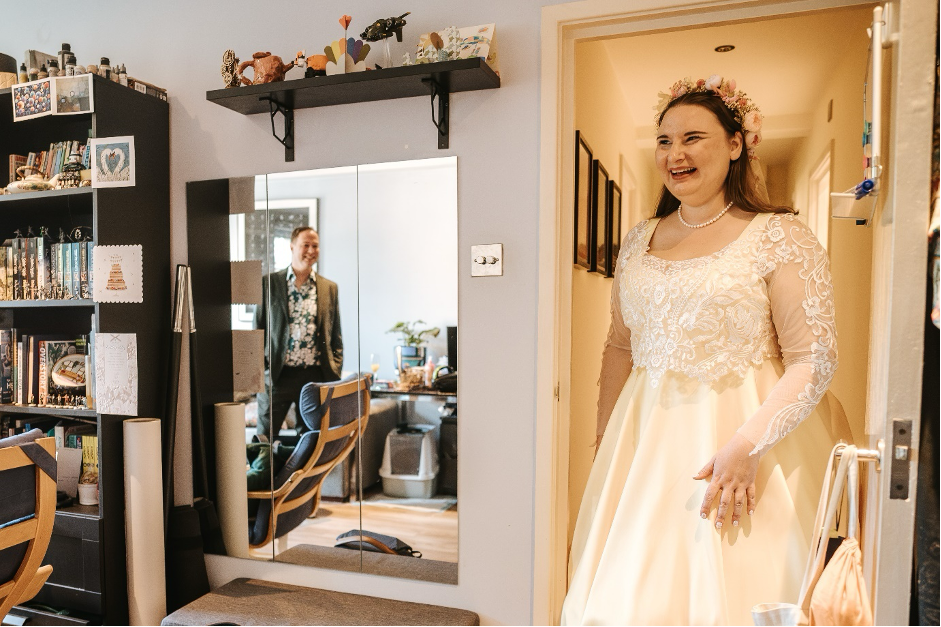
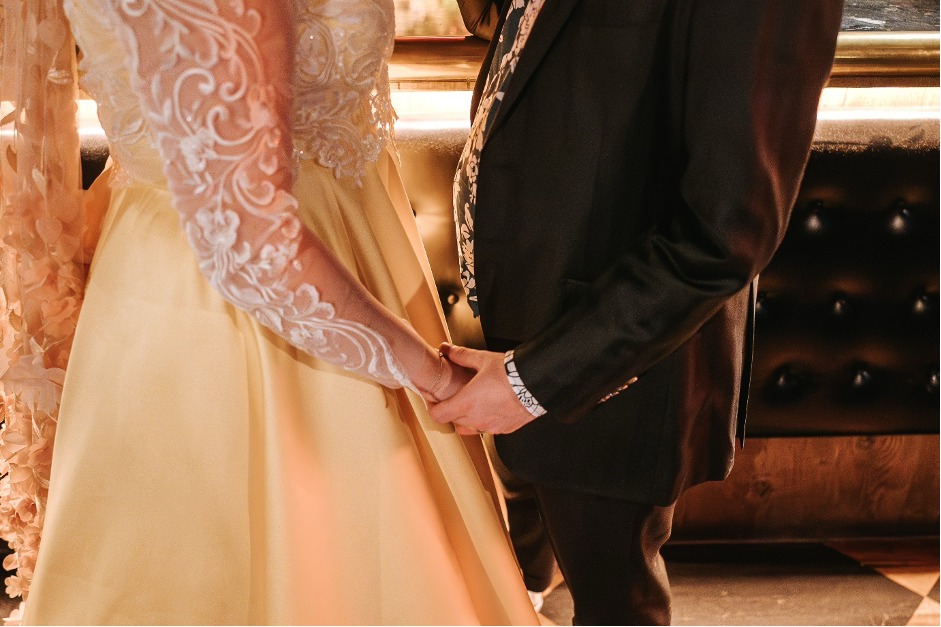
The ‘First look’. Photo credit: Marek Troszczynski @bluelilyweddings.
The lace overlay in all its glory! Photo credit: Marek Troszczynski @bluelilyweddings.
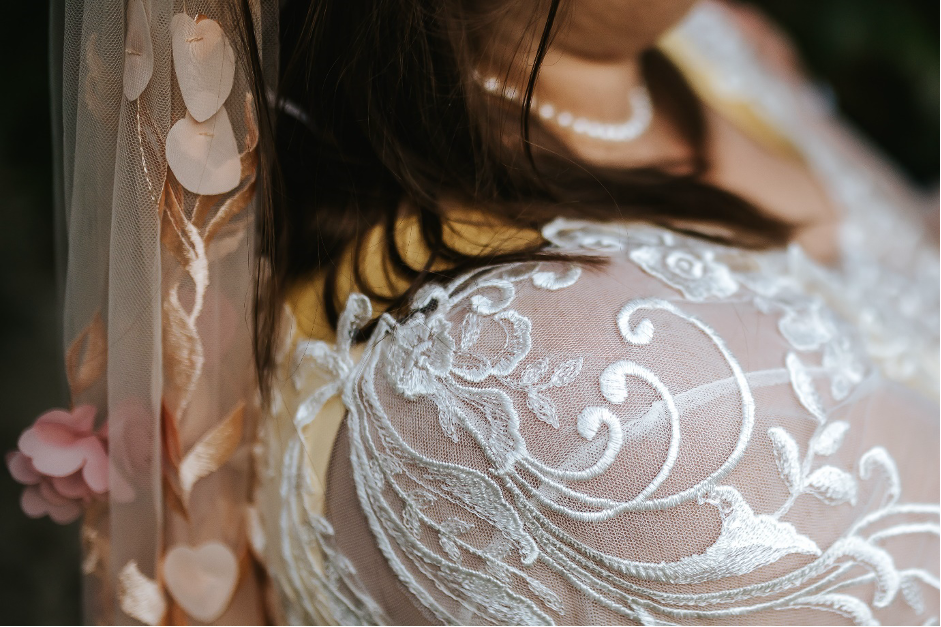
Hand stitching the lace was the most time consuming part of the construction.Photo credit: Marek Troszczynski @bluelilyweddings.
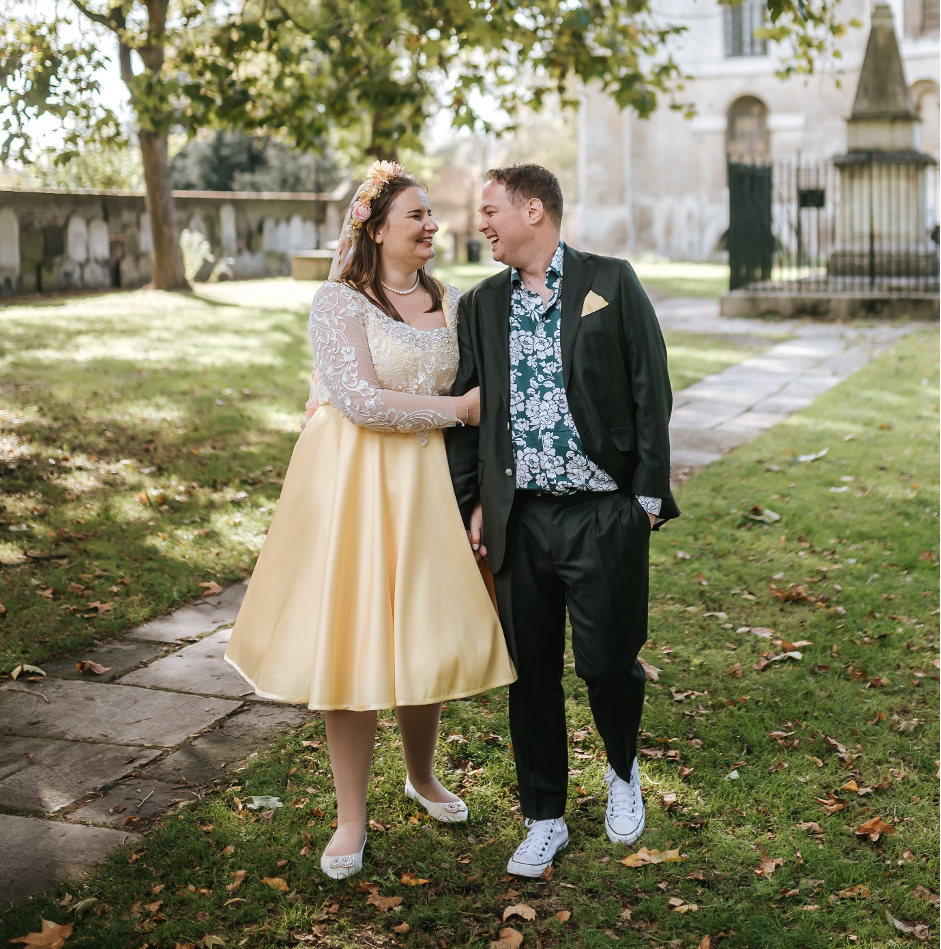
A full length shot showing the gorgeous sheen of the Mikado fabric. Photo credit: Marek Troszczynski @bluelilyweddings.
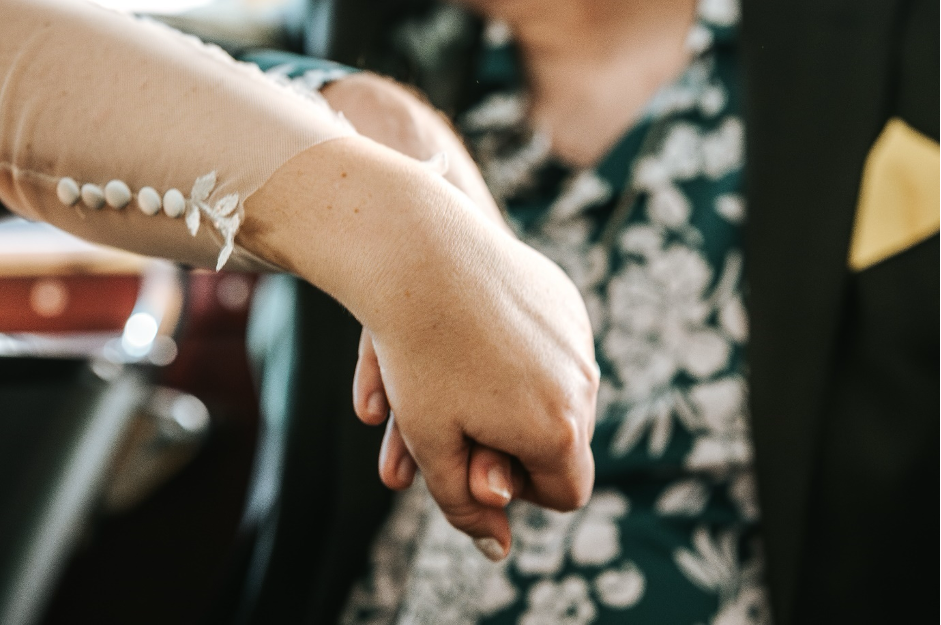
I finished the sleeves with bridal buttons and a motif from the lace. Photo credit: Marek Troszczynski @bluelilyweddings.

The petticoats! I wore two for extra volume. Photo credit: Marek Troszczynski @bluelilyweddings.
The sleeves were one of my favourite parts of the dress. Photo credit: Marek Troszczynski @bluelilyweddings.
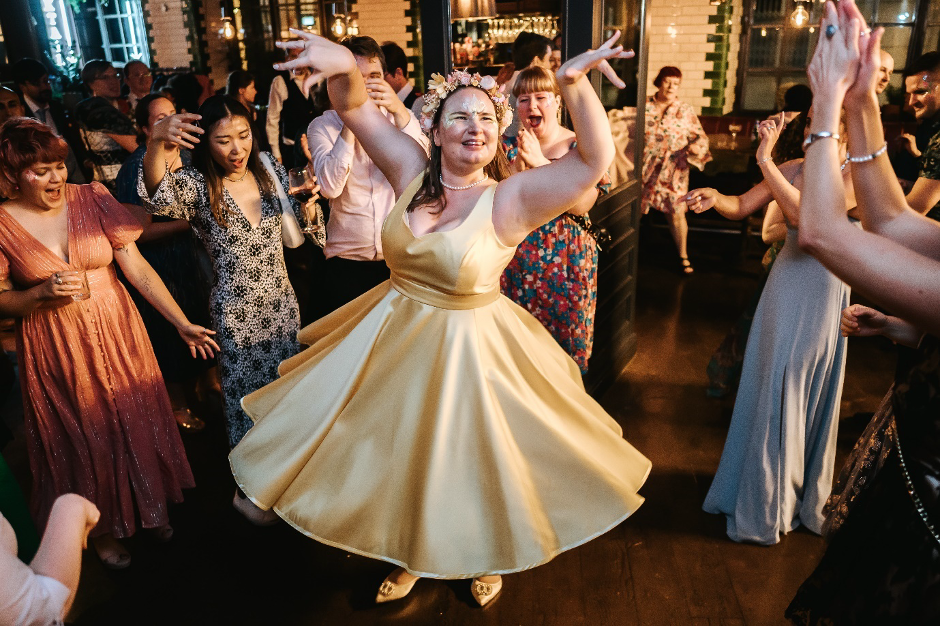
The dress was so comfortable for dancing. Photo credit: Marek Troszczynski @bluelilyweddings.
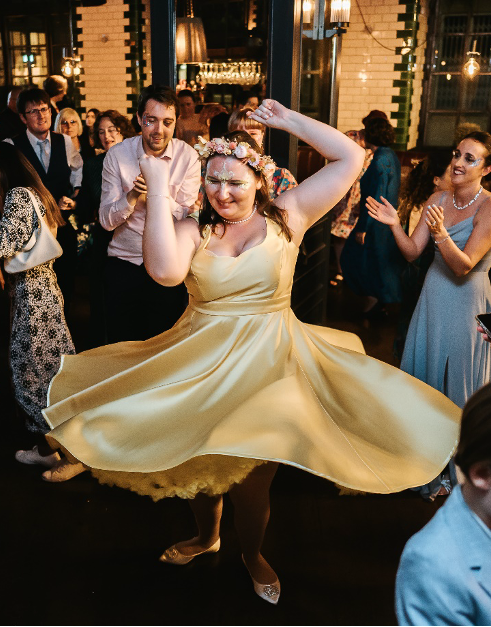
And so swirly! Photo credit: Marek Troszczynski @bluelilyweddings.
Oh My!!! What a beautiful dress. And you nailed the fit. Congratulations on your nuptials and your wonderful dress.
Thank you! I was so happy with how it came out 🙂
OMG, The wedding dress is amazingly out of this world. Gorgeous. Let me not talk about the lace part of the dress, breath taking👌
Thank you, I loved how the lace came out, but it was hard work! I’m so glad it was worth it in the end 😊
Totally amazing and gorgeous dress!! You looked fantastic!
Thank you for sharing this stunning creation. Dress is beautiful and your smile is too!
I am so impressed! You did a lovely job on it, and just nailed the fit. You have inspired me to have a go at the Upton for my daughter!
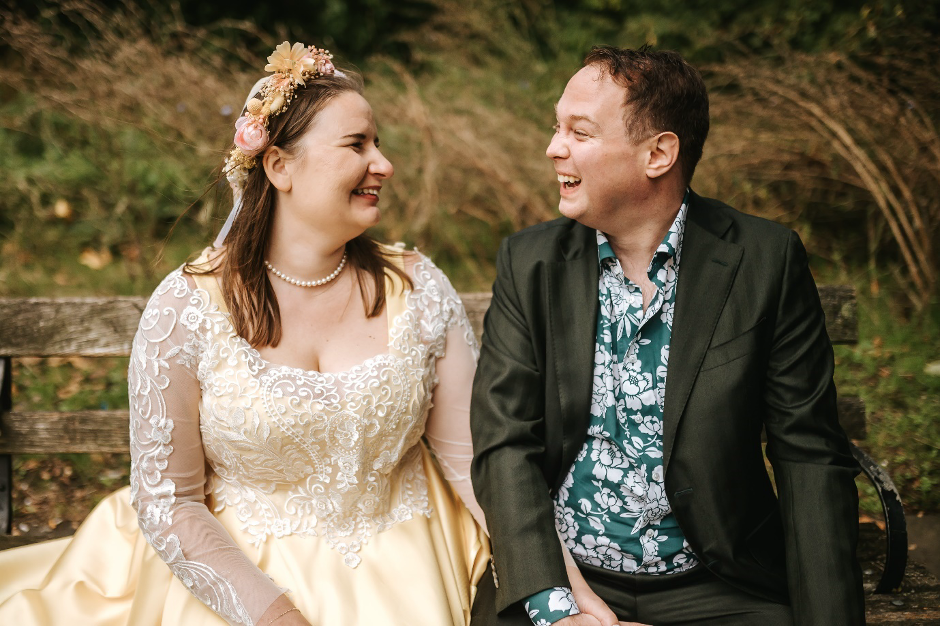
What a wonderful creation. You look so stunning for your wonderful day. Love your husband’s matching pocket square too.
Congratulations!! You looked lovely 😀 I am really impressed with how well the lace turned out. I am always intimidated by that,
You did an amazing job. Such a beautiful dress and beautiful bride. Congratulations
So beautiful! Such a great job!
Beautiful! And beautifully done.