We were absolutely tickled pink when Jane showed us her wedding dress that she made using the Upton Dress pattern! So it was such a joy to get to talk to her about her process—keep reading for all the delectable details.

Finding your dream wedding dress can be a challenge, and if you’re curvy and have big boobs, finding one that fits can be an even bigger challenge. It can be so empowering to sew your own wedding dress and celebrate your most special day in a dress that fits you well, looks unbelievably gorgeous, and shows off your incredible sewing skills. So we’re so touched every time we see a sewist turn to the Upton Dress for her wedding dress.
When we crossed paths with Jane and her wedding dress, our breaths were instantly taken away. We just had to know more about how she constructed this incredible gown, and it was such a treat to talk with her about her process. So here’s Jane to tell you all about how she made it, from original sketches to the dazzling finished product
Jane’s Upton Wedding Dress
JANE: When it came time for me to choose a wedding dress, I had a strong feeling I was going to go down the DIY path. I’d been to a couple of wedding dress shops and felt pretty underwhelmed with the available choices. I’d never wanted to get married in white, but finding a dress I liked in my chosen colour (gold) was proving to be fairly difficult.
To make things more complicated, the wedding was in five months, so I didn’t have a lot of time to search and just hope the perfect dress appeared. So DIY it was! However, I had only been sewing for about a year, and I knew I wouldn’t be able to complete my dress on my own. So I enlisted the help of my aunt, Cathy, who is an experienced sewist. I couldn’t have completed this dress without her skills and guidance.
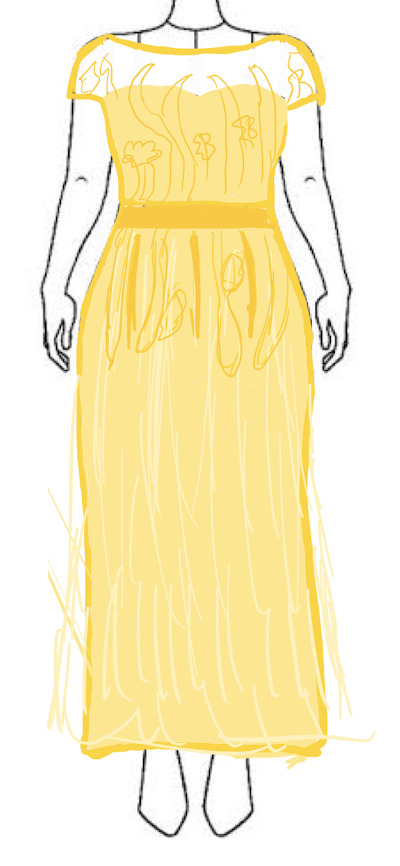
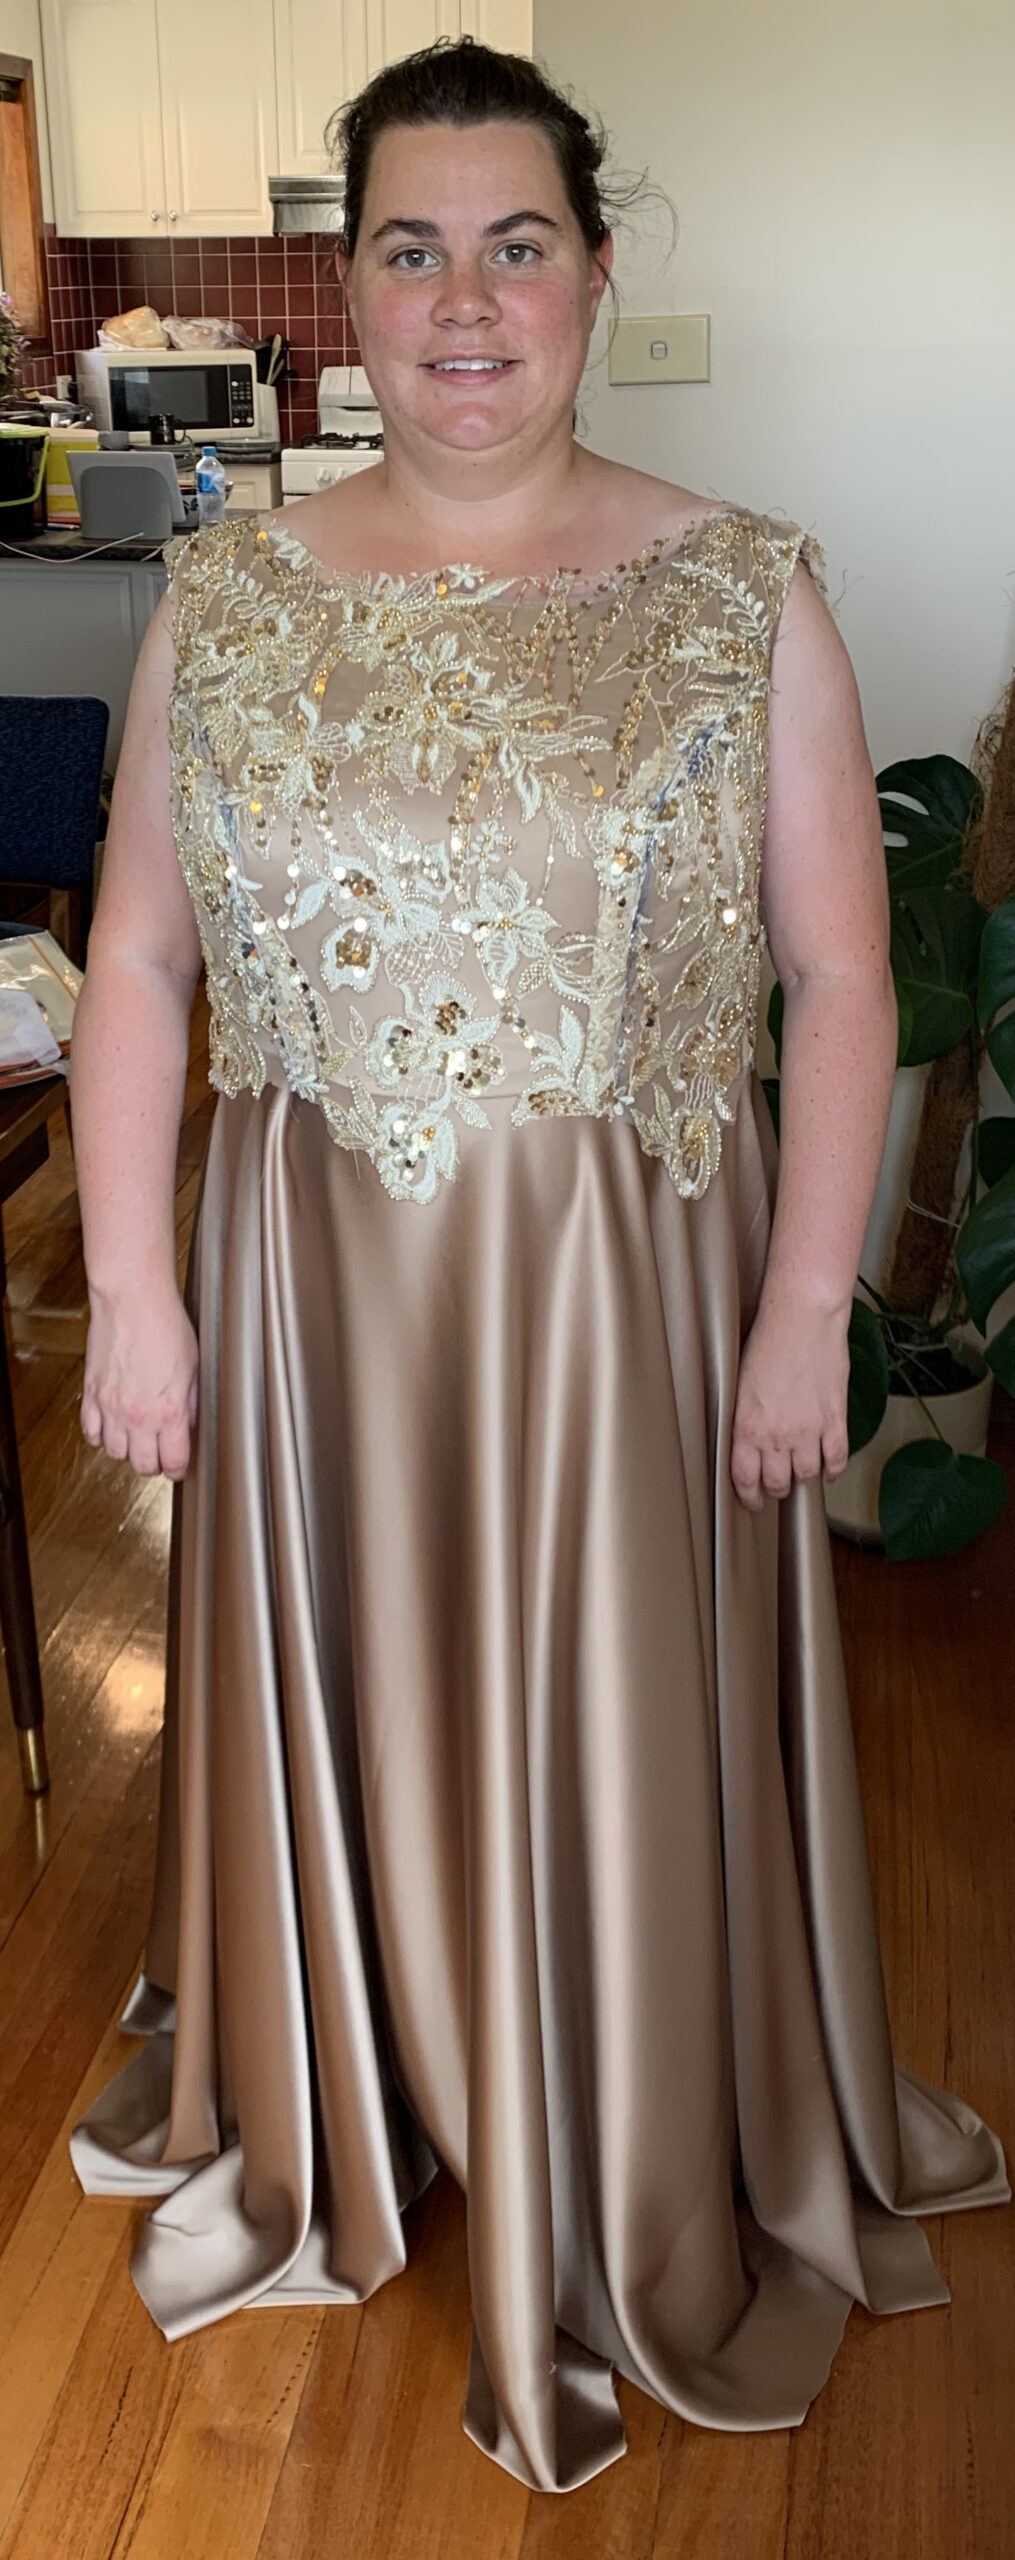
Once I was committed to the DIY route, the first step was to decide on the basic design details. Here is a very poorly drawn mock up of my original idea. I knew I wanted a gold dress with a boat neckline. As I’d sewn a princess seamed Upton Dress the previous year, we knew we already had a bodice pattern that fitted well in the bust and waist, and simply needed some small alterations to the neckline to match my design. I wanted a full circle skirt, and conveniently the Gilmore Skirt had recently been released.
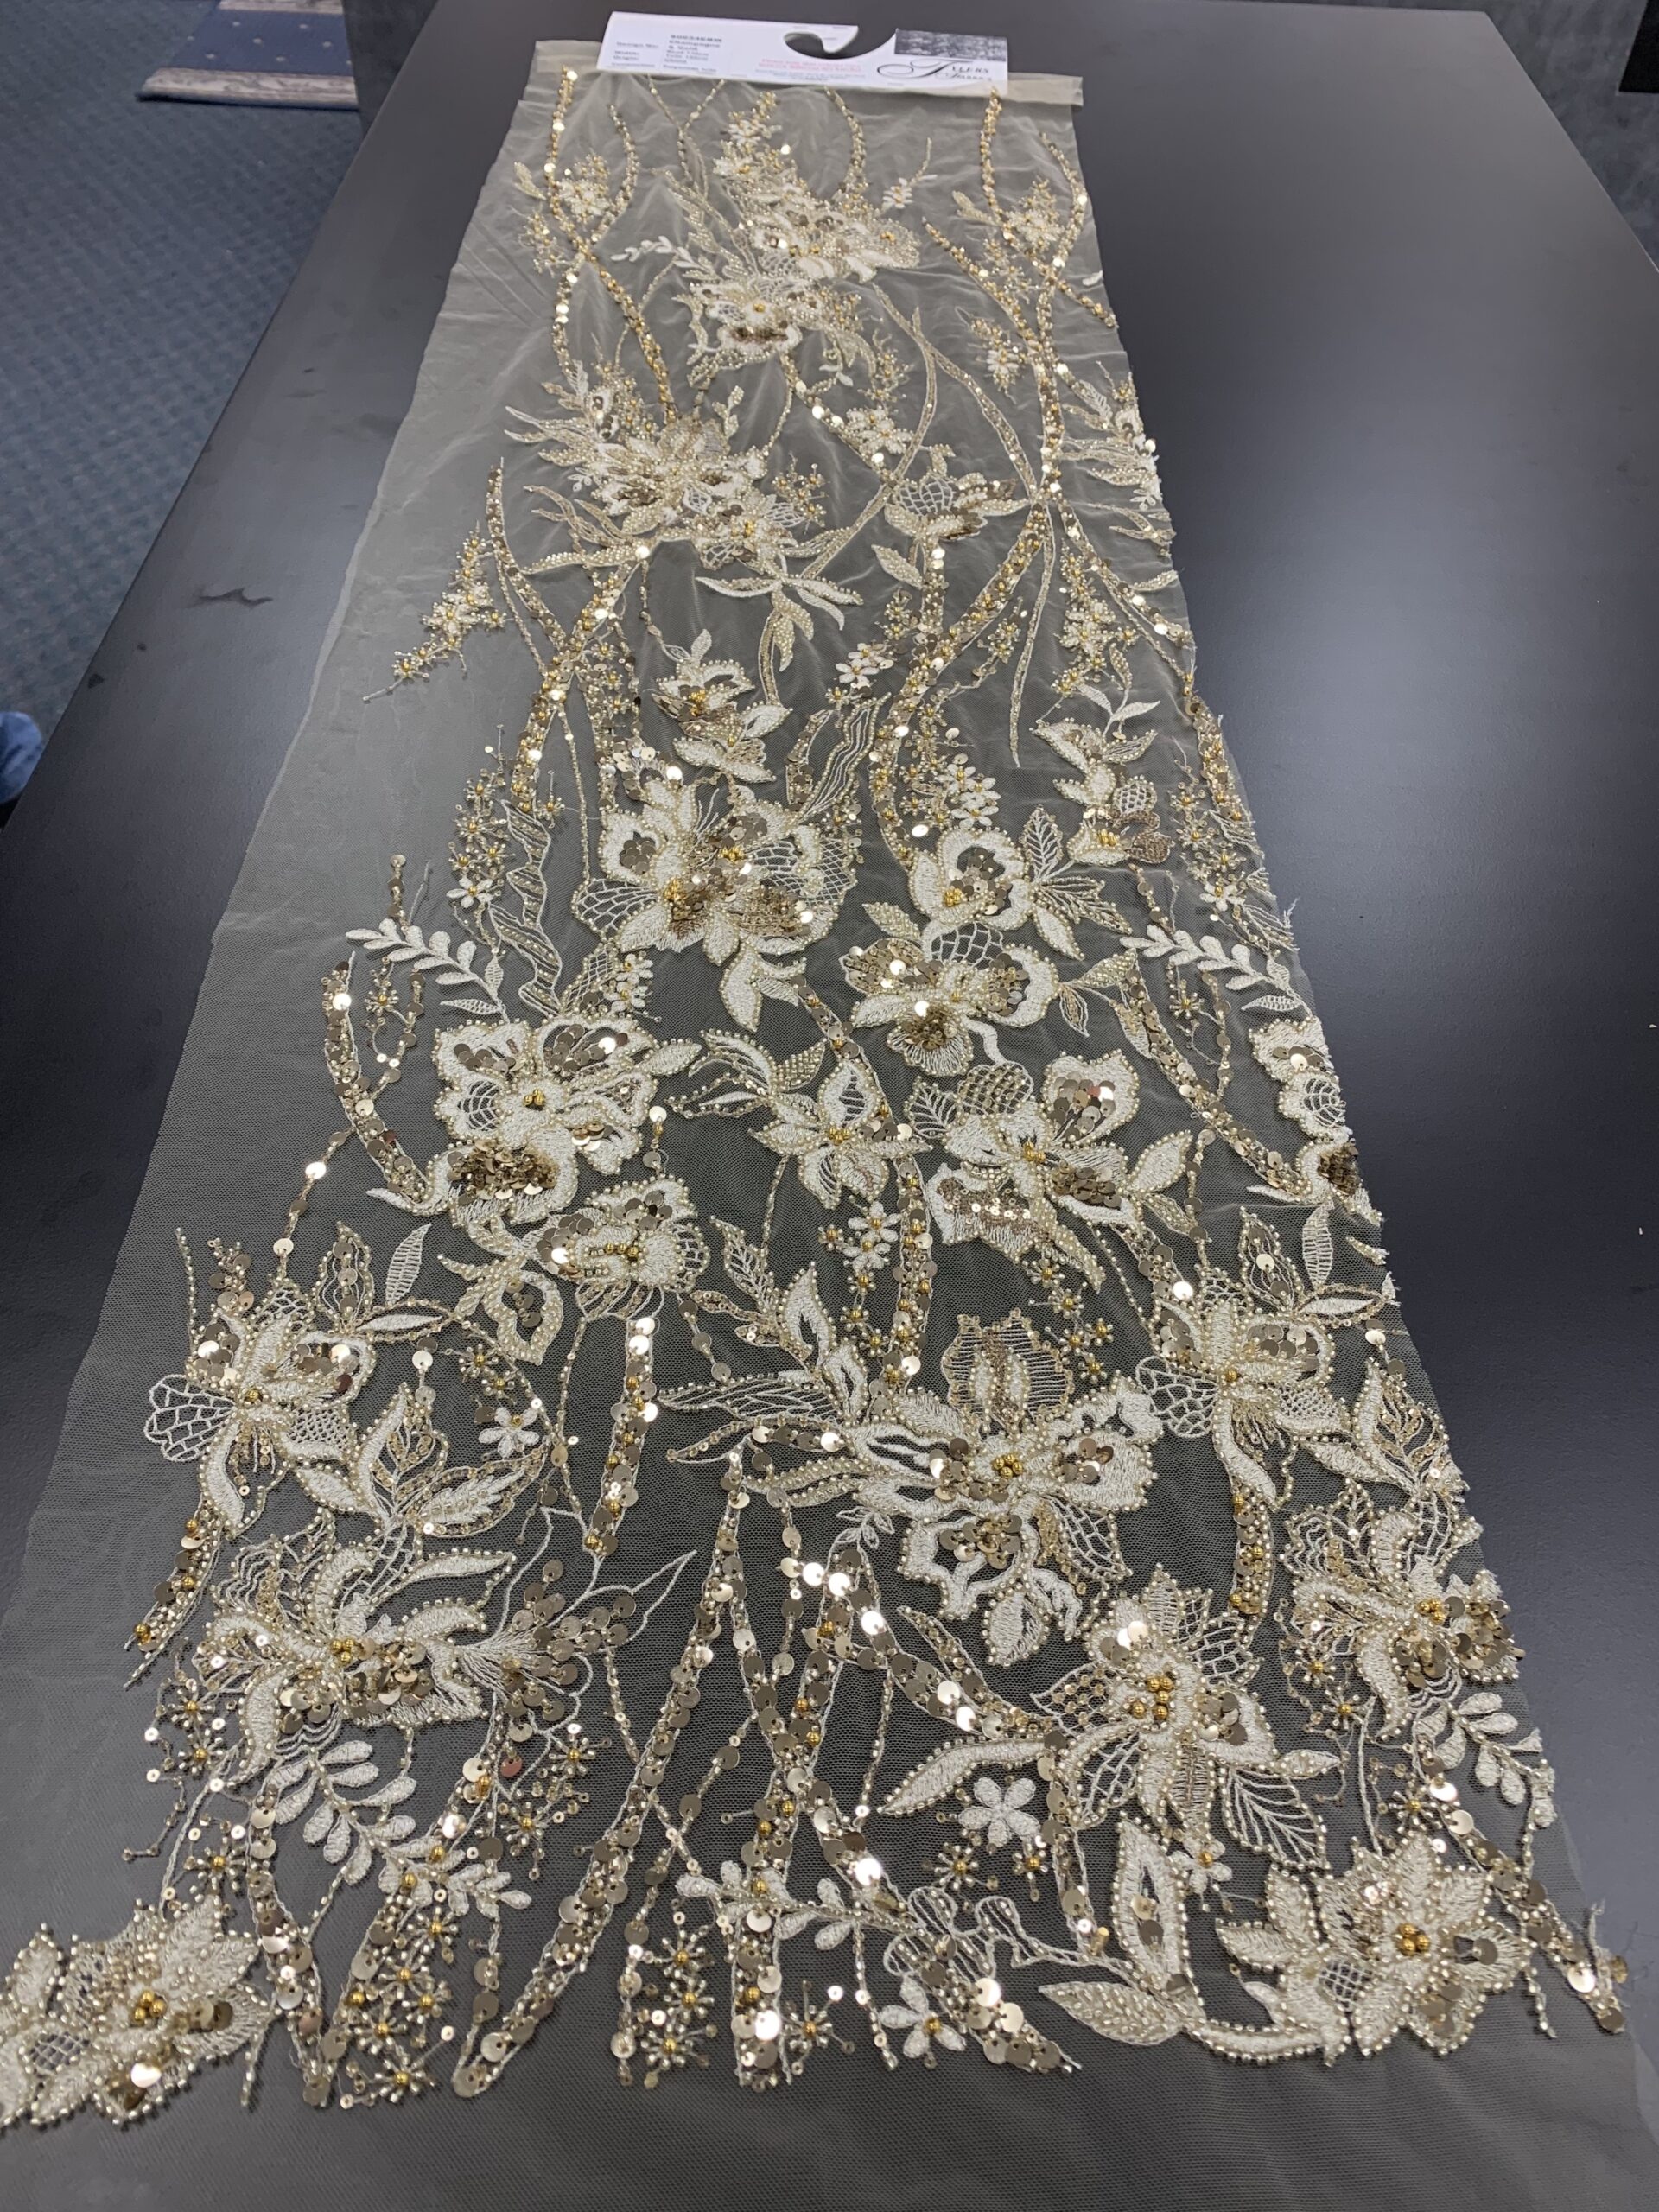
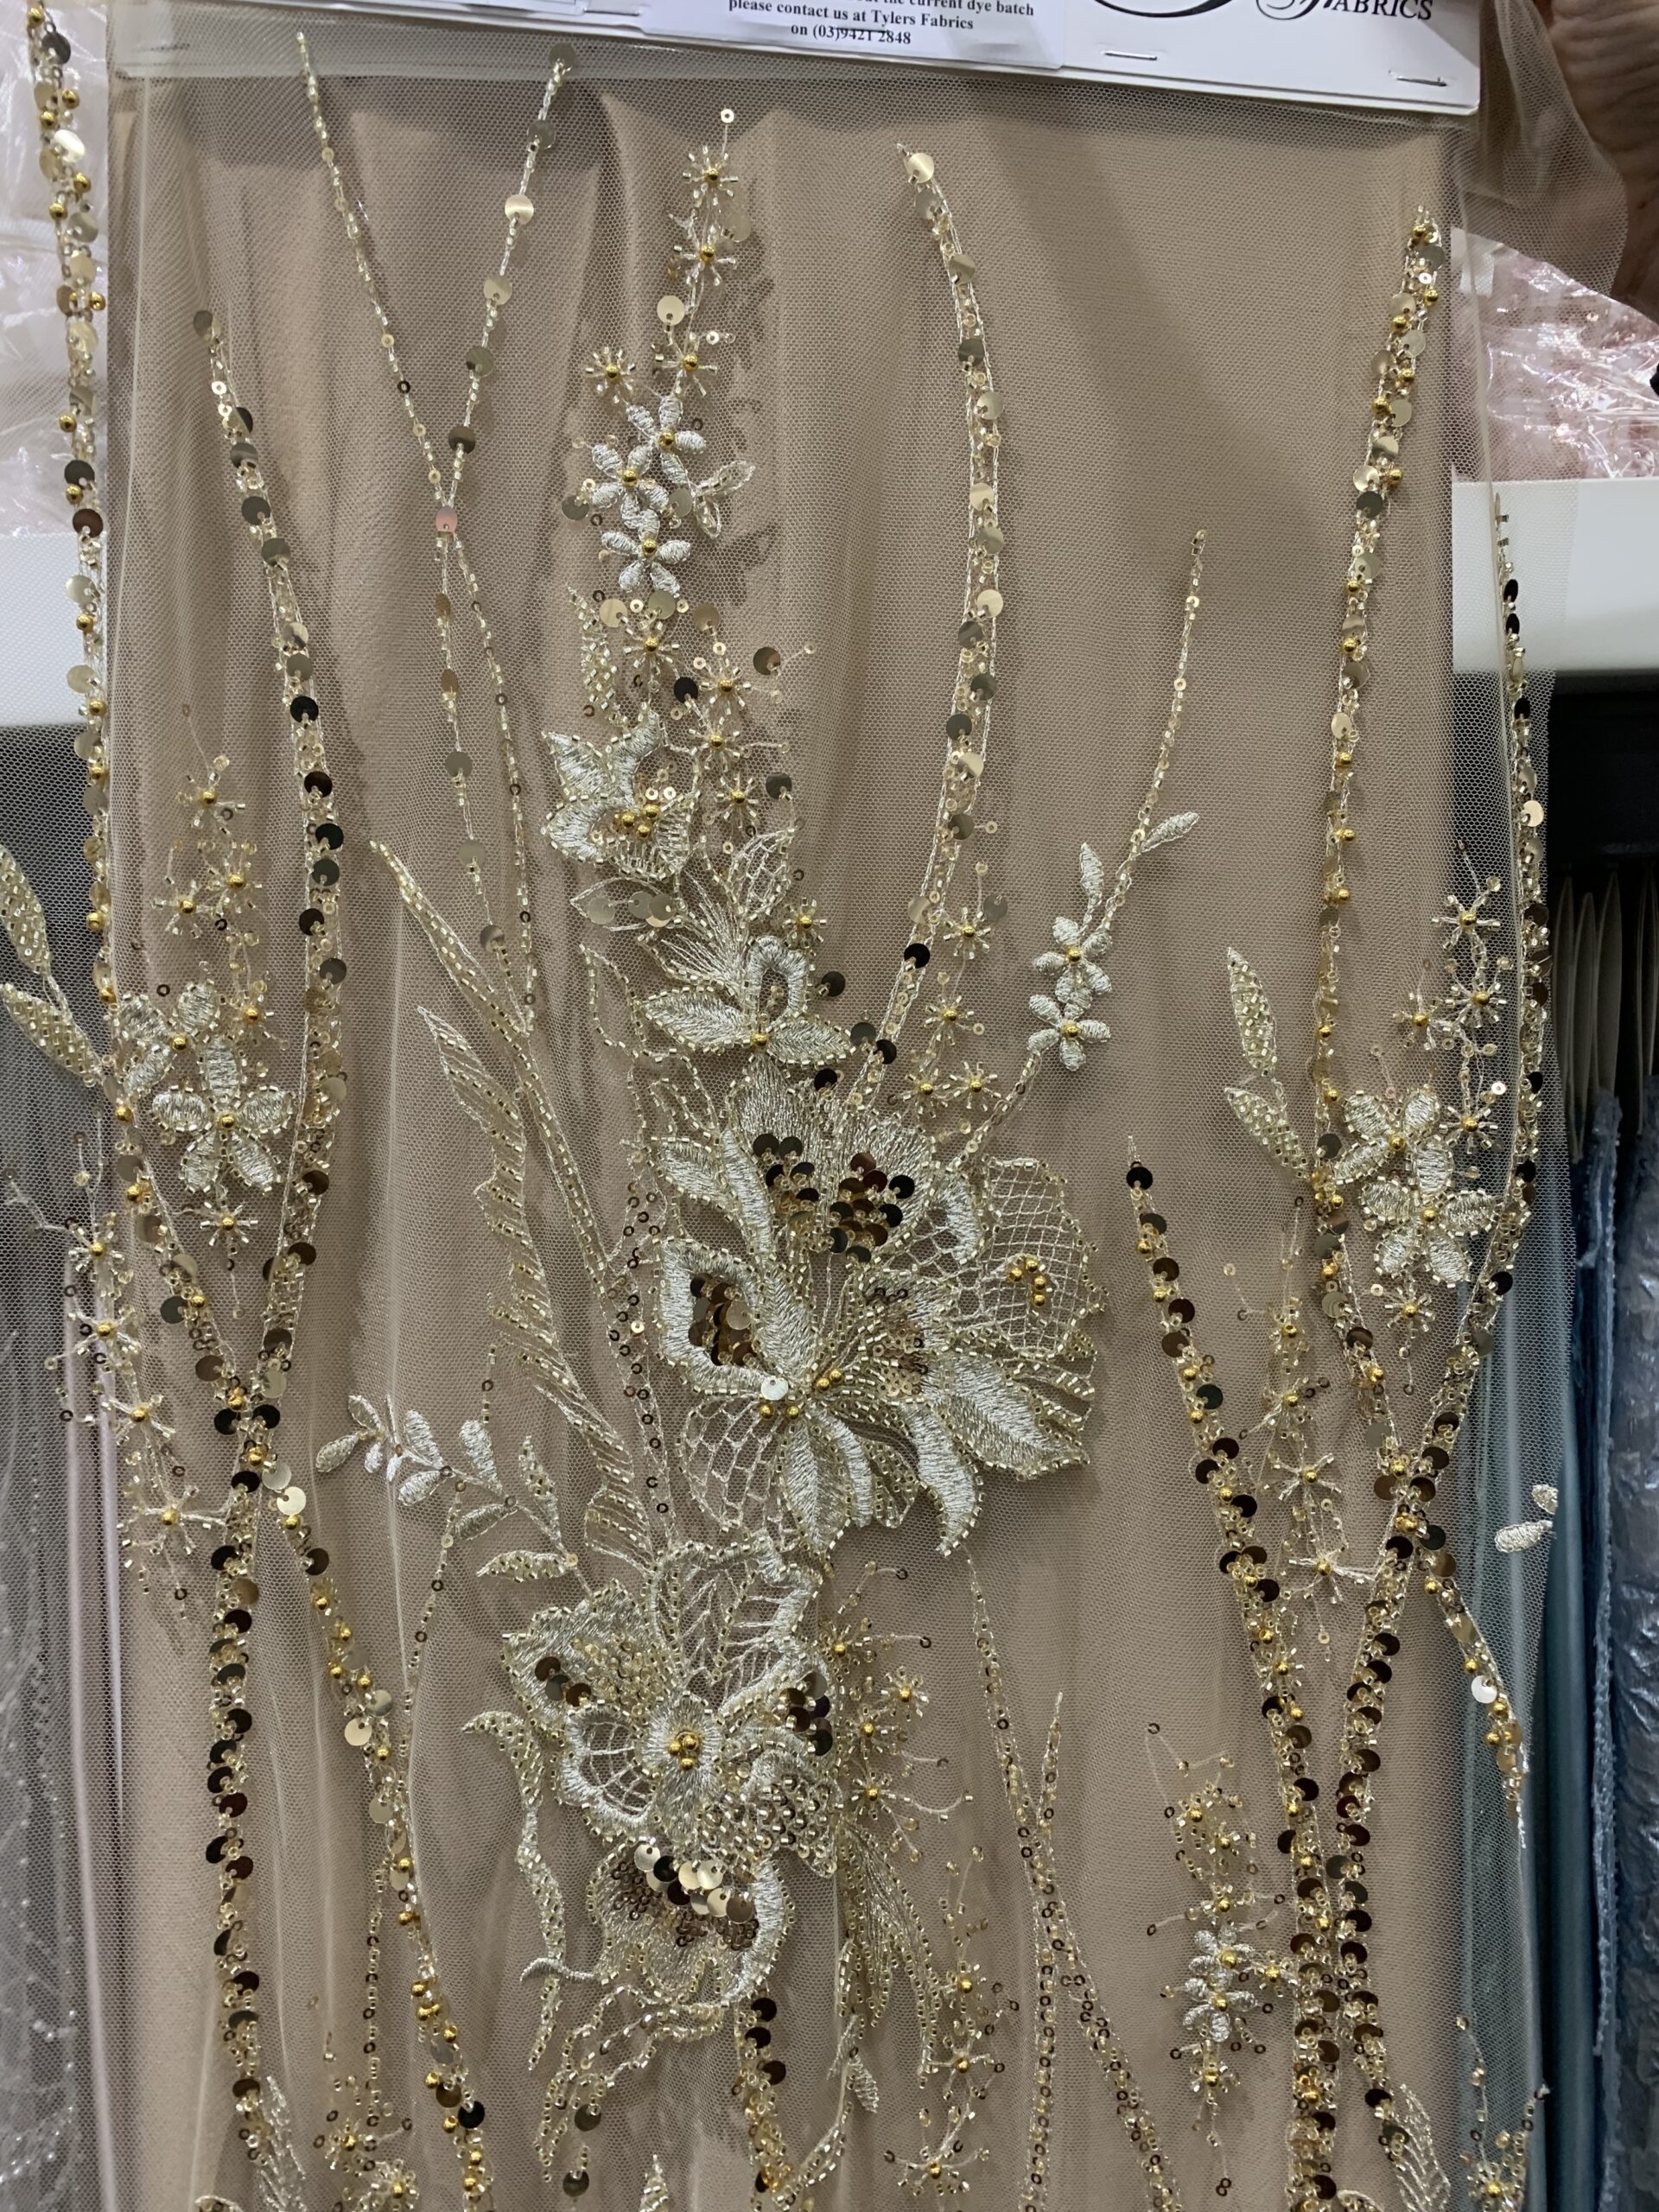
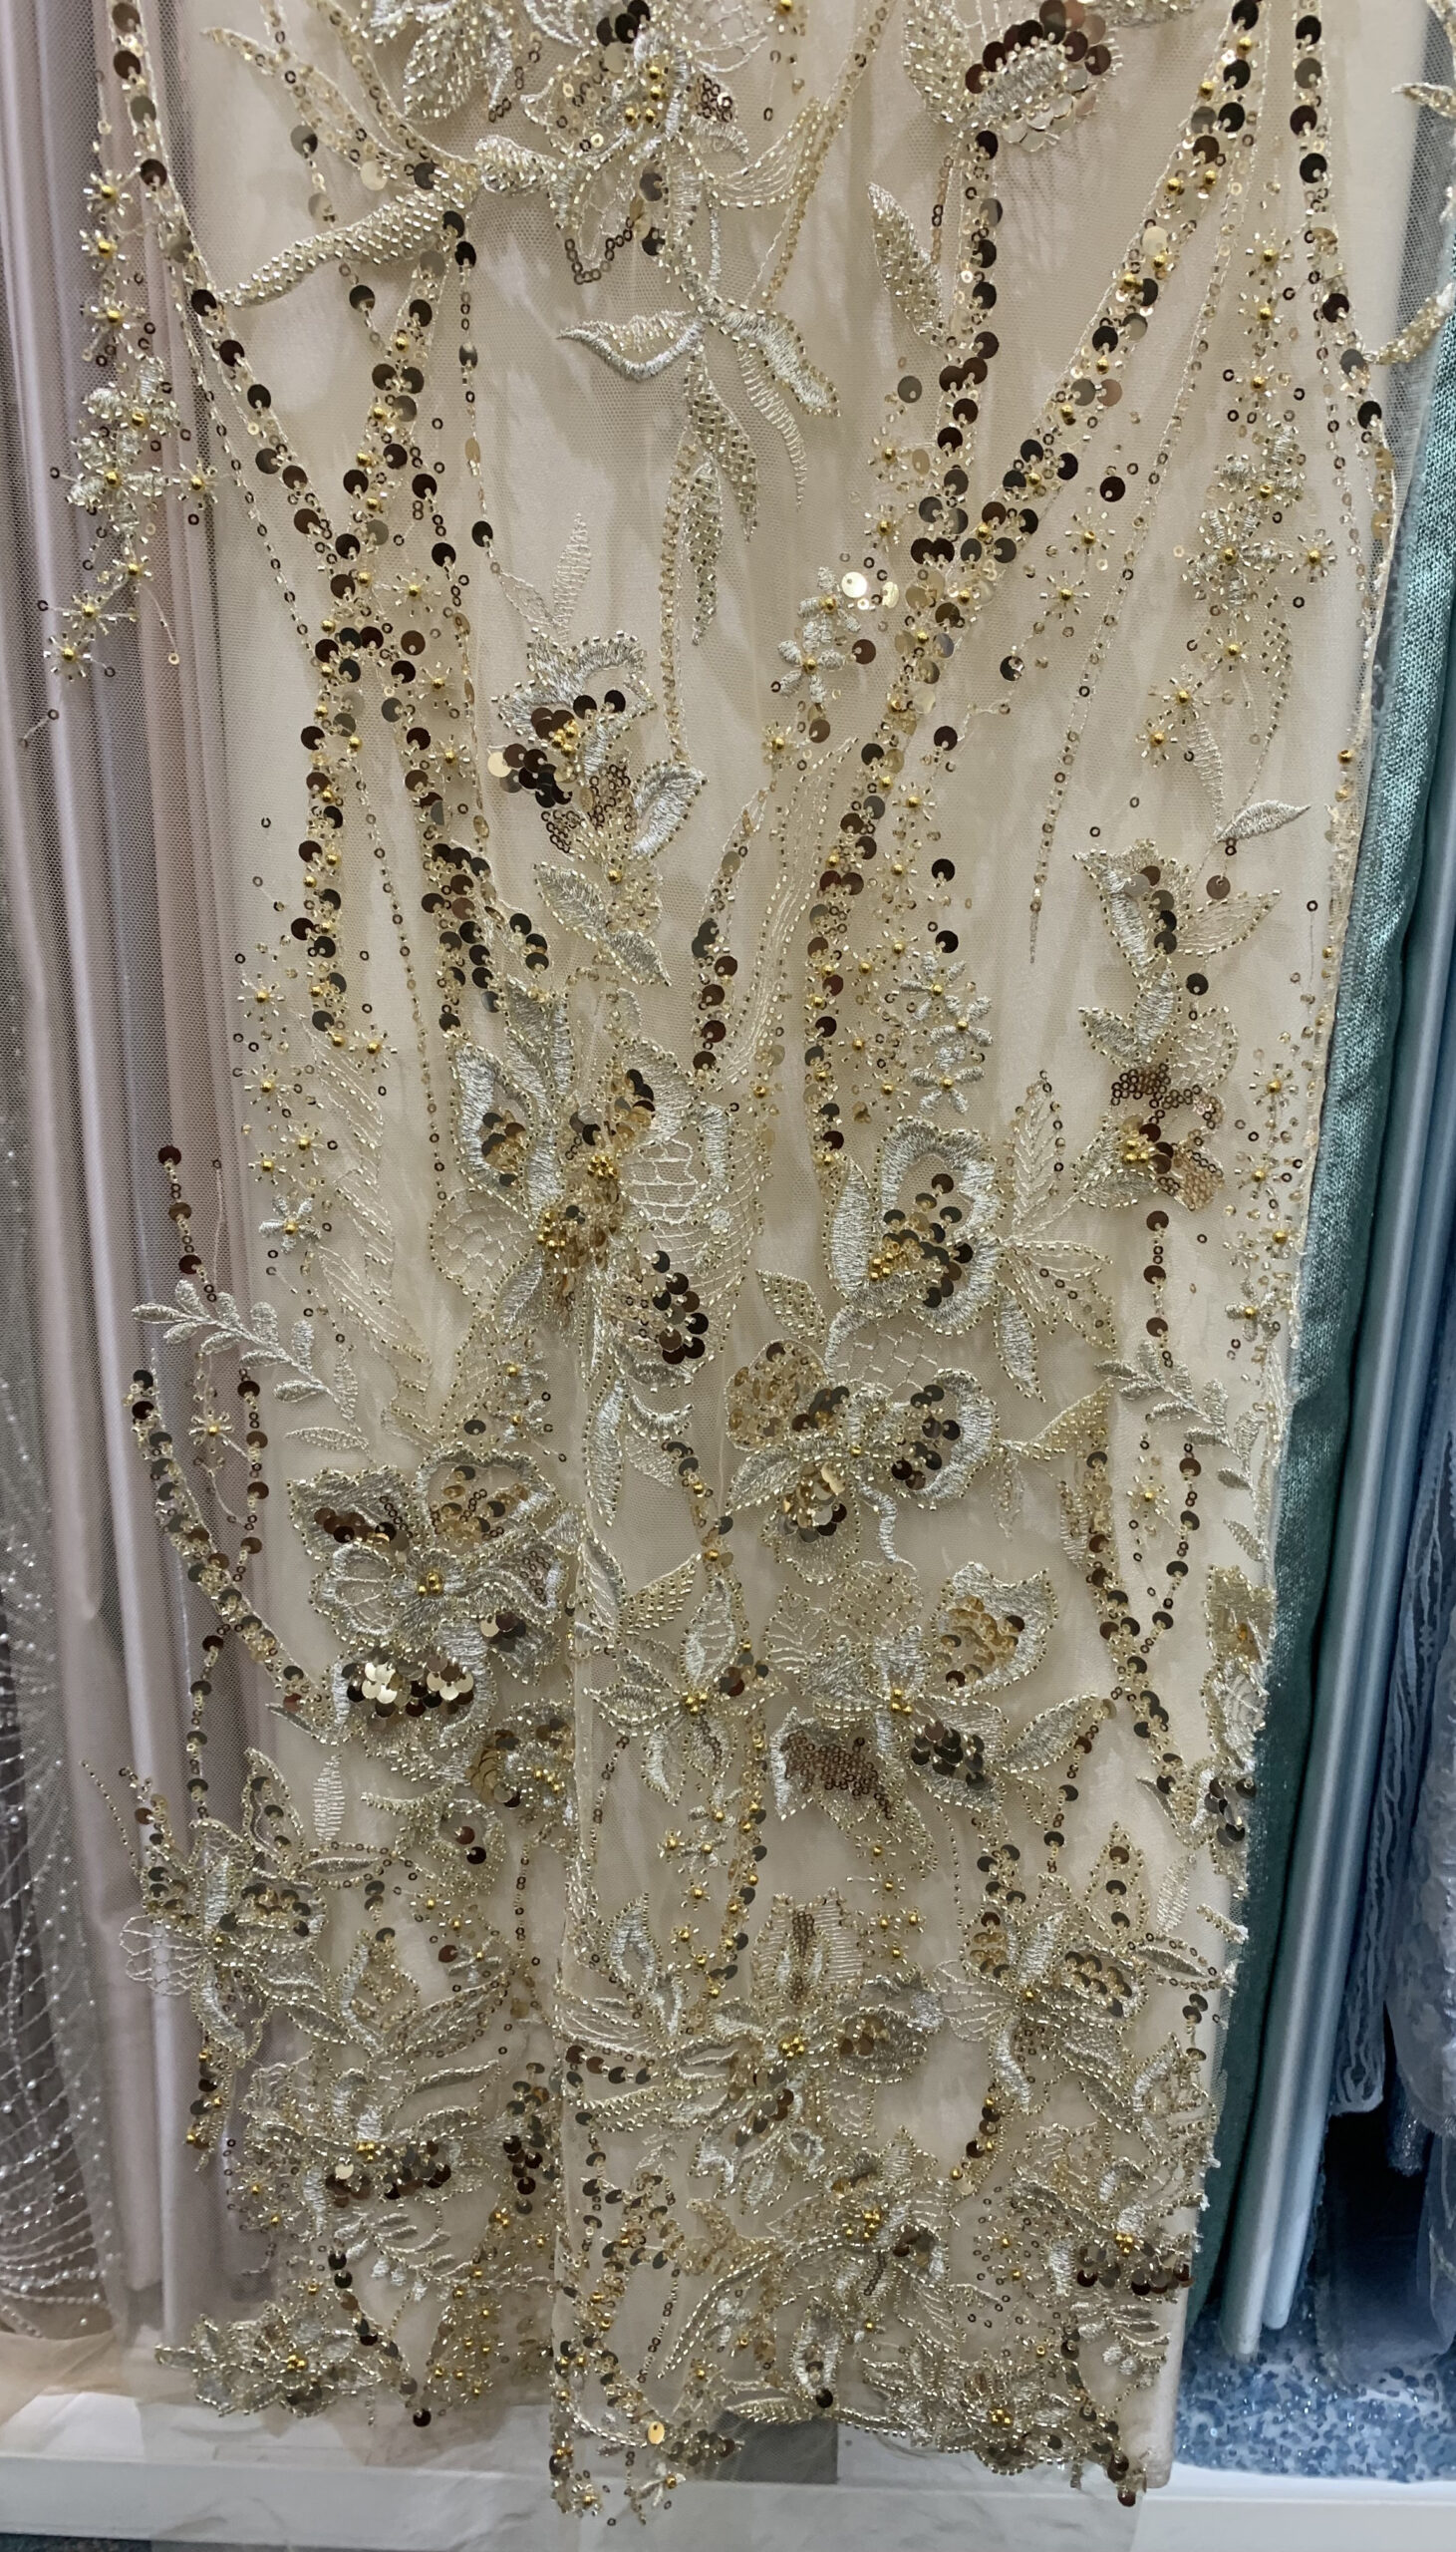
With a design and pattern in mind, it was time to go fabric shopping. We shopped in person, as I’m not great at picking fabrics online – I like to be able to touch and feel things. First up was picking the beaded tulle for the overdress. I fell in love with the first beaded gold fabric I saw – I explored other options but none were quite as good.
Picking the fabric for the underdress was much harder. I originally wanted silk, but this was outside of my budget so I opted for triacetate. The triacetate still felt silky and smooth, and importantly would still be breathable (an important consideration when you’re getting married in the Australian summer).
Selecting a colour for the underdress was a much harder decision – of the options below, I ended up going for the darkest colour as this was closest to gold and we thought it made the beaded overdress fabric ‘pop’ a little more.
With the fabric selected, we moved on to altering the pattern pieces to match my design. The neckline was simple to alter – we just drew a shallow scoop starting a few centimetres in from the shoulder of the front bodice. It was at this stage that we made the decision to make the bodice underdress identical to the overdress, to simplify construction (thus removing the see-through panel at the neckline that I’d originally drawn).
Sewing the underdress was pretty quick. We lined the underdress bodice as per the Upton instructions – the only deviation we made was to omit the waistband, to enable us to better integrate the beaded bodice with the skirt in the final dress. We also left off the sleeves, as we wanted to make these with the beaded tulle fabric and thought it would be simpler to do that later.
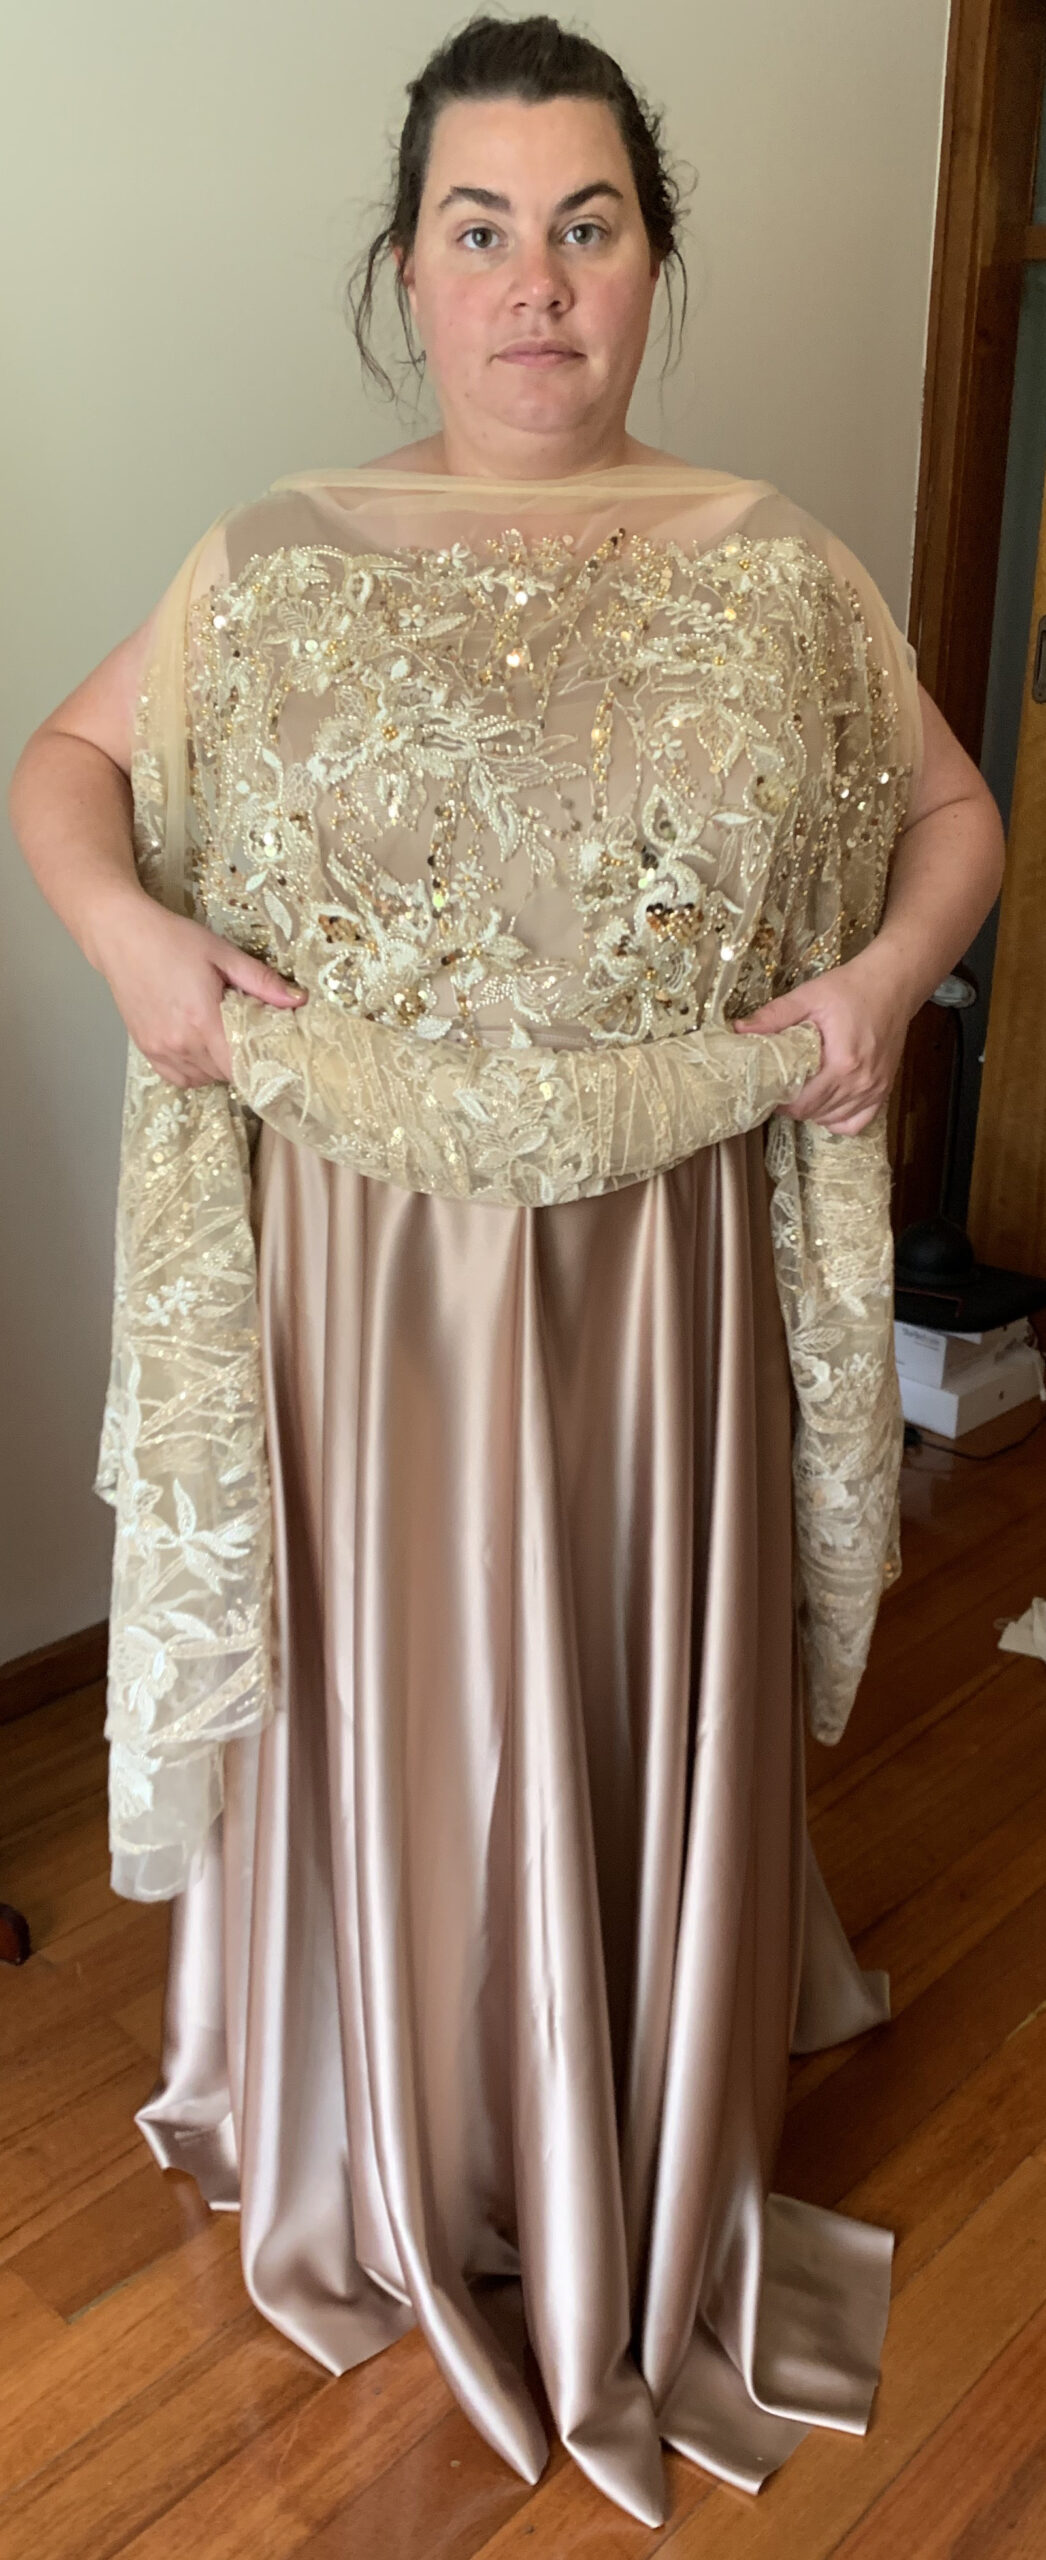
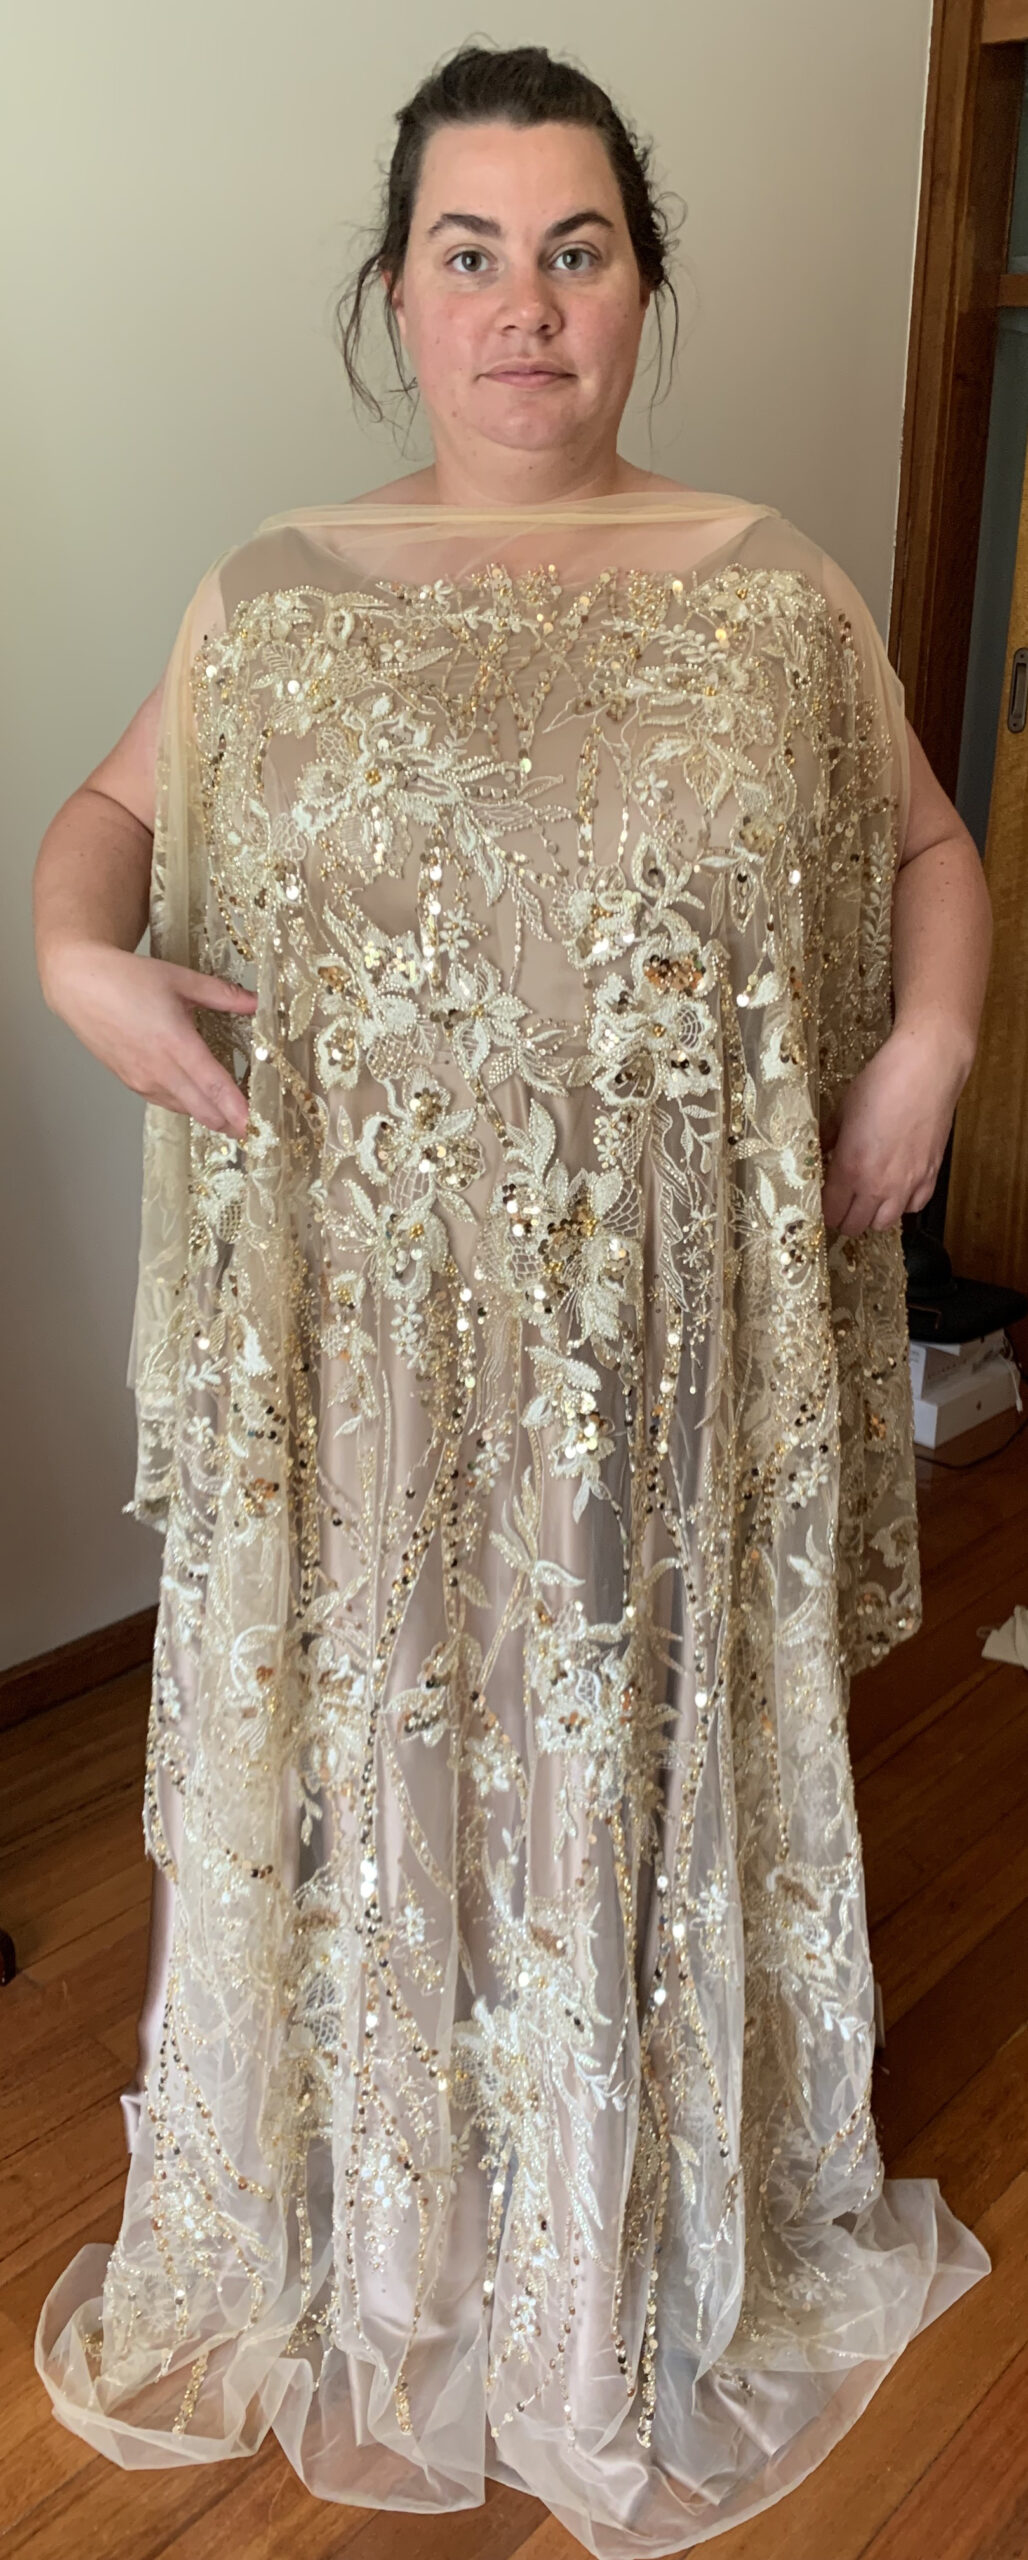
For the overdress, we equivocated for quite a while about how exactly we wanted the skirt to look – beaded bodice only with underdress skirt, beaded bodice with a plain tulle skirt over the underdress, or a fully beaded tulle skirt? I spent a lot of time looking at these photos (please ignore my disheveled appearance, we had some long sewing days!) trying to decide. In the end we agreed to just construct the bodice of the overdress, attach it, and decide on the skirt a different day.

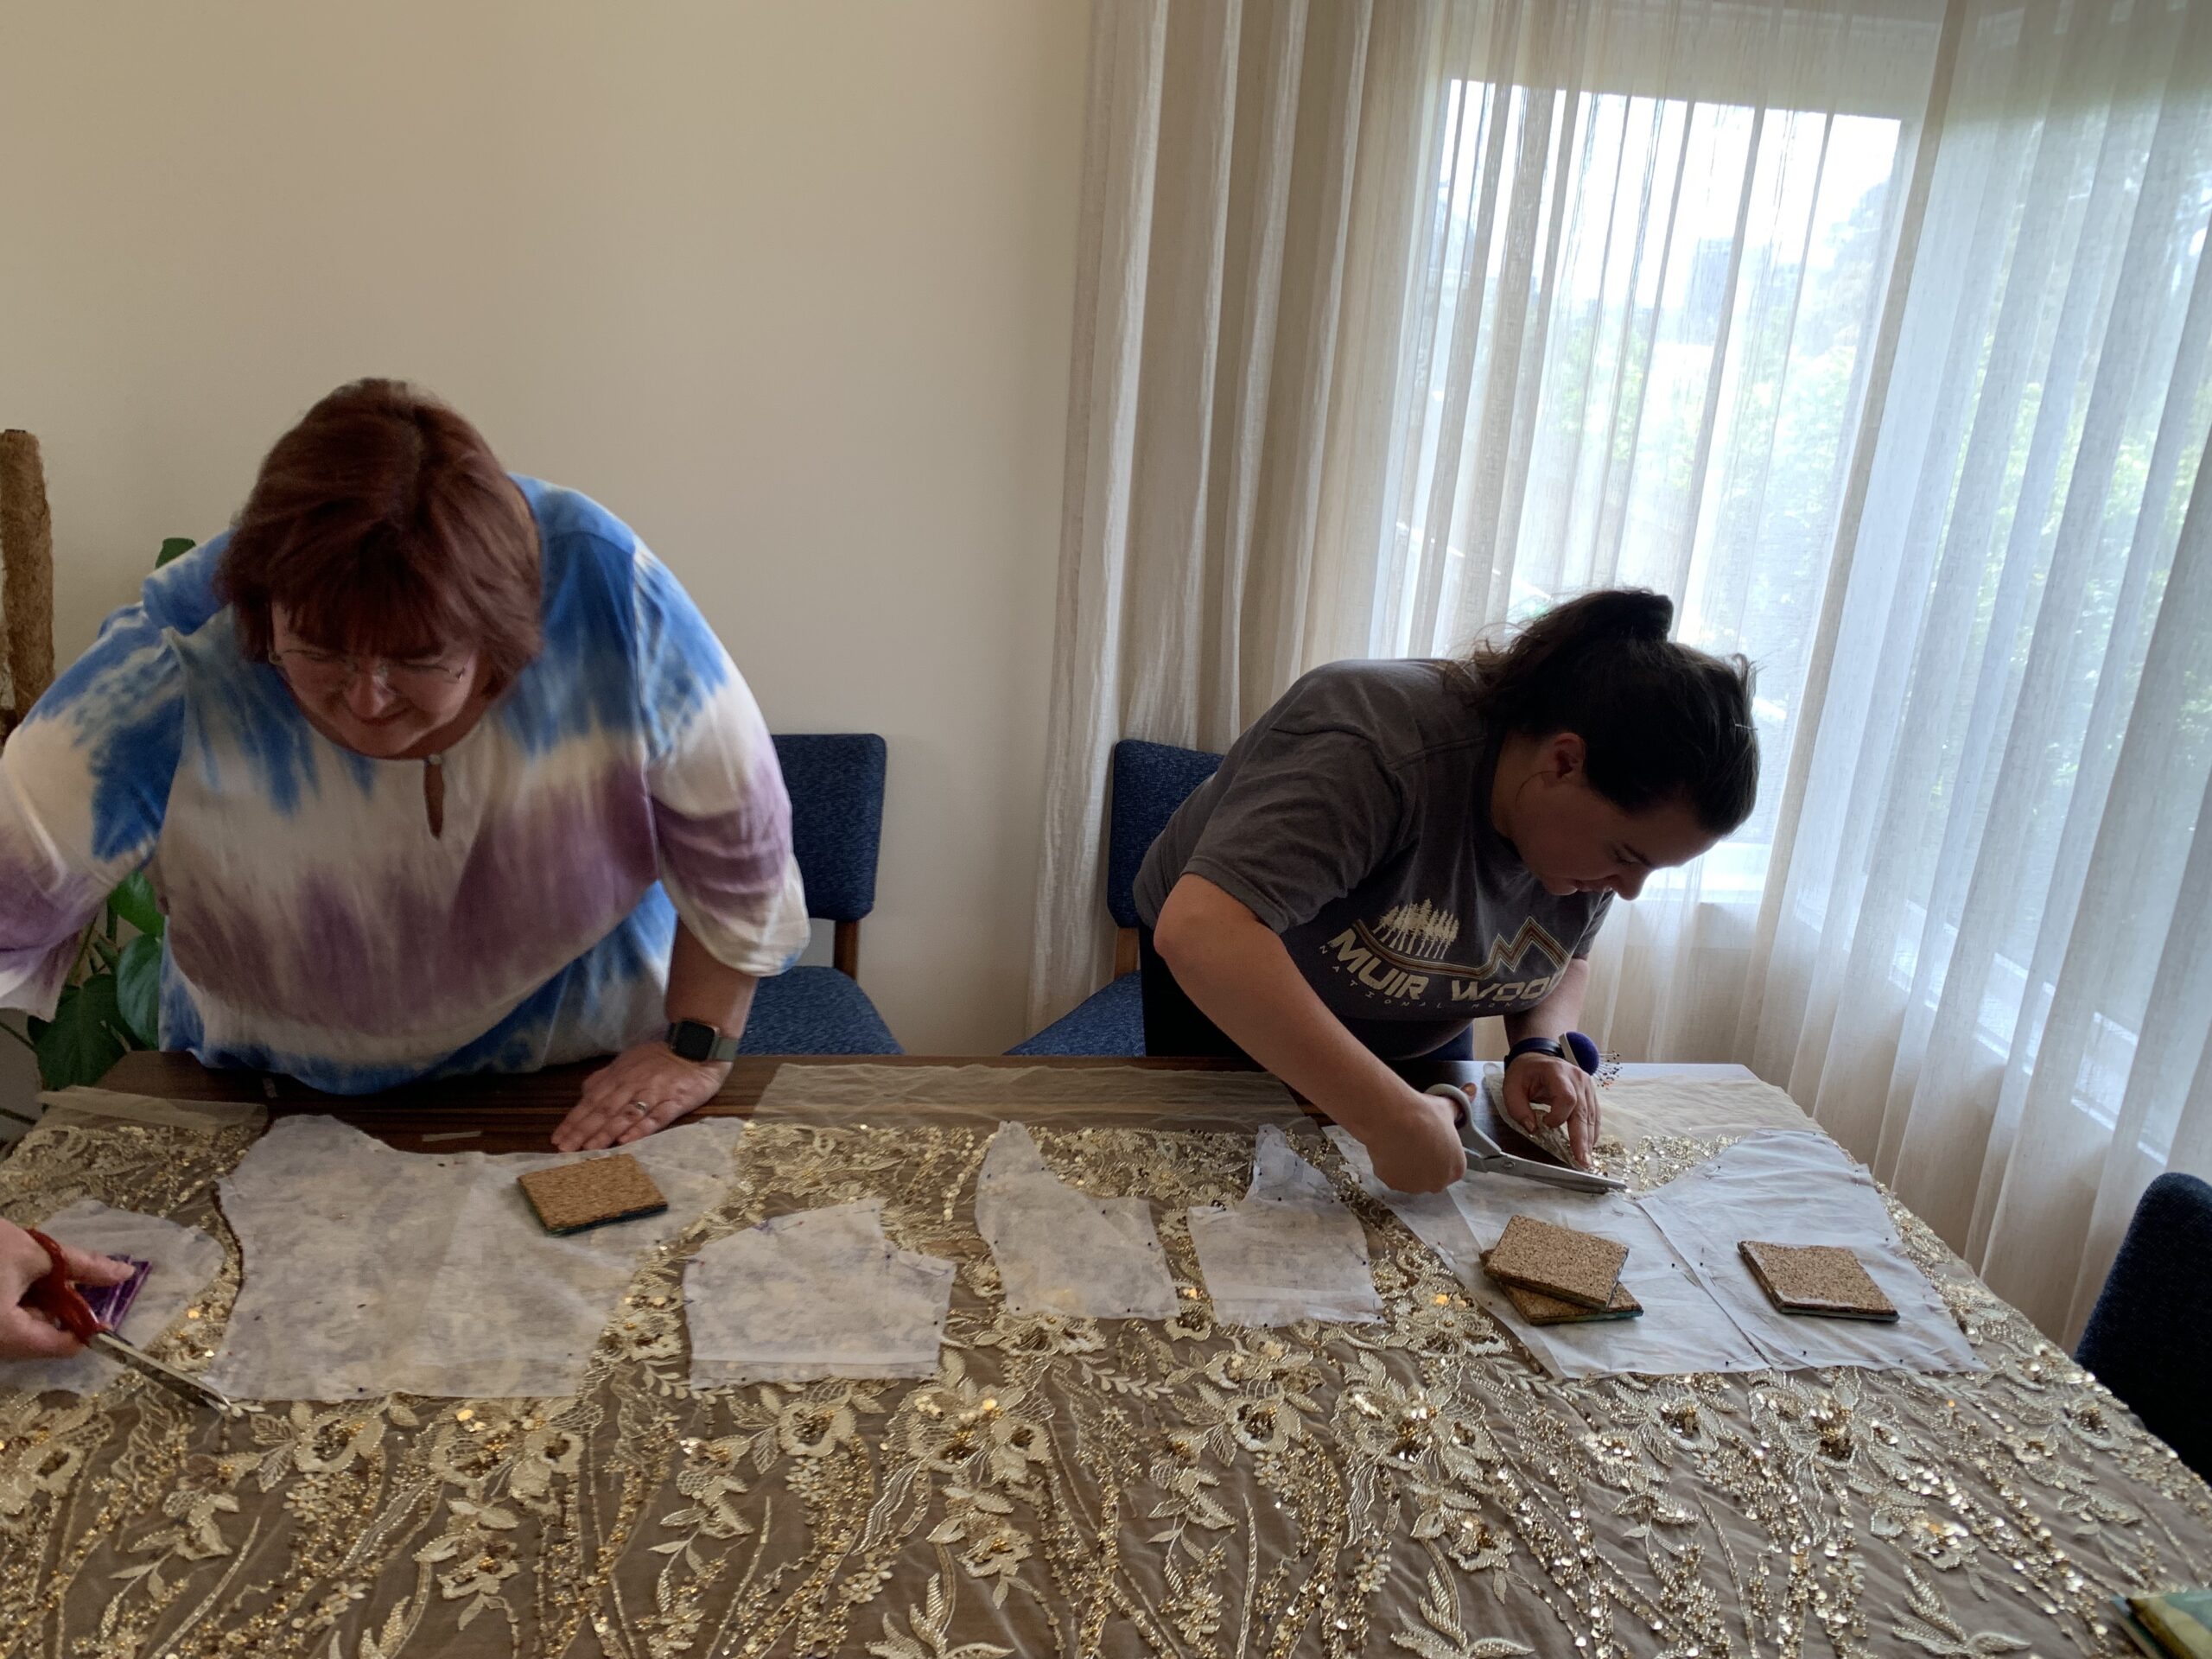
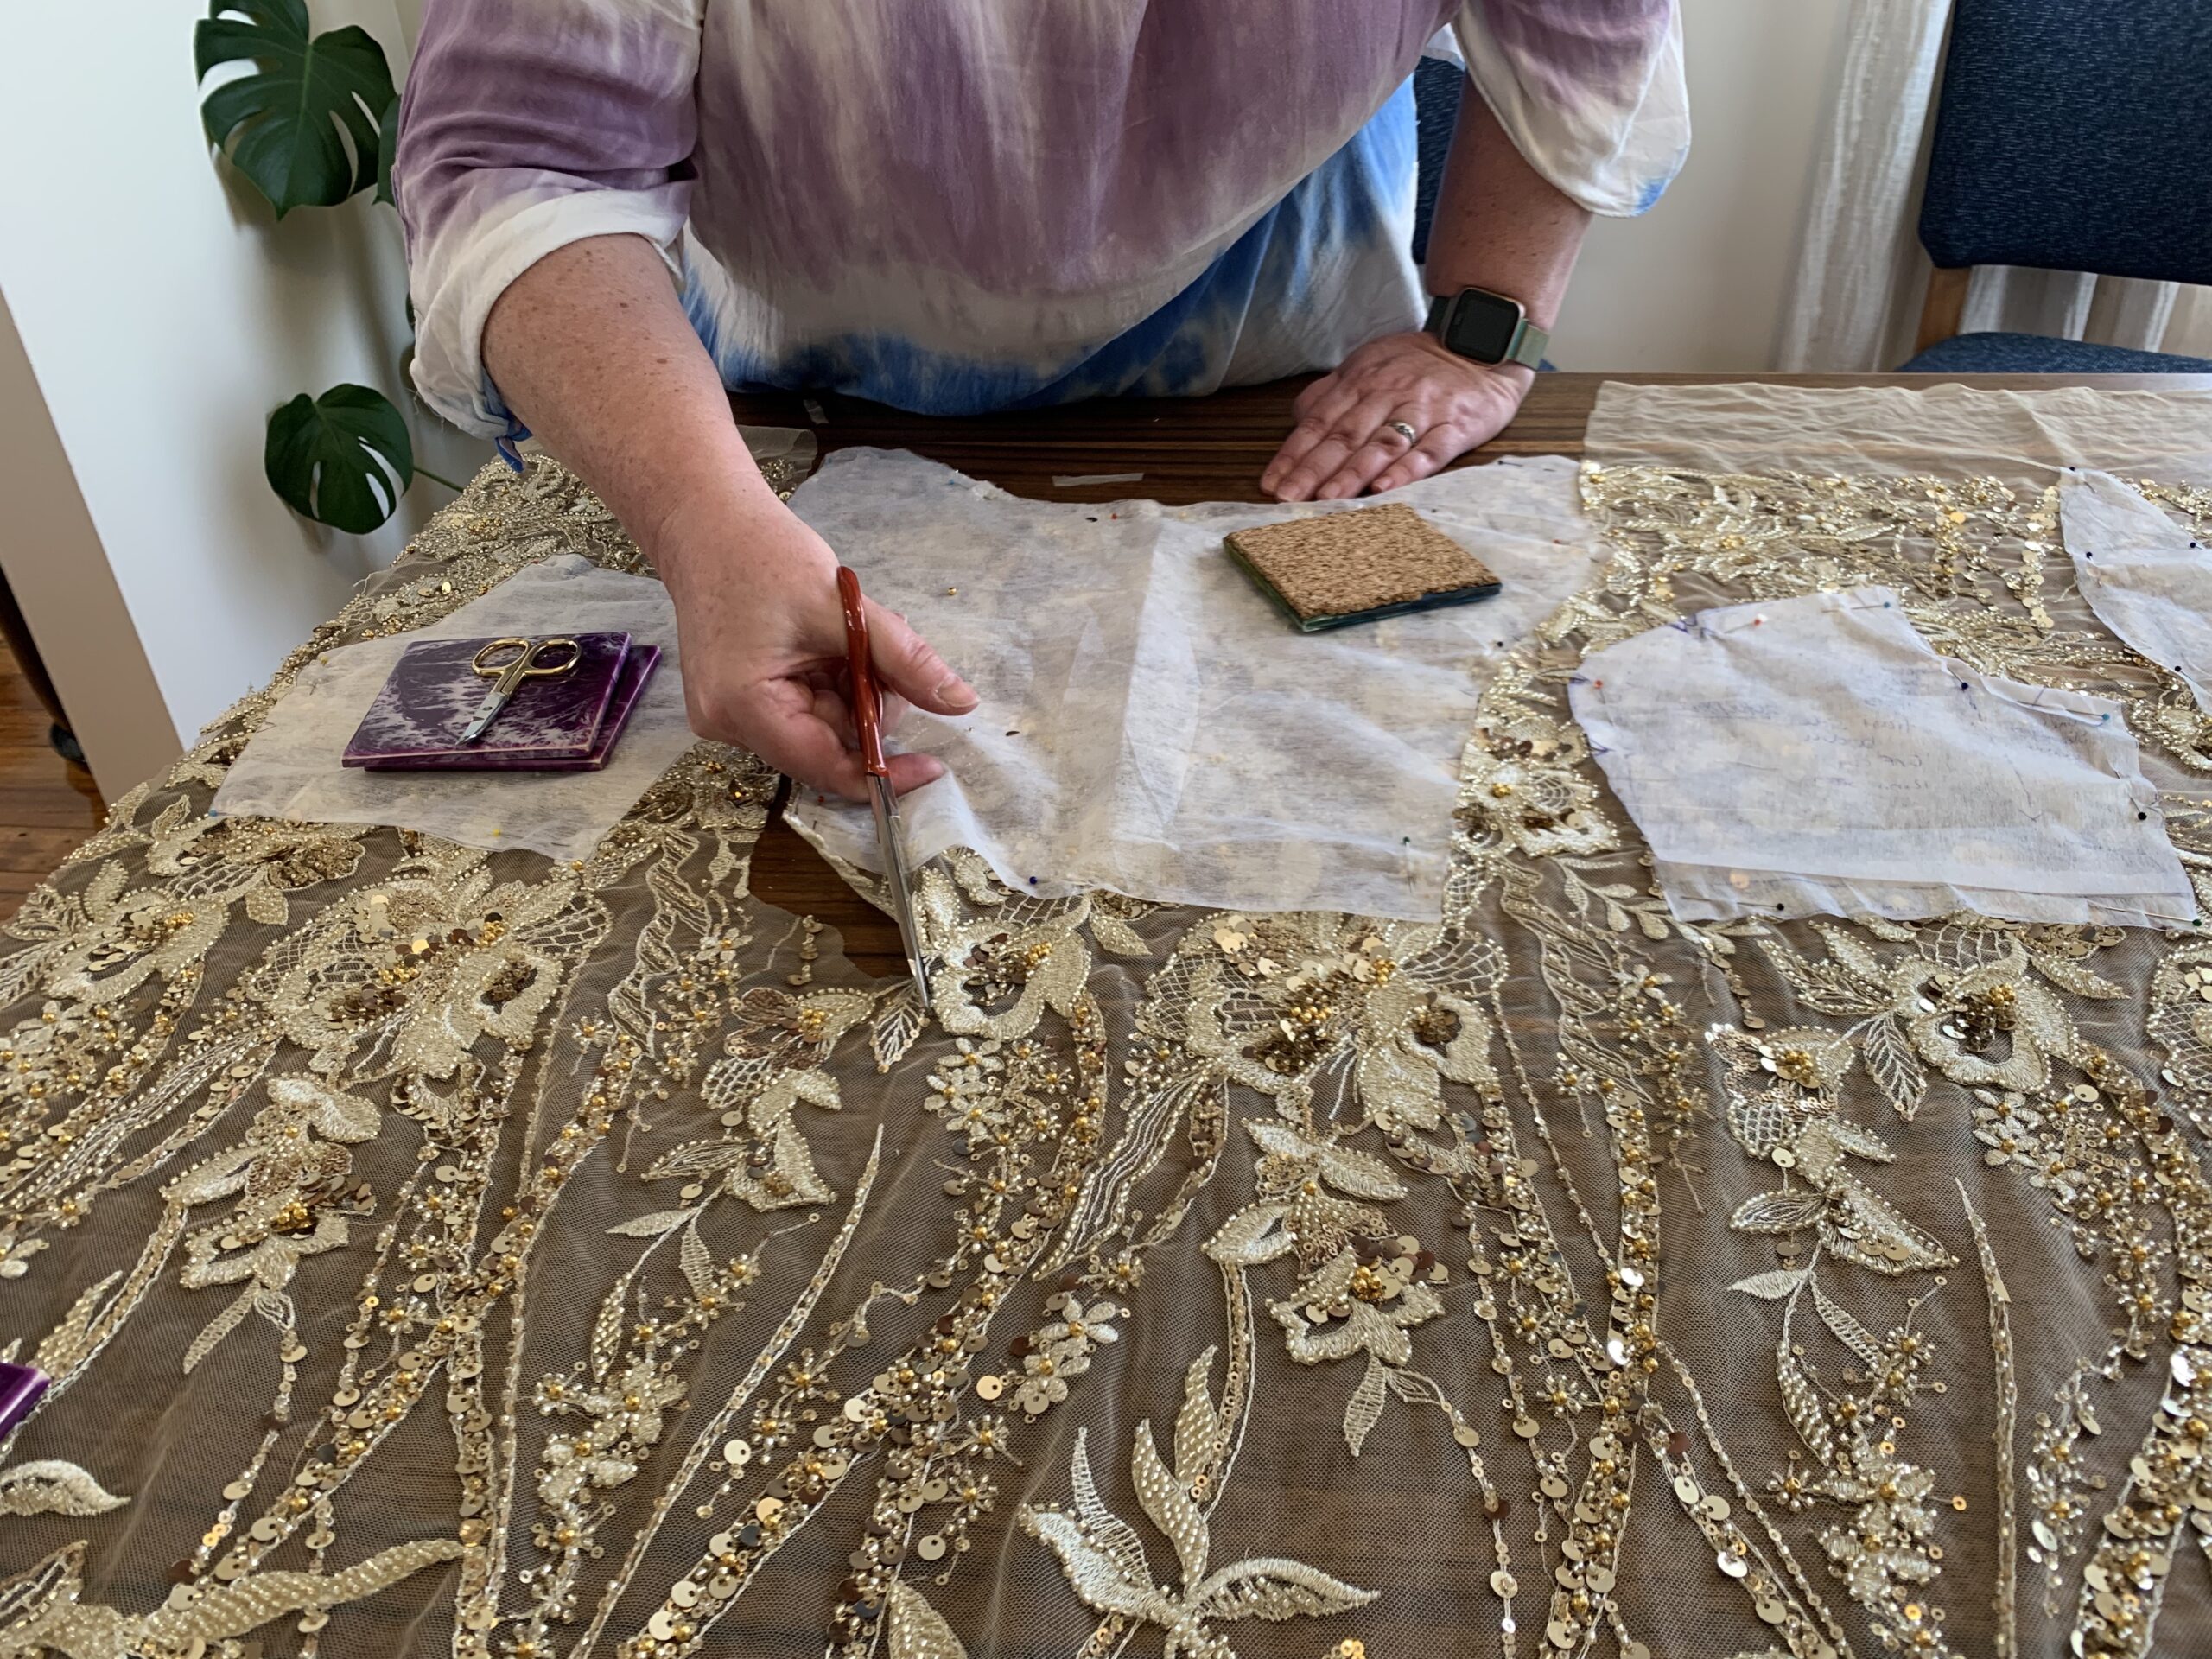
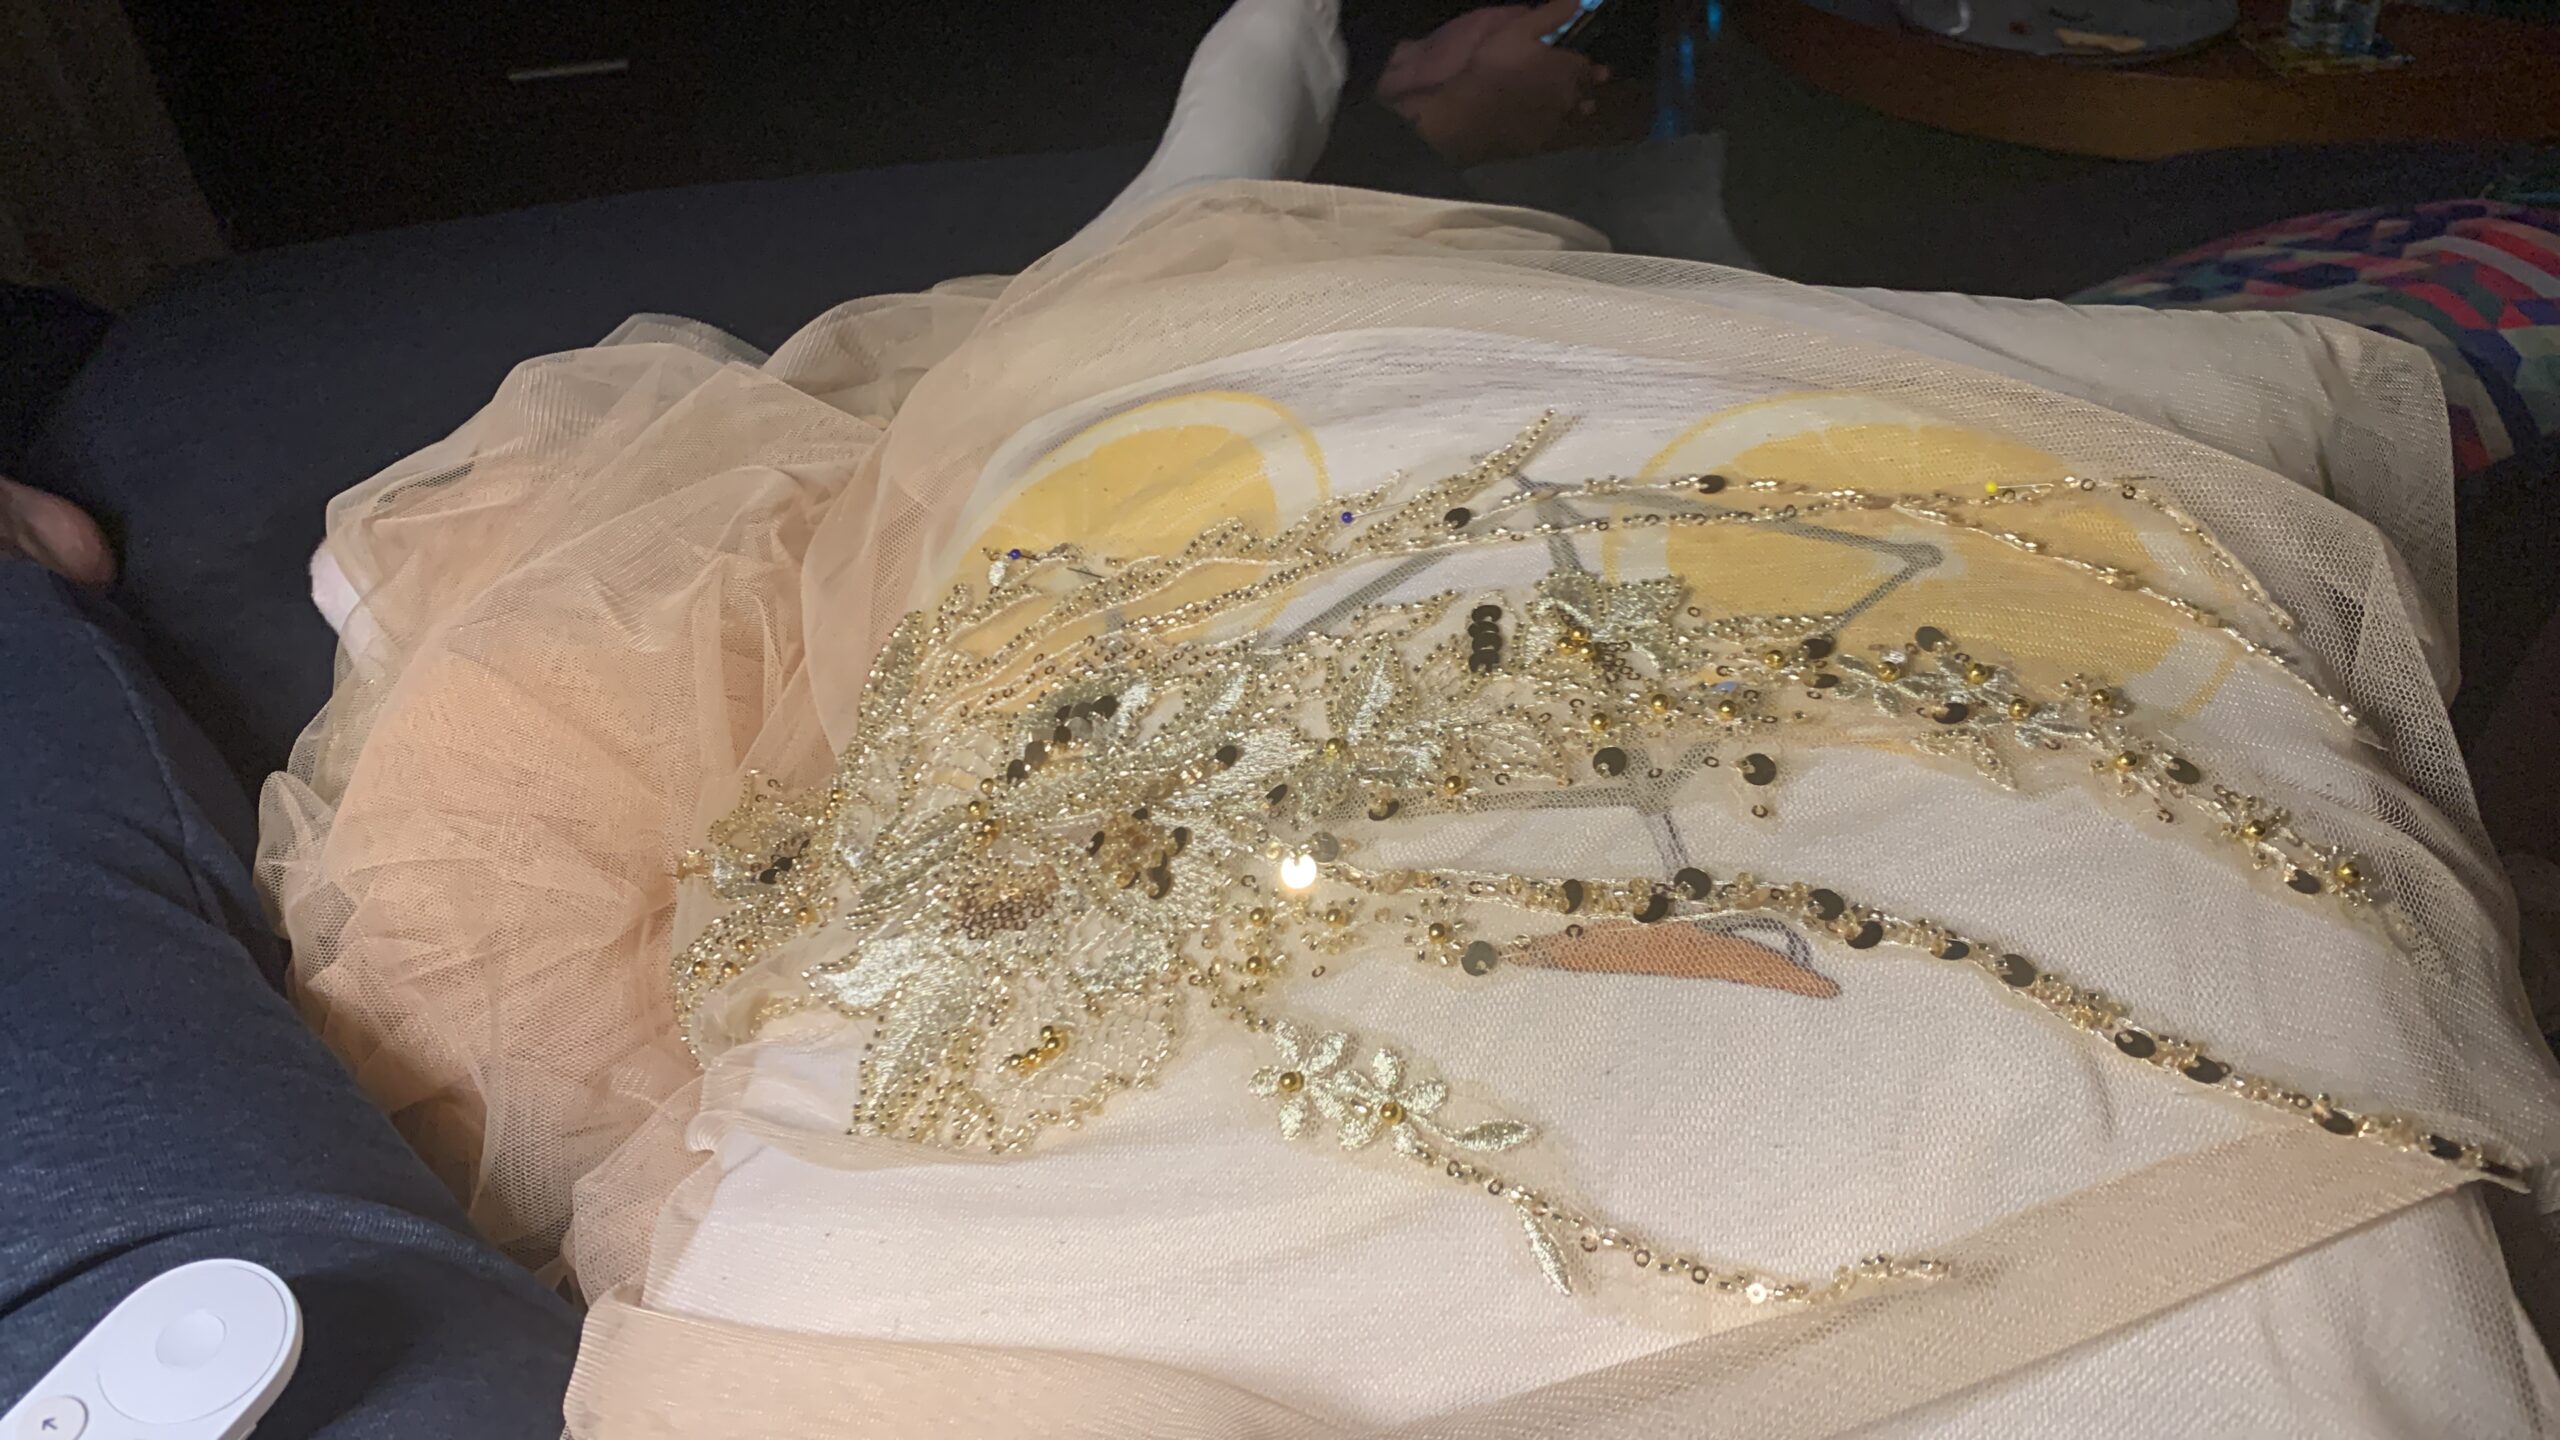
We found this video tutorial really helpful for giving us tips on working with beaded fabric (which neither of us had done before). The most important additional steps we took were to double the seam allowance, marking the seam line with contrasting thread. My aunt then hammered off any beads within the seam allowance, so I didn’t destroy my sewing needle when sewing the bodice together. When we cut the pieces, we made sure to cut additional beaded fabric below the waistline of each bodice piece, following the pattern on the fabric, so we could more seamlessly blend the bodice into the skirt.
Constructing the bodice was one of the most challenging steps for me. Whilst we’d removed beads within the seam allowance, some of the beaded motifs came quite close to the seam line, causing my sewing foot to move up and down as I sewed each seam. This made it difficult for me to make my seams accurate, especially the front princess seams.
With the bodice constructed, it was time to make a decision on how we wanted the skirt to look. We made the tulle version, pinned it on, and decided it would look more bridal if the beaded fabric continued down the skirt. But I didn’t have enough beaded fabric to do a full circle skirt (and it would have been way too heavy anyway!).
However, the beaded pattern repeated itself vertically across the fabric width, and I still had enough length of fabric to go from the bodice waist almost to the bottom of the skirt. My aunt suggested that we cut the remaining fabric into vertical panels, attempting to keep each pattern repeat intact. We managed to get ten panels out of the remaining fabric which she arranged and pinned onto the skirt while I was wearing it.
I then spent the next couple of weeks hand sewing each panel in place in front of the TV – this was easily the most labour intensive part of the dress. We were starting to get very close to the end of the year, and with the wedding on January 7th, I had to get my skates on to finish the dress in time.
For the sleeves, my aunt did some draping magic with our leftover tulle to create some flutter cap sleeves. We then hand sewed a couple of spare bead motifs to each sleeve before hand sewing the sleeves to the dress. We hand finished the armholes, hand sewed the beaded bodice at the back next to the zip, and the very last step was my least favourite job – hemming.
I didn’t need to hem the tulle, but I did need to hem the underdress. I decided to try using a rolled hemming foot (my first time using this type of foot), as I couldn’t face any more hand sewing. This final step was the bit that almost broke me – we were less than a week out from the wedding by this point and I just couldn’t get fabric to stay rolled in the foot properly. Somehow I managed to get through it (and didn’t chuck my sewing machine out the window in frustration), and with four days to spare it was finally done.
Overall I was incredibly happy with the final product. It was so comfortable on the day and looked fantastic on the dance floor! And I don’t think anyone noticed my messy hem.
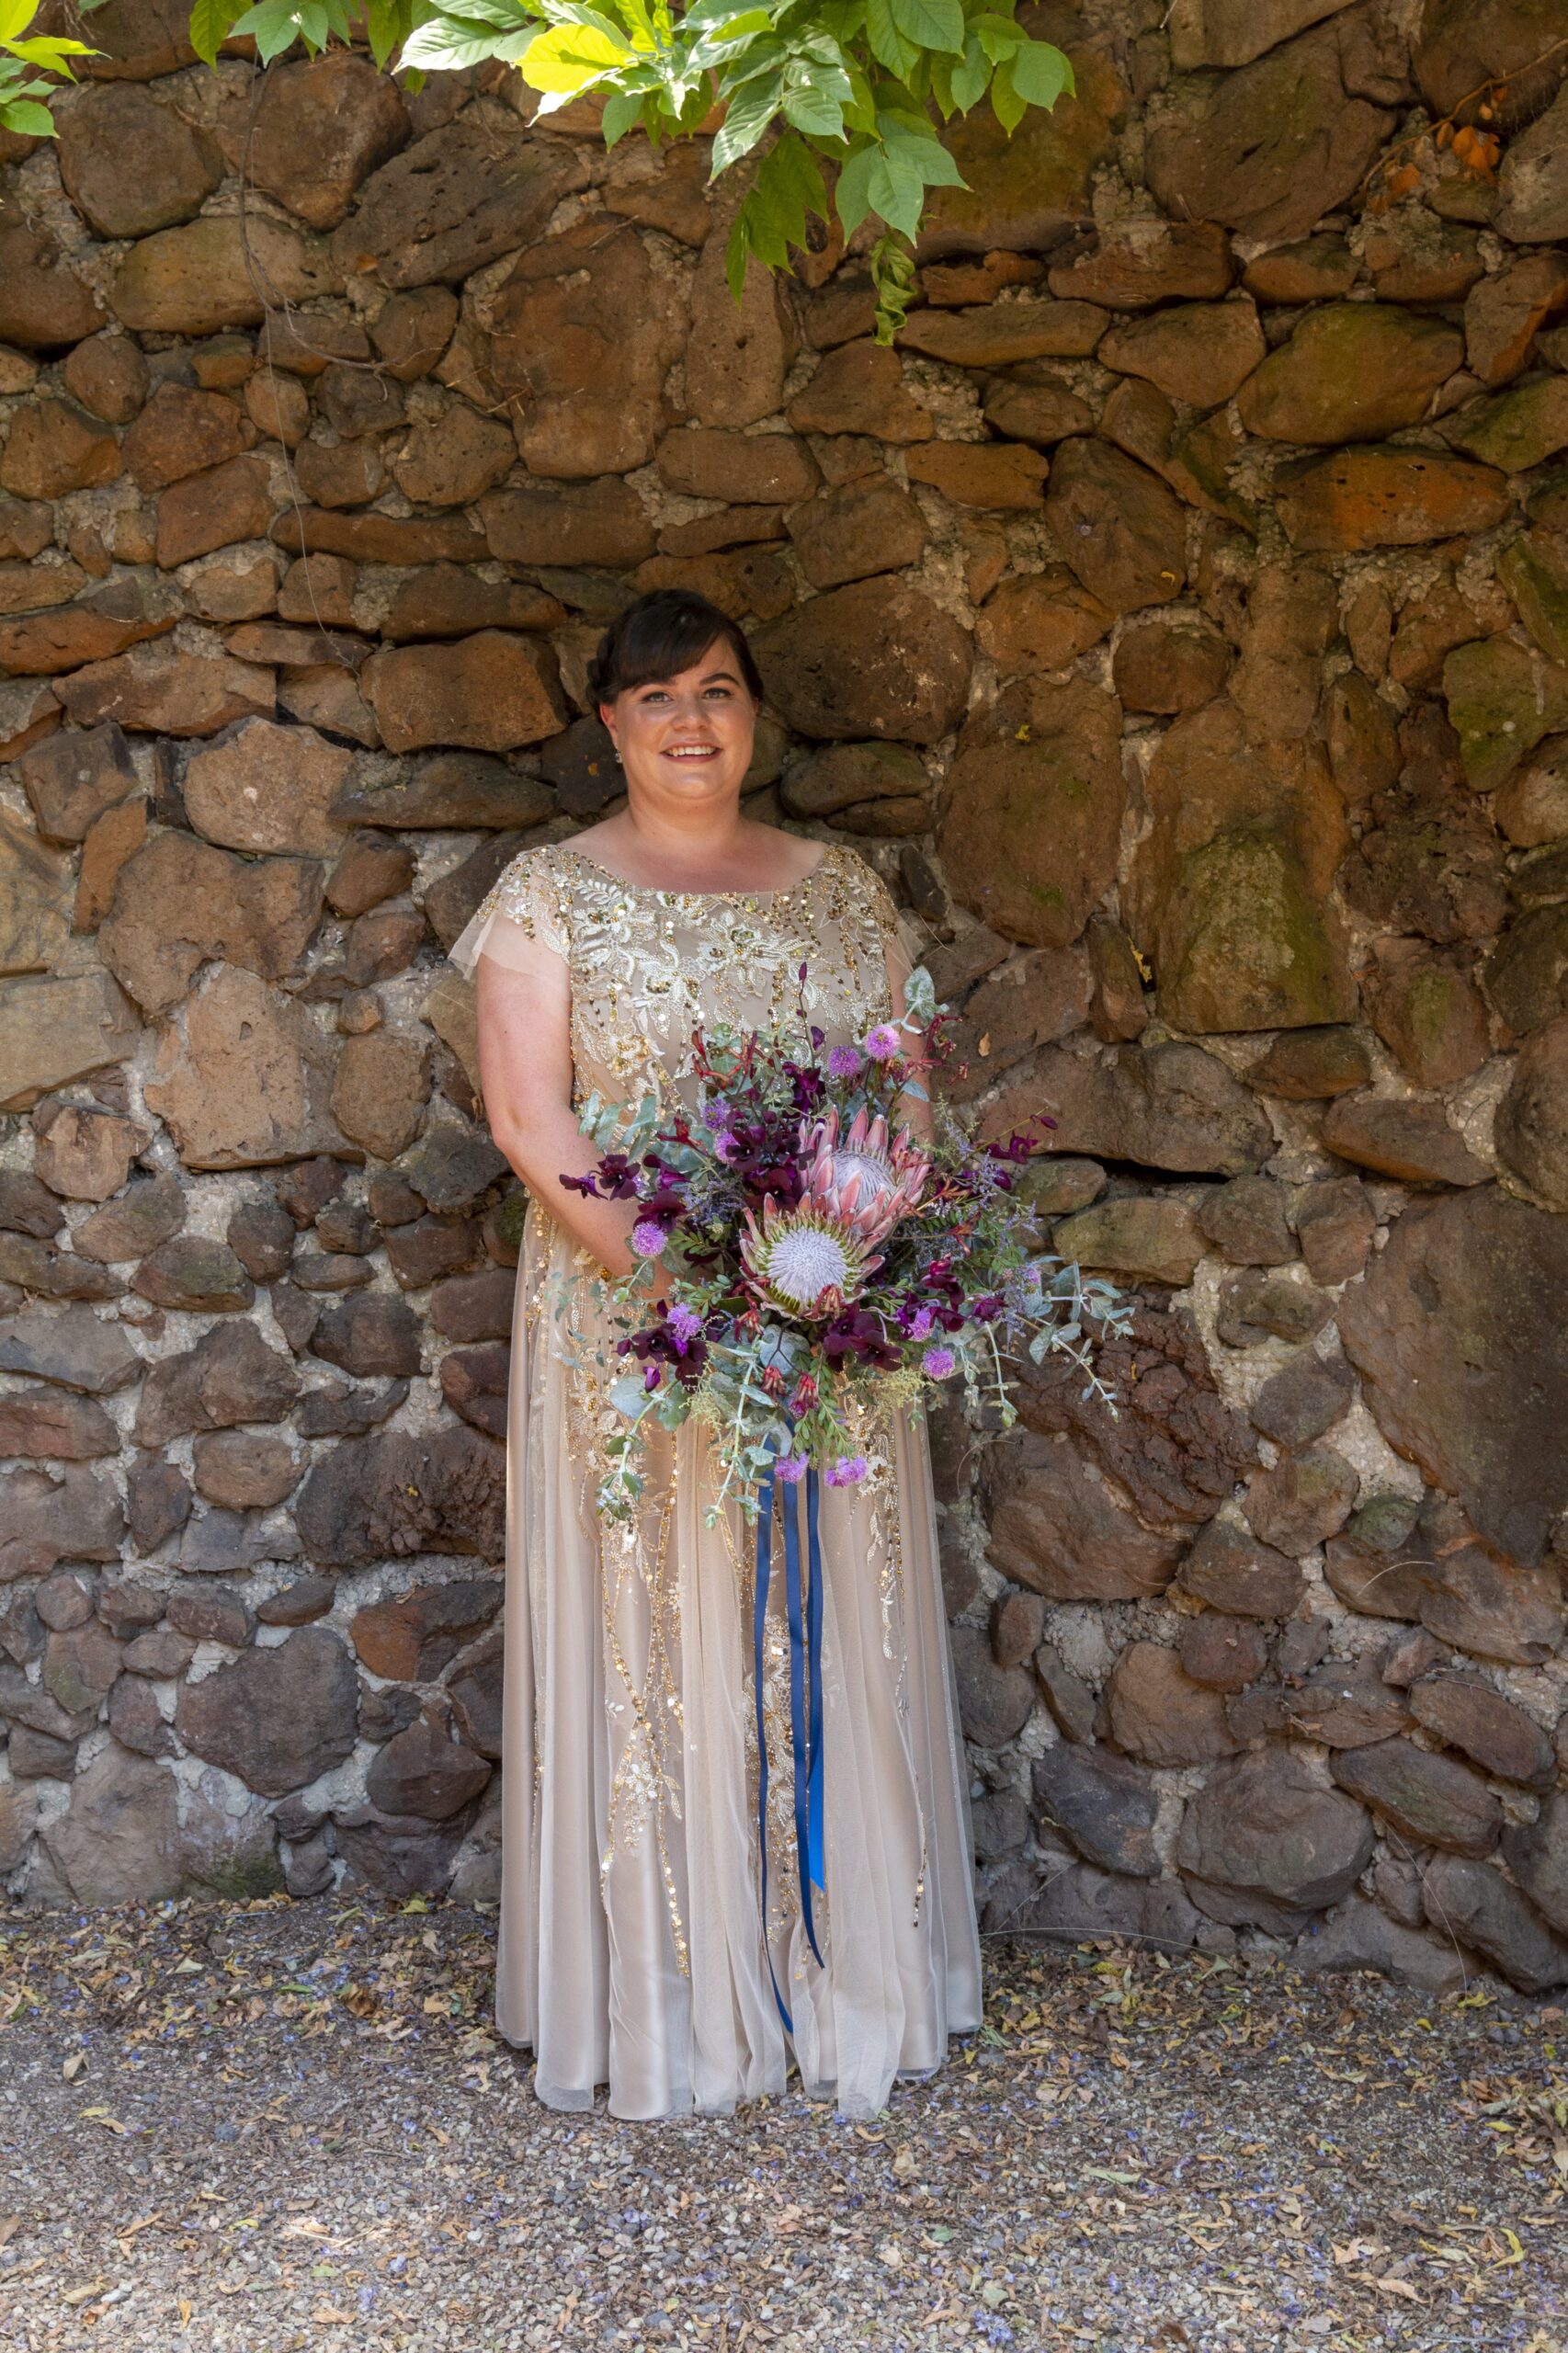
Photo credit: Jon Bagge
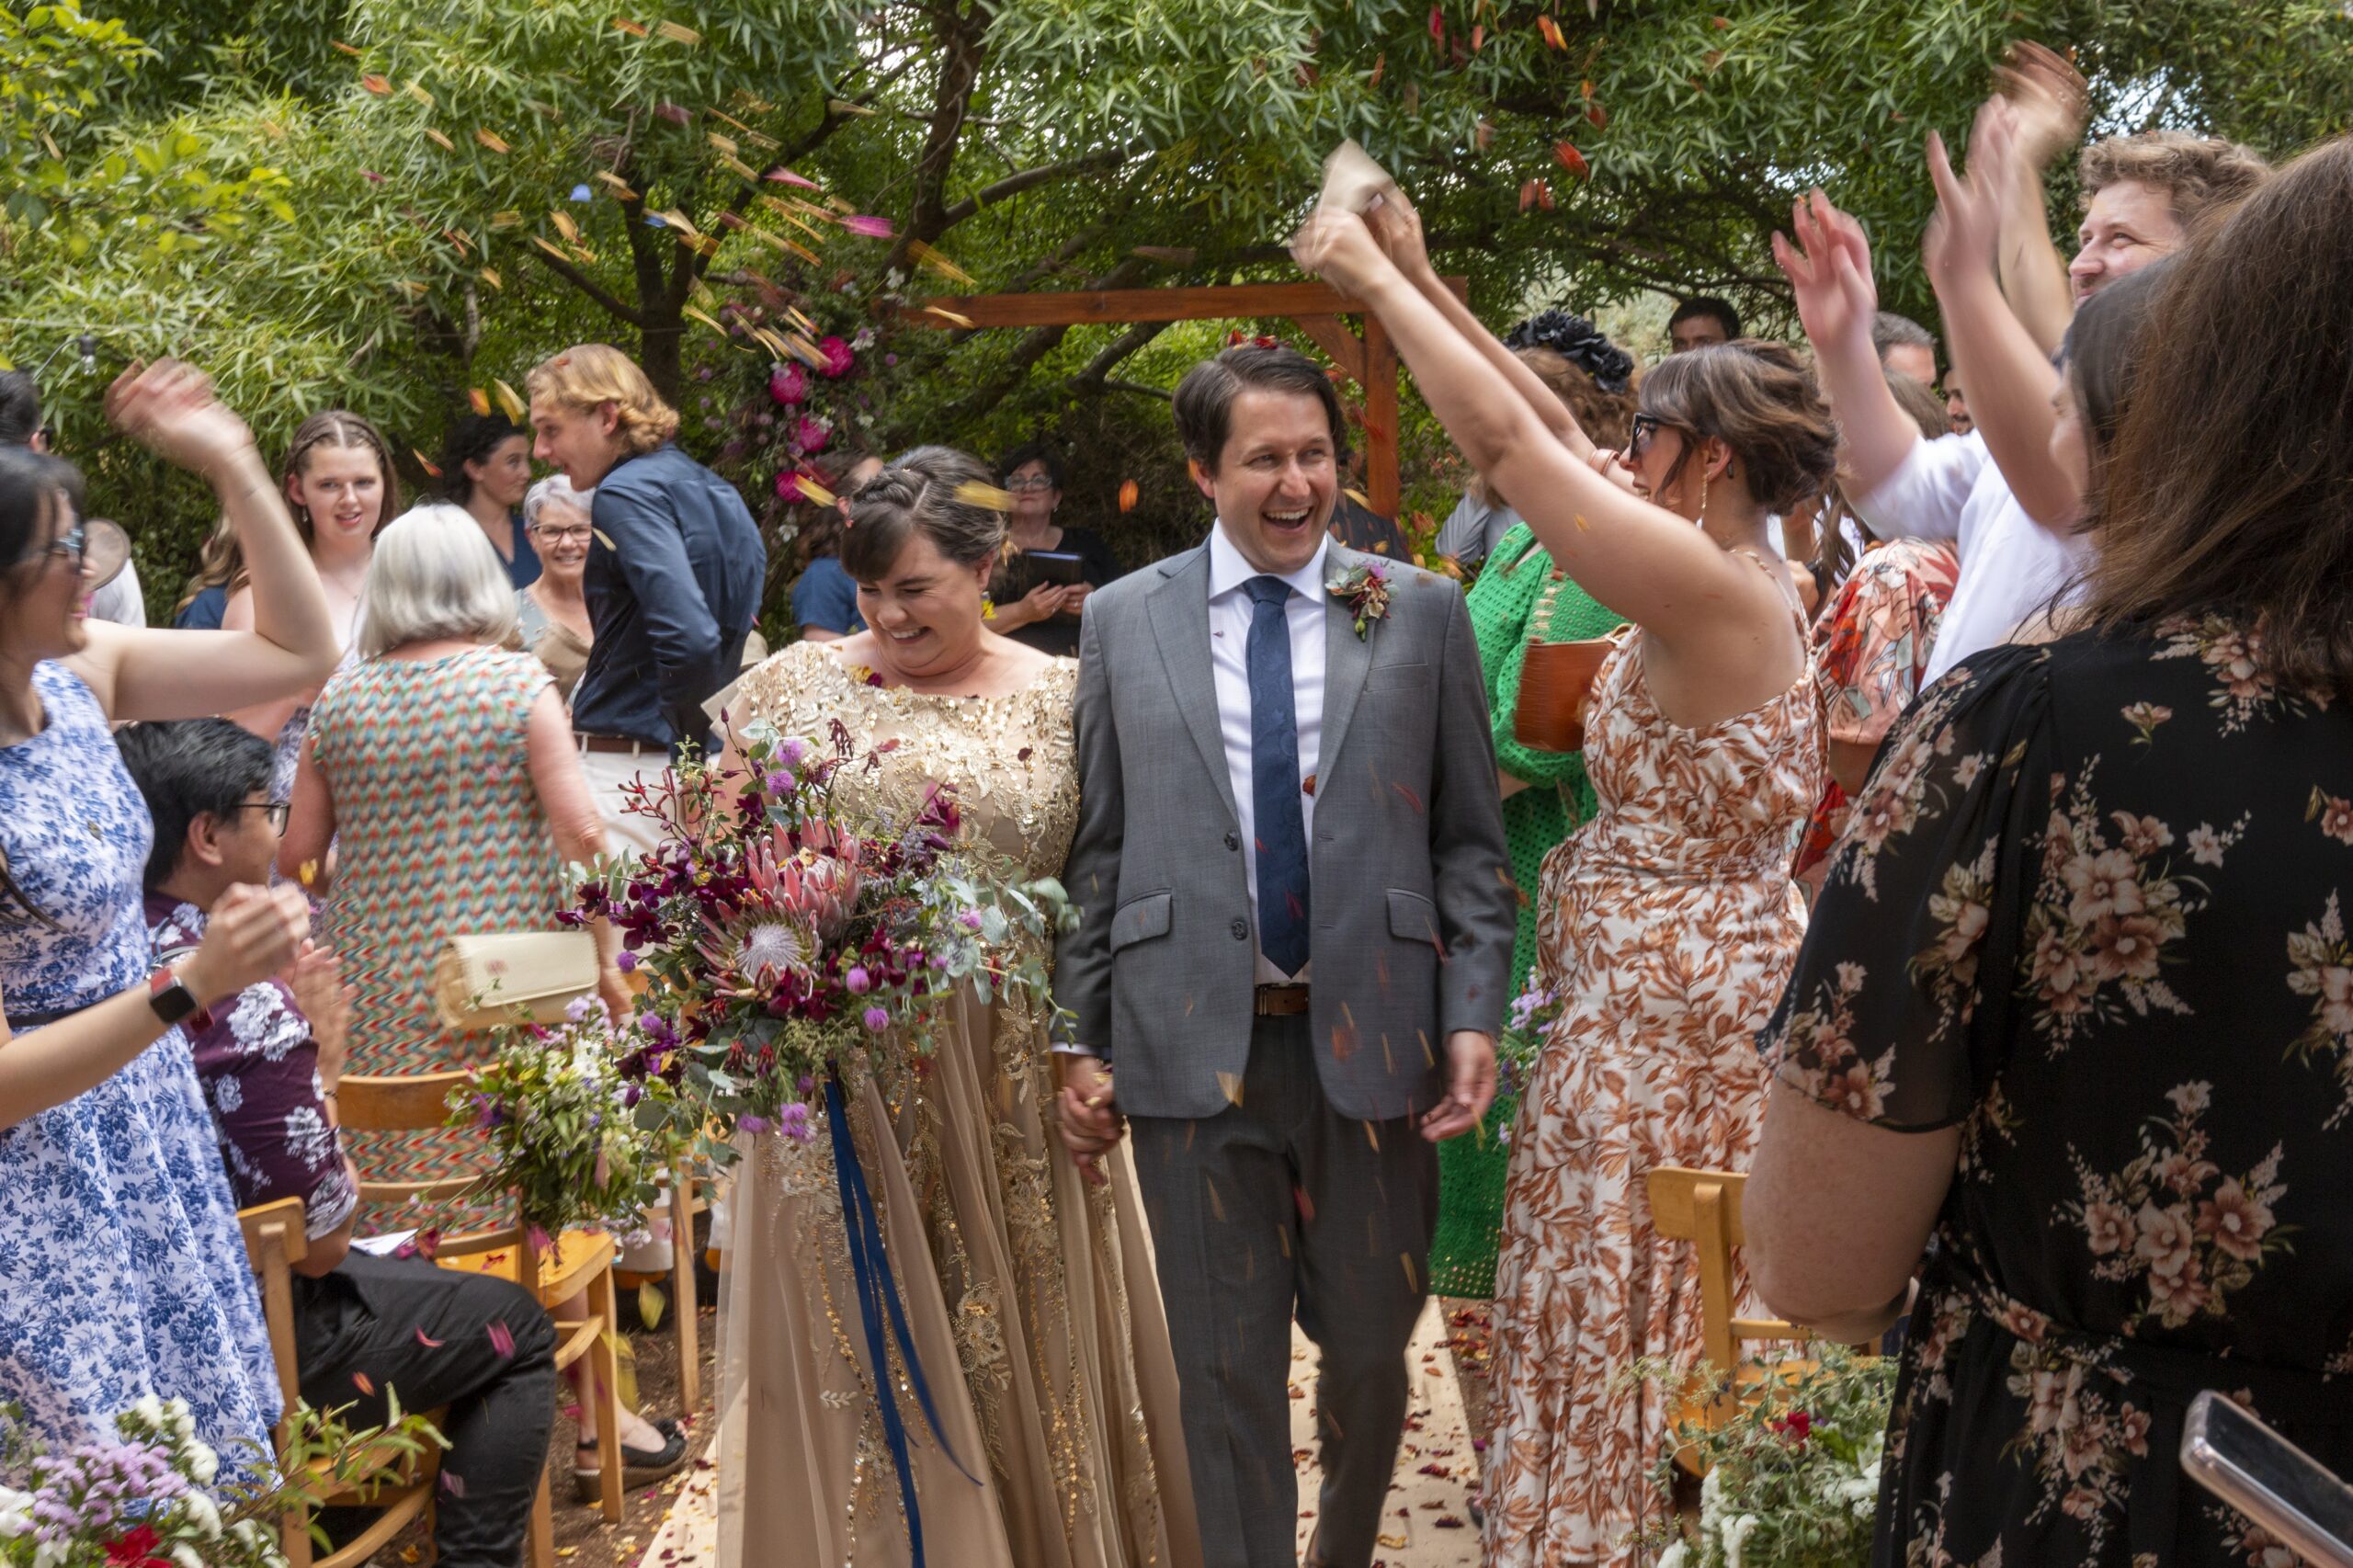
Photo credit: Jon Bagge
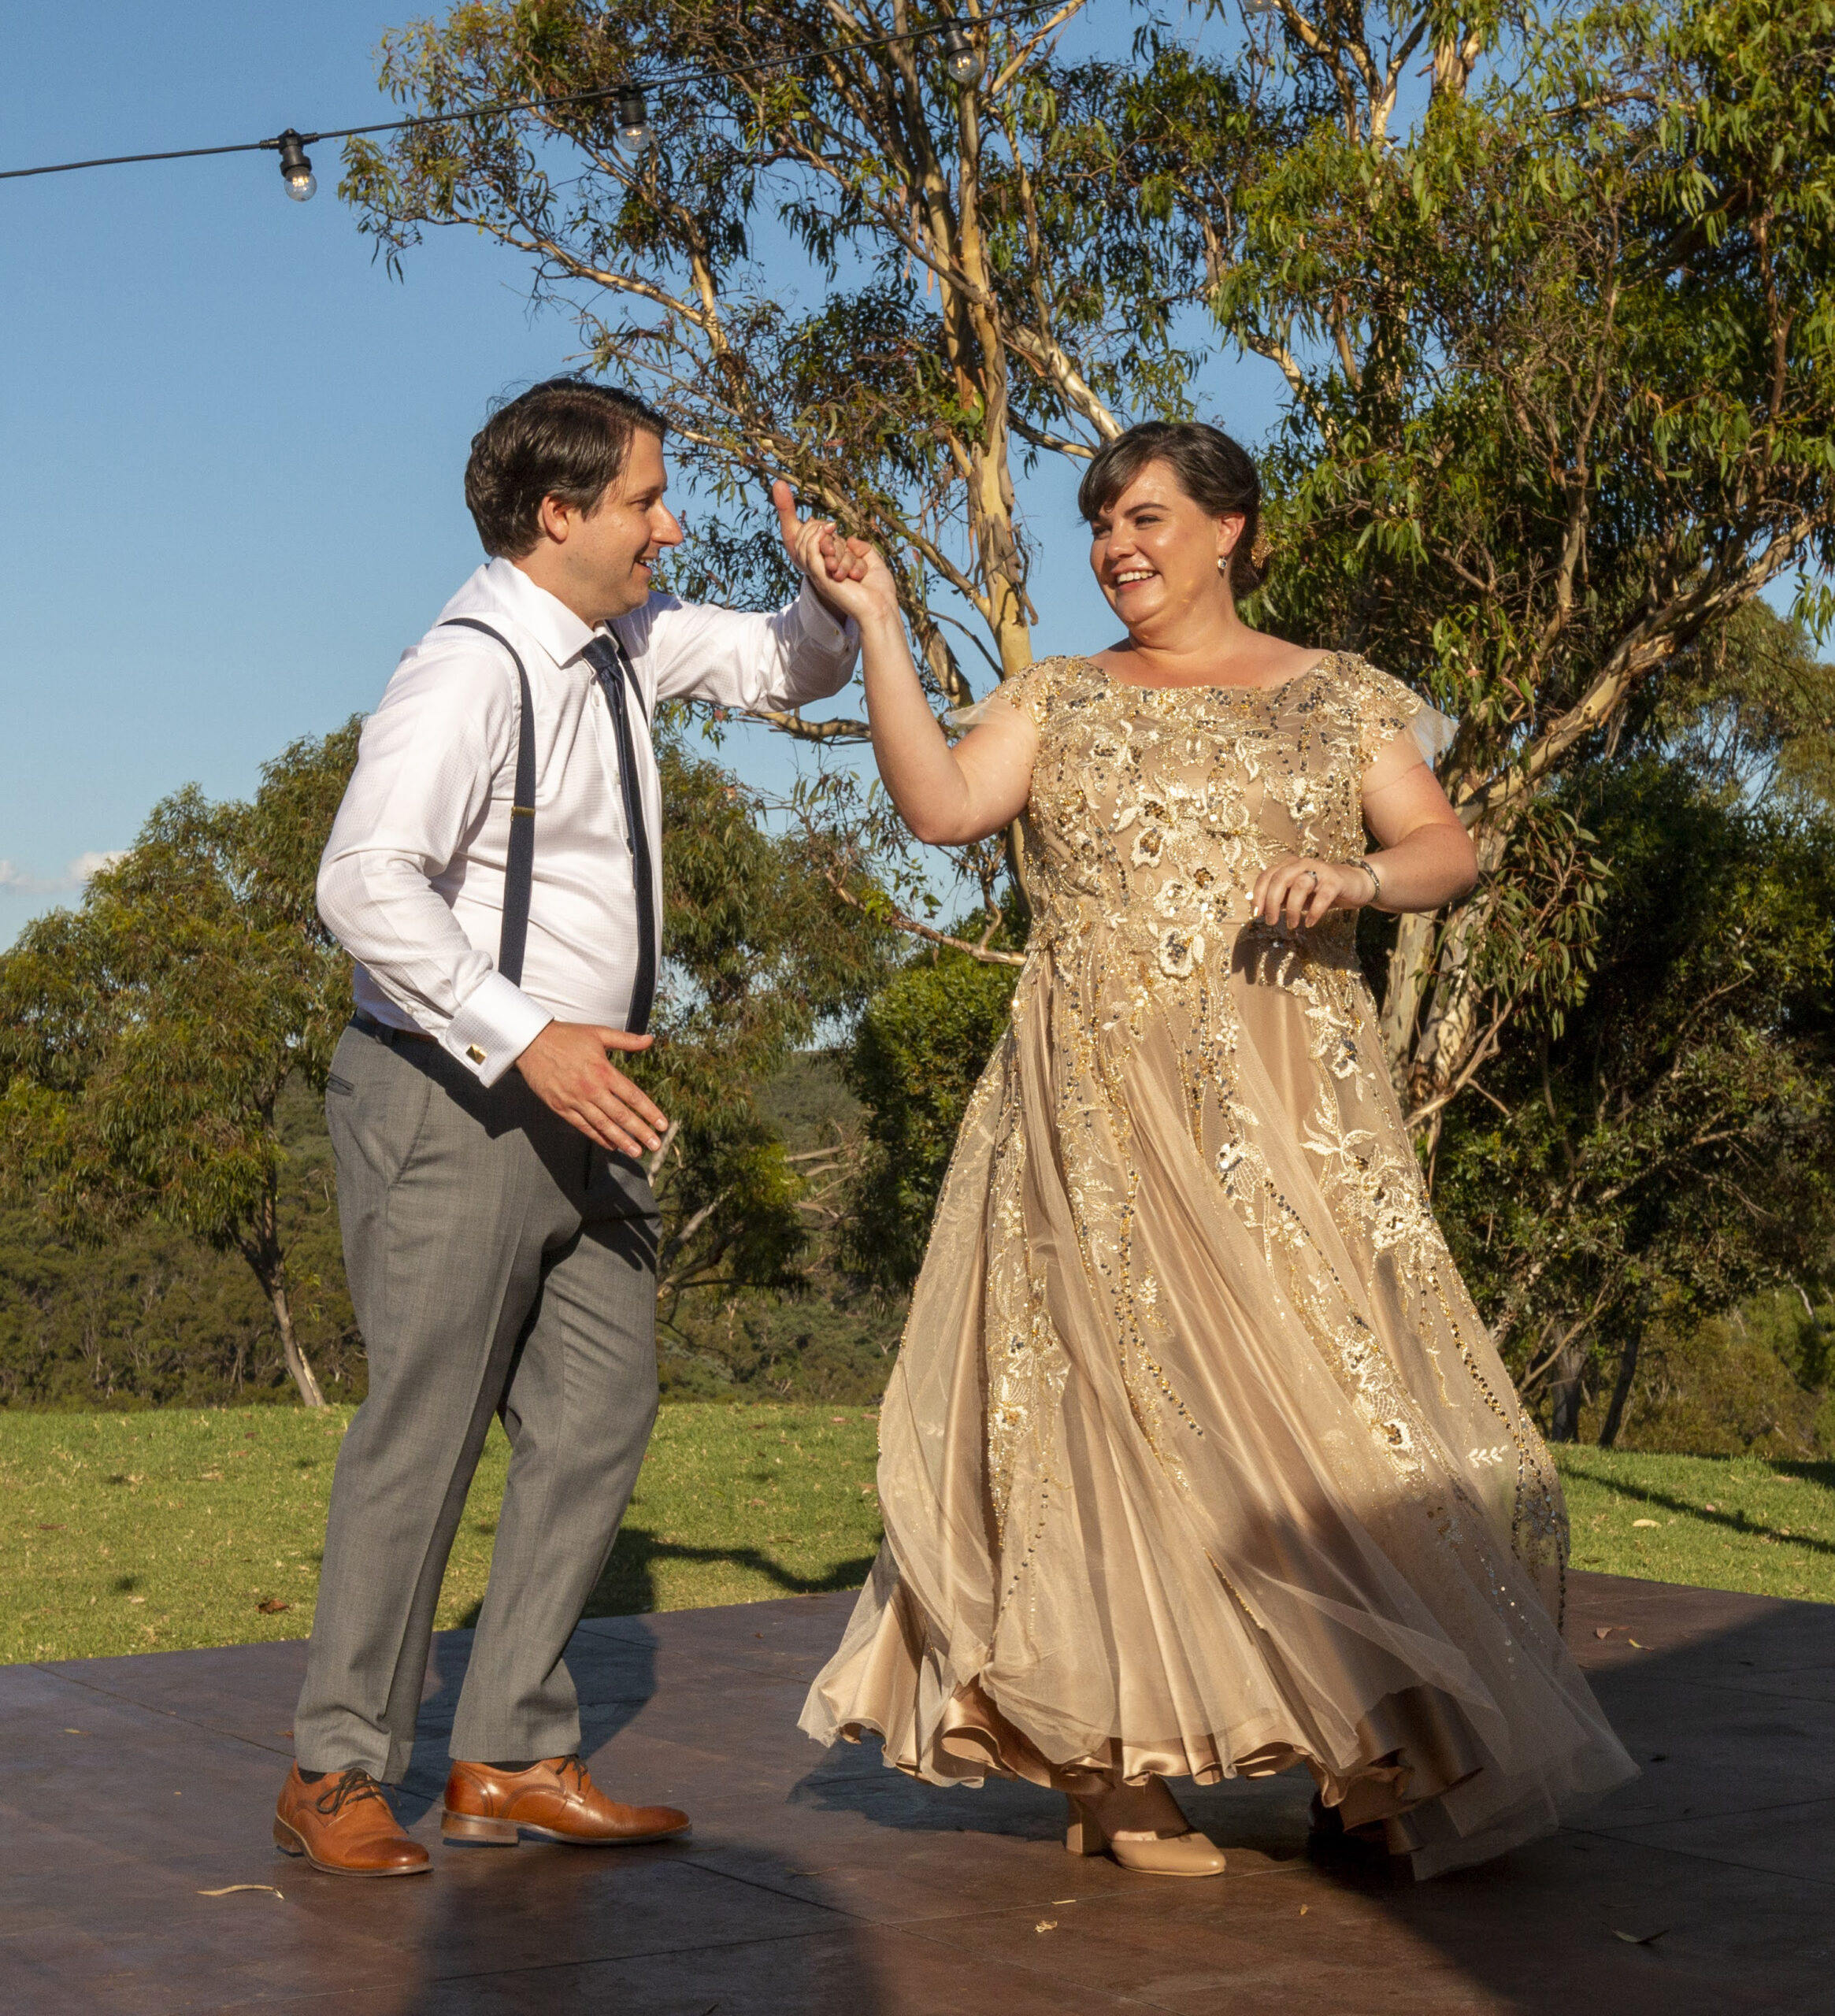
Photo credit: Jon Bagge

Very industrious and innovative and a Beautiful send off to a Forever blessed Relationship!
They did a beautiful job for the most important day of a beautiful bride. The dress looked fabulous as it hunged perfectly to her body.
You looked absolutely stunning Jane, beautiful 👗 dress
A frustrating process…..but it came out wonderful. You made a beautiful bride!
An absolute stunning masterpiece. Should I marry in my second life, May I borrow it? It is gorgeous.
Exquisite Jane! You looked fabulous! Such a glorious custom wedding gown! Do much thought, love & effort for a one of a kind day💕 so worth the time it took!!
Love love the dress. U were beautiful. Great job.
Beautiful bride in a beautiful dress! May I ask where you bought the different fabrics? Thank you so much for your help and understanding in advance 🌈 💖
I absolutely love your wedding dress. It was great to read your construction journey.the rime you put in to it was well worth it.
This is so beautiful! How did you do the zipper below the waist with the overlay hanging freely?