Finally—a curve-friendly blazer sewing pattern! If you’re busty, the Auburn Blazer will give you a great fit in the bust, but you may still need to grade between sizes. This is a common adjustment many sewists make, and today we’ll be showing you how it’s done.
The Auburn Blazer is designed specifically for curves, with princess seams, multi-cup sizing, and side seam shaping. We put the Auburn through a rigorous development process to get you the best fit right out of the envelope. However, many of us (in fact, over 80% of sewists, based on informal polls we’ve done) don’t have measurements that fit neatly into a single size. What do you do in that case? Grade between sizes!
What is Grading Between Sizes?
In short, grading between sizes involves blending different sizes together to form a custom size that works just for you. For example, if your bust is a size 20 G/H, your waist is a size 24, and your hips are a size 22, you essentially connect the dots between those sizes. That ensures that the garment fits you in all those areas, rather than going with a “straight” 20 G/H (which wouldn’t fit your waist or hips) or a “straight” 24 G/H (which would be too big in the bust). Grading between sizes is one of the reasons why sewing your own clothes is so great—you couldn’t walk into a ready-to-wear shop and ask for a size 20 bust, 24 waist, and 22 hip.
If your waist is one or more sizes bigger than your bust and hips, you may think that by grading out for your waist, your new side seams will curve outward and look like a bubble around your waist. It’s understandable why you might think that! But in reality, you are probably just straightening out the side seam, since many of the side seams on our patterns curve inward at the waist, and that is true as well for the Auburn. So no need to fret!
(Want to learn more about grading between sizes? Check out our complete guide here.)
How Do I Know If I Need to Grade Between Sizes on the Auburn?
Start by taking your measurements. You’ll need your high bust, full bust, natural waist, and hip measurements. Check out our measurements guide to see how to take those measurements, and make sure you’re wearing undergarments that are similar to those you’d be wearing with the Auburn Blazer.
Next, compare your measurements to our size chart. (You can also plug them into our handy size calculator here.) Circle your measurements on the chart.
Now, look at what sizes your measurements correspond to. Do they fall neatly into a single size? Then you’re good to go—no grading needed!
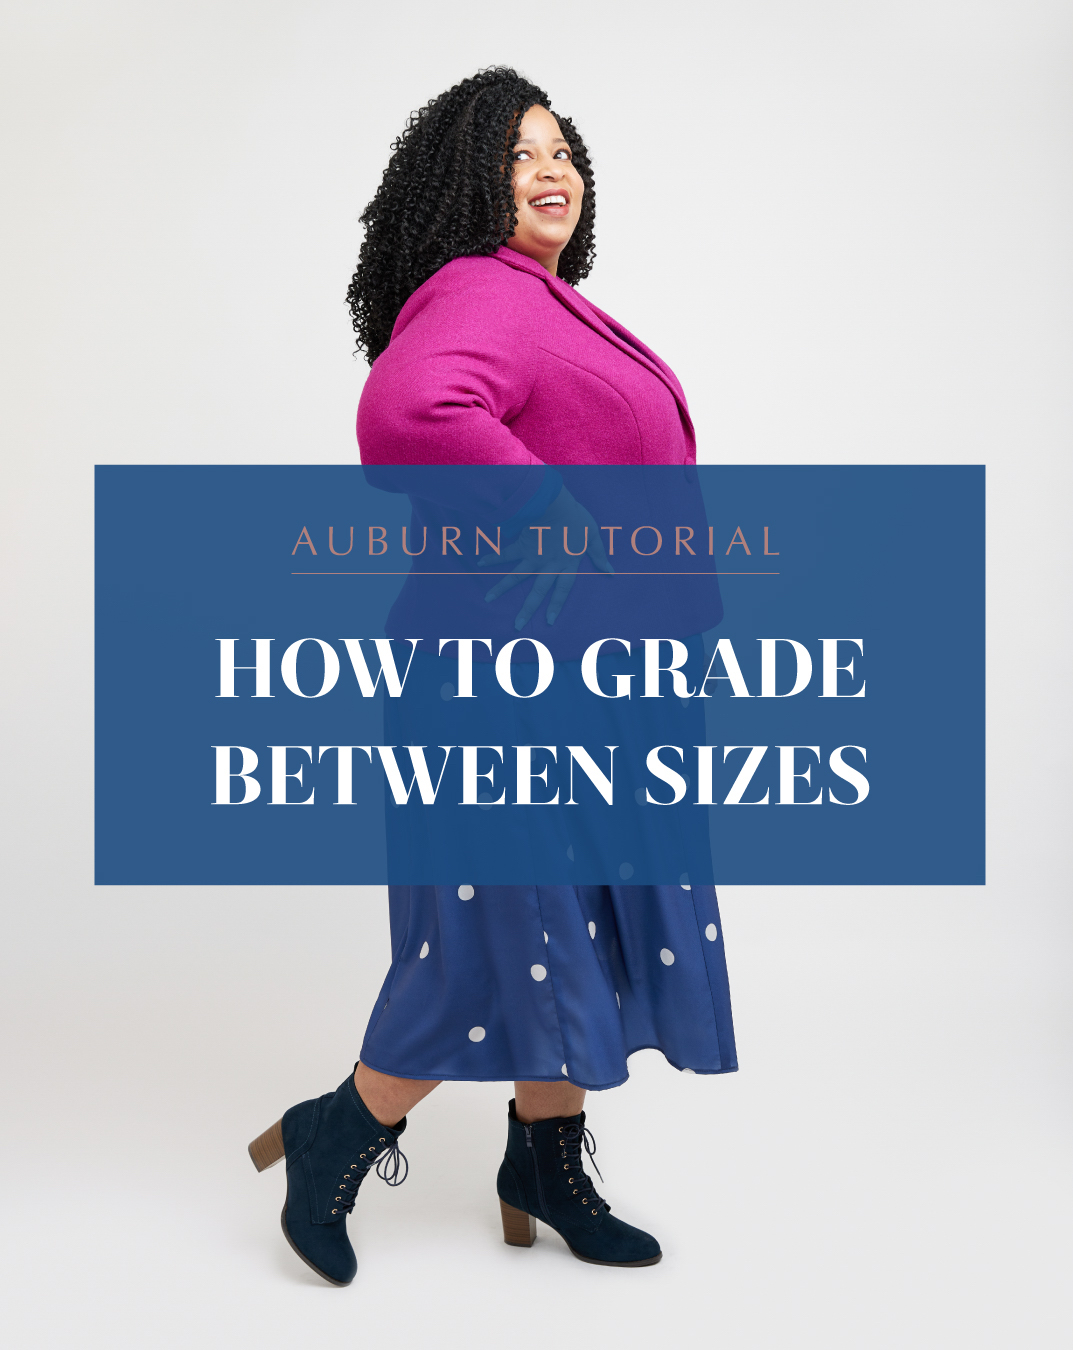
For example, if your measurements are 45″ high bust, 50″ full bust, 40″ waist, and 50″ hip, you can make a size 20 G/H.
If your measurements fall across different sizes, the next question to ask yourself is how you plan to wear your Auburn. Do you expect to wear it buttoned up, or will you have it always open? If your waist and hips are 1-2 sizes bigger than your bust size, but you don’t expect to want to button your blazer, you can go make a “straight” size using your bust size.
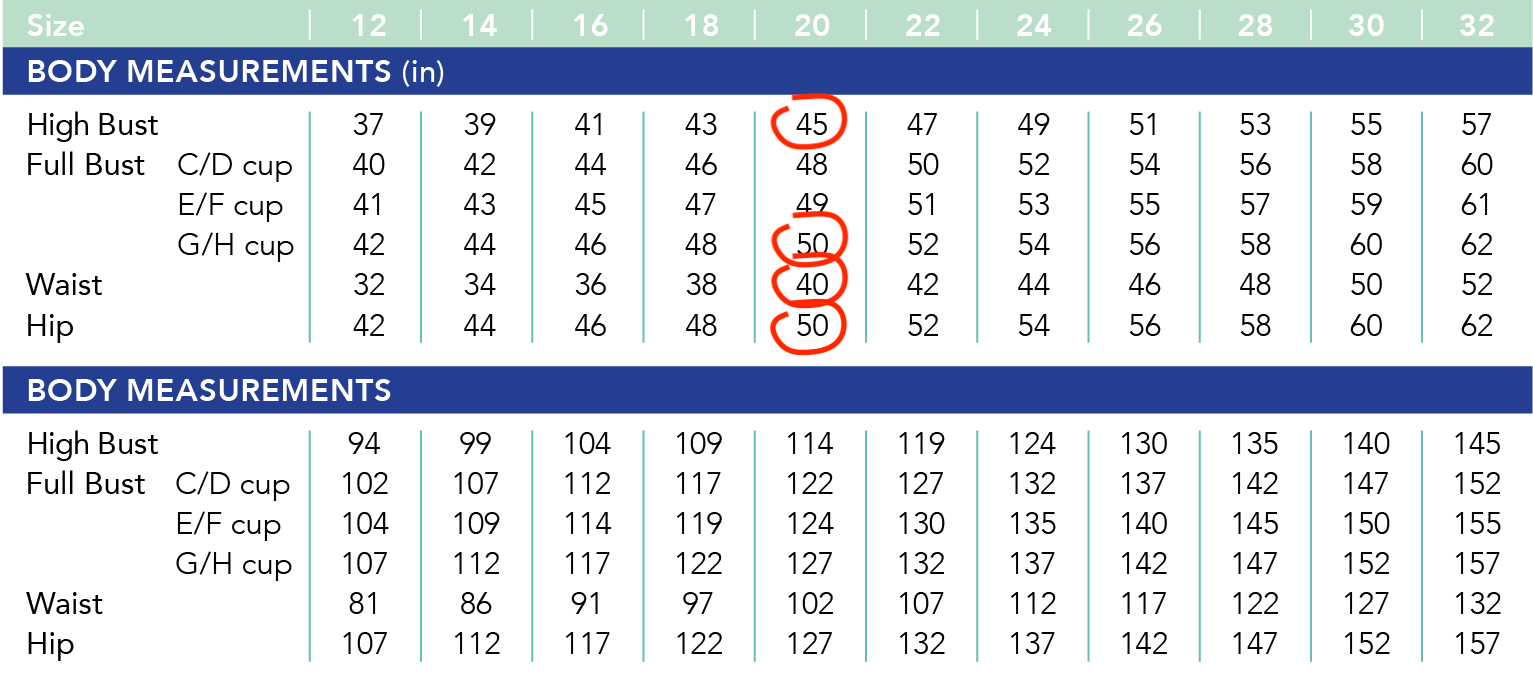
For example, if your measurements are 45″ high bust, 50″ full bust, 44″ waist, and 52″ hip, but you never plan to button up your blazer, you can make size 20 G/H across the board even though your waist is a size 24 and your hips are a size 22.
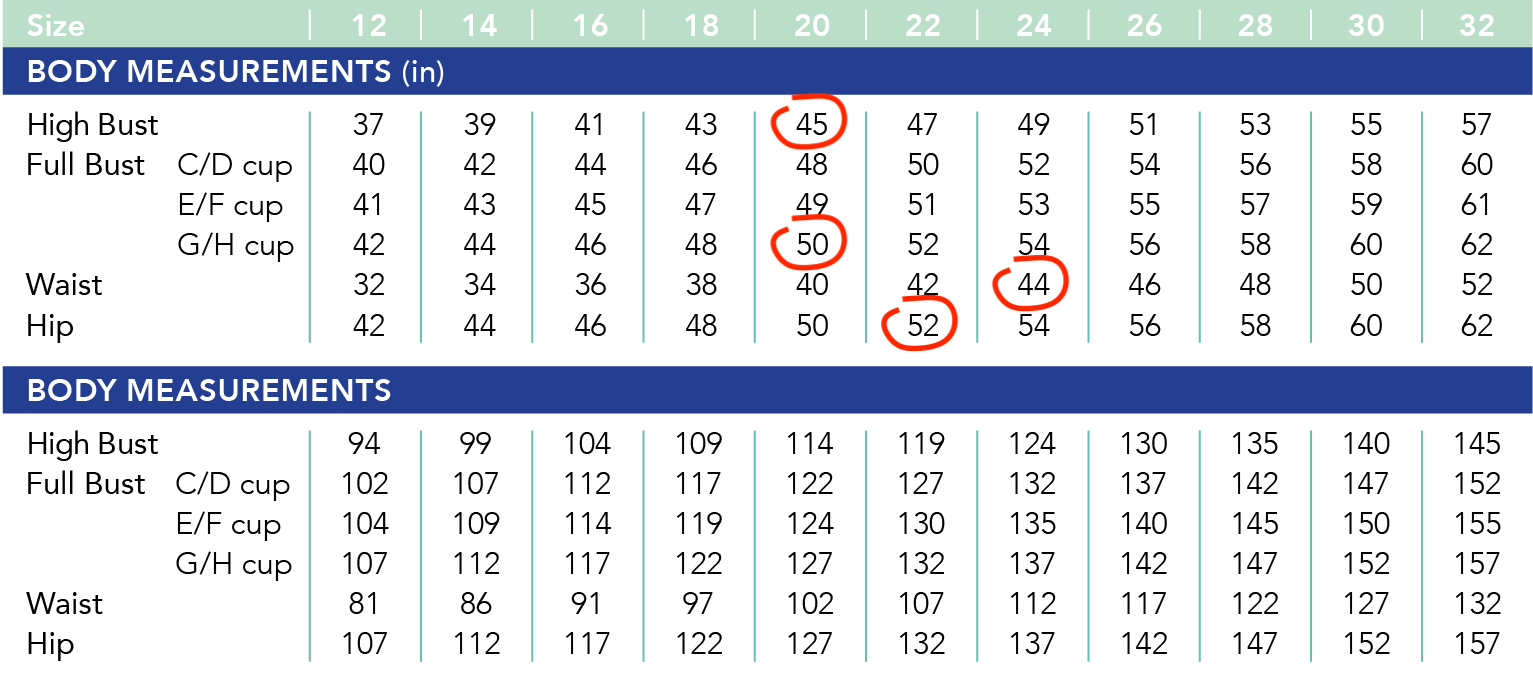
If your measurements fall across more than 1-2 sizes, or if you plan to wear your blazer buttoned up, you’ll need to grade between sizes. For example, if your measurements are 45″ high bust, 50″ full bust, 46″ waist, and 54″ hip, you’ll need to grade between a 20 G/H bust, 26 waist, and 24 hip. We’ll show you how that’s done in the next section.
How to Grade Between Sizes on the Auburn Blazer
Once you’ve determined what sizes you need to grade between, grab your side front (#2 A/B/C) and side back (#7) pieces. We’re going to calculate how much grading we need to do, and then draw our new lines on our pattern pieces.
For patterns without princess seams, you can simply “connect the dots” of the bust, waist, and hip notches for the different sizes you need. For patterns with princess seams, grading gets a bit more complicated. Rather than adjusting the princess seams themselves, which is very complicated and can easily lead to a poor result, we recommend creating the adjustment at the side seams.
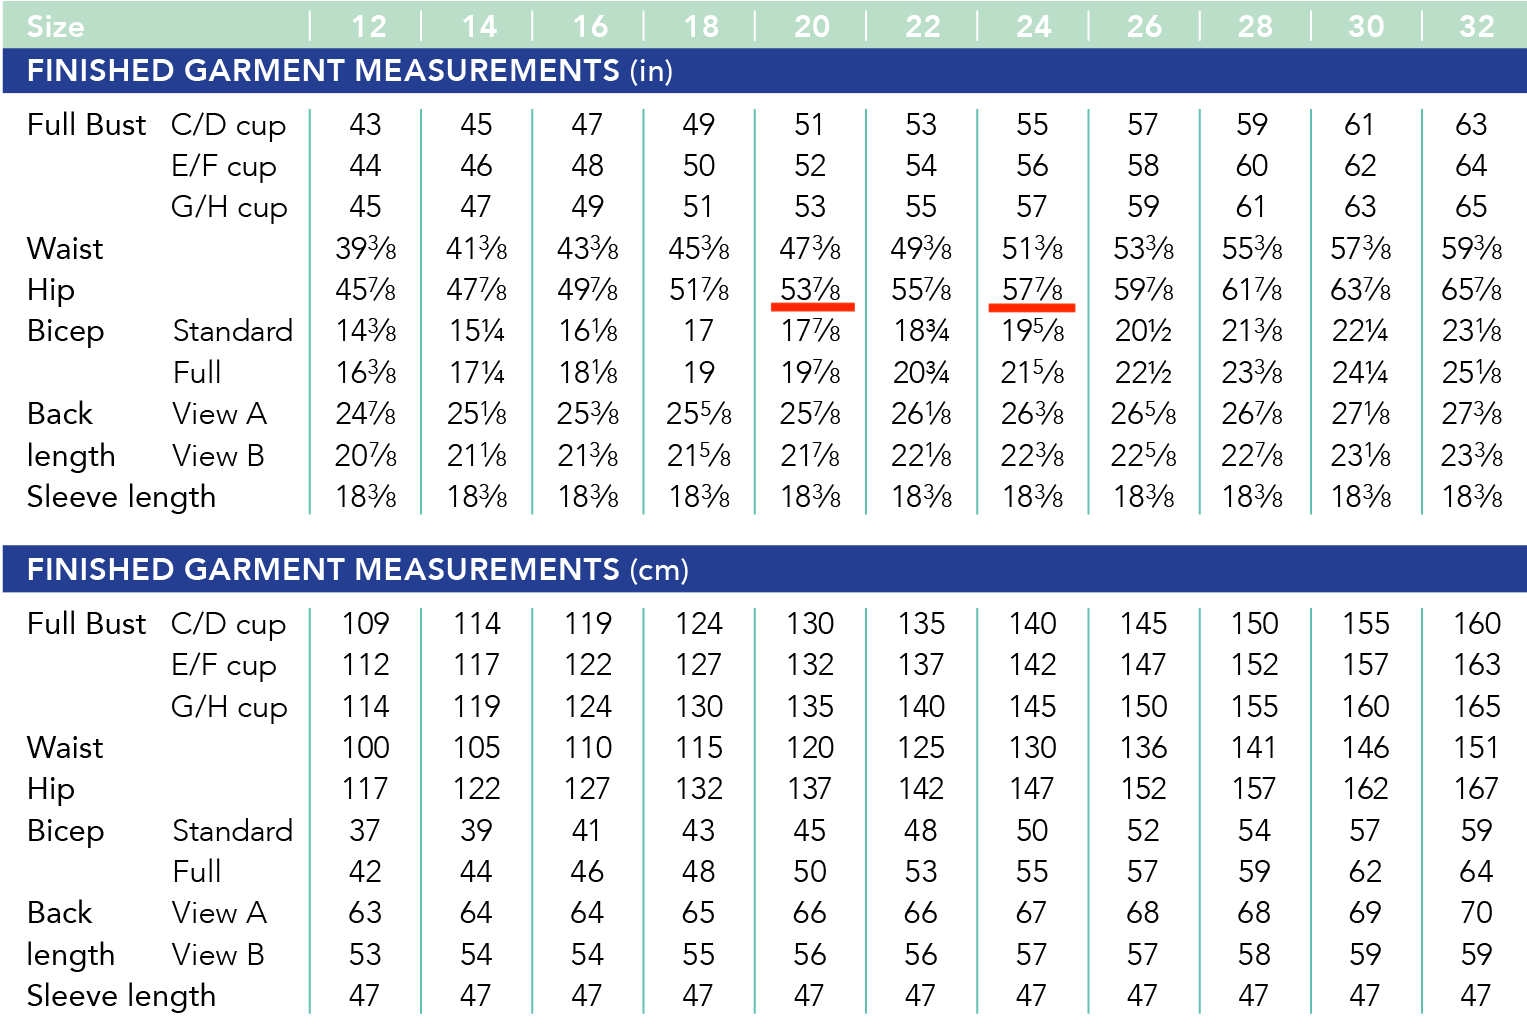
Let’s say we need to make a size 20 G/H bust, graded to a 22 waist and a 24 hip. If we look at the finished garment measurements chart for the Auburn Blazer, we can see that the difference between the waist on a size 20 and a size 22 is 2 inches.
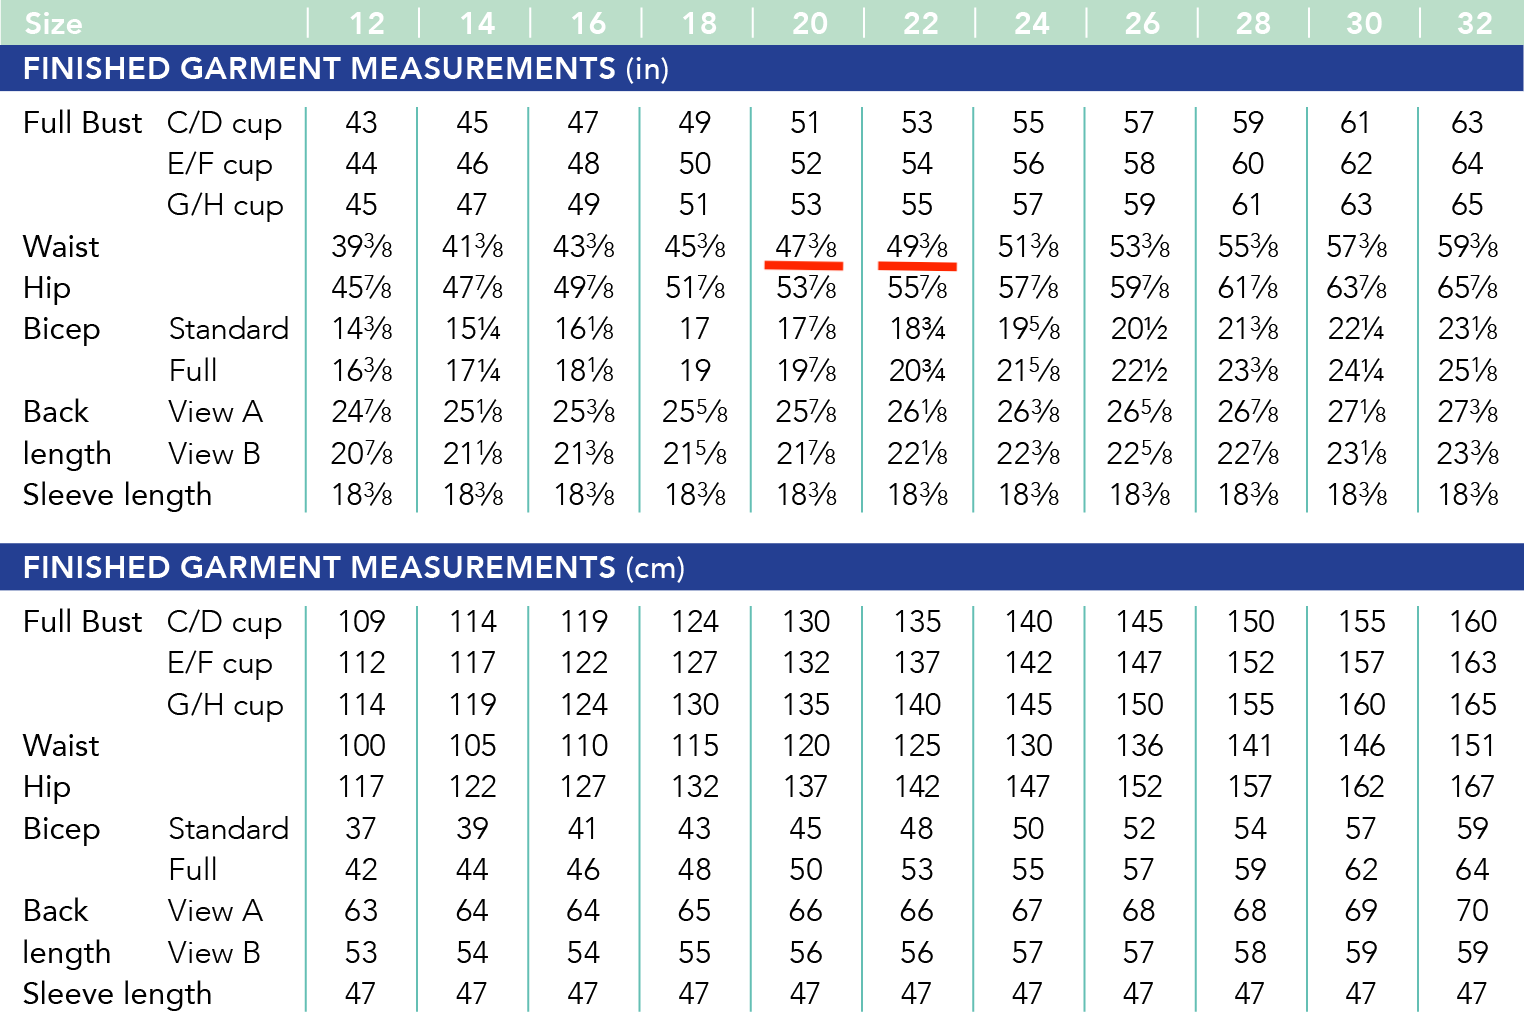
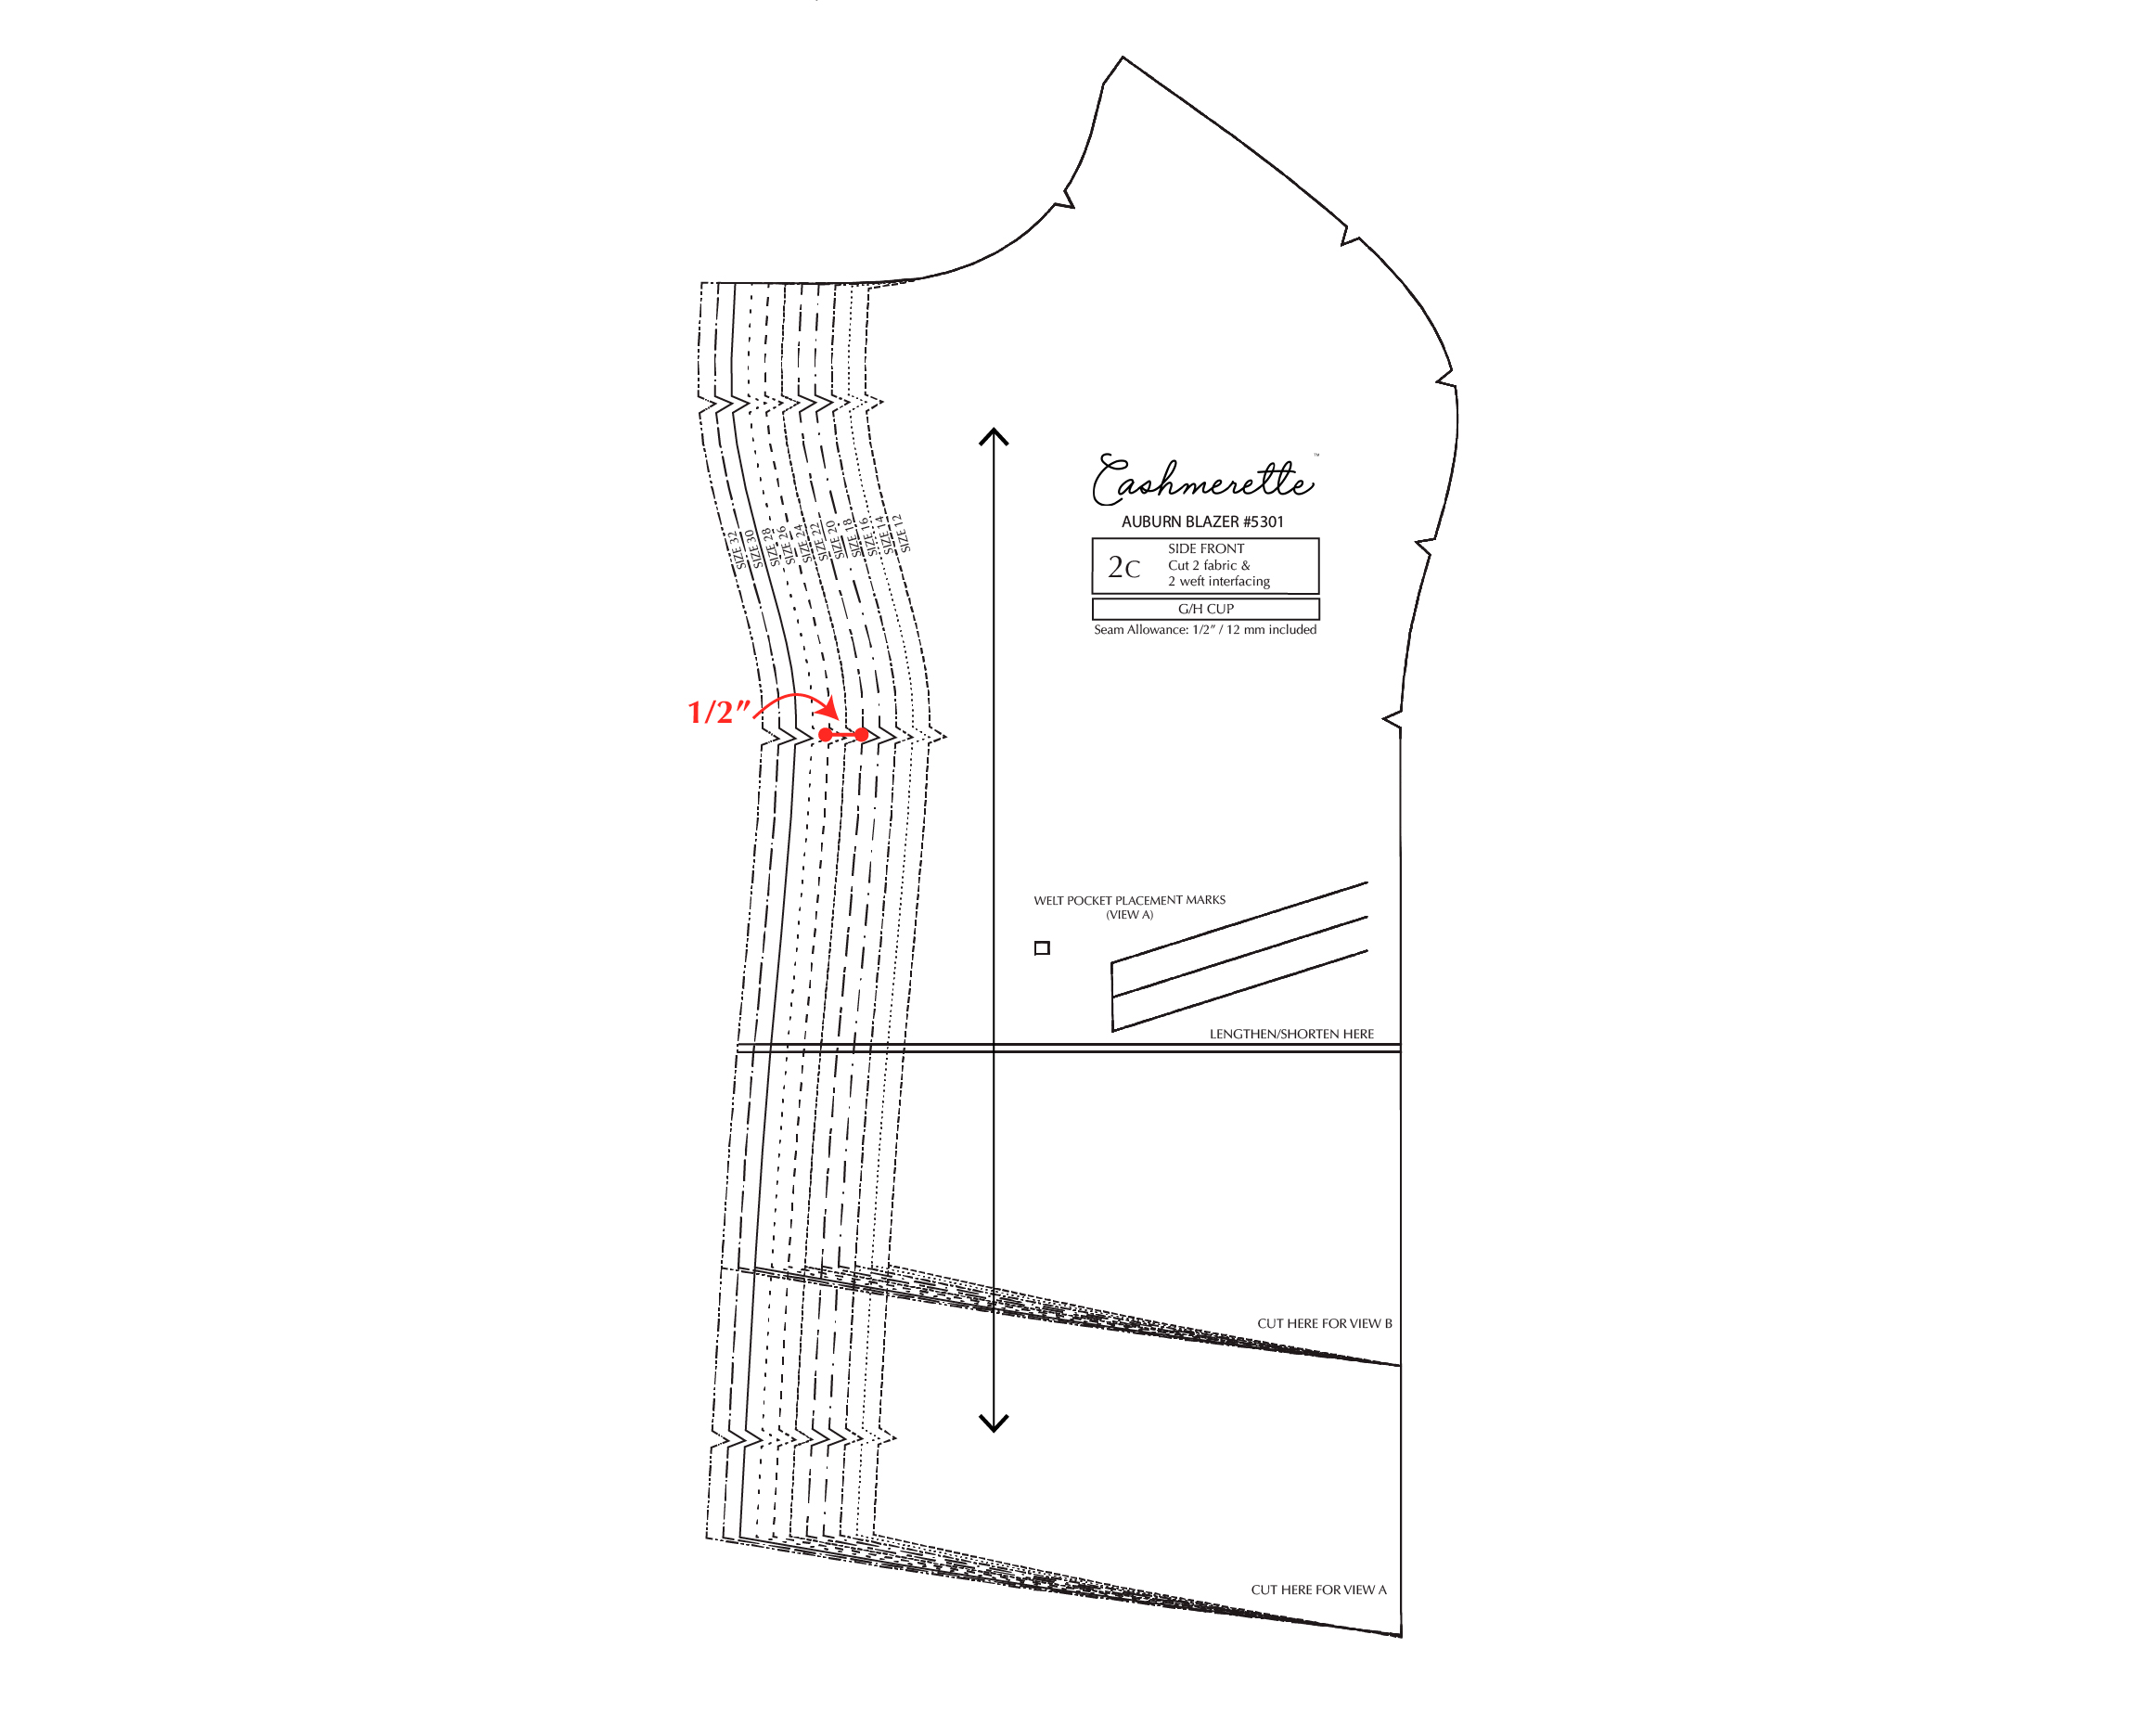
We’re going to divide that by 4, because the front and back side pieces are each reflected across the body. That gives us 0.5″ that we need to add to our side seam.
Let’s make a marking on our pattern piece that is 0.5″ away from the waist notch of the size 20.
Similarly for the hip, the finished garment measurements chart shows a difference of 4″ between the size 20 and size 24. Dividing that by 4, we now know we need to add 1″ to the hip, so let’s measure 1″ away from the hip notch of the size 20.
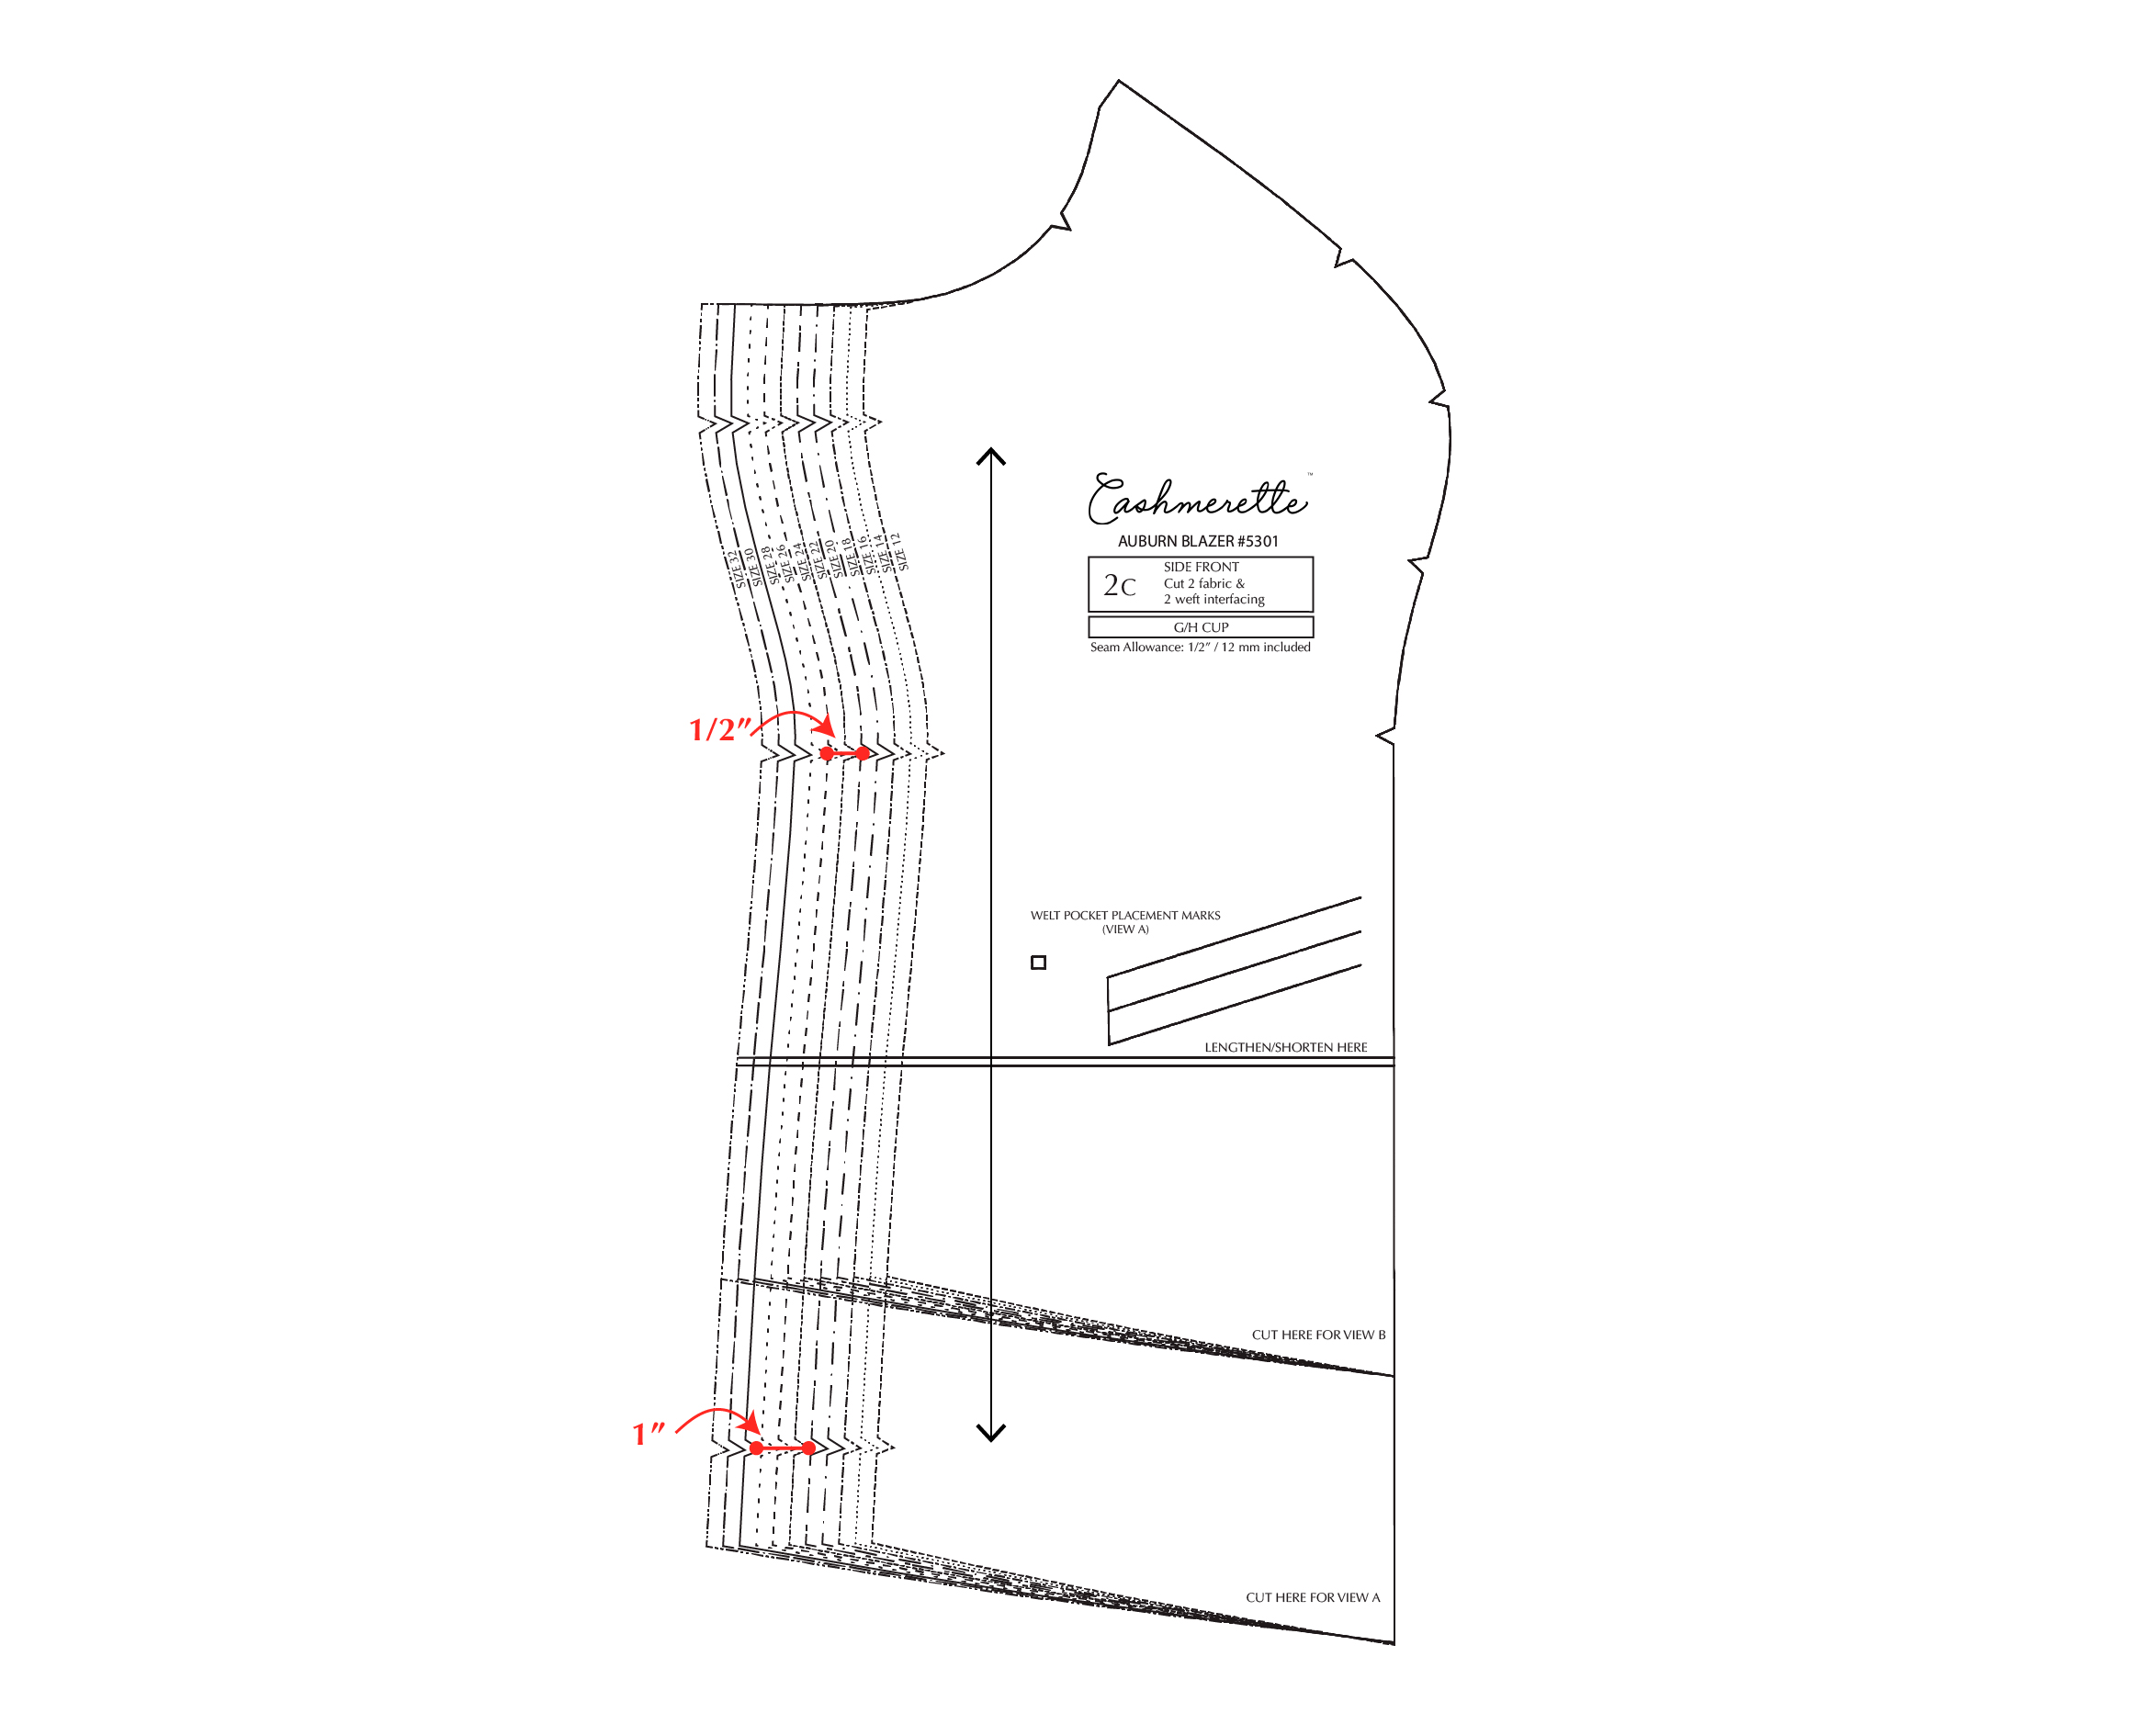
Using a French curve, we can draw new lines to connect our new sizes.
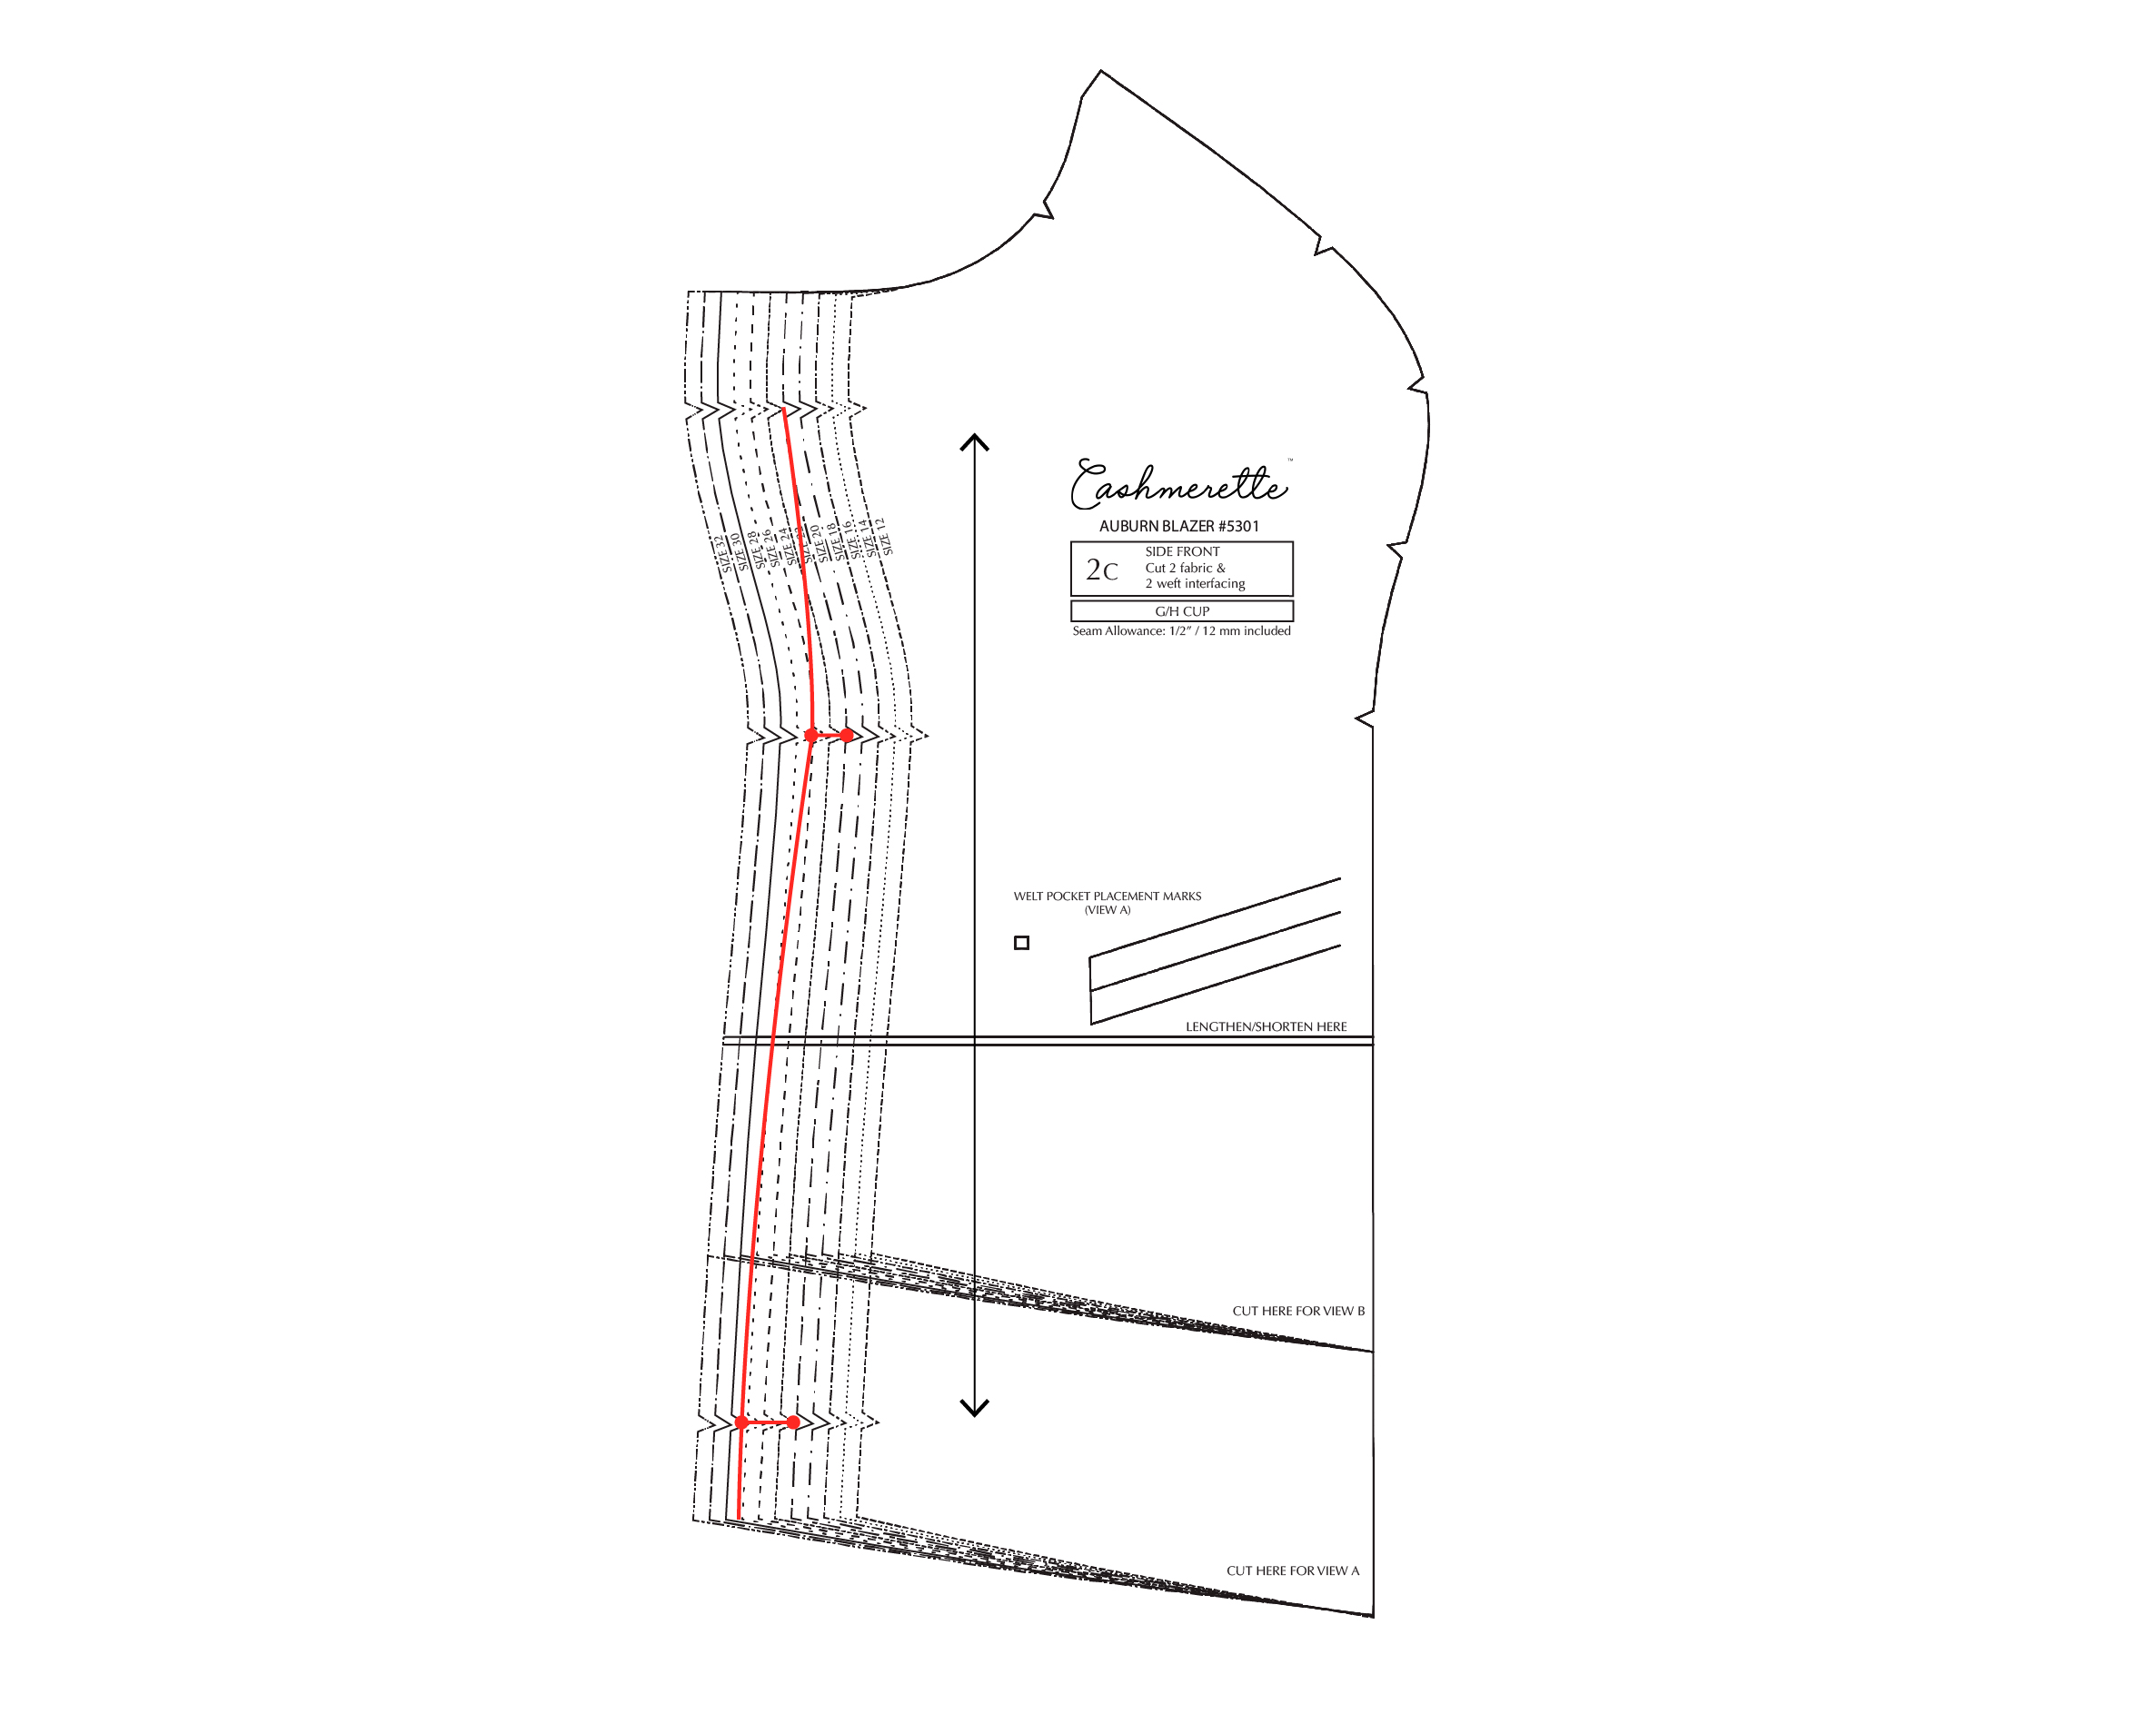
So that’s our new front side piece. We’ll need to do the same to our back side piece, as well as our lining front side (#14 A/B/C) and lining back side pieces (#16).
Not so bad, right? This adjustment requires a little bit of math, but you’ll end up with a fabulous result because you’ll have a garment that’s specifically designed to fit your unique shape. If you have any further questions about grading between sizes on the Auburn, check out our grading guide or drop us a note at hello@cashmerette.com!

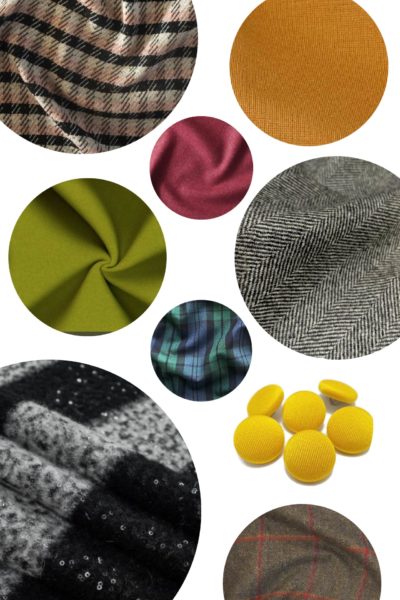

Would a raw silk or sand washed silk be too light for this blazer?
It would depend on the weight of it – theoretically one of the thicker, nubblier silks, if interfaced appropriately, could work.