Are you ready to sew your Auburn Blazer? Today, we’re kicking off our sewalong by going through our prep checklist to make sure our pattern and fabric are ready for us to start. Thanks for joining us!
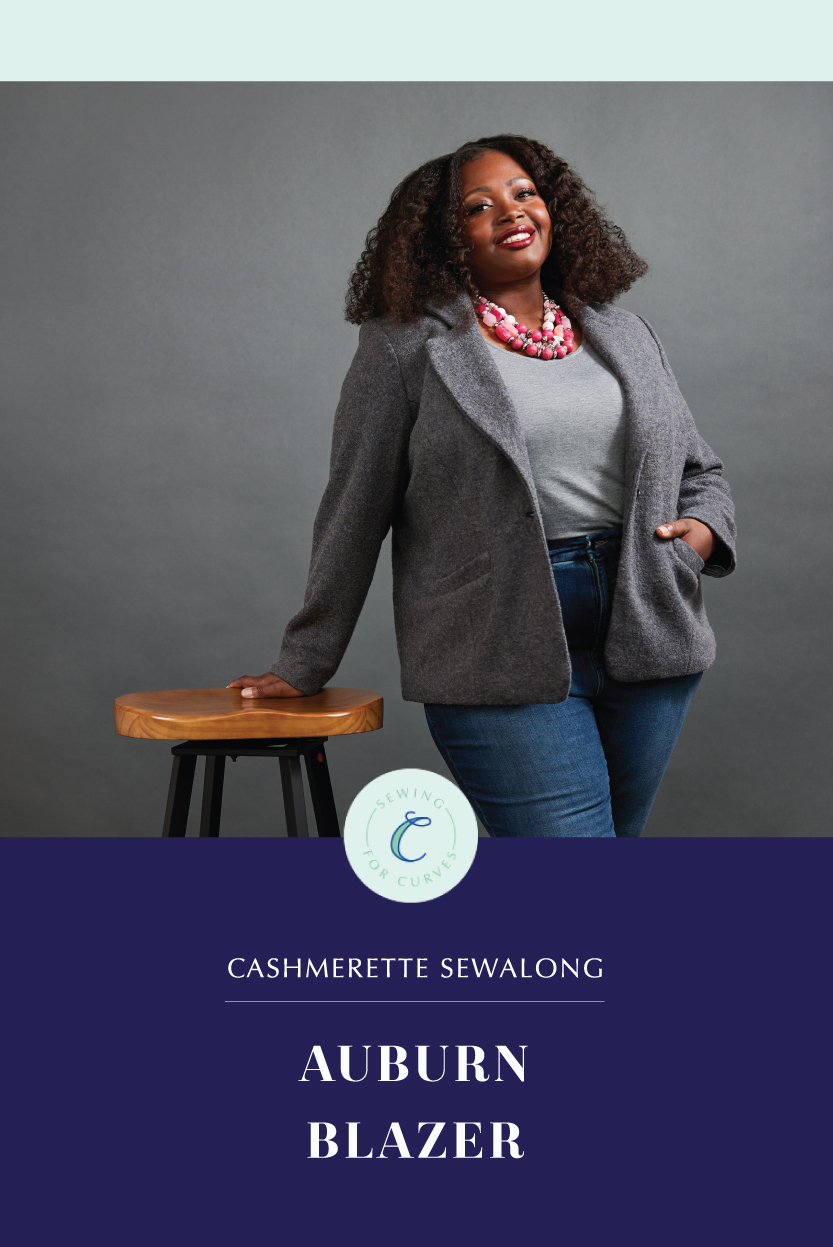
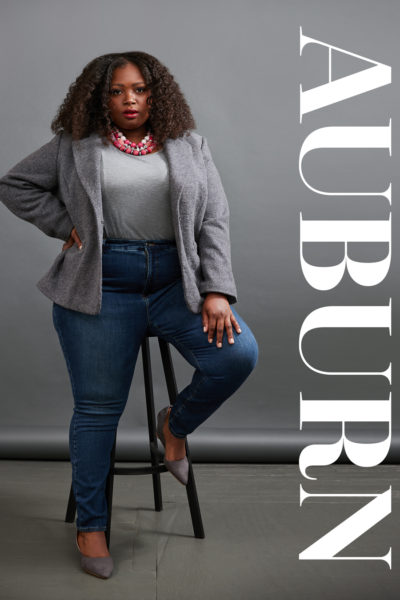
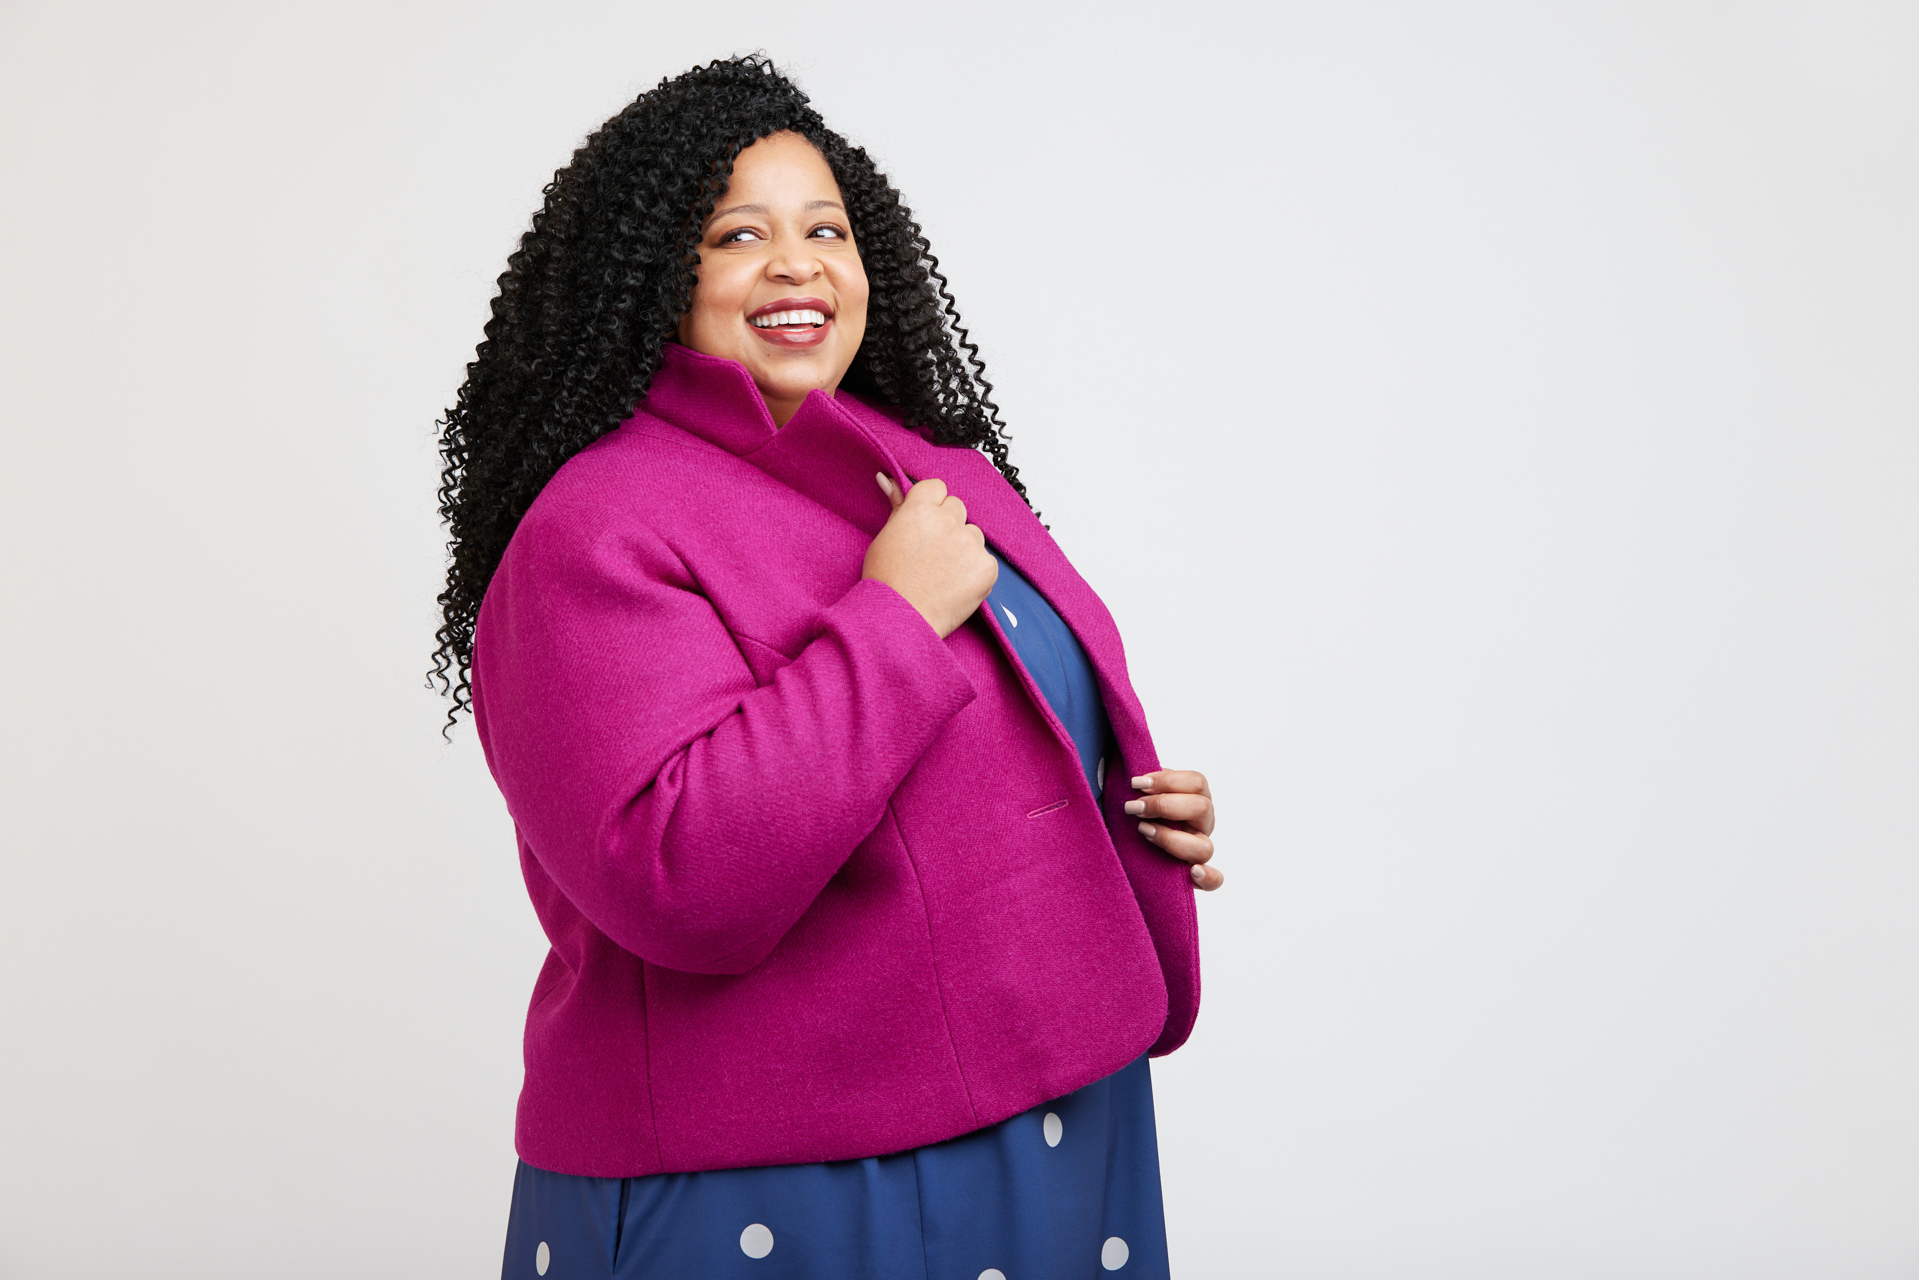
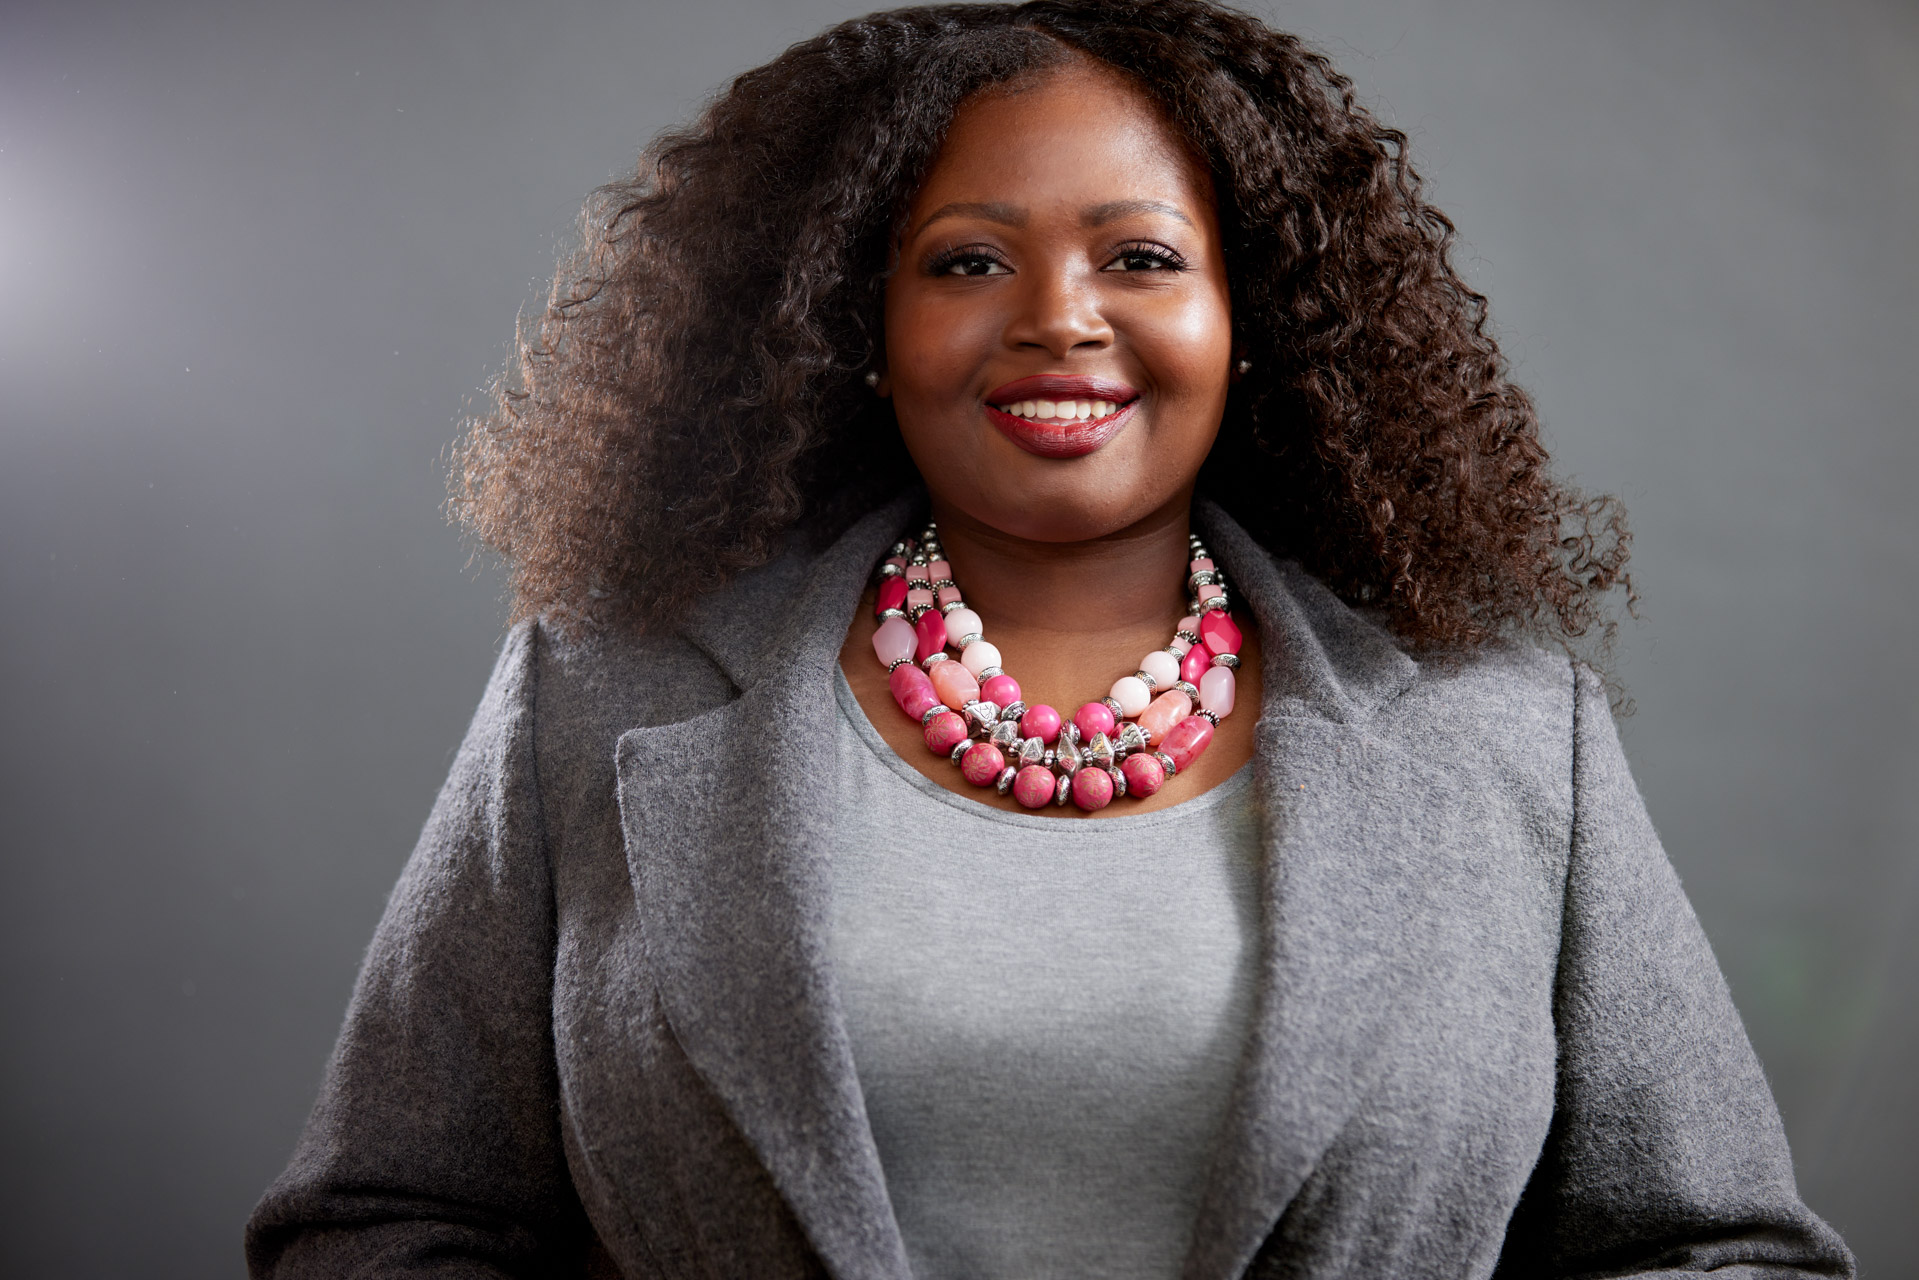
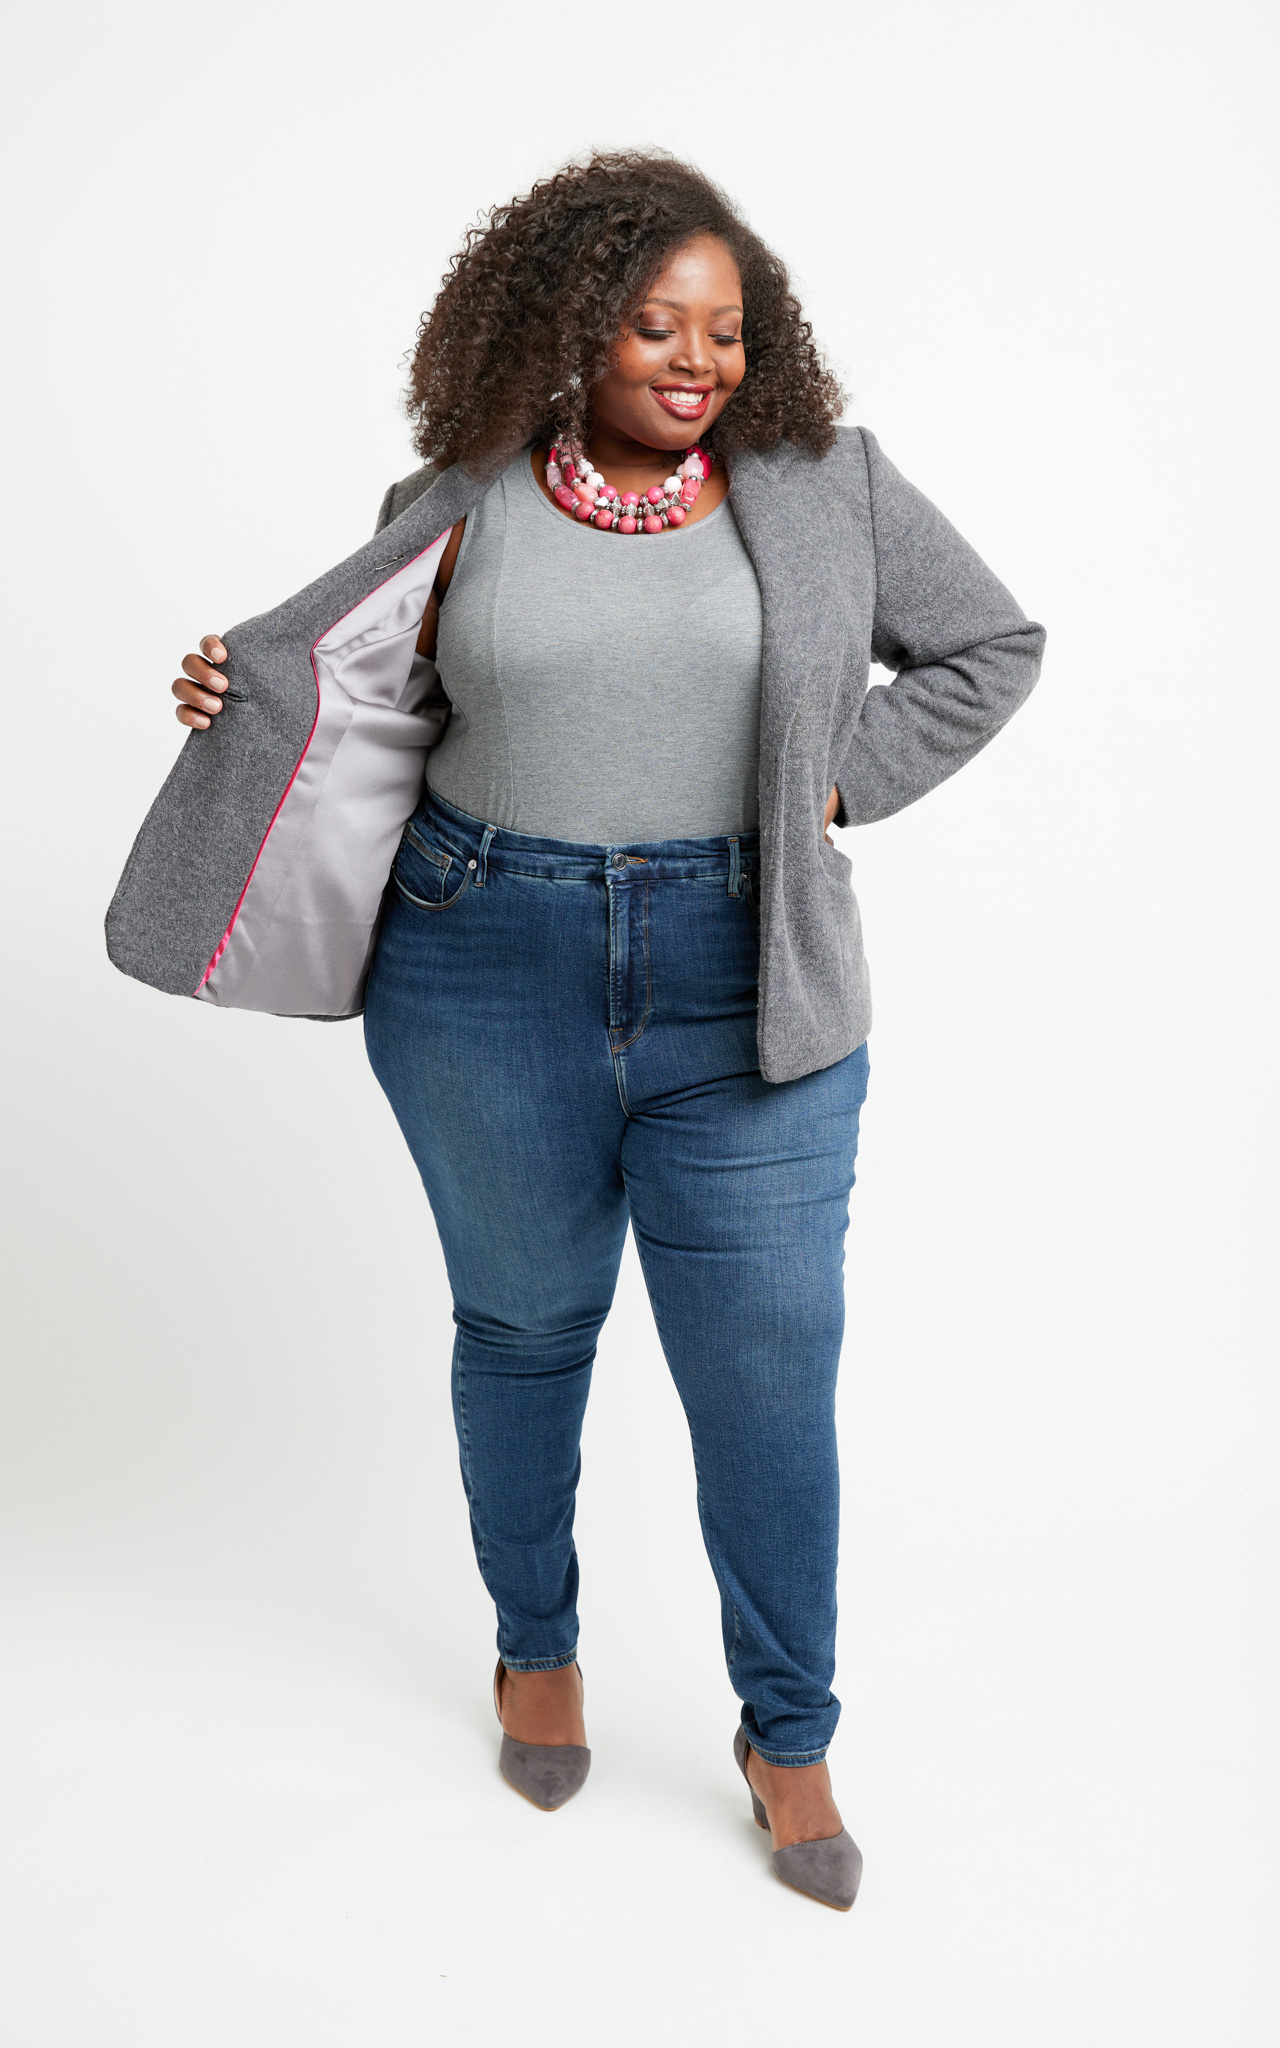
Finally—a blazer designed specifically for curves! The Auburn Blazer is a curve-friendly blazer sewing pattern in sizes 12-32 and cup sizes C-H, with sleek princess seams and all the details you love in a blazer: angled single welt pockets, a notched collar, and two-piece vented sleeves. Or go with View B for a cropped look and quicker sew. Either way, you can sew your Auburn in a woven, stretch woven, or stable knit—the possibilities are endless!
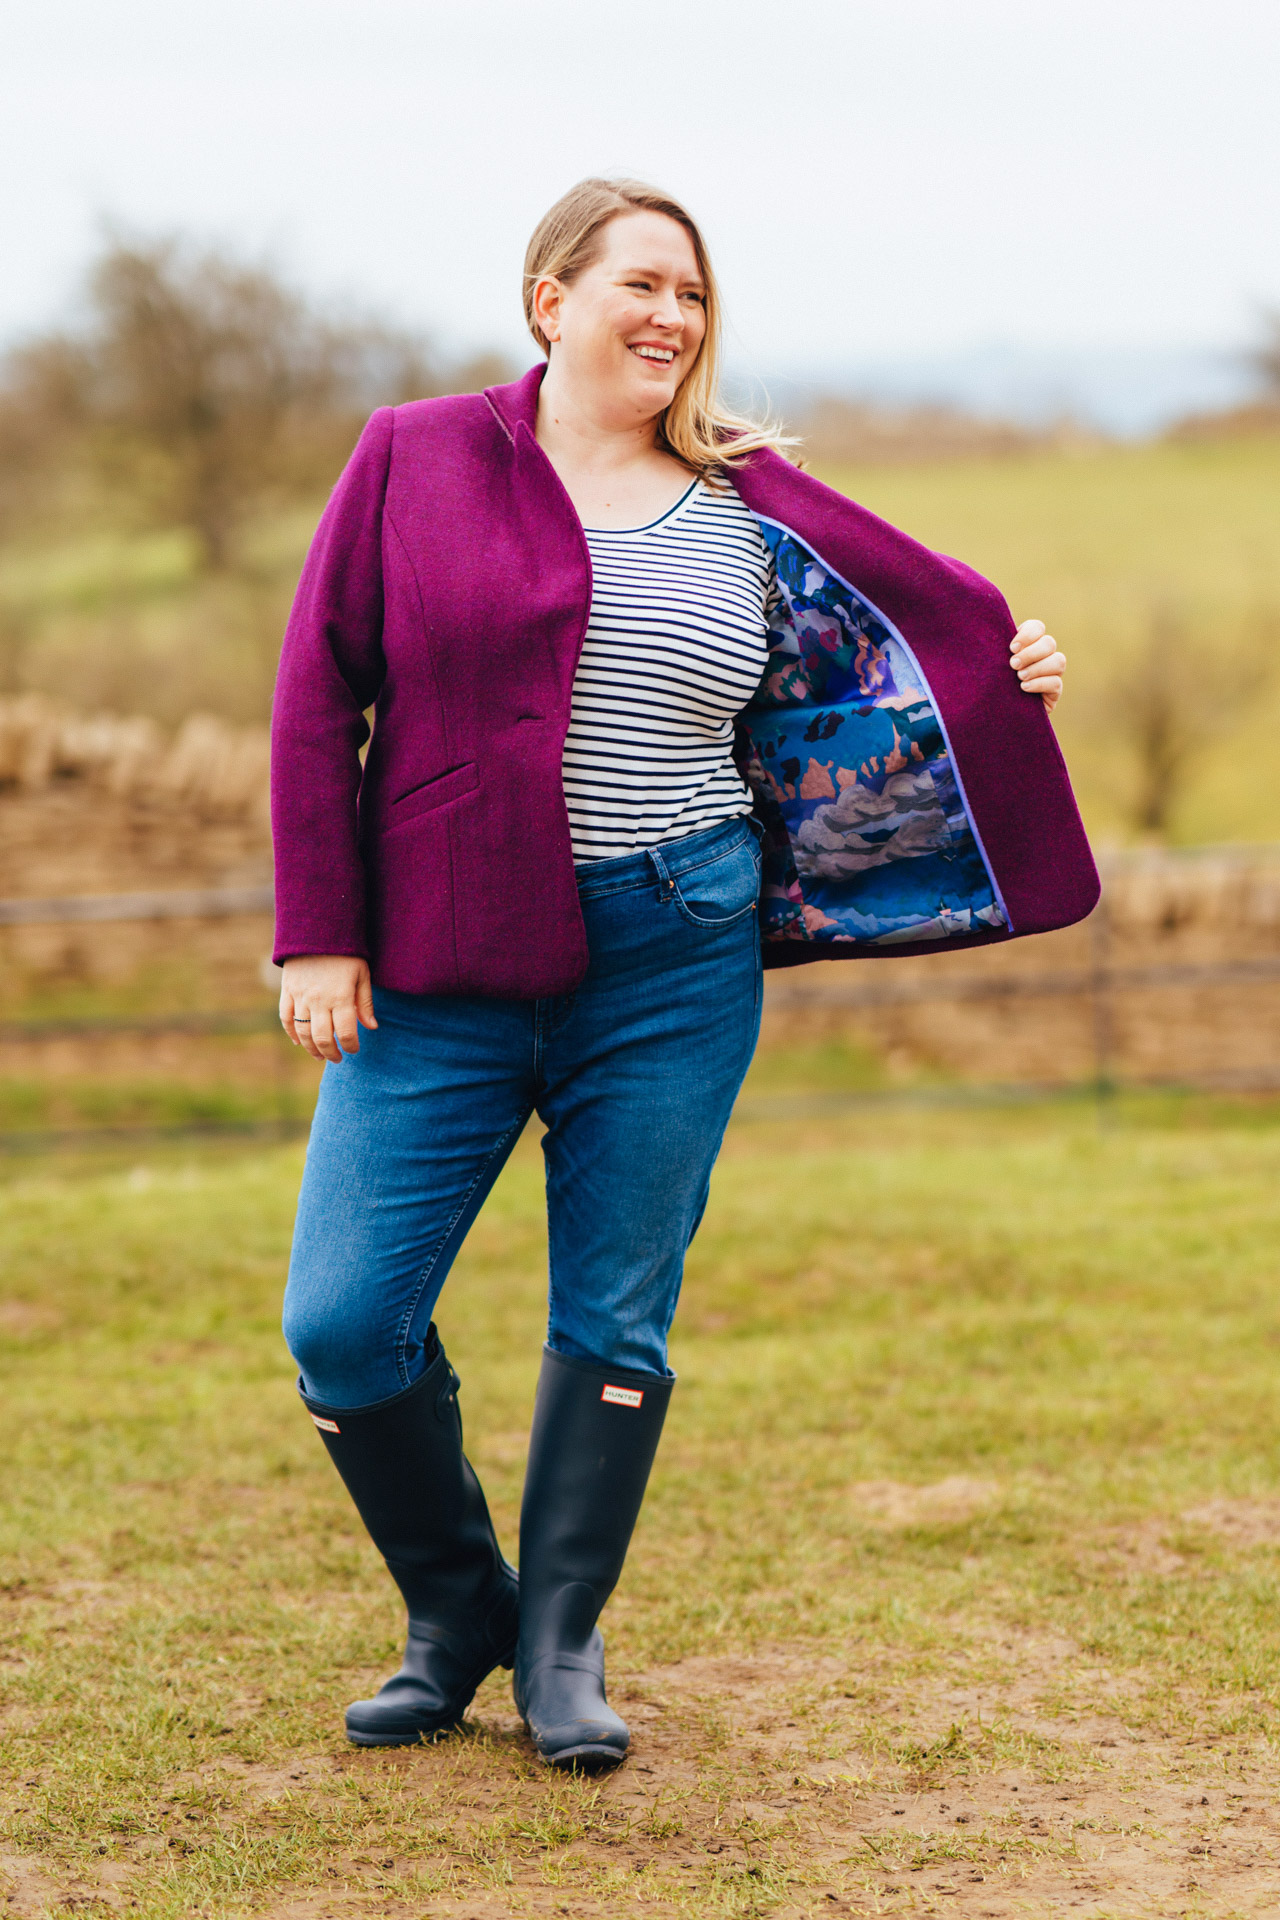
Once you’ve checked out our ready-to-wear blazer inspiration and our fabric and notions suggestions (as well as Jenny’s epic purple Harris Tweed Auburn), it’s time to get started sewing.
First up, we need to pick our size. Thanks to the three cup sizes it’s more likely that you’ll fit in a “straight” Cashmerette Pattern than many other companies, but of course we all vary and chances are you may not be perfectly in one size. The good news is that sewing gives you tons of flexibility, and it’s easy to grade between sizes.
How to Choose Your Size
The fastest way to find your ideal starting size is by using our Size Calculator! Try it here.
There are two measurement charts: one is the Body Measurement chart, and the other is the Finished Garment Measurements chart. The Body Measurement chart helps you choose your size based on what numbers you get when you measure your body with a tape measure—it has numbers for your high bust, full bust, waist and hip.
(Not sure how to measure yourself? Check out our guide here.)
The Finished Garment Measurements chart shows you the size of the actual sewn garment. The difference between that and the Body Measurement chart is called “ease”, and it’s the amount of extra room or stretch in the garment that the designer recommends for the clothes to fit well and allow movement.
Generally, you want to start by comparing your measurement with the body measurement chart. However, if your measurements are between sizes you can take a look at the Finished Garment Measurements chart to see if you can fit in just one.
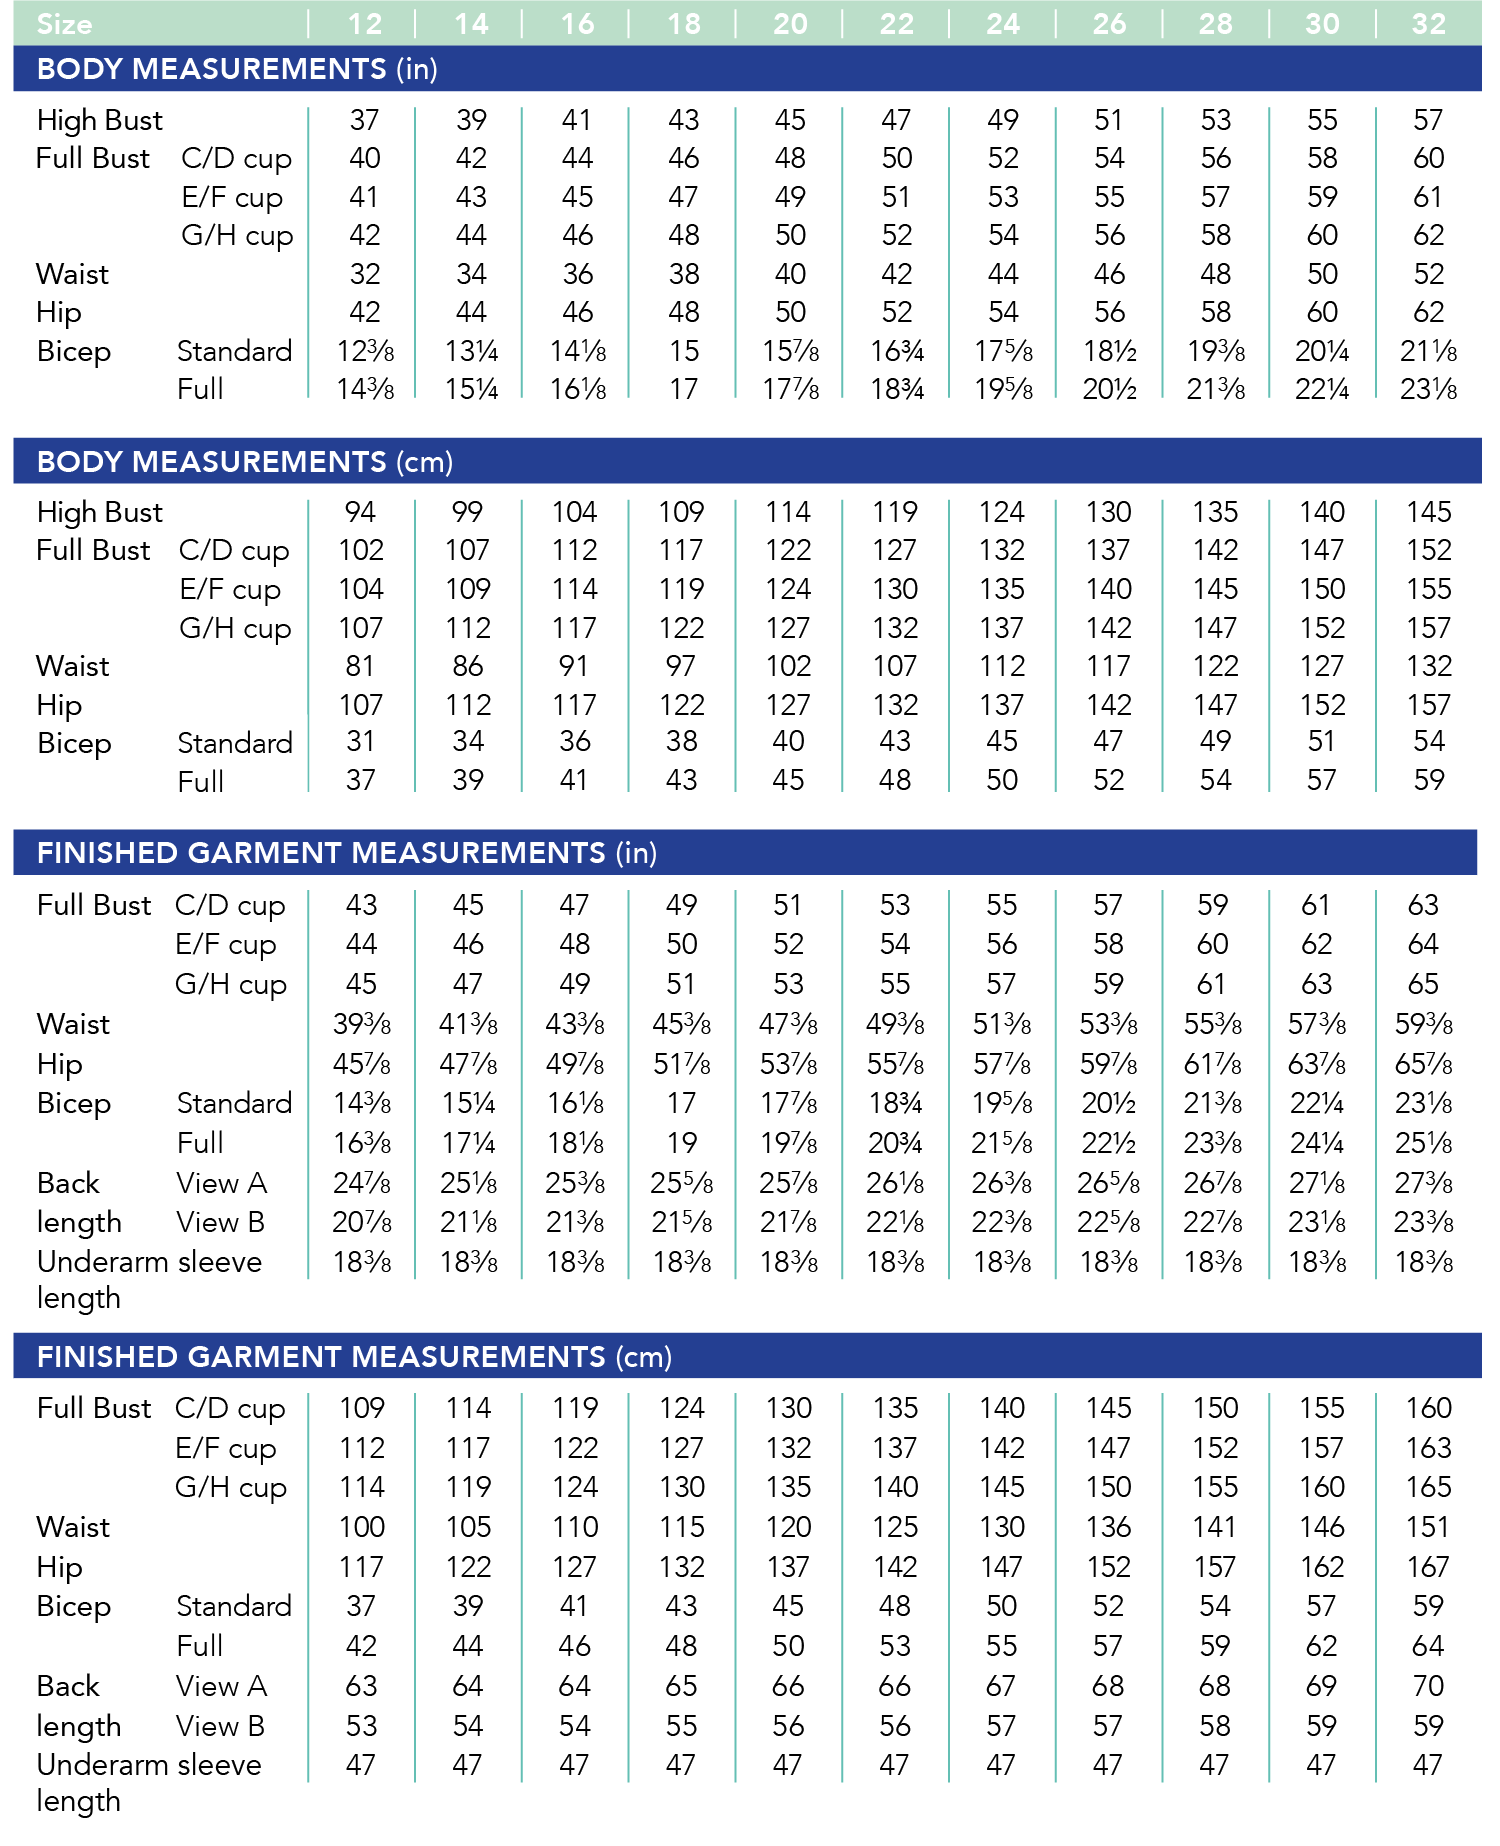
For the Auburn Blazer—as with all Cashmerette patterns—the best bet is to start with your high bust and full bust measurements. You may find that your full bust can fit into multiple size—for example, if your full bust is 48″, you may be an 18 G/H or a 20 C/D—so your high bust will clue you in as to which size and cup size you should use. In this case, if your high bust is 43″, you’d go with the 18 G/H, while if your high bust is 45″, you’d go with the 20 C/D.
Don’t fret if the cup size doesn’t match up with your bra size–there is so much variation in bra sizing that it’s not possible to perfectly line them up. Use your actual full bust measurement and you’ll be fine.
The Auburn sleeves come with standard and full bicep options, so you’ll also want to select your sleeve option. Refer to the body measurements chart to see which sleeve option is best for you. (We’ve got more info on fitting the Auburn sleeves here.)
Grading Between Sizes
If your bust, waist, and hip measurements end up in different sizes, you may want to grade between sizes. For a rundown of how to grade between sizes on the Auburn Blazer, check out this tutorial here.
Still not sure what size to use? You can write to us here for additional fitting advice.
Preparing Your Pattern
Now that we’ve chosen our size and graded if necessary, it’s time to prepare our pattern.
Here’s what you need to do:
- If you’re using the PDF pattern and are printing your PDF pattern at home, you’ll need to print and assemble it. Here are some pointers to help you. If you want to get it printed, here are some suggestions.
- Either cut or trace off your pattern pieces. If you’re using a paper pattern, making adjustments, or are going to make any other sizes in the future, we definitely recommend tracing.
Making a Muslin
If this is your first time making an Auburn, we recommend making a muslin first using an inexpensive fabric that has similar weight, drape, and stretch to your final fabric. You can take shortcuts like skipping the lining and omitting the pockets—you’re trying to get a general sense of the fit, not do all the fussy bits. (Although your muslin could be great practice for those steps as well!)
Before trying on your muslin, make sure to insert your shoulder pads (you can safety pin them to in temporarily, if you want) so that you can get the truest sense of how the blazer will fit in the shoulders and sleeves.
Adjusting the Fit
Once you’ve made your muslin, put it on and take a look in the mirror. Does it fit as intended? We have a full fit guide for the Auburn Blazer here to help you answer any fit questions you might have, as well as tutorials for fitting the bust, shoulders, and sleeves of the Auburn.
If you find that you want to make fit adjustments, make those changes to your pattern pieces before cutting into your final fabric.
Preparing Your Fabric
Here’s your fabric prep checklist:
- Pre-wash your fabric to make sure it’s pre-shrunk and you’re not going to get any nasty surprises later! Be sure to follow manufacturer instructions for how to do this—if you’re working with a wool or wool blend, your fabric may be dry-clean only.
- Pre-treat your fabric if needed. For many wool and wool blends, this means running a hot, steamy iron all over your fabric to help it shrink a tiny bit. This ensures that when you apply your interfacing to your cut pieces, the wool doesn’t shrink on you and distort the interfacing.
- Press your fabric so it’s nice and flat. Check to see if you get any iron shine when you press the right side. If so, you’ll want to use a press cloth when pressing between steps.
Finally, it’s time to cut into our fabric!
- Cut all pieces, following the layout diagrams in the pattern.
- Transfer all the markings to the fabric. For the notches, make a little snip into the fabric within the seam allowance (so no more than 1/4″ / 6mm).
Made it this far? Give yourself a pat on the back and get ready for the fun part—the sewing!
We want to see your creations, whatever stage of the process you’re at! Tag your makes with #AuburnBlazer on social media so we (and the whole sewing community) can cheer you on to the finish line!