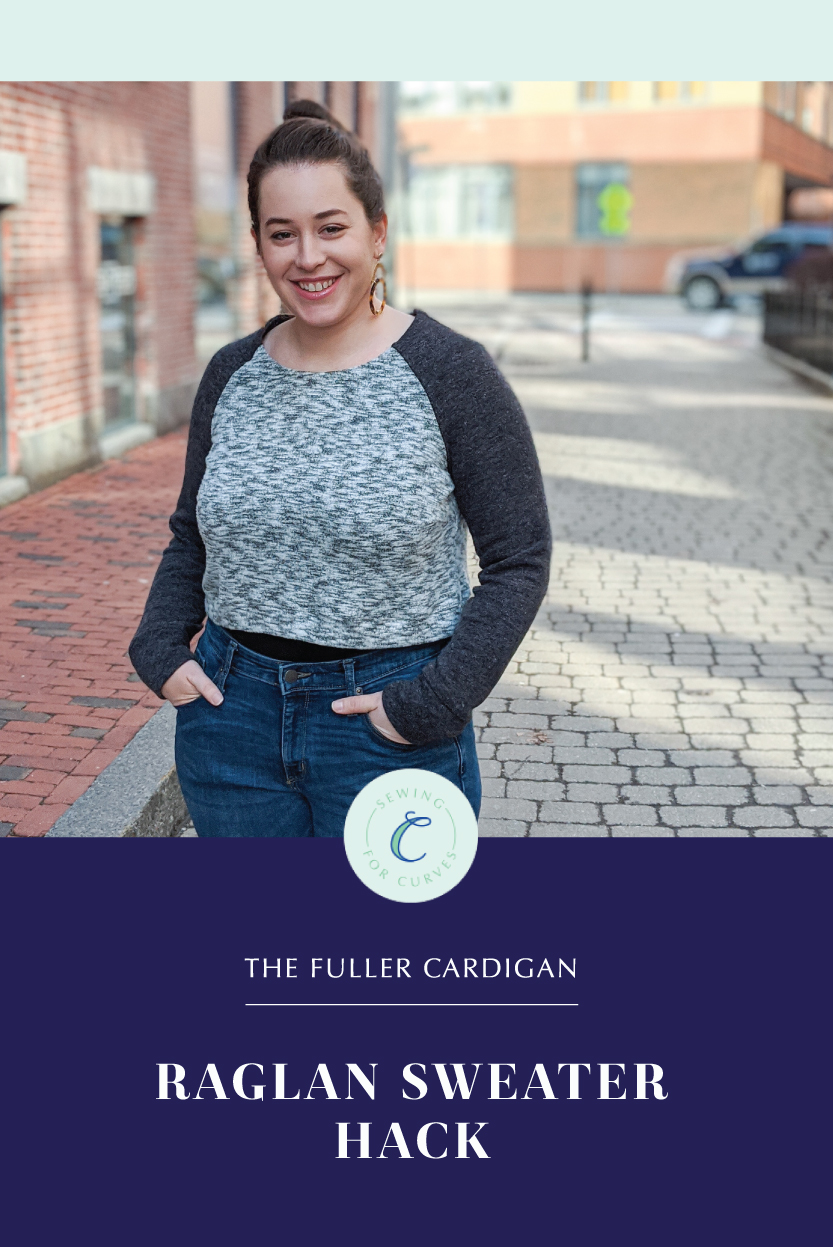
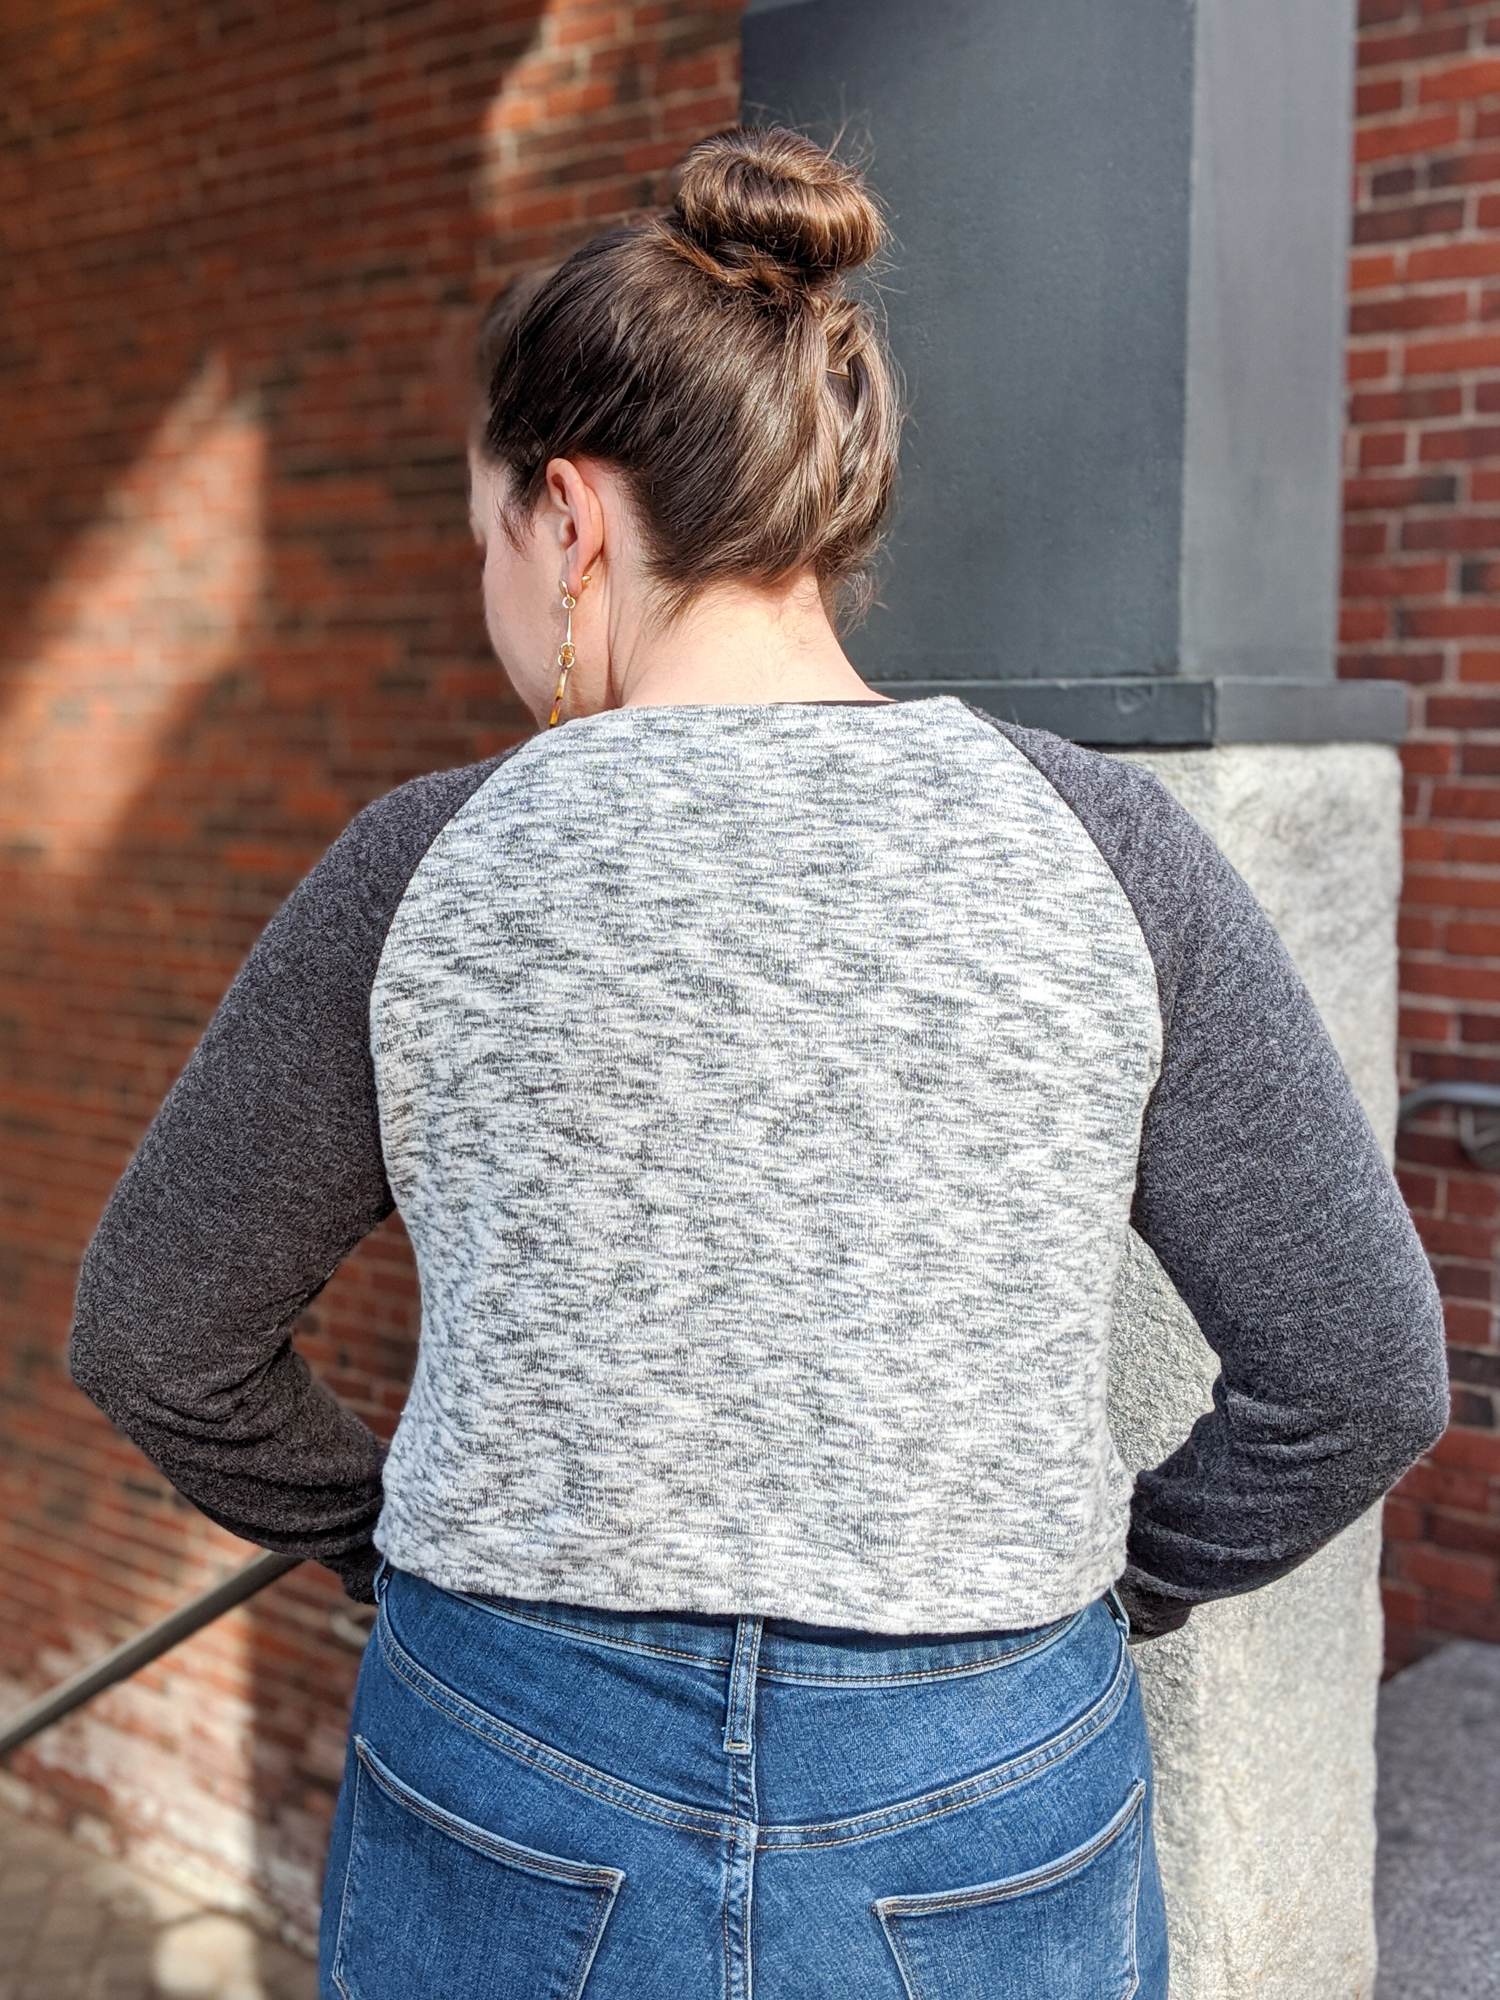
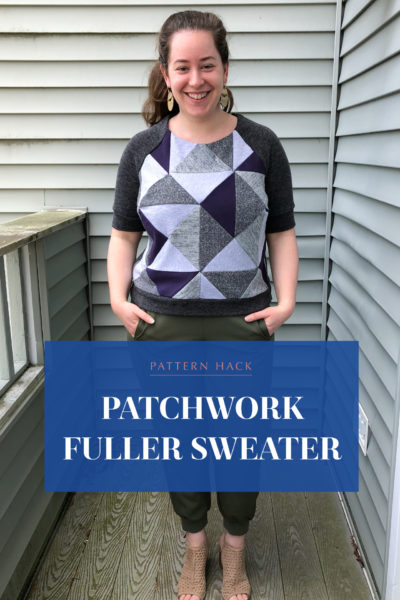
The Fuller Cardigan is the raglan cardi of our dreams, and today we’ll be showing you how to turn it into the raglan sweater of your dreams!
Turning a sweater pattern into a cardigan can be a bit of a head scratcher, but luckily going the other way around is super easy! I think you’ll be delighted to see just how easy it is, and how much further you can make your cardigan patterns go with this hack.
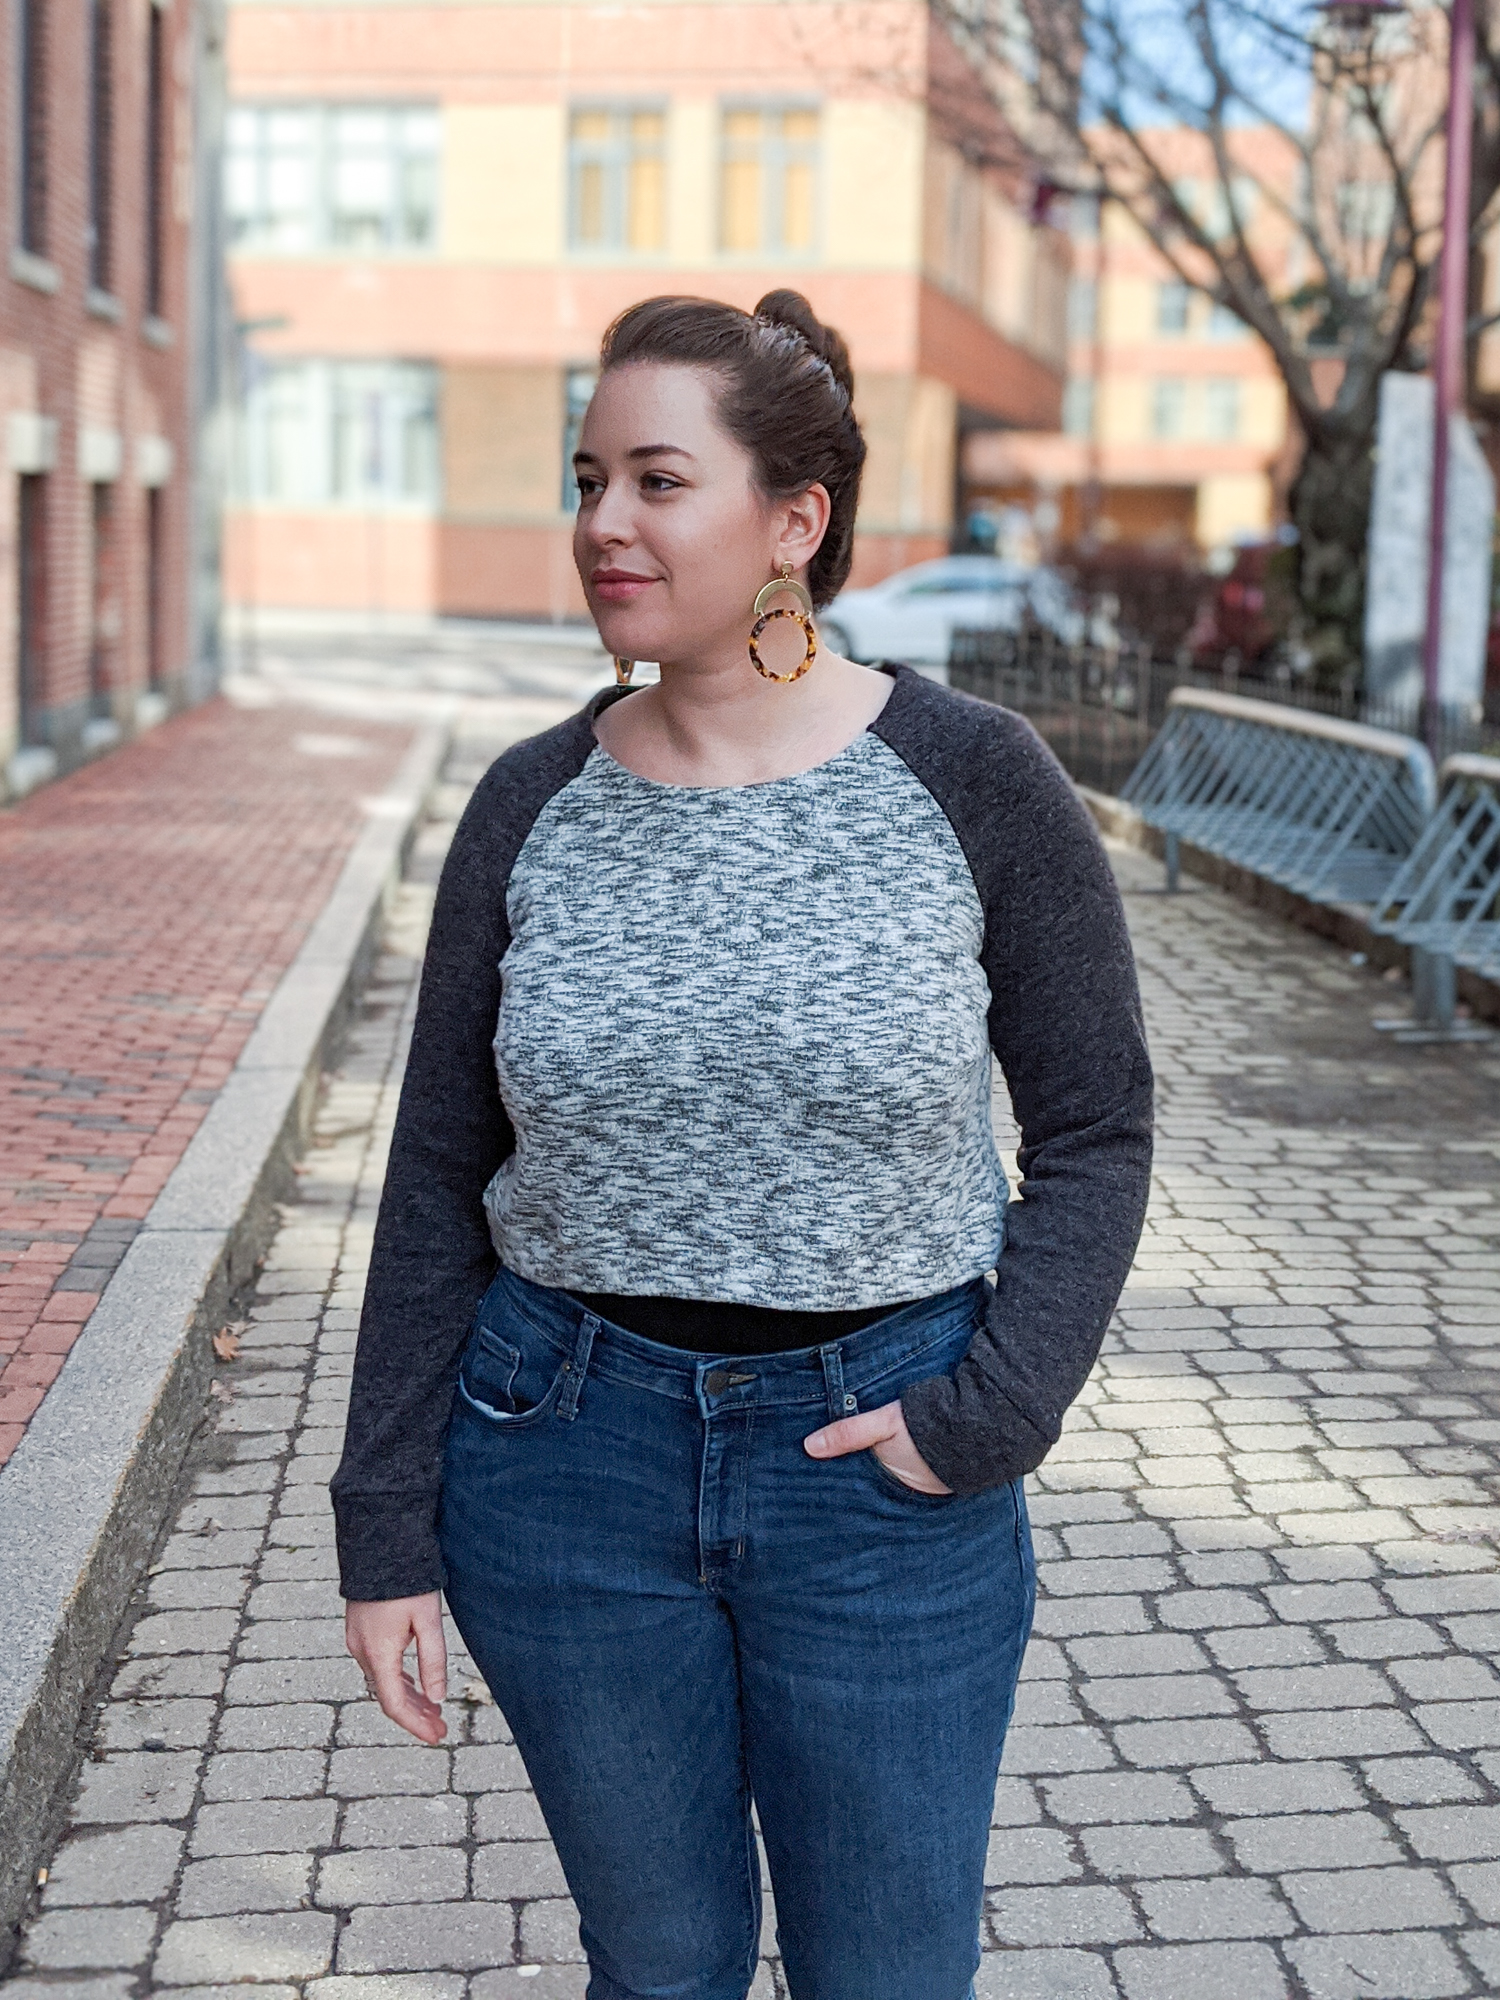
For the sweater we’re making today, we’re going to be using View B of the Fuller Cardigan using the long sleeves of View A, but you can just as easily do View A with View B sleeves, or any combination of neckline, length and sleeves that you desire.
Okay, let’s get started. For this hack, we need to eliminate the button band on the front bodice (1 A/B/C) so that we can cut the front on the fold. We’ll also need to tweak our front facing piece (4B) and our front waistband (7). Here are the pieces we’ll be adjusting:

Let’s start with the front bodice. We’re going to trim off the 3/8” (1 cm) seam allowance (which attaches the facing to the bodice). The two sides of the front also overlap by 1/2” (1.3 cm) at the button band, so that means that the bodice extends 1/4” (0.6 cm) beyond the true center of the front. We’ll eliminate that as well.
So to recap, we’re going to trim the center of the front bodice by 3/8” + 1/4” = 5/8” (1.6 cm). That will allow us to cut the front bodice on the fold.

Let’s do the same thing with the front hem band—we’re going to remove 5/8” (1.6 cm) from the center (the side without the notch). If you’re making View A which doesn’t have a hem band, you can skip this part!
Finally, we need to adjust the front facing. As you can see, this piece scoops around the neckline and then drops down to the hem. Since our front is now a solid piece, we don’t need to face anything but the neckline.
To adjust this piece, we’re going to first continue the bottom curve of the front facing to the center. It’s okay if this curve isn’t totally perfect—it’ll be on the inside of your sweater anyway.

After that we’re going to eliminate the 5/8” (1.6 cm) from the center like we did with the other two pieces.

And there we have it! Our three adjusted pieces are ready, and all can be cut on the fold.

Here are the adjusted pieces cut out:

Time to sew up our sweater! We’ve just shaved off quite a few steps in the sewing process so this Fuller sweater will be sewn up in no time.
Follow the instructions of the Fuller Cardigan to sew the bust and shoulder darts, and to attach the sleeves to the front bodice and the back bodice. We’re going to pause there and not sew up our side seams just yet—it’ll be easier to attach our neck facing when we can lay the garment flat (sort of).

Now let’s assemble our neck facing. Don’t forget to apply your interfacing first! You may want to use stretch interfacing to make sure you can get the sweater on over your head. I’m using black interfacing for my sweater.
Attach the shoulder facings to the front facing (along the more angled edge of the shoulder facing) and then attach the back facing. Finish the outer edge of the facing by folding and topstitching, or by serging.

Now let’s lay the facing on top of the neck opening and pin.


We’re going to sew this seam at our 3/8” (1 cm) seam allowance.

Understitch the facing to the seam allowance (this helps keep the facing from peeking out) and then fold the facing towards the inside of the sweater and press. Pin or use Wonder Tape to hold it in place. Topstitch the facing down from the right side 1 3/8” (3.5 cm) from the neck edge.

Okay, now we can sew up our side seams and attach our hem band. Remember that our front hem band is now cut on the fold, so we need to attach it to the back hem band at both ends before folding, pressing, and attaching to our bodice. If you’re sewing View A (without the hem band) you can turn up your hem and topstitch to finish it.
And as a final step, we can attach our sleeve cuffs and then we’re done!


I (Ayelet) am wearing a Fuller Cardigan in a size 12 E/F using two sweater knit leftovers from my stash. (Color blocking is great for stash busting!) I’m a bit shorter than what the pattern is drafted for so I shortened the bodice by 1″ for an extra cropped look. This sweater hack would also work well with the mid-hip length.


Is this a hack you want to try for yourself? We’d love to see your Fuller sweaters (or cardigans, of course!) so be sure to tag us and use the hashtag #FullerCardigan.
What other hacks do you have planned for the Fuller?
Perfect – and it looks so quick and easy. I think it could be made to look like a “grandad” shirt with a higher neckline and a fake button band about 3 buttons long at the neck. Im not clever enough to do a real one. I also fancy pockets somewhere – maybe 2 big patch pockets
I absolutely love this hack! It’s a great way to use up smaller pieces of fabric with color blocking and it’s a RAGLAN!! For
busty girls like me!!! I may try to add a henley button plaque to the front!
p.s. Nice to put a face to the name! Ayelet helped me through fitting the Springfield top!
This is so cool. The currently popular indy raglan pattern is not working well for me due to the bigger bust issue. I’m so excited to use a raglan pattern that is designed for my shape!
Love this. I’m going to try it. Are these the Ames jeans also in the pics?
Hi Angela, these are ready-to-wear jeans.
-Ayelet at Cashmerette
Hi Ayelet, I love your sweater hack so much. I want to do that for myself too because I have a knit fabric in my stash, a sweater knit with braids. I was looking at your patchwork sweater too. Now I have this question…how did you do with the bust darts. Did you leave them like they are? I am a little bit afraid because of the braids in my fabric. And I think maybe it would be better, to shift them to vertical darts . In this way I would have a little bit more room in the hip area and would not destroy the braids. Do you have any suggestions ? By the way, I wanted to thank cashmerette for the wonderful Concord pattern. I had it in my pattern library but never sewn it because I had no motivation. I thought all the t-shirt patterns had the same “tent” under the bust if you sew them for bigger sizes. I only sewed the Concord because I felt it was my duty to do it. And now I am so happy….I got my motivation back and today I will sew the calders. So..thank you so much..even for showing the patterns on real bodies. They all look great. Regards from Germany and already thank you for your effort responding to my question. Kirsten
Hi Kirsten, thanks so much for your kind words! I left the darts as is–there’s definitely a bit of bulk there, and I know some people cut open their darts to reduce the bulk, but it doesn’t bother me. If it were me, I would keep the darts as they are to maintain the great bust fit rather than making them vertical, which won’t get you quite as good of a fit. But it’s your sweater, so it’s totally up to you! 🙂
-Ayelet
If your facing won’t stay put, I found it helpful to stitch in the ditch along the seams to hold it in place. I used a softer jersey and it kept wanting to flip around.
Thank you for the helpful tutorial!
I should add that I didn’t top stitch the neck, because the fabric was too soft to feed smoothly. Stitching in the ditch was my work around.