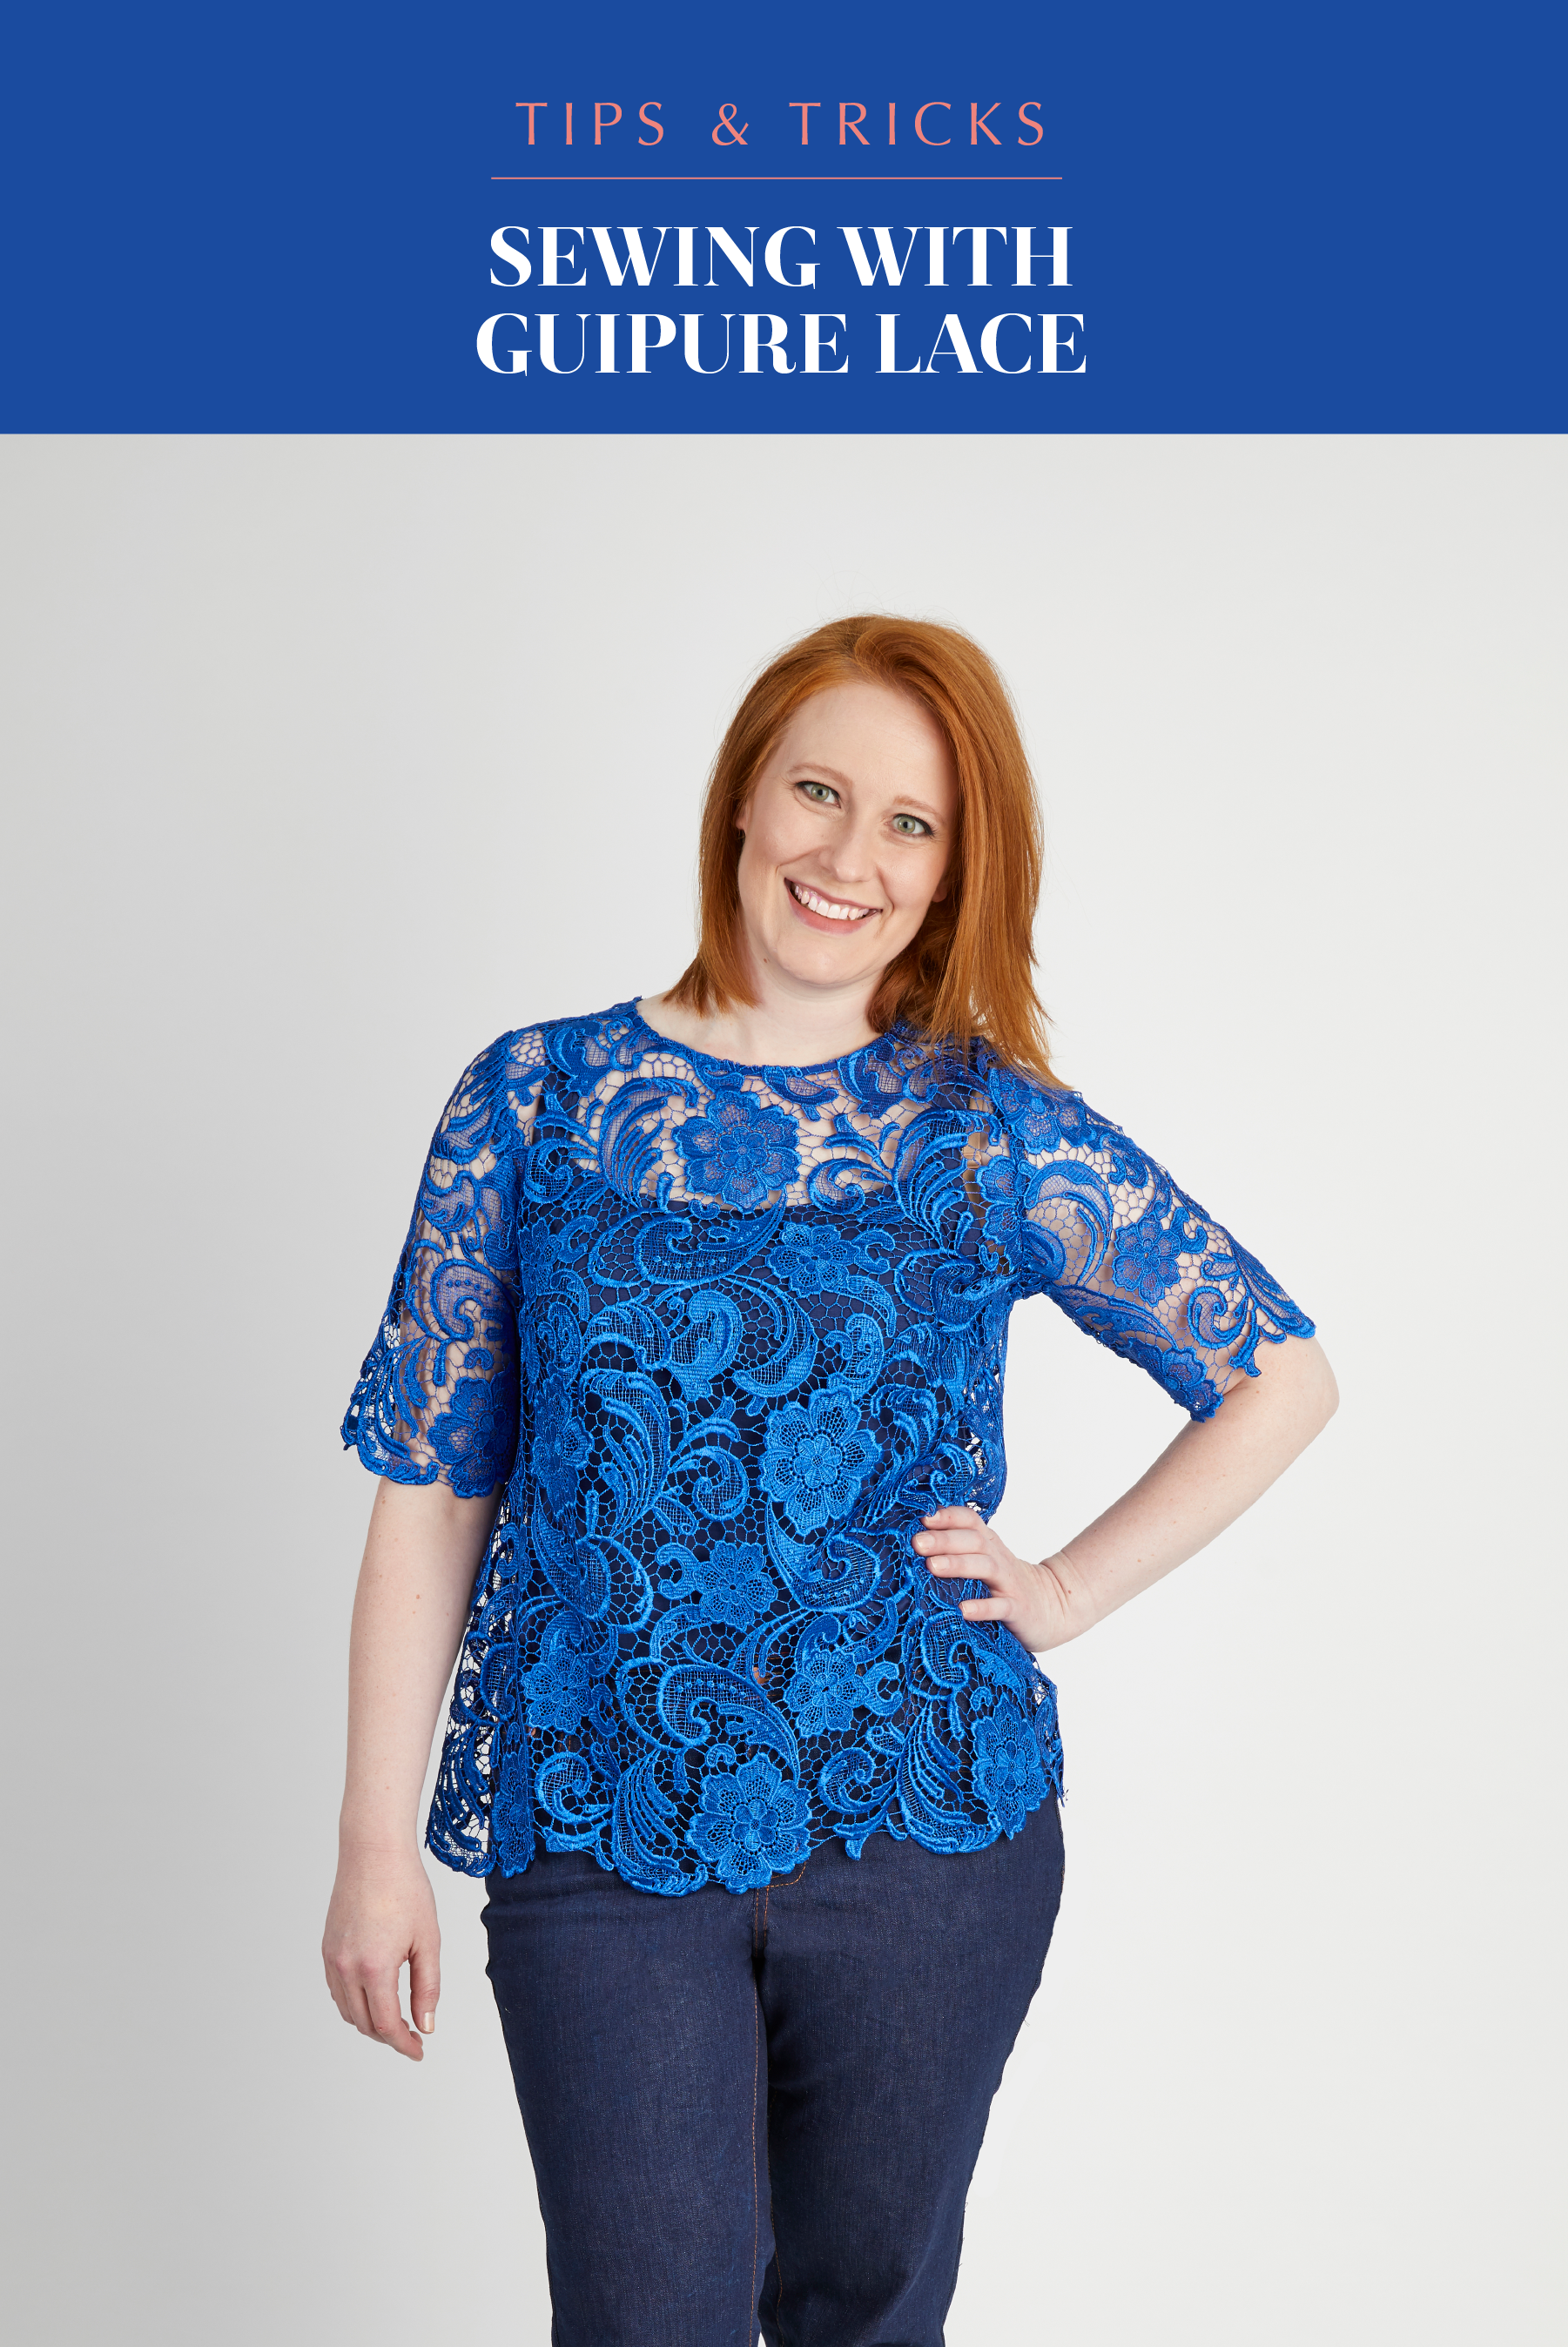
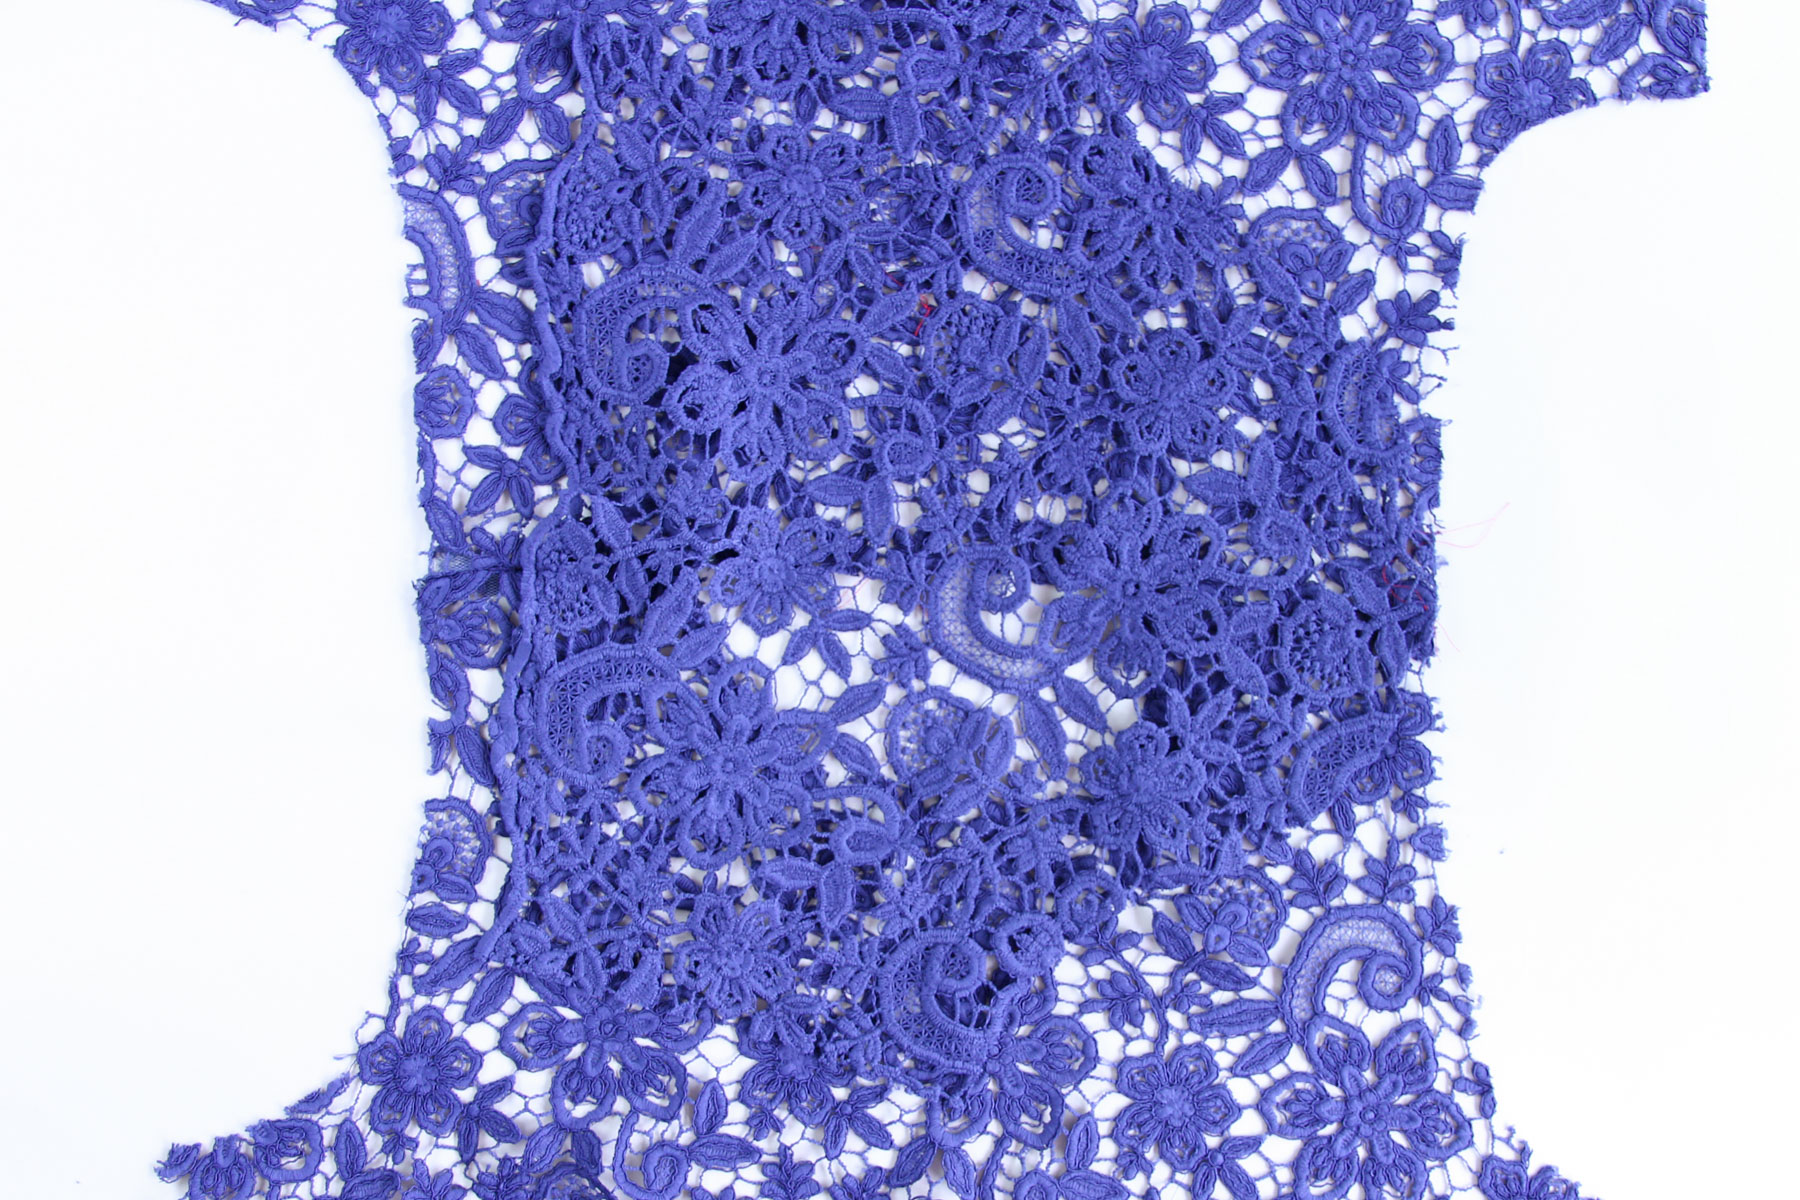
Welcome to day 3 of the Montrose Top sewalong! Today is a special post dedicated to sewing with guipure and other open laces. Guipure lace is a heavier lace with many open sections; it makes a gorgeous statement top like the royal blue version on the Montrose cover, but it does take some special handling. Also, heads up, photographing lace flat makes it look a bit out of focus because of the shadows on the paper; if you zoom in, the photos actually are in focus, but can look a bit fuzzy from far away. I’ve taken down the shadows on the pictures as much as possible to minimize the fuzz.
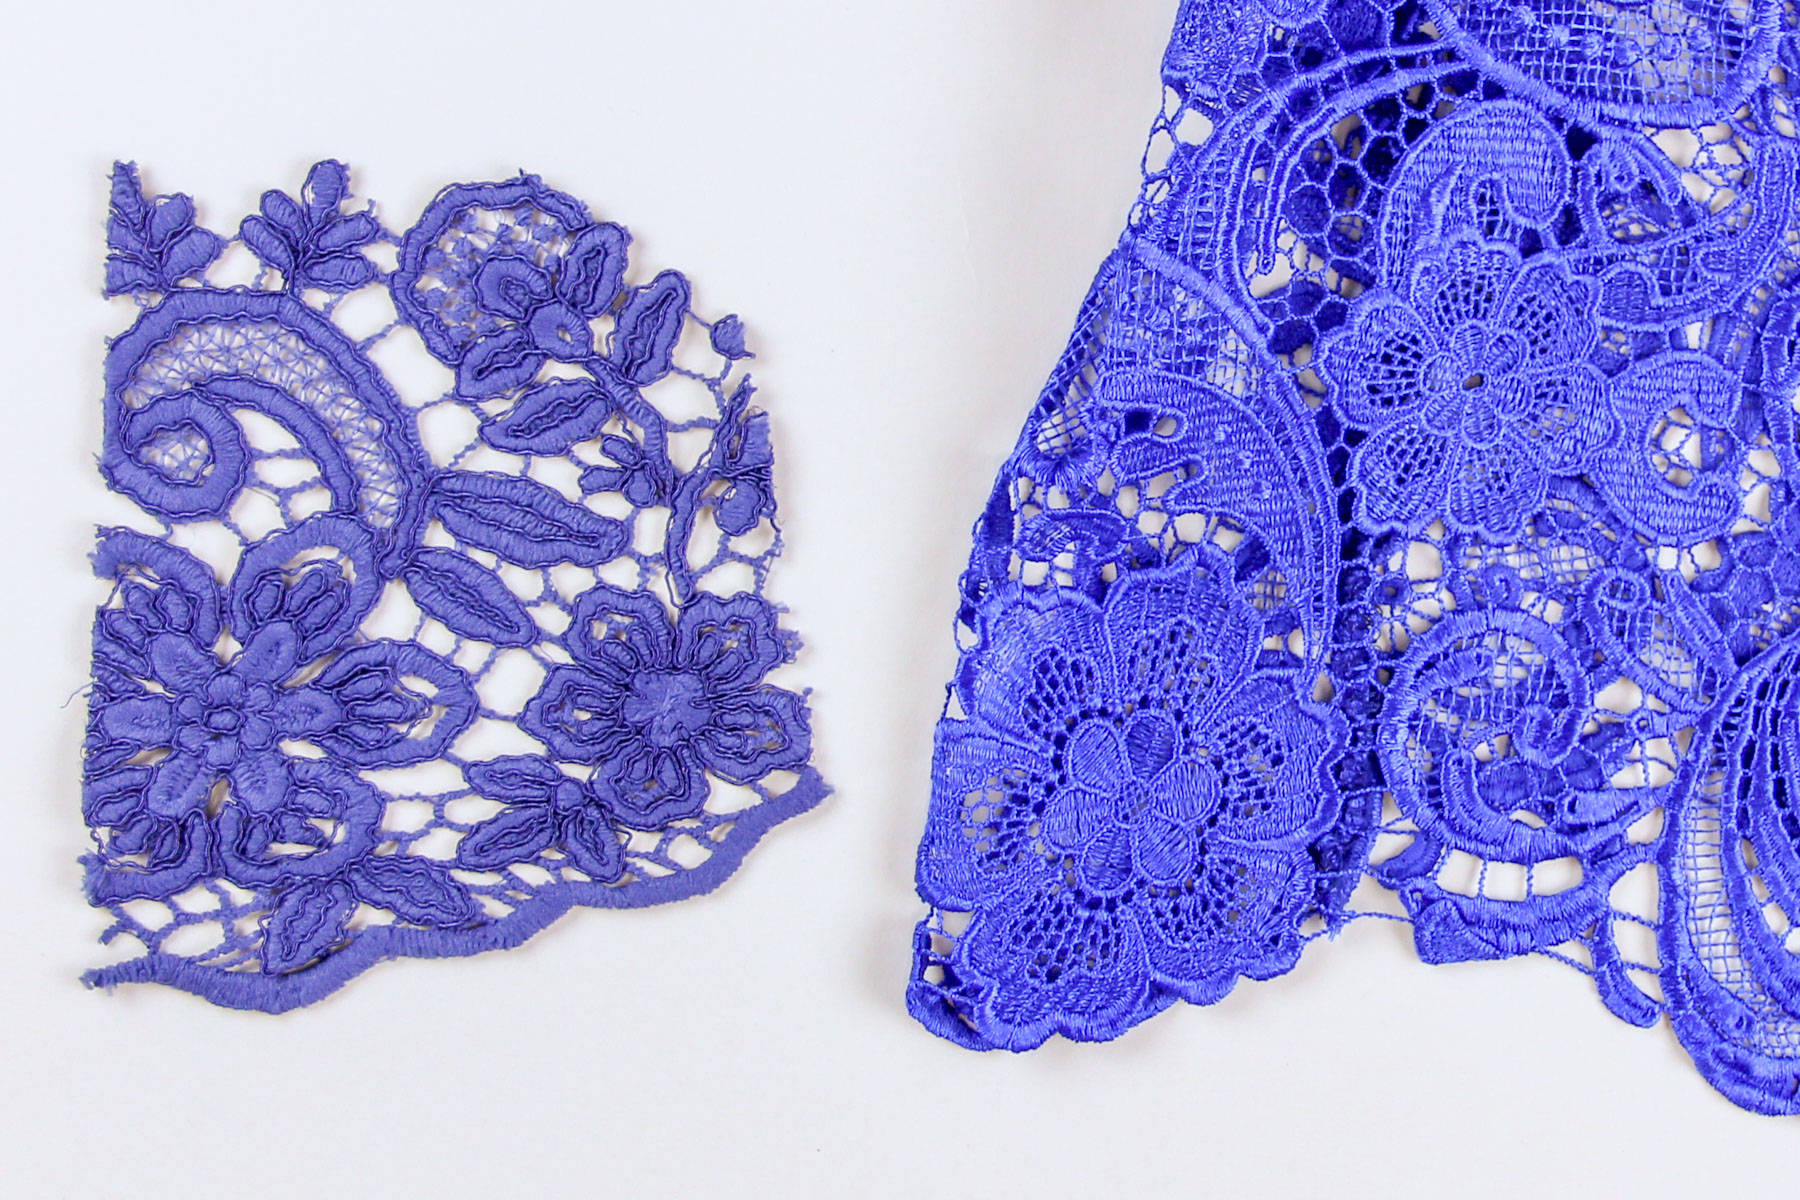
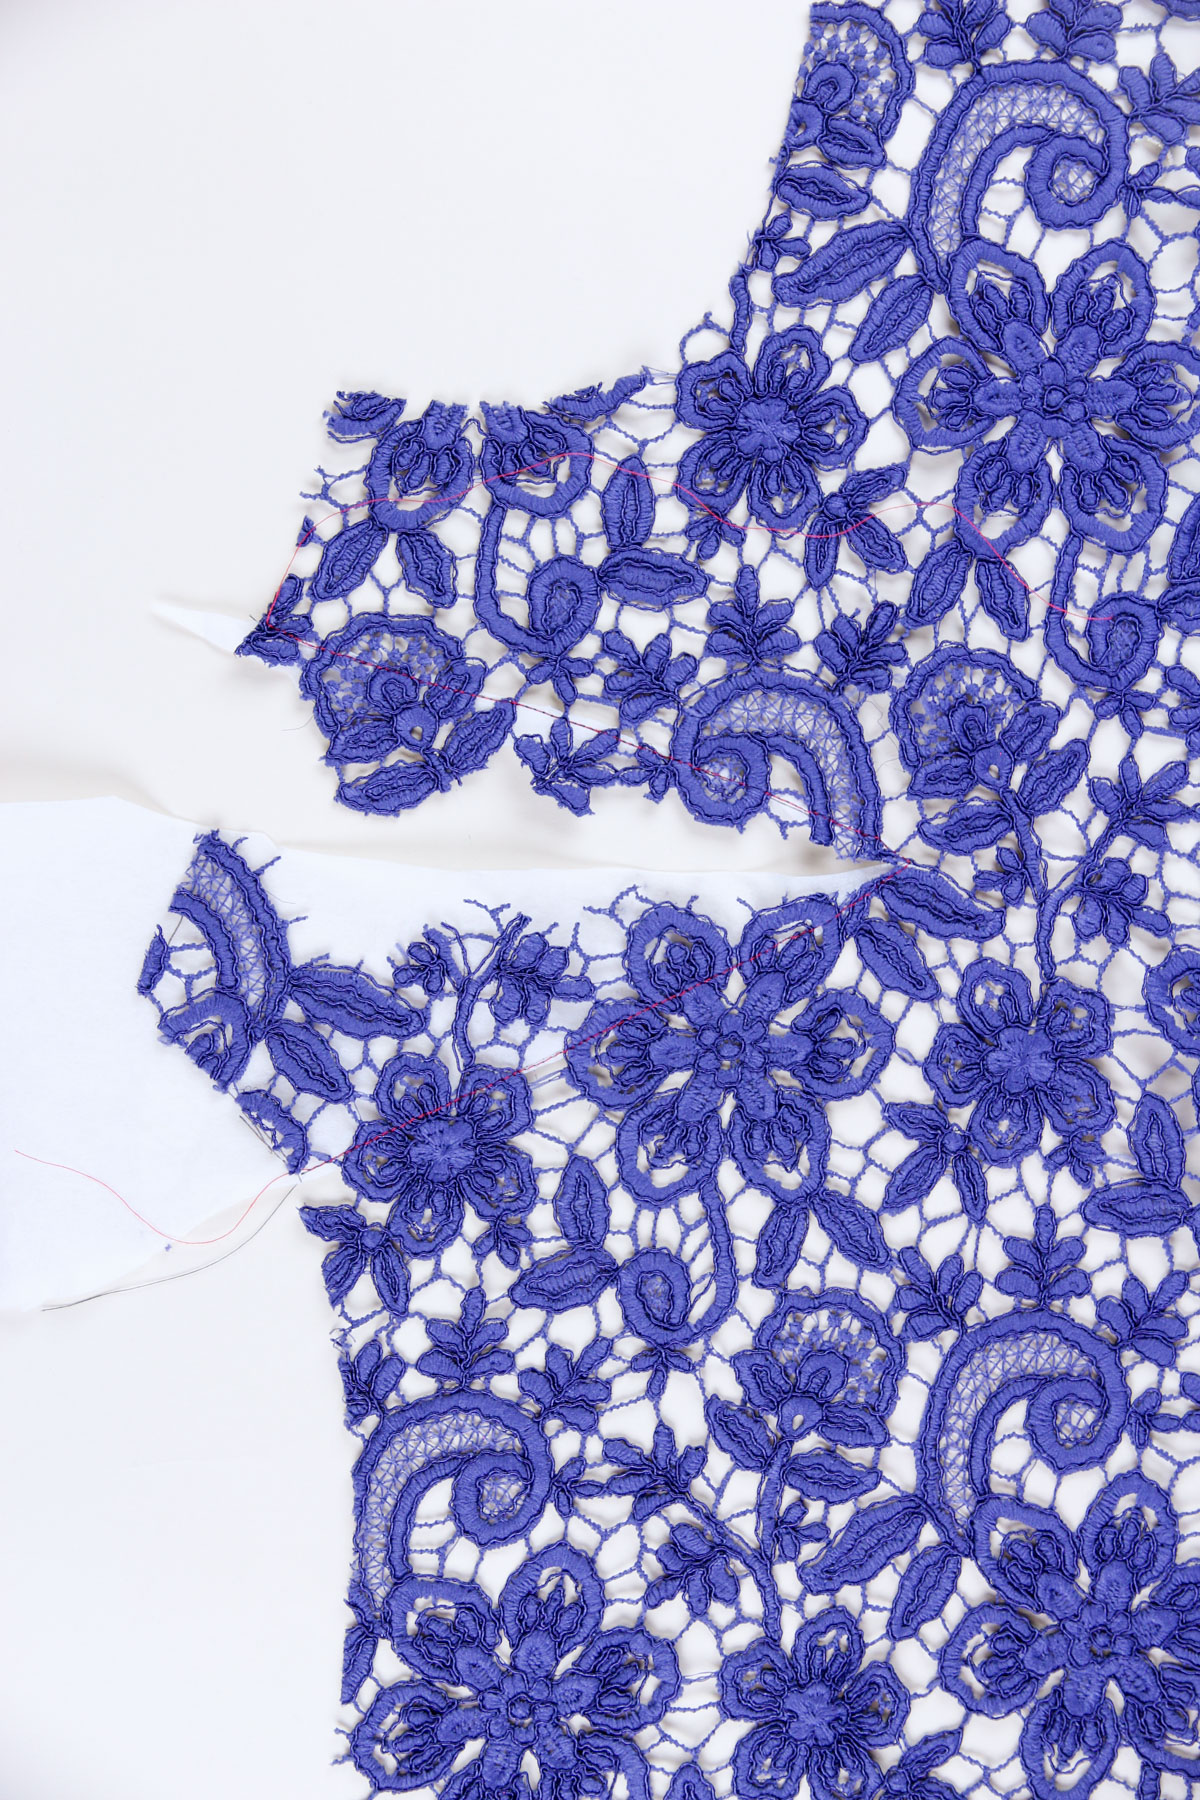
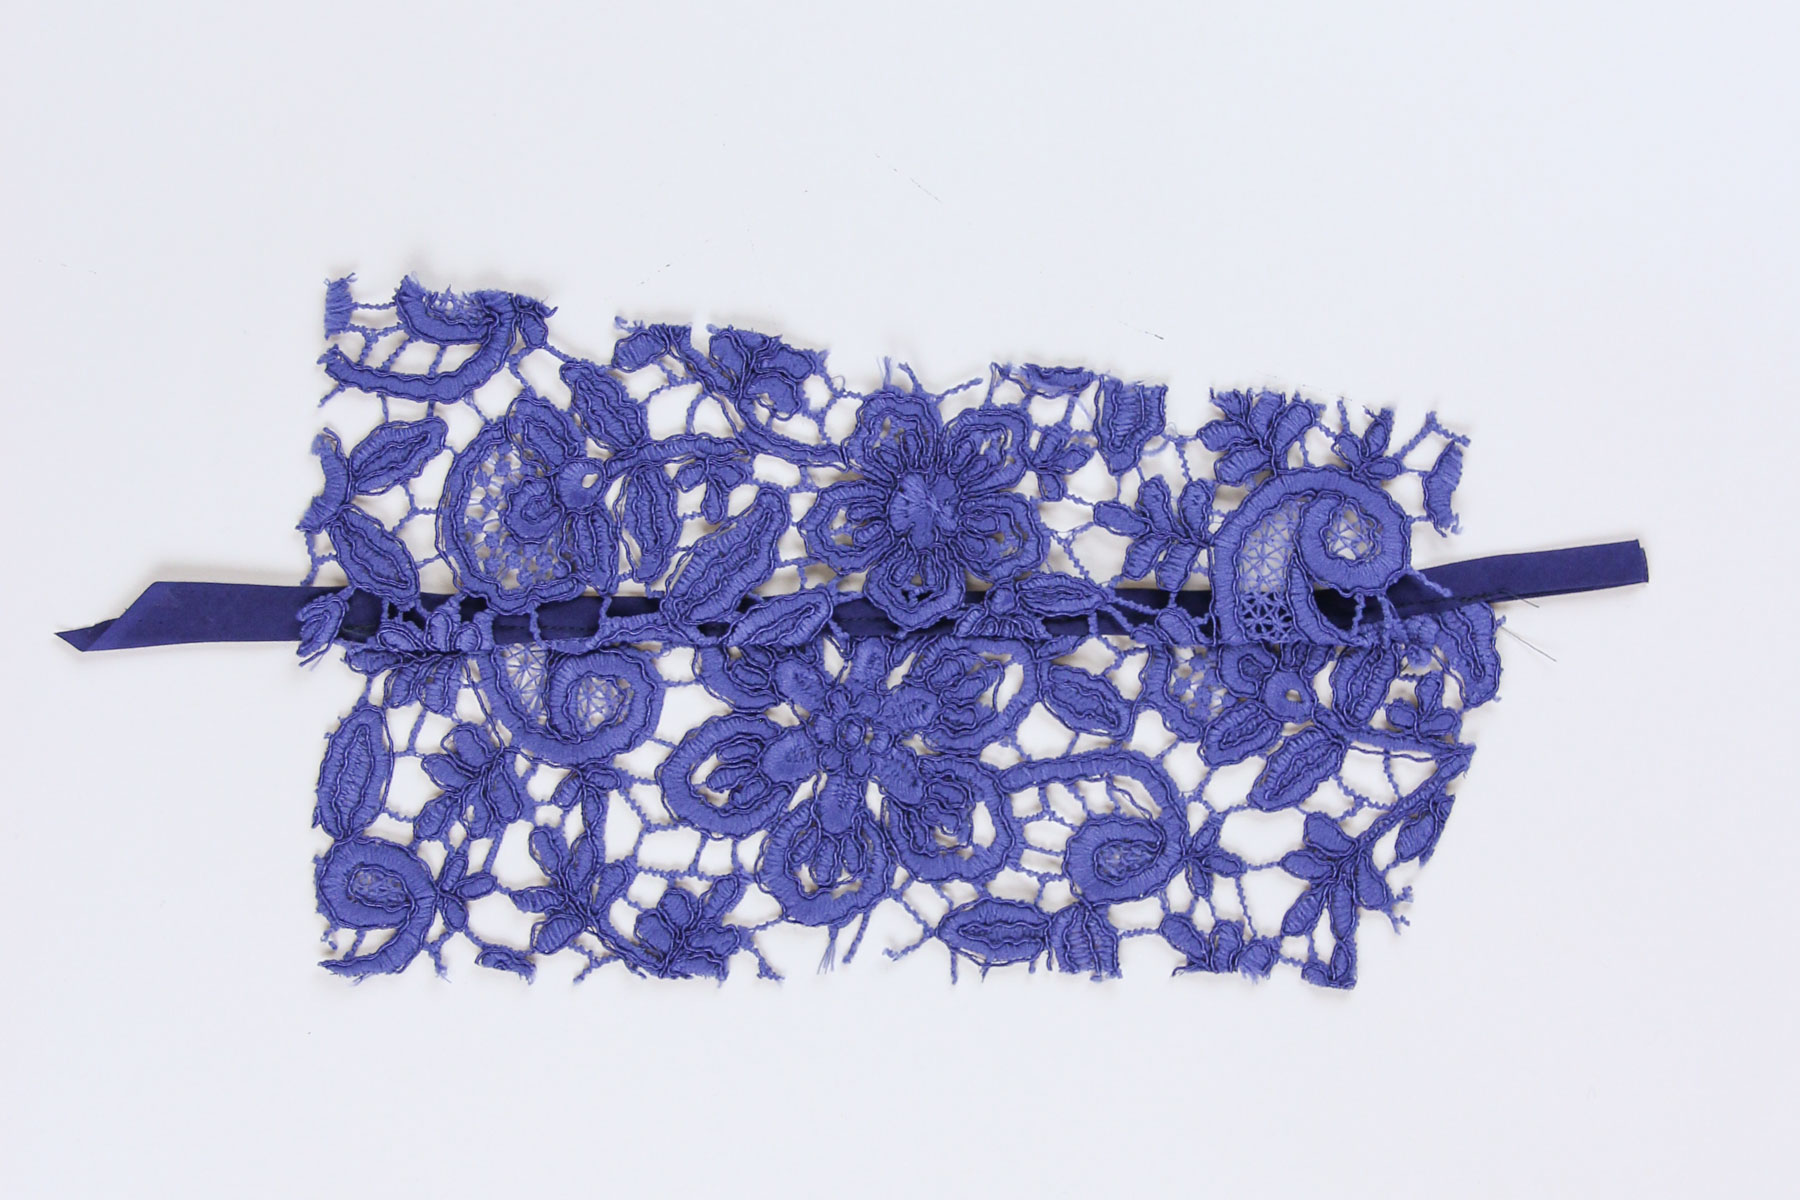
First of all, when cutting your guipure lace, you want to think carefully about the edges you’ll end up with. On this lace, there’s a decorative selvage that I chose to use for the hem edges. The cover version didn’t have that, so we chose a point in the lace motif to use as our edge. Whatever you decide, just be sure to be consistent on the front and back.
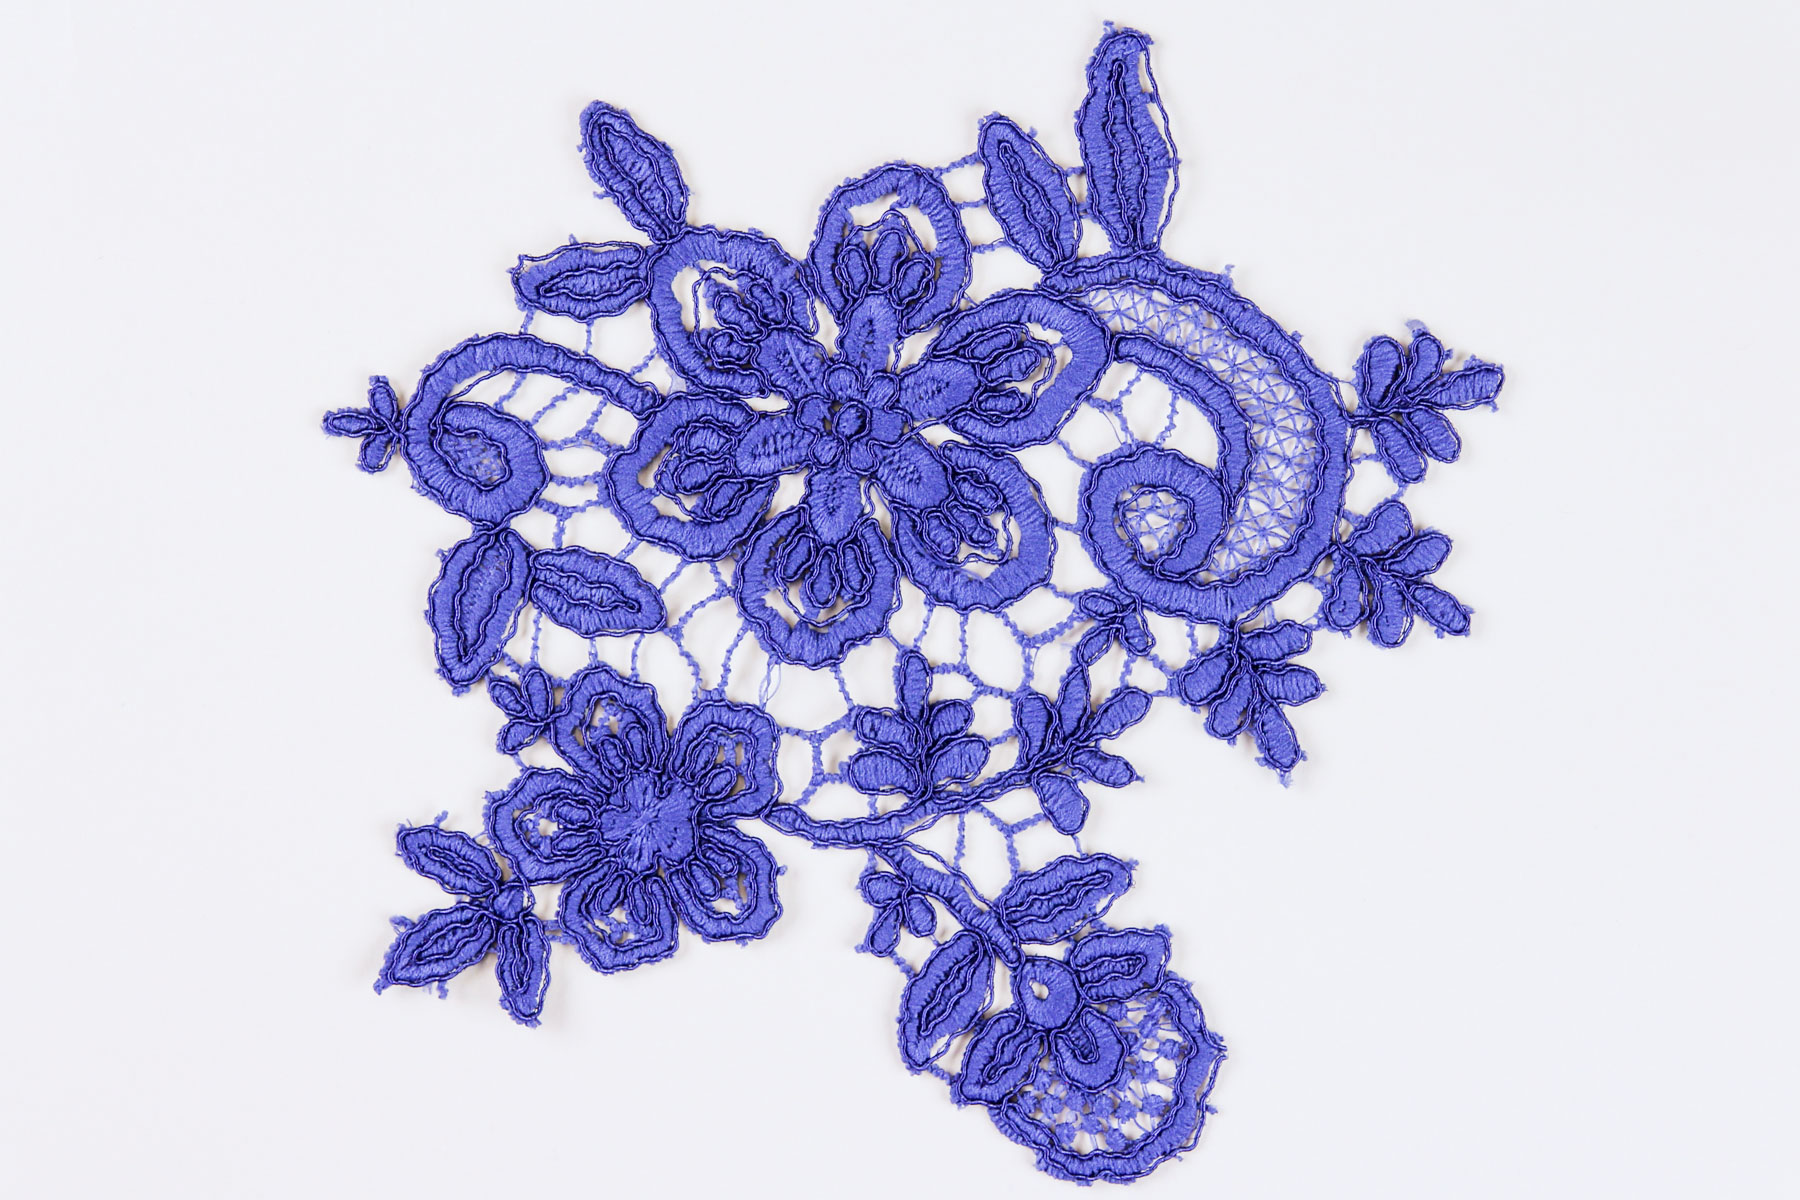
The second thing to think about when cutting your lace is the placement of motifs near the point of the dart. Some of these beautiful swirly and floral motifs can end up looking a bit too evocative when placed on the bust apex (this is also something to pay attention to when cutting florals!).
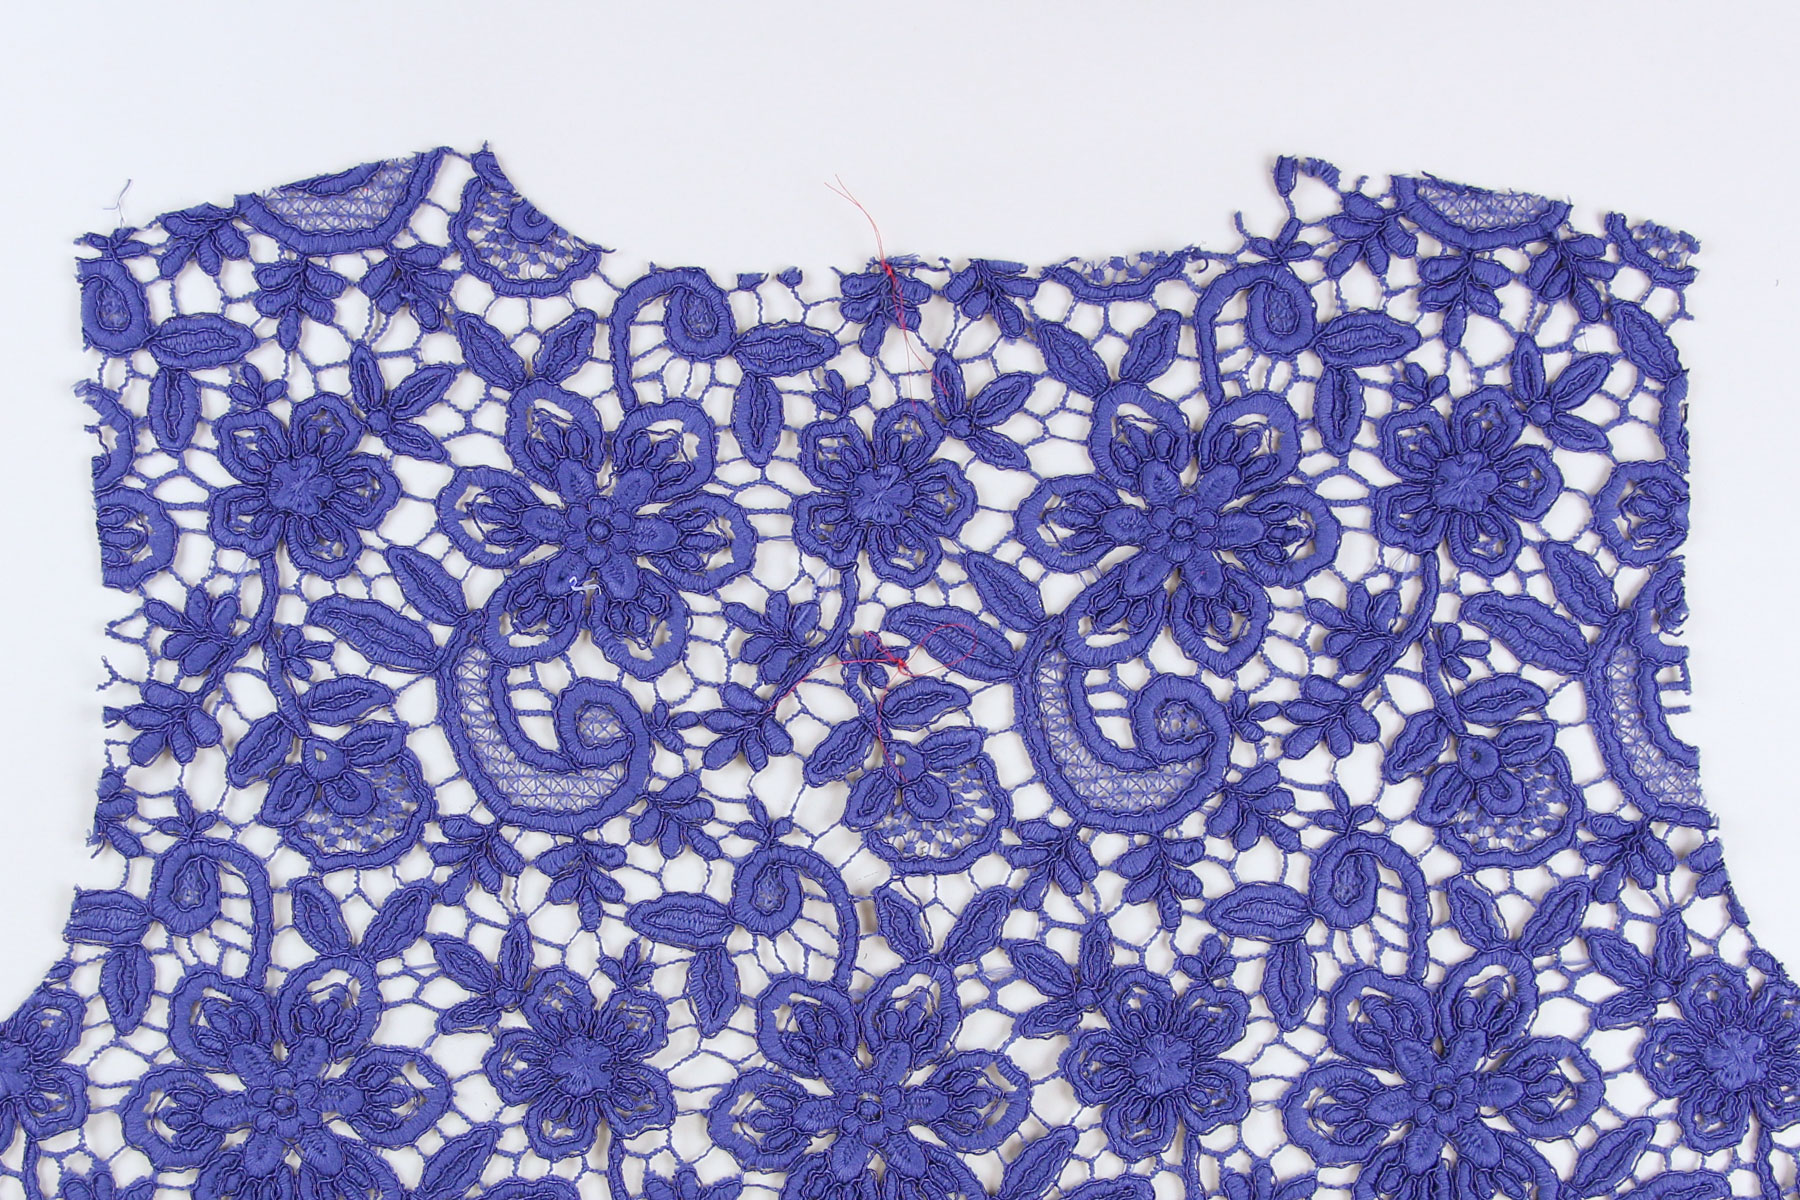
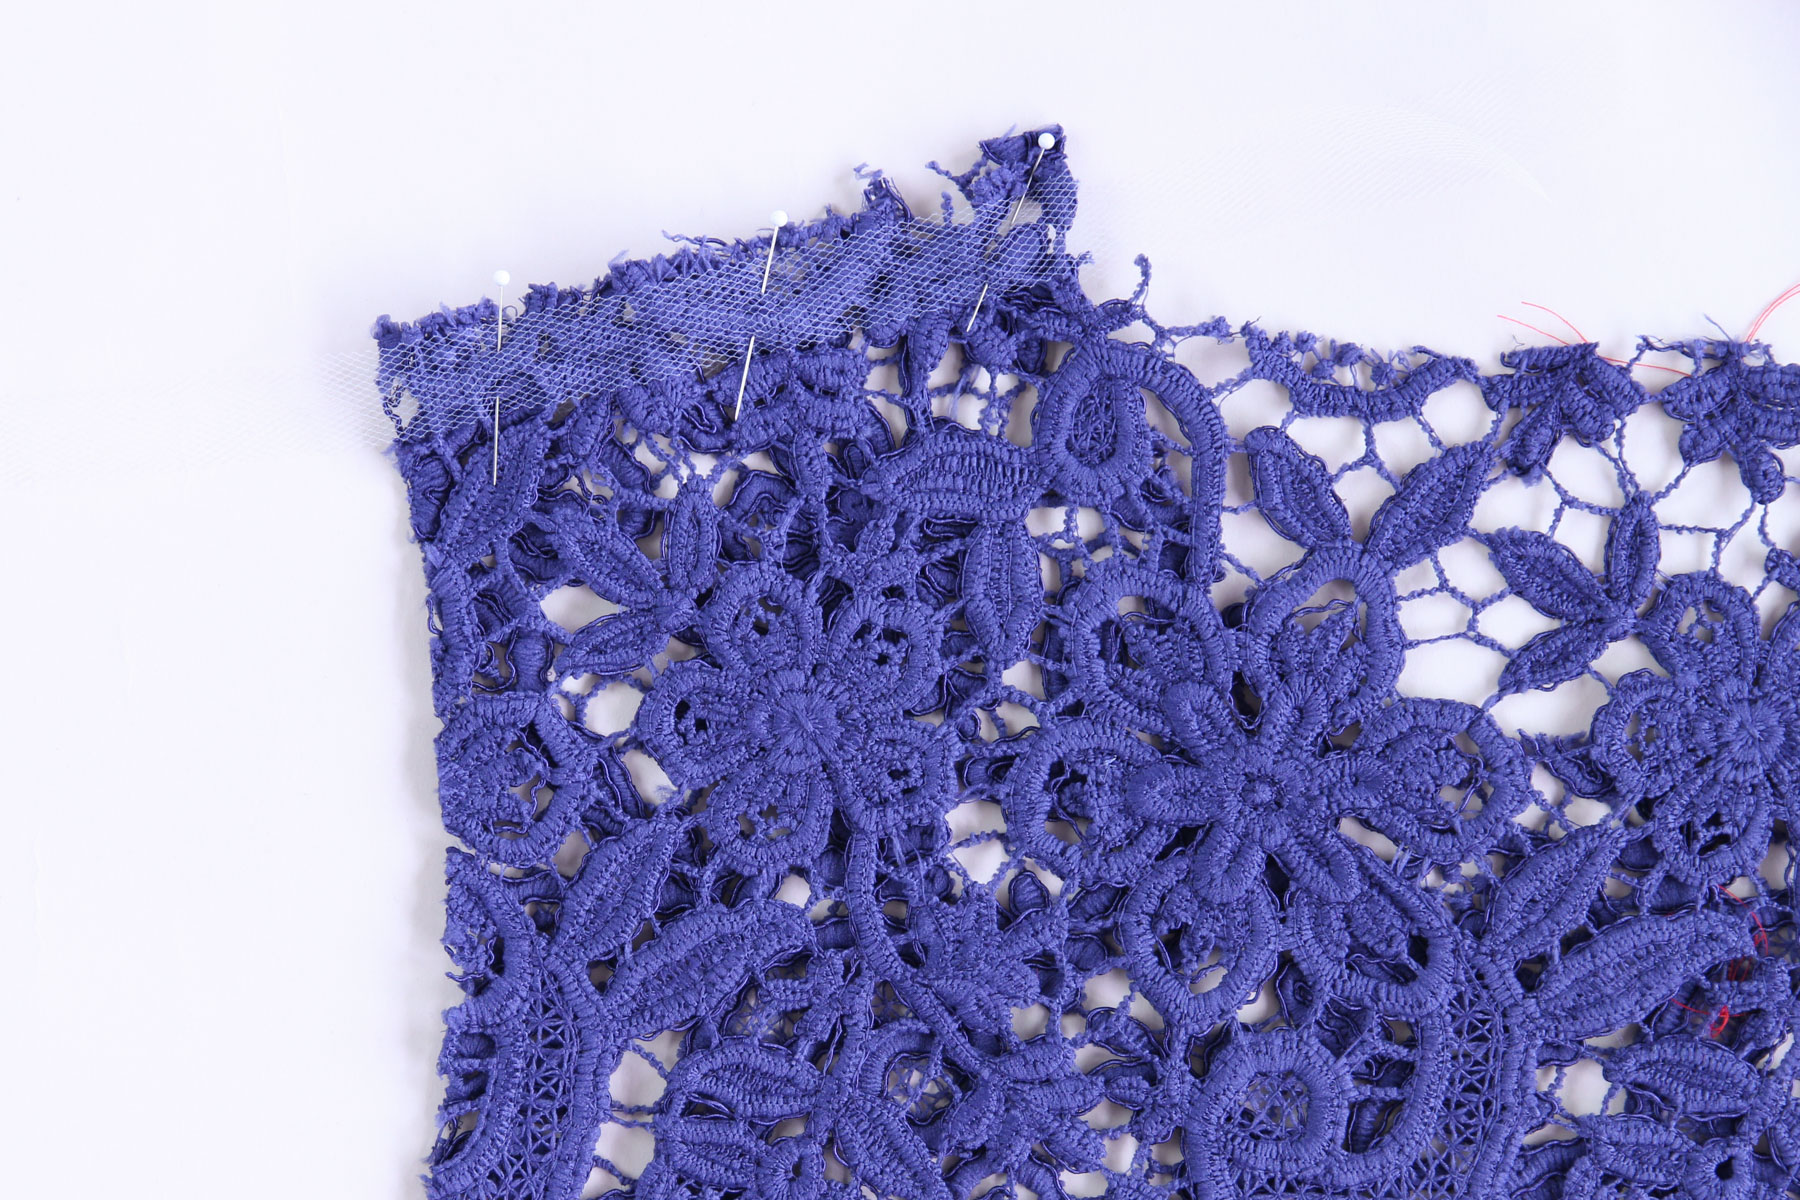
You ALWAYS want to cut guipure lace on a single layer; it’s far too malleable and shifty to cut on the fold. For marking things like the keyhole cut line on the back, using a tailor’s tack is definitely the best option on lace.
For the neckline, you don’t need to staystitch guipure, but do handle it carefully to avoid snagging it while sewing.
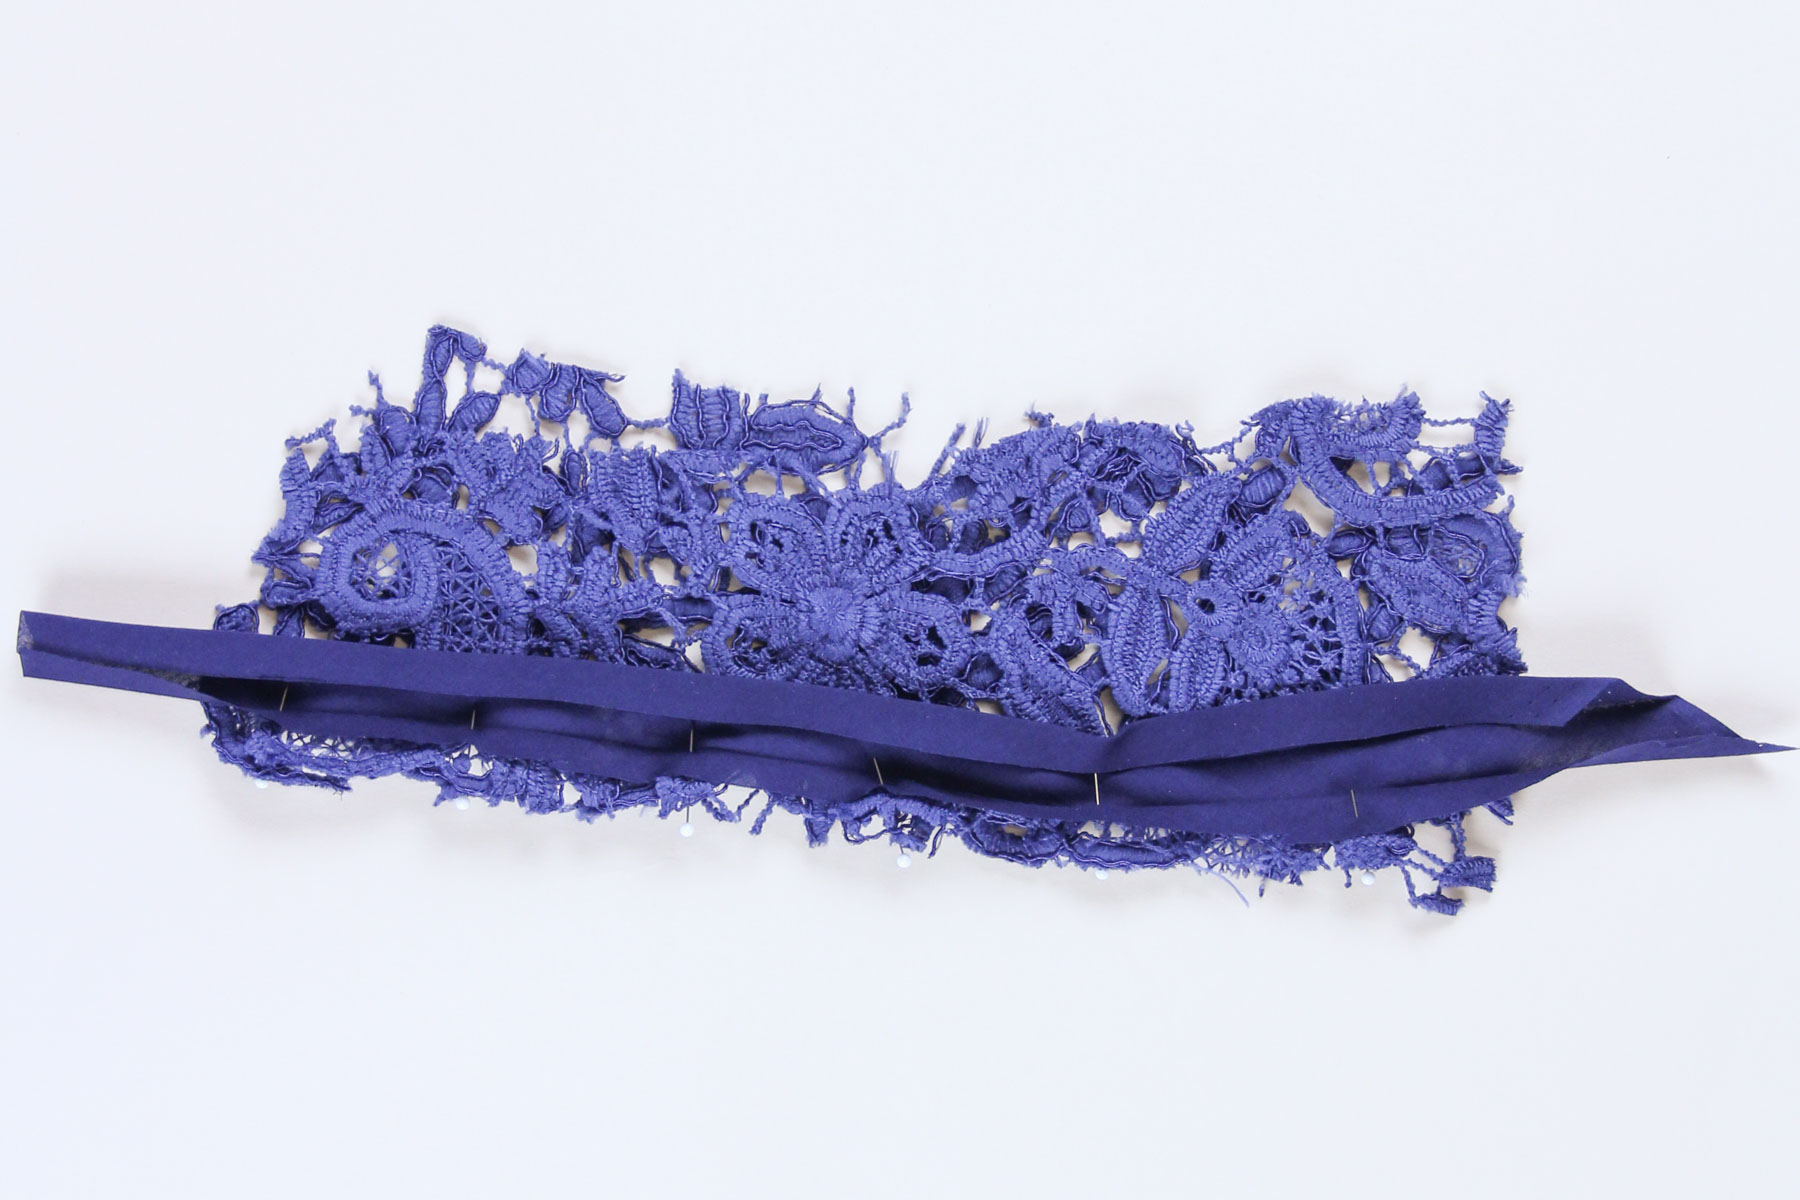
The first sewing step is going to be marking and sewing your darts. If you have a lace with smaller holes, you can mark and sew the dart as usual and trim away the excess just like we did for the embroidered mesh version. Marking darts can be a real bugger on open lace, so here’s what I recommend. Trace your dart and a bit of side seam on either side onto a scrap of tracing paper. Use a sharpie or other bold line for this.
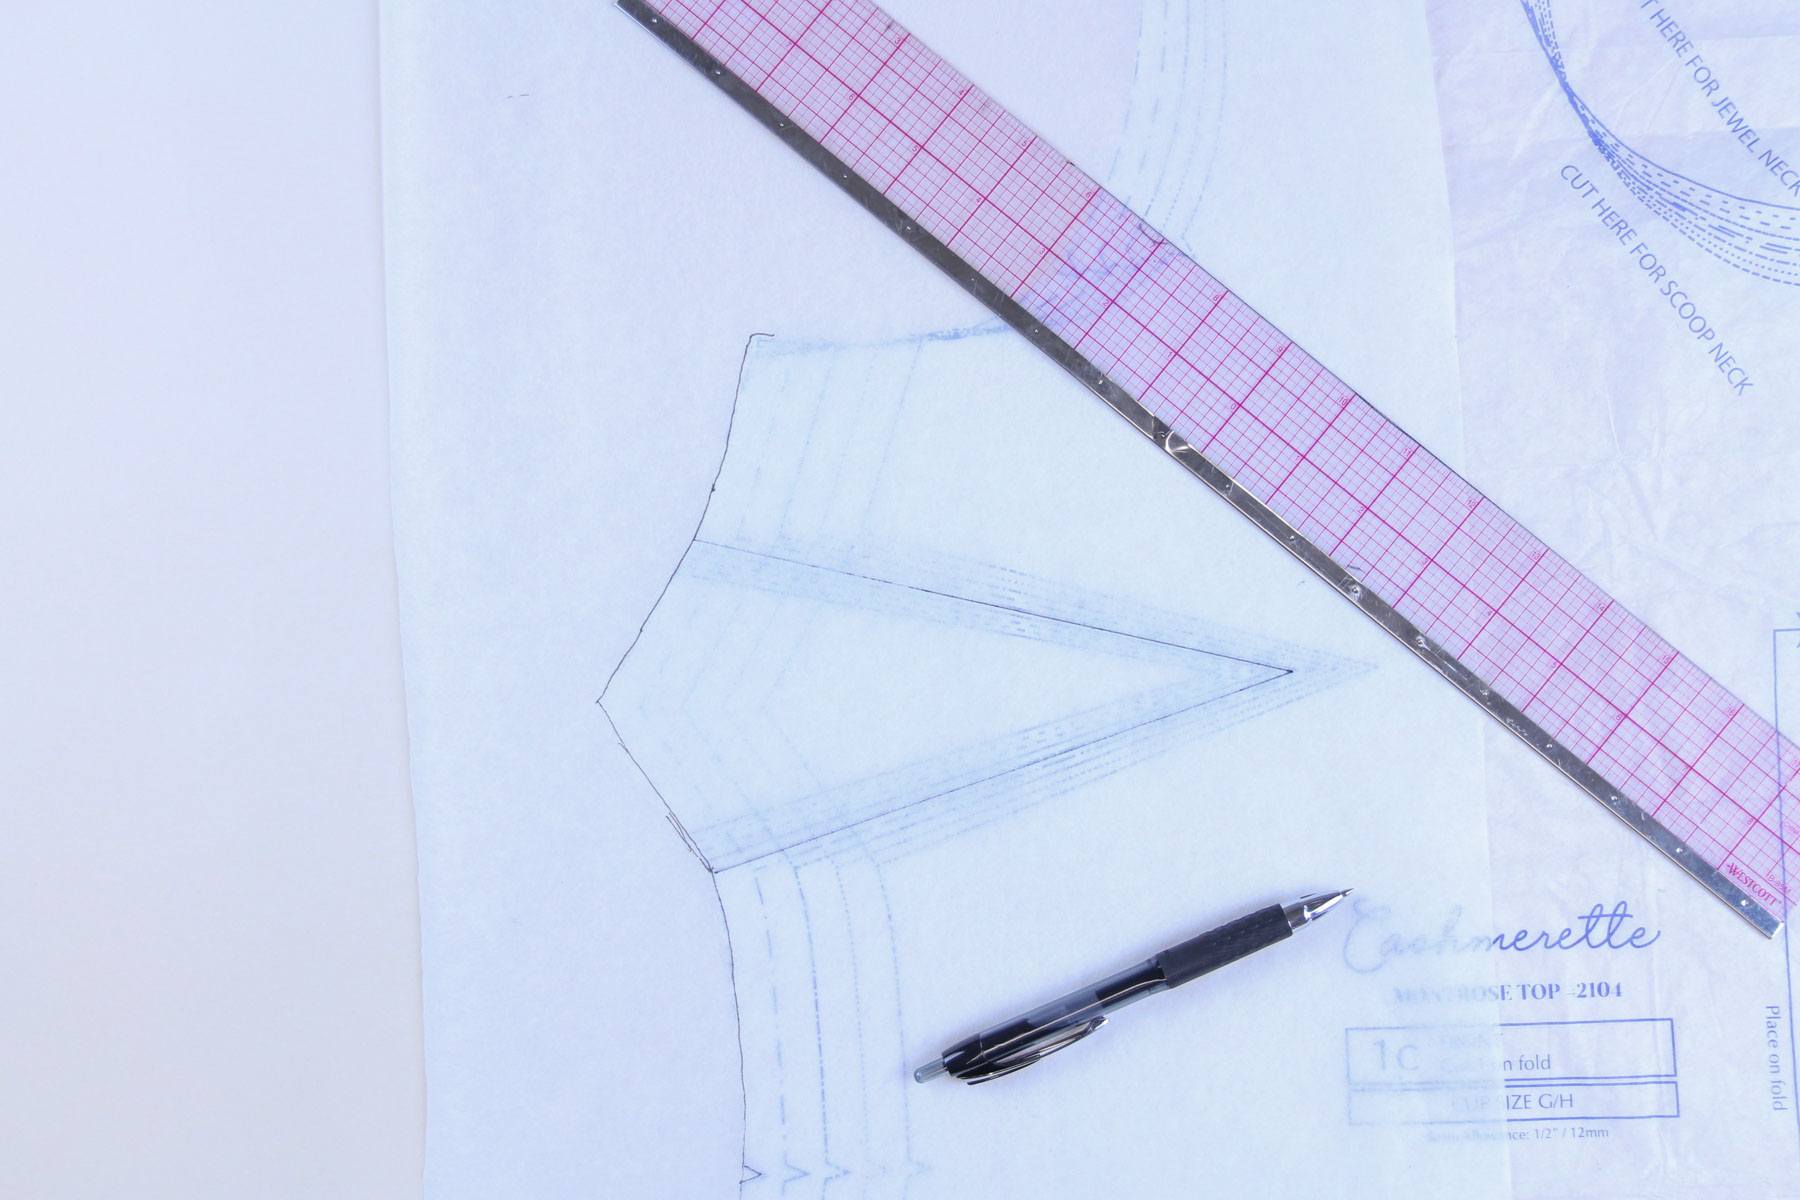
Place the tracing paper under the cut fabric, lining up the side seams. Pin the paper in place around the outside of the dart.
Using a contrast thread and a long stitch length, sew along the dart legs through the fabric and the tracing paper, stopping at the dart point.
Tear away the tracing paper from the wrong side of your fabric, and there you have it! A dart tracing that isn’t going to wander off! Repeat this with the second dart.

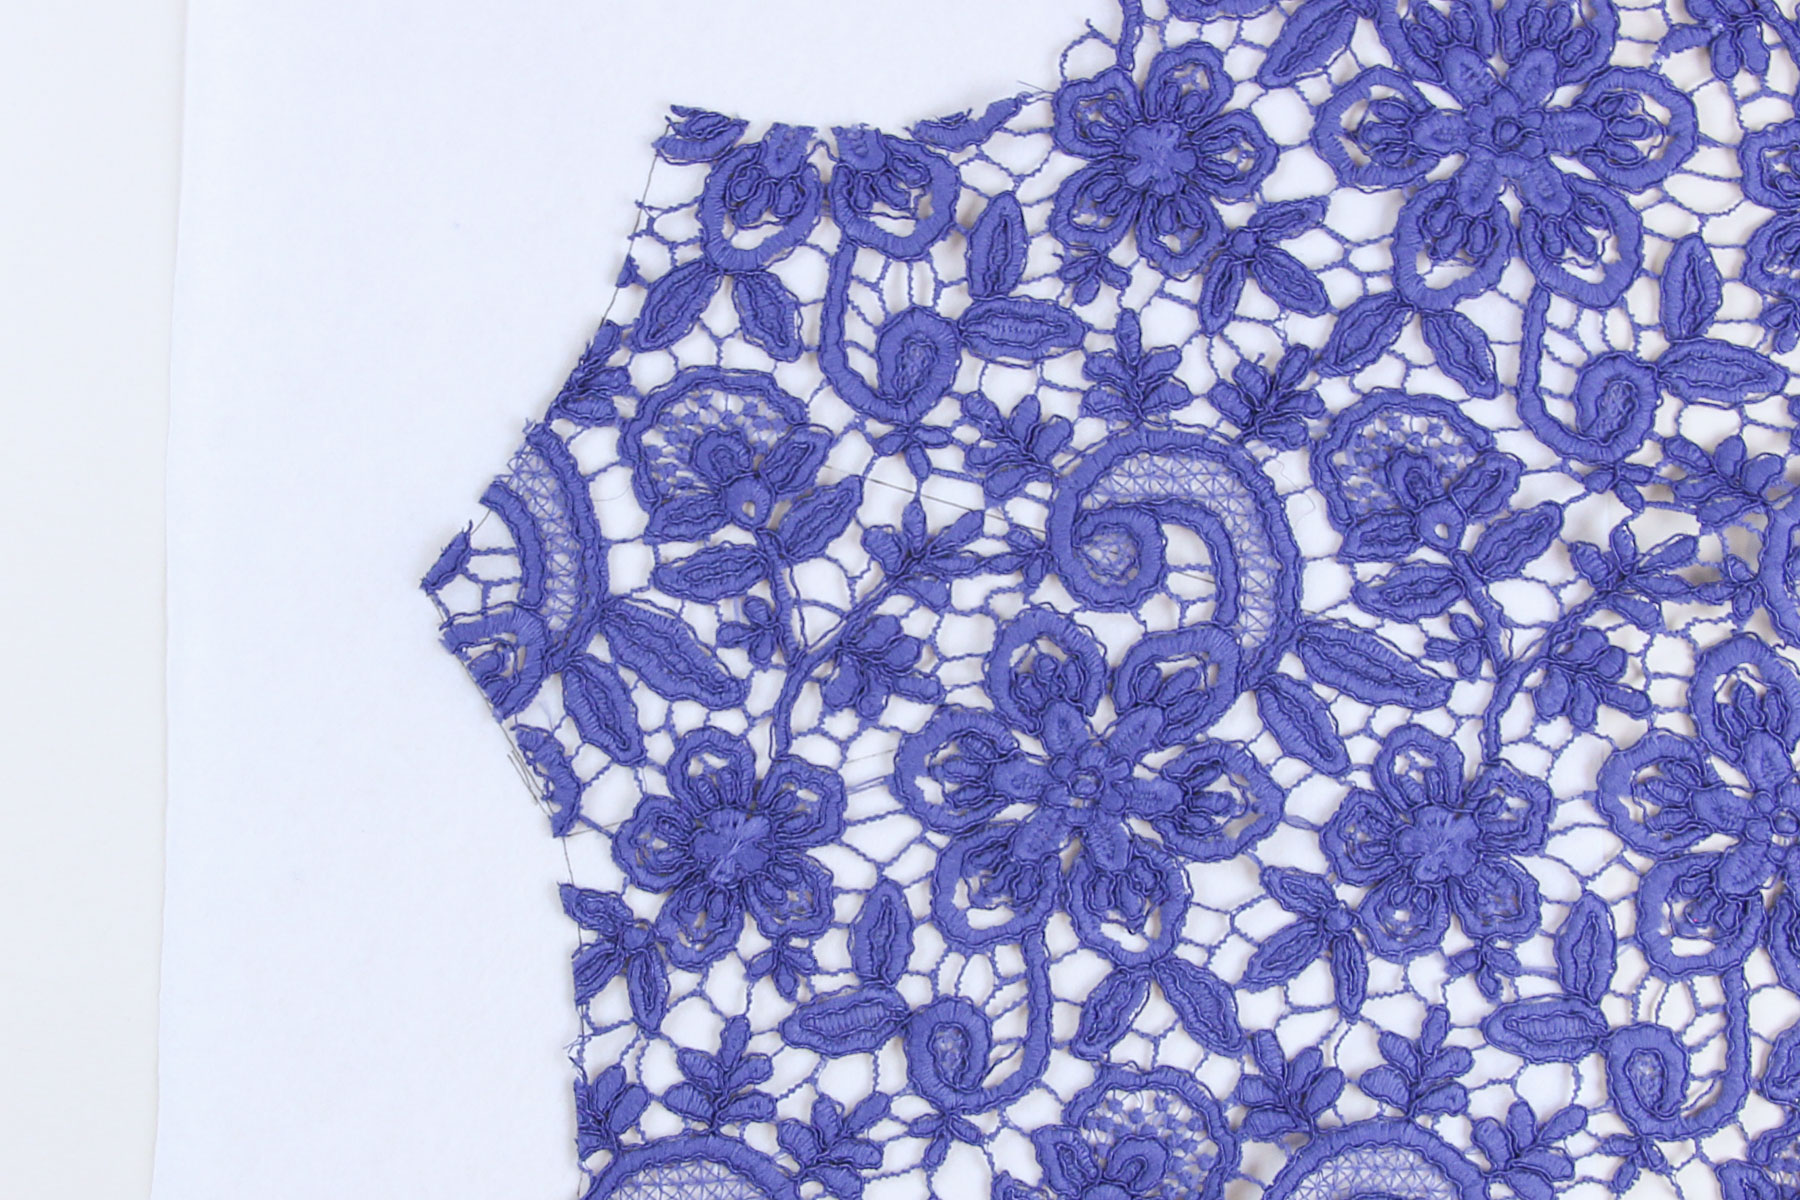
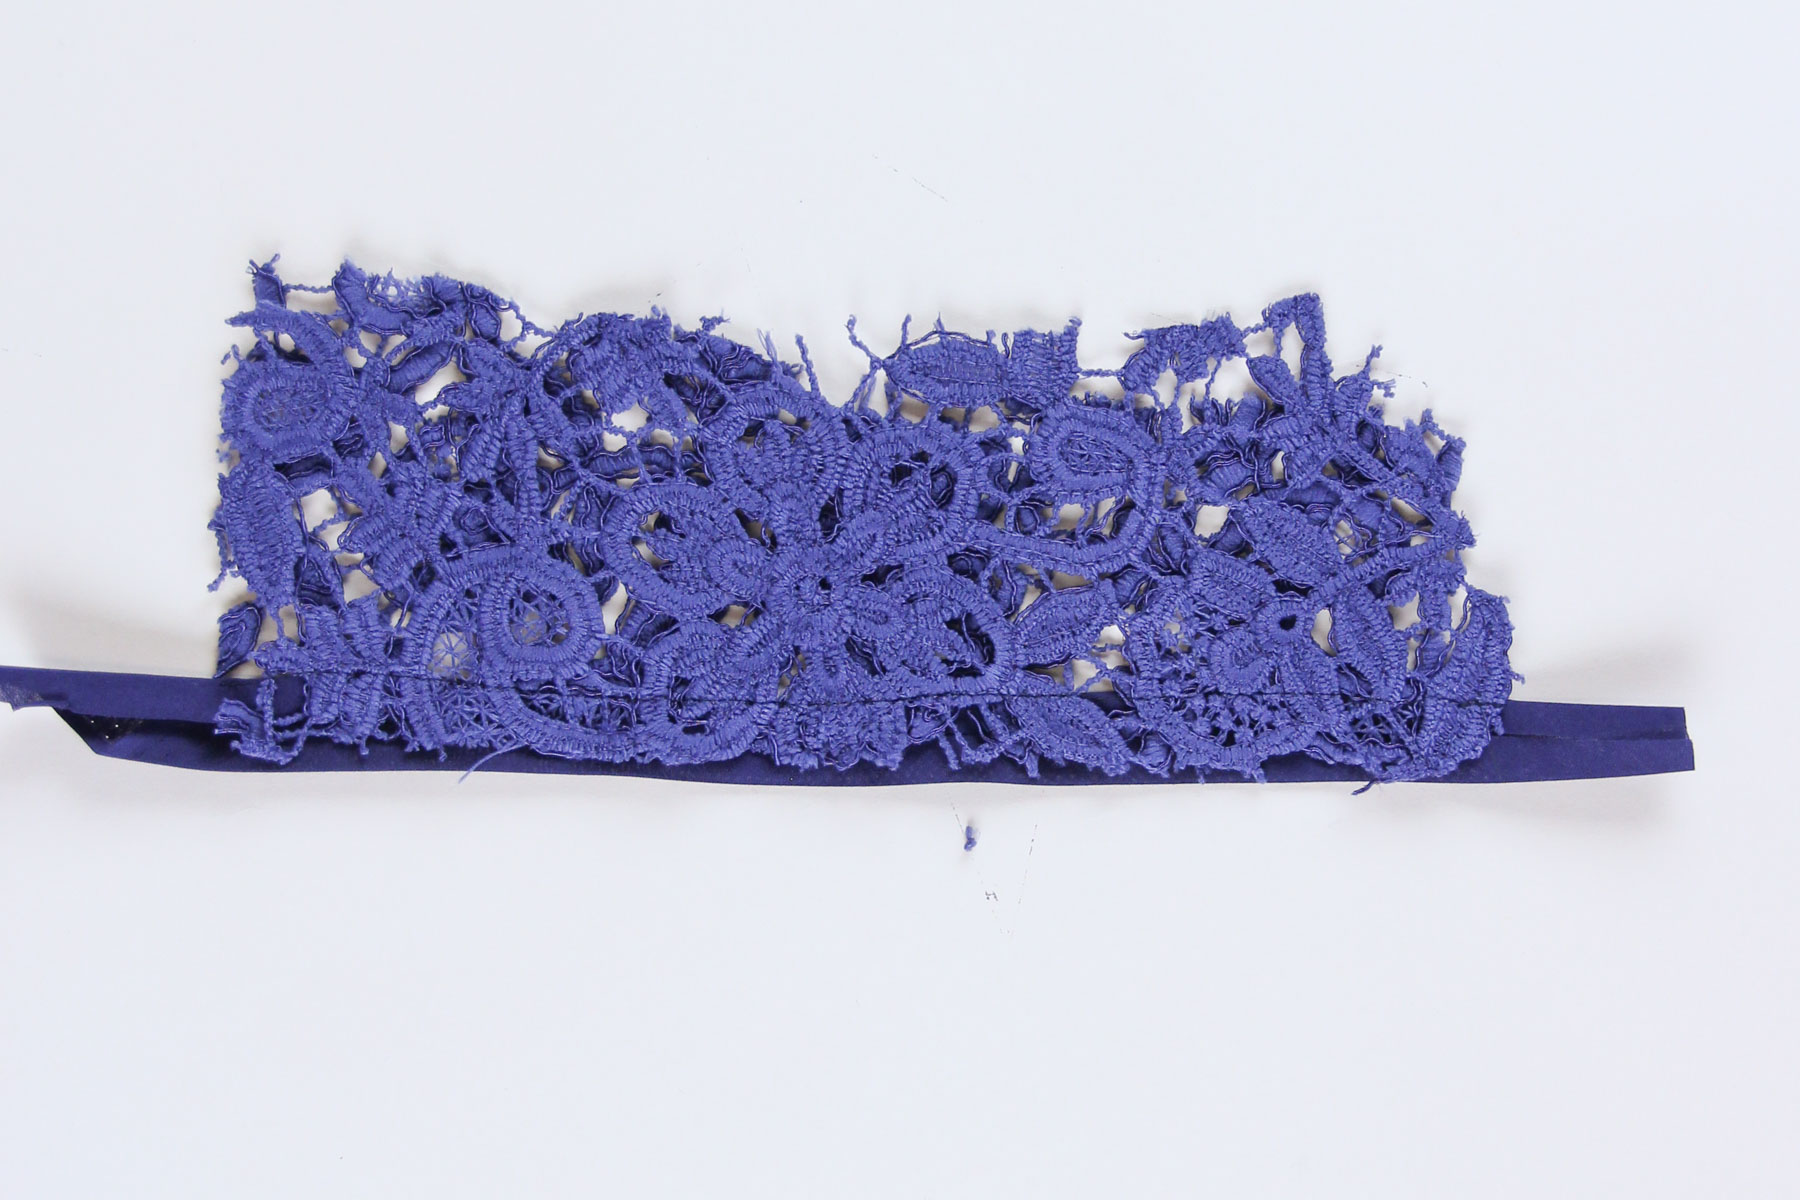
With a very open or thick lace like guipure, you’ll want to treat the actual sewing of the dart differently as well. This is a couture finishing option called lap and appliqué and it will seriously elevate the look of your top by removing distracting second layer of lace where the dart is folded. Plus, your machine may not even sew a dart in the normal manner if your lace is as open as the one we’re using here!
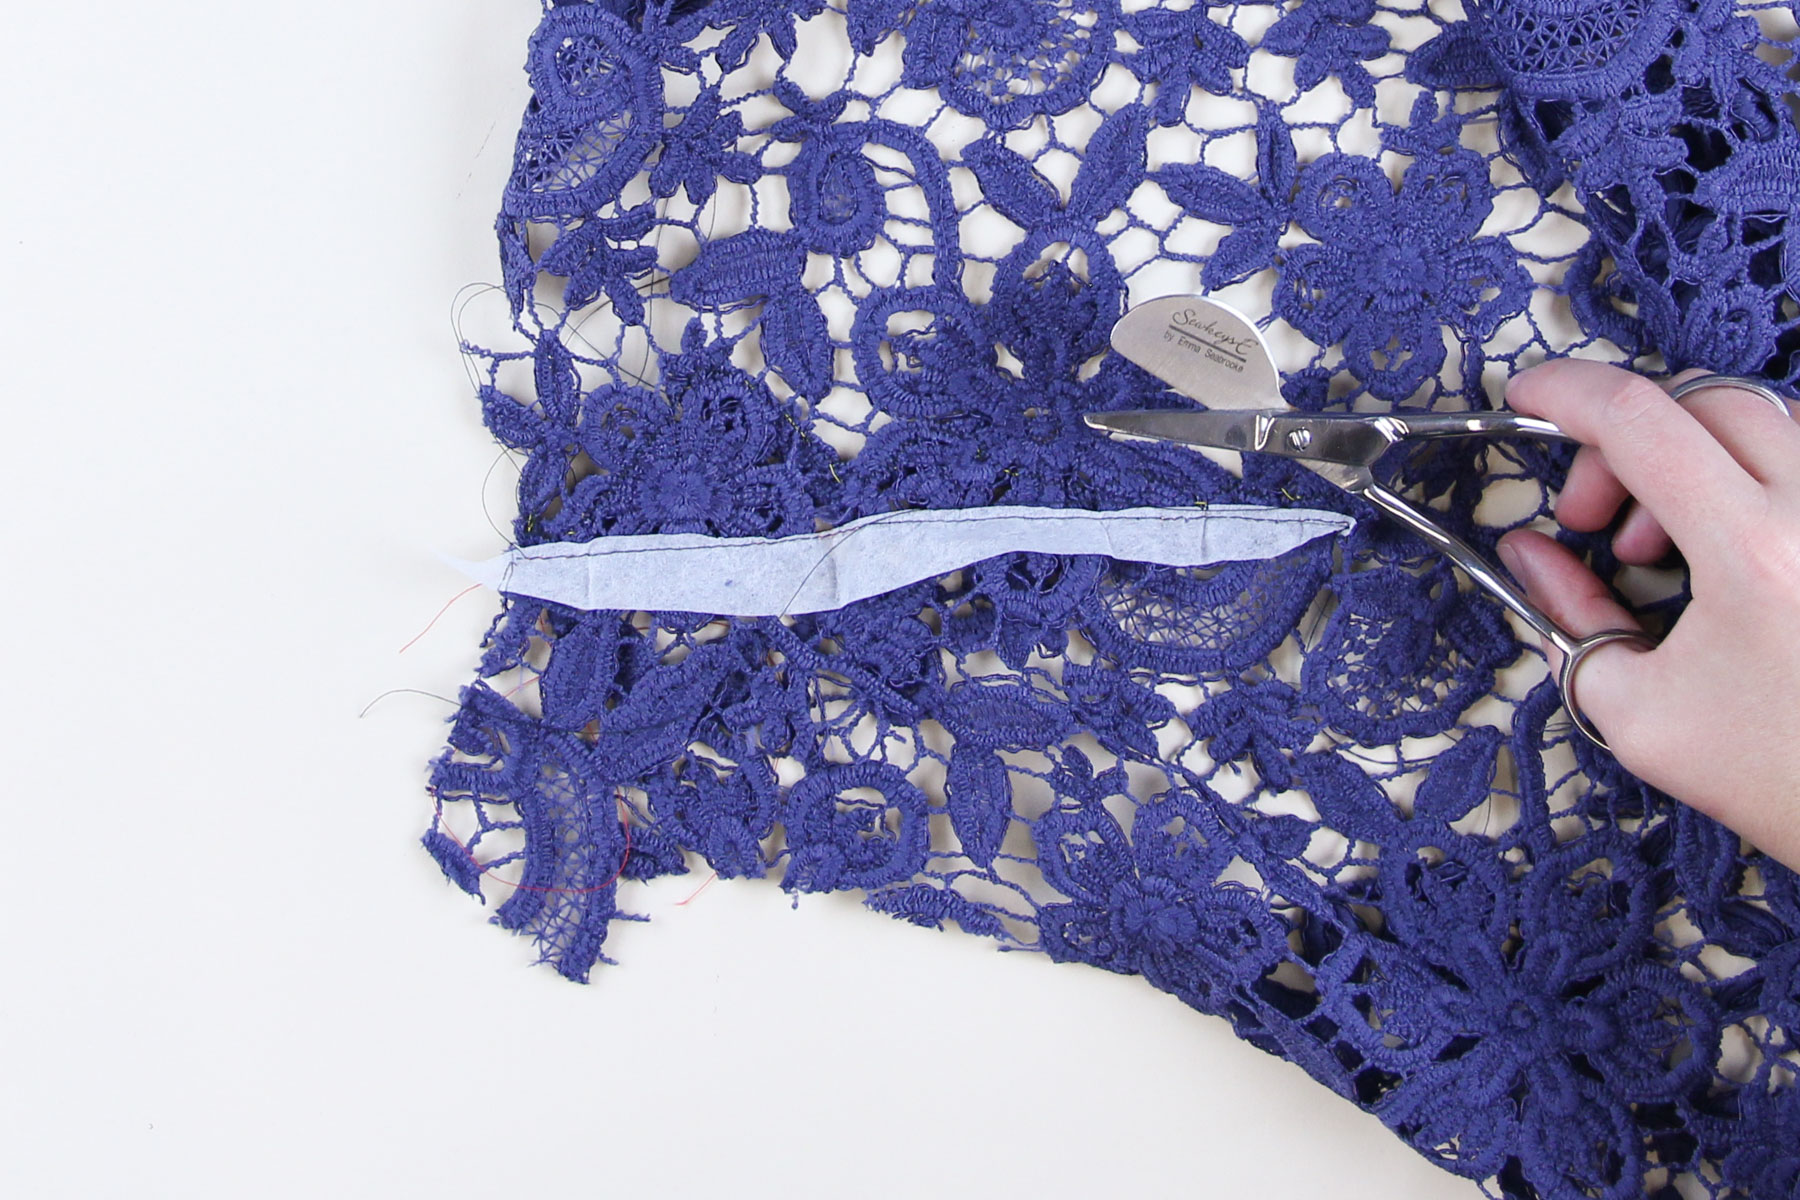
Choose a motif roughly along the upper leg of the dart and carefully cut along the edge of that motif.
Place a ham under the dart so you can shape your fabric. Pull the upper dart leg down over the lower dart leg so the stitching lines overlap.
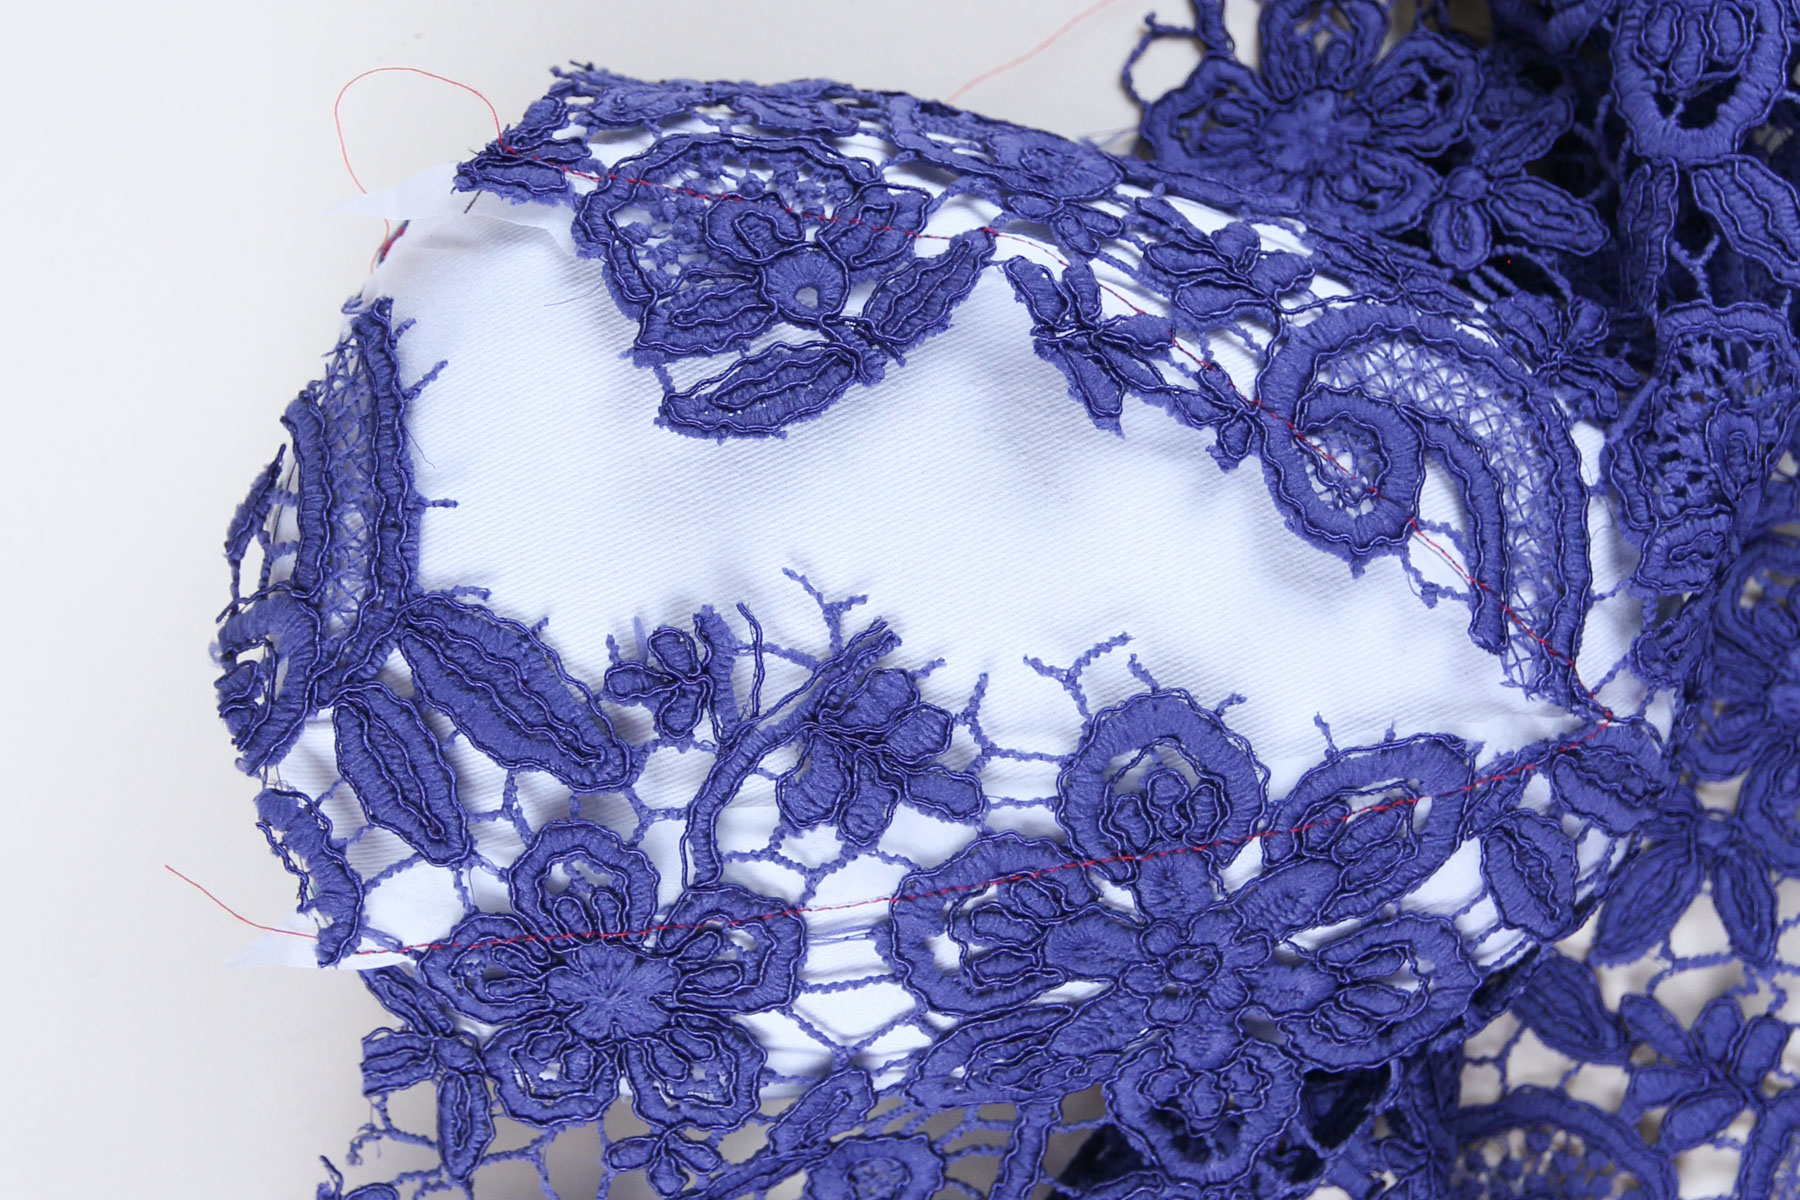

Hand baste along the edge of the cut motif in a contrast thread. This is going to be your guide when you go to the machine and will also hold the two layers together while you sew. I pinned as well to help support the weight of the lace.
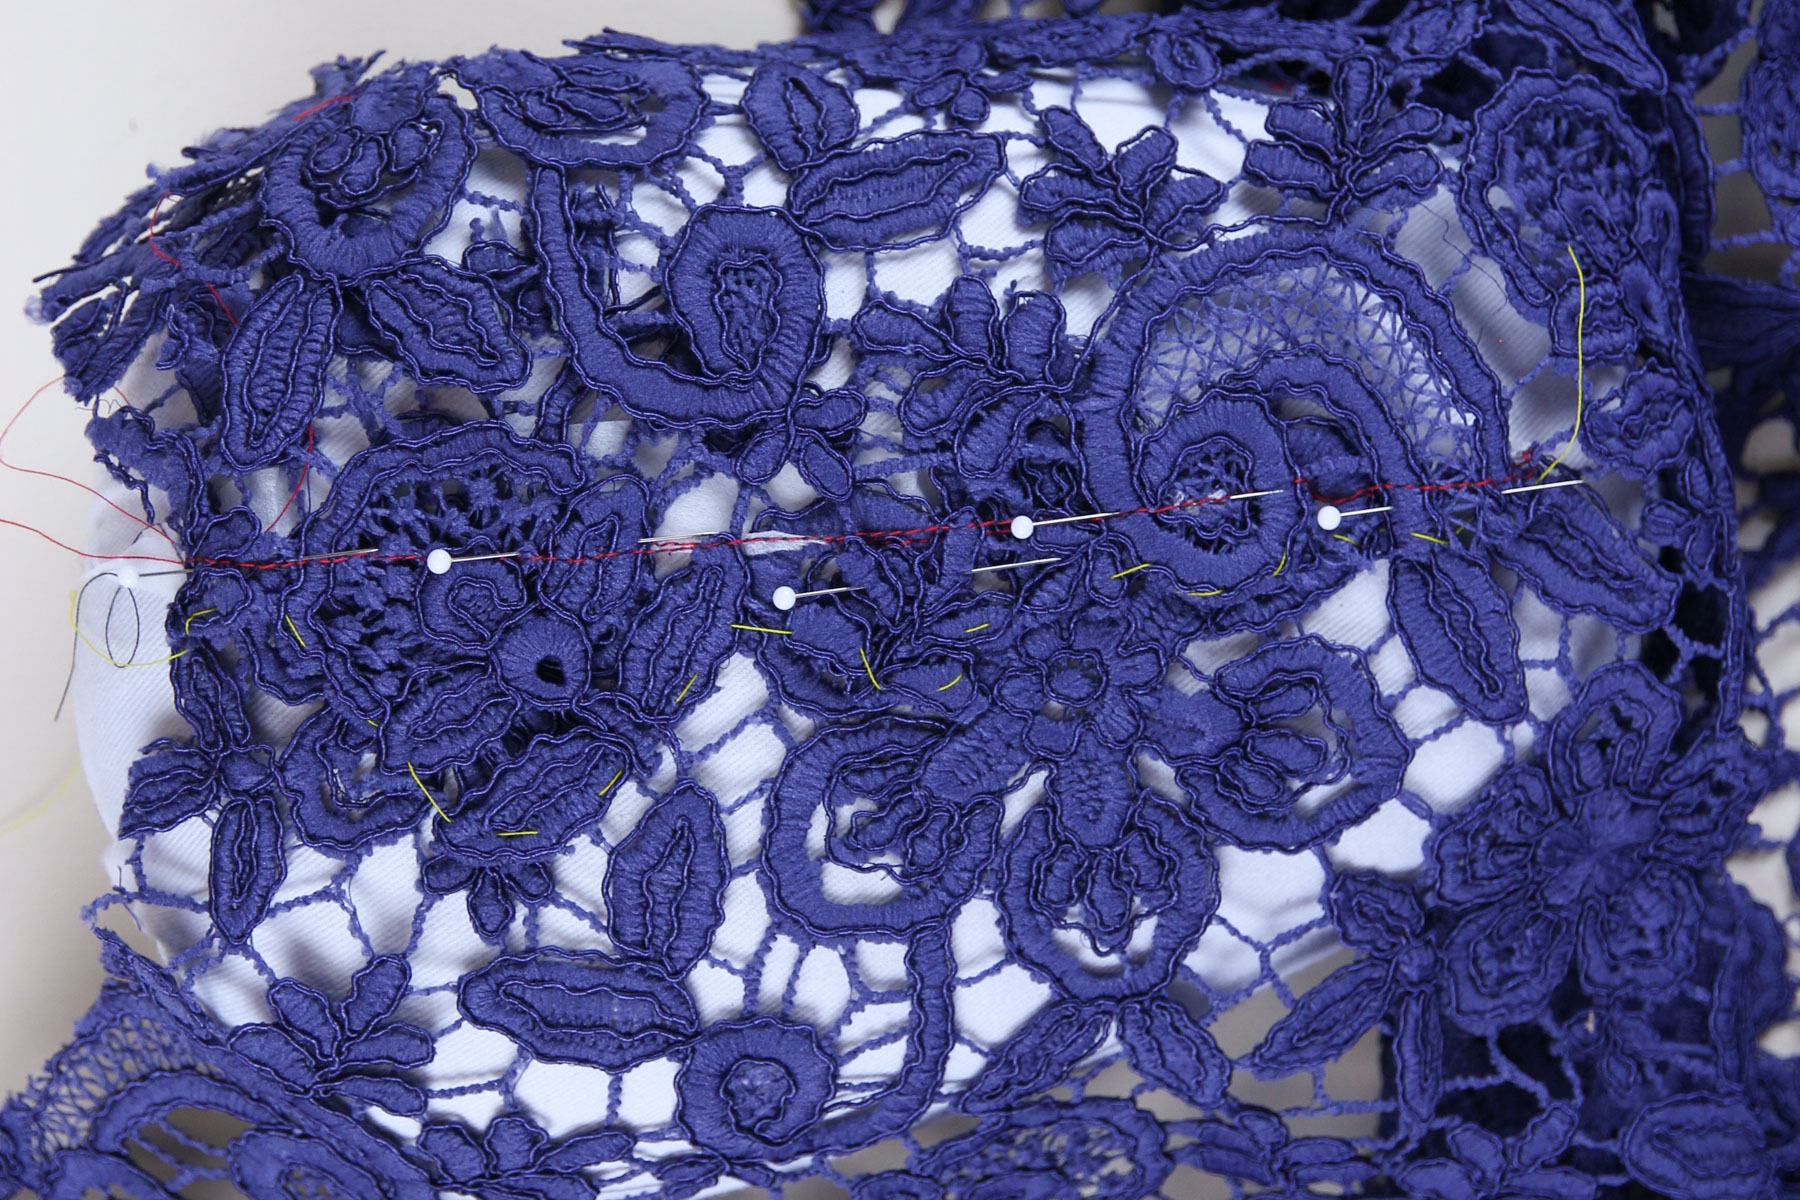
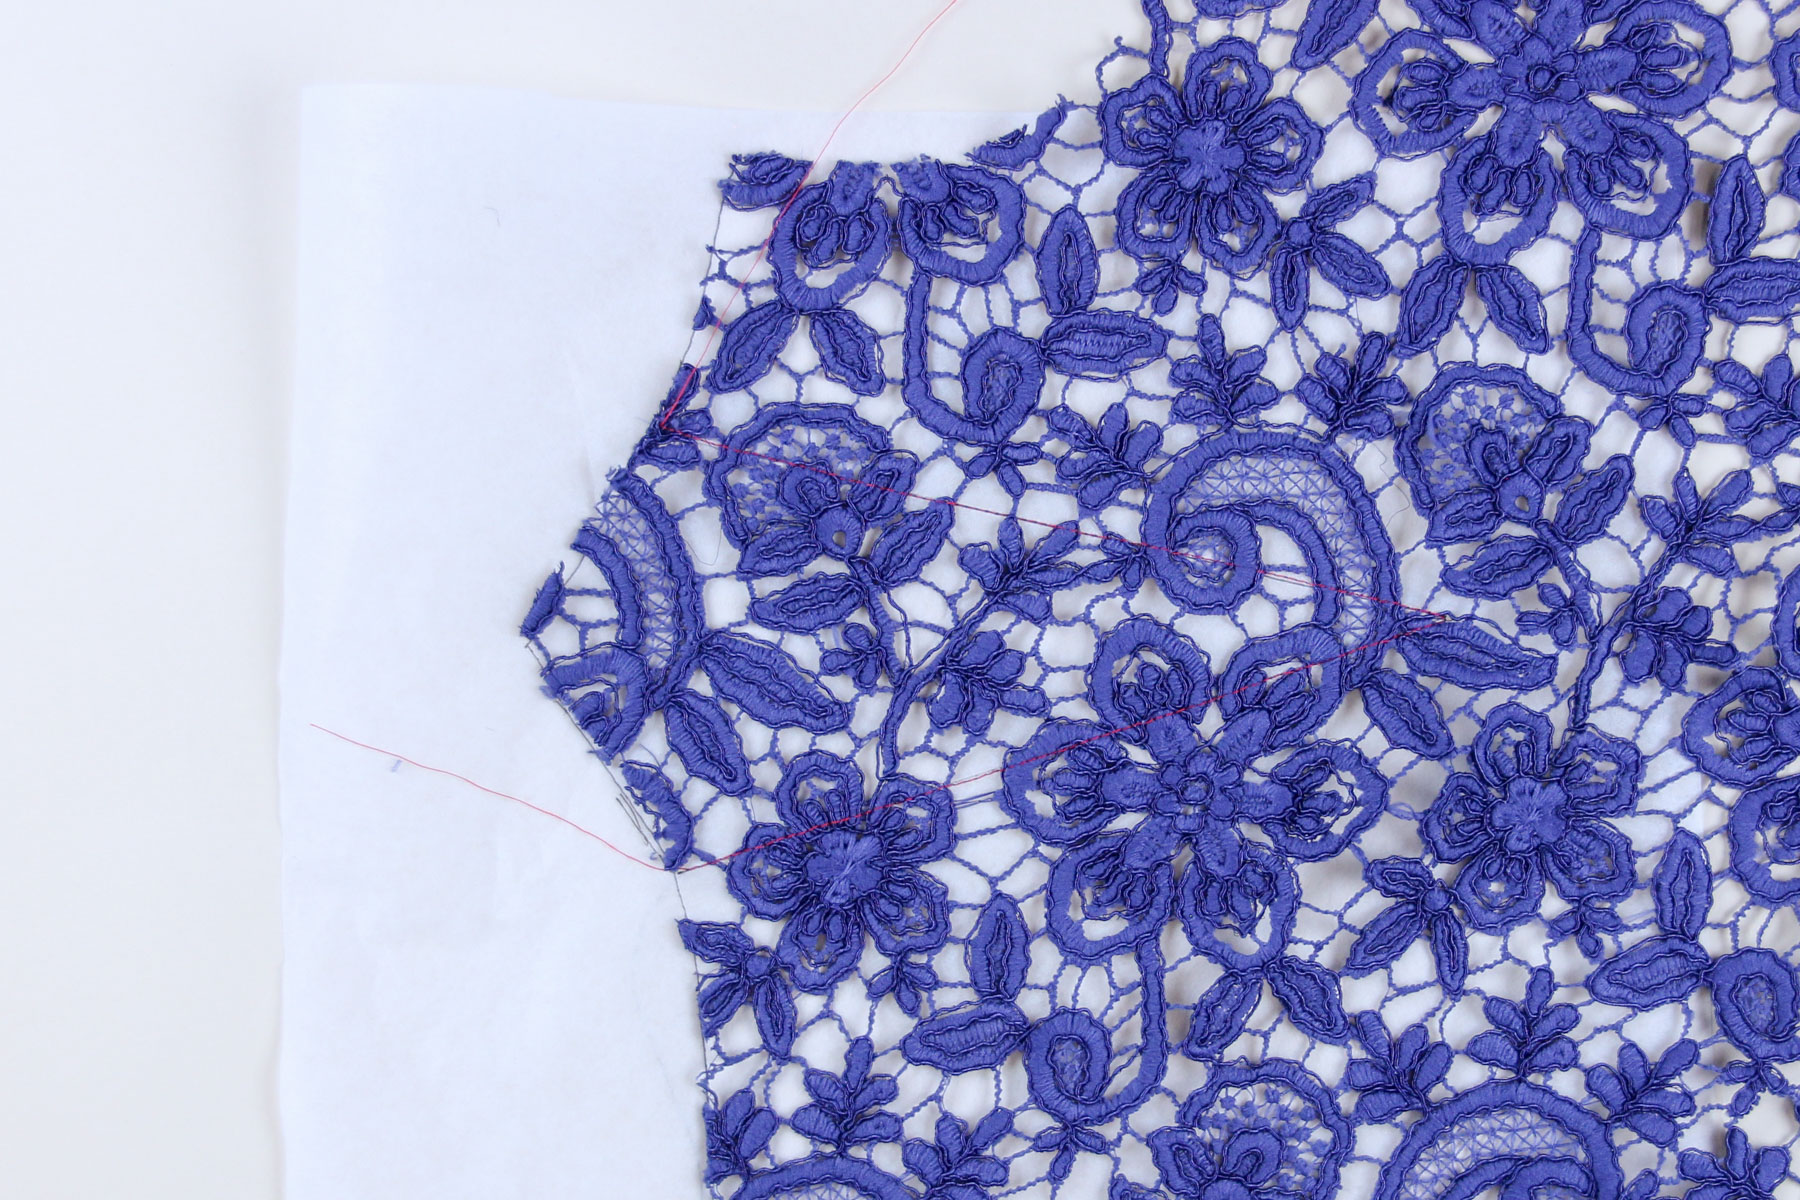
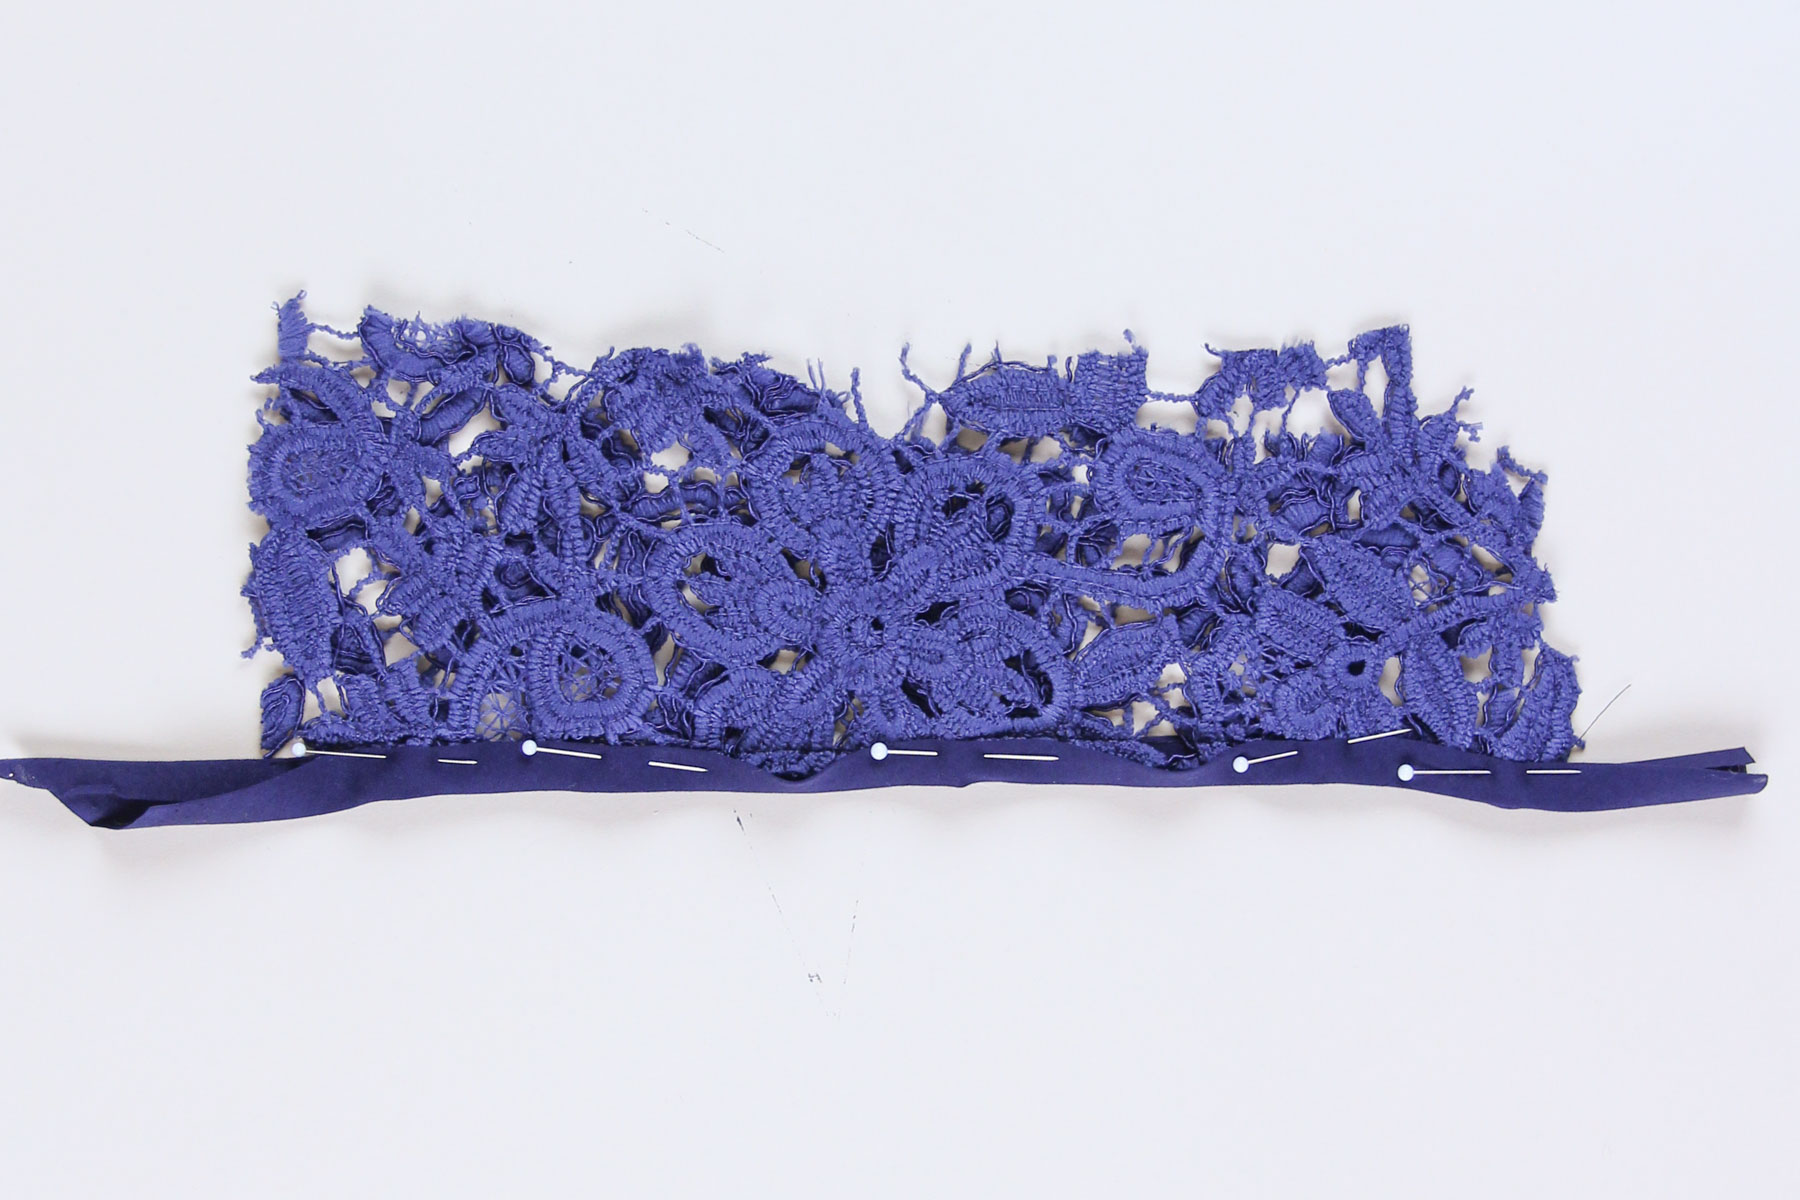
Now, head to your sewing machine and, using a matching thread, sew a dense zigzag stitch along the edge of the motif that you just hand basted. I have my stitch set to 2mm wide and 0.8mm long. Take your time, keep putting the needle down and rotating your fabric. This is the fiddliest bit of this top, but so worth it for the final result! When you reach the dart point, don’t backstitch, but leave long thread tails.
Thread the tails of thread to the wrong side of the top and tie a square knot. Then, using your hand sewing needle, bury them in the fabric of the lace. Alternatively, you can cut them and place a tiny dot of fray check on the dart point.
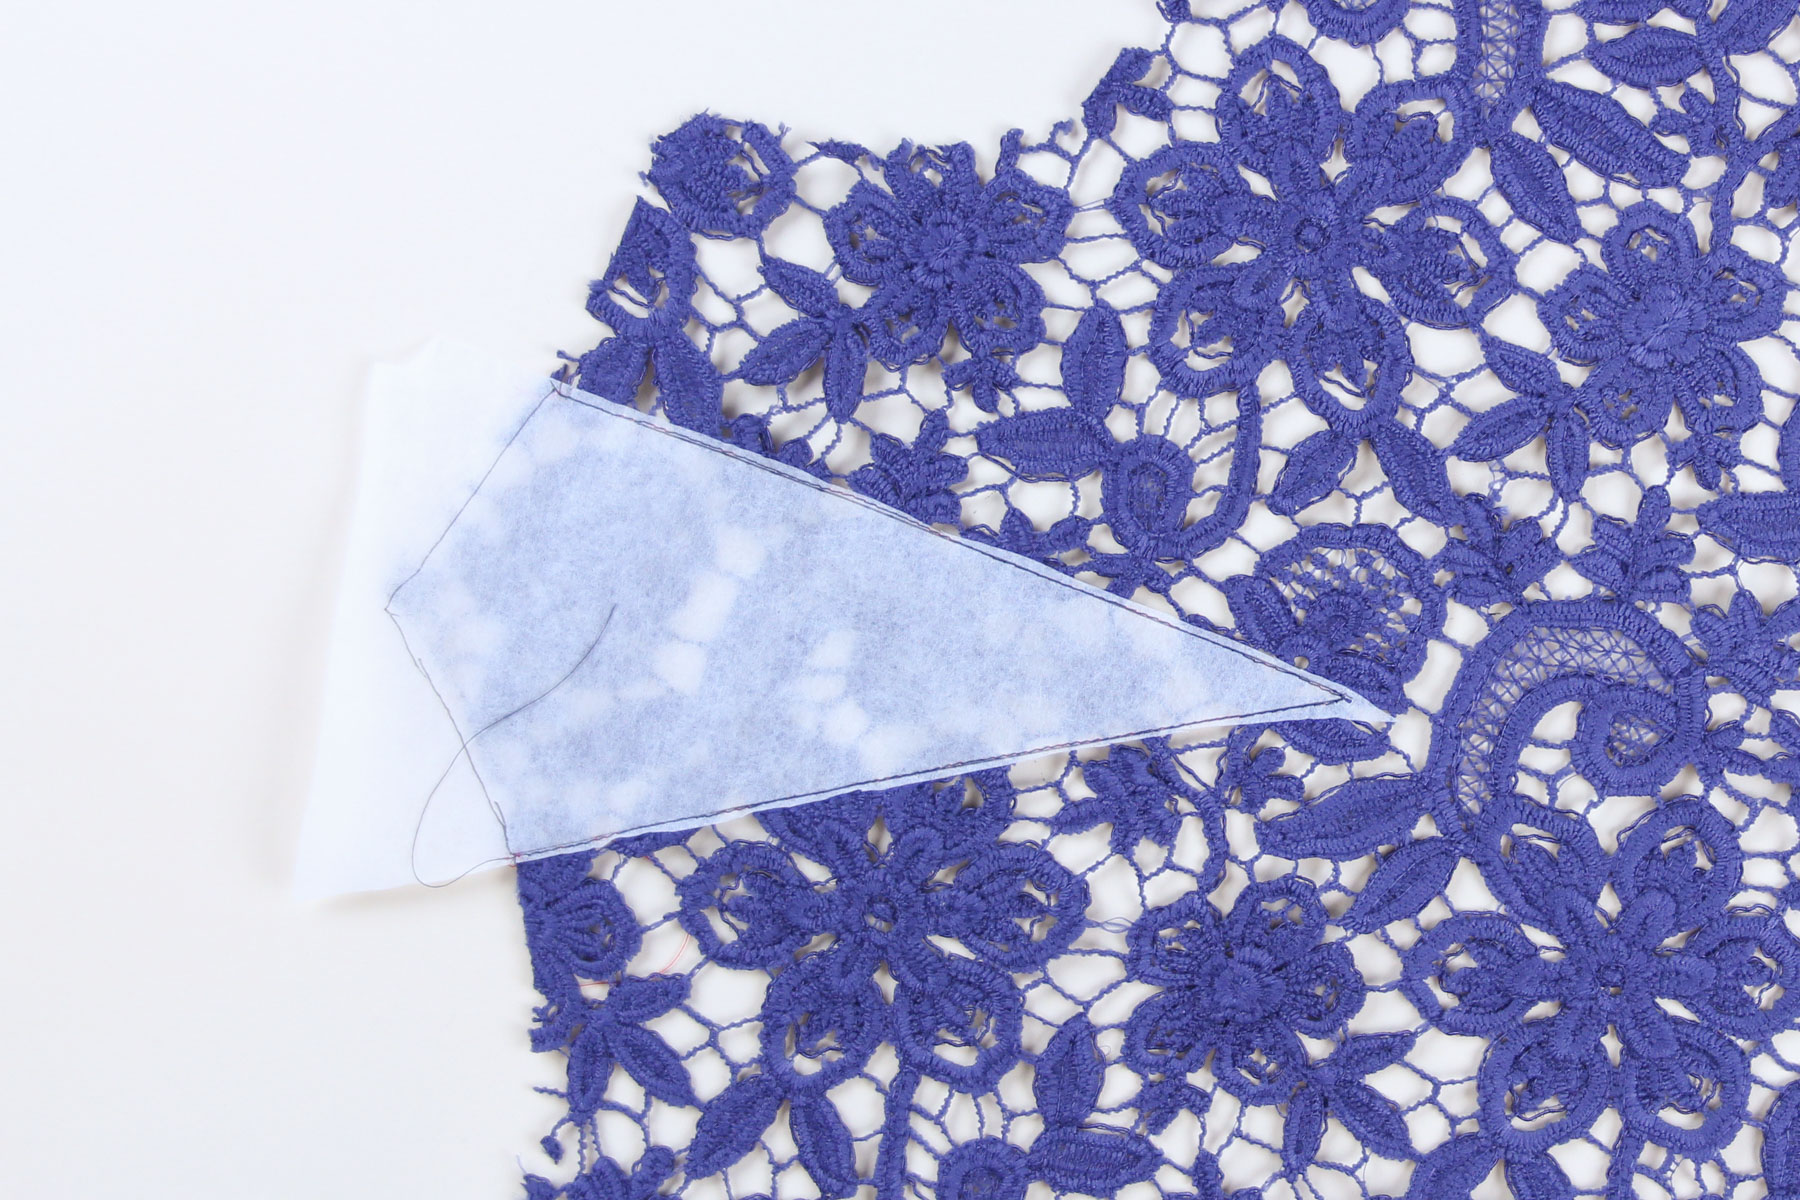
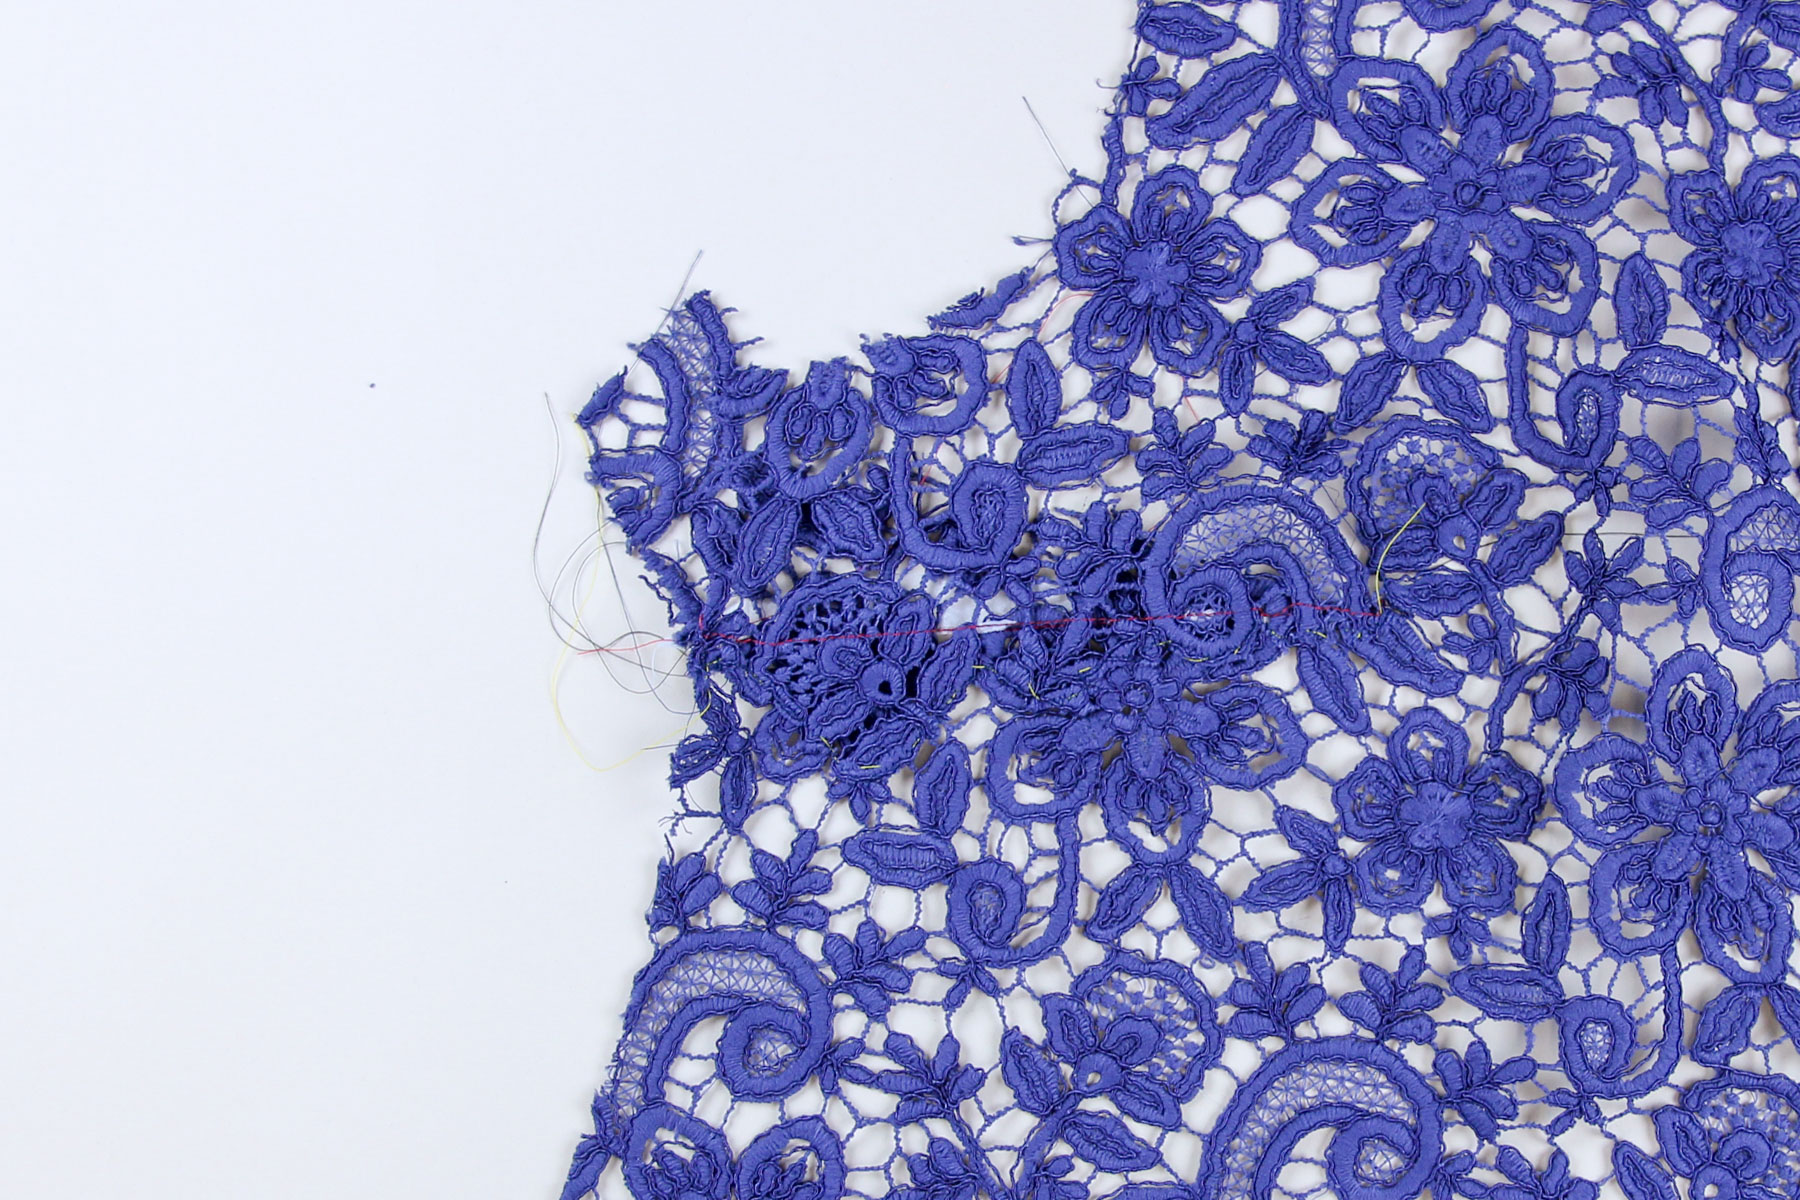
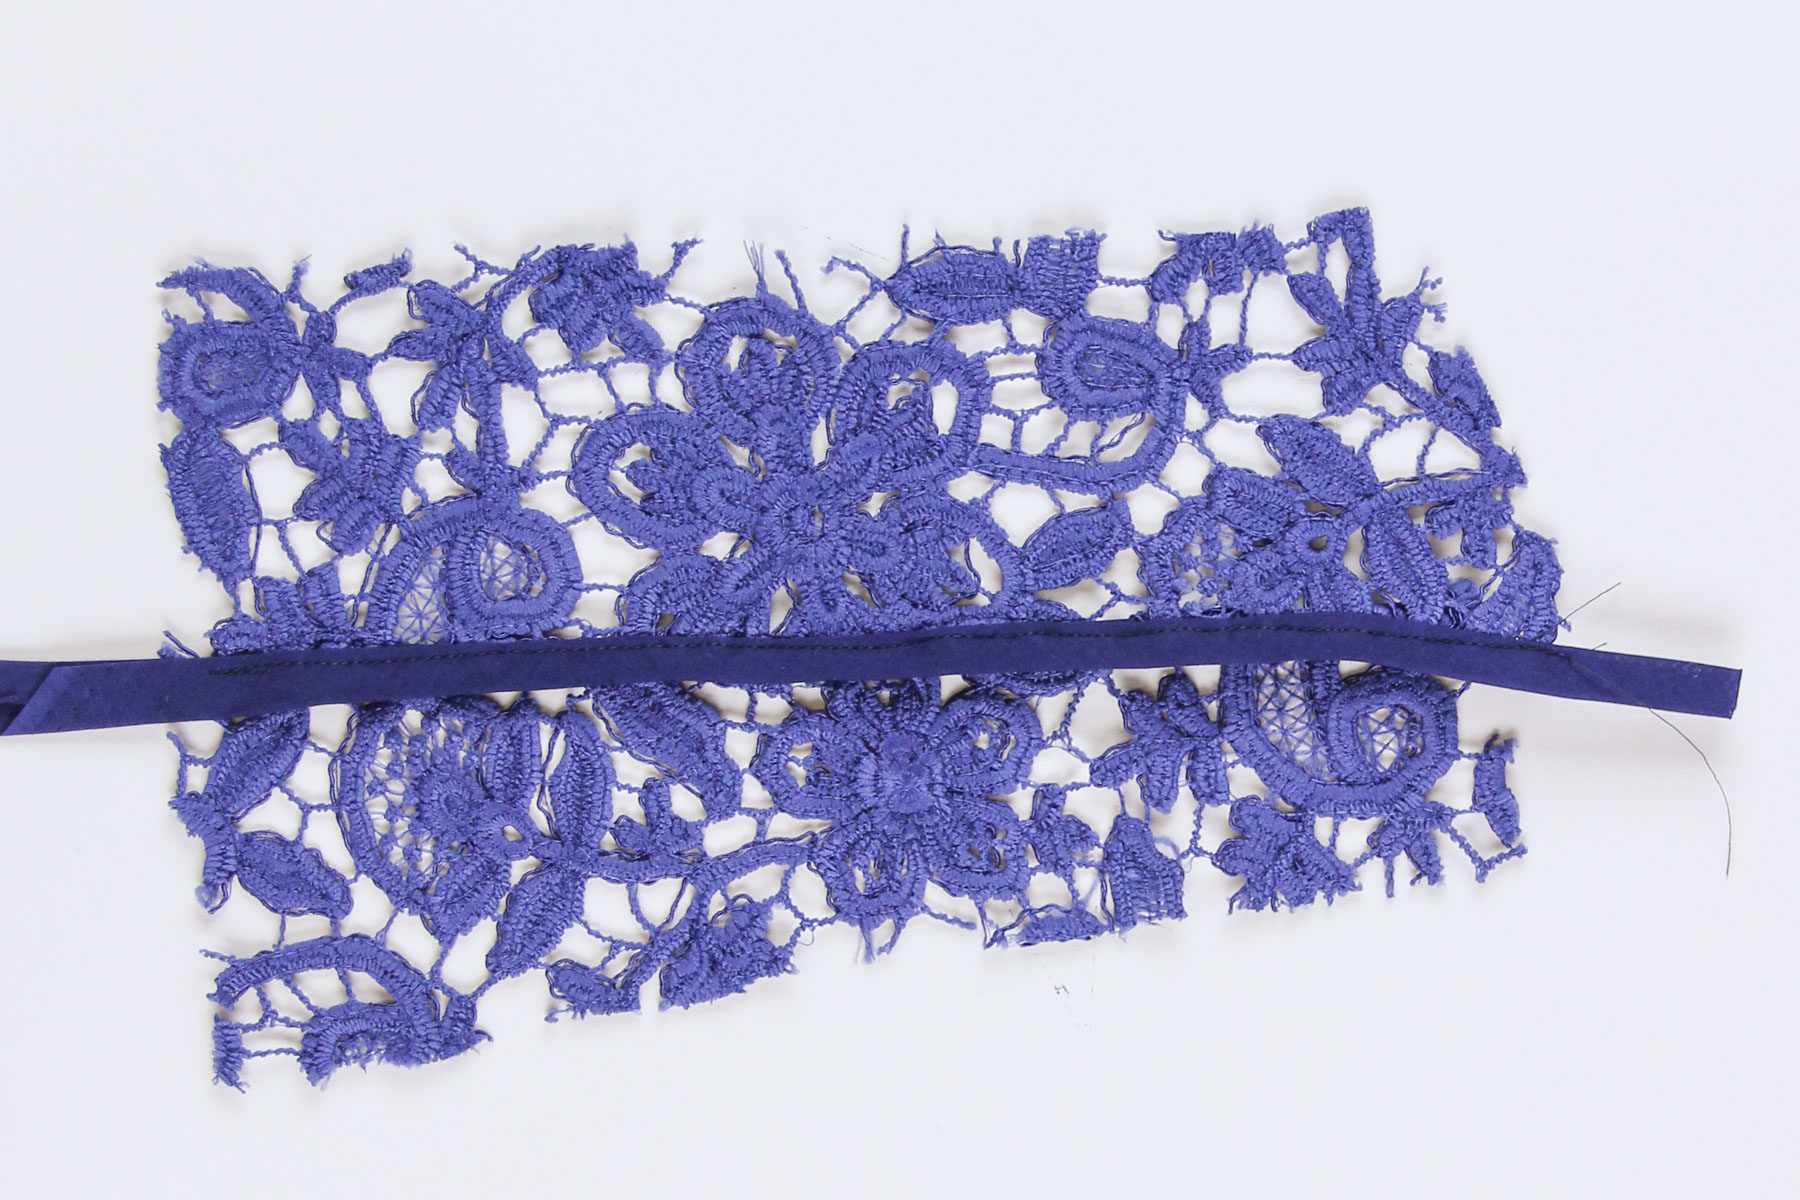
Now for the scary bit: trimming the lace! On the wrong side of your top, carefully trim away the lace that would have been folded in the dart. Applique scissors are useful for this but any small scissors will work; just be very careful not to cut through the front layer of lace. Trim as close to the zigzag stitch as you can, being careful not to cut the stitches.
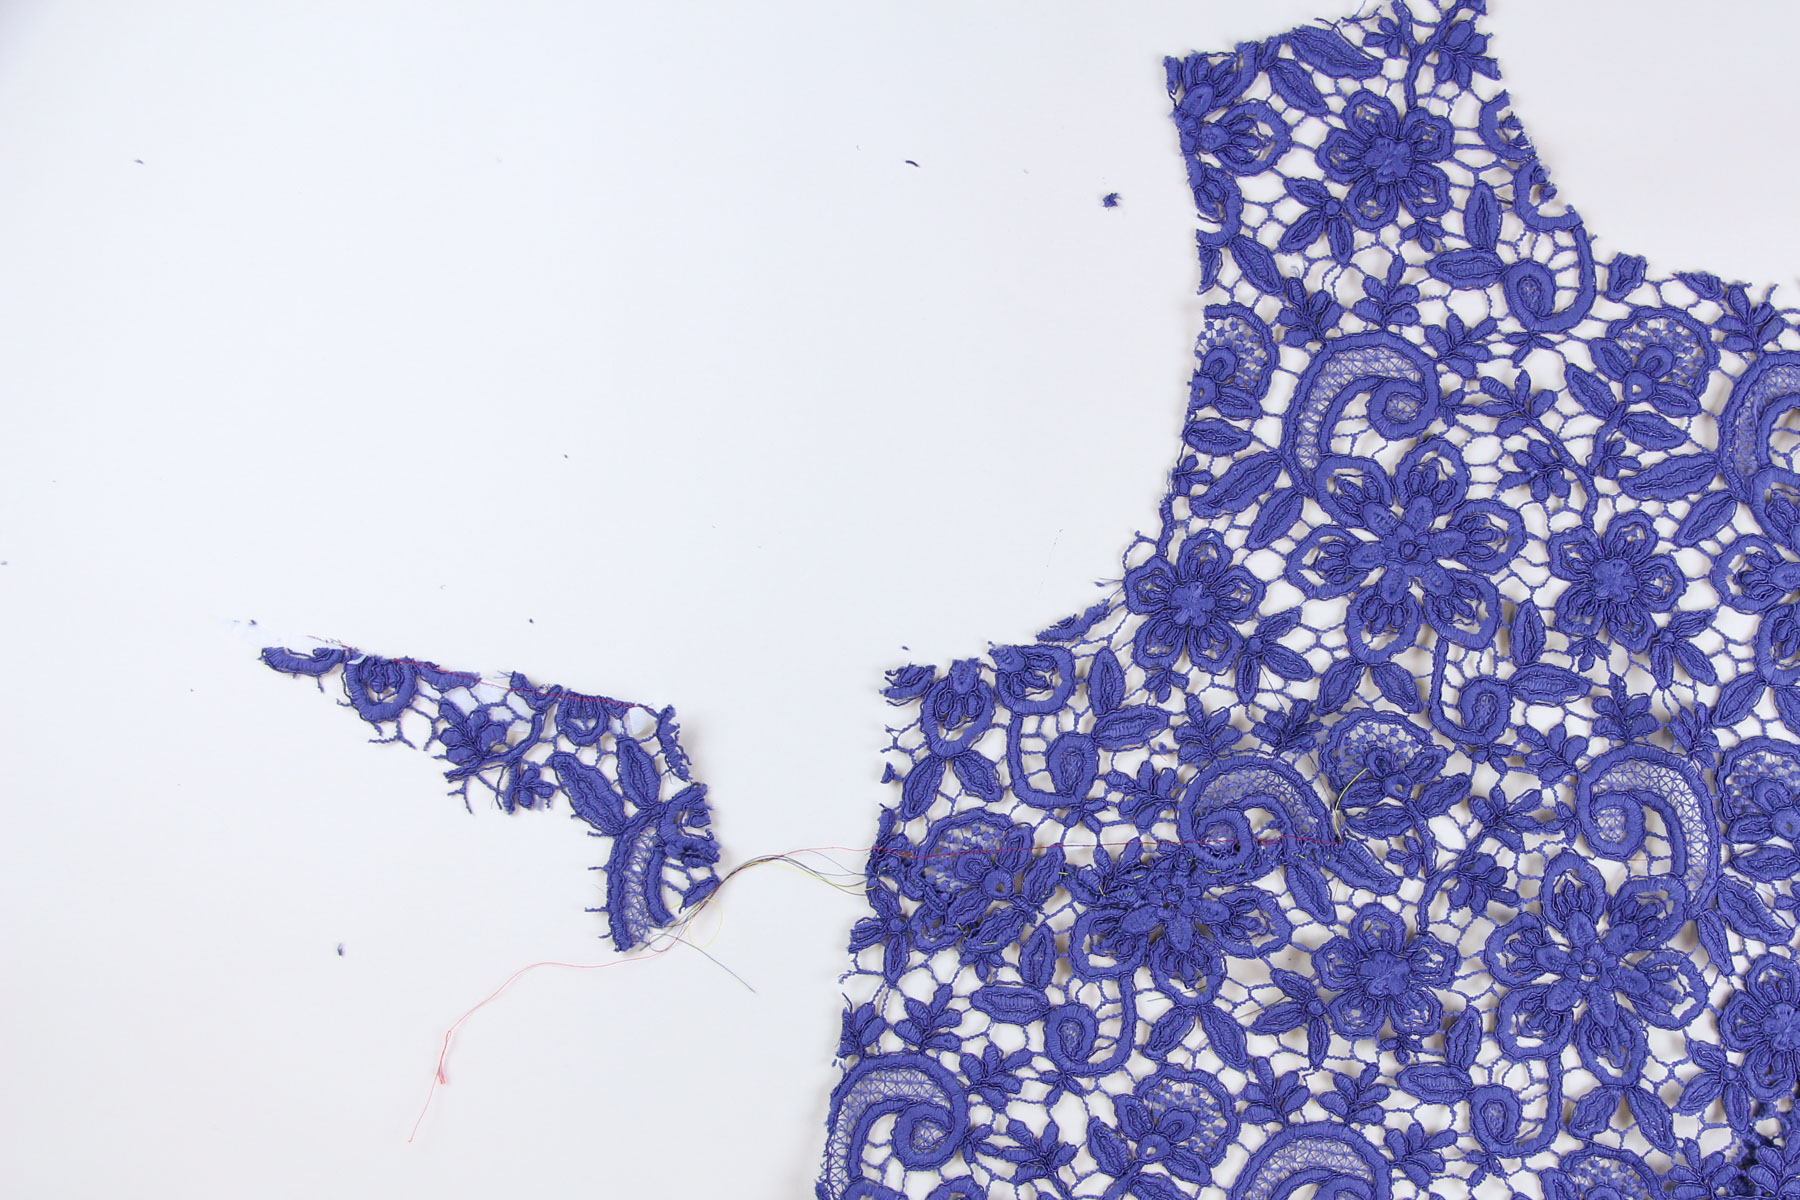
Now, remove all your basting stitches and repeat with the second dart!
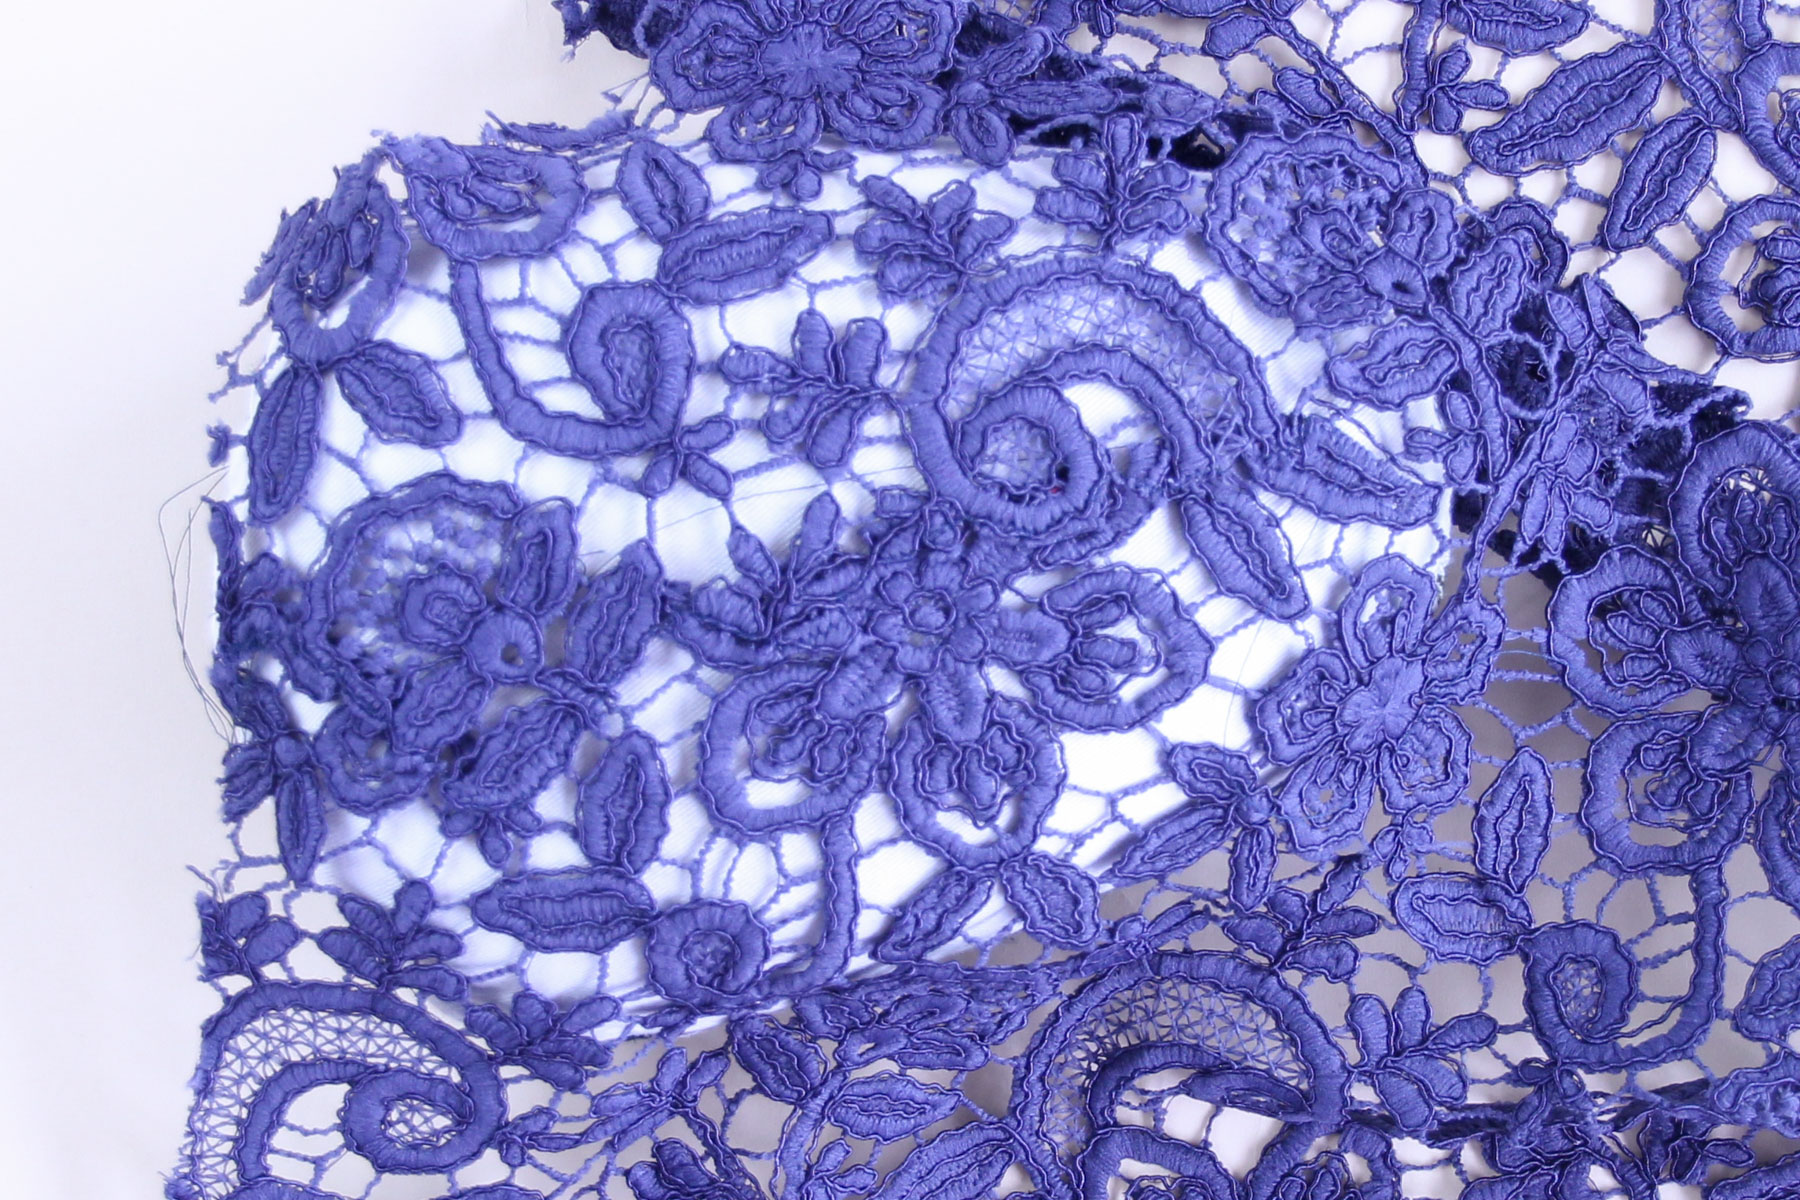
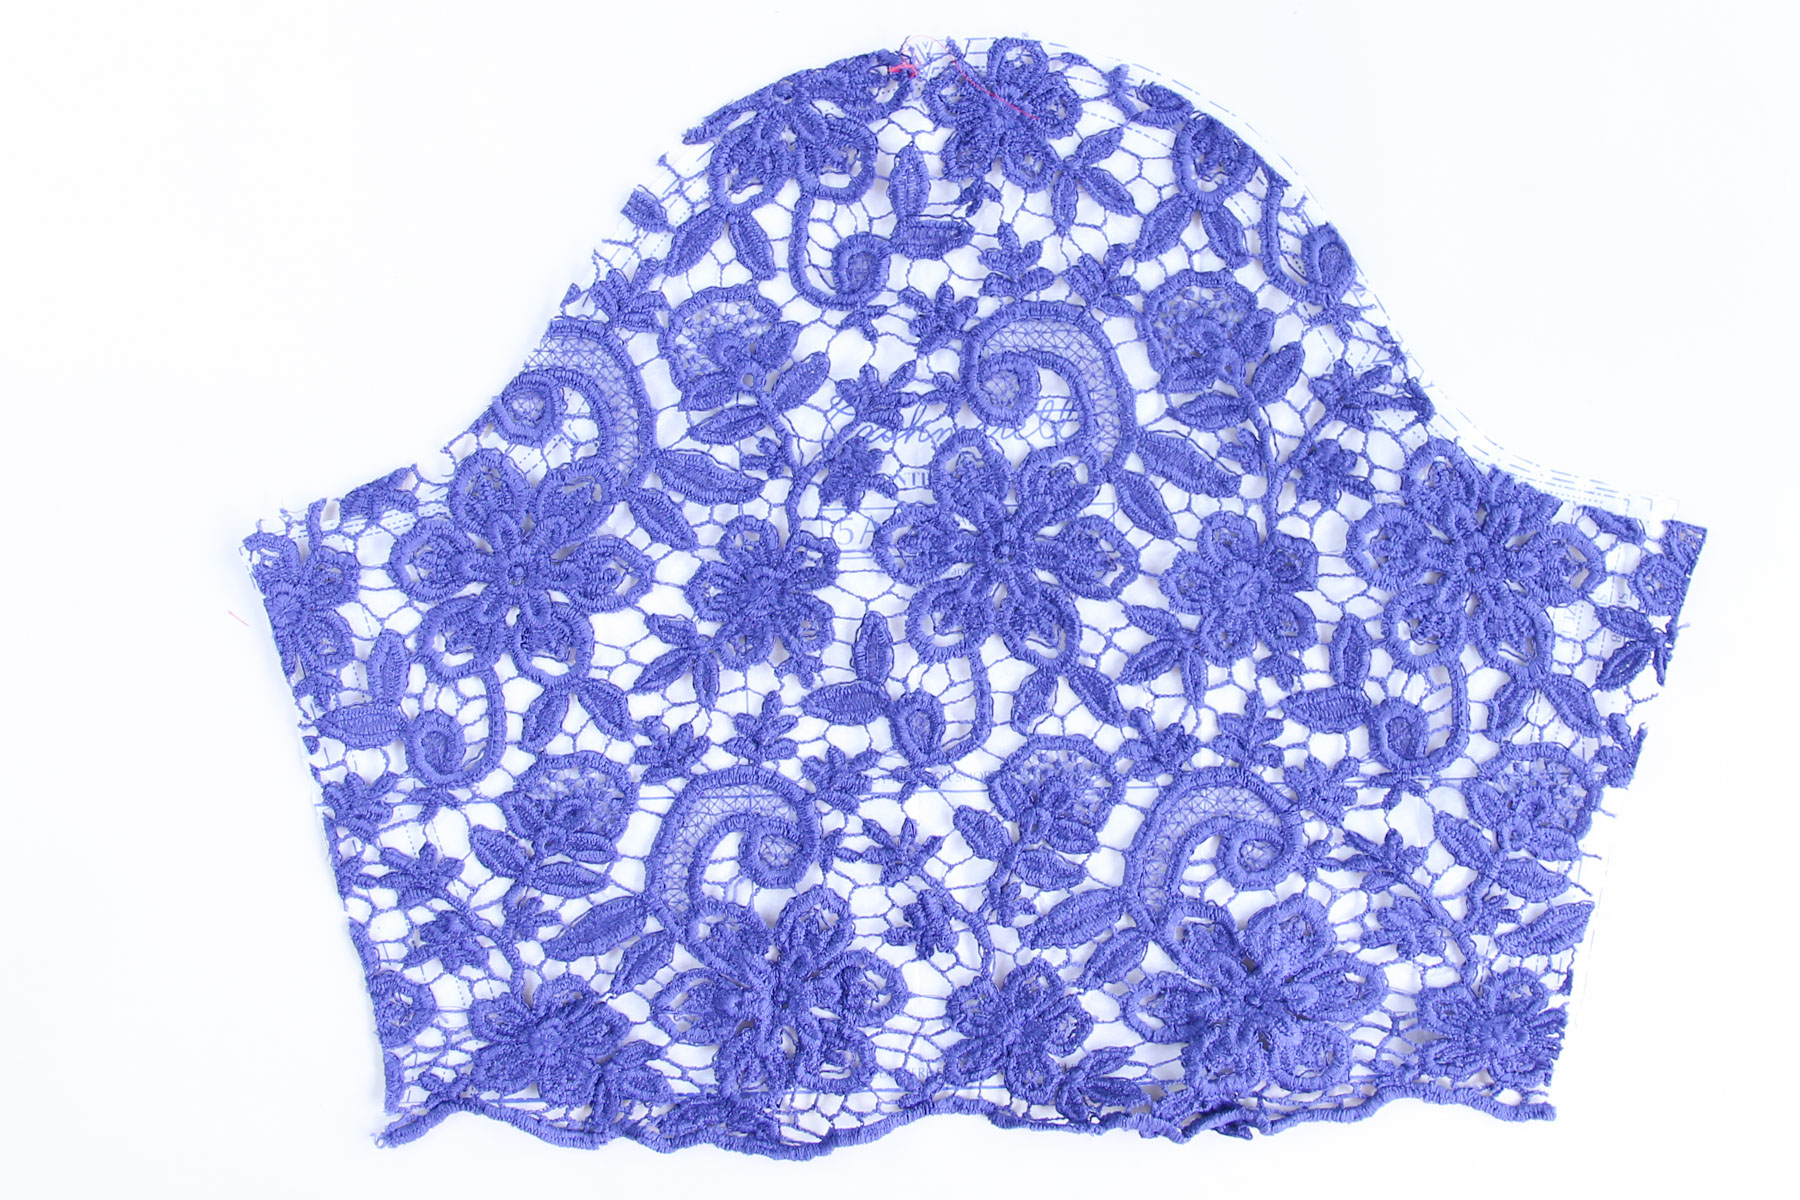
See how nice and invisible those darts are?! Great work! Now we can move on to construction. Again if you have a densely patterned or thin lace, you can sew the top as usual, but with an open guipure lace, you’ll need to address how to seam across those holes. One option is to lap and appliqué the side and shoulder seams as well; if you’re feeling really fancy, go for it but you need to cut extra seam allowance to do that. Frankly, I would only bother doing that for a super special dress (wedding or other special occasion) and the slightly visible seams don’t bother me on a top!
There are two simple options to help your machine cope with all of these holes and one is slightly more visible than the other. The more visible (and slightly more time consuming) option is to cut a piece of bias binding (1/4” double fold works well for this, or make your own starting with 1 1/2” wide bias strips) roughly the length of the seam you’re sewing. Pin together your two layers of lace and pin the bias strip to the underside with the pressed fold lined up with the seam line.
Sew at 1/2” seam allowance in coordinating thread through both layers of lace and the bias tape with the bias tape down against the feed dogs.
Trim the seam allowance in half. Finger press the bias tape around the seam, enclosing the raw edges of the guipure lace and pin or fix with Wonder Tape. Topstitch the bias tape to the seam allowance of the lace.
And there you have a perfectly encased seam. You can see that it is a bit visible from the right side, but it makes a very nice finish against the skin.
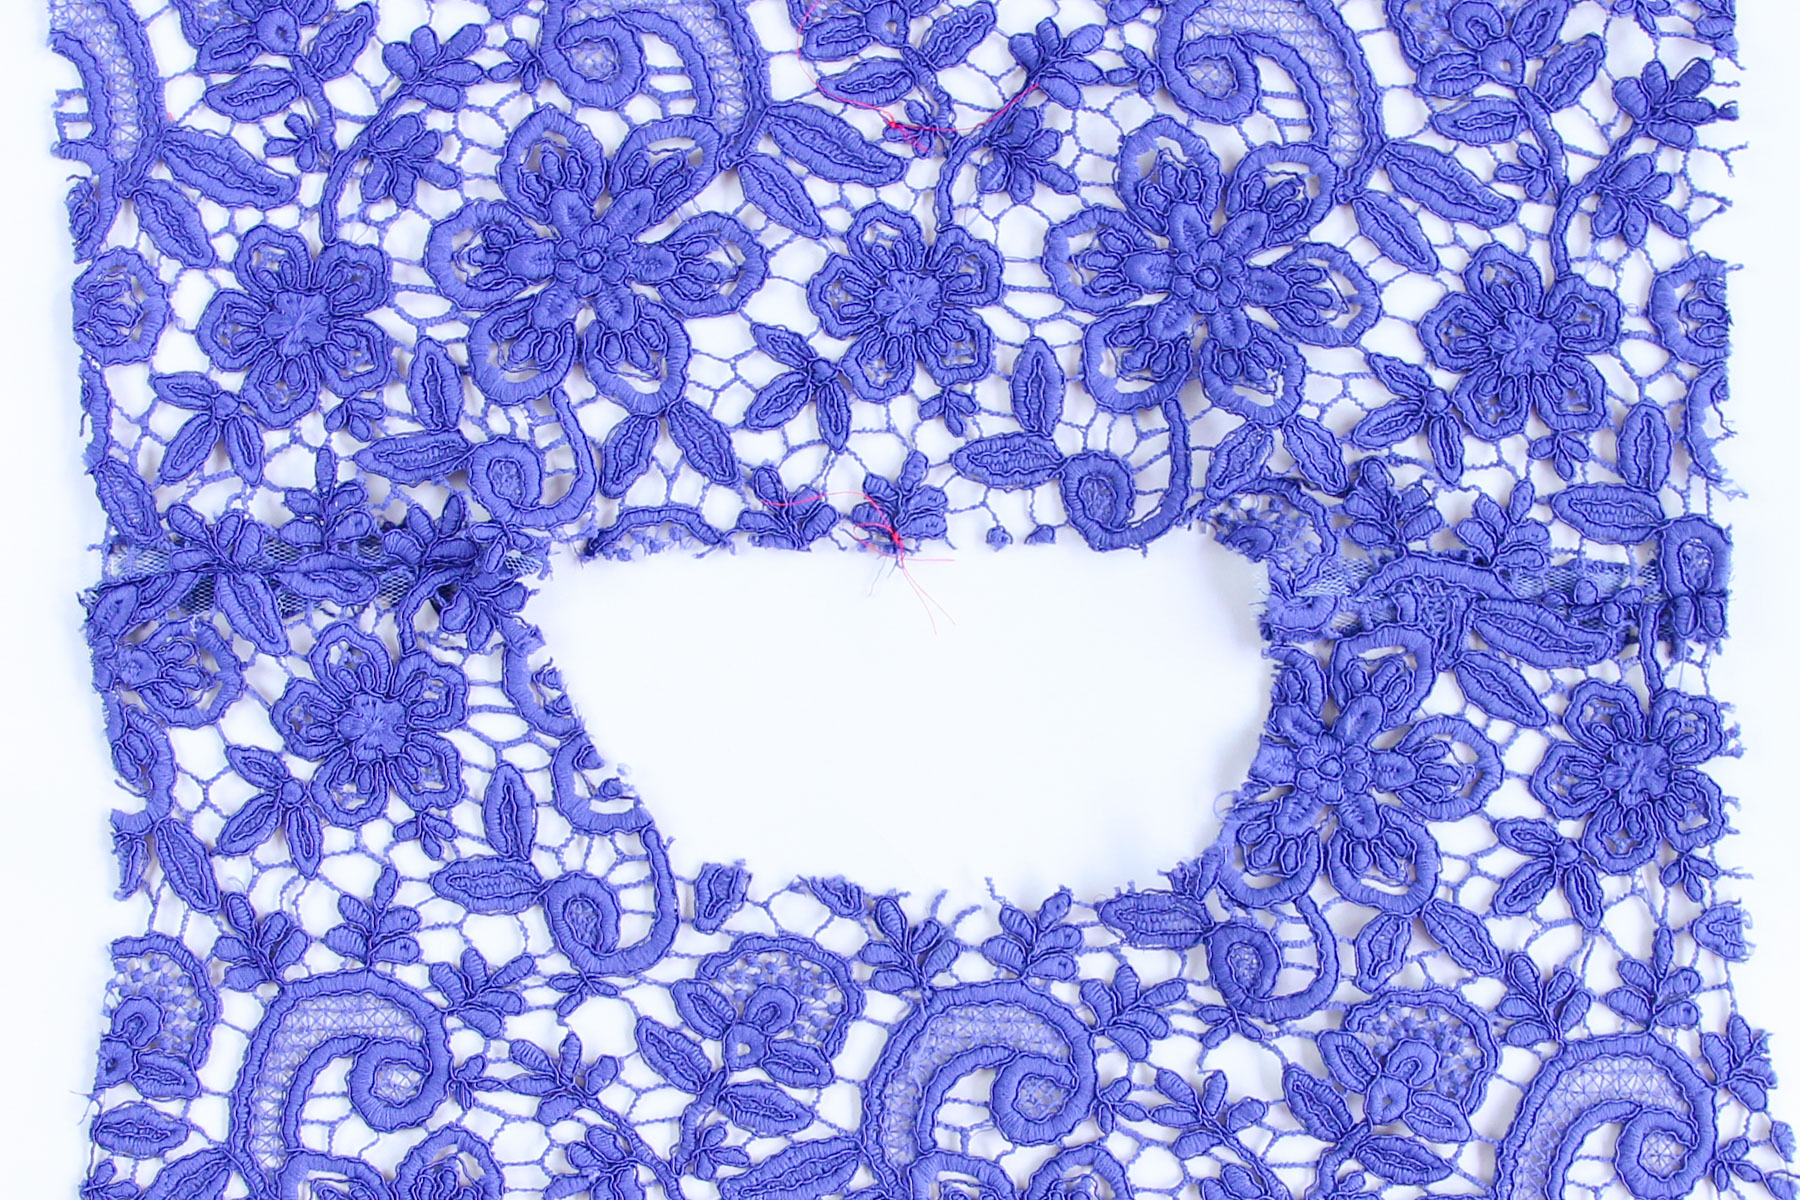
The second option for treating these seams is the one I’ll be using for our garment today. It is a bit less visible from the right side and it is also a bit quicker. For this method, you’ll be using tulle or silk organza instead of bias tape. I picked up a roll of tulle in a light ivory color for just a few dollars at my local craft store; this needn’t be anything fancy. Cut two strips of tulle 1/2” wide and a bit longer than the length of the seam you’re sewing.
Pin your pieces of guipure lace together along the seam you’re sewing. Then place one strip of tulle on the underside and one strip of tulle on top, pinning them to the lace, making a little tulle and lace sandwich. I found on my machine that just one strip of tulle on the underside worked best, so that’s what I did for the remaining seams, making it even more invisible.
Sew this seam on the machine with a short straight stitch. The tulle acts as filler substituting for fabric where the lace has big holes. Trim back the tulle close to the seam line on the body side of the seam using small scissors or appliqué scissors, being very careful not to cut the lace. Finally, finish the seam by either serging it, if your serger can handle it, or trimming back the lace and tulle.
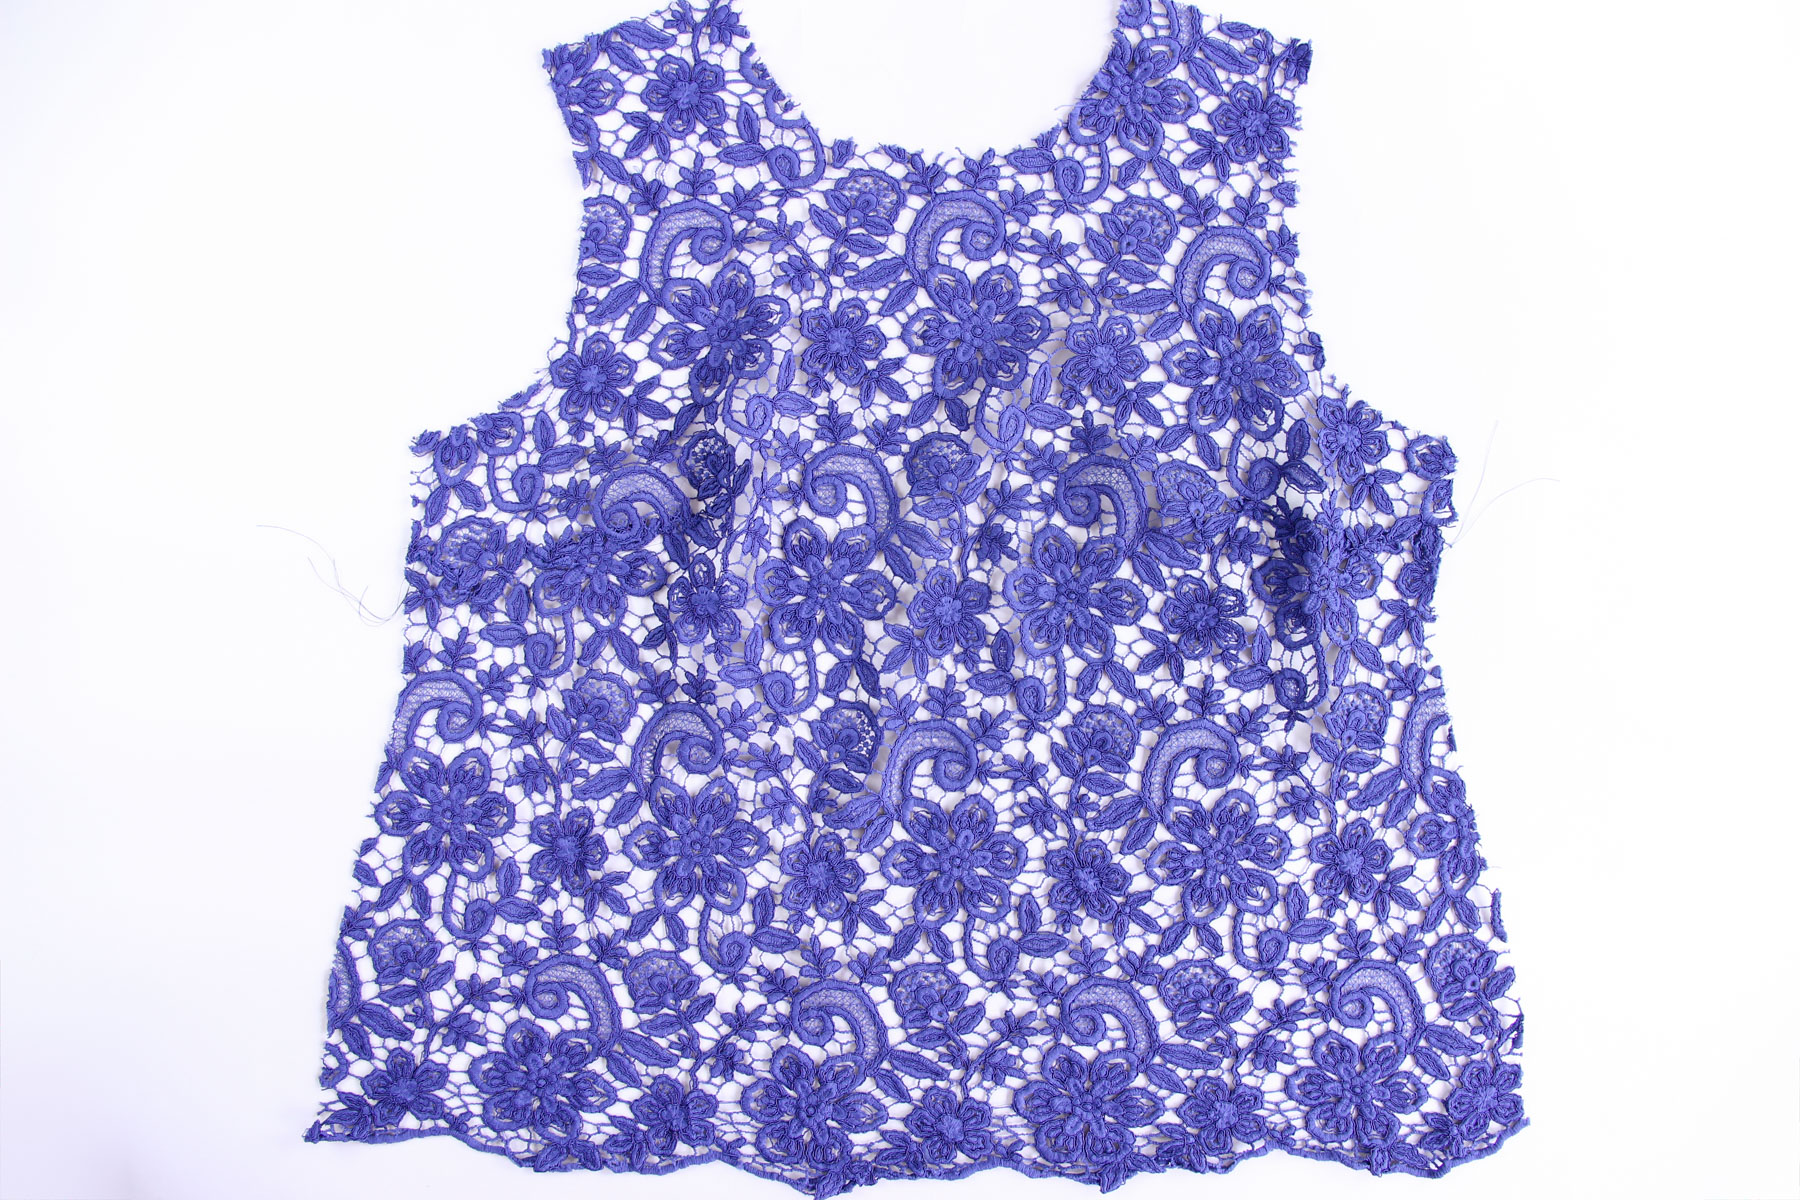
The last thing to consider when sewing with guipure lace for the Montrose Top is sleeve insertion. Gathering stitches don’t really work well on an open lace like this, plus, the nature of the lace makes them unnecessary. Because there are all these gaps in the fabric, you can really manipulate it quite a bit. Start by pinning the shoulder notches together (I marked these with tailor’s tacks) and the ends of the sleeves to the ends of the armscye. Then pin from the ends of the sleeve up to the notches on each side. Finally, distribute the remaining sleeve head into the armscye, moving around the bits of lace as needed. Use either the tulle finish (shown here) or the bias finish (described above) and sew the sleeve in.
That’s it for our special guipure lace post. Next time, we’ll finish the necklines of all our versions of the Montrose Top, including this one!

I’m not making the Montrose top but I think your lace sewing tips are great. Thank you for a very informative article.
I love these tips! I just received a couple of different laces to make a couple of these tops, and this makes it much less intimidating.
Thank you for such a detailed and informative post. I learned a lot.
What a post!!Very useful and loved reading it 🙂
I am sewing the bodice overlay of a wedding dress. I would prefer to use hand stitching for the lap applique of darts. I am also sticking with the waist darts as there is no scalloped edge to be concerned with. Question. What type of hand stitch would you recommend? blanket? Also can i put fray check on the few small areas that I had to cut through the motif ? I also am wondering…. the pattern called for me to do an underlining of tulle for the entire bodice front and back. I like that it helps maintain the shape and stability of the bodice, however, is this still okay with guipure lace since the holes and lack of “net” make it beautiful?? (The under bodice is a sweetheart taffeta backed satin. I appreciate your time and talent. thanks
hi Heather – I’m not really an expert on couture hand stitching – I’d recommend checking out Claire Schaffer’s Couture Sewing book or Susan Khalje’s Bridal book.
Your sewing tips and info are great! Do you have email for your followers? Sign me up if you do. My em is sab54cook3@gmail.com. Thank you!
Hi Susan, you can sign up for our newsletter here: http://cashmerette.com/newsletter
-Ayelet at Cashmerette
Just what I needed! Can’t wait to get started creating my version.
P.S. I love that royal blue color, it’s so pretty!
Absolutley priceless! Thank you so much for this post! I will be using guipure lace for my daughter’s wedding dress. Thanks again for all your work on this post!
The most comprehensive guipure machine stitching guide I’ve found on the internet! This was SO helpful!
I have never sewn lace before. I was given a beautiful lace tunic top. It fits perfectly except the sleeves are a bit too long. Can I cut the lace so that it does unravel? Or should I just find a seamstress?
Hi Dale, if you shorten your sleeve and the lace does unravel, you can use a hand sewing technique to do a very delicate hem. We have a tutorial on how to do that here: https://blog.cashmerette.com/2018/04/montrose-sewalong-day-4.html
-Ayelet at Cashmerette
Wow this was so informative and practical. I have been sewing for many years but this is my first with using guipure lace and of course it would have to be for my mother of the bride dress. So no pressure there then! This was so amazingly helpful. Many thanks.
Thank you! I am actually sewing a priest’s liturgical garment called a surplice (or rochet), and he has requested lace. I sewed one for him like this 4 years ago and really struggled to seam the lace; I ended up serging. I am going to try one of your ideas this time, looks so much nicer. Thanks! And thanks for clean blog with no ads!!!