The Calder Pants & Shorts are here! We are loving seeing all of your excitement about this new pattern, and have already seen a number of Calders popping up in our feeds!
The Calder Pants & Shorts sewing pattern is available in our new size range, sizes 12-32. (If you need help choosing your size, click here.) One thing you’ll notice right away is that there are two pelvis fit options—apple and pear. How do you go about choosing the fit option that’s right for you? We’re going to talk about that and more in this very post, so keep reading!
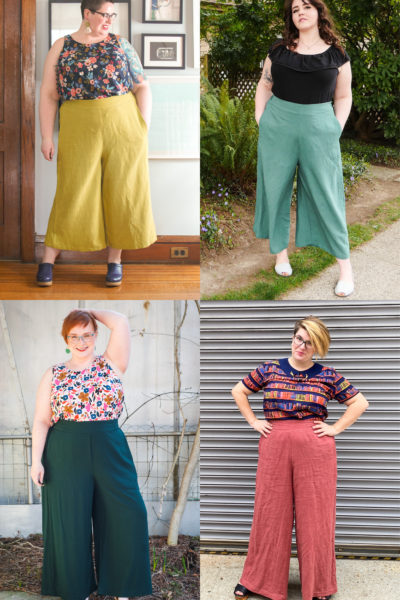
Calder, the Wide-Leg Trouser of Our Dreams
The Calder features wide, flowy legs, a flat front, and elastic back waistband. This makes them perfect for everyday wear or special occasions.
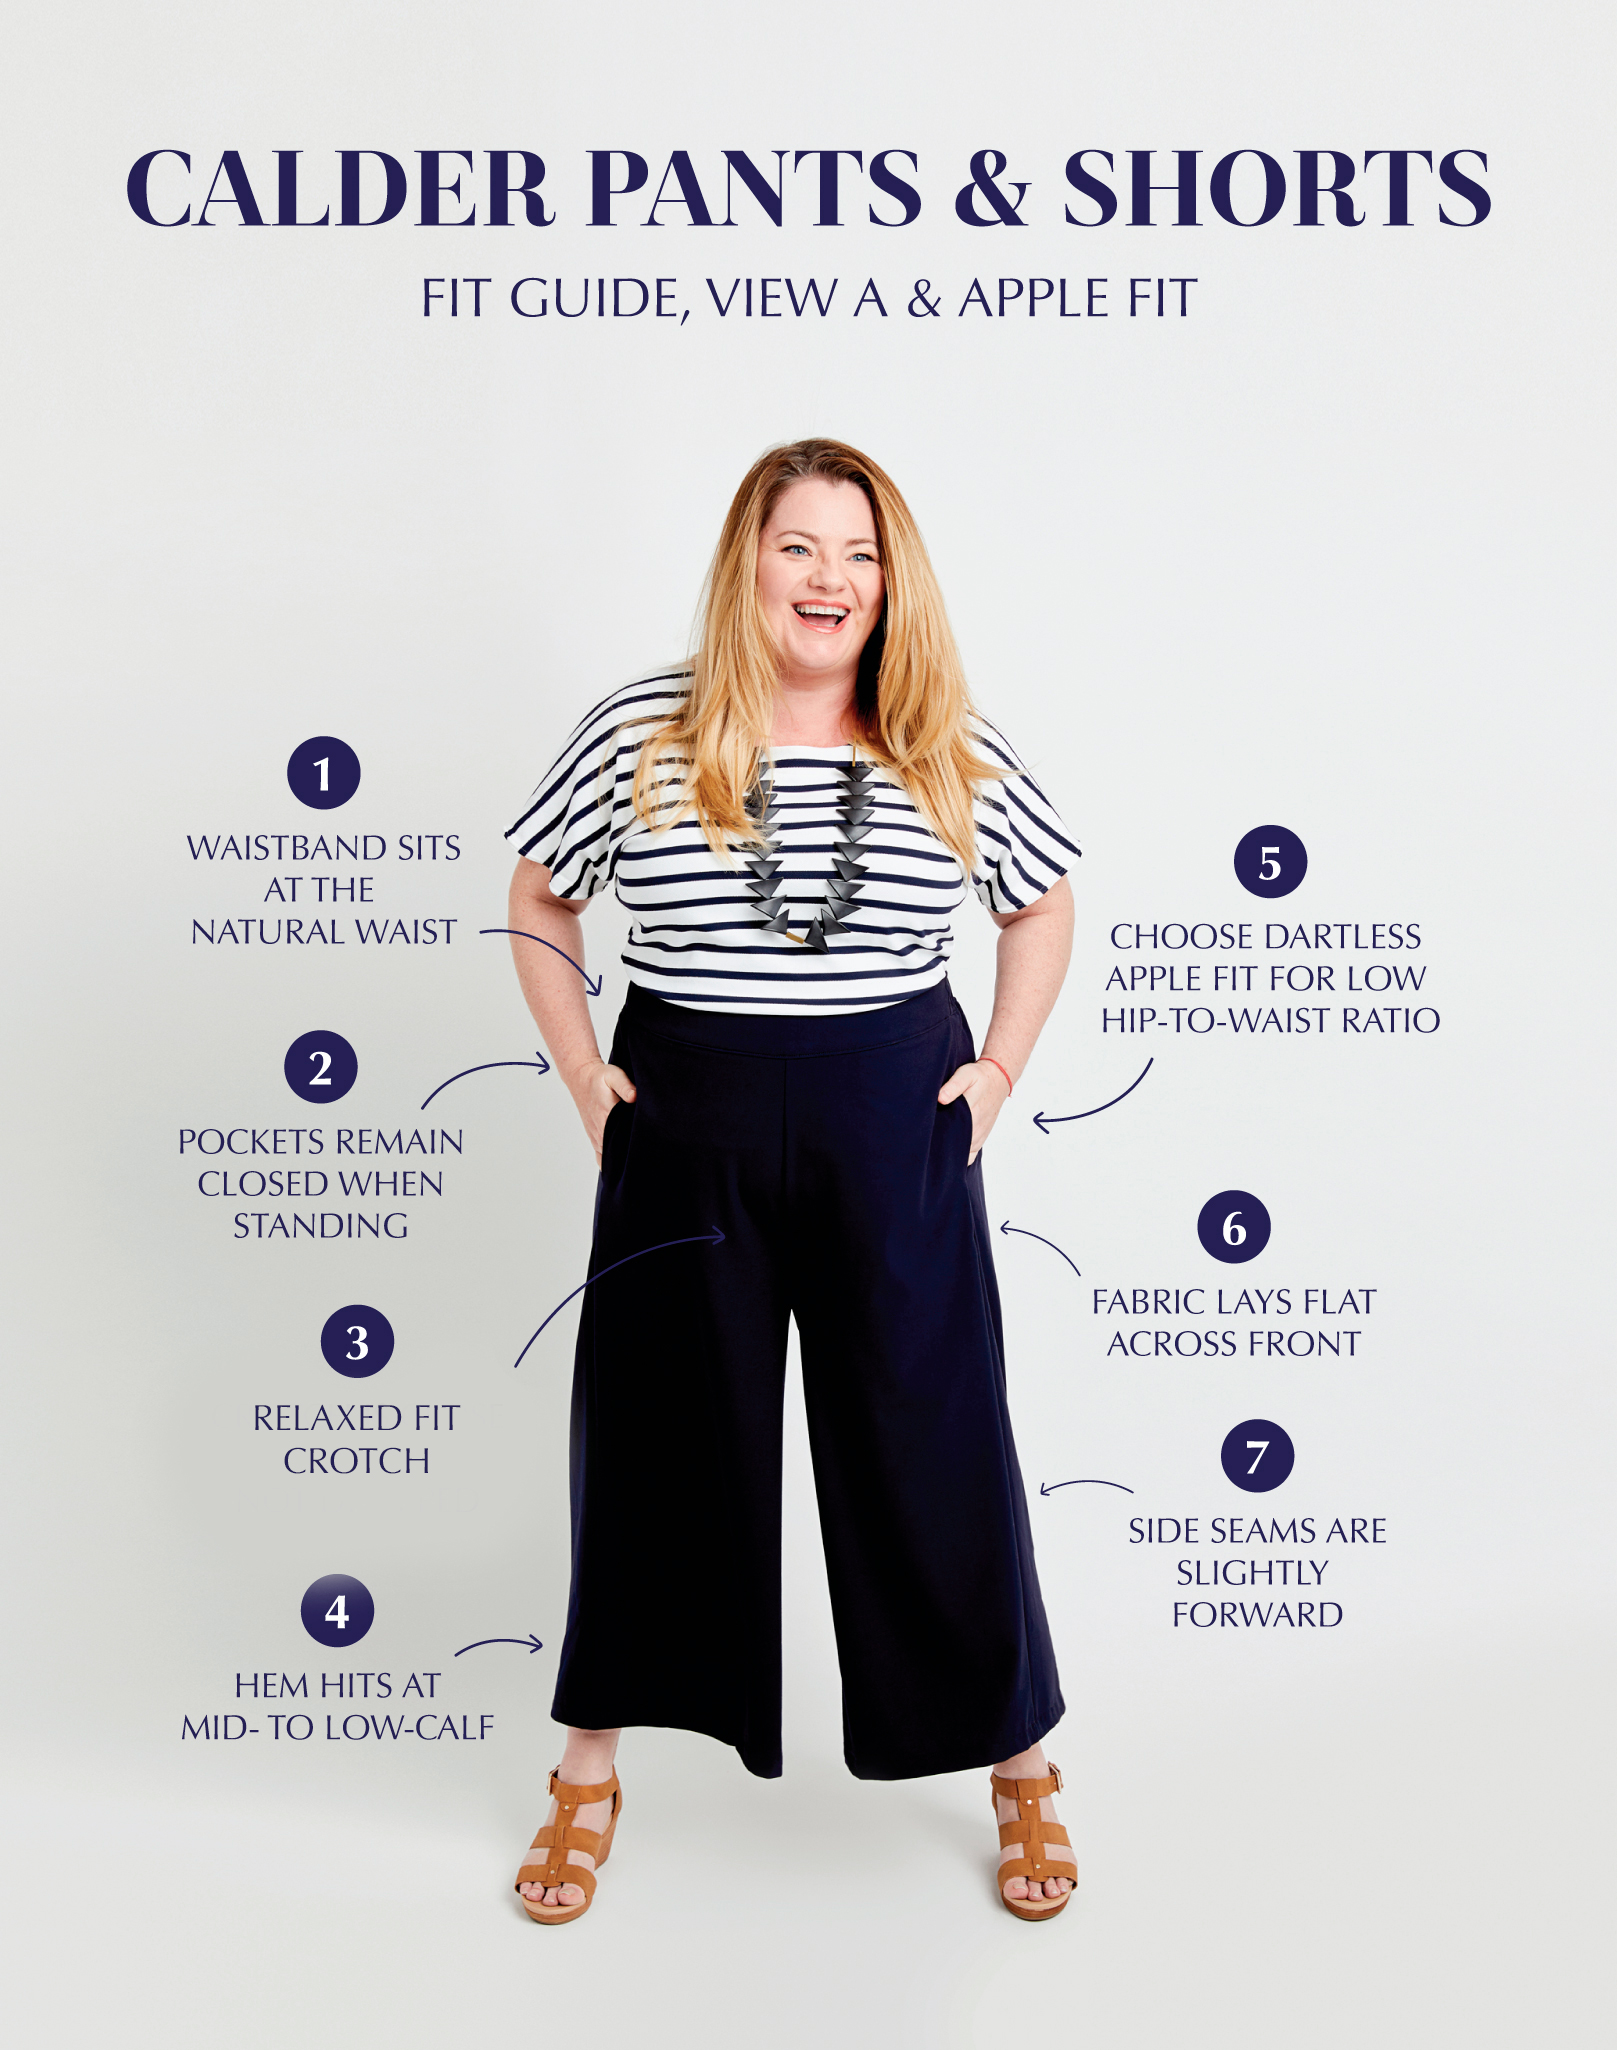
Here’s Andrea modeling View A in the apple fit. (You can mix and match pelvis options with any of the lengths!)
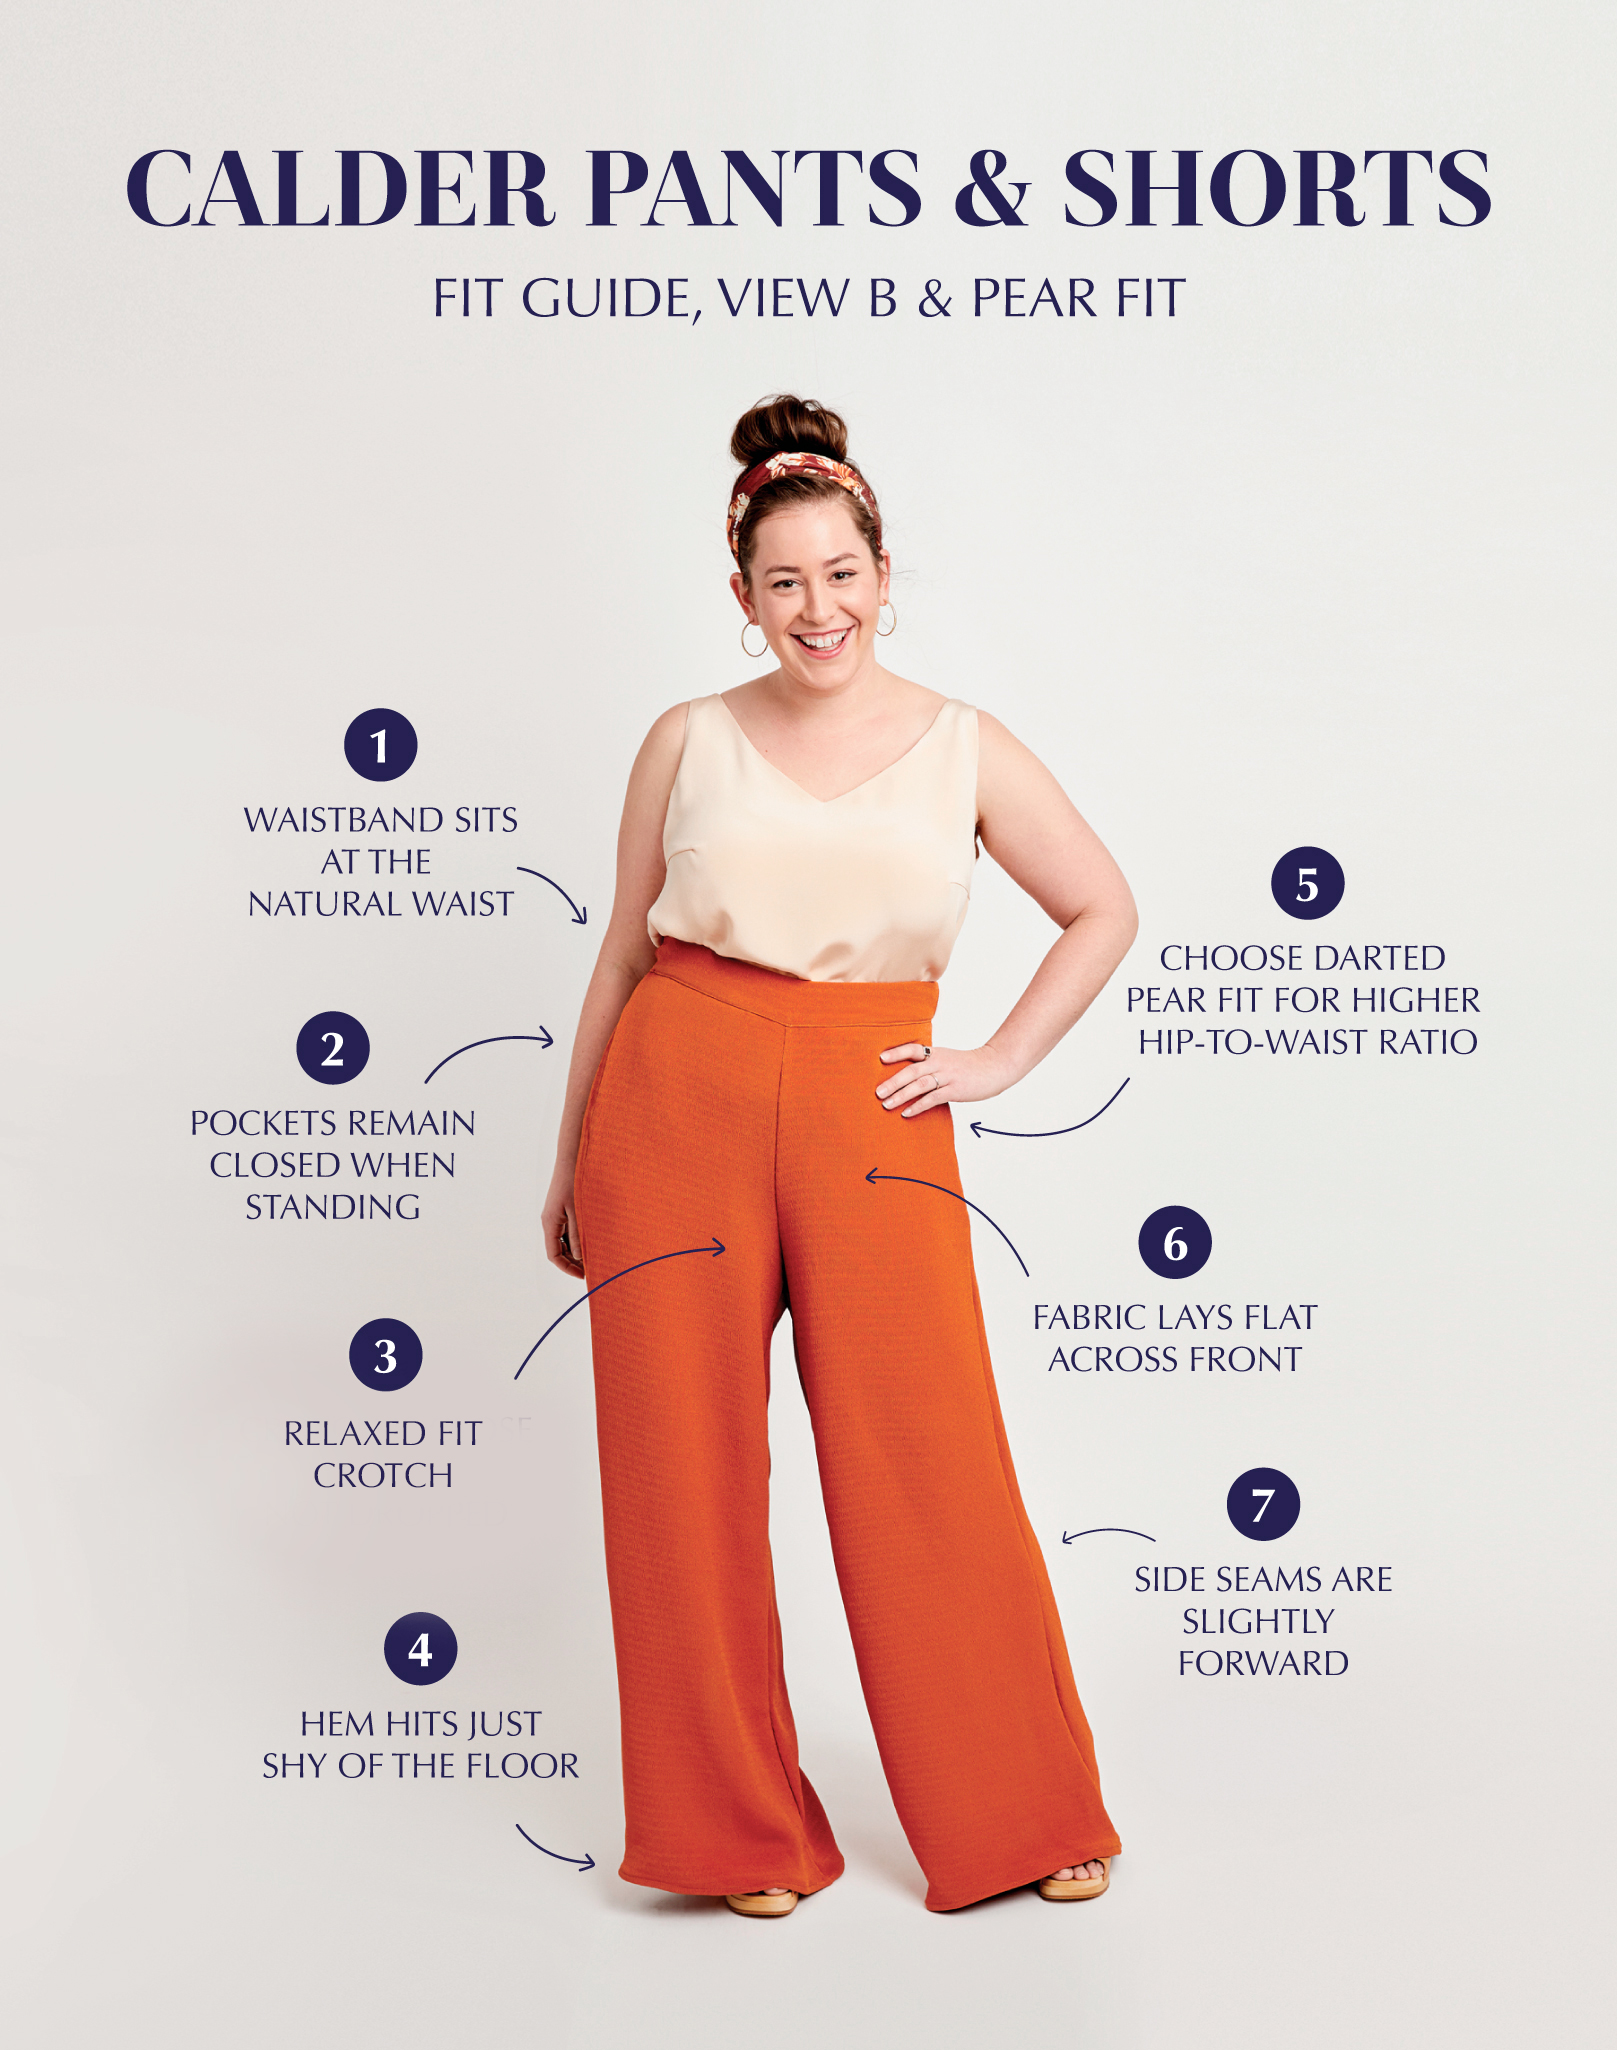
View B has the same fit as View A but is full length, which means it should just barely skim the floor. Here’s Ayelet wearing View B in the pear fit:
Calder Pants Fit Details
- Waist
-
Waistband should sit at the natural waist.
-
Waistband should be snug but not dig in uncomfortably when sitting down. If the waistband is uncomfortable when sitting, a larger waist size may be needed.
-
- Front
-
Front of pants should lay flat, without pulling across the stomach or between the legs. If fabric is pulling, a full tummy adjustment may be needed.
- Side seams are slightly forward on the body.
-
Pockets should remain closed while standing and not overly gape while sitting.
-
- Back
-
Elastic waistband pulls in back of pants at the waist.
-
If there is an abundance of fabric in the back waist, consider switching to pear pelvis or increasing the width of the darts, but be sure that you are still able to pull the pants over your hips.
-
If pants feel tight across the butt, a full seat adjustment may be needed.
-
-
Crotch
-
Crotch of pants should be relaxed, not too close to body nor overly dropped.
-
If crotch is sitting too low or high, shorten or lengthen the rise accordingly.
-
- Hips & Legs
- Pants should be loose-fitting at the hips and legs.
- Hem
- View A hem hits at mid-calf
- View B hem hits just shy of the floor
- View C hem hits at mid-thigh
How to Choose Your Pelvis Fit
Let’s go into a bit more detail about the two pelvis fit options, to help you figure out which is best for you.
The Calder Pants have interchangeable pelvis options (apple or pear). That means the back pelvis and leg pattern pieces are separate (for both the PDF and printed pattern) and you need to tape them together before you cut your fabric. (Making the Calder Shorts? Just use the back pelvis piece, no need to attach the leg.)
Okay, let’s get one thing straight: none of us are fruit, or any other shape besides human. But given that we can’t make custom fit patterns for everyone, it seemed to be helpful way to create two different fits. Of course, you may still need to grade between sizes and make adjustments, but we found that our testers had much better luck starting off with their pelvis fit, than a standard “one size fits all” pattern.
Calder Apple Pelvis Fit
You are likely going to be best in the “apple” pelvis fit if:
- Typically, you find pant waistbands are constricting, and the back bum/thigh area is a bit baggy. Typically, pant waistbands cut in when the pants fit your hips.
- You have a straighter hip curve rather than a very curved one.
- You have a low hip-to-waist ratio.
Here you can see that the “curve” between Andrea’s waist and hip is pretty minimal–she has a proportionately large waist and small hips:

Calder Pear Pelvis Fit
You are likely going to be best in the “pear” pelvis fit if:
- Typically, you find that pant waistbands gape at the back, but are tight through the hips. Conversely, when pants fit you in the hips, the waistband is much too big.
- You have a very curved hipline.
- You have a higher hip-to-waist ratio.
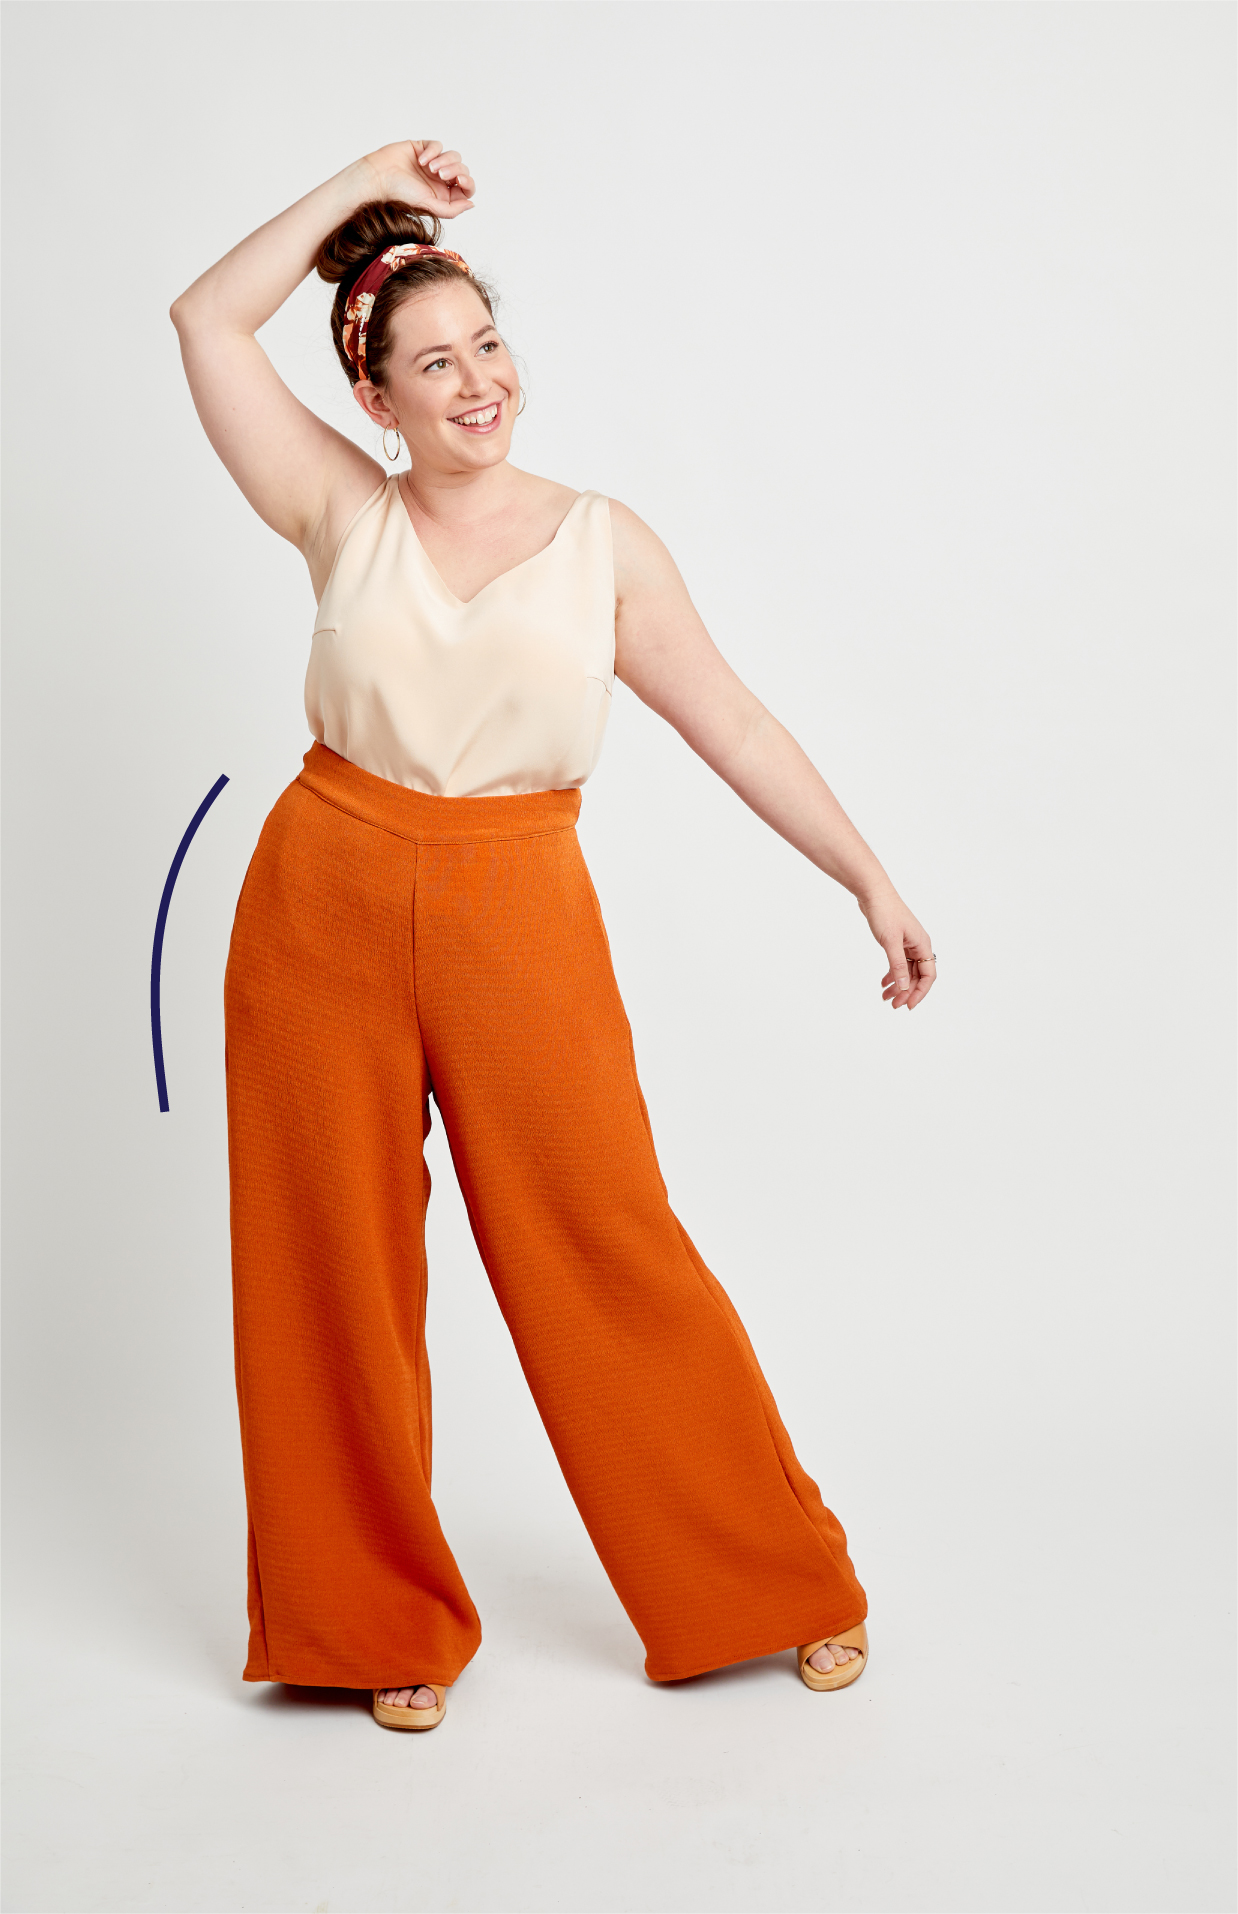
Here you can see that the curve between Ayelet’s hip and waist is more pronounced:
If you’re still unsure about how to choose your Calder Pants & Shorts fit, here are some additional thoughts:
- It’s always a good idea to make a muslin first! And remember to baste your side seams before you do final stitching/top-stitching, so you will have time to make adjustments.
- Grading between sizes is always an option, so don’t worry if you’re “more of an apple” or “more of a pear” than the pants are designed for.
- If you make the pear shape pelvis, you can always take it in at the hips later when you baste.
- If the existing Cashmerette waist/hip ratio usually works for you, the apple is likely to fit you best.
- If you’re an hourglass with a defined waist, then you’re probably going to be the pear.
- Remember, most of us have to make some adjustments to most patterns! Pick a fit as a good starting point, but you’ll likely have to make further changes, so don’t get too worried about having a perfect fit straight from the packet.
Ready to sew your first Calder? Then let’s get started! You can get your copy of the Calder Pants & Shorts here, and get additional help with fitting by joining our Facebook group or emailing us at hello@cashmerette.com.
Was this fit guide useful? Let us know in the comments below!
Great advice. I have yet to find a good fit in pants. I hope to be able to try these soon..
I love the drape ar the legs and hips. I want to make this in rayon, linen. And wool. I still am working on crotch. It was too long I adjusted front at designated lines. Should I consider different sizes for front and back