
Grading Between Sizes
Top or Dress with Princess Seams
In this section, we’ll look at how to grade between sizes on a top or dress with princess seams.
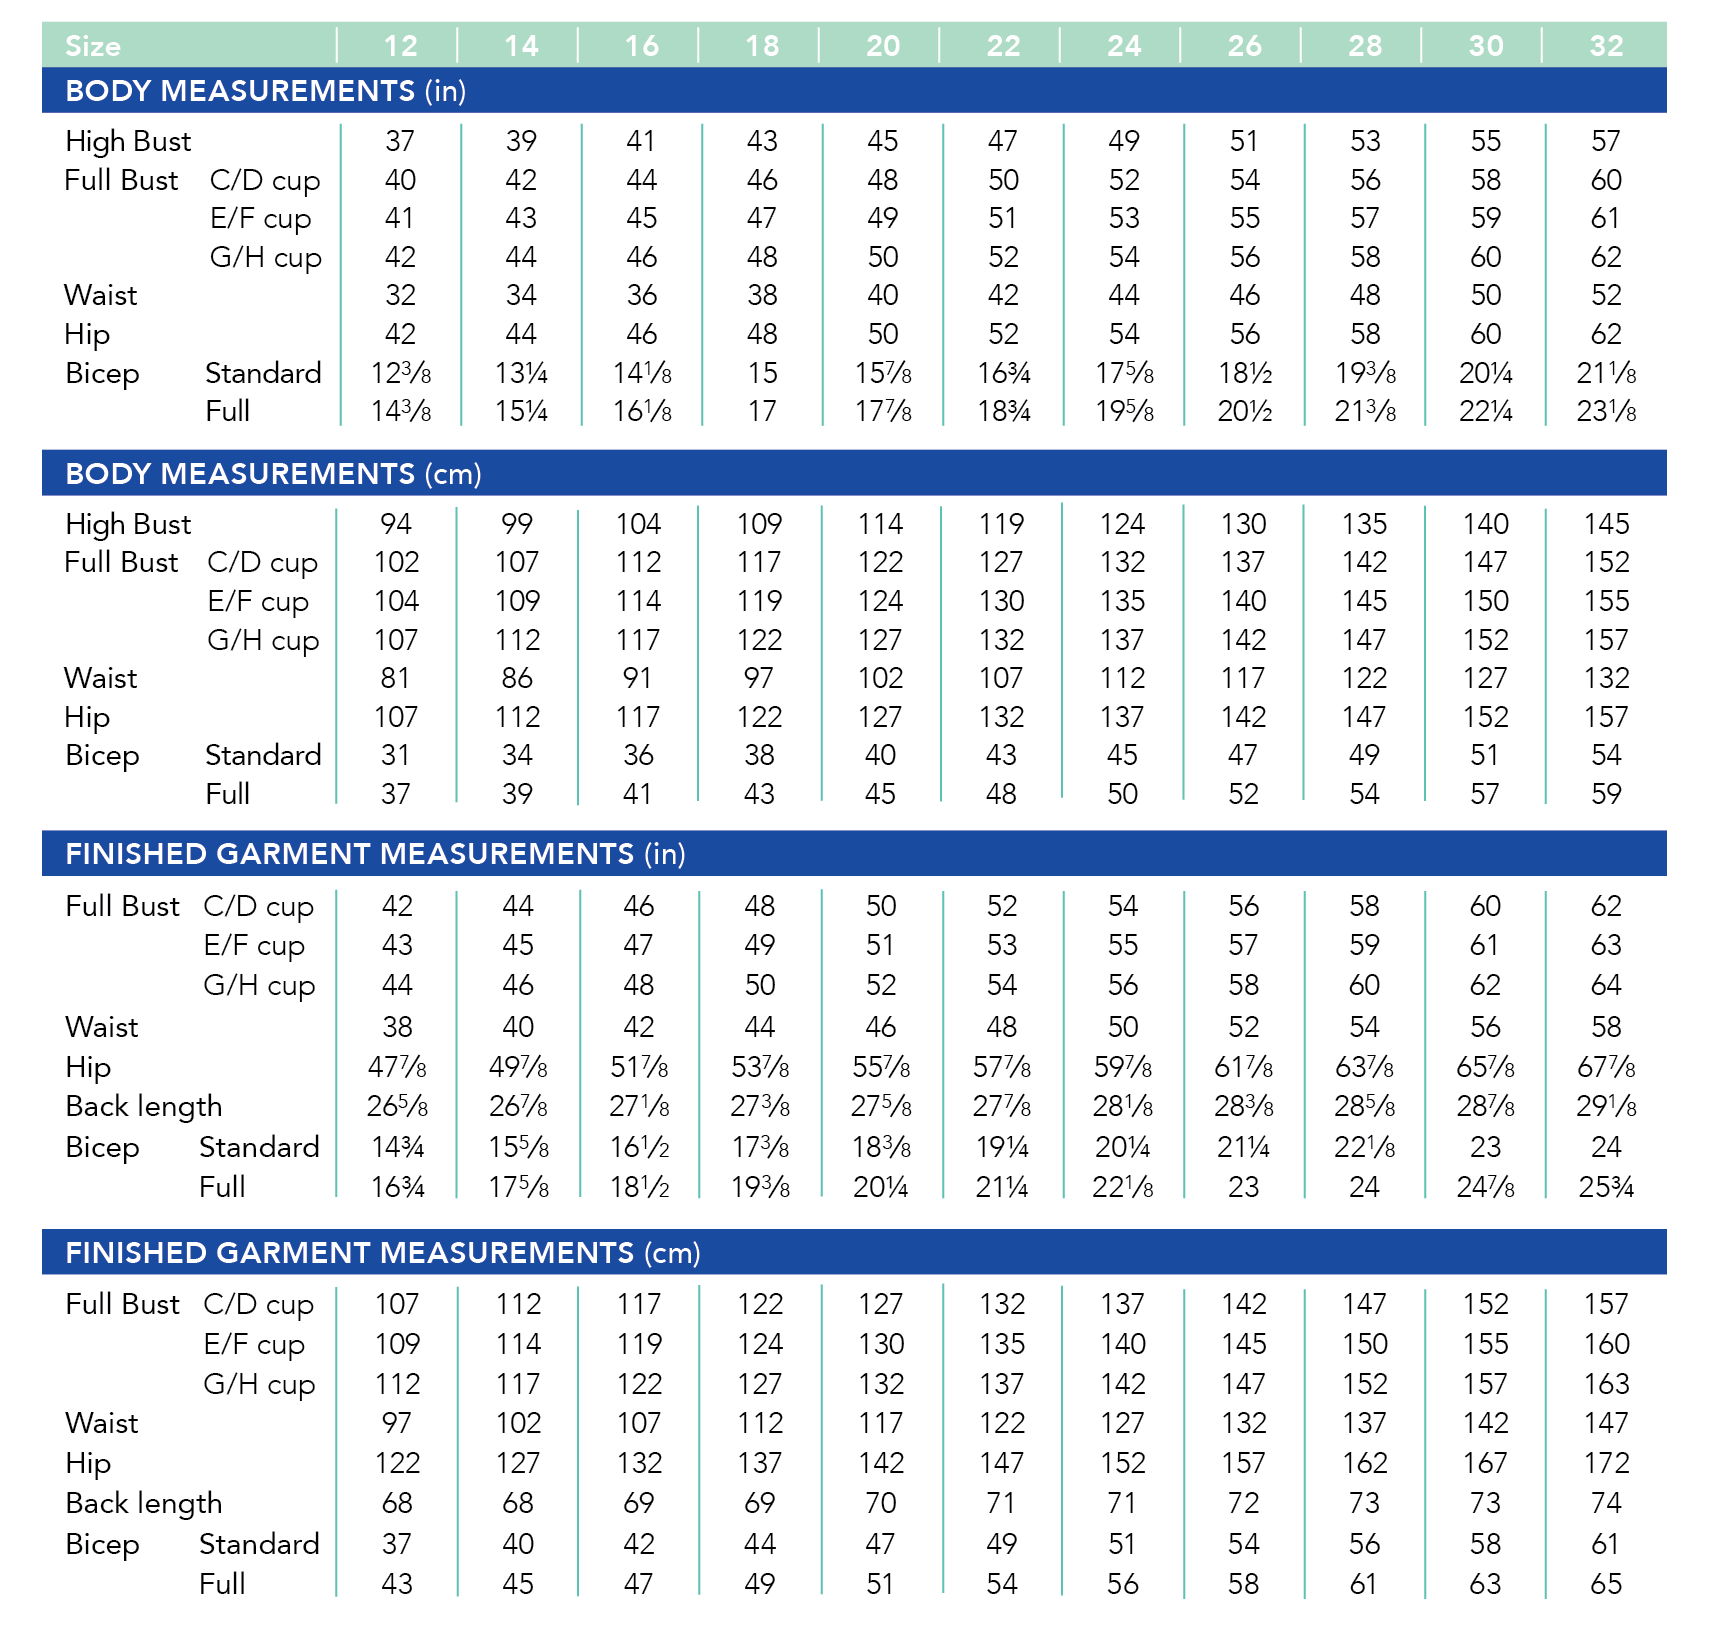
Always retake your measurements before starting each project. Make sure you’re wearing the type of bra you’ll be most likely to wear with the garment and take your waist and hip measurements while both standing up and sitting down to make sure you have sufficient wearing ease in your garment.
Let’s say you have measurements of 45″ at the full bust, 38″ at the waist (when sitting down…measure your waist when sitting down for this pattern so your buttons don’t end up straining when you move around!) and 52″ at the hip (also sitting down.)
If you look at the body measurement chart, you’ll see your bust would fall in the 16 E/F, your waist would fall in the 18, and your hips would fall in the 22. Now let’s compare this with the finished garment measurements of the Harrison Shirt. There is some positive ease in both the bust and the hips but not a whole lot so those are the most important measurements. The waist has a bit more positive ease, so that may be less critical.
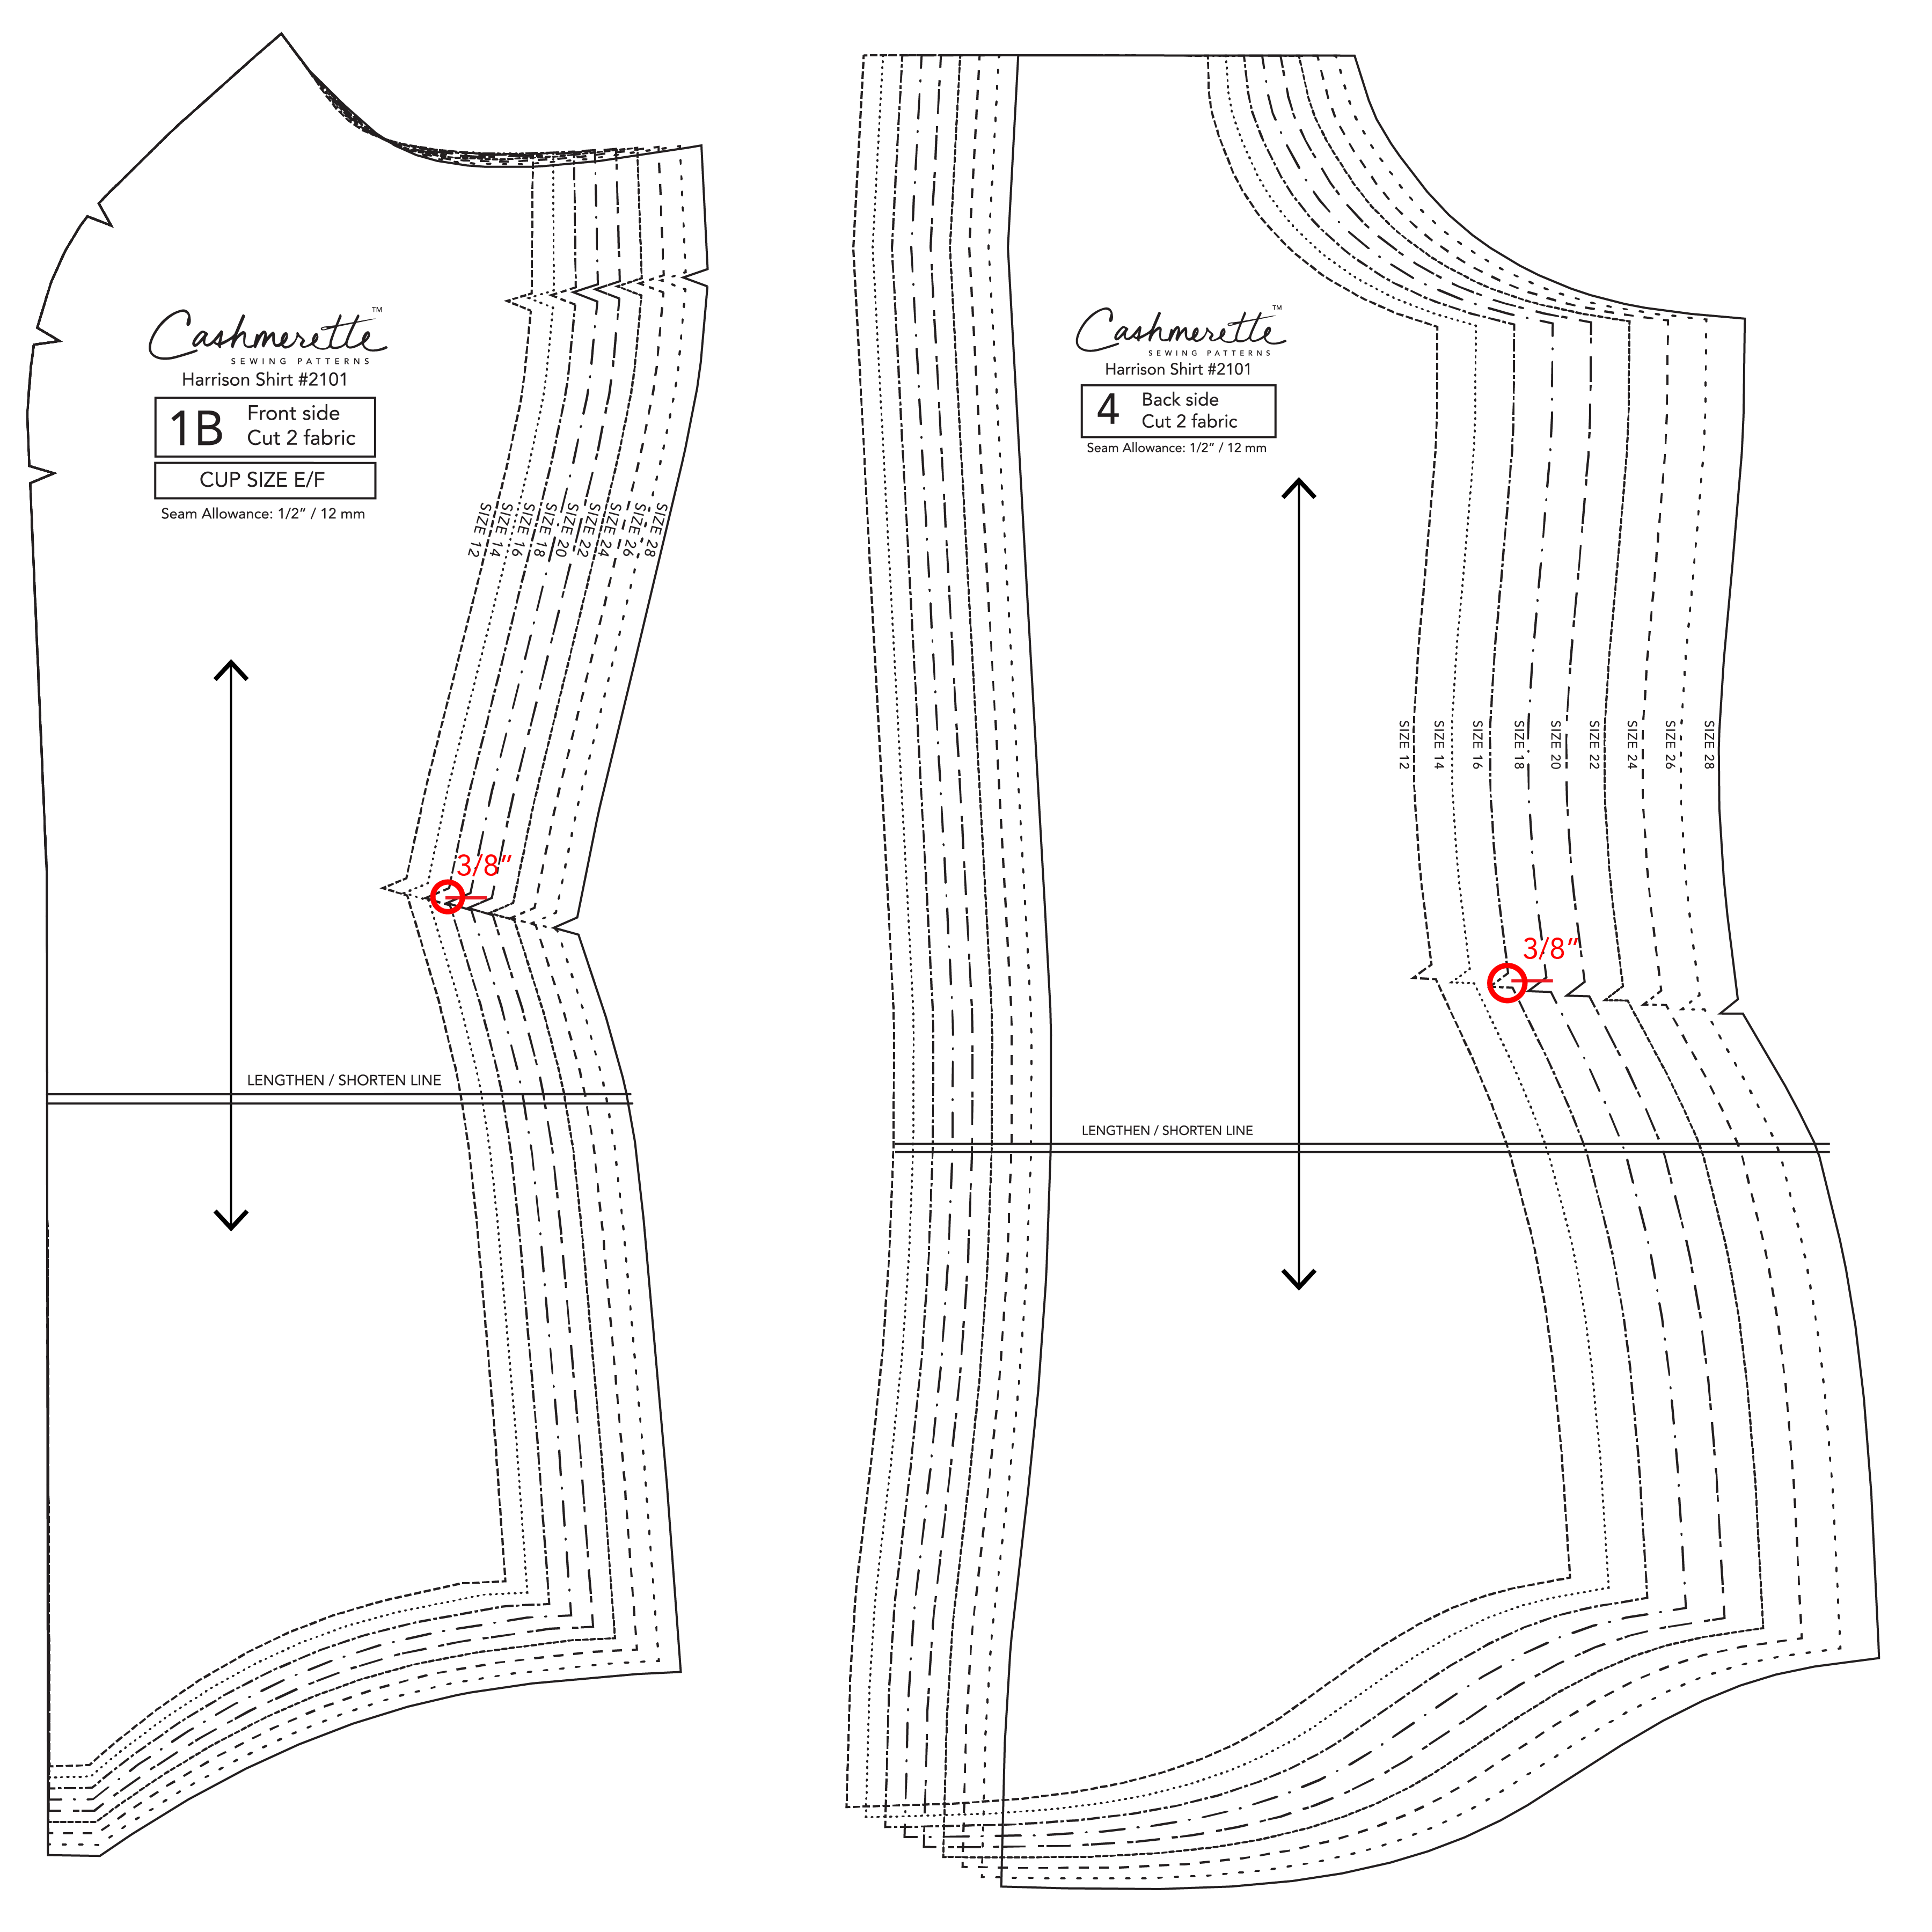
 The Harrison Shirt has double princess seams, which makes grading a bit more complicated. When grading between sizes on a pattern like this, it’s easiest to just change the side seams. This also maintains the placement of the princess seams over your bust.
If you look at the difference in finished garment measurements in our example, the 16 has a finished waist of 40 3/4″ and the 18 has a finished waist of 42 5/8″, with a difference of 1 7/8″. We want to add this to our 16 at the waist. The simplest way to do this is to add 3/8″ to the side seam of the side front and side back pieces (2 front sides + 2 back sides = 3/8 + 3/8 + 3/8 + 3/8 = 1 ½”). This is a bit less than the actual ease difference, but we’ll still have plenty of ease around the waist (4 ¼” of ease). Add this width at the waist point of the piece.

Next, let’s look at the hip measurements. Again, starting at the 16, there’s a finished measurement of 49 7/8”. The 22 (which fits our body measurement) has a finished measurement of 56”. This is a difference of 6 1/8”. At the hip point of the side front and side back pieces, we’re going to add 1 1/2”. This will give us the additional ease we need around the hips.
Finally, we’ll connect the graded points using a curved line, matching the front and back side seam.
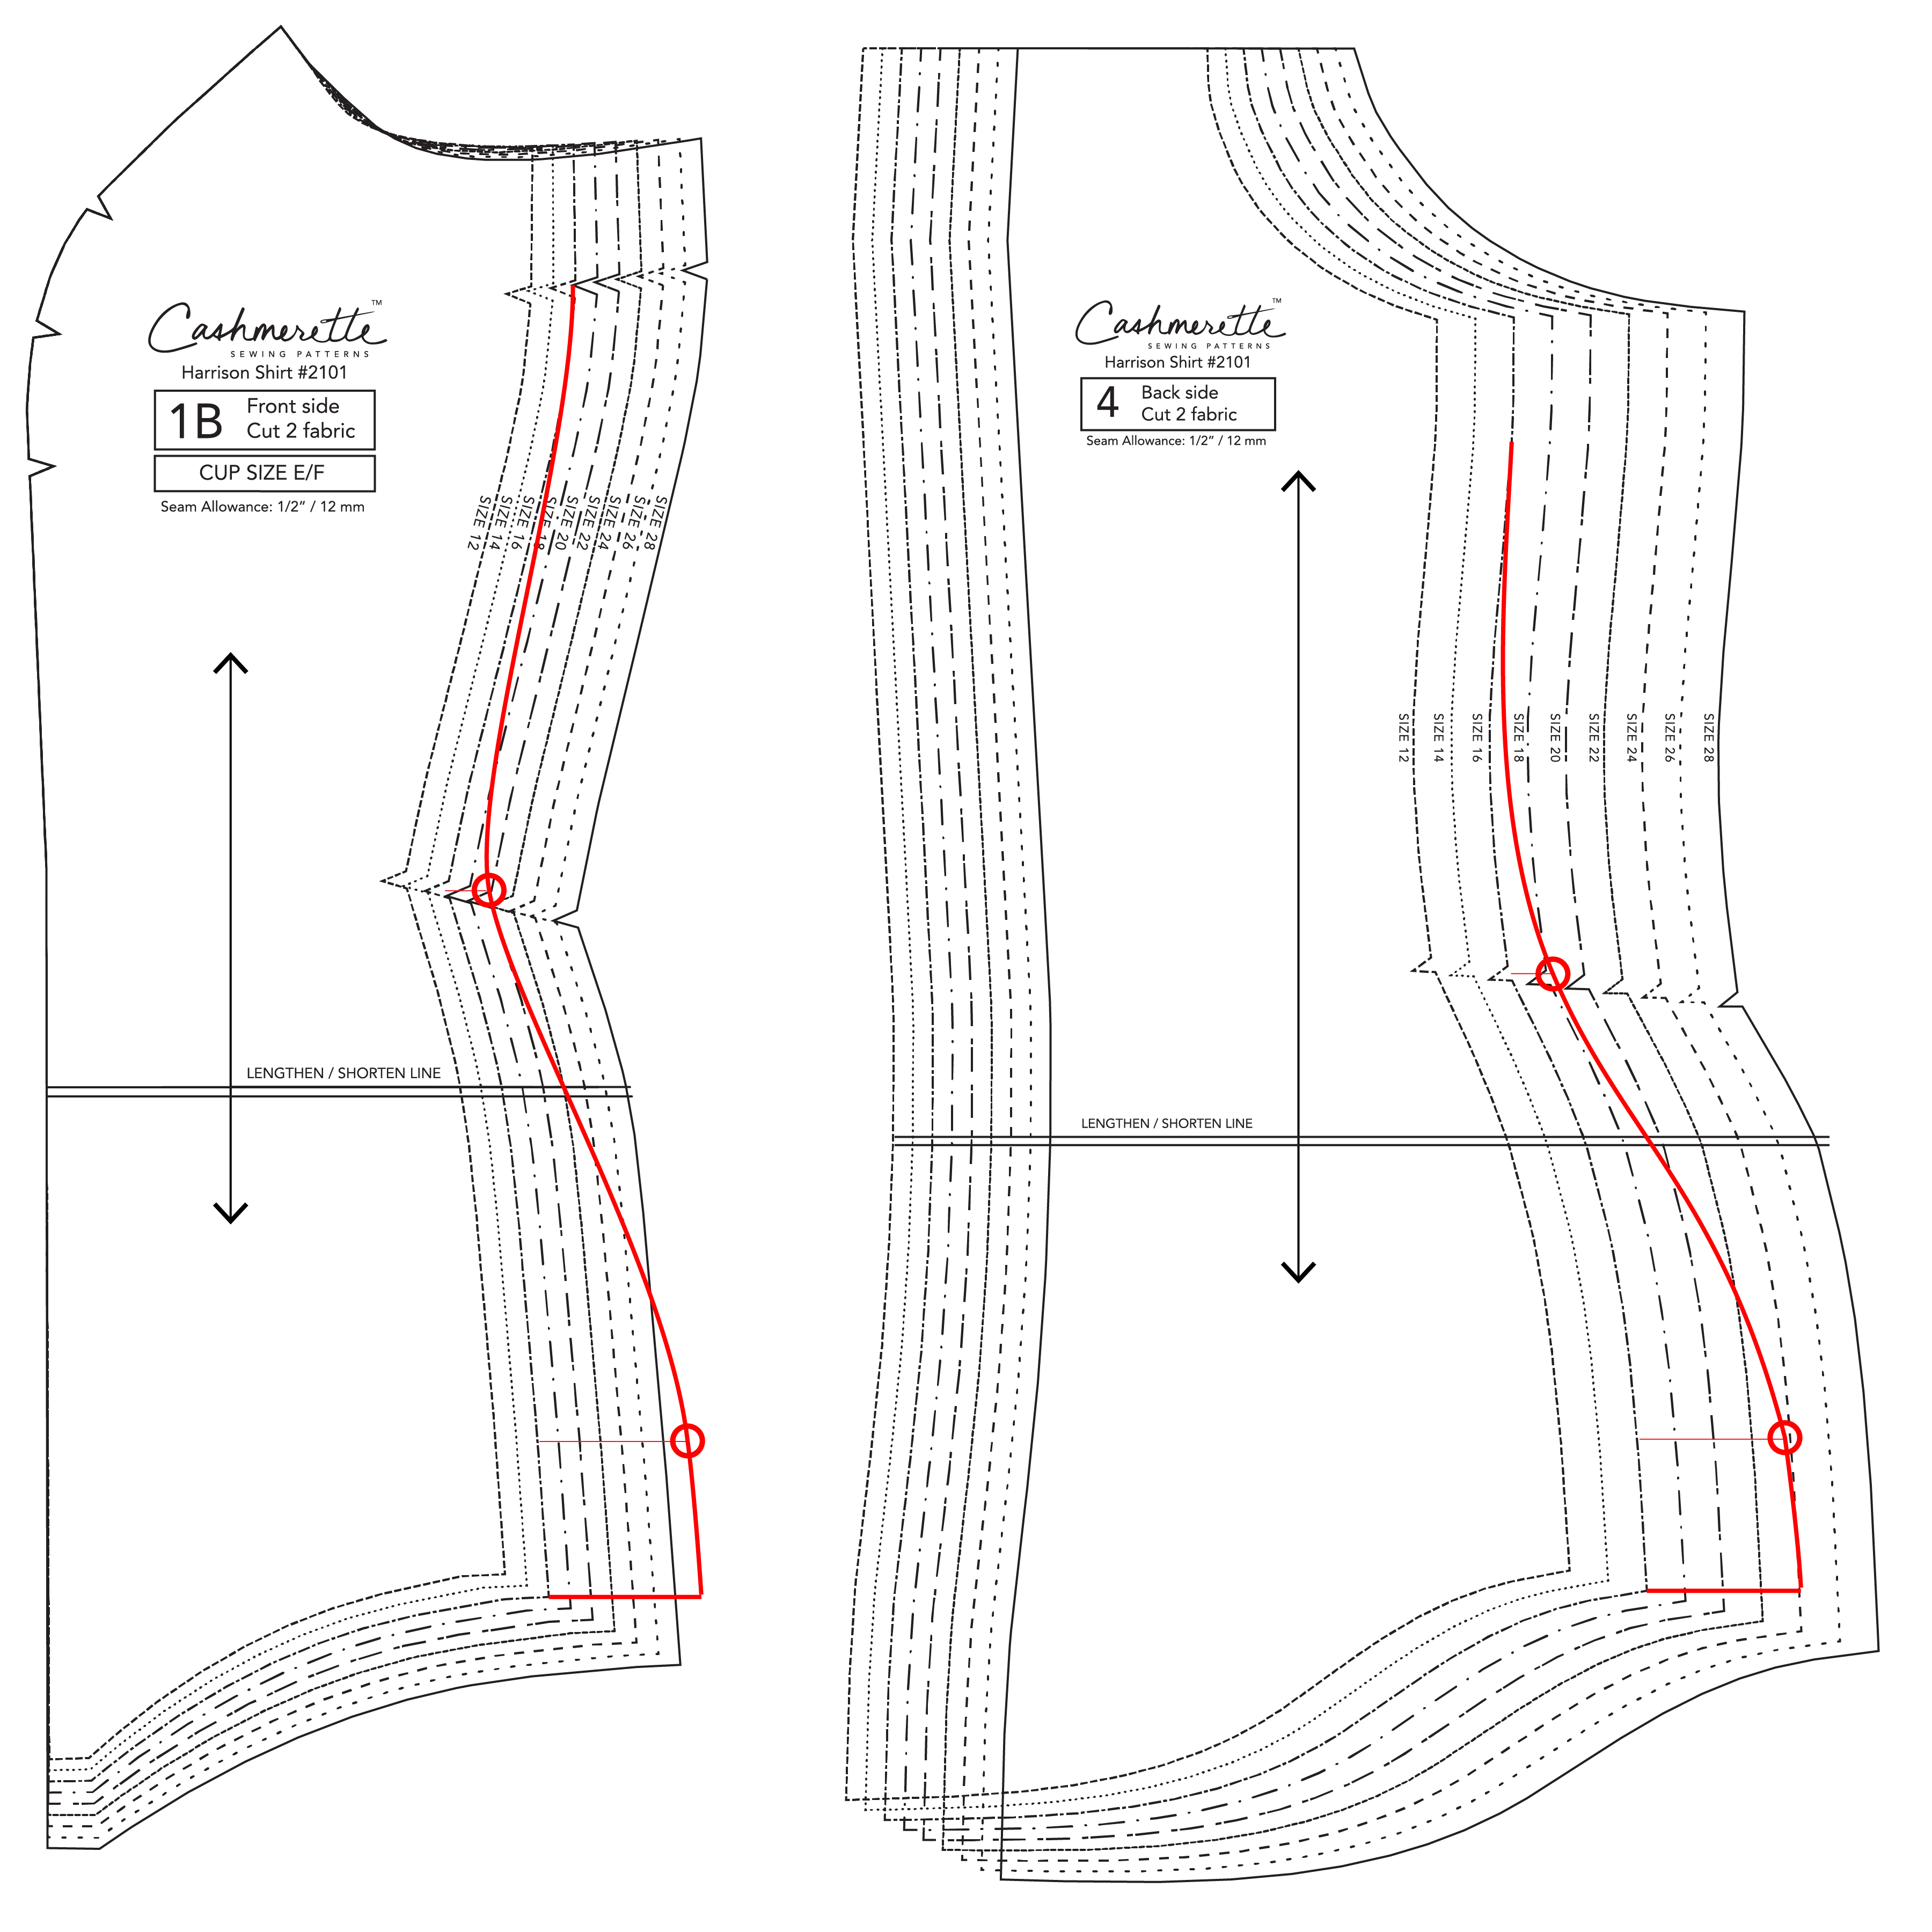
The remainder of the pieces can be cut at a straight size 16. Pay careful attention to the size lines! This can be a bit tricky here. The way the pieces are stacked on the side back means on one side, the 12 is the innermost line while on the other side of the piece it’s the outermost line. Unless you need extra length, the pieces can all be cut as the length of the 16. Make sure your seams have steady curves and the ease is added where you need it vertically and definitely make a muslin to test these changes.
NOTES:
- For the Lenox Shirtdress and Holyoke Maxi, the waistband should be cut in the base size with the same amount of ease added at the side seams. The skirt pieces should be cut in the base size with ease added at the waist seam edge of the side seam (front and back skirt for the Lenox Shirtdress, front side skirt and back side skirt for the Holyoke Maxi).
- Because of the ease at the hip in the Lenox Shirtdress and Holyoke Maxi, you may not need to add ease; check the finished garment measurements.