Grading Between Sizes
Top or Dress with Bust Dart
In this section, we’ll look at how to grade between sizes on a top or dress with a single bust dart.
Always retake your measurements before starting each project. Make sure you’re wearing the type of bra you’ll be most likely to wear with the garment and take your waist and hip measurements while both standing up and sitting down to make sure you have sufficient wearing ease in your garment.
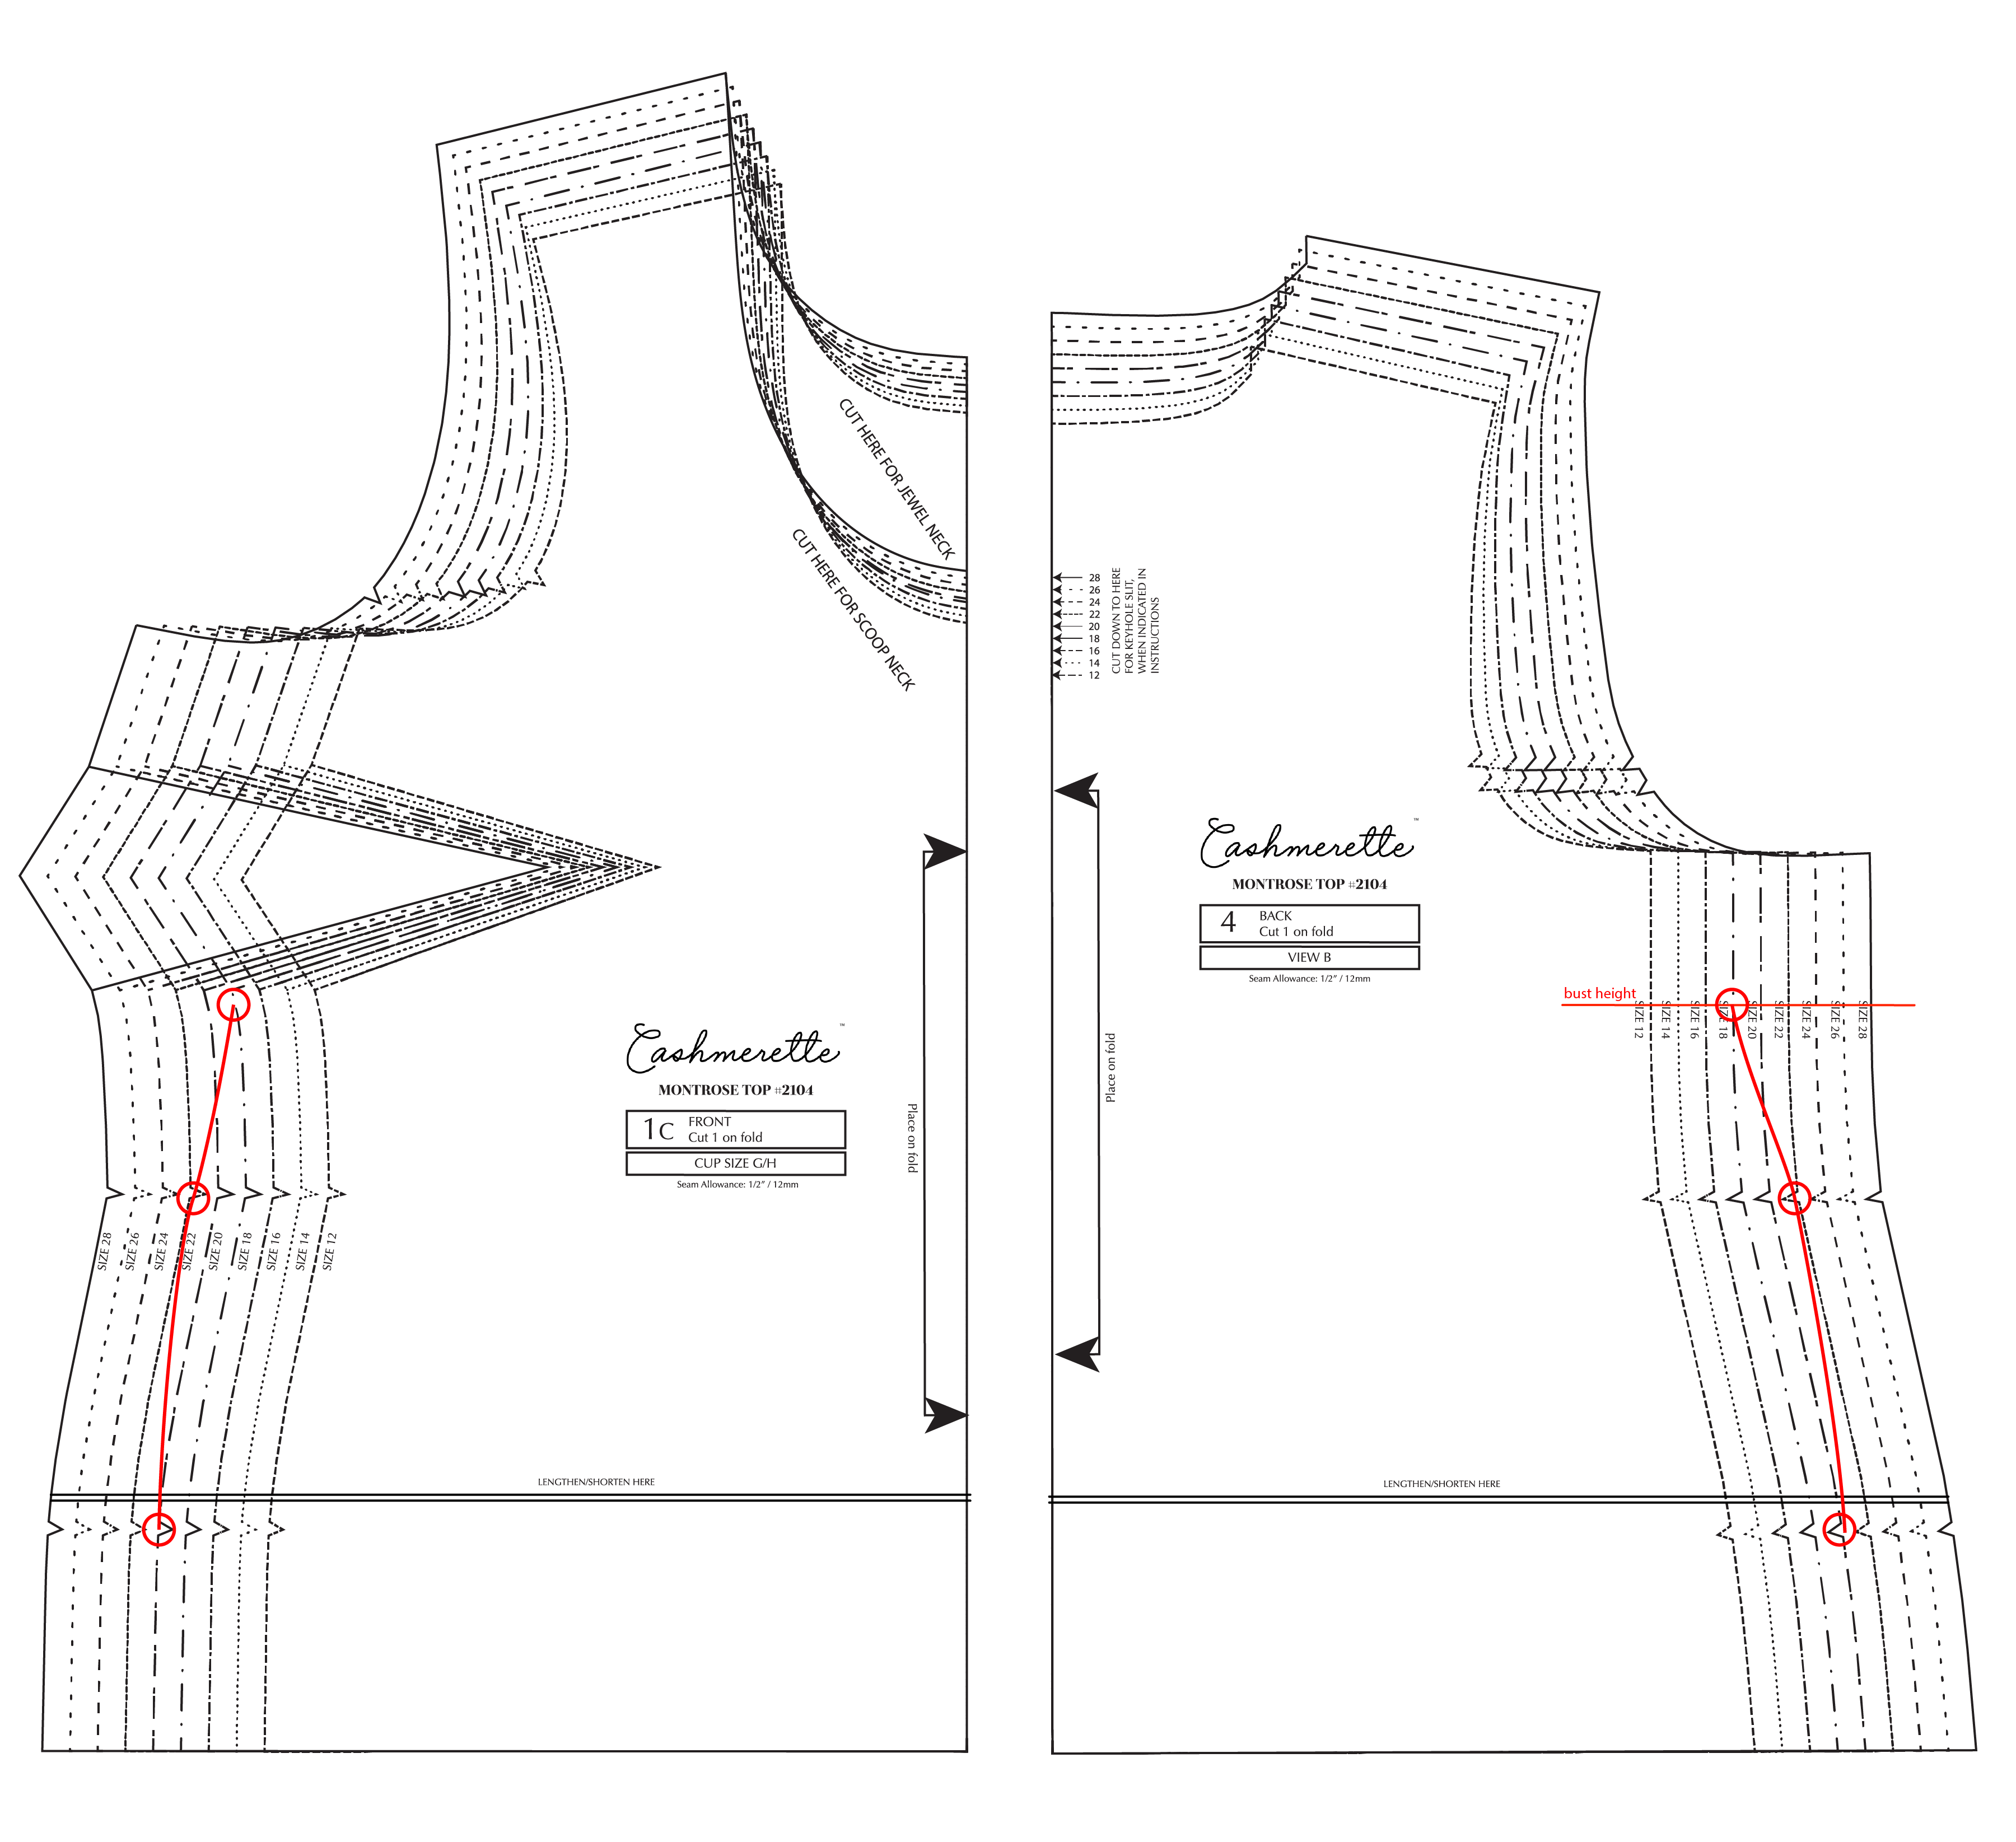
Before deciding whether to grade, take a look at the finished garment measurements of the pattern. For example, these are the measurements for the Montrose Top.
You may find that even allowing for the extra ease at the waist, you still need to grade between sizes (or you want to keep the intended amount of ease) – for instance, if you needed to grade between an 18 G/H at the bust to a 22 at the waist and back to a 20 at the hips. It’s a fairly straightforward case of “join the dots” when it comes to a simple pattern like these!
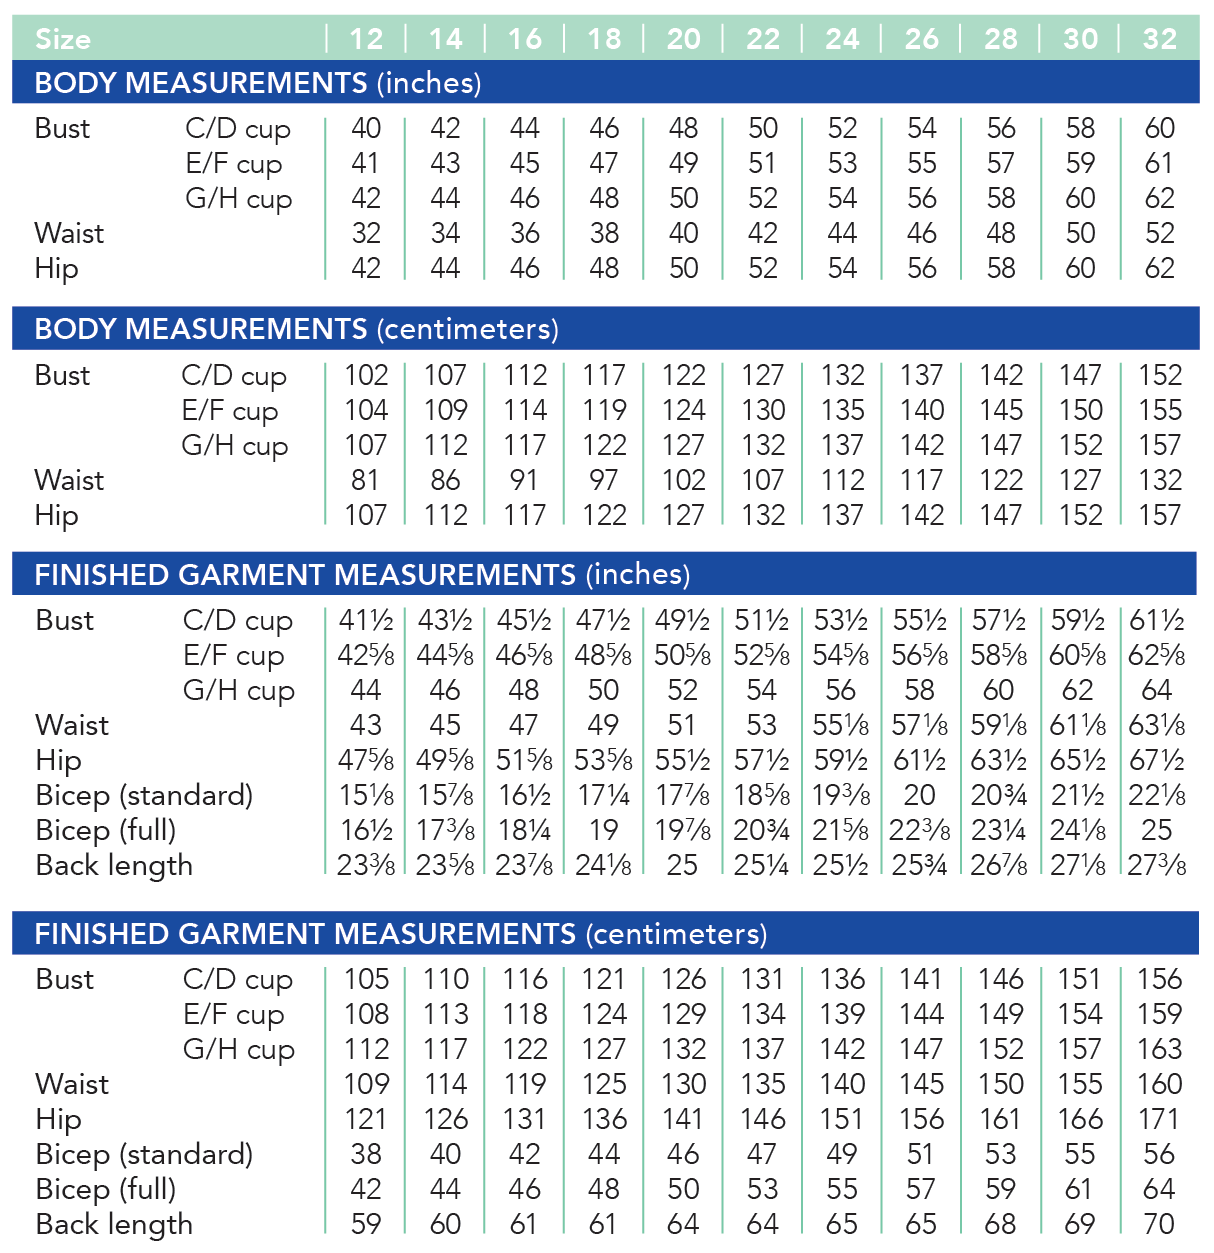
First, mark your sizes you need at the bust (in this case, the bottom of the bust dart), waist (the narrowest bit) and hip (where the notch is).
Next, join those markings up! You want to use slightly curved lines, to give you a smooth side seam.
Now, you have your new side seam! Mark it in full and then trace or cut off your size. Then, you need to do the exact same process for the back piece, marking again at bust height (measure up from the waist to the lower dart leg), waist, and hip and joining the lines up. After you grade both pieces, lay the two on top of each other with the side seams aligned to make sure the curves roughly match. Smooth out your curves if necessary.
 Sometimes you may need to grade in at the waist, which is done in a very similar way. If the grading between waist and hip is too steep, like in this example, you may need to choose a curve that gets close to the desired waist size but doesn’t necessarily hit it.
