Grading Between Sizes
Top or Dress with Bust and Waist Darts
In this section, we’ll look at how to grade between sizes on a dress or top with bust and waist darts.
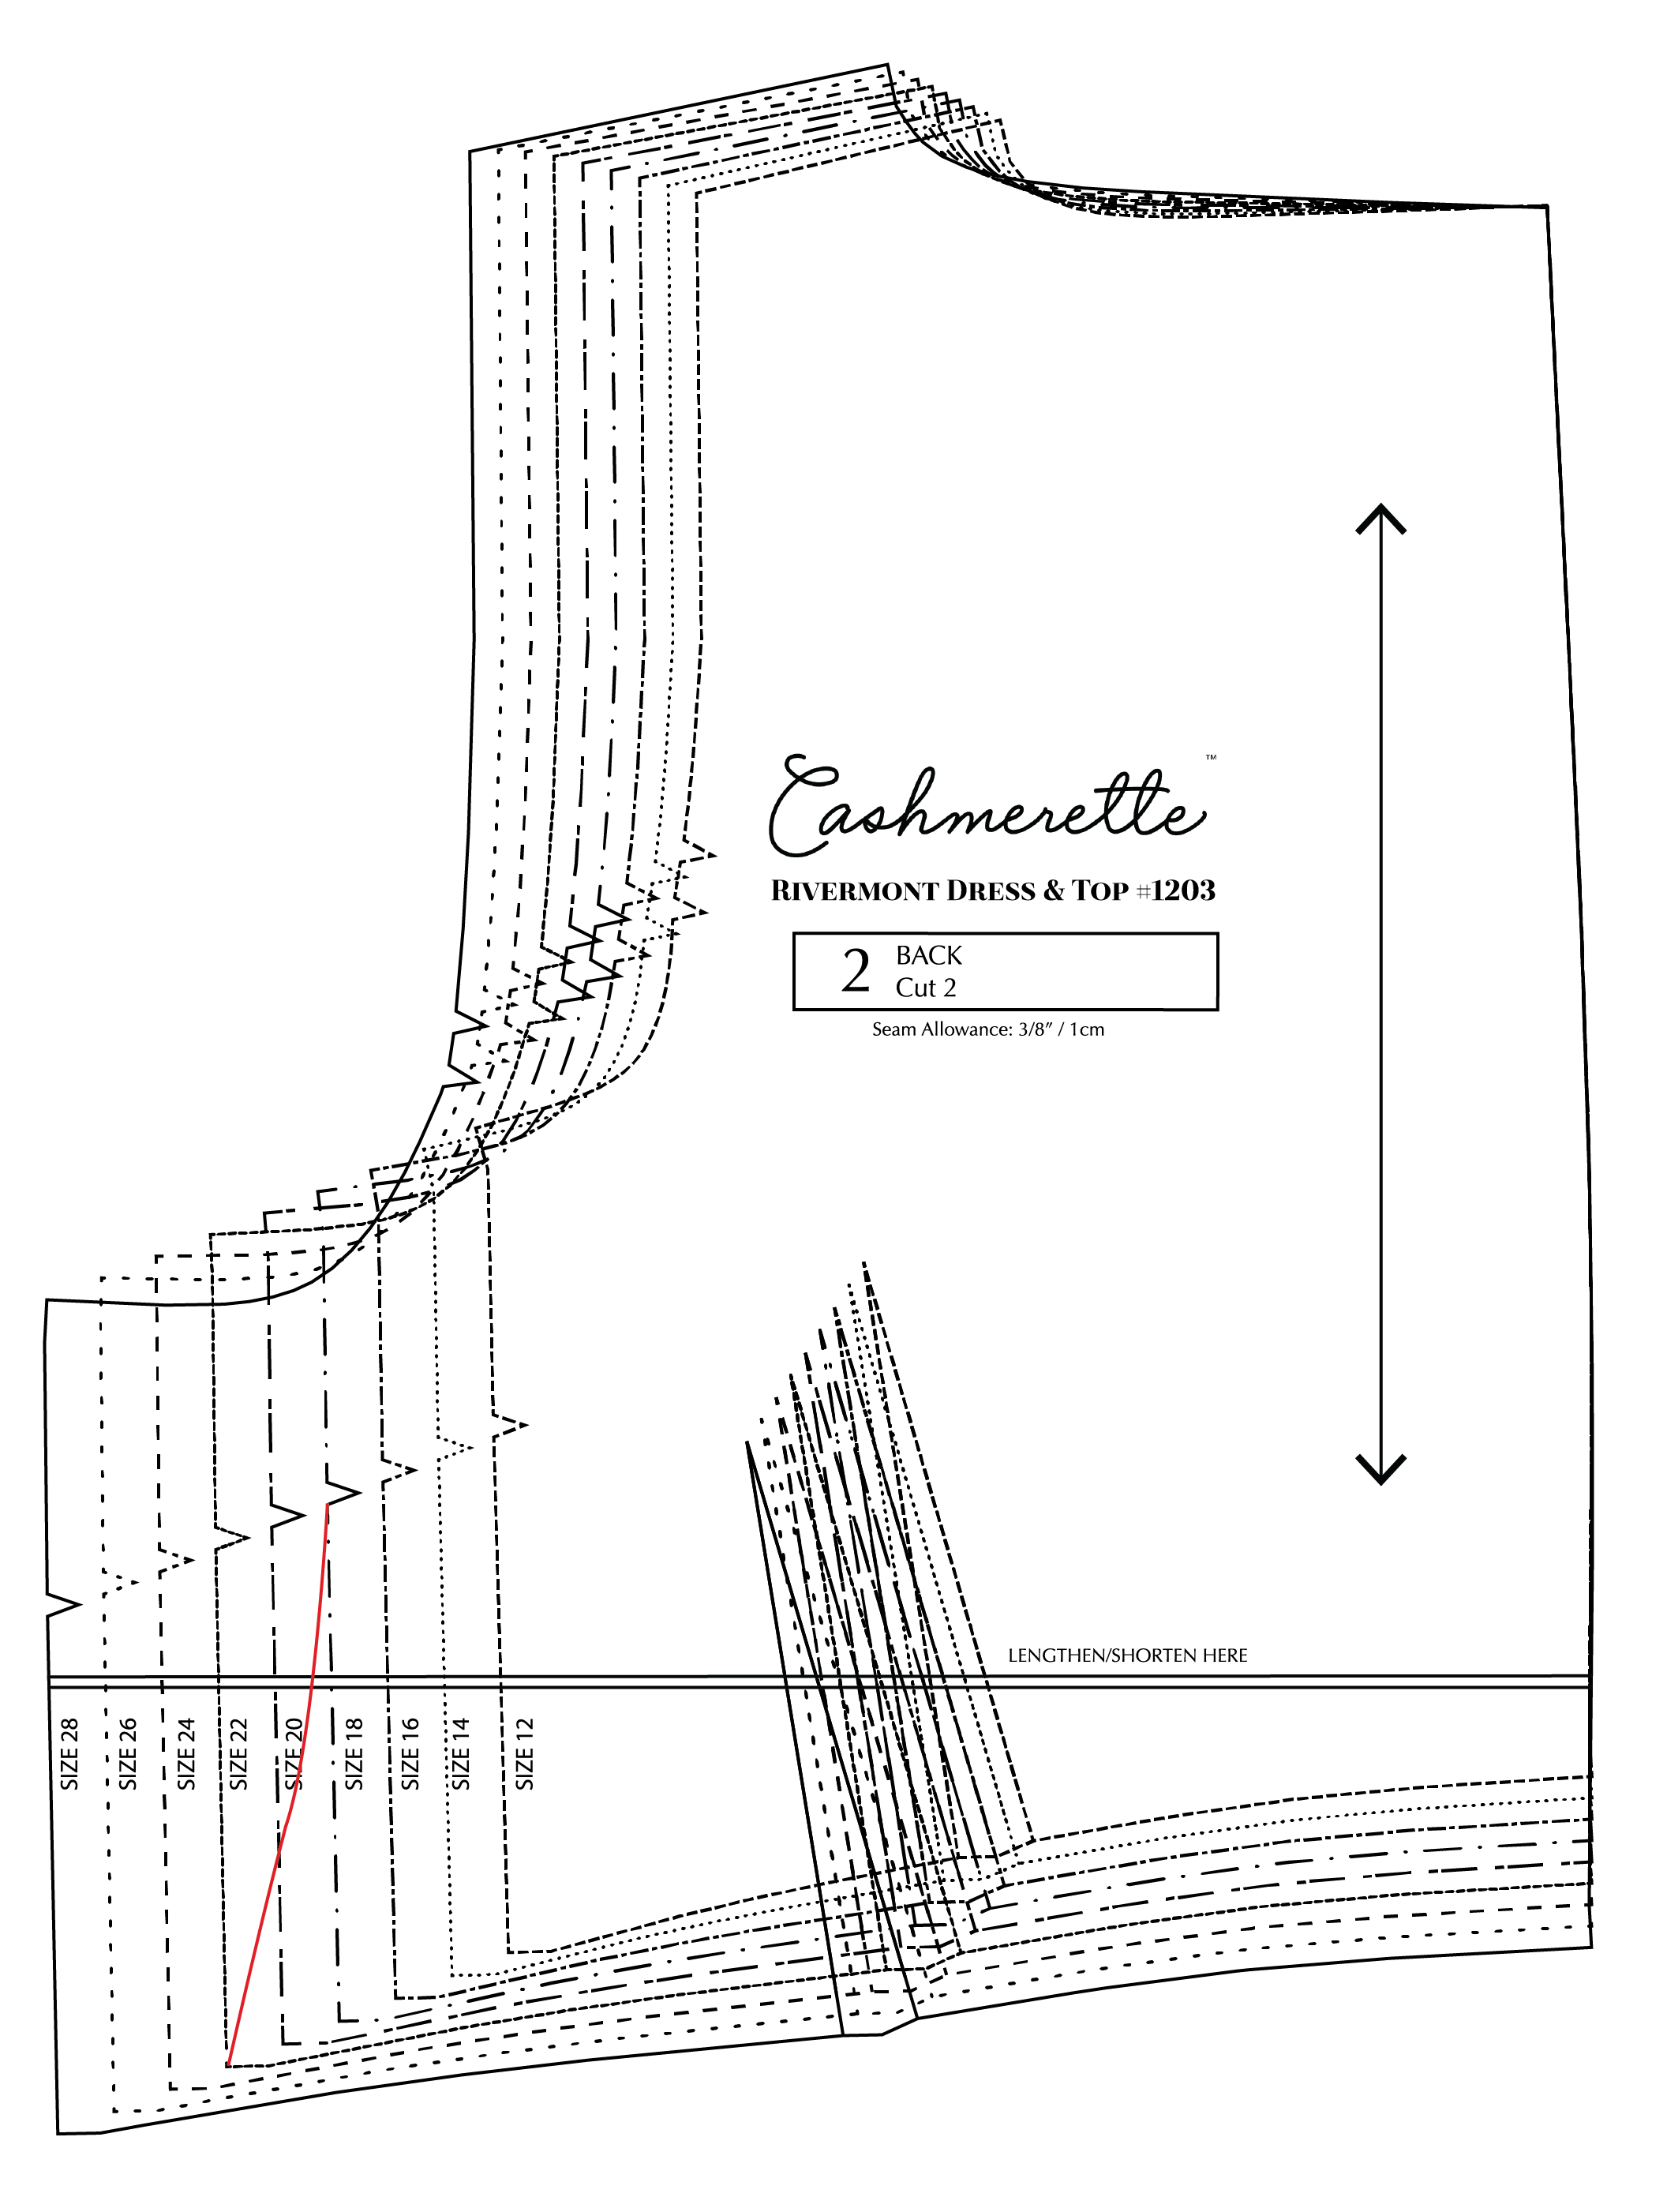
Always retake your measurements before starting each project. Make sure you’re wearing the type of bra you’ll be most likely to wear with the garment and take your waist and hip measurements while both standing up and sitting down to make sure you have sufficient wearing ease in your garment.
Let’s take a closer look at the Rivermont. Even though it’s drafted for knits, the Rivermont Dress & Top has darts that give it a classic sheath dress fit. Grading between sizes is quite similar to grading on a woven dress like the Upton as a result. Let’s say your bust measurement is 48″, your waist measurement is 42″, and your hip measurement is 50″. Based on these measurements, you’d want the 18 G/H bust, a size 22 waist, and a size 20 hip.
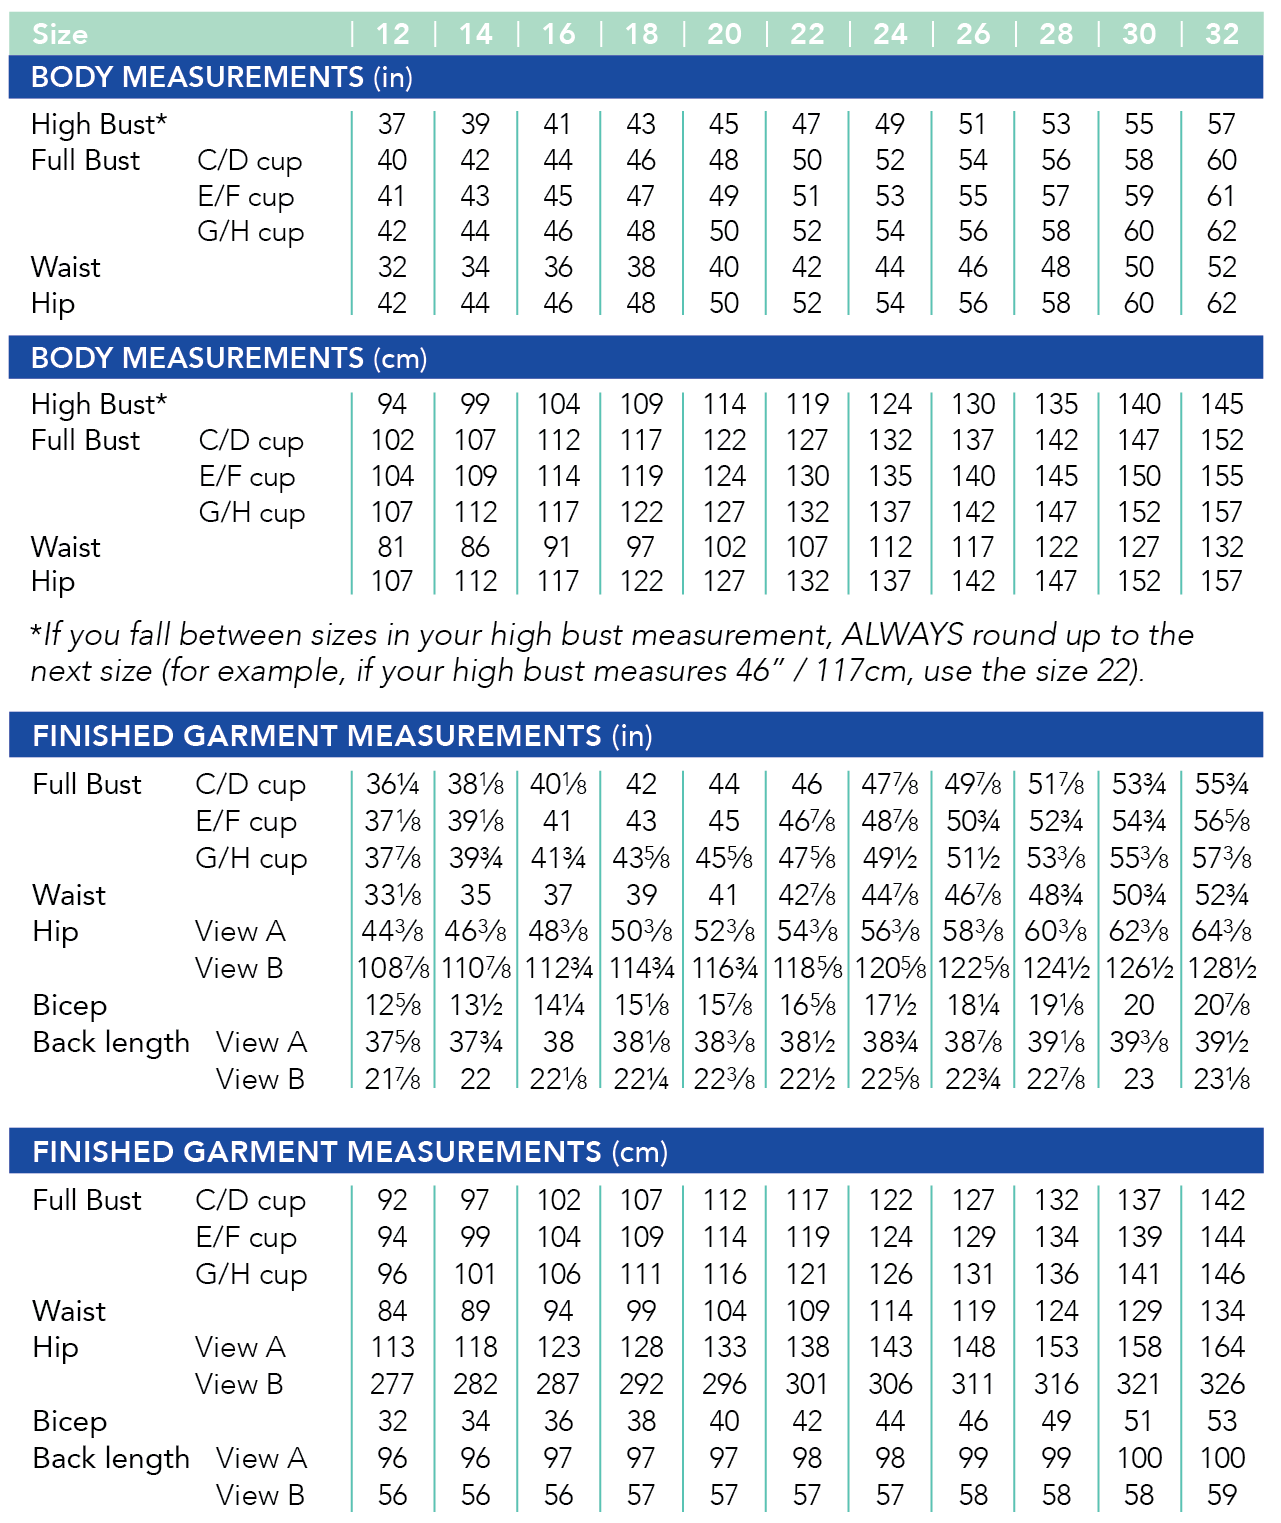
Start by grading the bodice pieces from an 18 at the bust to a 22 at the waist. Begin at the lower notch on the bust dart on the front and on the side seam notch on the back, adding a curve to the grading.
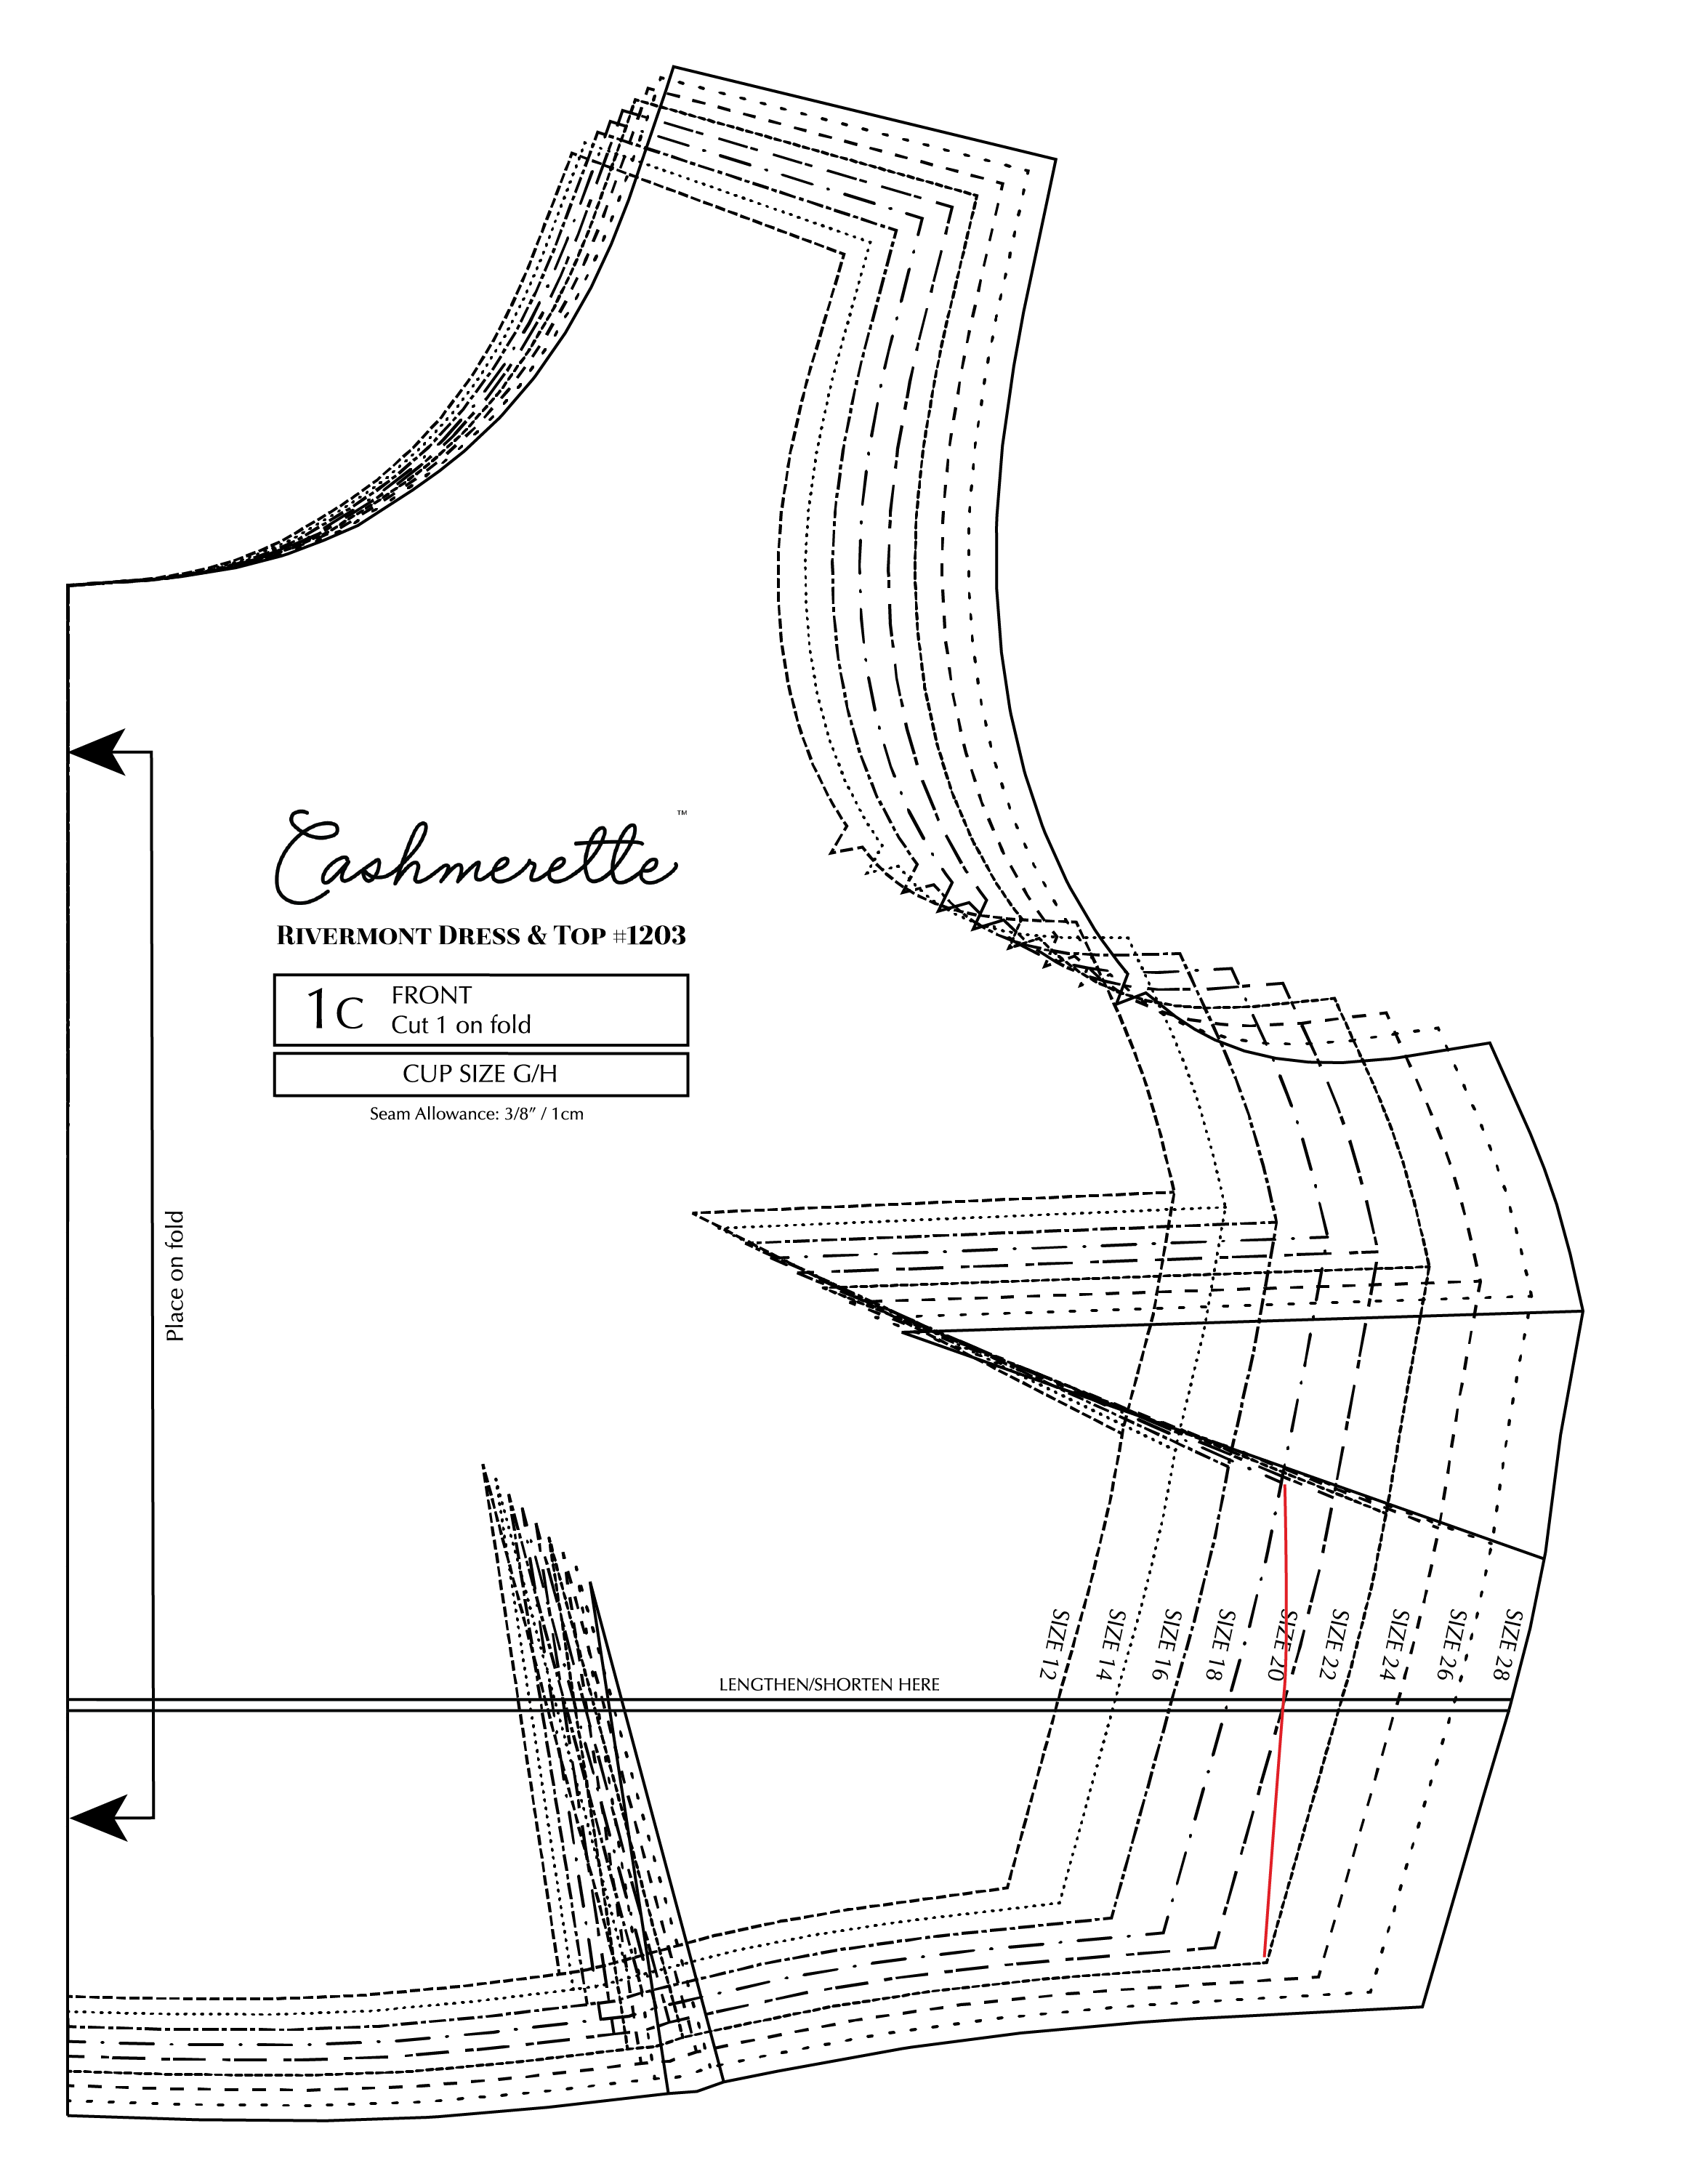
 If you’re making the peplum top, go ahead and cut a straight 22 in the peplum! If you’re making the dress, you may want to grade back to a 20 at the hips to get the sheath skirt shape. On the back piece, simply start at a 22 at the waist and grade to a 20 by the hip notch, adding a curve. On the front piece, start grading at the bottom of the pocket opening, since the pocket is the same for all sizes!
Other things to consider:
- Waist darts should always be cut in the size of the waist. You may need to adjust the length of them based on the shape of your hips or bust; that’s what you’ll see after making a muslin.