Grading Between Sizes
Swimsuit
In this section, we’ll look at how to grade between sizes on the Ipswich Swimsuit.
Always retake your measurements before starting each project. Make sure you’re wearing a bra (not an uplift bra) and take your waist and hip measurements while both standing up and sitting down to make sure you have sufficient wearing ease in your garment.
Though the color block panels look similar to princess seams, they are actually just style lines. We recommend adding ease to the side seams when you need to grade between sizes which will keep the style lines in place.
Let’s say your measurements are 51” at the bust, 46” at the waist, and 52” at the hips. This would put you in a 22 E/F bust, 26 waist, and 22 hips. In this example, we just need extra ease at the waist.
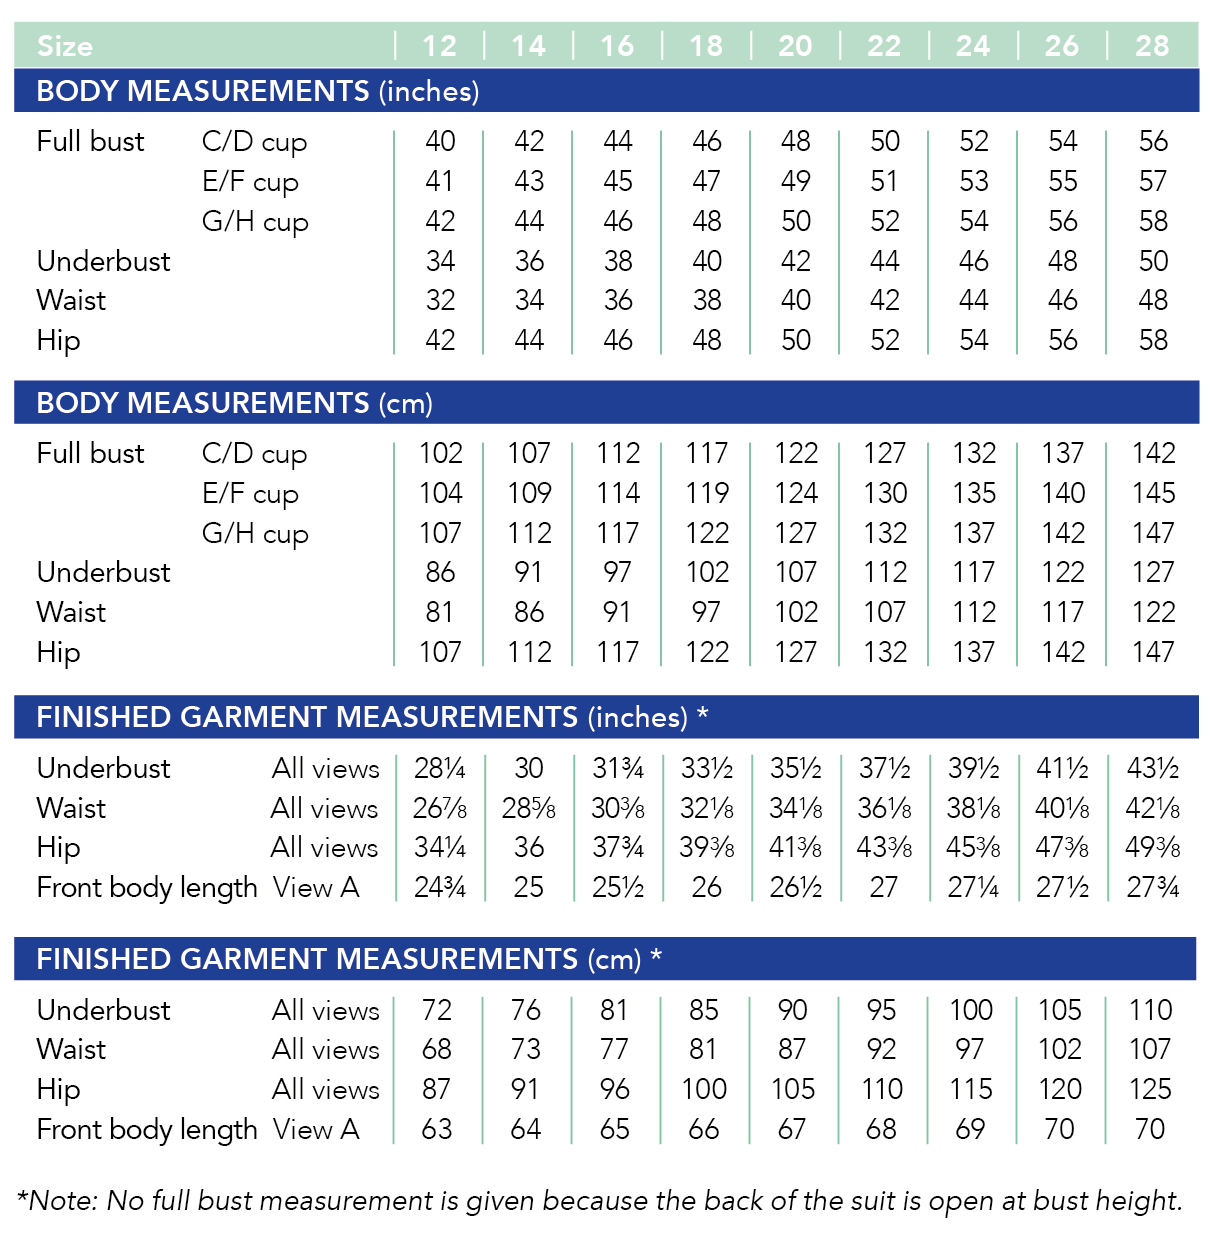 Looking at the finished garment measurements, the 22 has a waist of 36 1/8”, but don’t worry, you don’t need to add 10”! There is significant negative ease in this garment to get a nice fit. If we look at the finished waist of the 26, we’ll see the measurement we need – 40 1/8”. This means we need to add a total of 4” to the waist.
The waistband will get cut in a straight 26; the upper front side, upper back side, lower front side, lower back side, and the lining pieces will be graded. All remaining pieces will get cut in a straight size 22 E/F.
To the side seams of the upper front and back sides, you’ll need to add ease from below the bust point to the waist edge. We need to add a total of 4”, so we’ll add 1” to each of those pieces. The bust point is parallel to the notch on the upper front side piece and falls at the top of the upper back side piece.
On the lower front and back sides, you’ll need to add 1” at the waist edge and then grade back to the 22 at the hip level, about 2” above the leg opening.
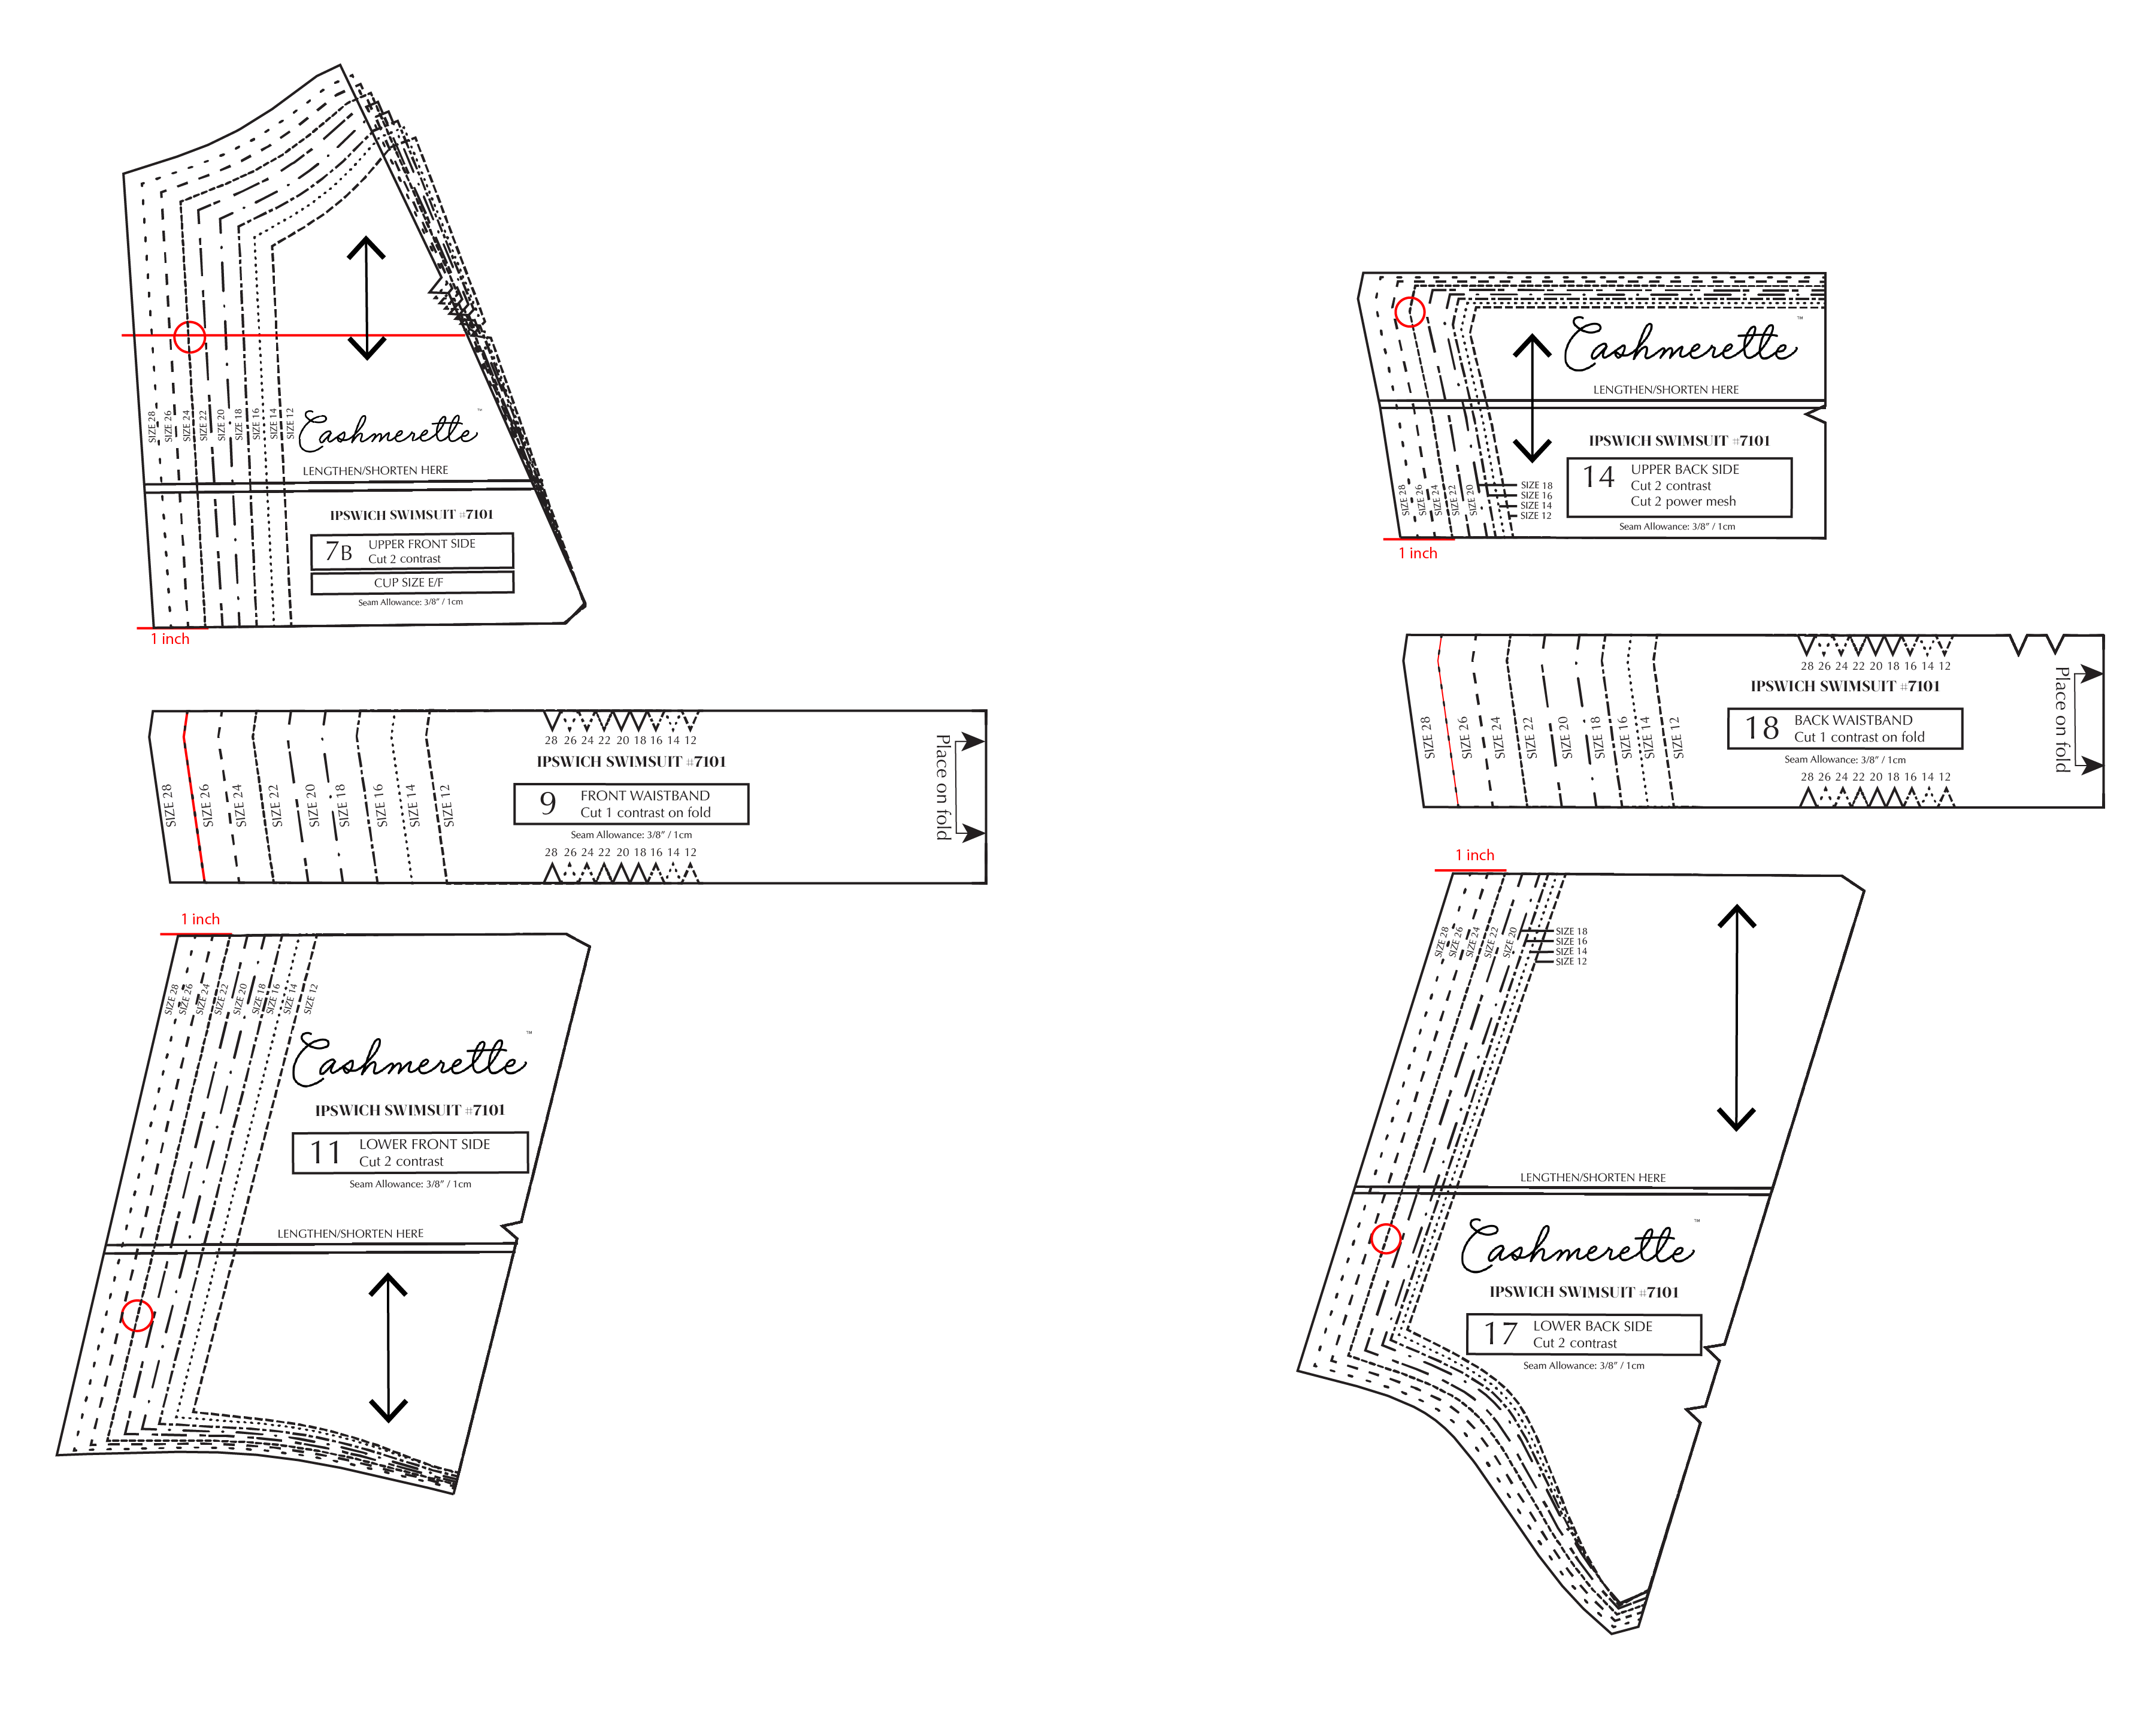 Connect these points, smoothing out the lines where possible. Because there is so much negative ease, there aren’t too many curves in this pattern, so you don’t have to do much curving, just enough to avoid sharp corners.
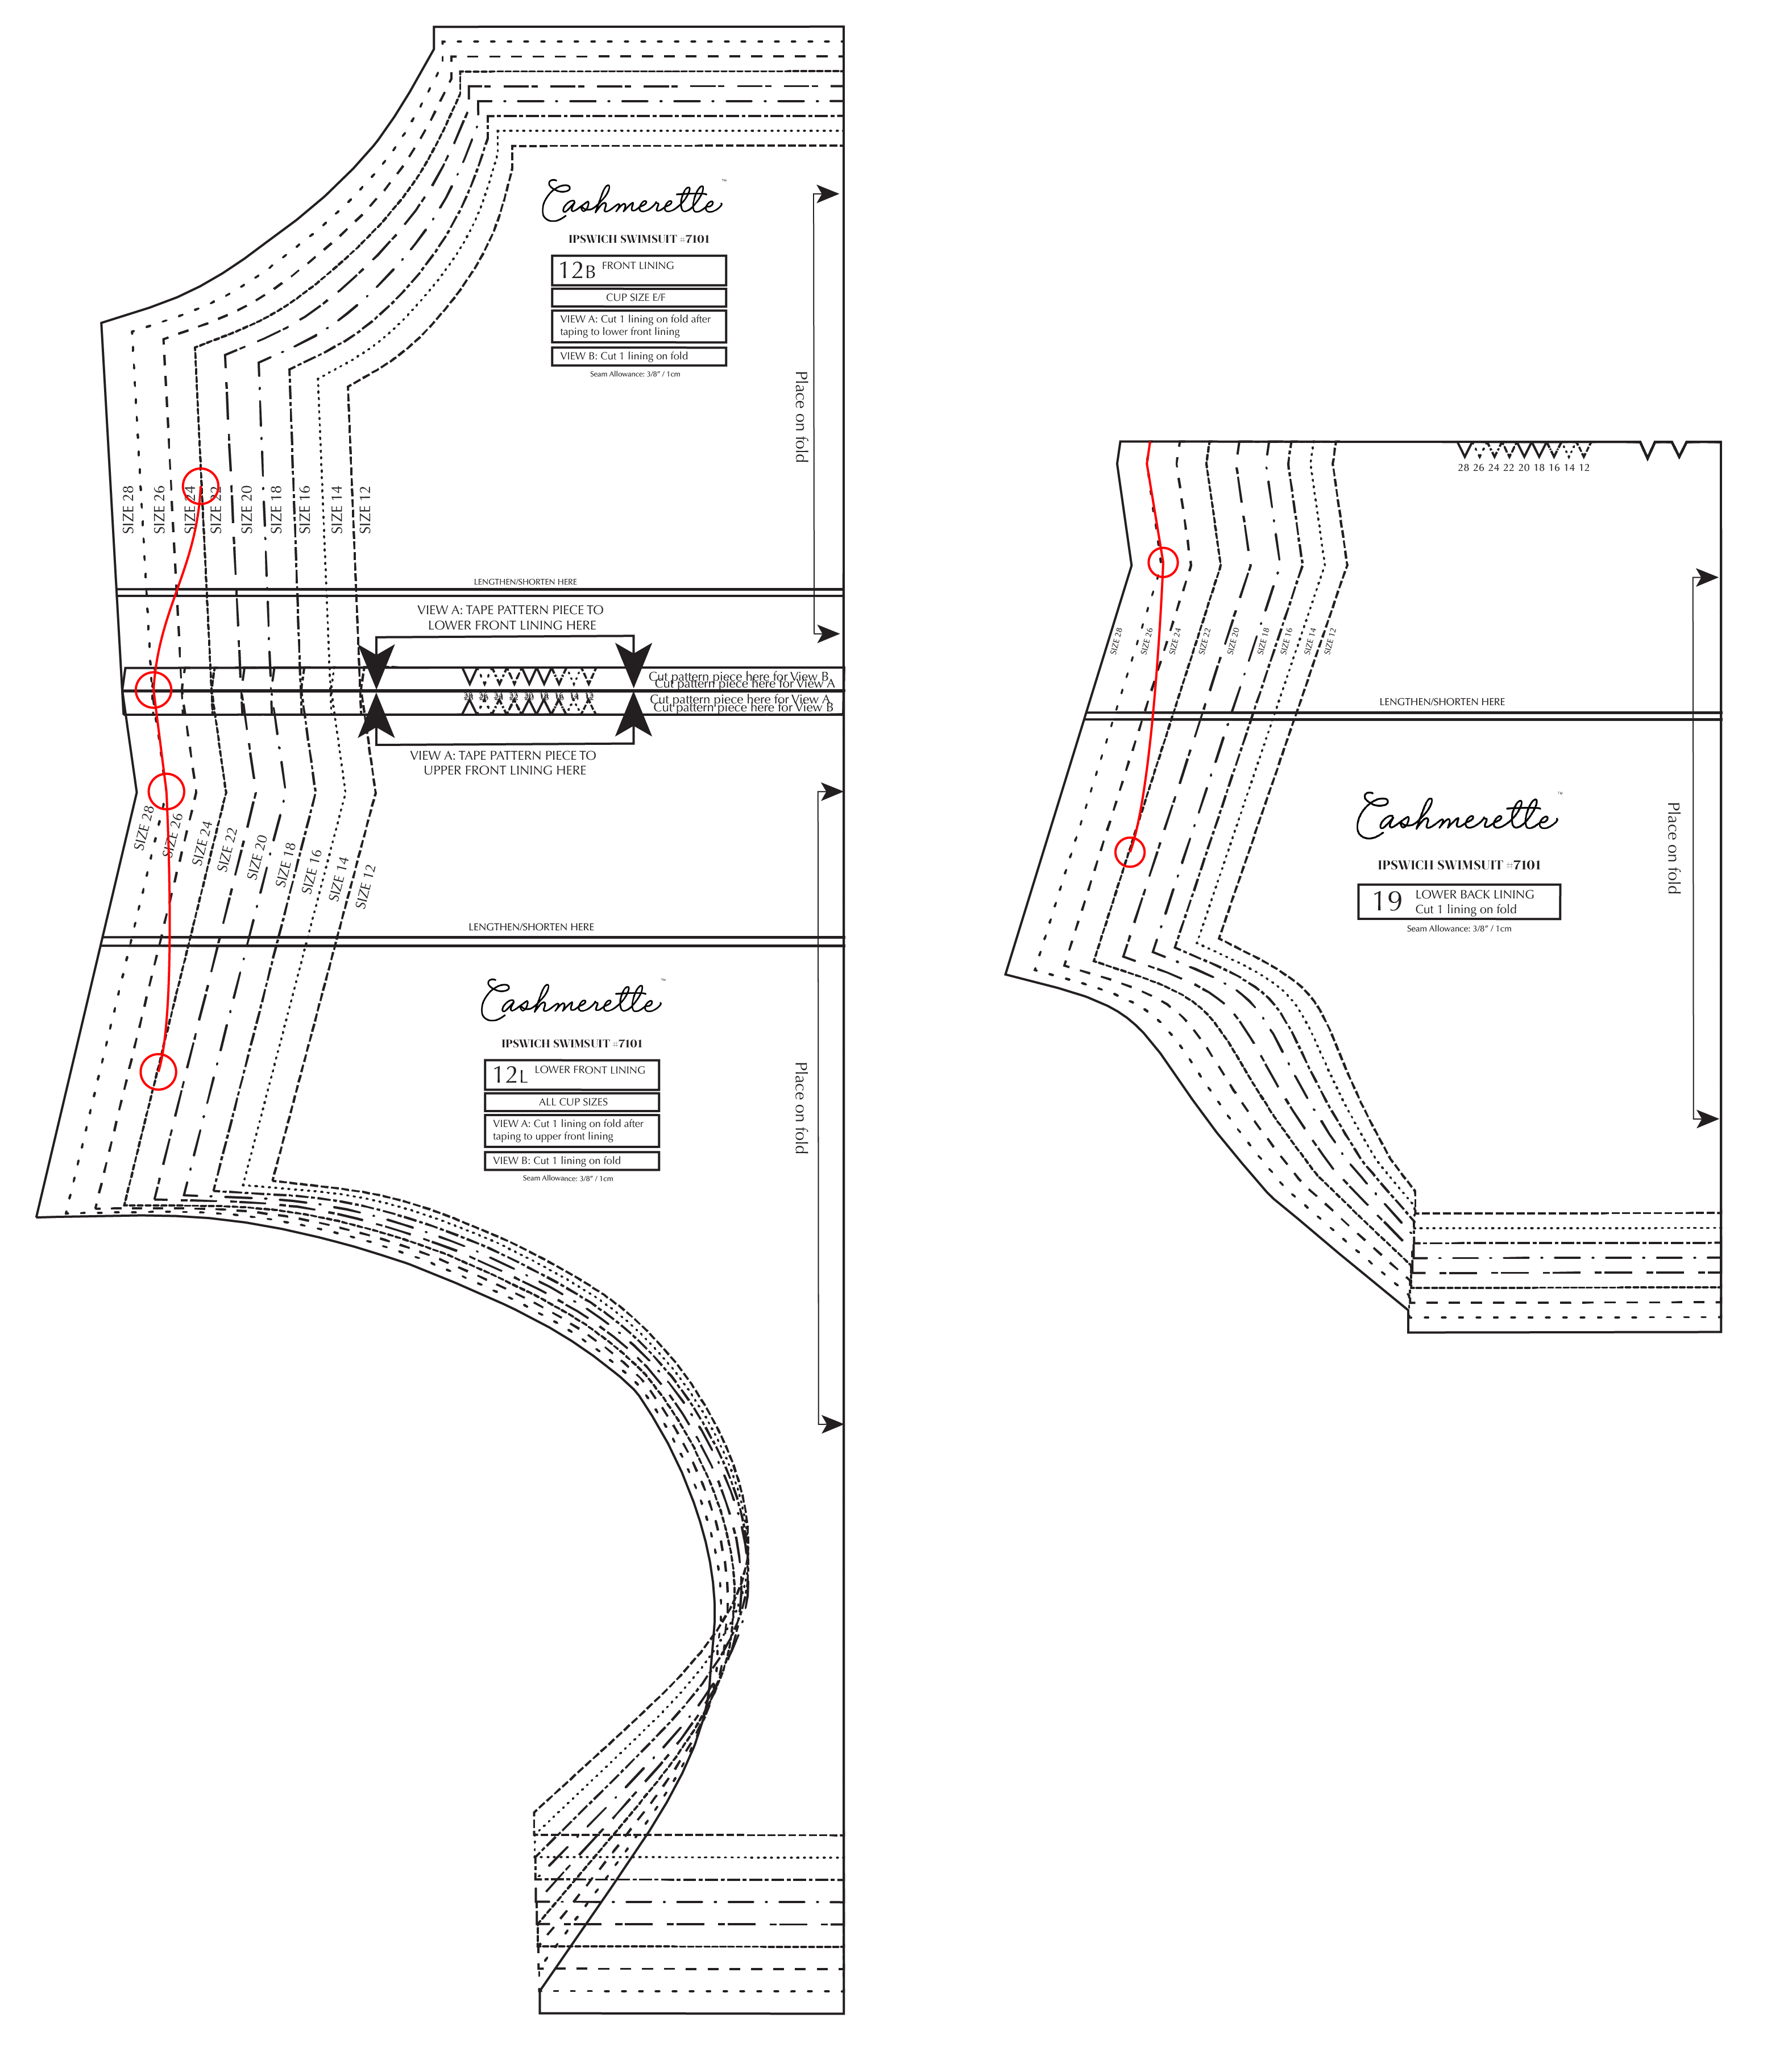
 Finally, we need to grade the lining pieces, but those can be graded in the standard way, grading out to the 26 for the waist section and back to the 22 at the hip. To make sure the lining seam matches the curves of the outer pieces, lay the side pieces on top of the lining pieces, lining up the armscyes and the leg openings and smooth the edges as needed.
 Make a muslin to ensure you’ve added ease at the proper spots and that the seams still match up well.
Other things to consider:
- If you need to grade between more than two sizes, grading each individual piece will help distribute the angles because the pieces are small. (Do not grade the upper back band, neckband, and waistband pieces because they are too compact to grade effectively.) See this section for an example of this type of grading.
- Cut the swim bra in a single size; it’s not designed to fit as precisely as a stand-alone bra, but will give plenty of support as drafted!