In this section, we’ll look at how to grade between sizes on pants and skirts.
Always retake your measurements before starting each project. Take your waist and hip measurements while both standing up and sitting down to make sure you have sufficient wearing ease in your garment.
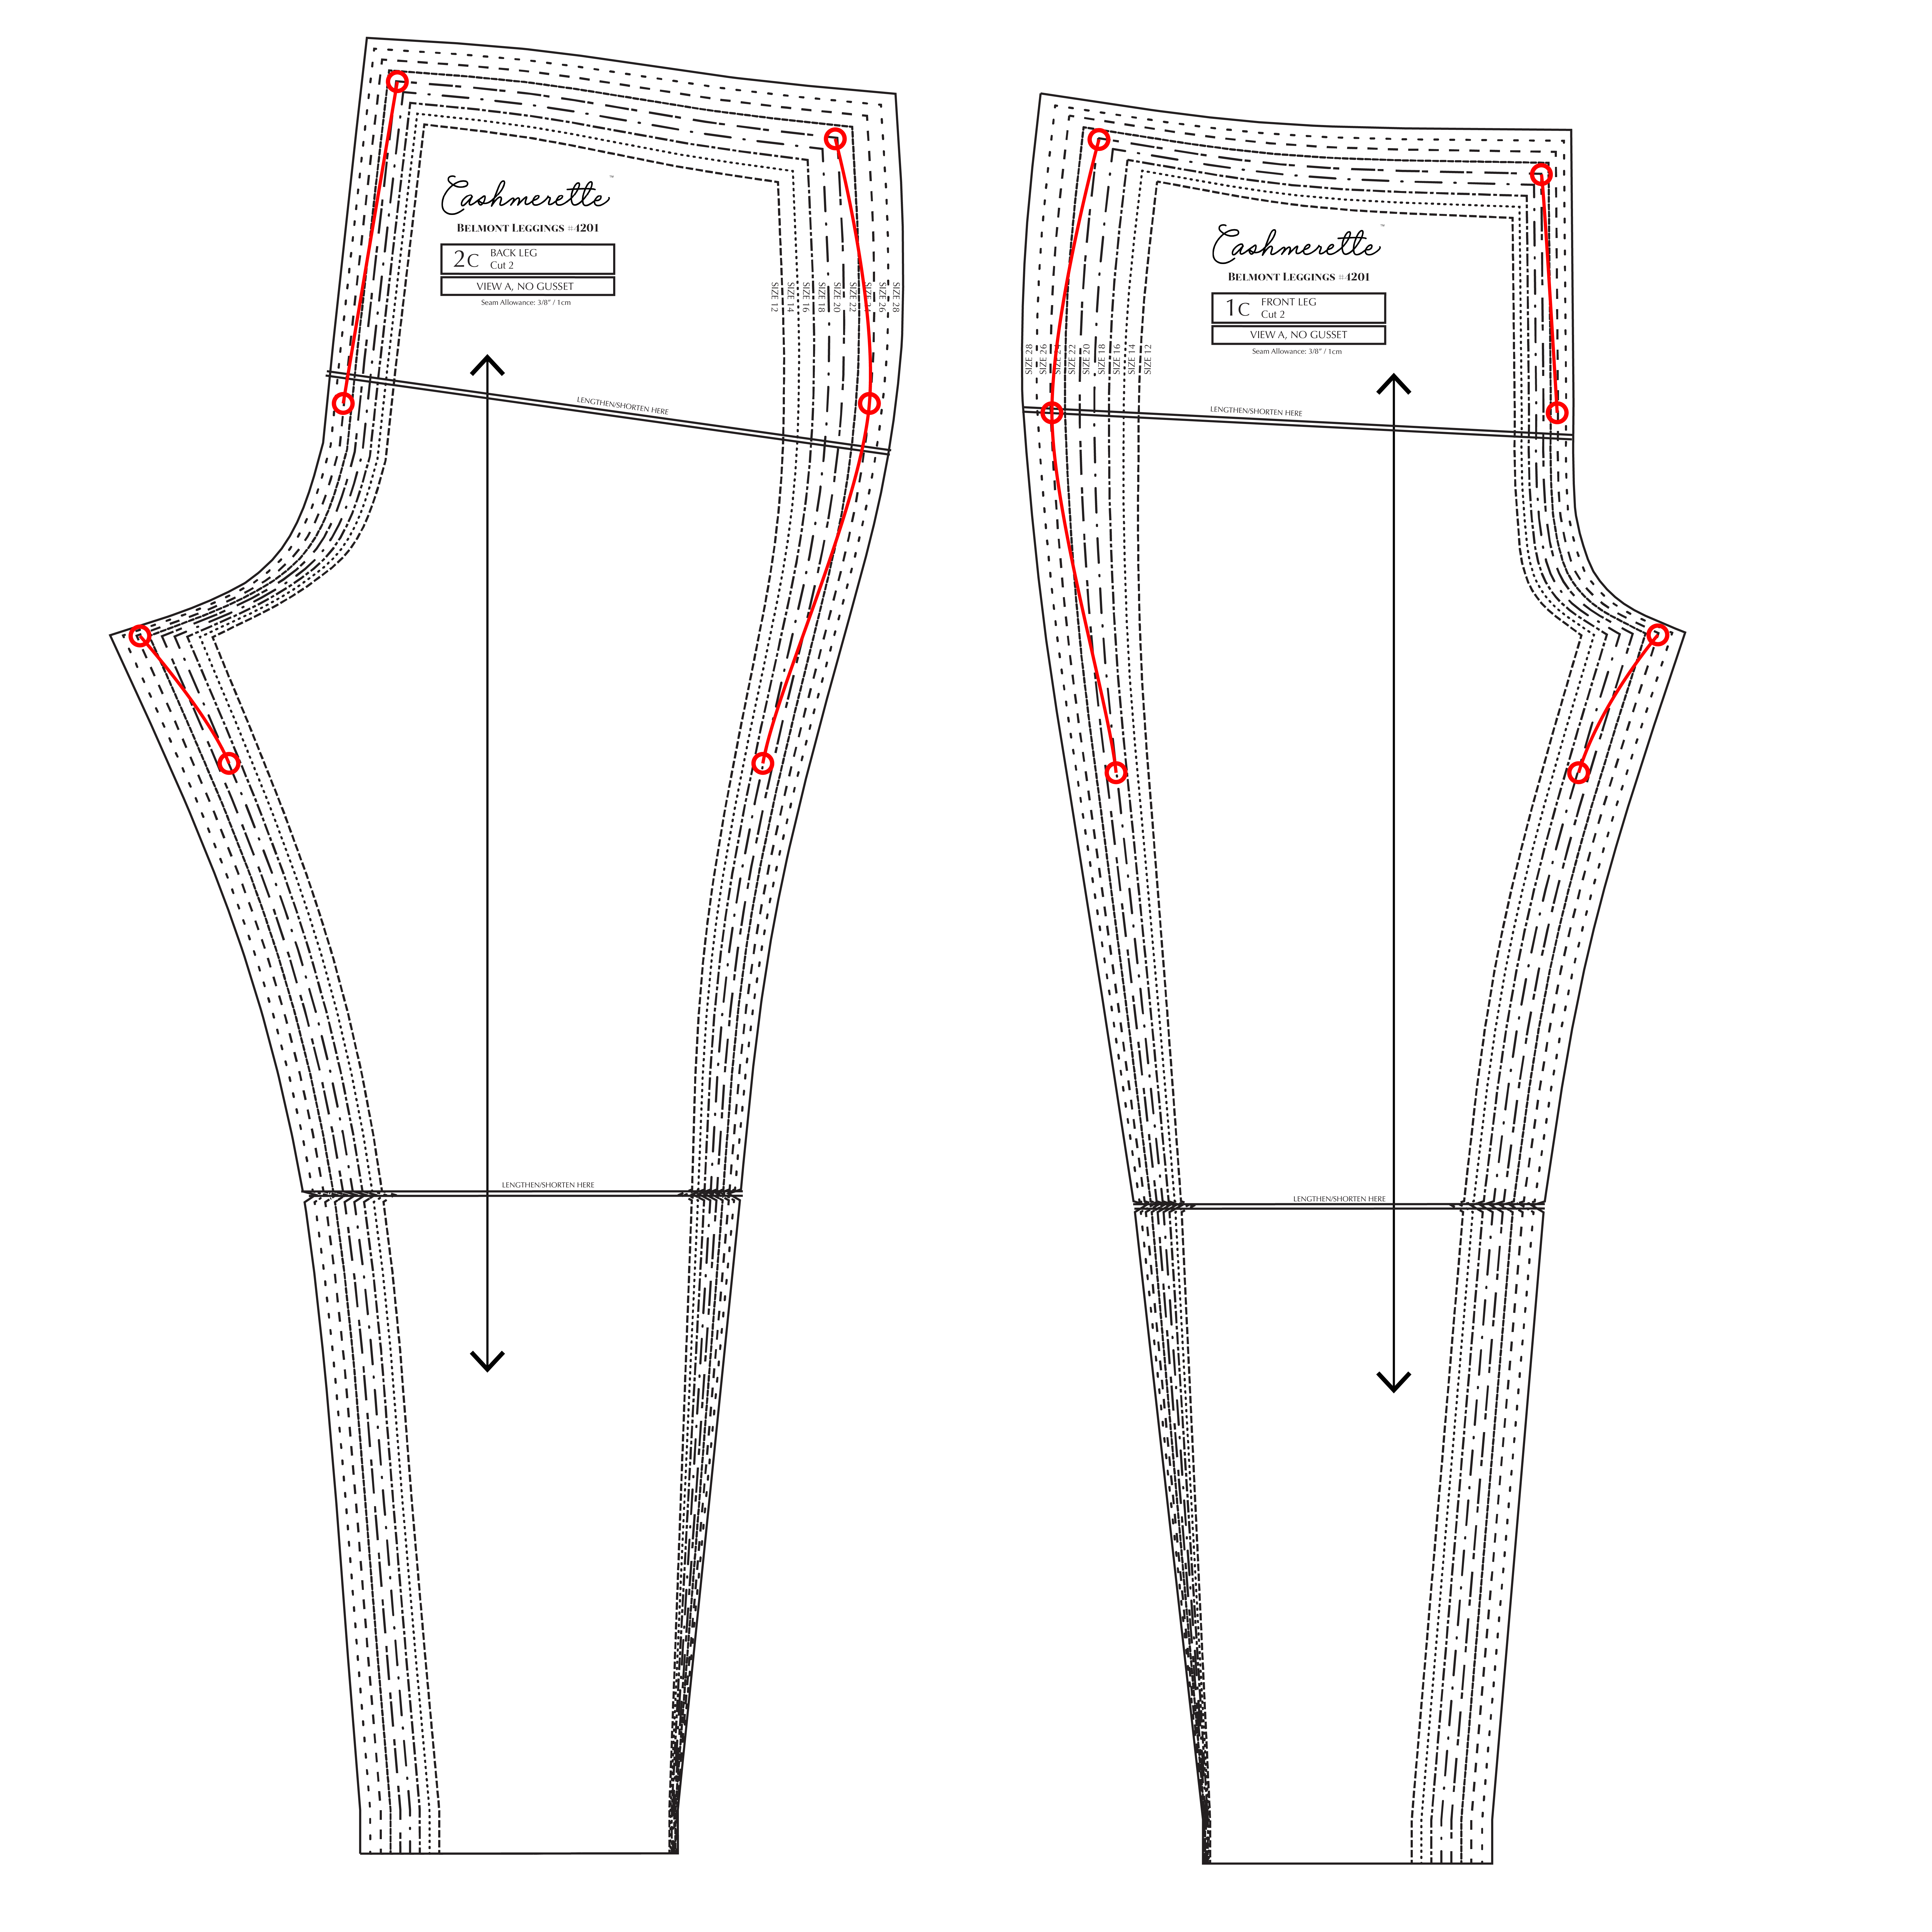
Let’s say you want to grade between a 20 at the waist, a 24 at the hip, and an 18 at the leg. Start by marking the 24 at the fullest point of the hip on the front leg pattern piece (use the hip curve to judge.) Then mark the 20 at the waist; you’ll want to cut a straight size 20 waistband, so make sure your piece is a 20 at the seam allowance of the waistband. For the leg, start just below the crotch seam and grade down to the 18 at the mid thigh. Repeat these steps with the back leg pattern piece.
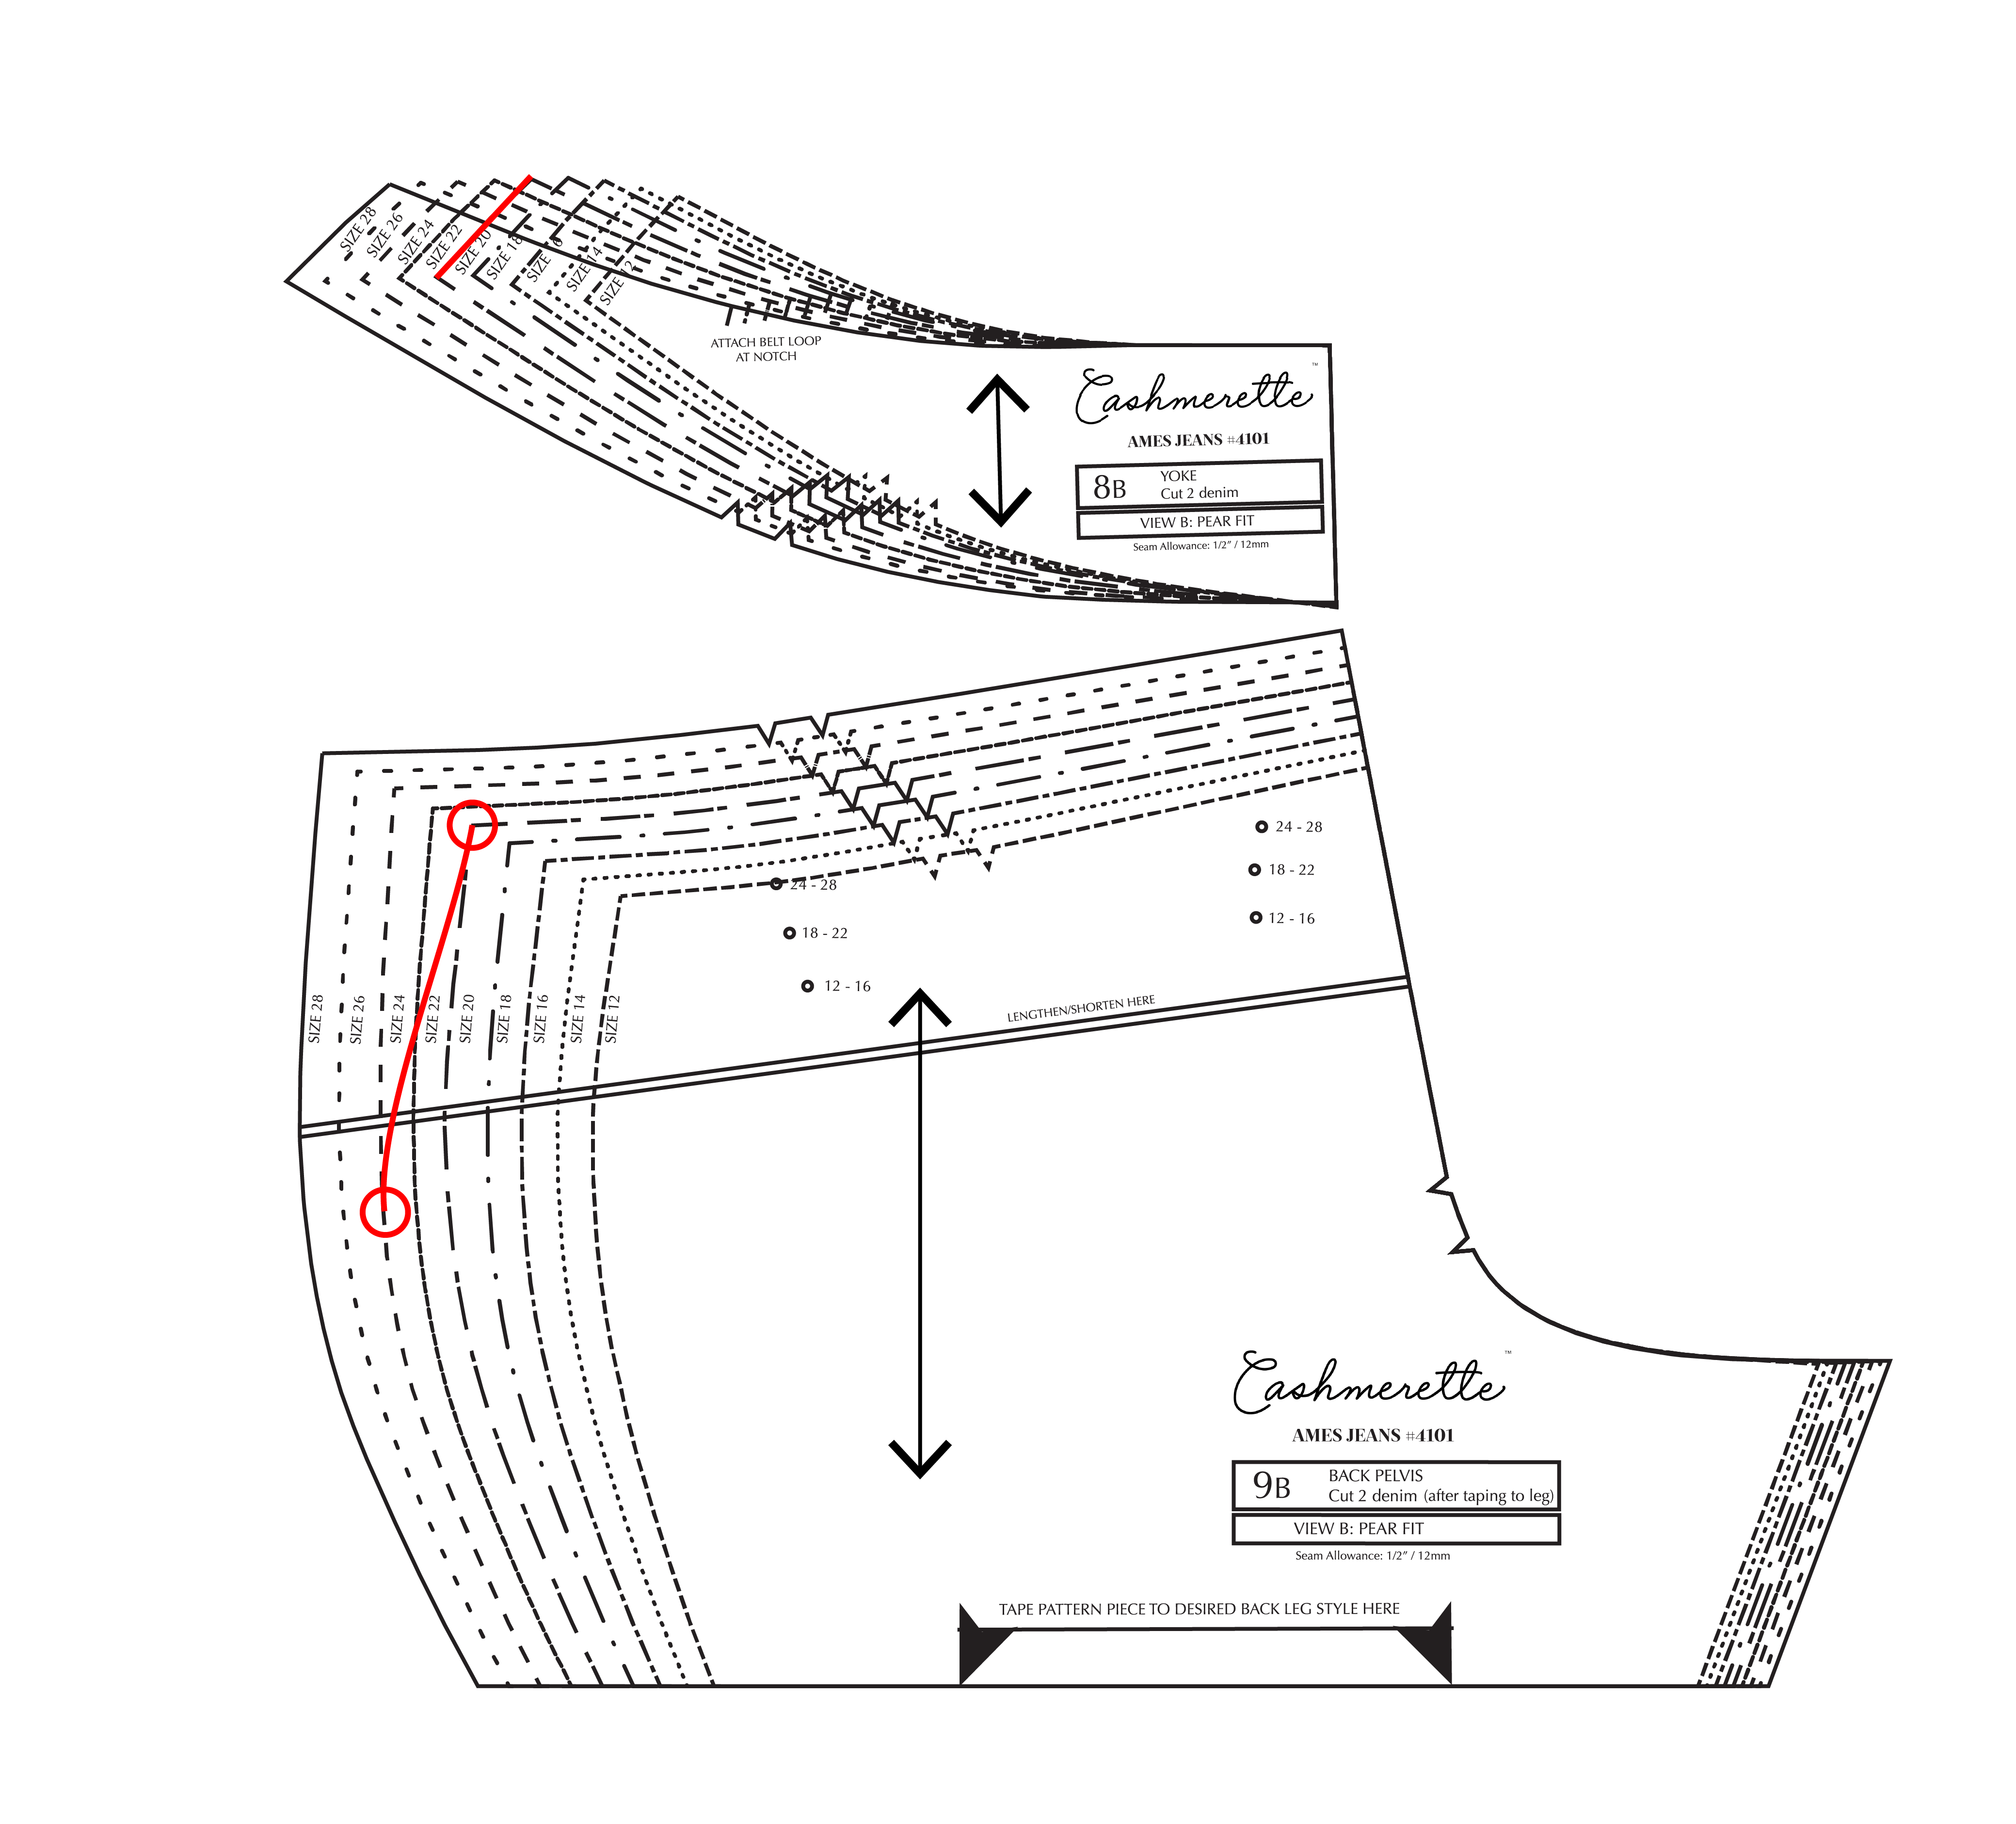
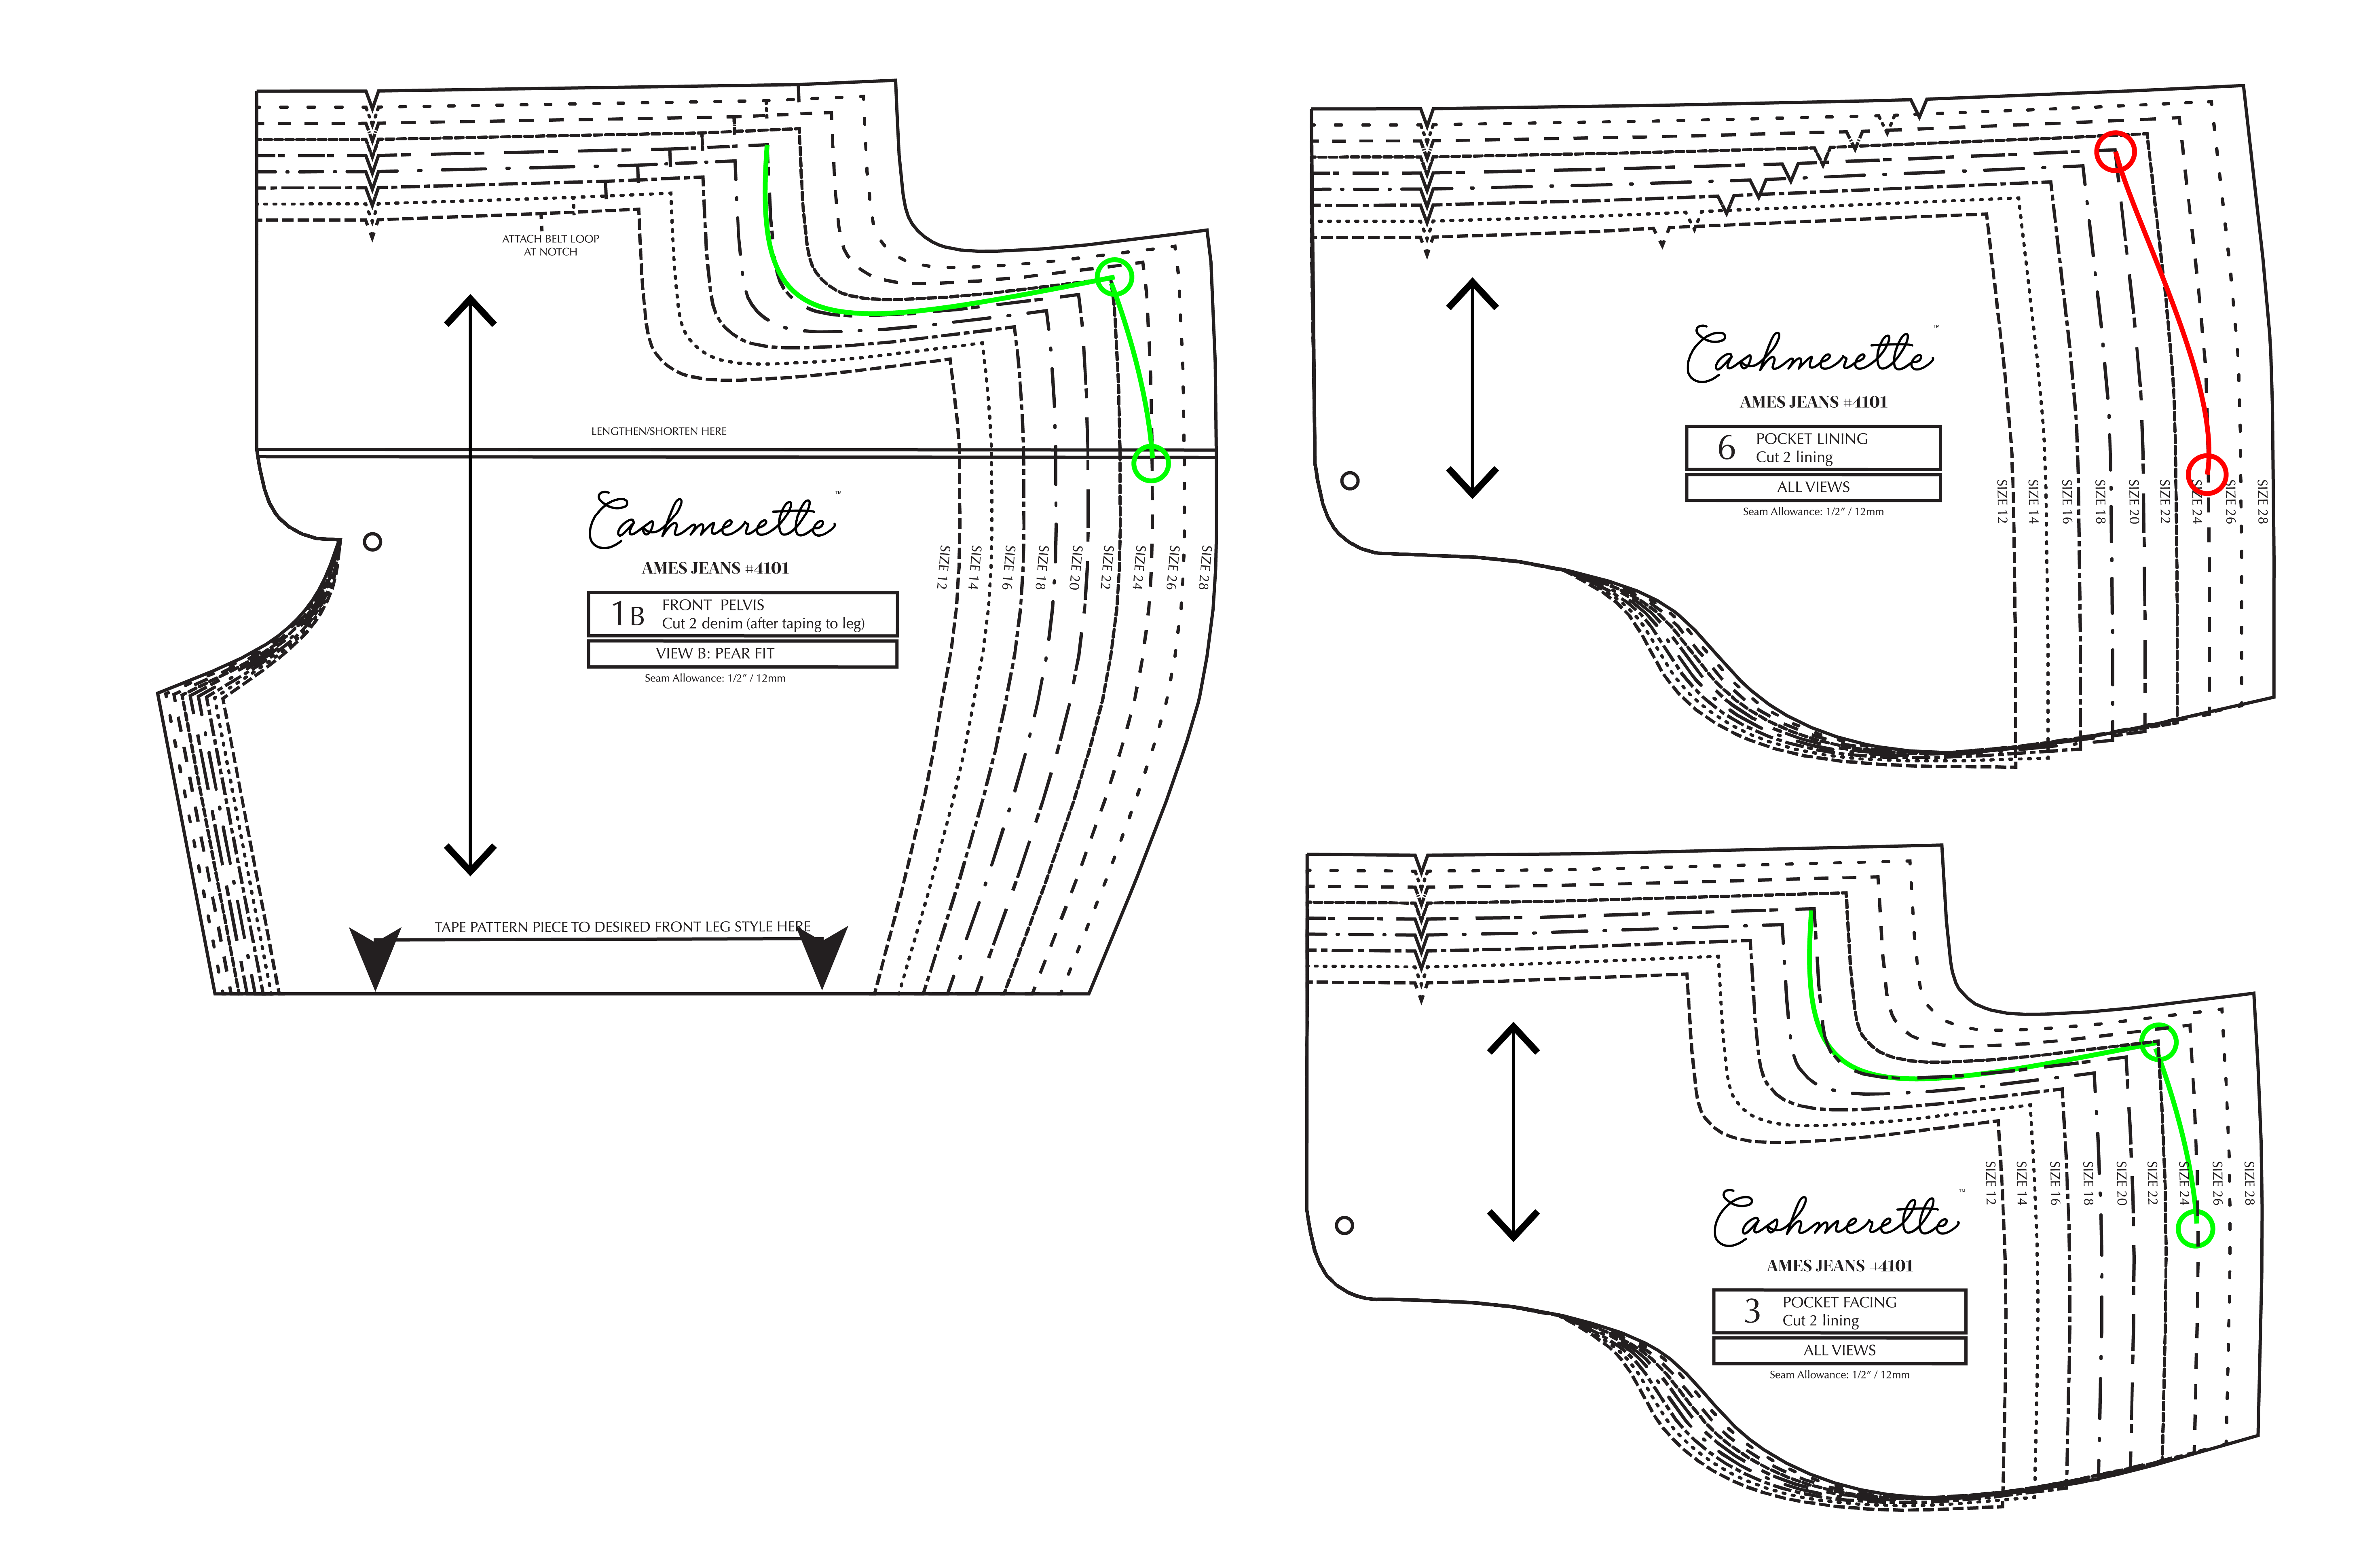
 If you decide to grade between sizes for the hip and waist on the Ames Jeans, you’ll need to take into account the pocket opening and yoke, which makes it a bit more complicated. For the yoke, you’ll want to cut a straight size because it is a small piece and grading through it wouldn’t be very accurate. For the example above, you’ll cut a straight size 20 yoke. On the back leg piece, grade from a 20 at the yoke seam to a 24 at the fullest part of the hip.
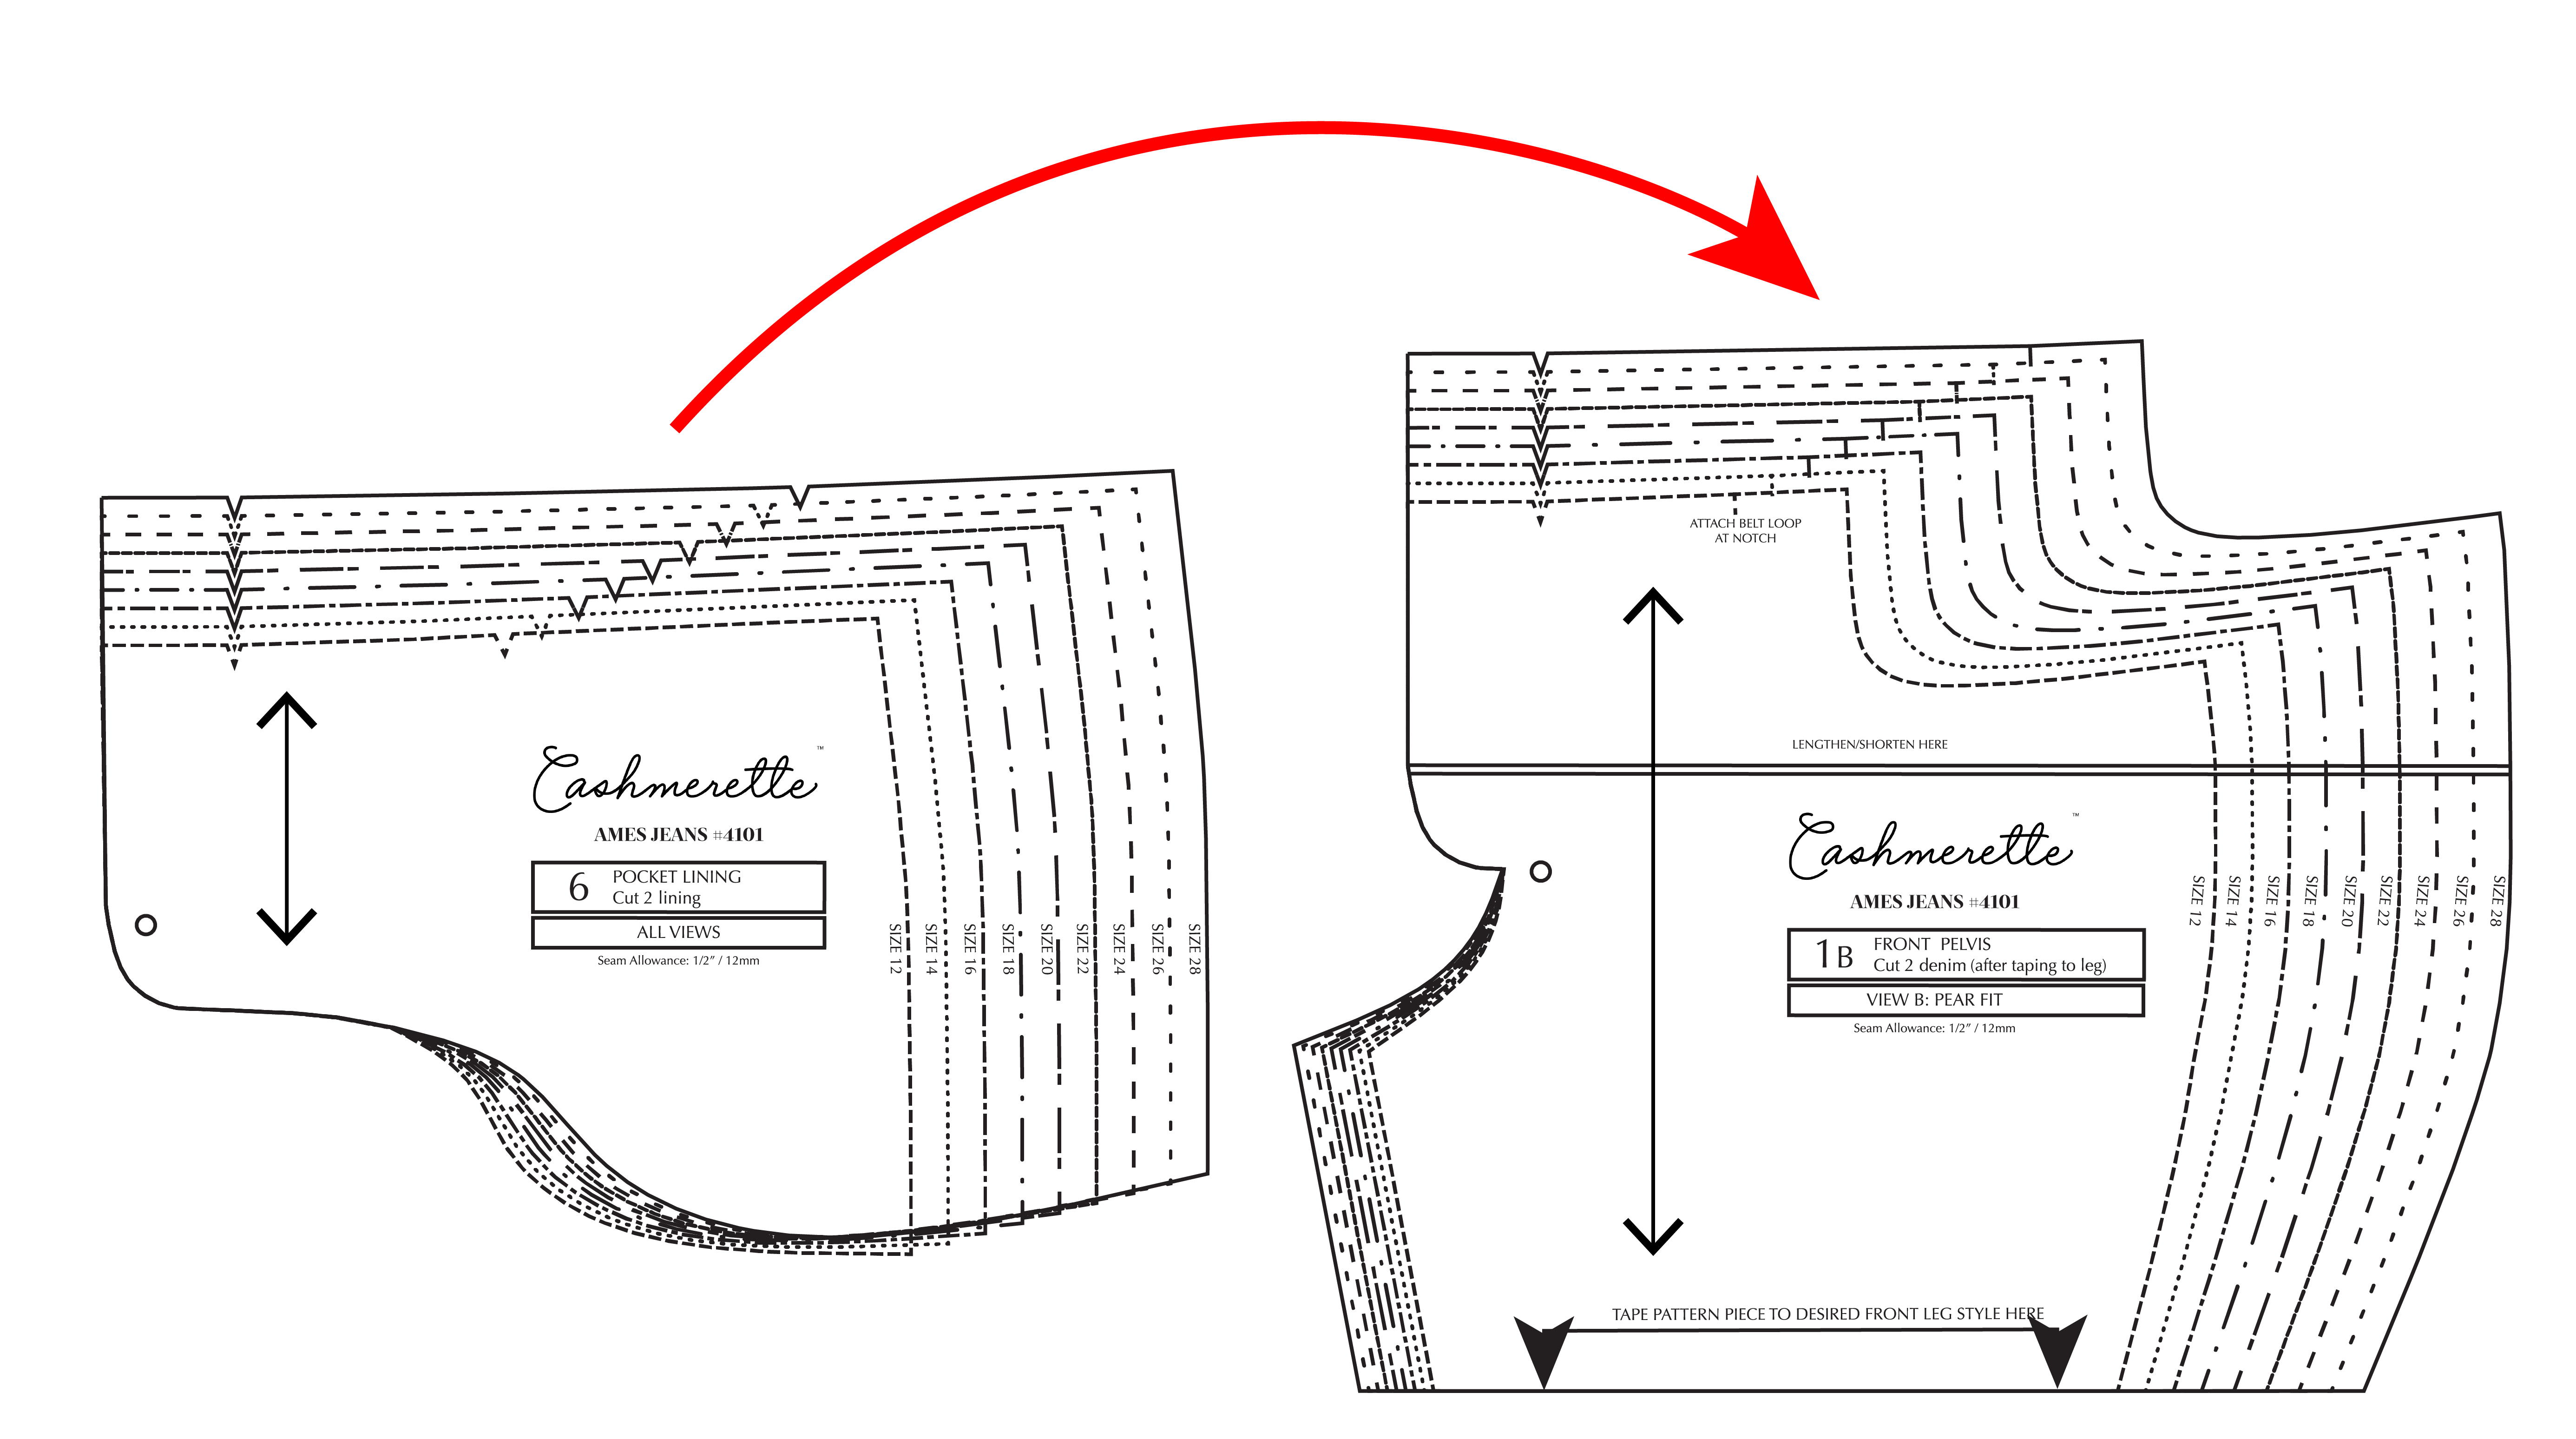
 On the front leg piece, start by lining up the pocket lining piece underneath the front leg, matching the notches and center front.
Trace from the 20 at the waist to the 24 at the fullest part of the hip. At the pocket opening, you’ll want to follow the size 20 pocket opening extended out to where your grading line intersects the opening. Trace the size 20 pocket opening and the size 20 along the upper edge of the front leg.
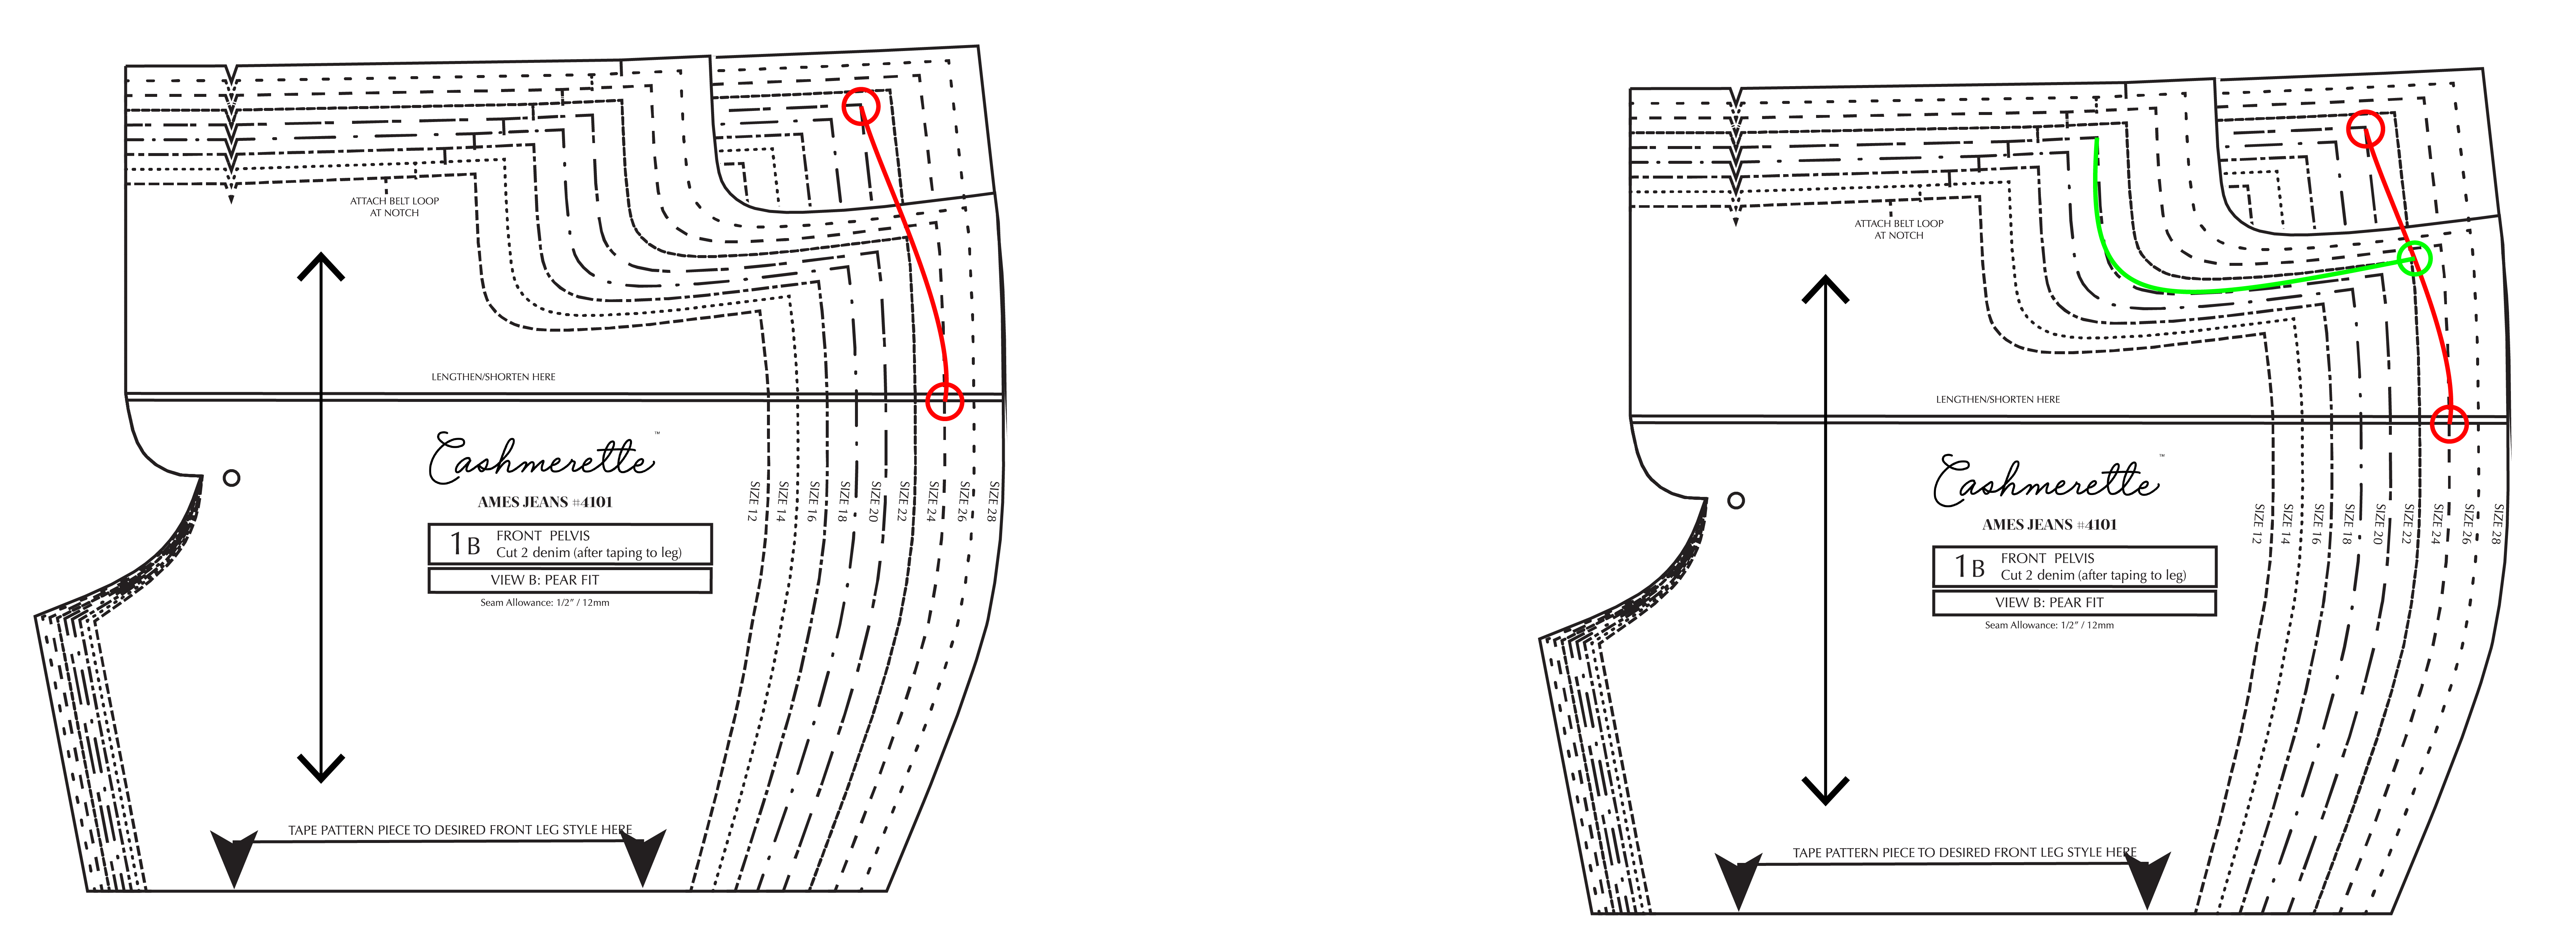 The pocket is the same size, so that doesn’t need to be graded, but the pocket lining and facing will need to be graded the same way as the front leg.
 Other things to consider:
- If you want to grade to a different size through the leg, such as for the thigh or calf, you’ll want to grade on both the inseam and outseam sides of the front and back pattern pieces.
