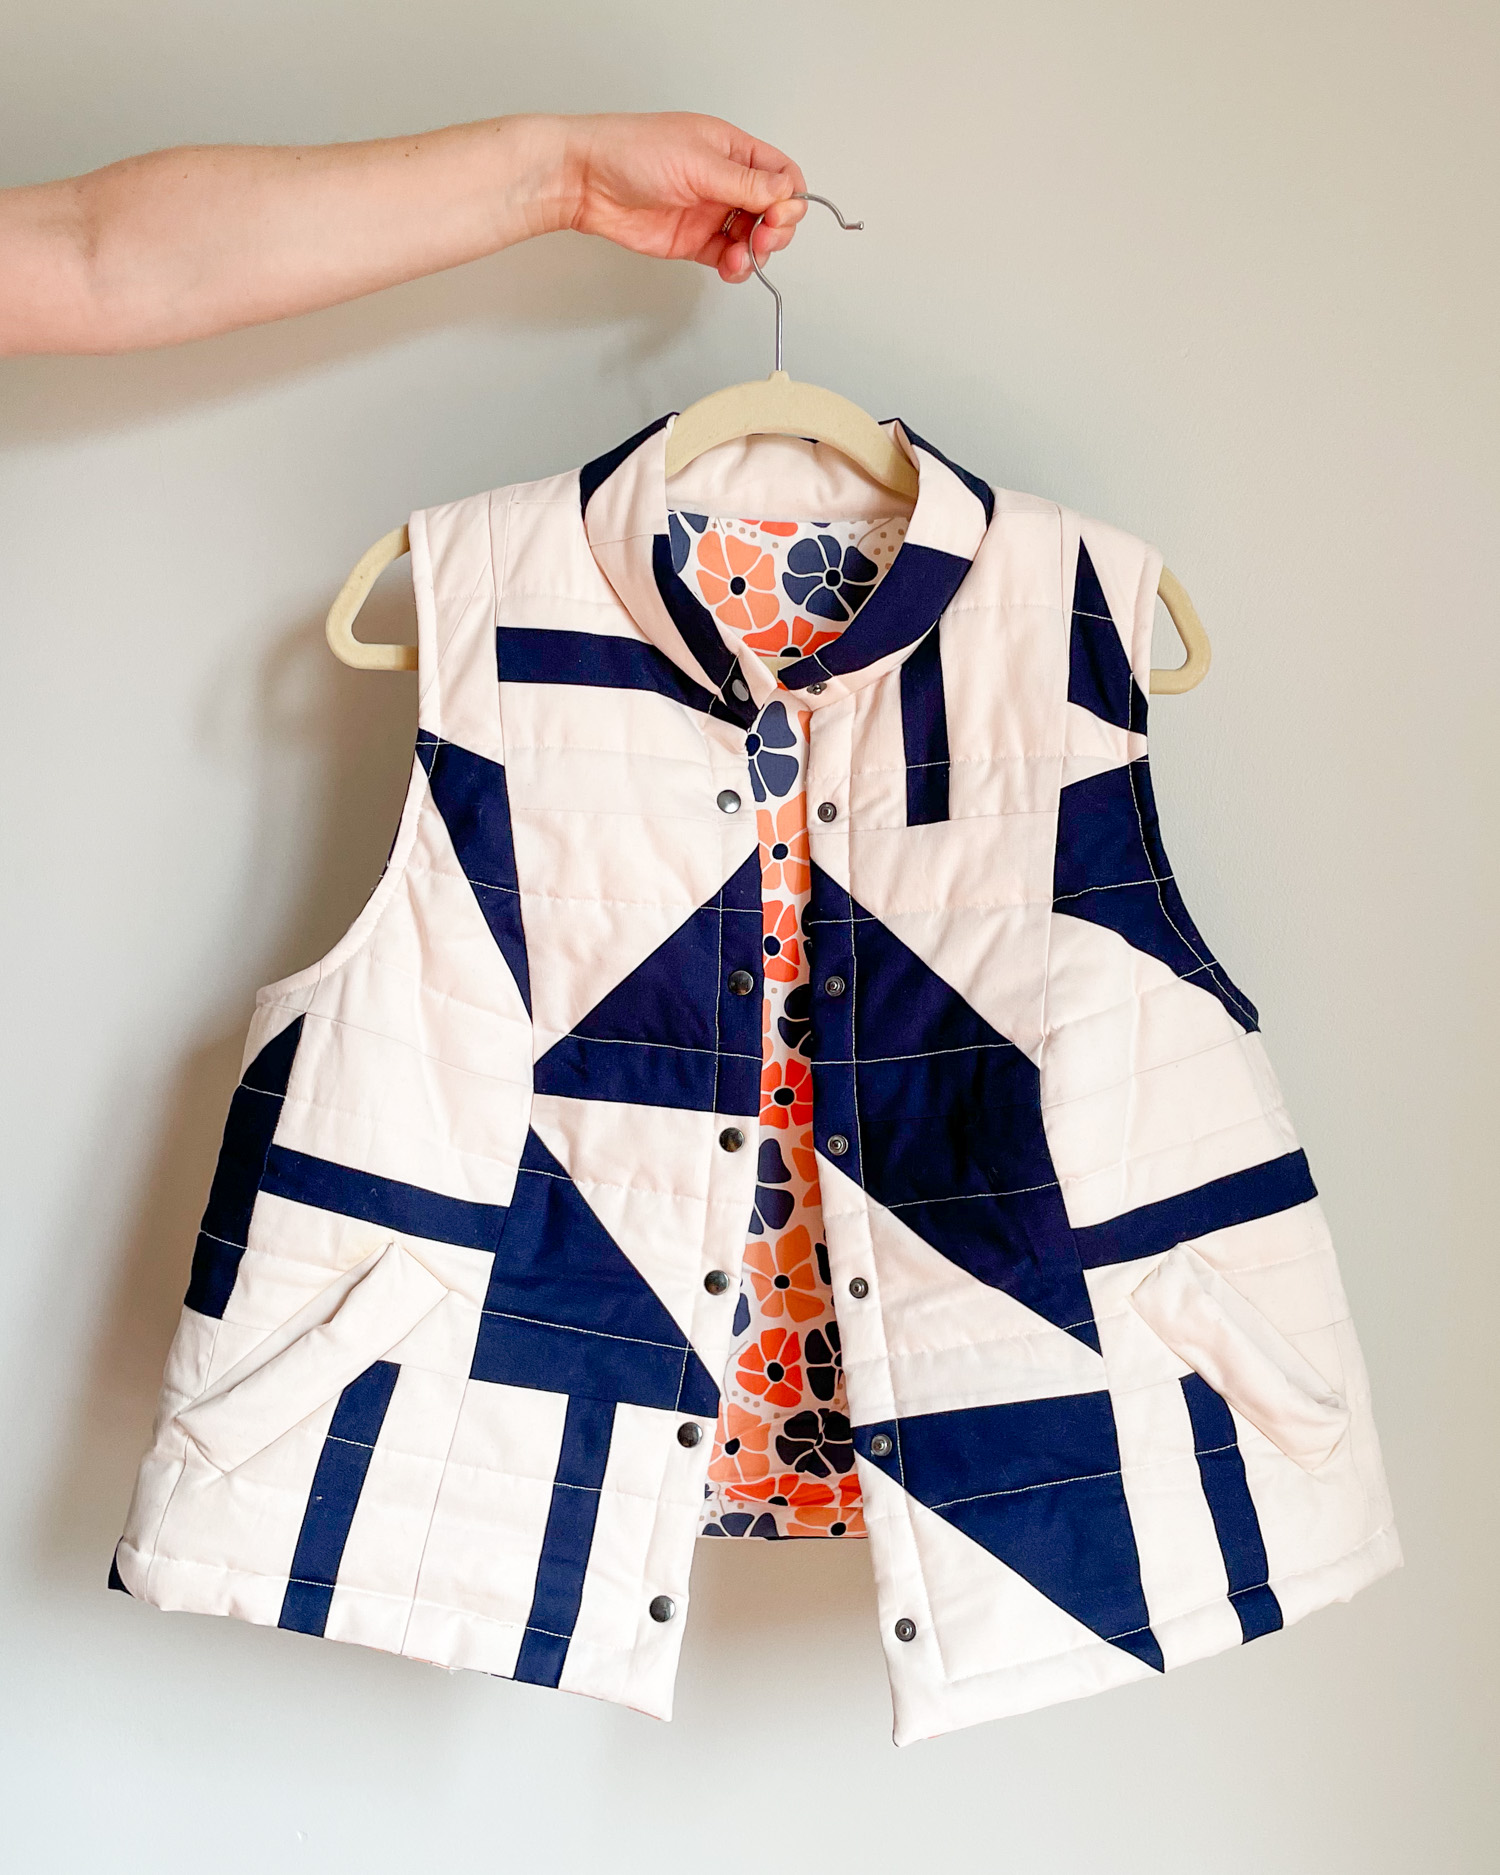
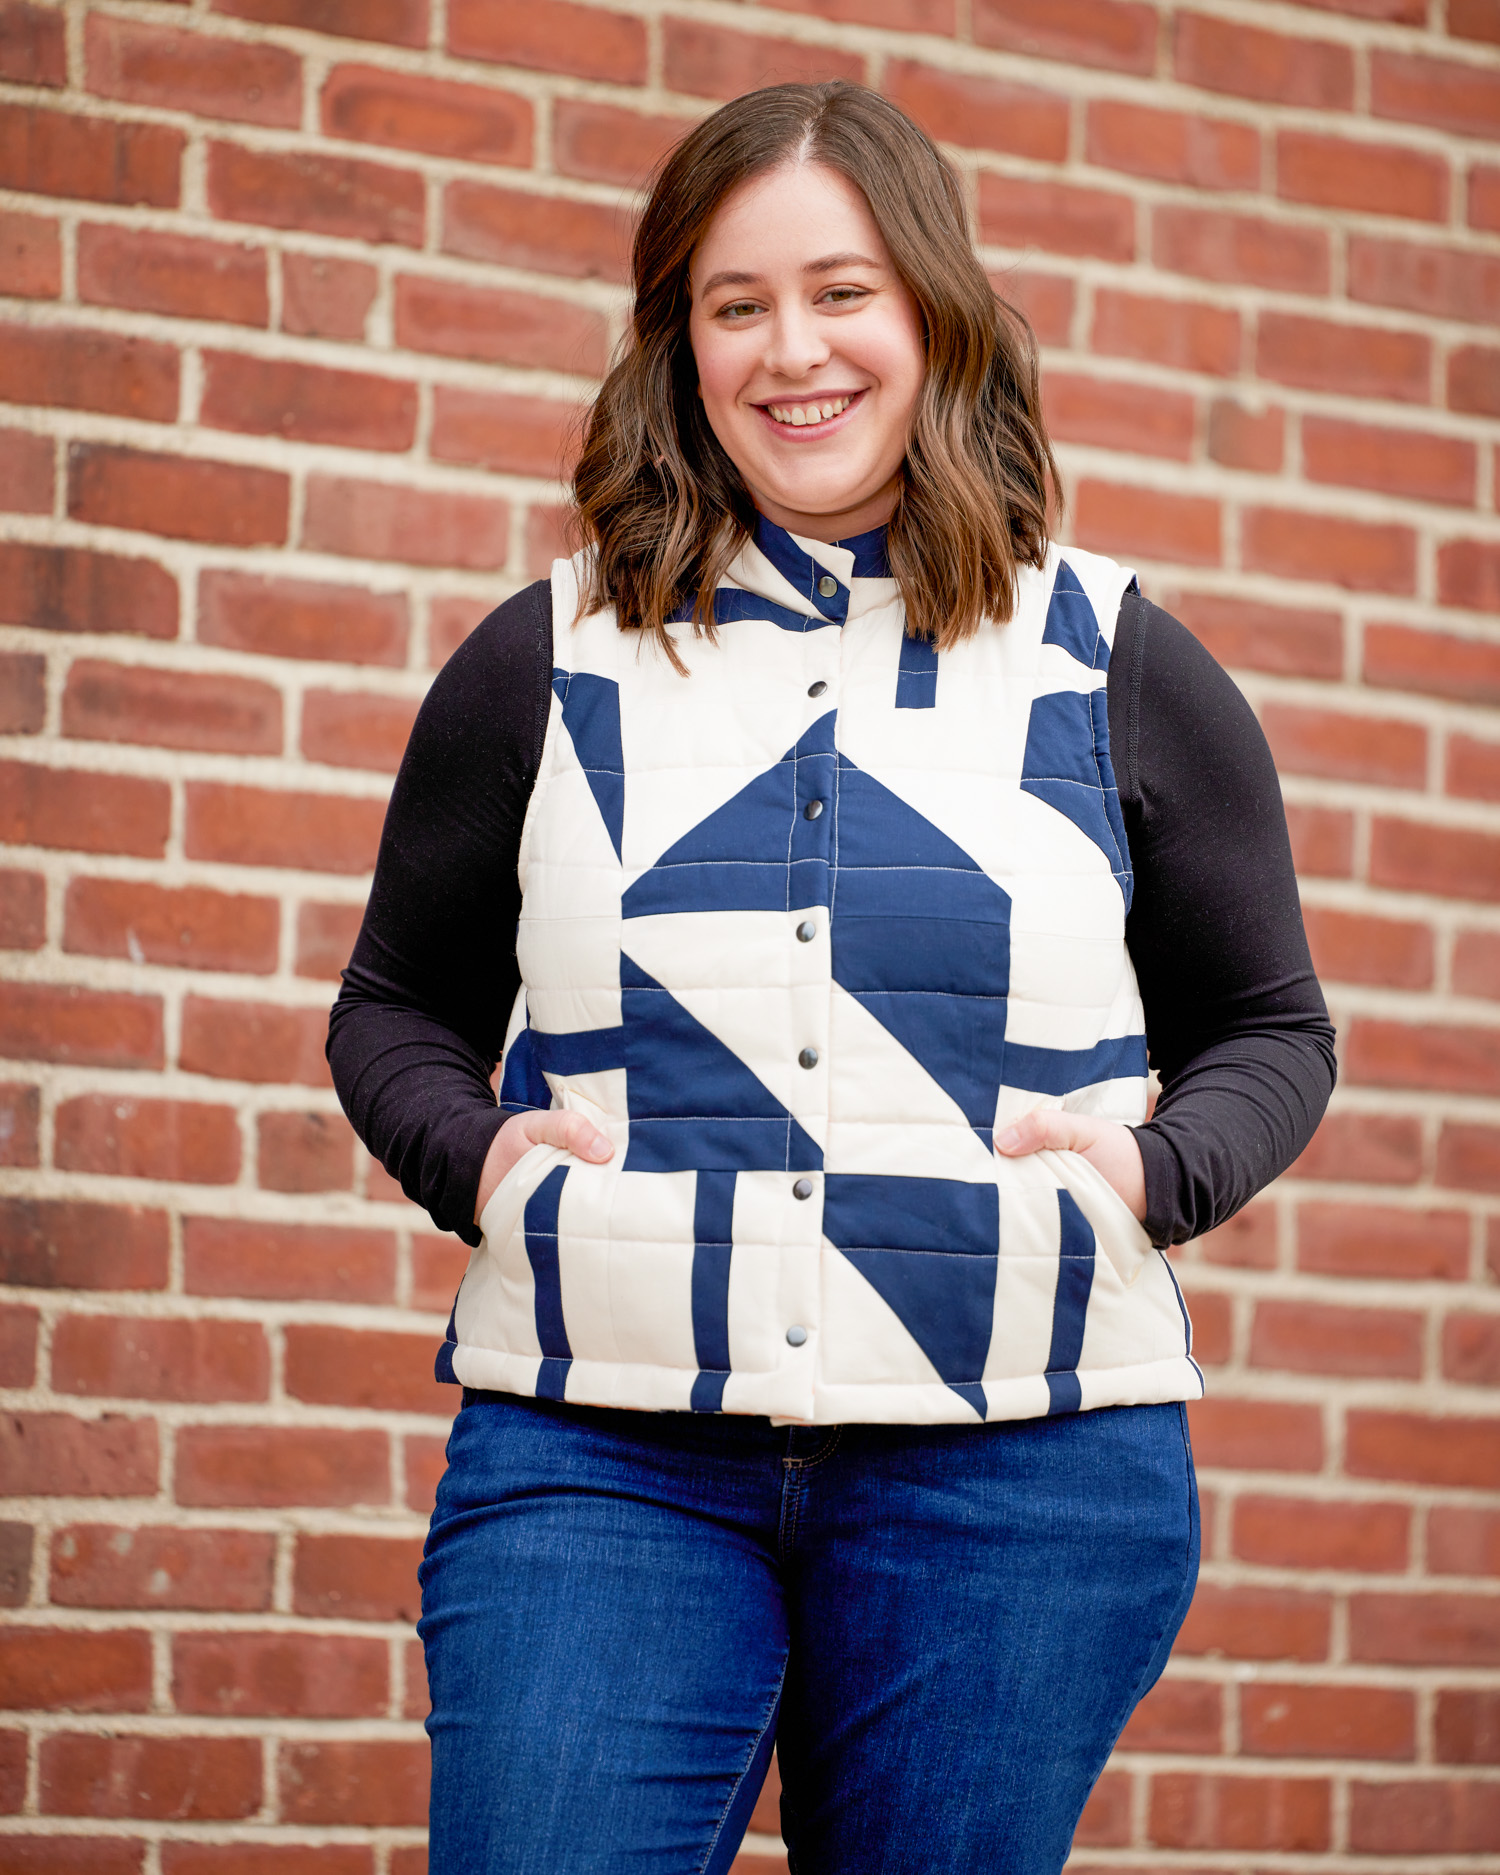
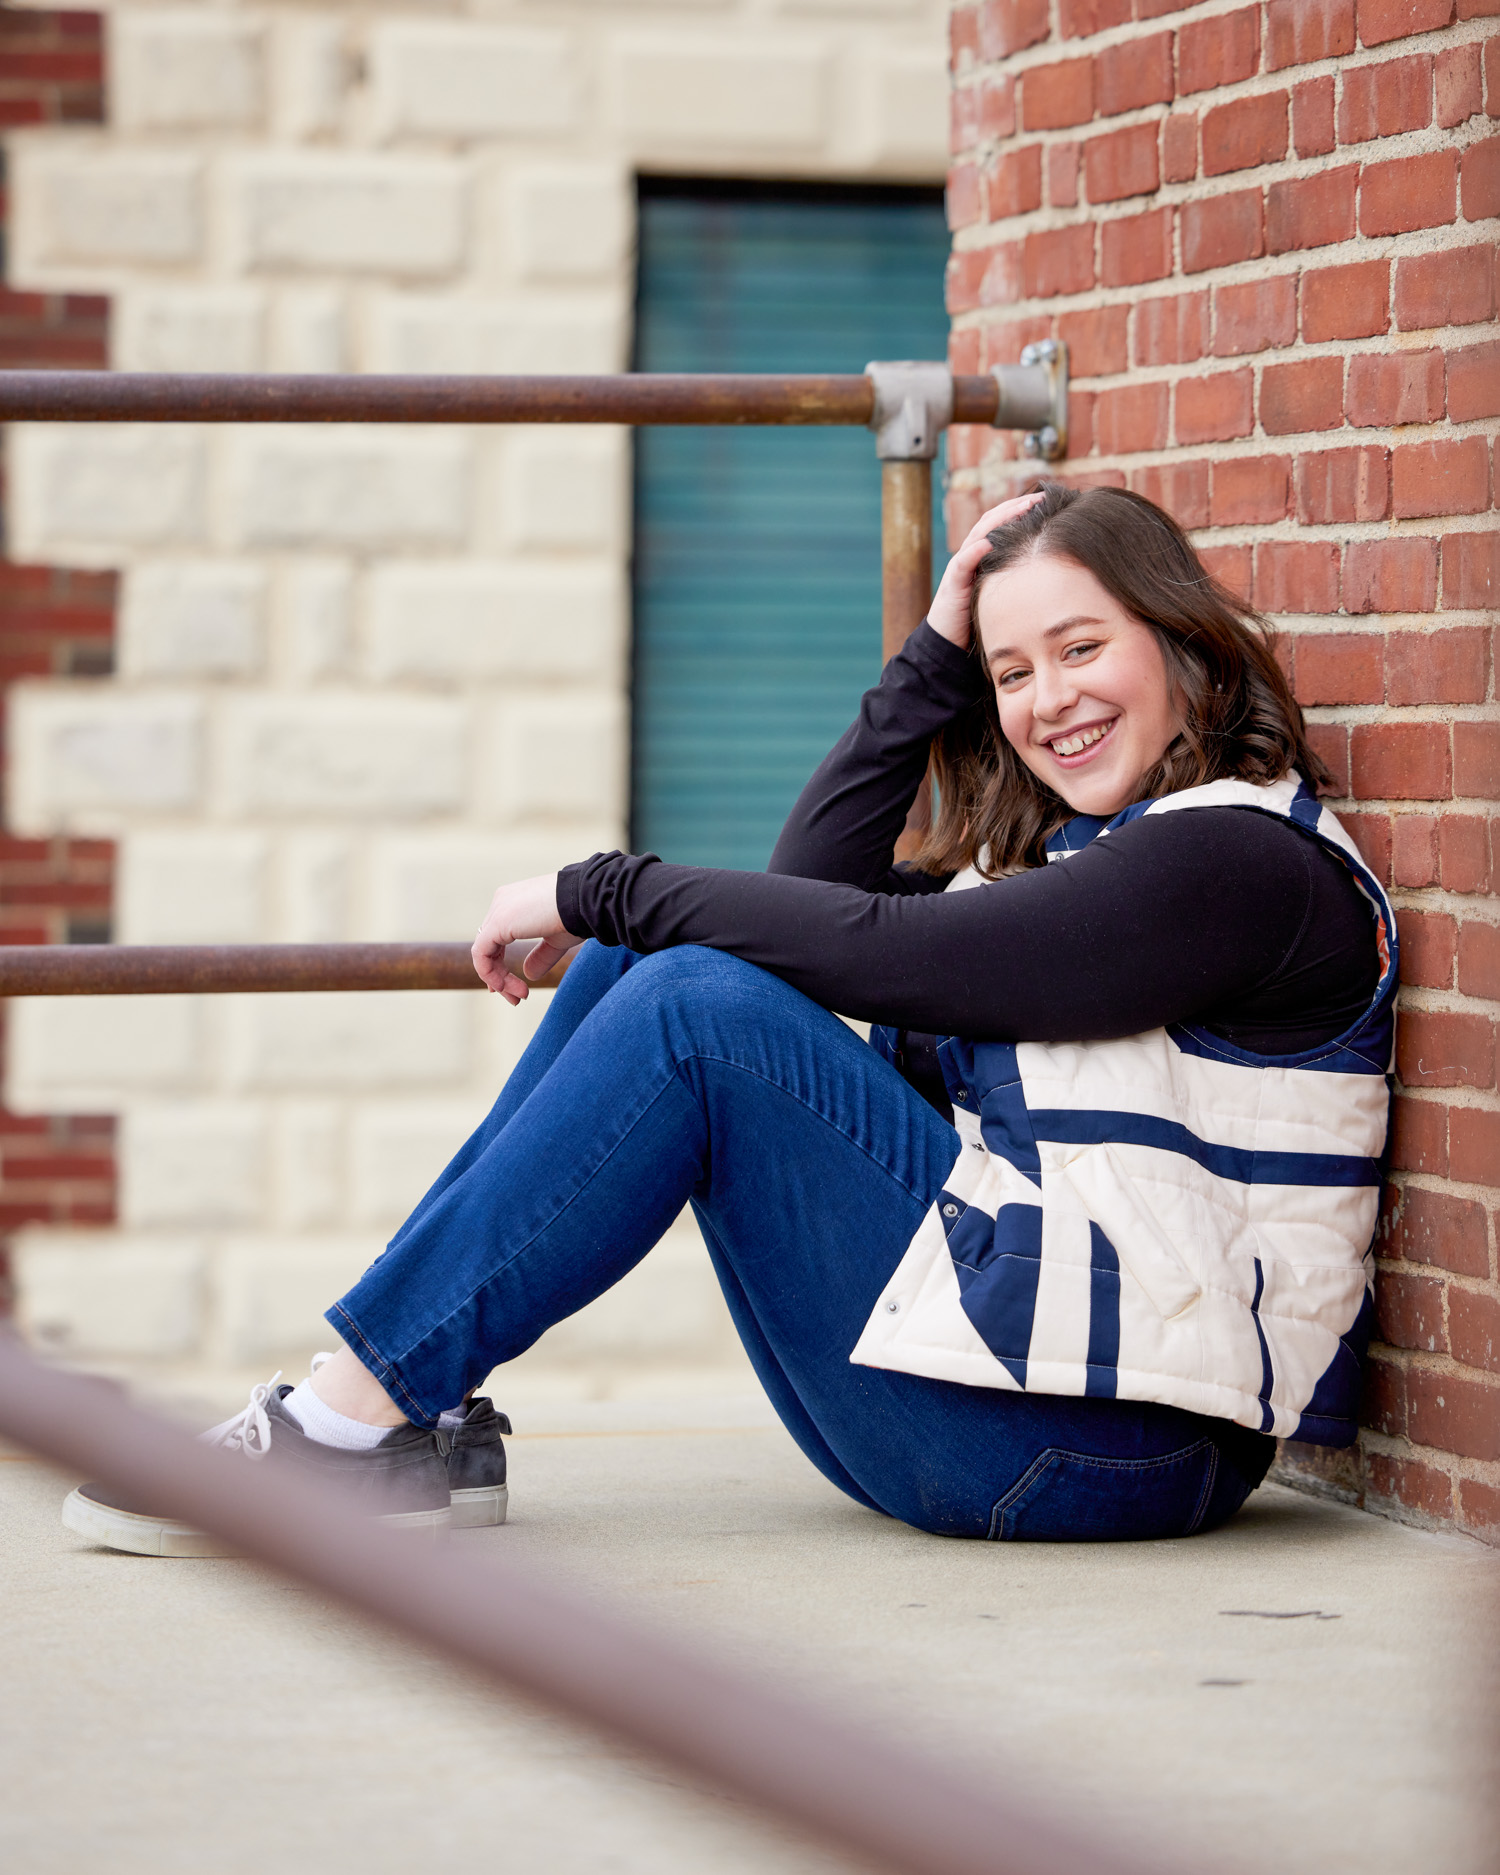
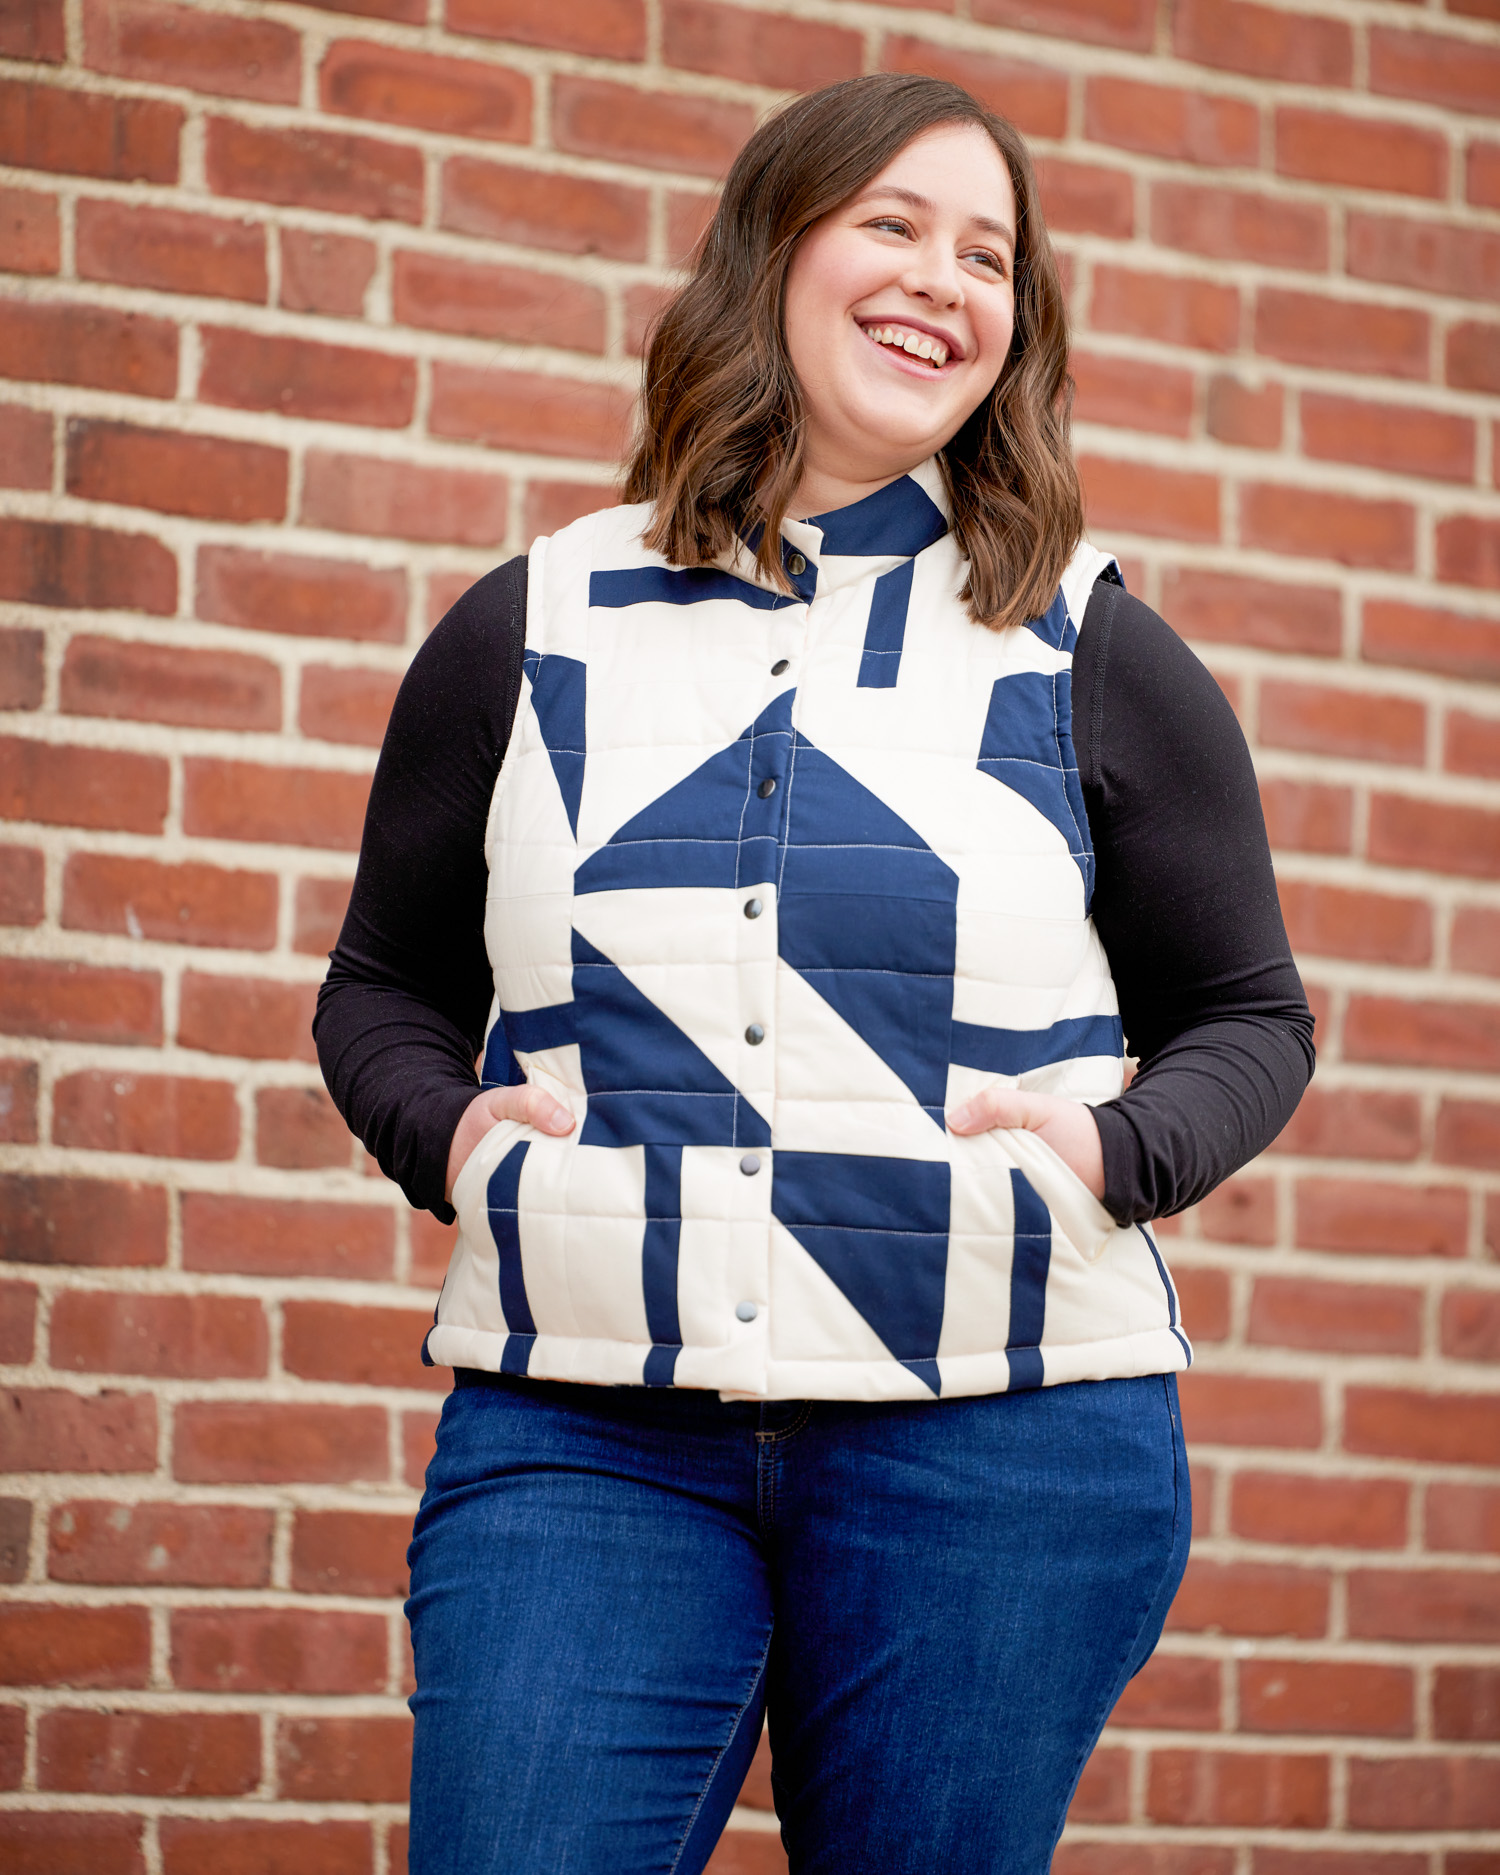
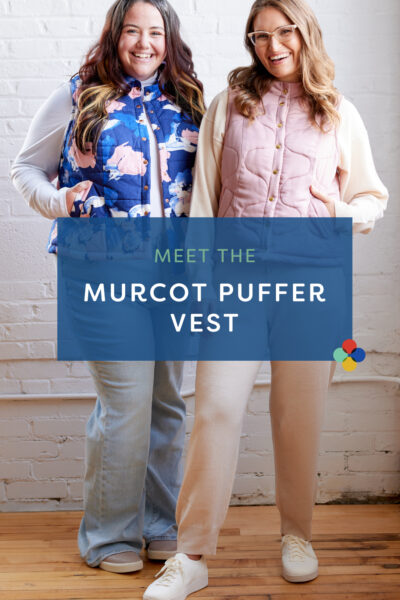
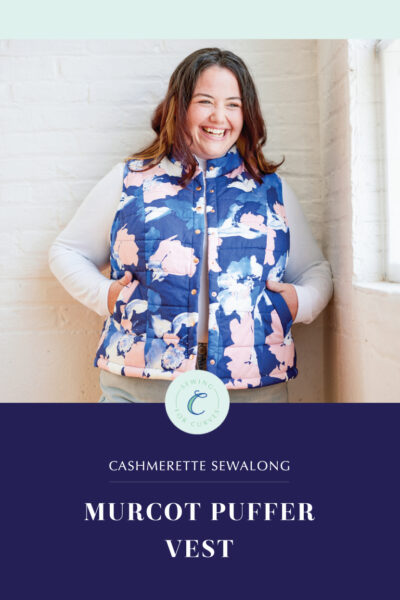
Hi everyone! Ayelet here and I’m so excited to show off my pieced Murcot Puffer Vest and share all the deets of how I made it.
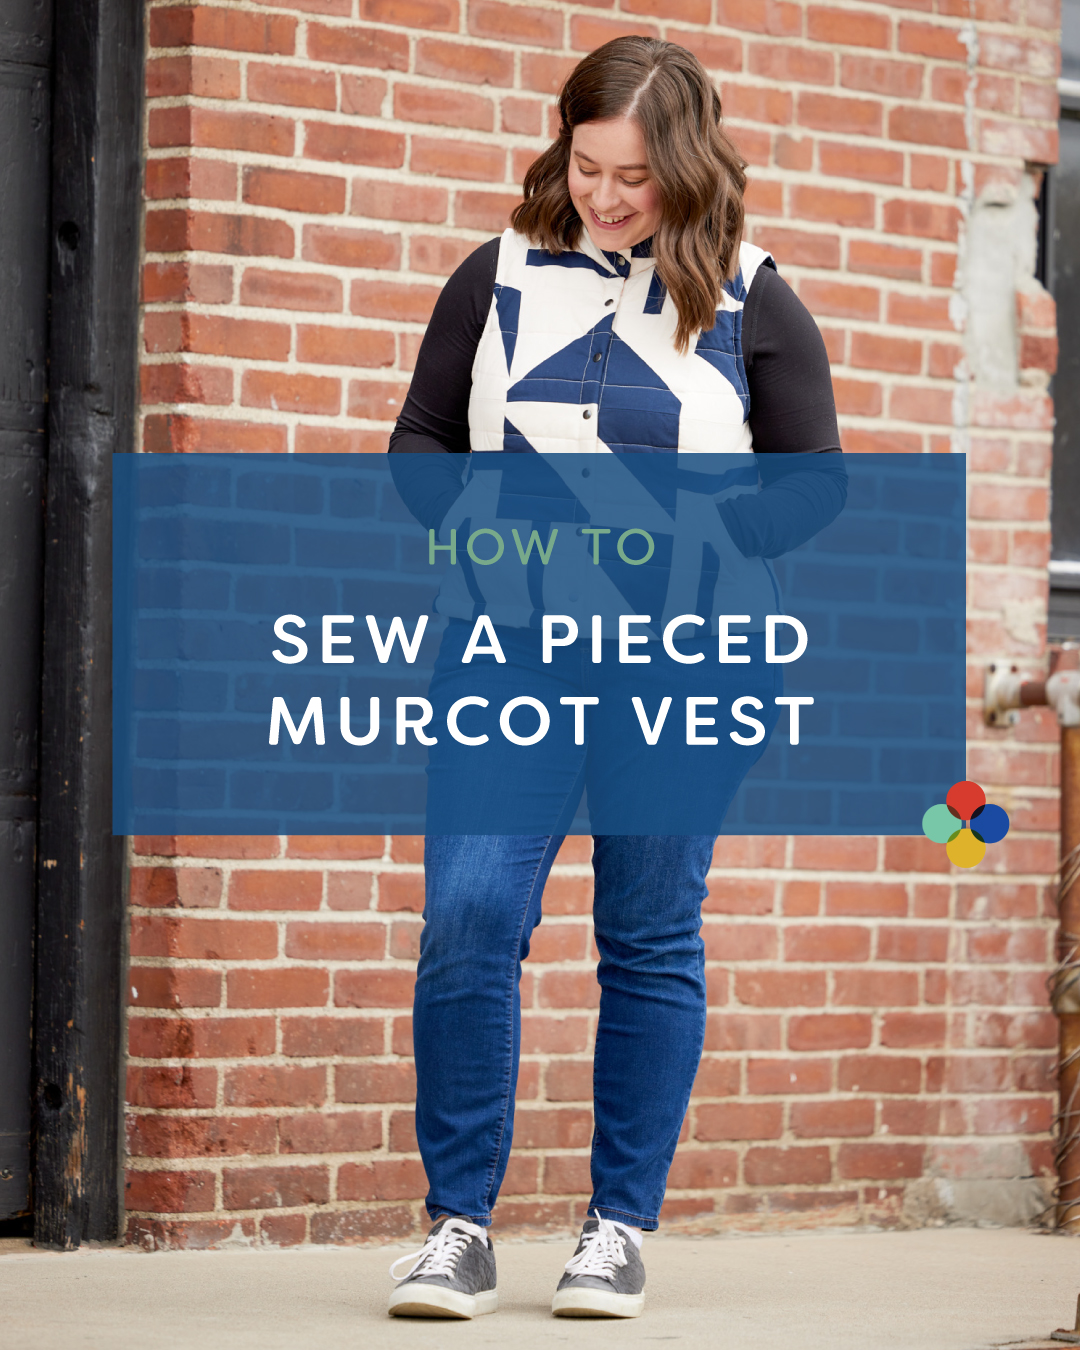
This month’s Cashmerette Club pattern immediately caught my attention: I’ve never owned a puffer vest before and the samples looked so cute and cozy. As a semi-new quilter, I could instantly see that there were infinite possibilities to combine my two hobbies and create a totally unique Murcot. And so I did!
The Murcot Puffer Vest is cozy layering piece in sizes 0-32 and cup sizes C-H with shoulder princess seams, standing collar, optional puffy welt pockets, and two quilting templates. (Or get creative and design your own with our worksheet here.) It’s available exclusively to Cashmerette Club members, and you can join in February and get the Murcot for as little as $9 USD.
(If you’re joining after February 2023, you can get the Murcot with the All Access level of the Club.)
How I sewed a pieced Murcot Puffer Vest
Once I knew I wanted to make a pieced Murcot, I spent MONTHS deliberating over the design. Sometimes when you have infinite possibilities, the decision overload becomes debilitating! And if you’ve ever made a quilt, you know that there are endless designs to choose from.
I’ve been experimenting with foundation paper piecing lately, and considered designing my own image for the back of the vest. But over the many months of contemplating, I kept coming back to the Playroom Quilt by Sewn and that’s ultimately what I selected for my Murcot.
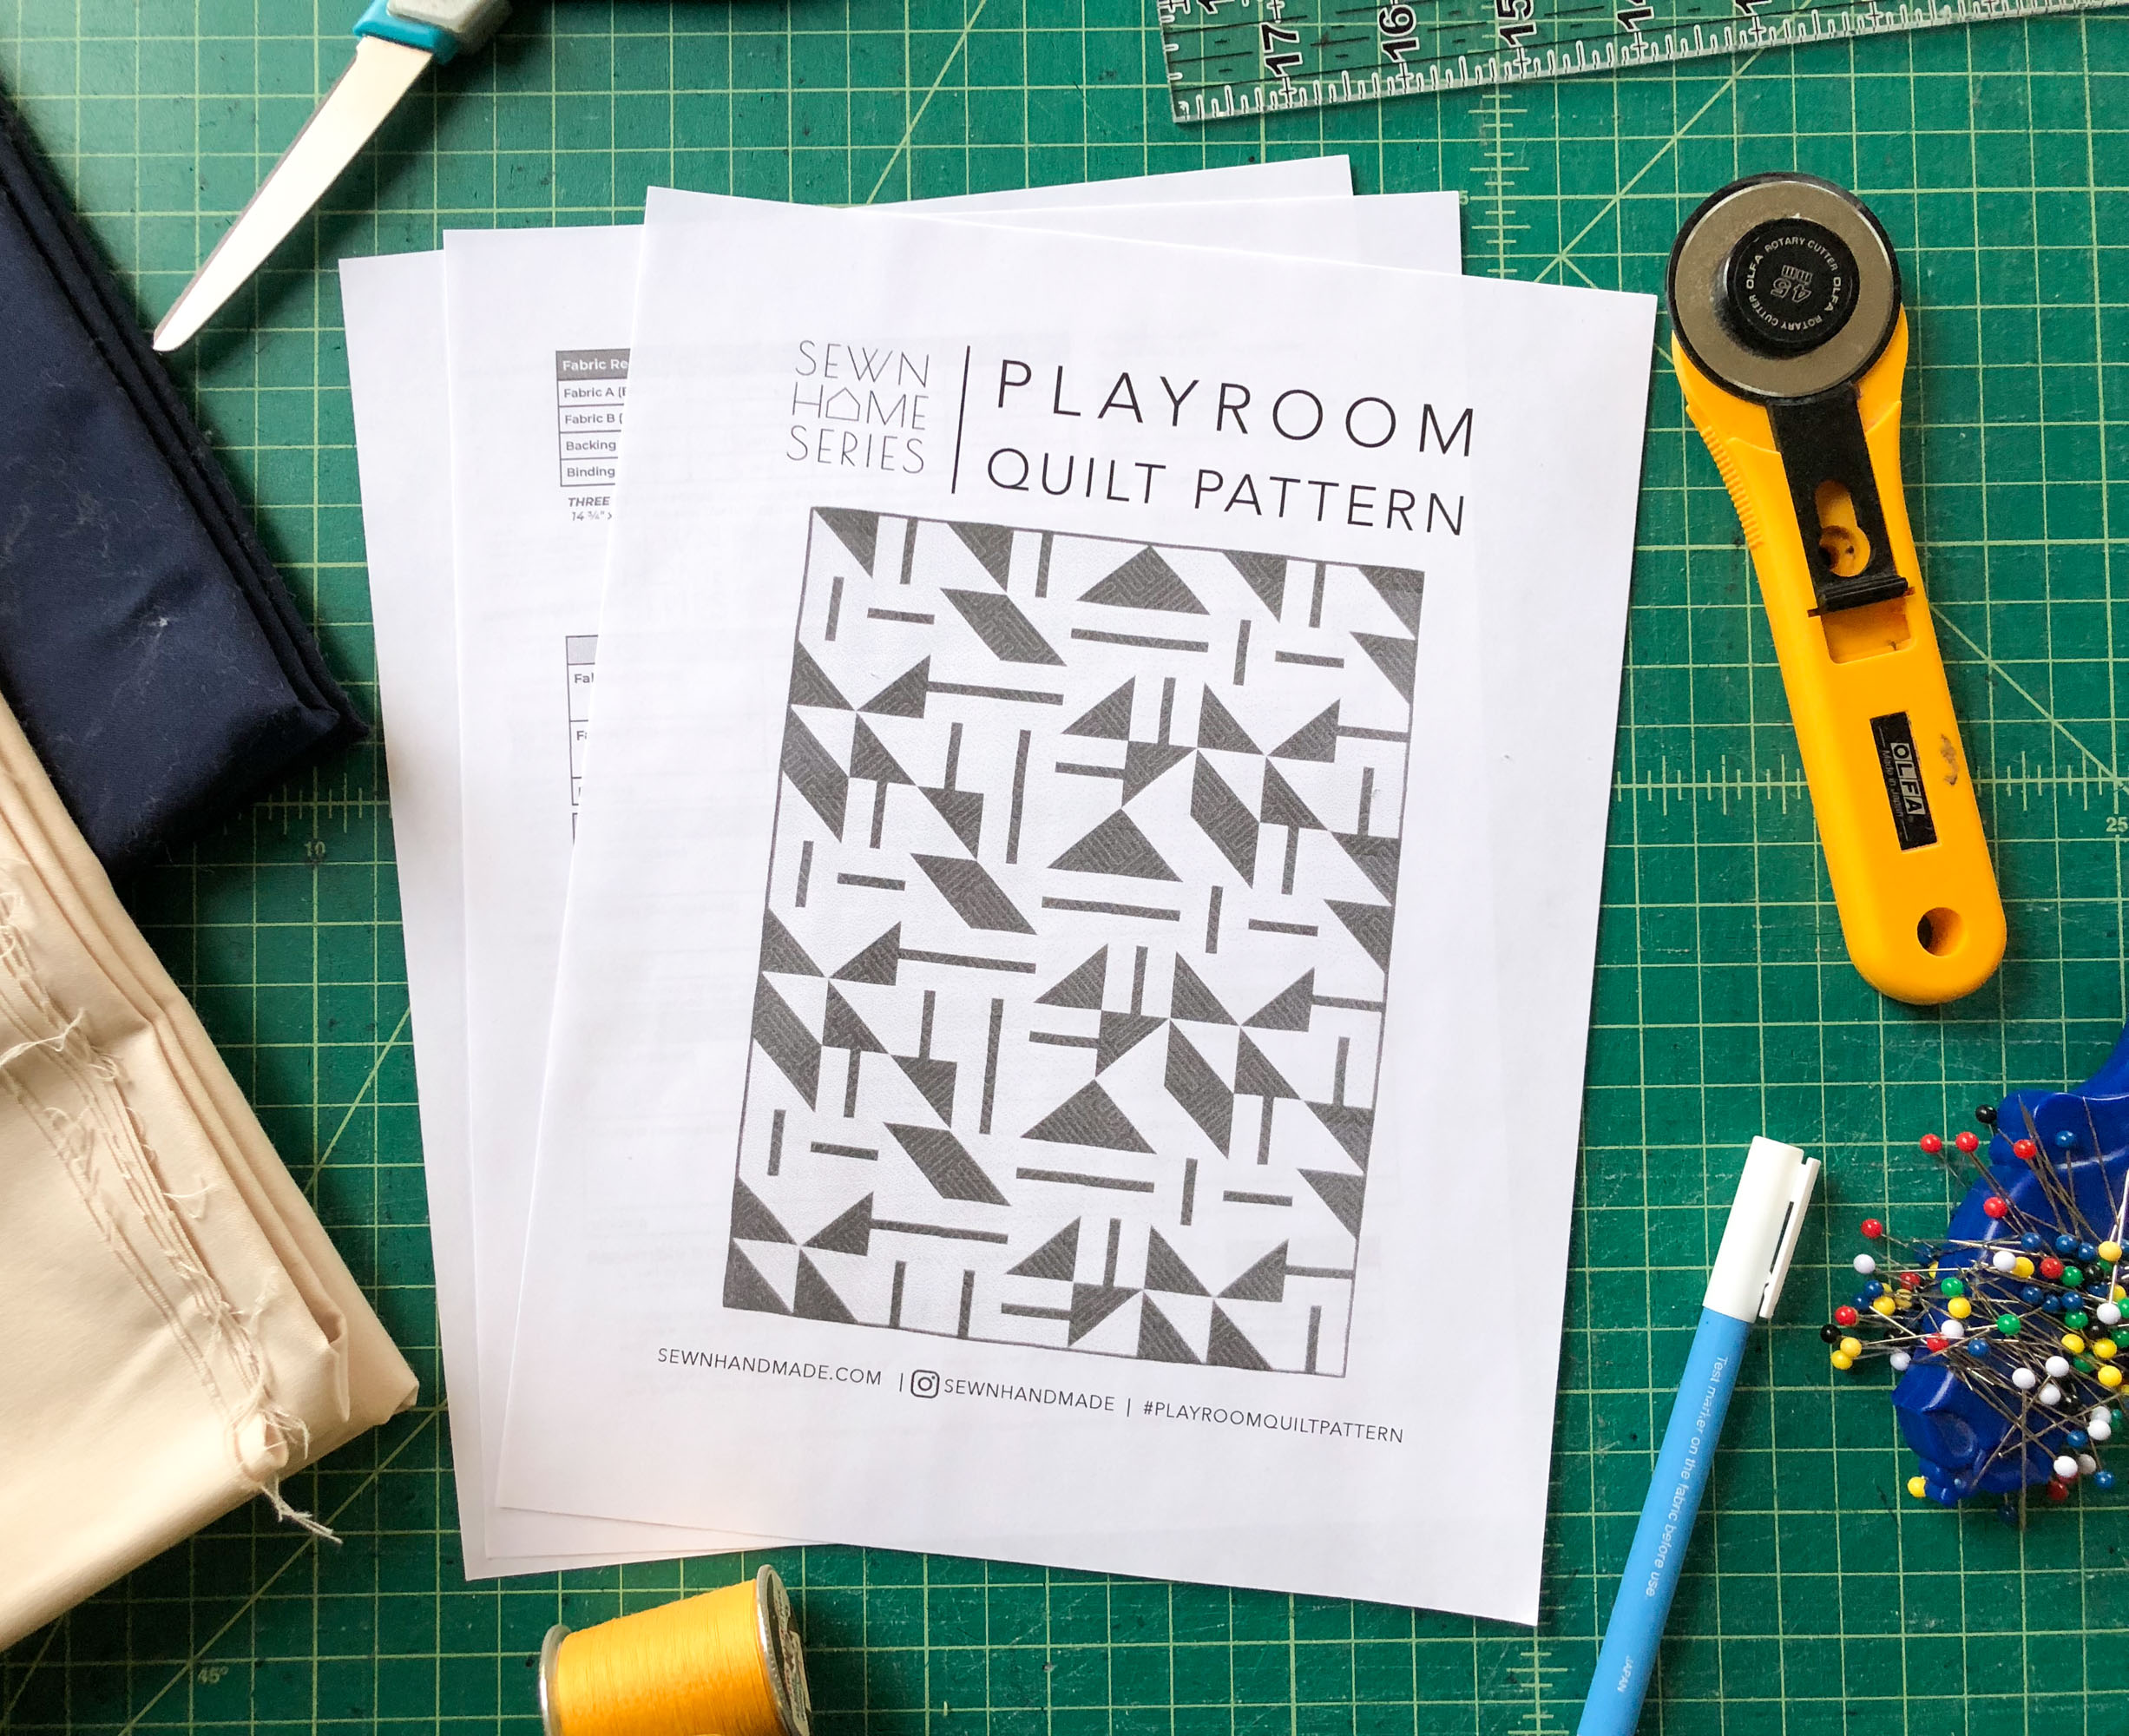
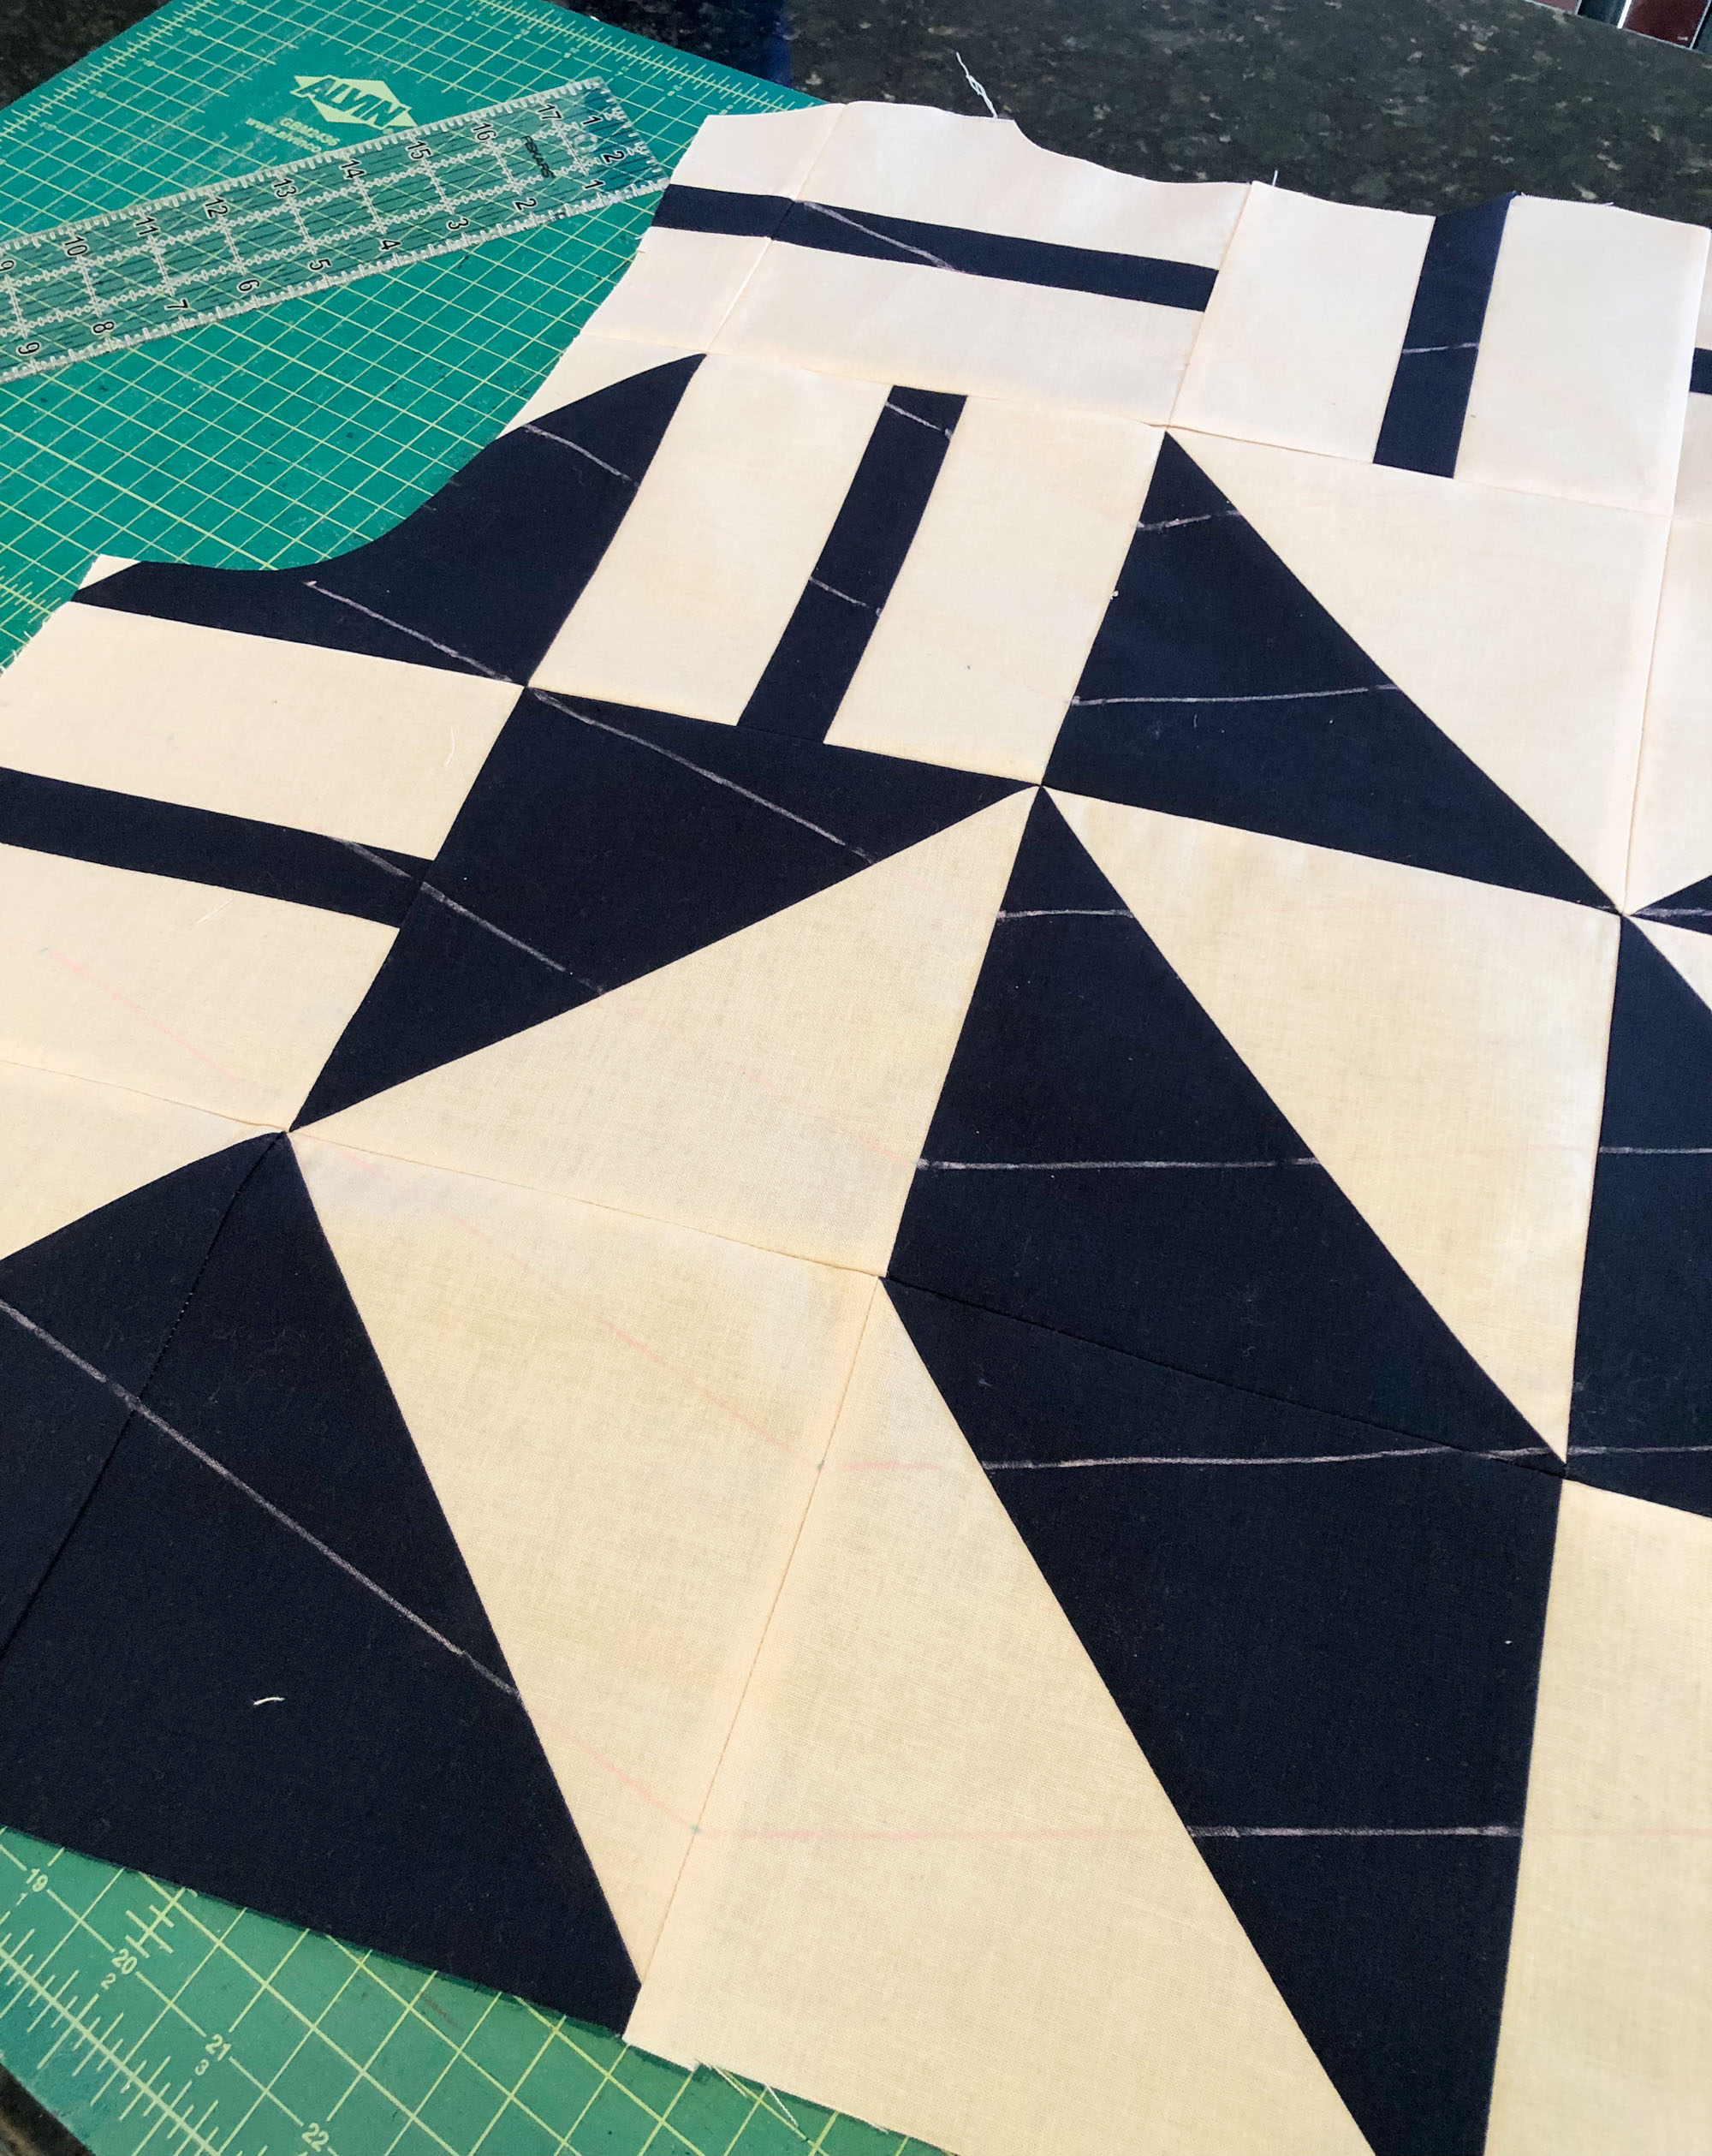
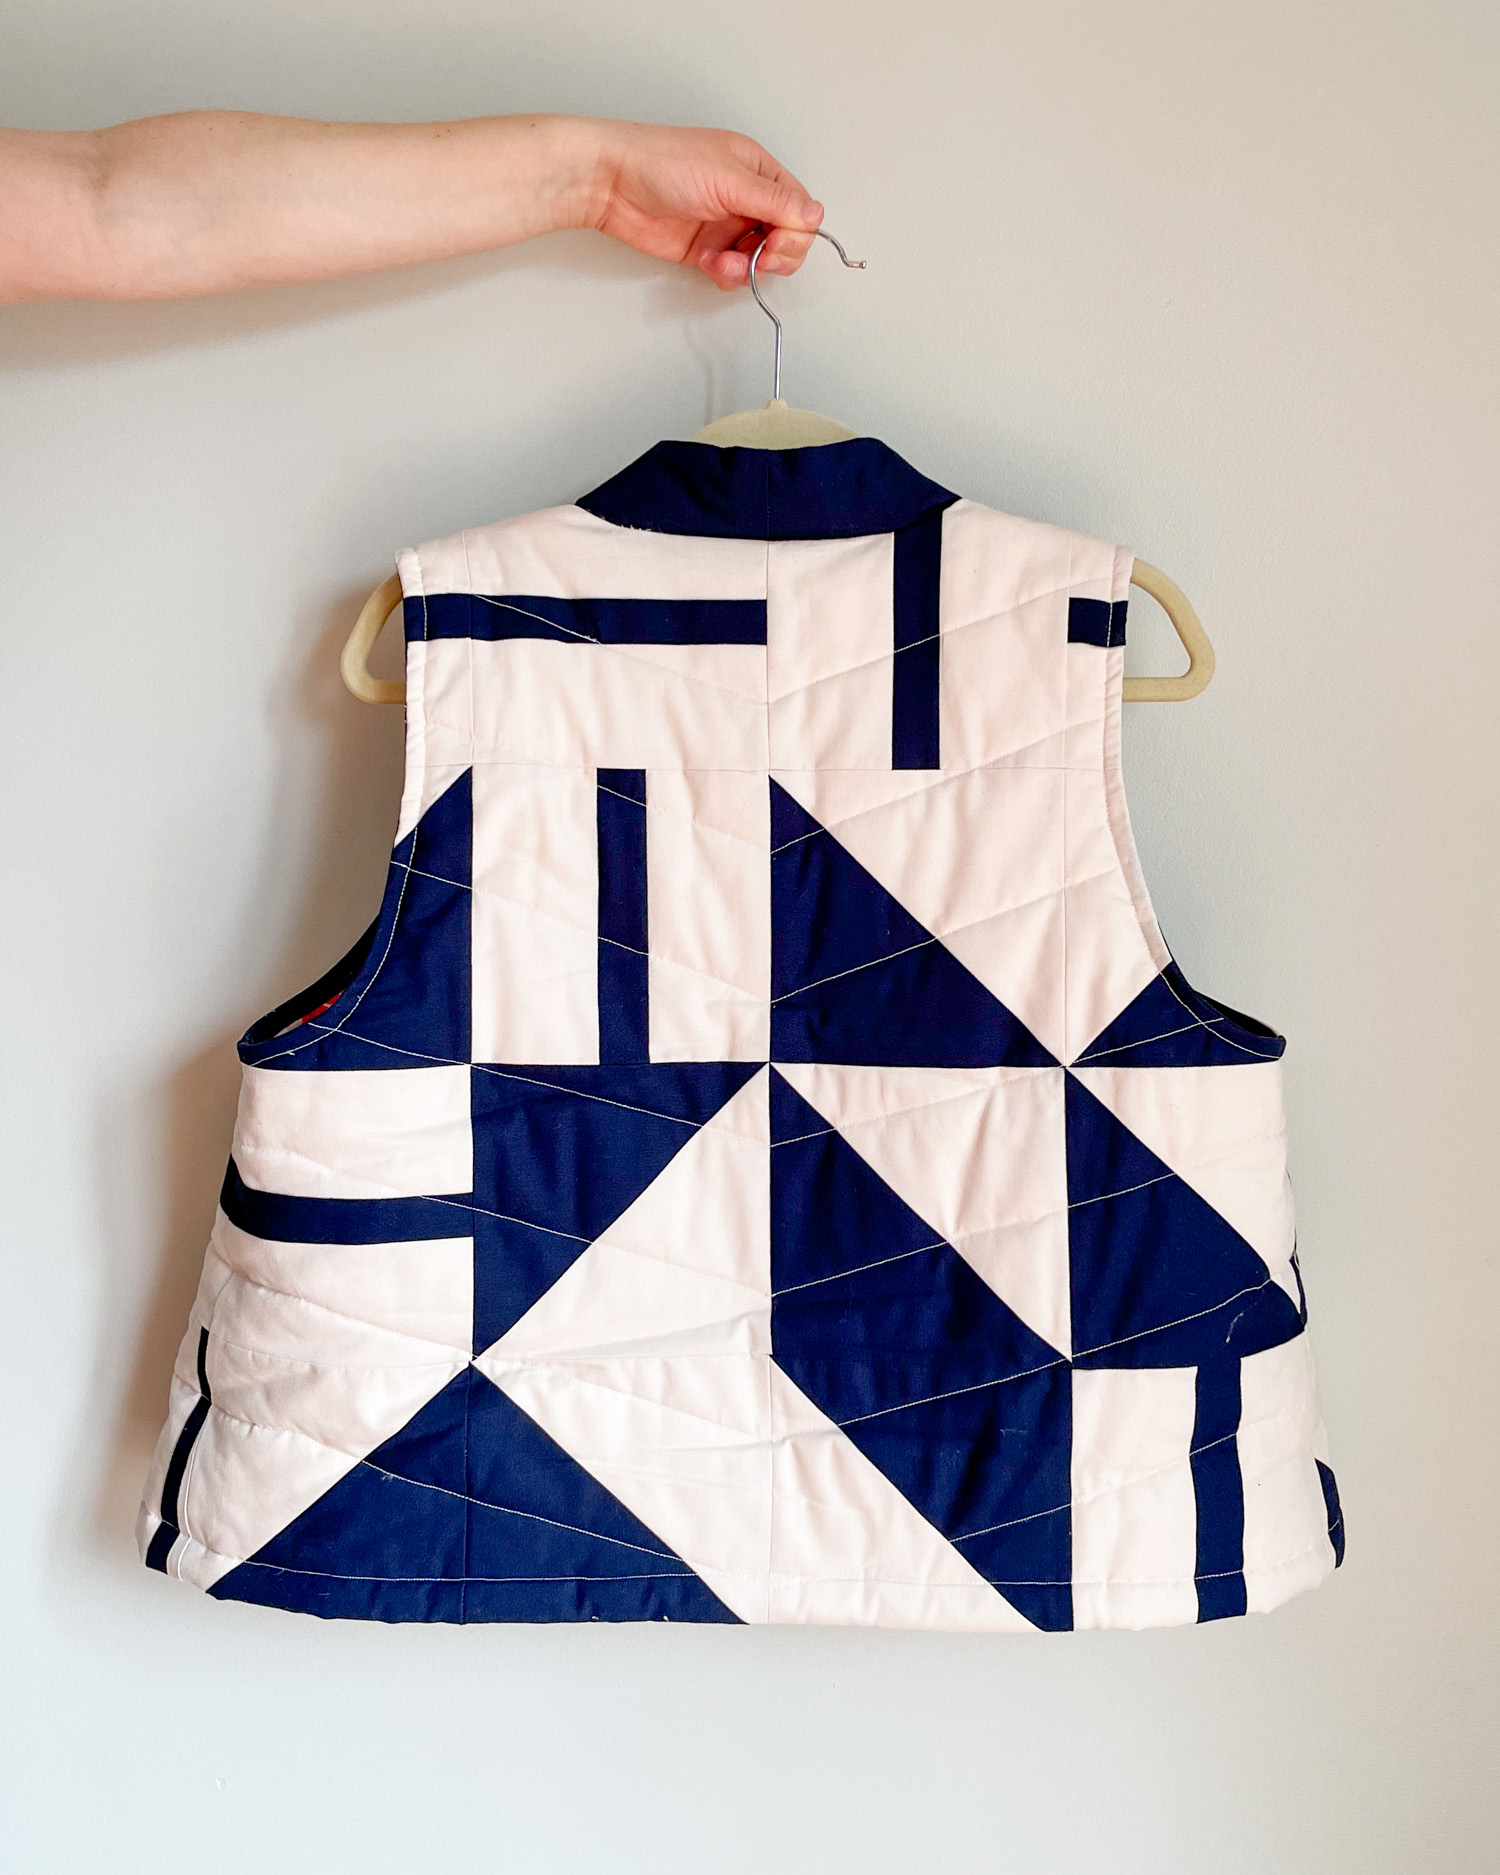
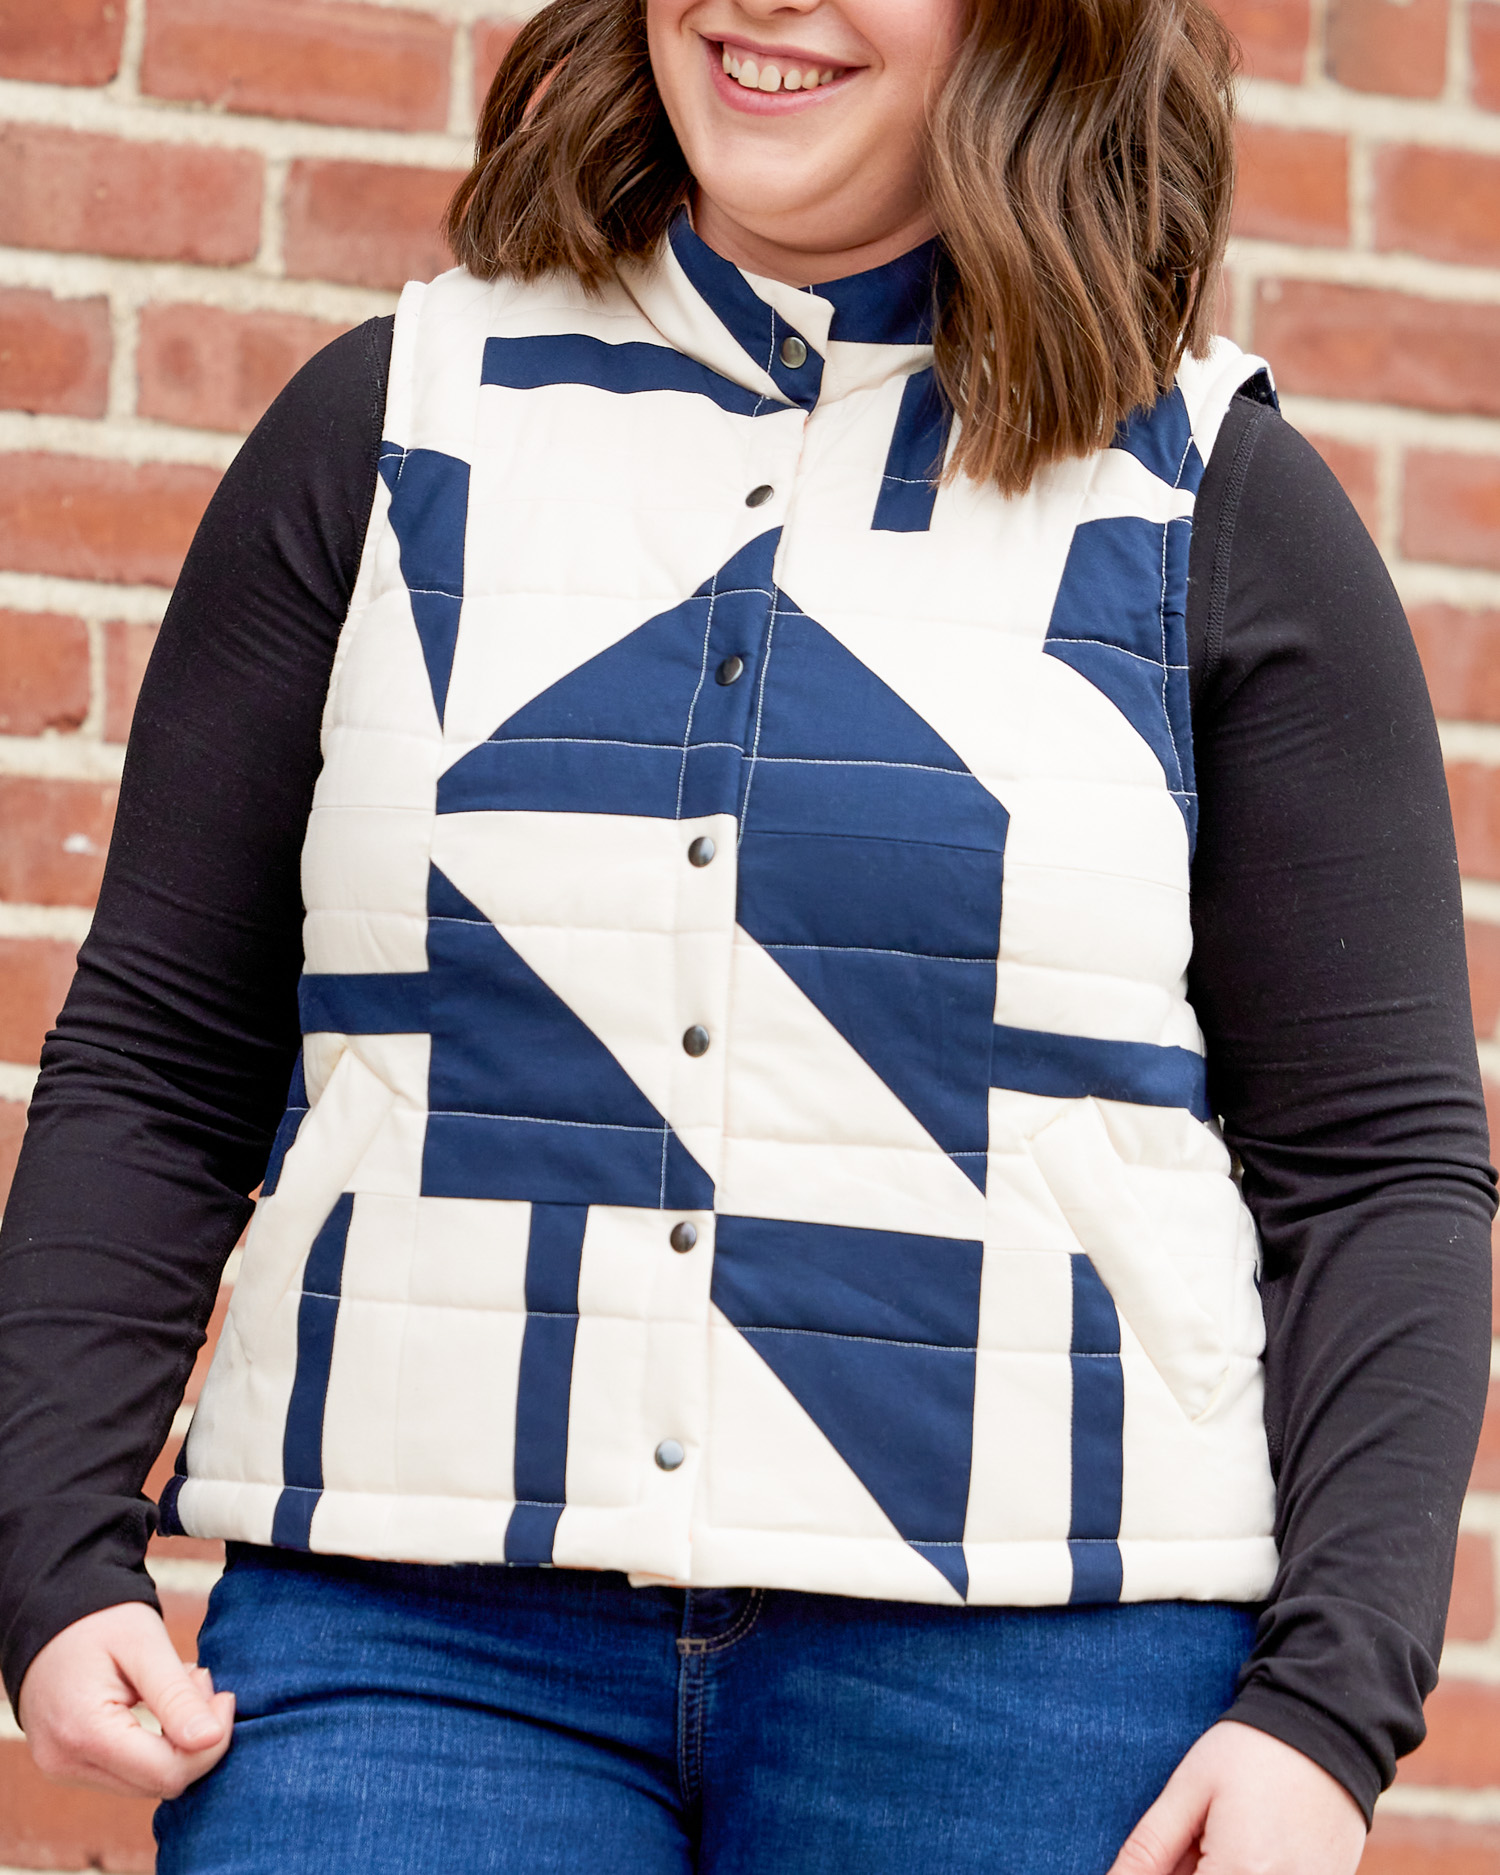
The Playroom Quilt is designed with two blocks: a half-square triangle block and a square block with a line running through it. Those two blocks are arranged in different ways to create a cool modern quilt design.
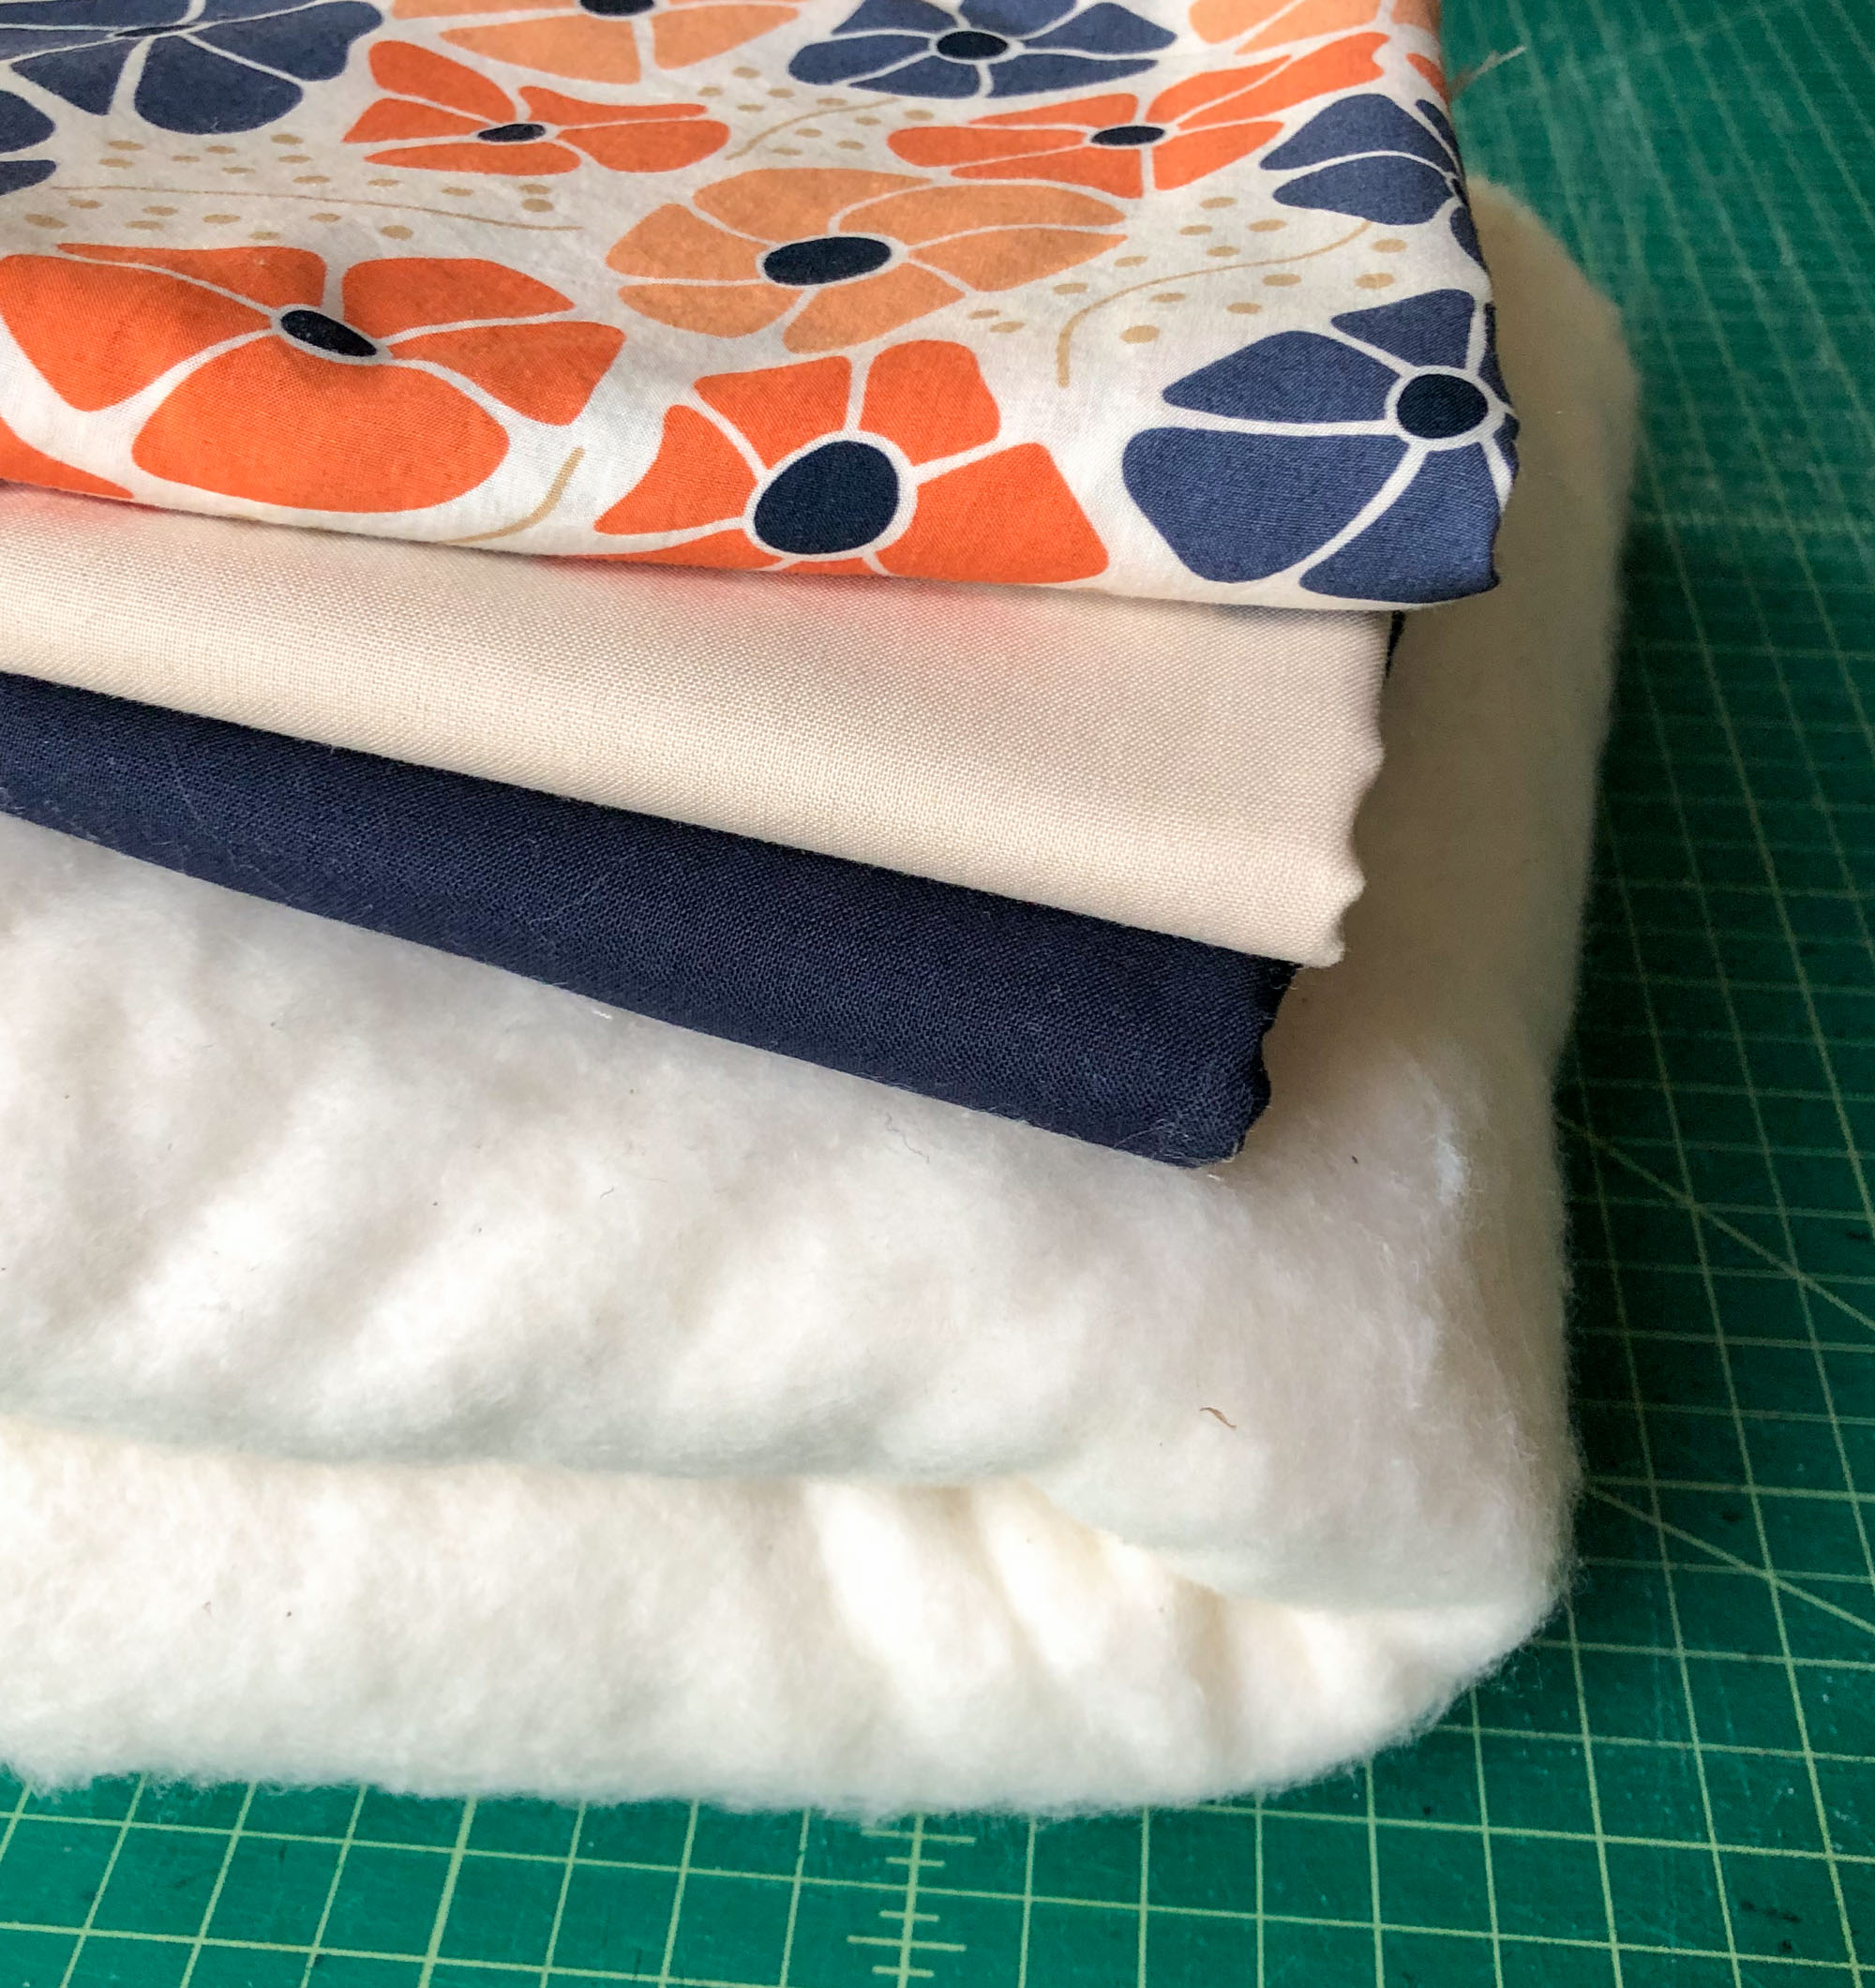
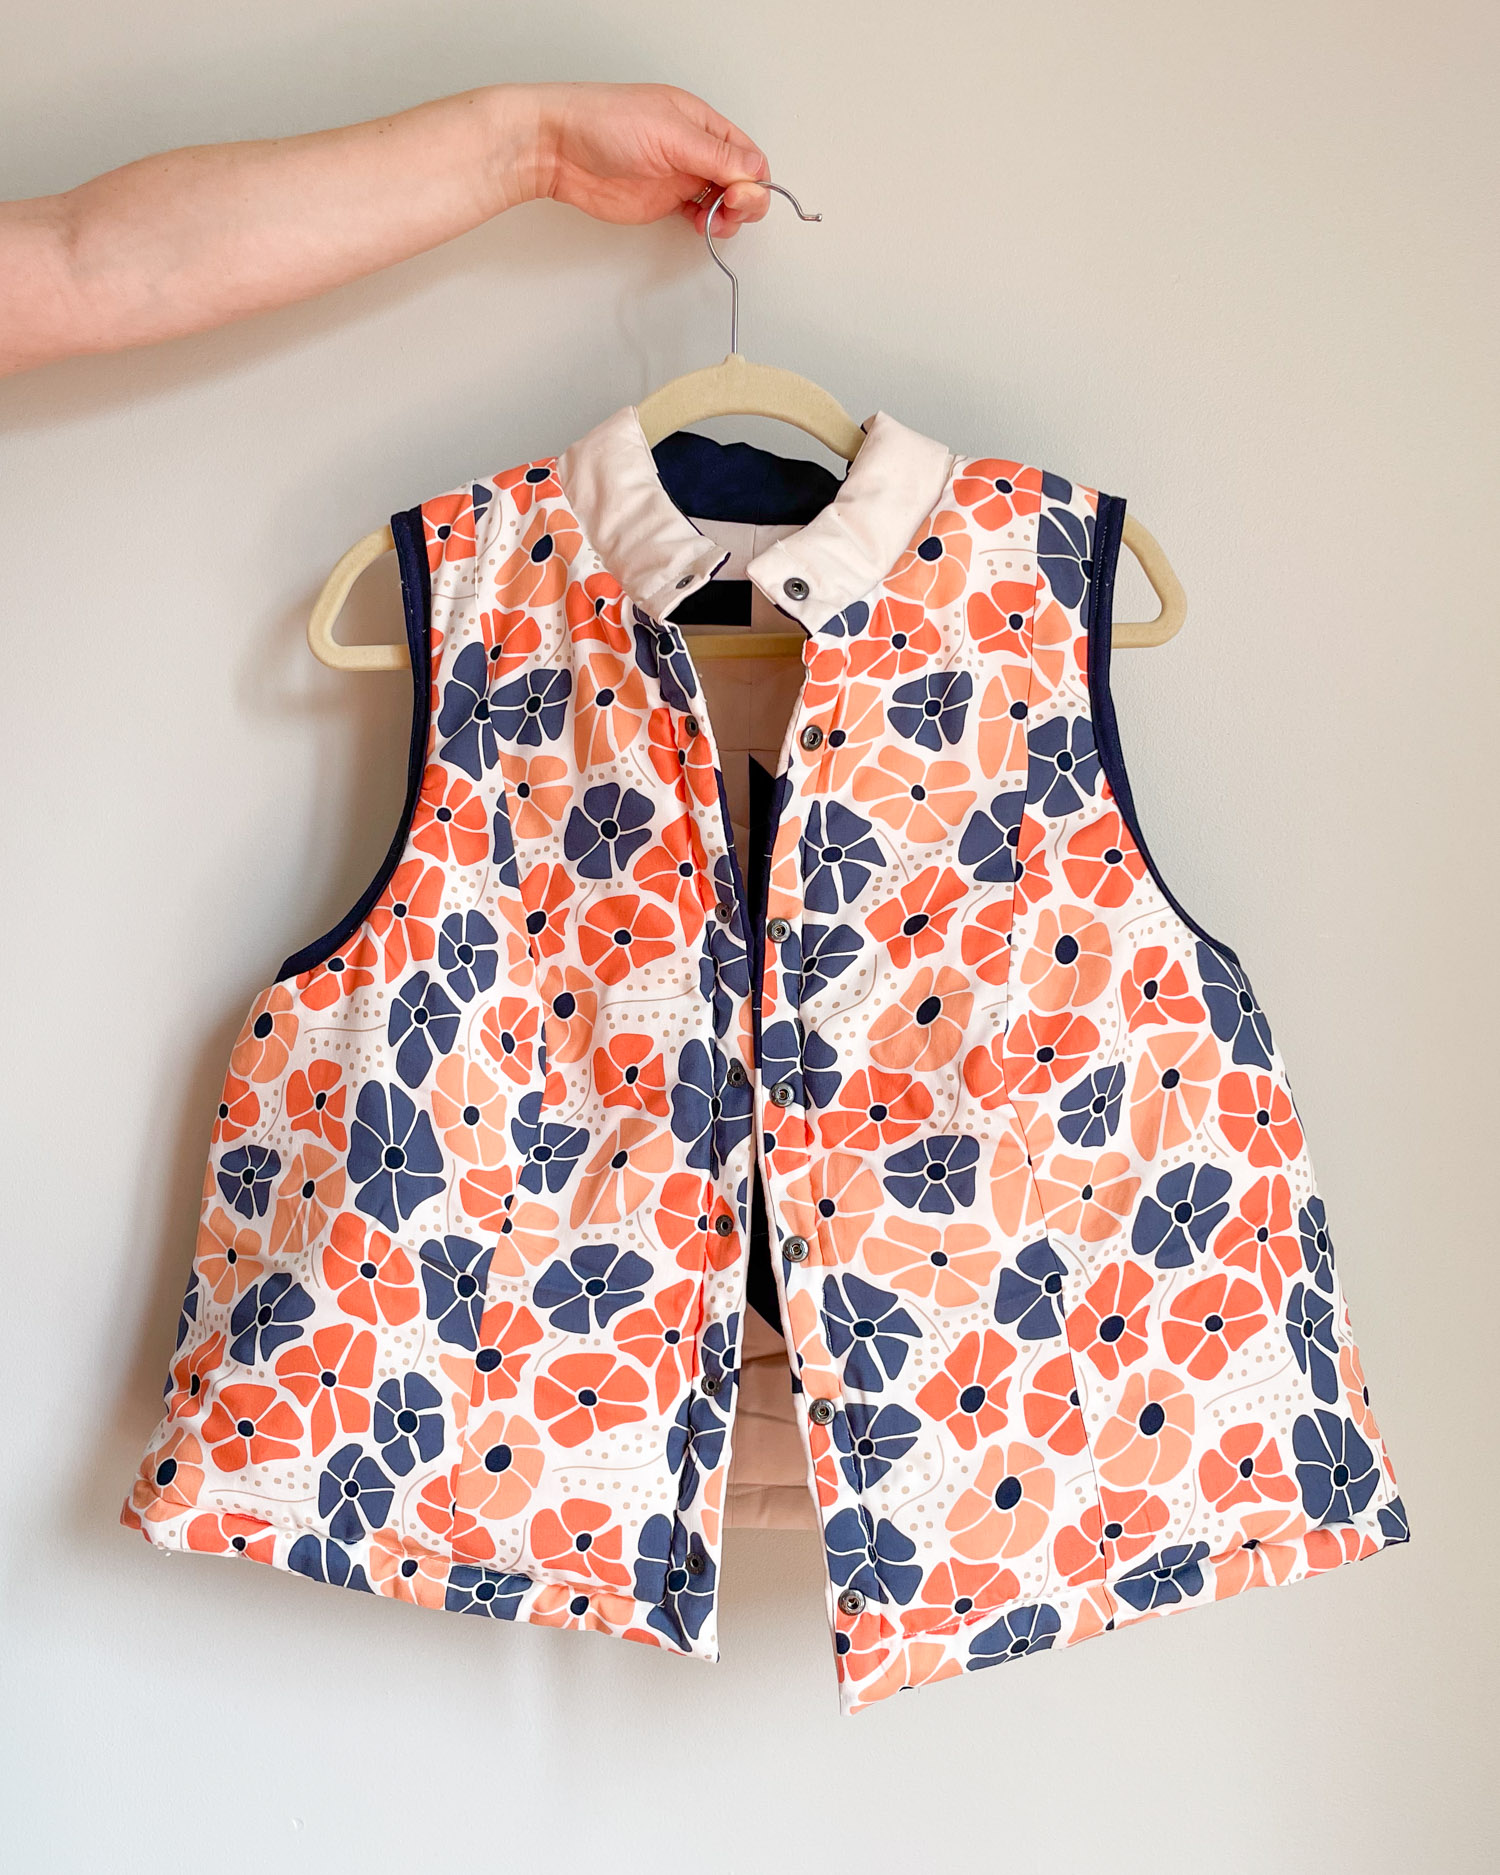
I spent a lot of time looking at different color options for this quilt on Instagram, and decided that I liked the light background and dark accents. So I went to my local fabric shop and picked out two Kona cottons: ivory and indigo. I found this fun Cloud 9 “Floral deco” print on rayon for my lining (you can get it here) and got some leftover high loft batting from the many samples we made for the Murcot photoshoot.
Time to start piecing! If there’s one thing I’ve learned about quilting so far, it’s this: quilters are ultra efficient. Us garment sewists would probably expect to cut every triangle and rectangle individually and sew them together one at a time, and we’d be laughed out of town by the quilters.
Here’s how the process for piecing this quilt went:
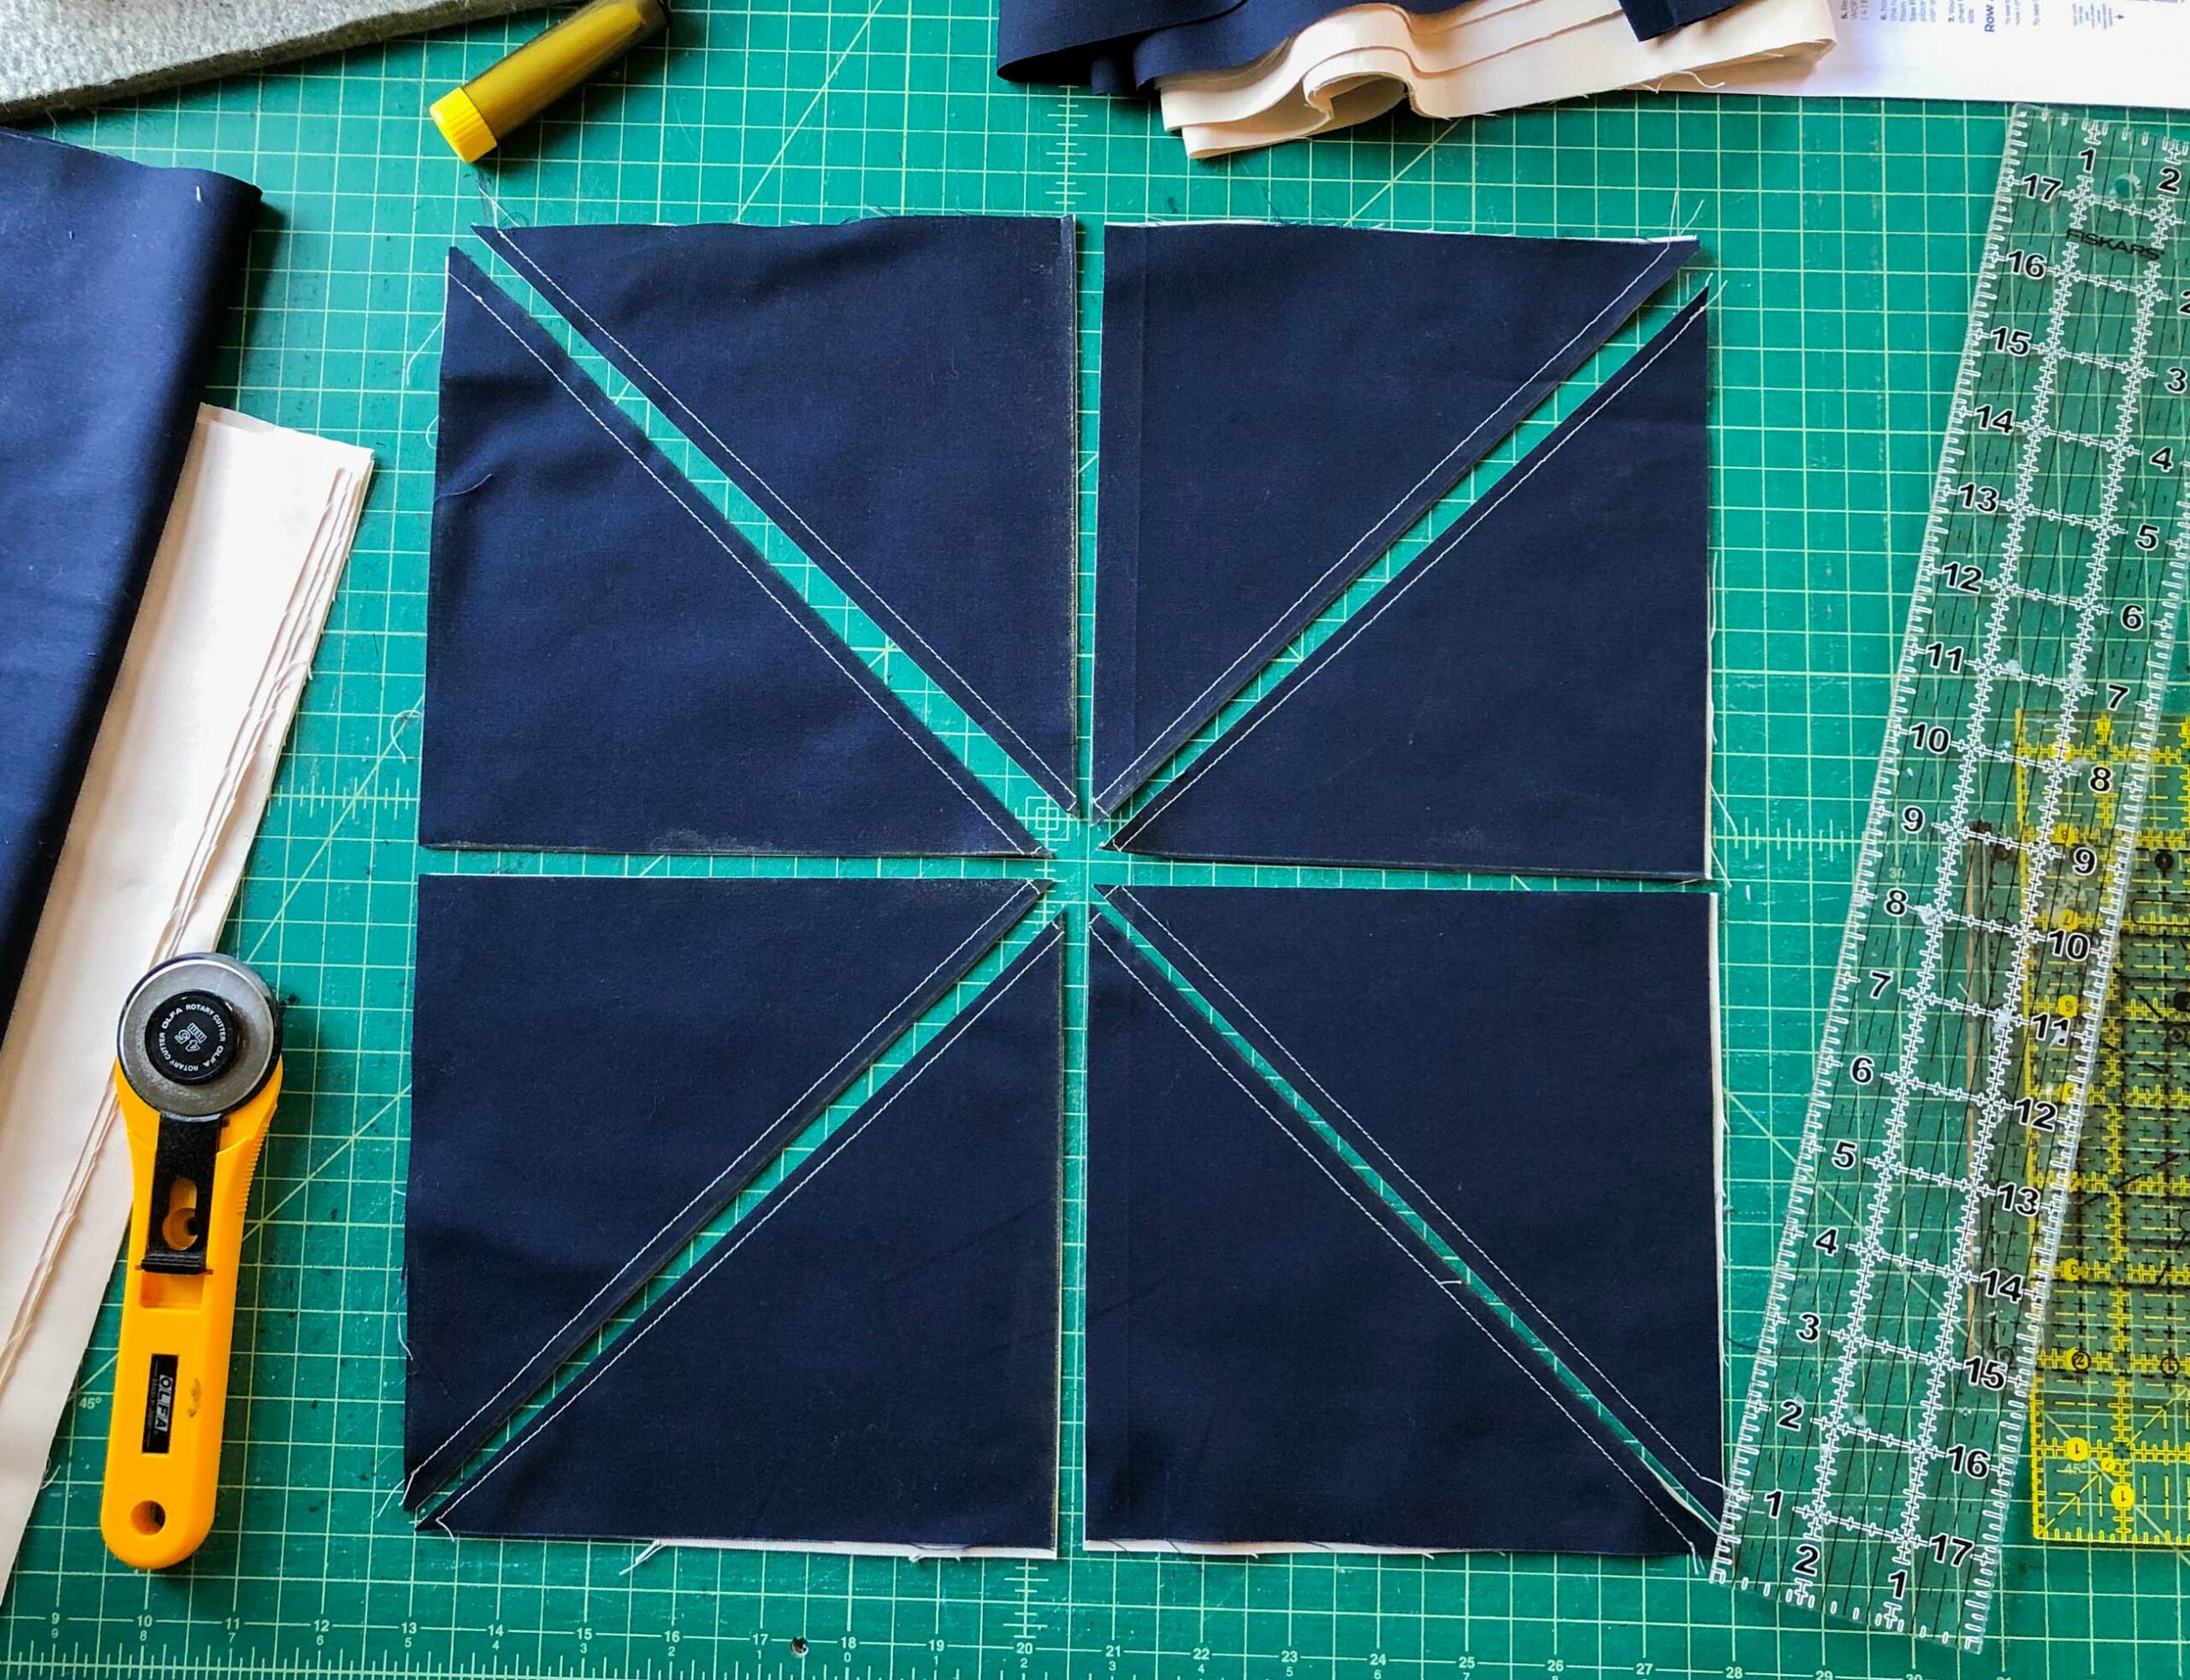
I cut a few big squares and long rectangles, per the pattern instructions.
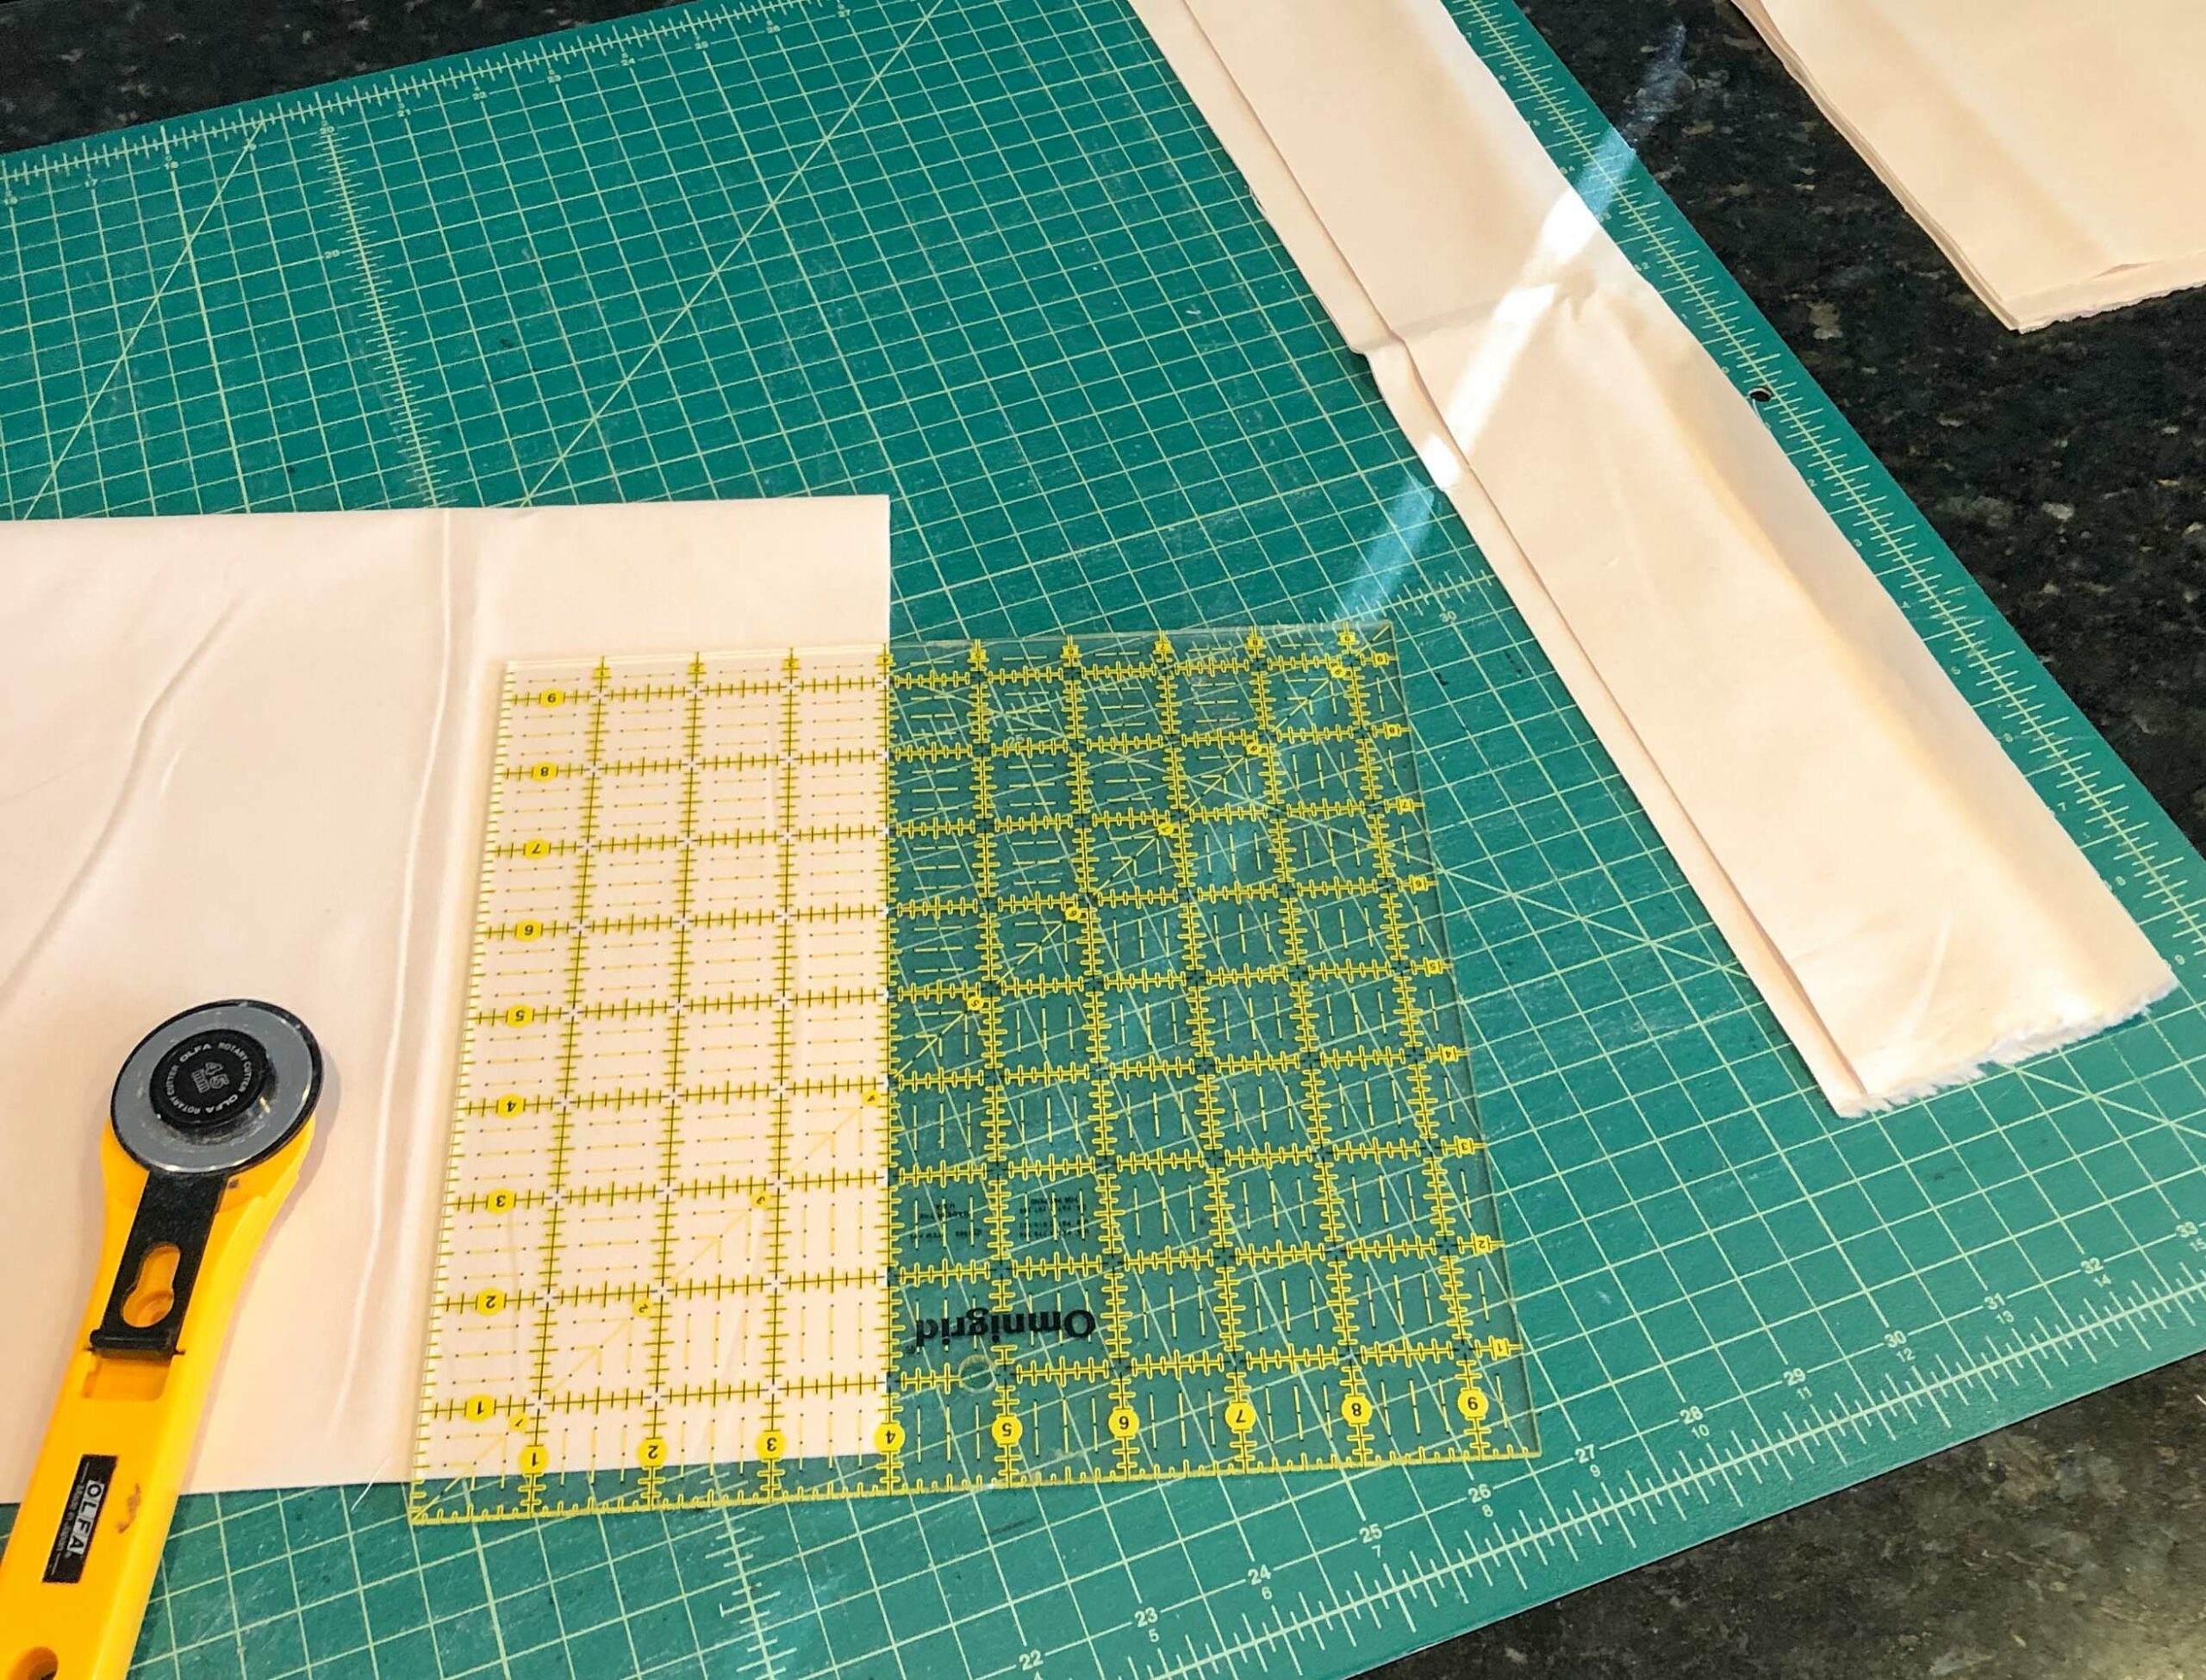
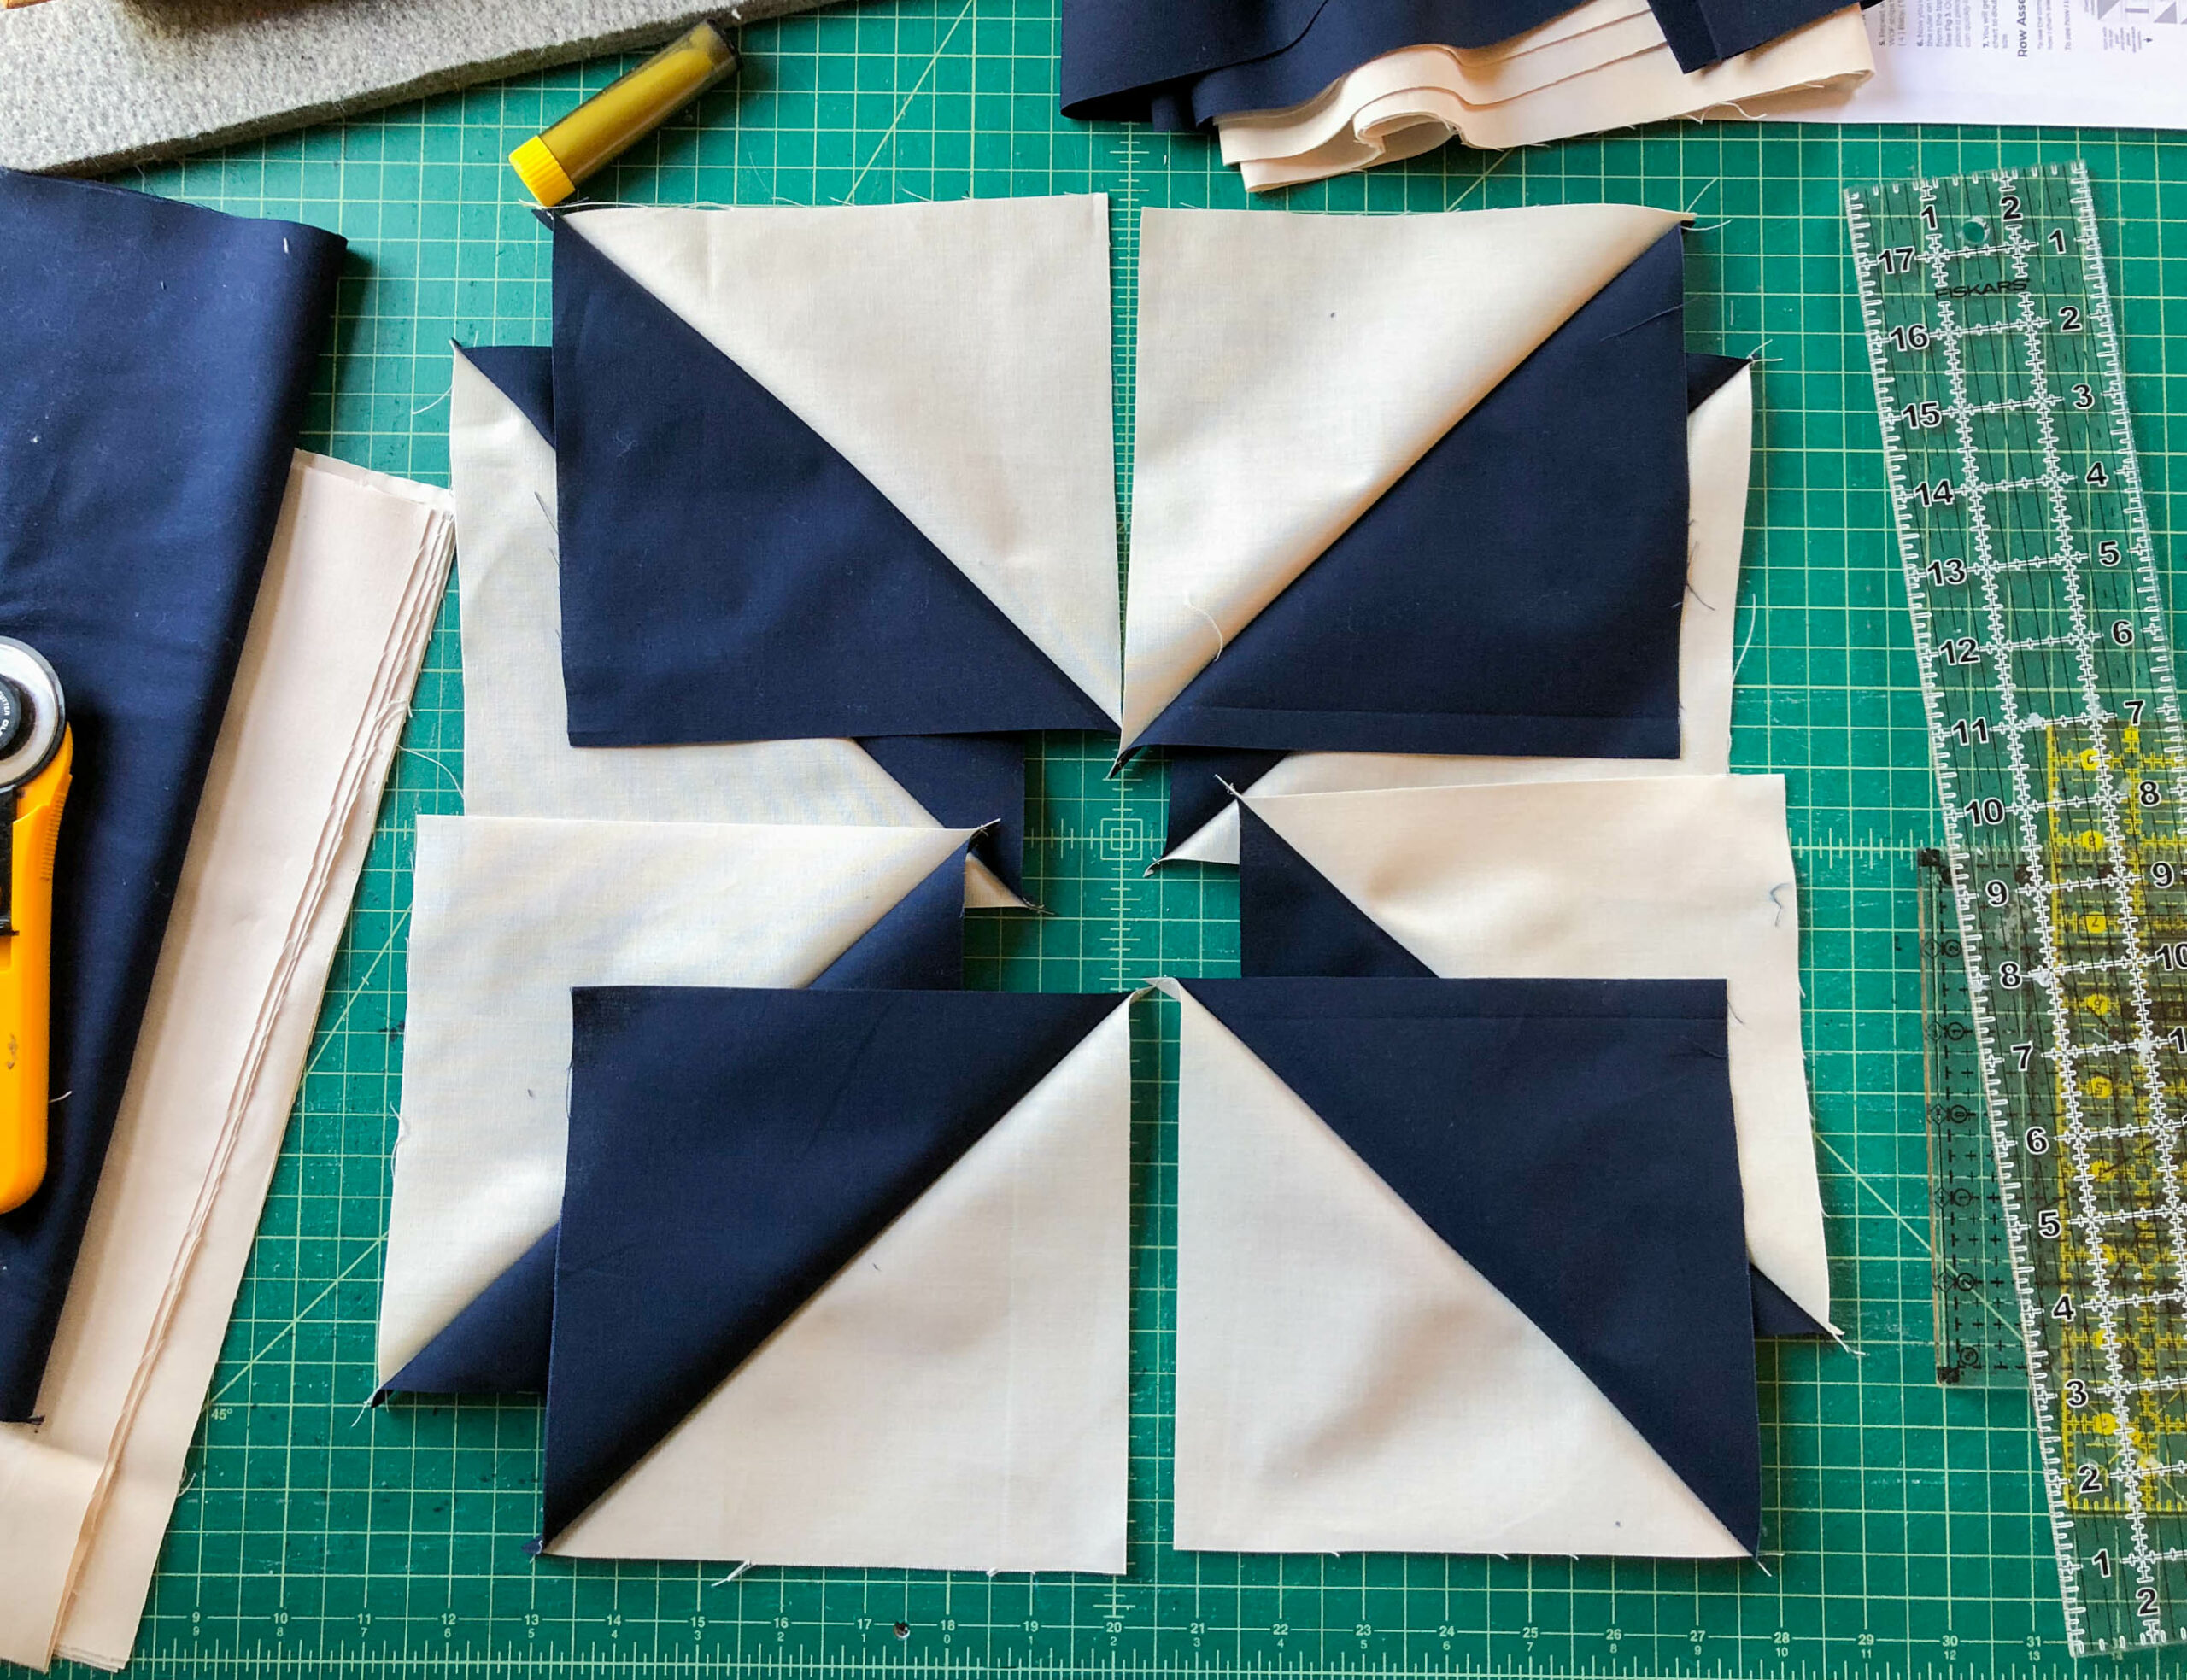
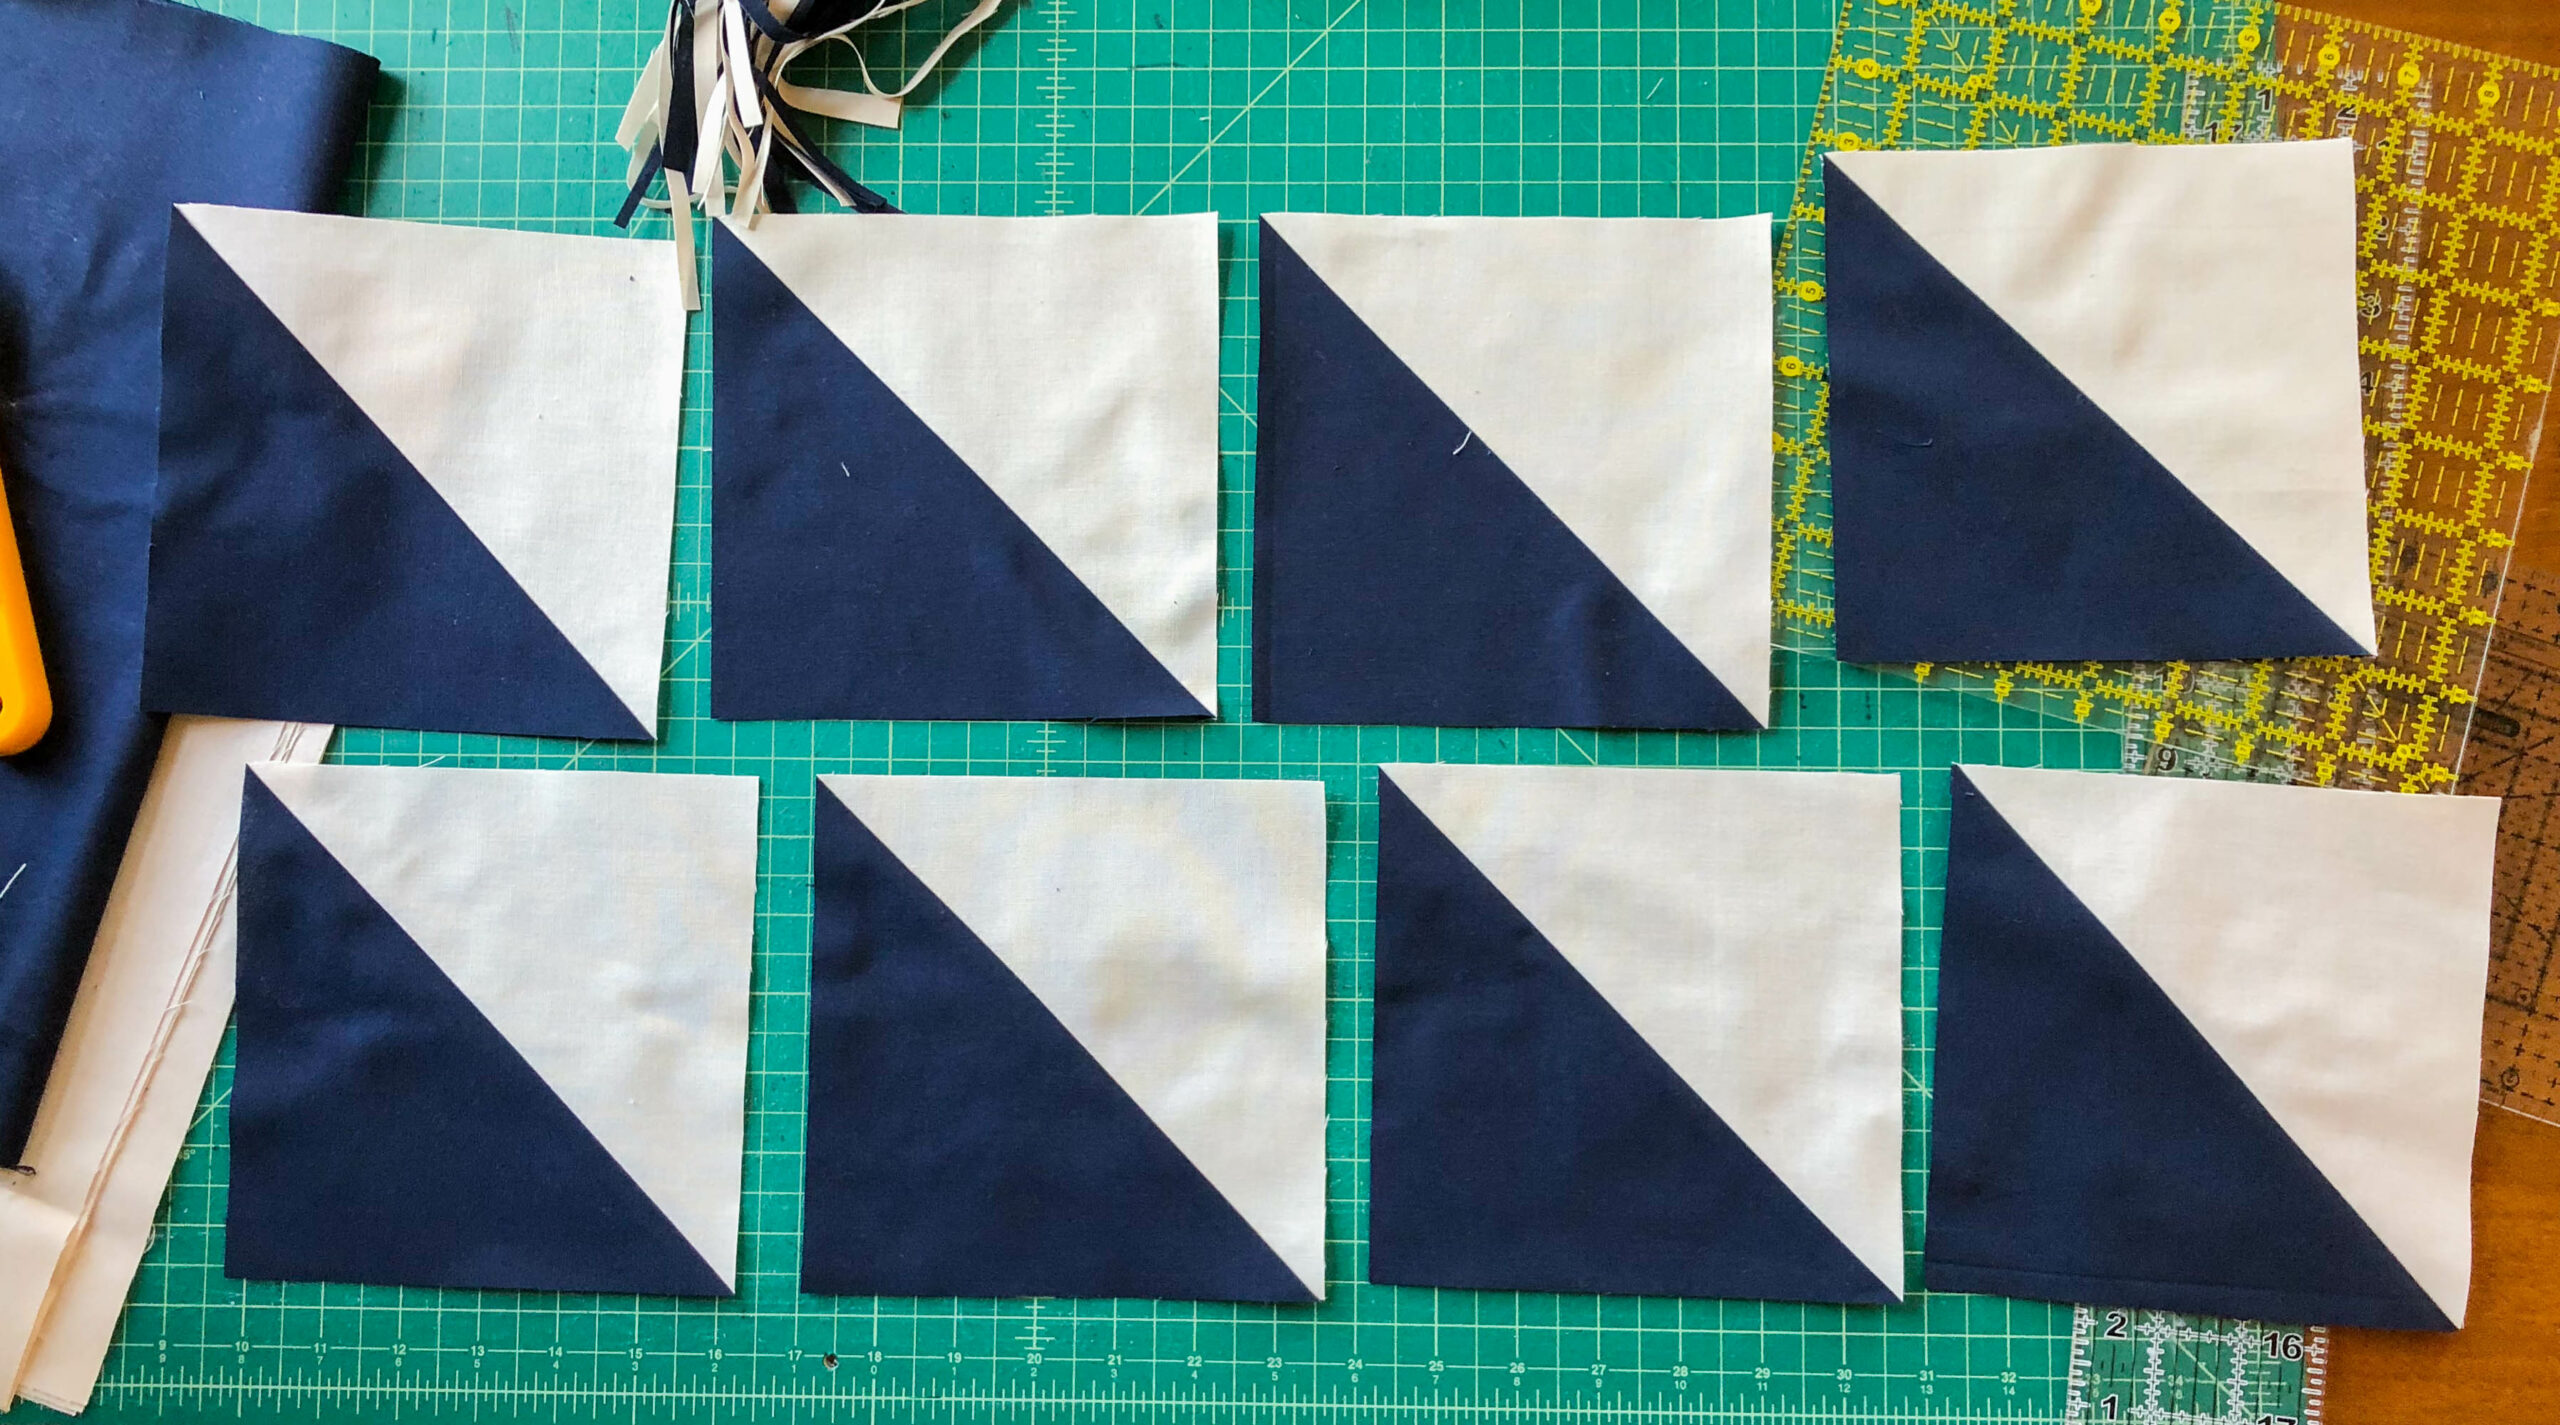
I then made 8 (yes, EIGHT!) half-square triangle blocks at once by pairing one ivory square with one indigo square, marking diagonal lines, sewing on either sides of those line, and cutting the block into 8 pieces. (The efficiency is unreal!)
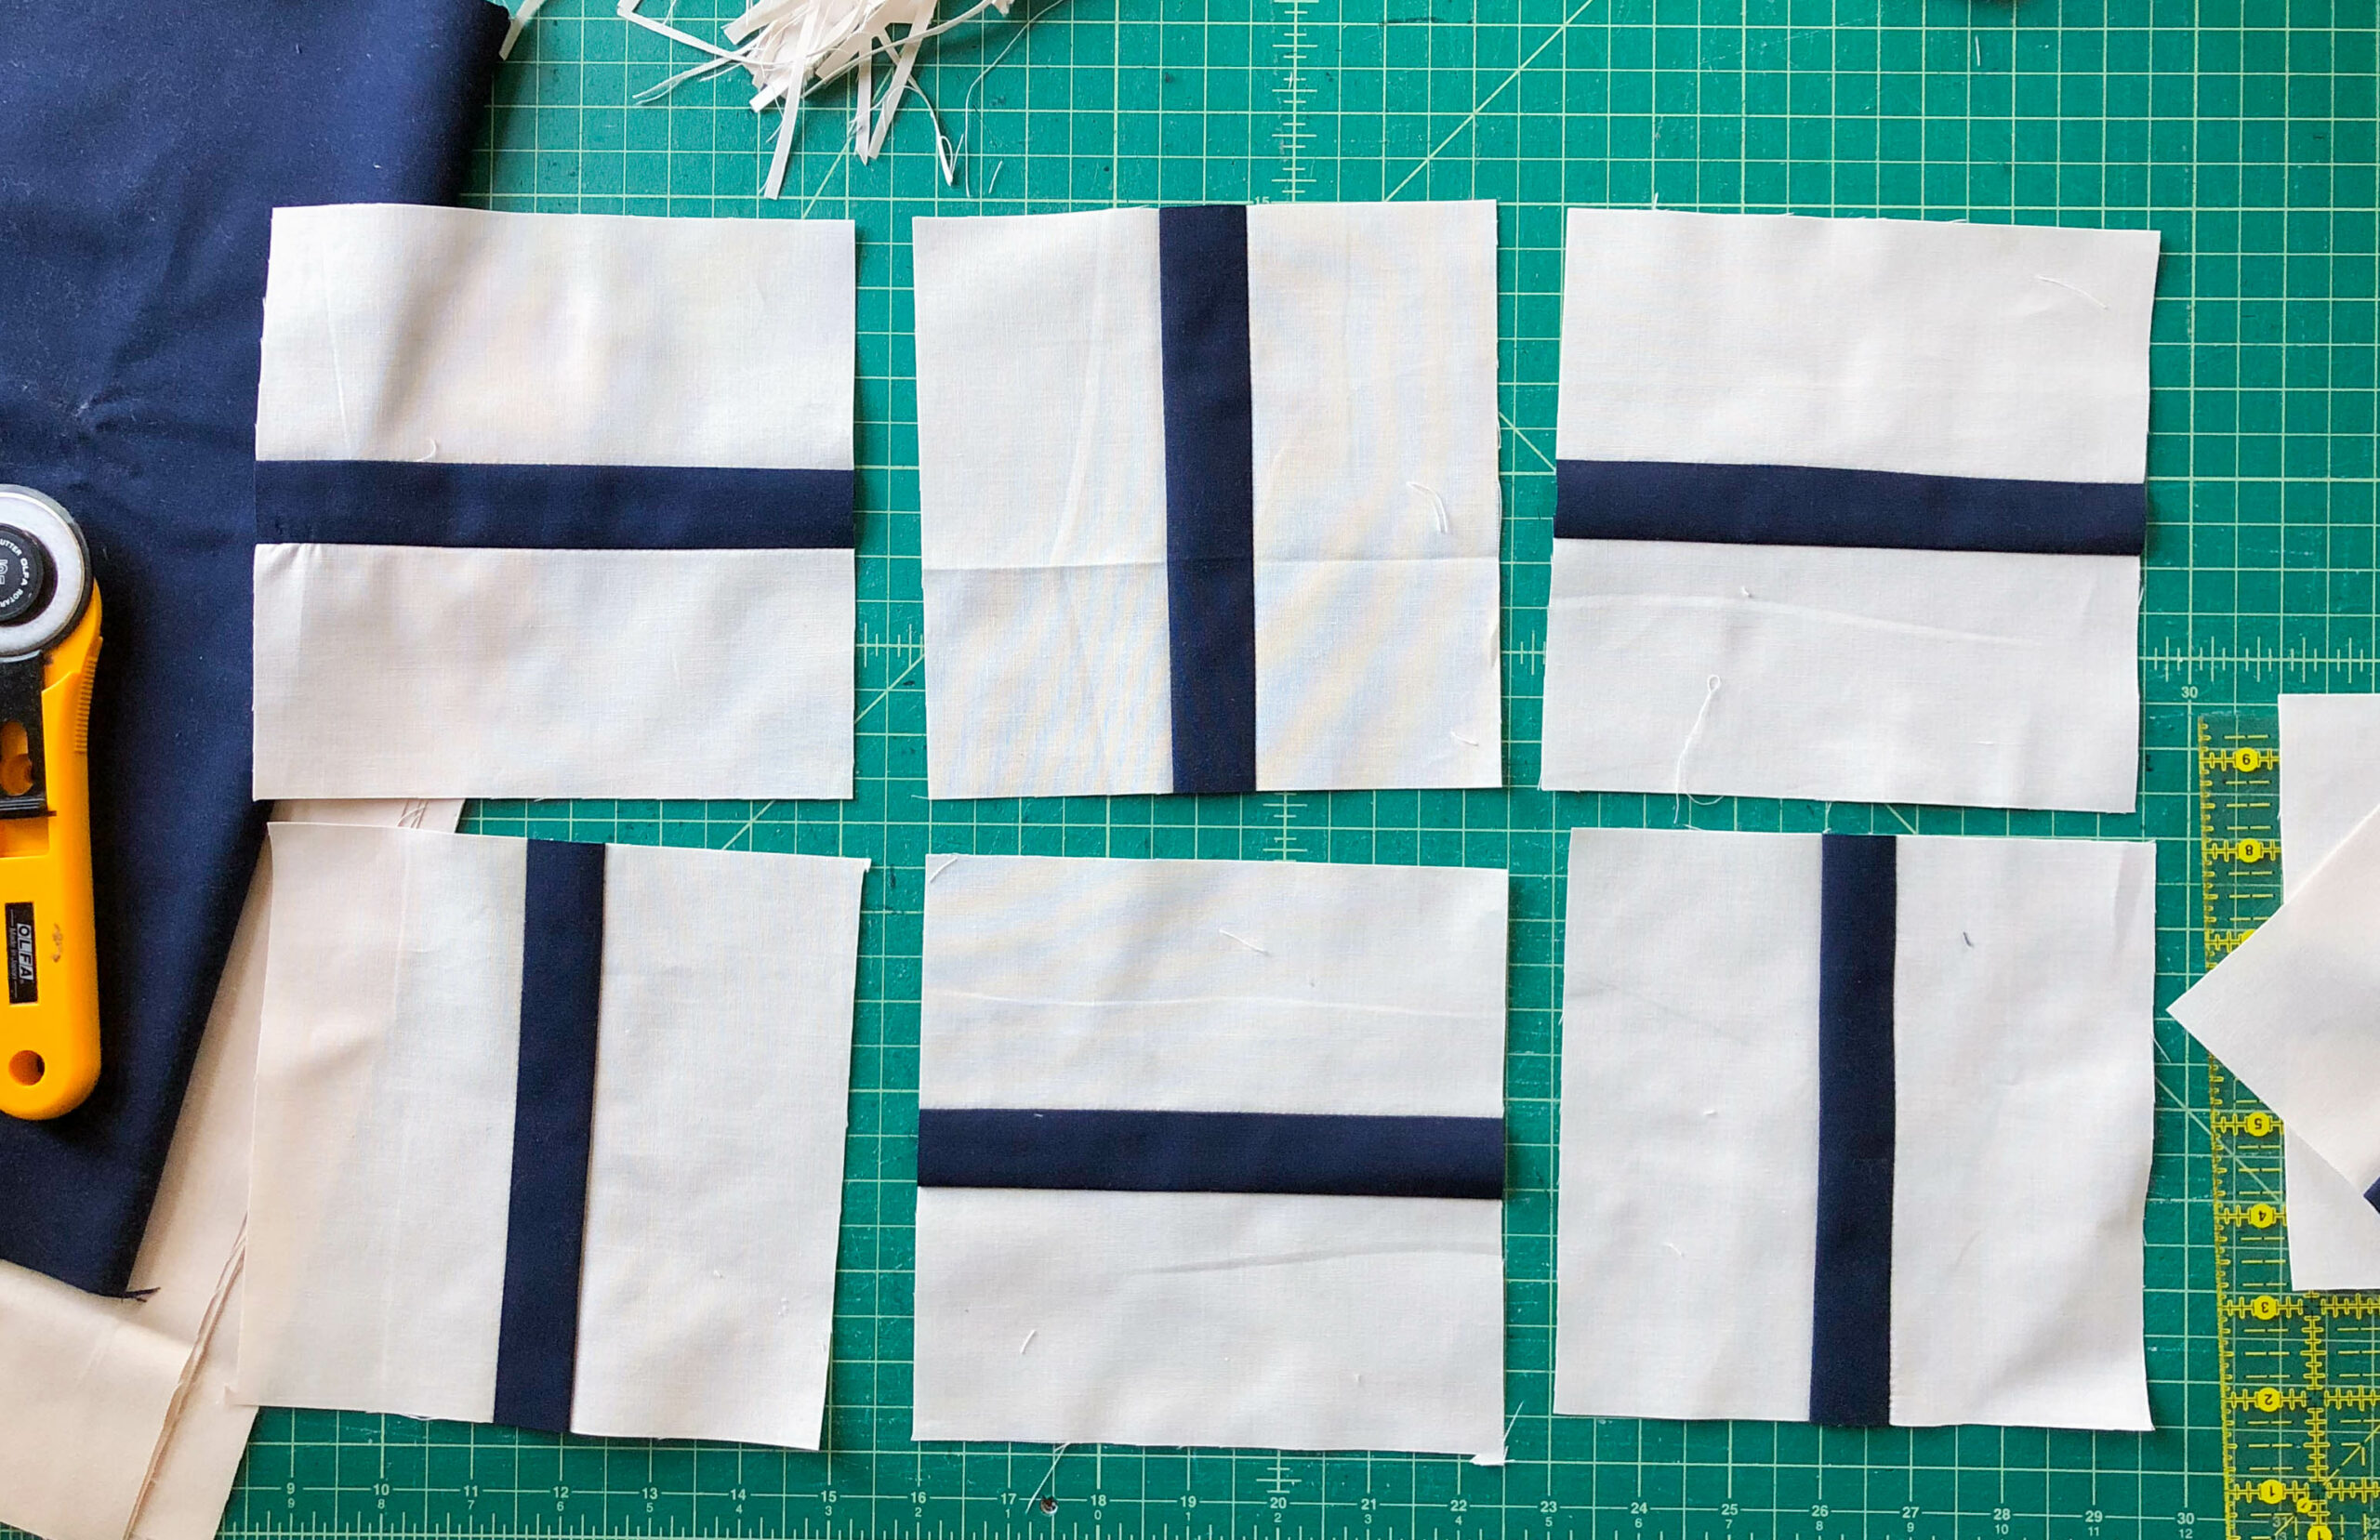
Piecing the line blocks was just as efficient: I sewed long strips ivory and navy fabric, pressed them open, and cut them to size.

From there, I needed to decide whether to sew a big quilt top and cut my garment pieces out of that, or sew smaller sections to the size of my pieces. I started by arranging the blocks on my design wall (a large piece of cardboard with some thin batting stretched over it) to see which approach to take.
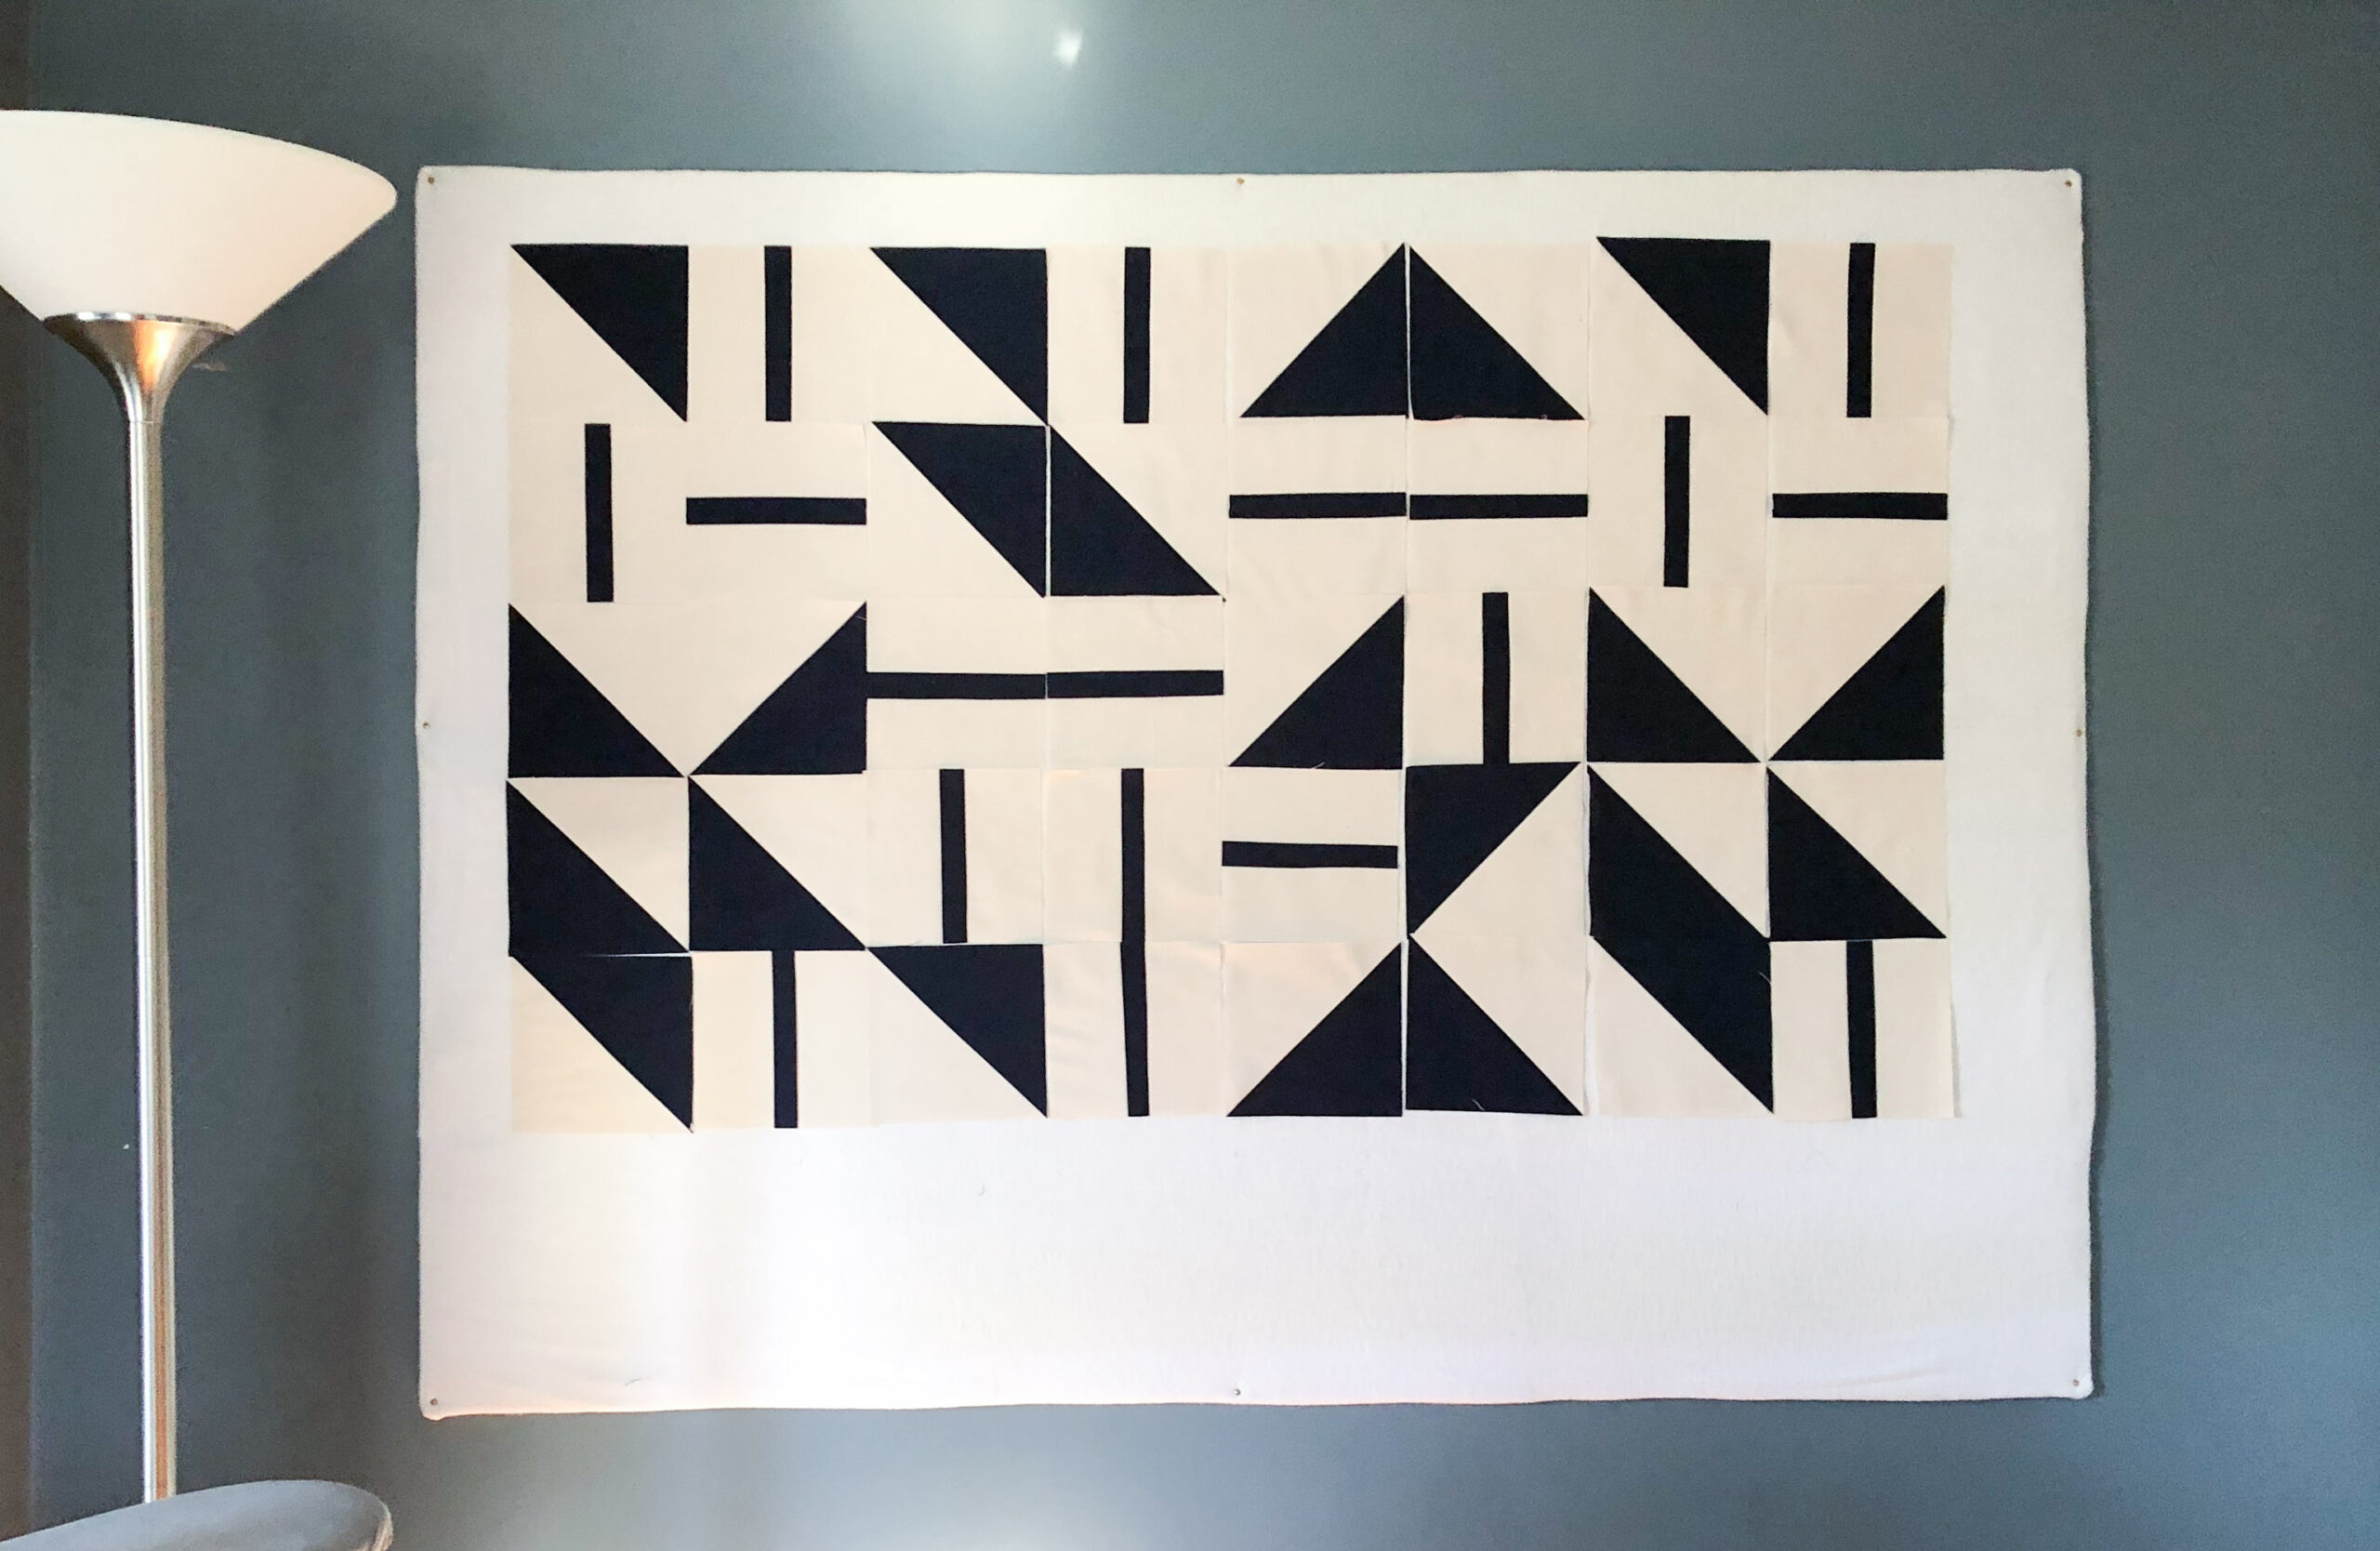
Once I arranged my pieces on top of the quilt, I could immediately tell that piecing the entire thing would not be the most efficient way to use my fabric. So I decided to assemble it in sections that were just big enough for each piece.
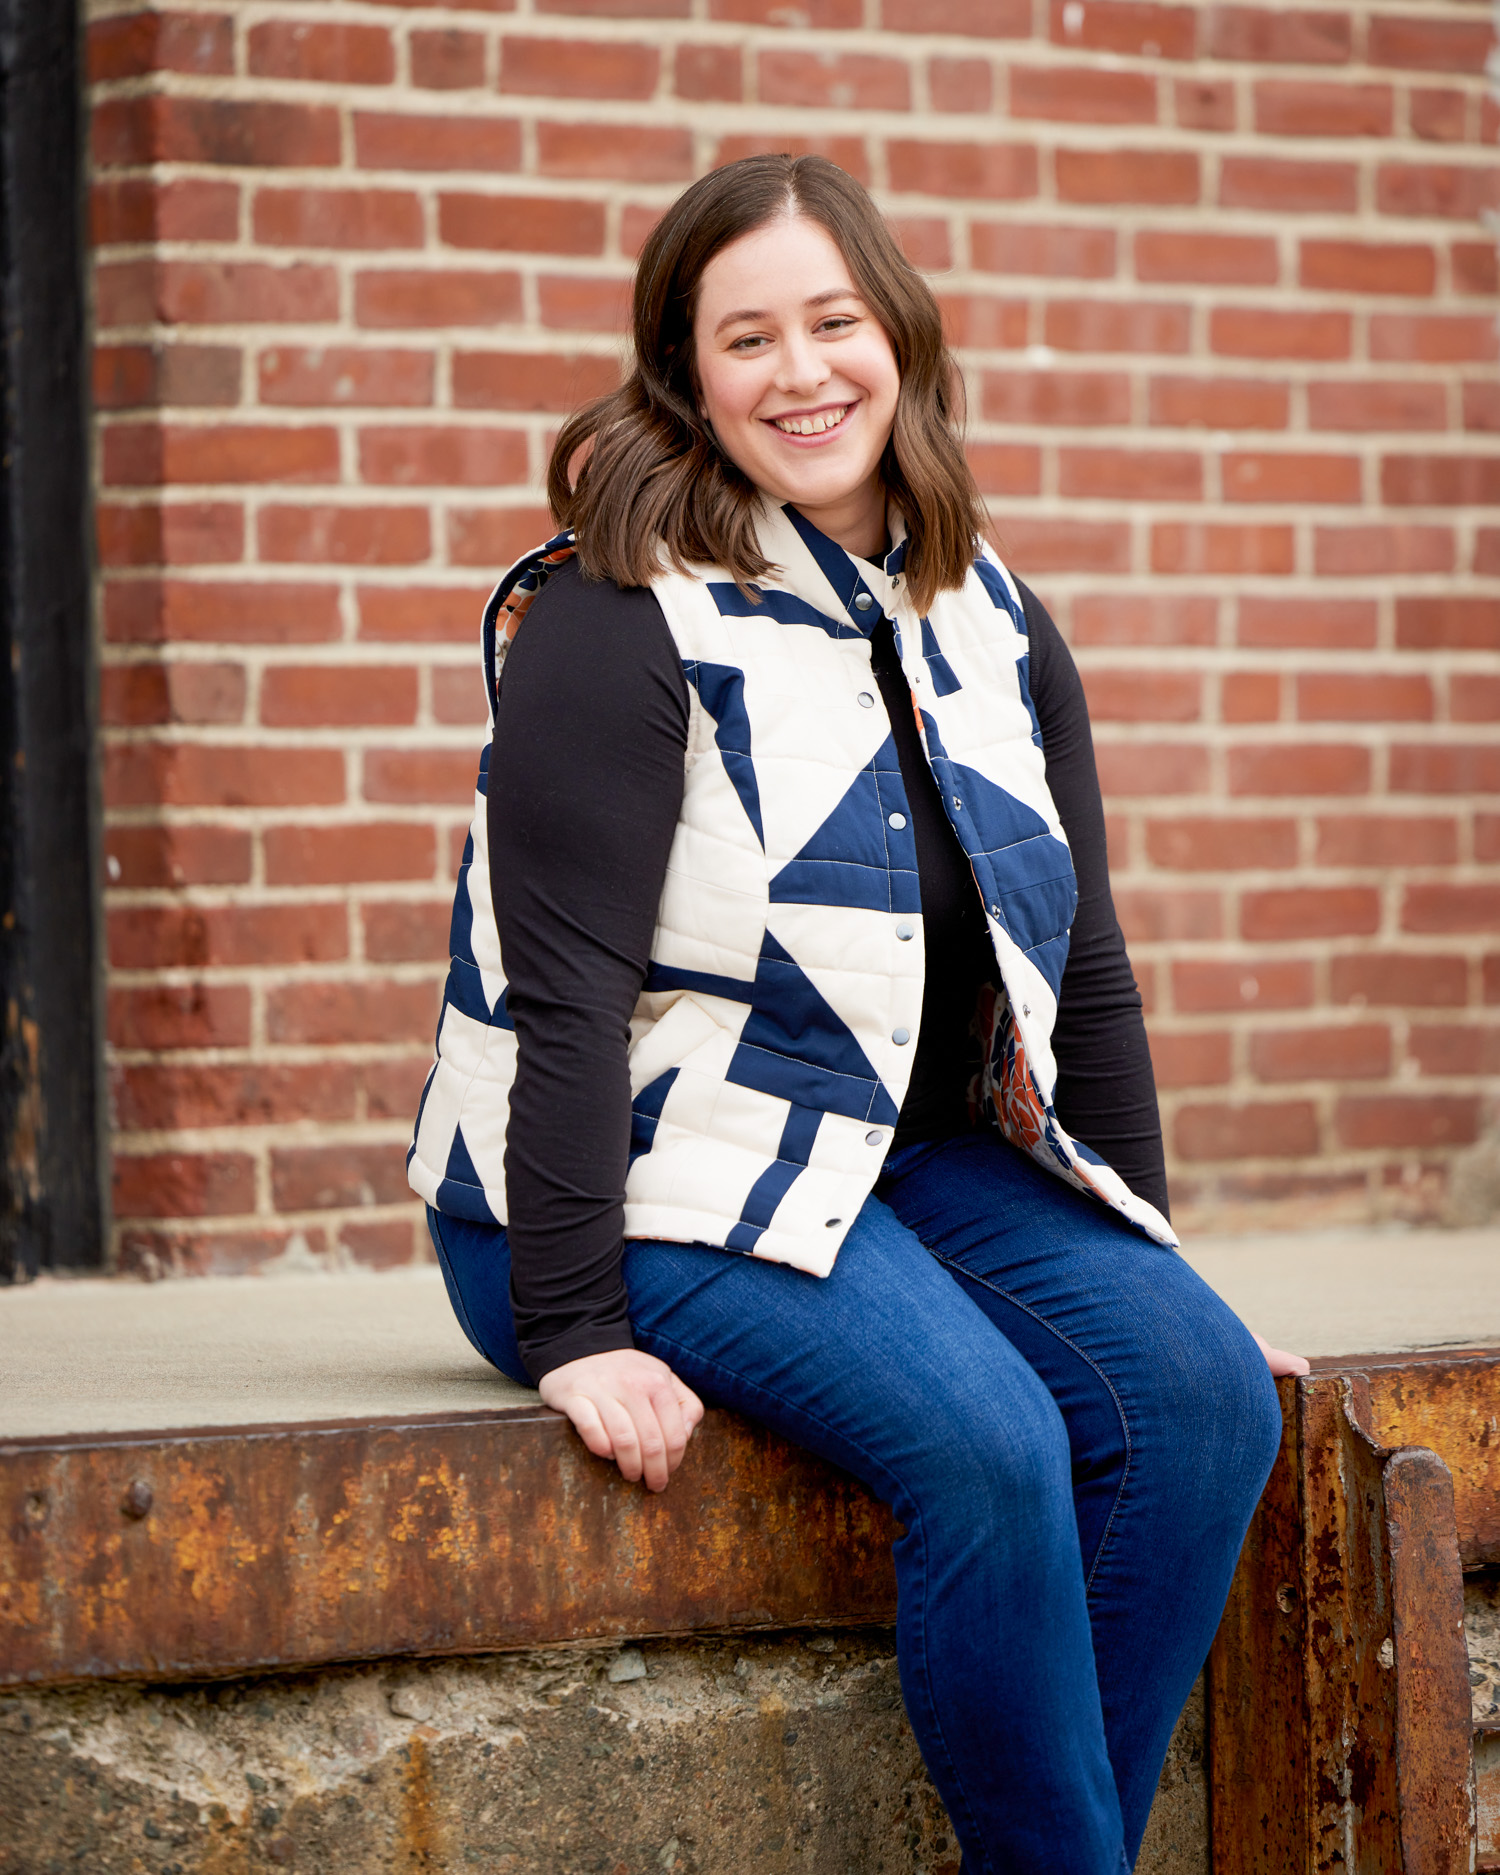
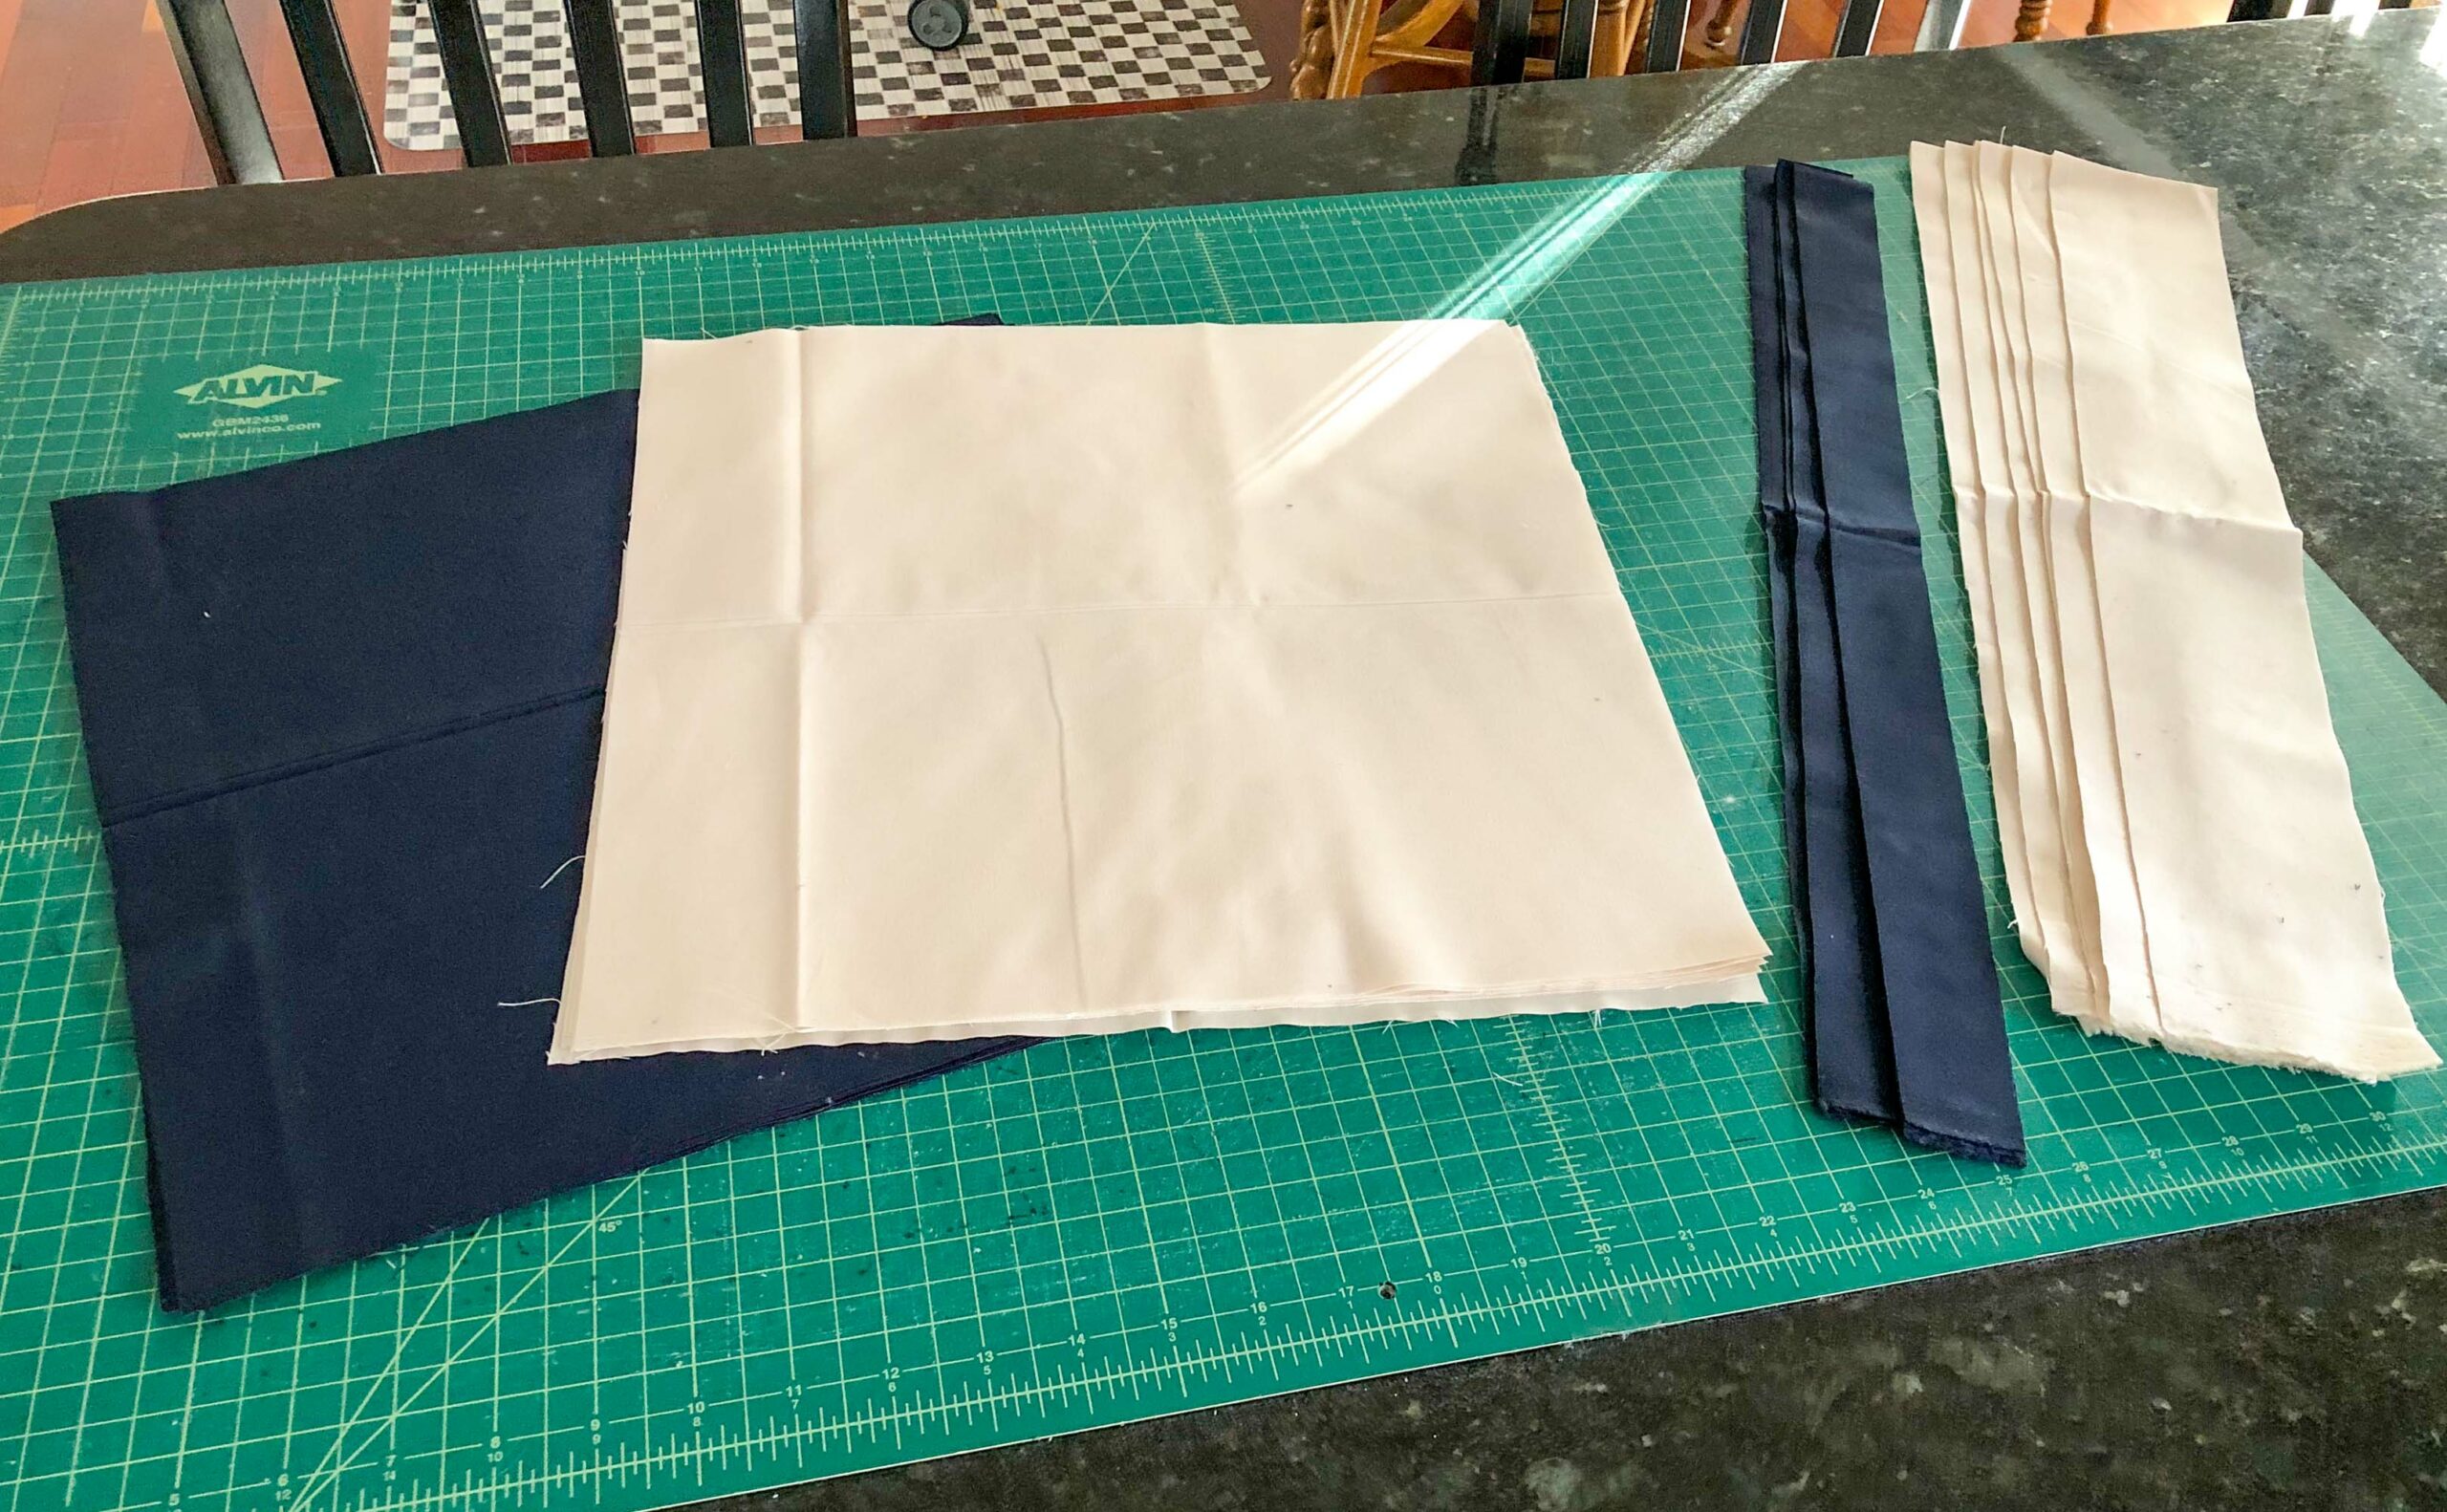
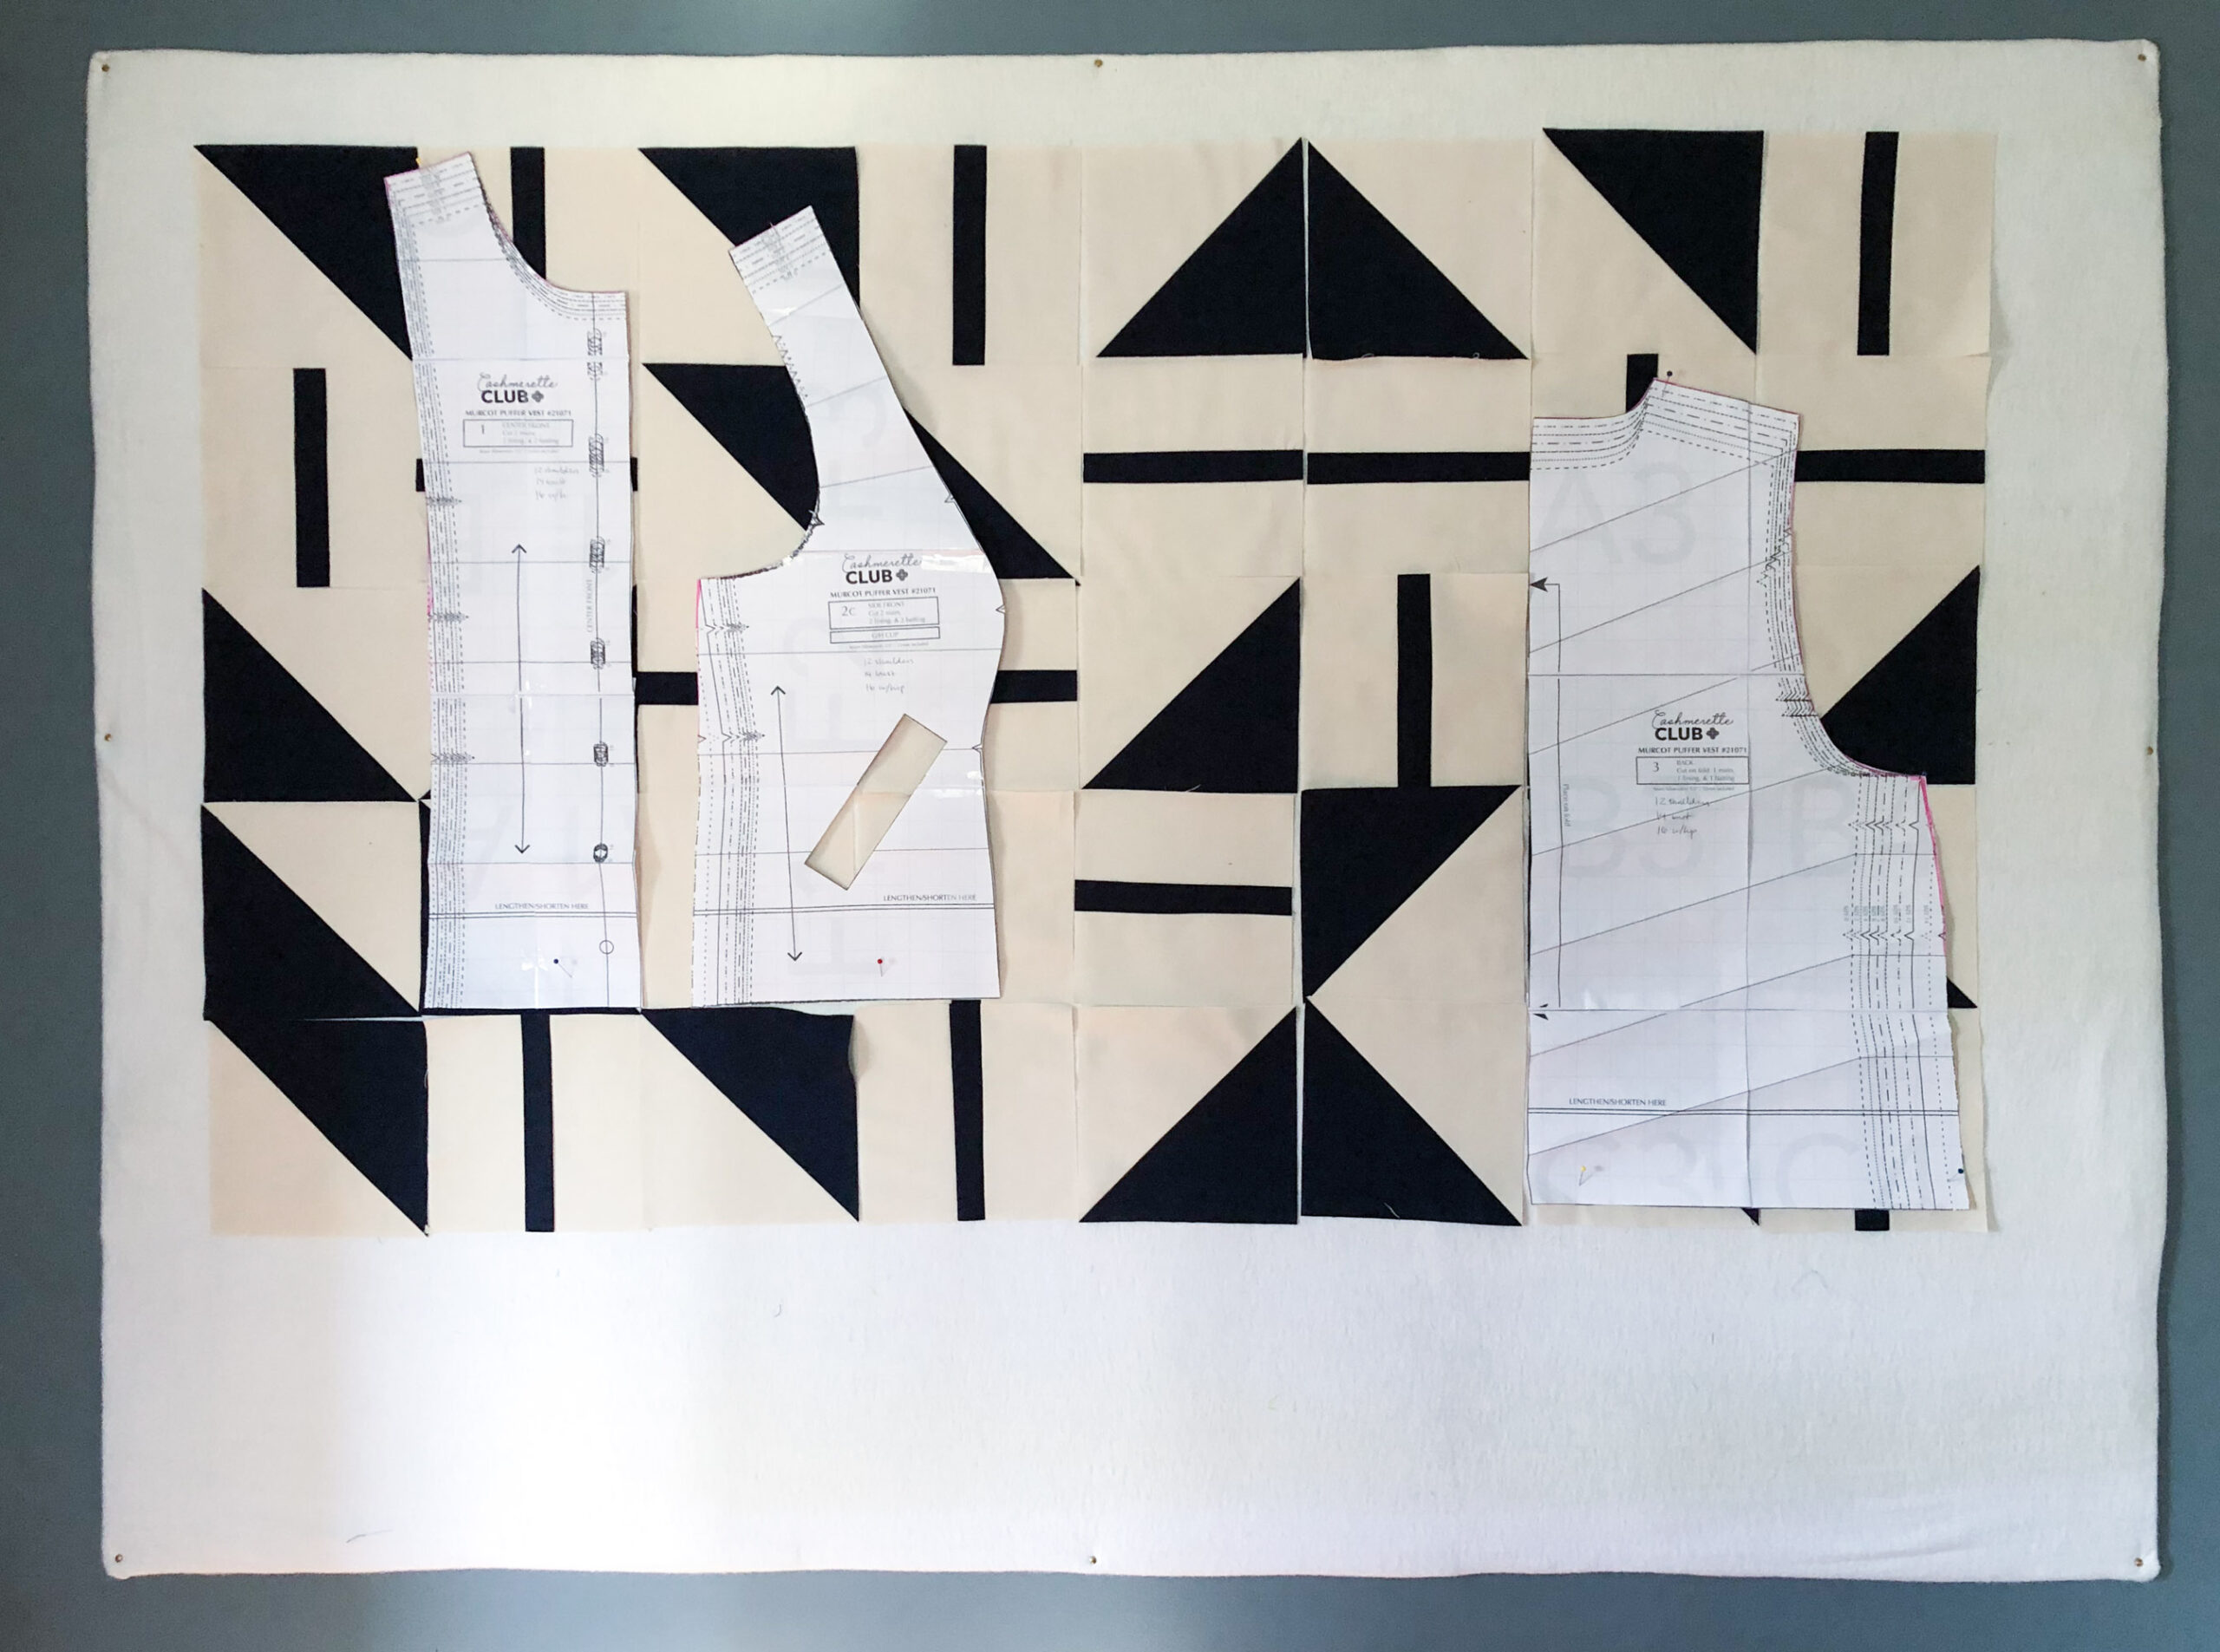
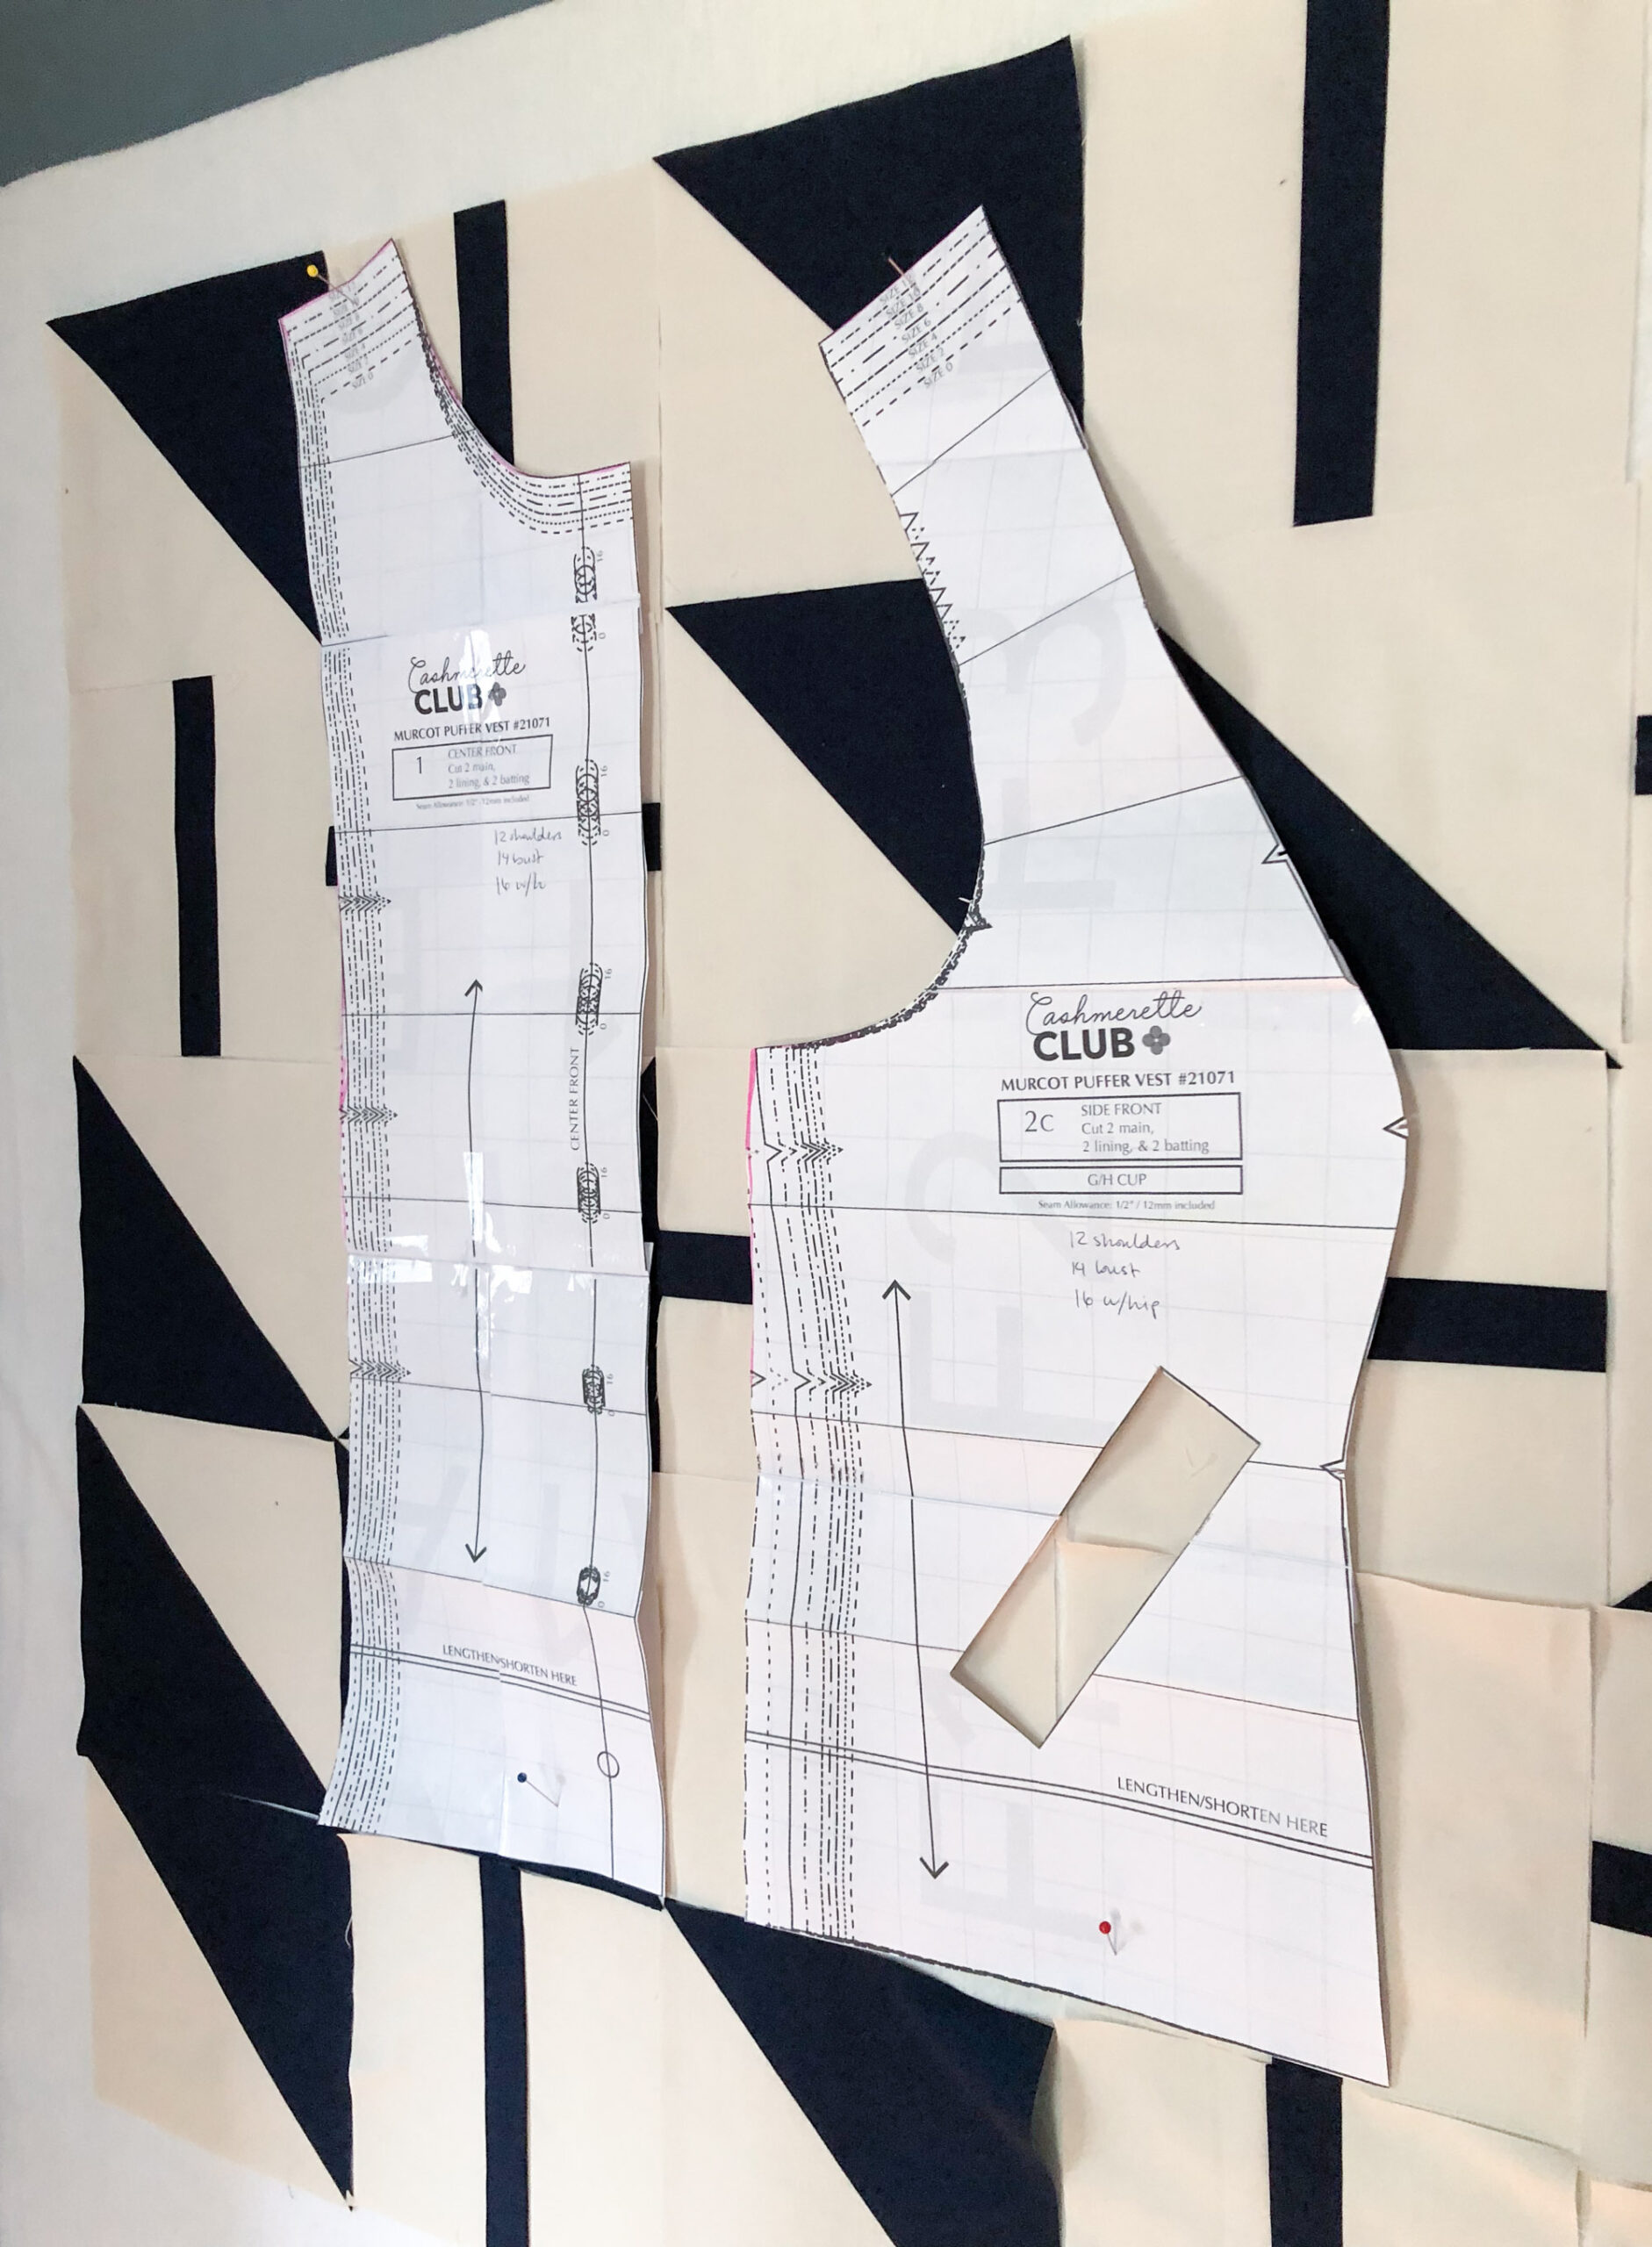
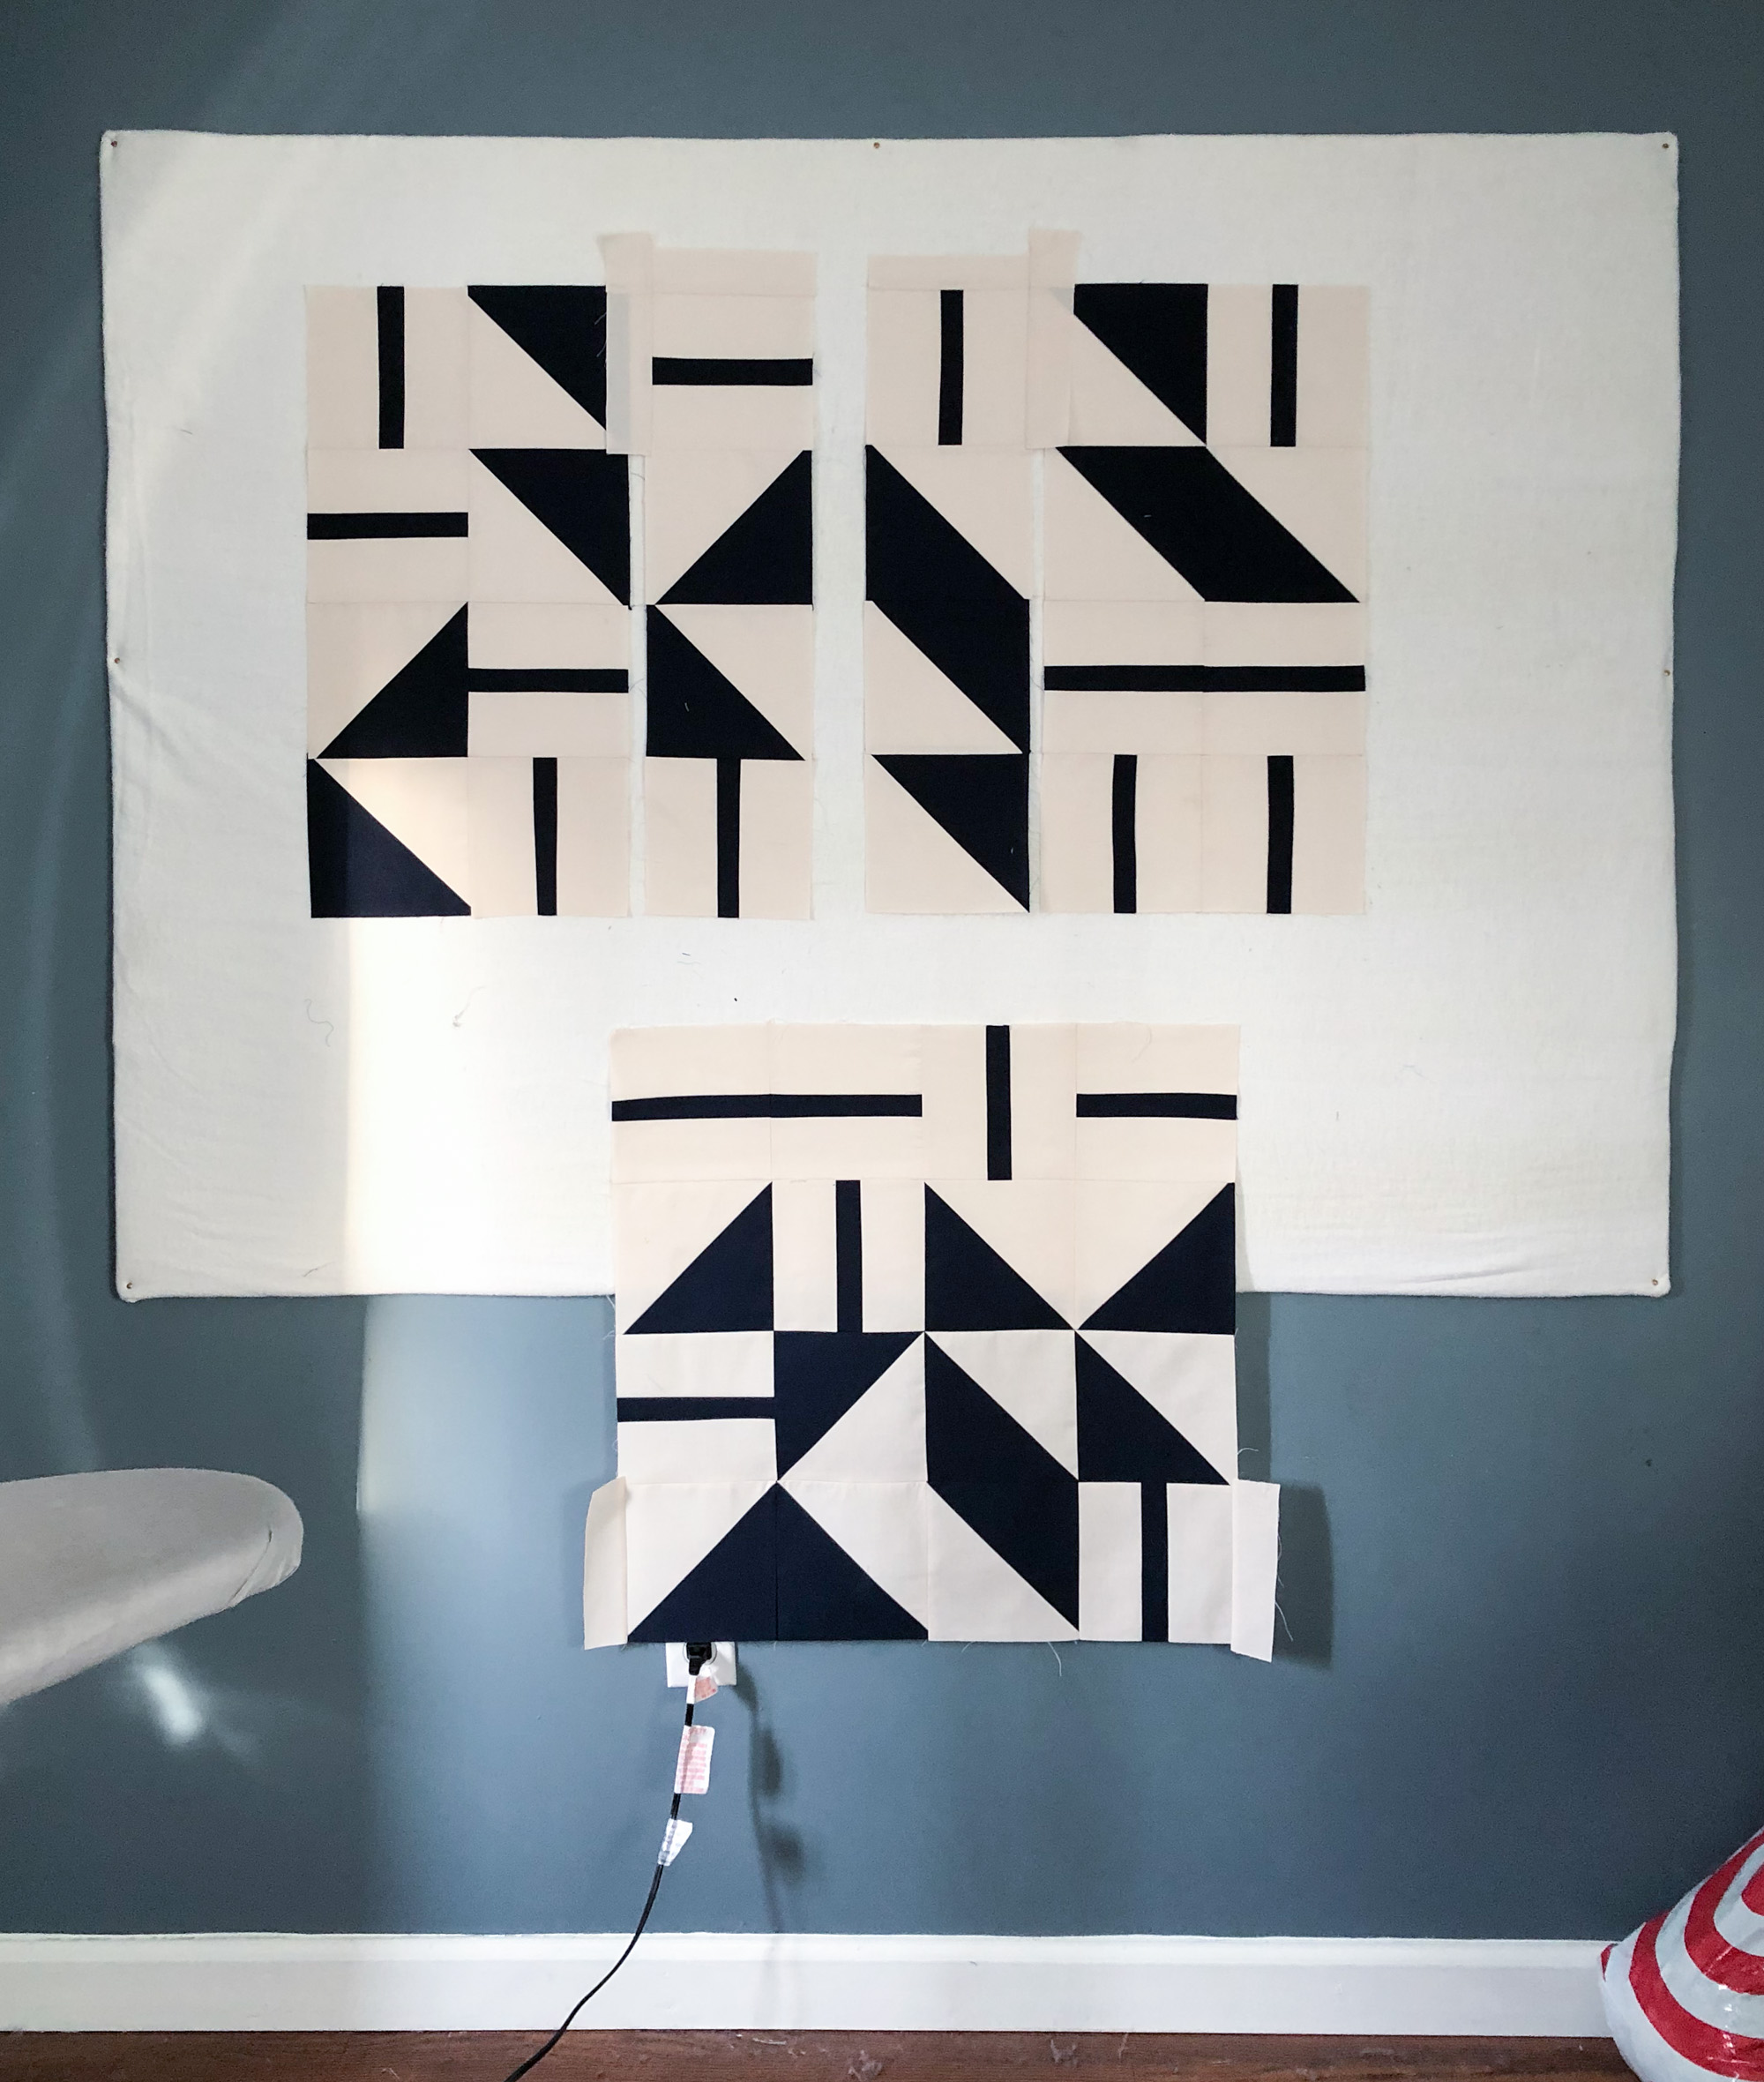
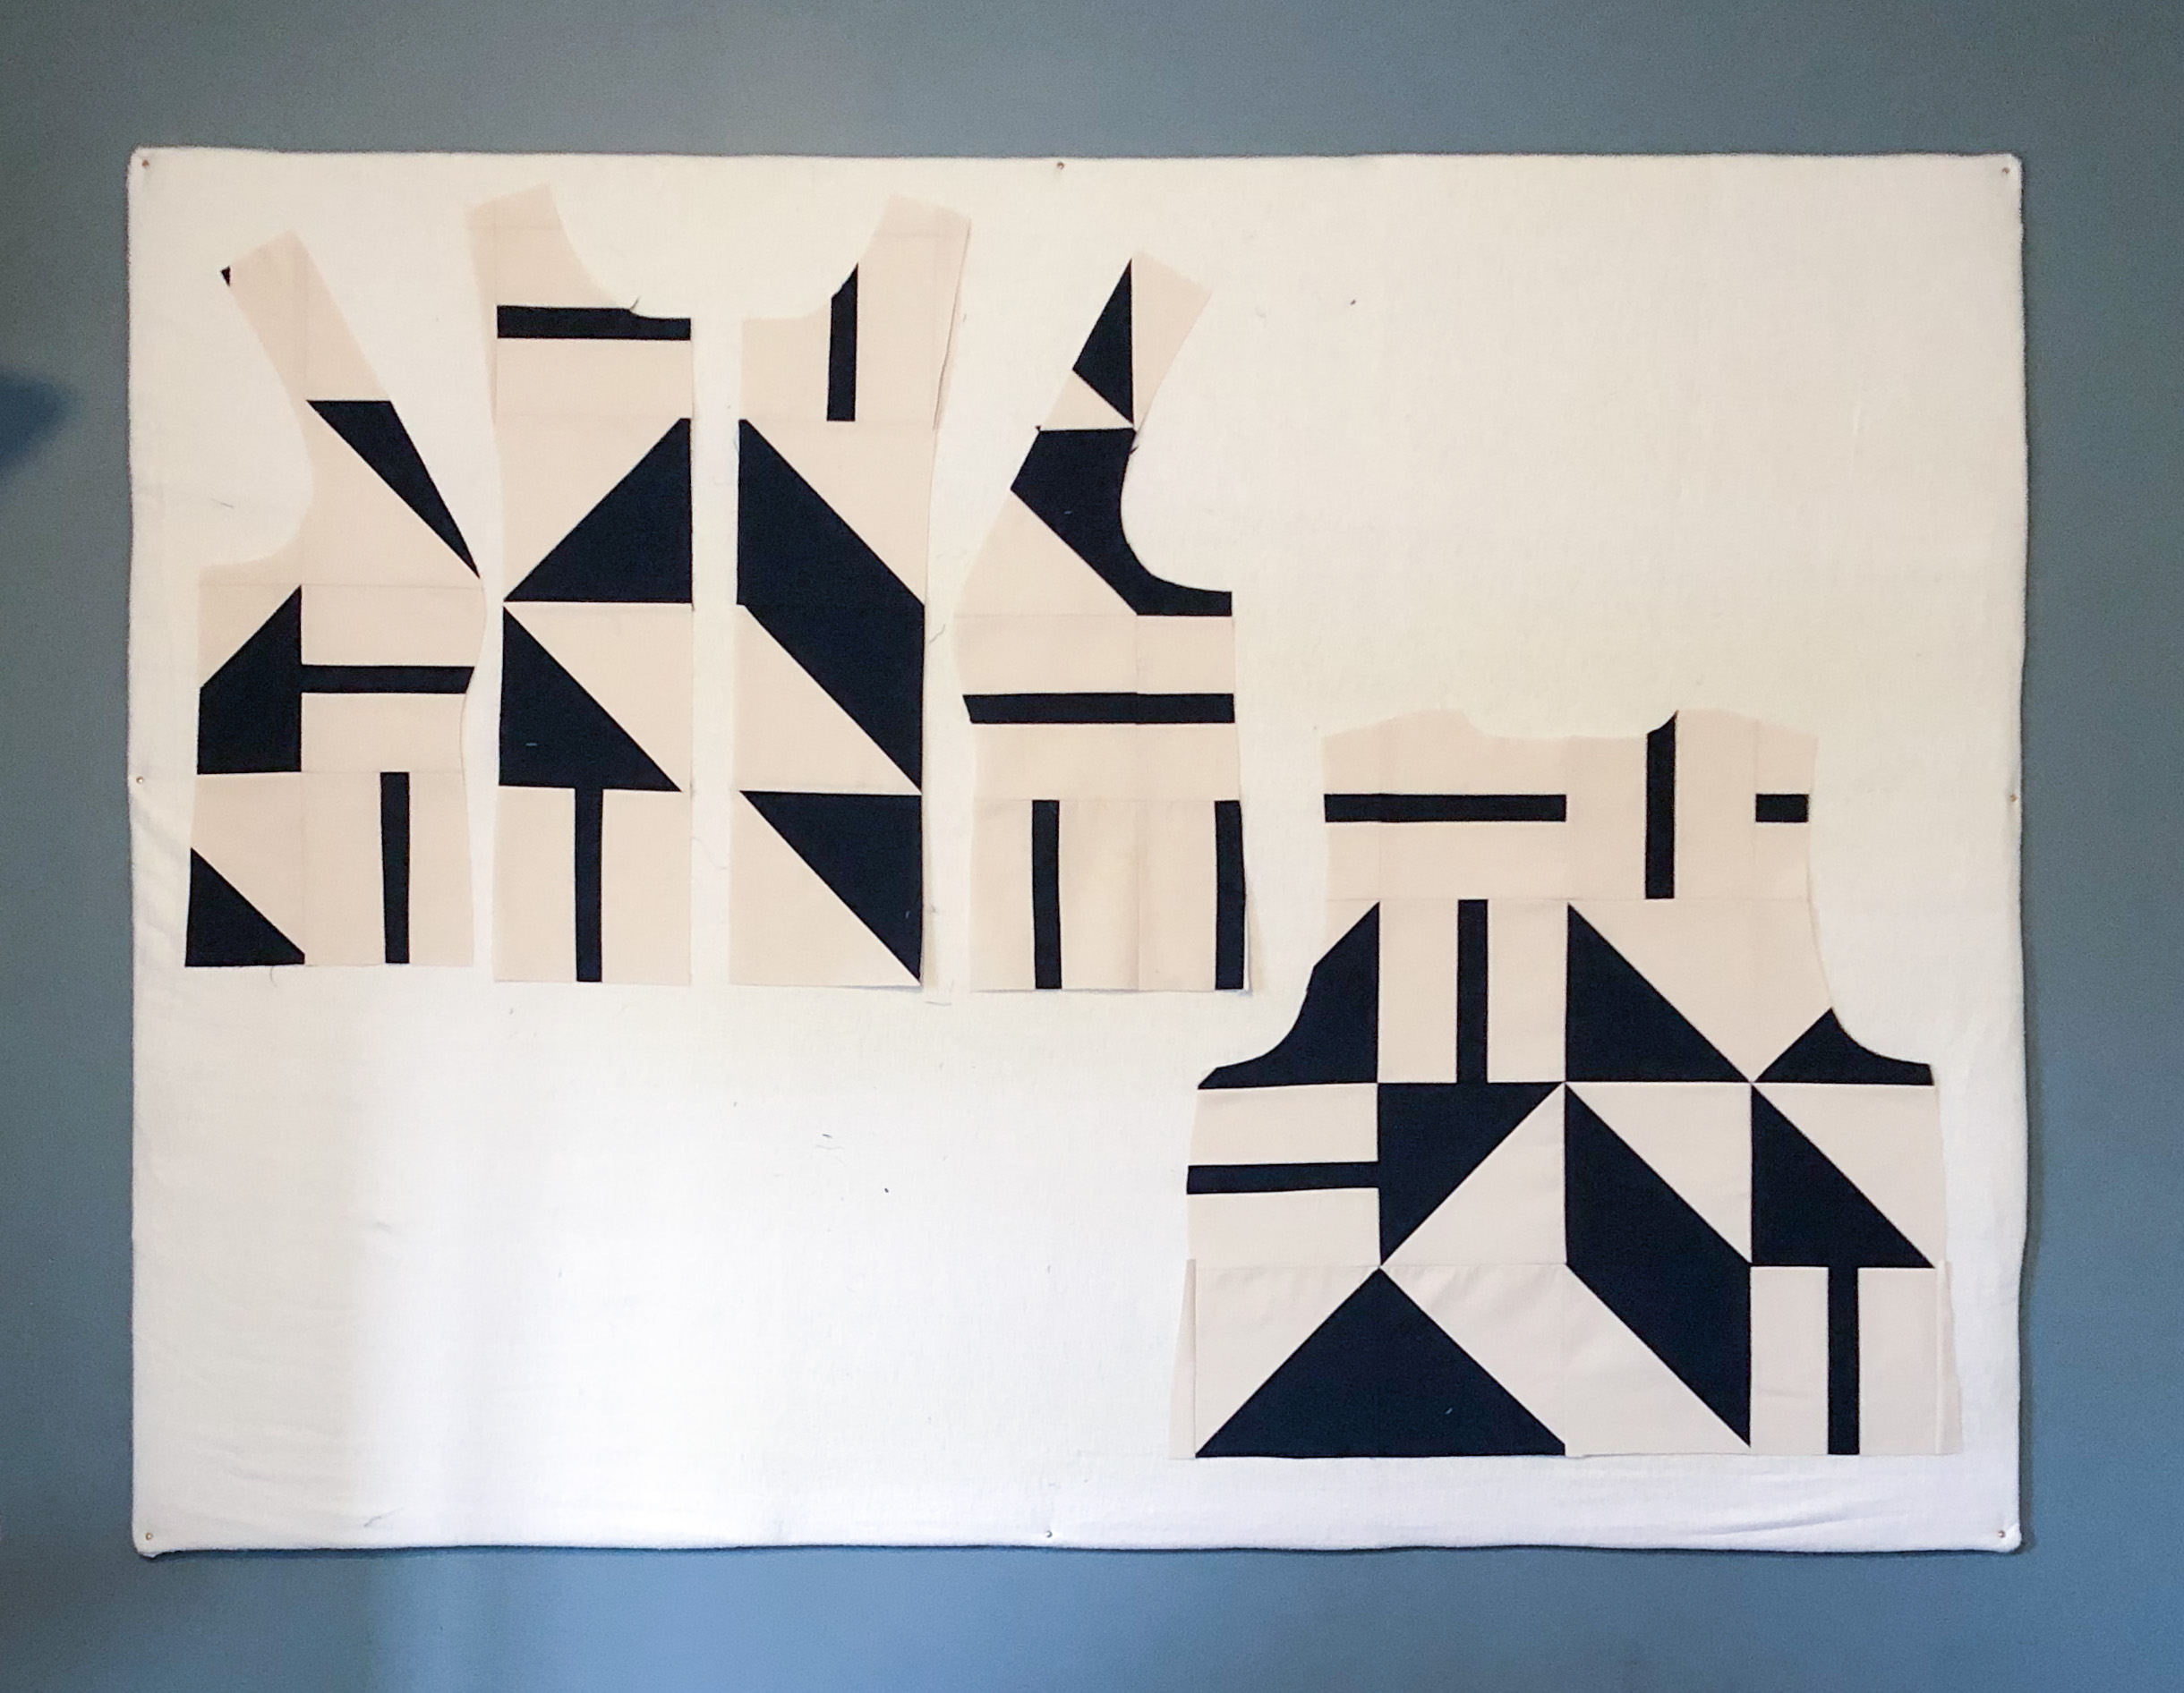
Here are the 5 pieces I assembled: two center fronts, two side fronts, and one back. (I also later pieced the outer collar.)
Now it’s time to cut my pieces out! By now it was getting dark (i.e. 4pm here in Boston), hence the long shadows.
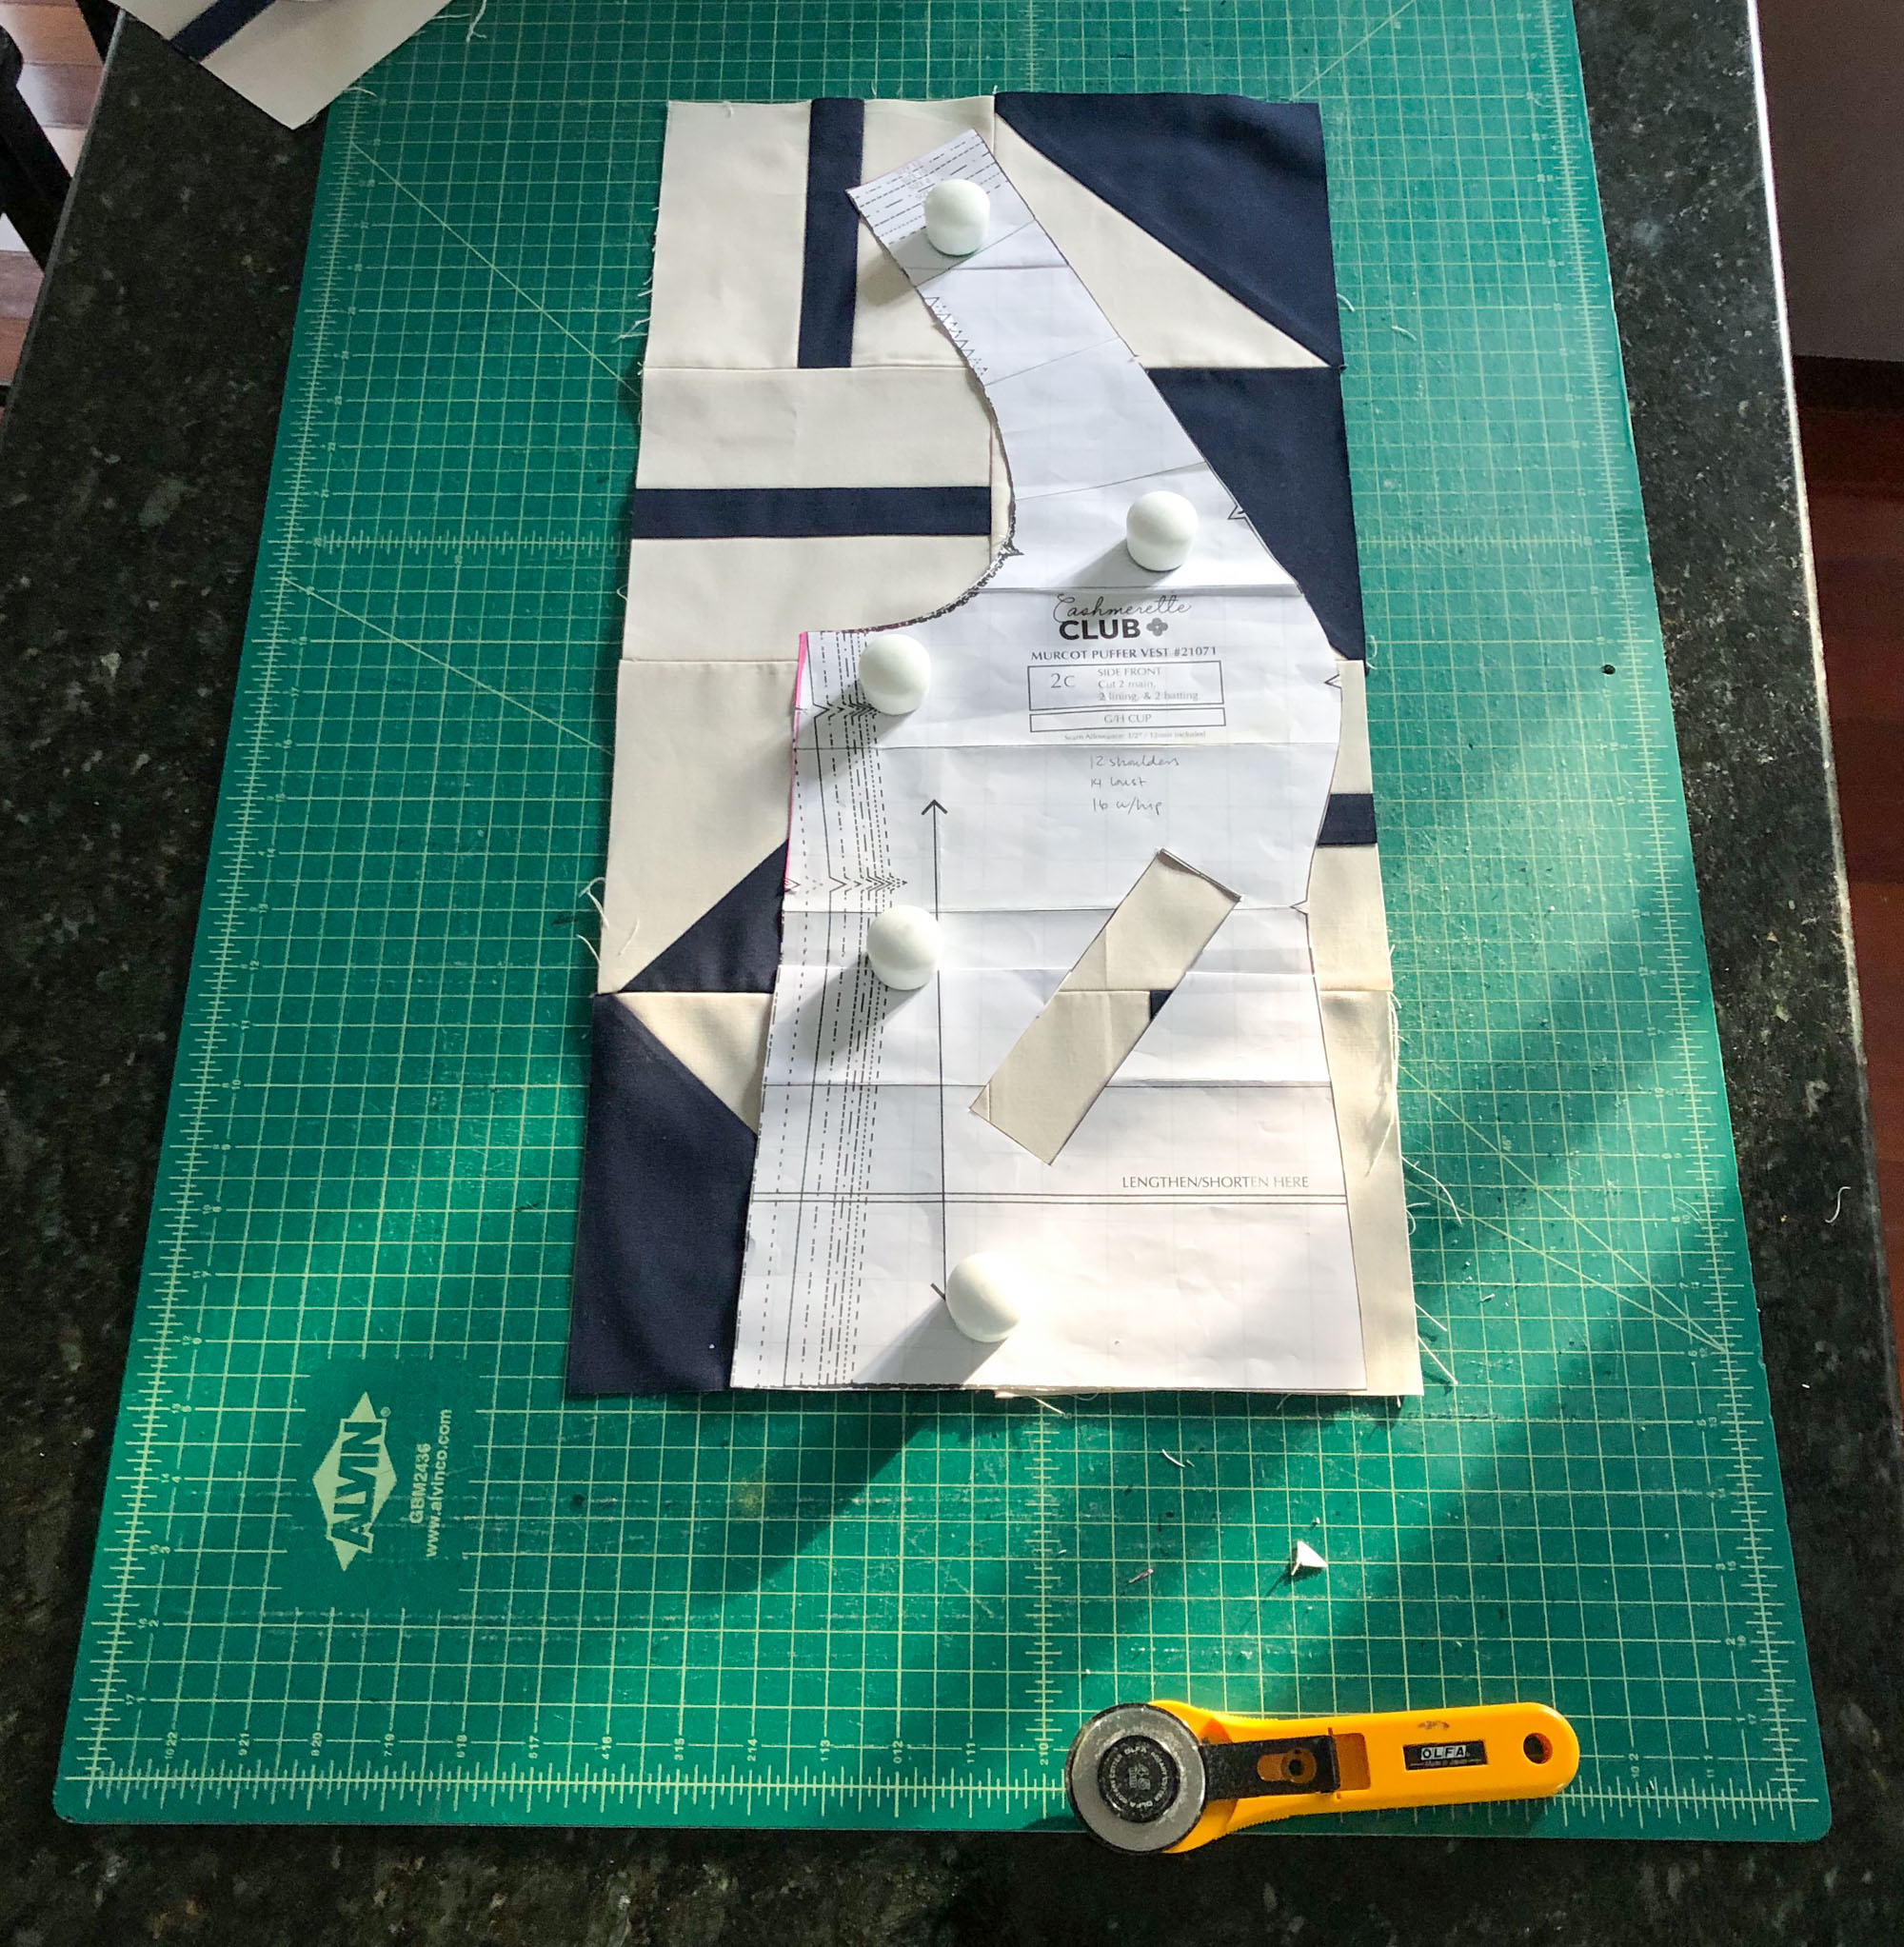
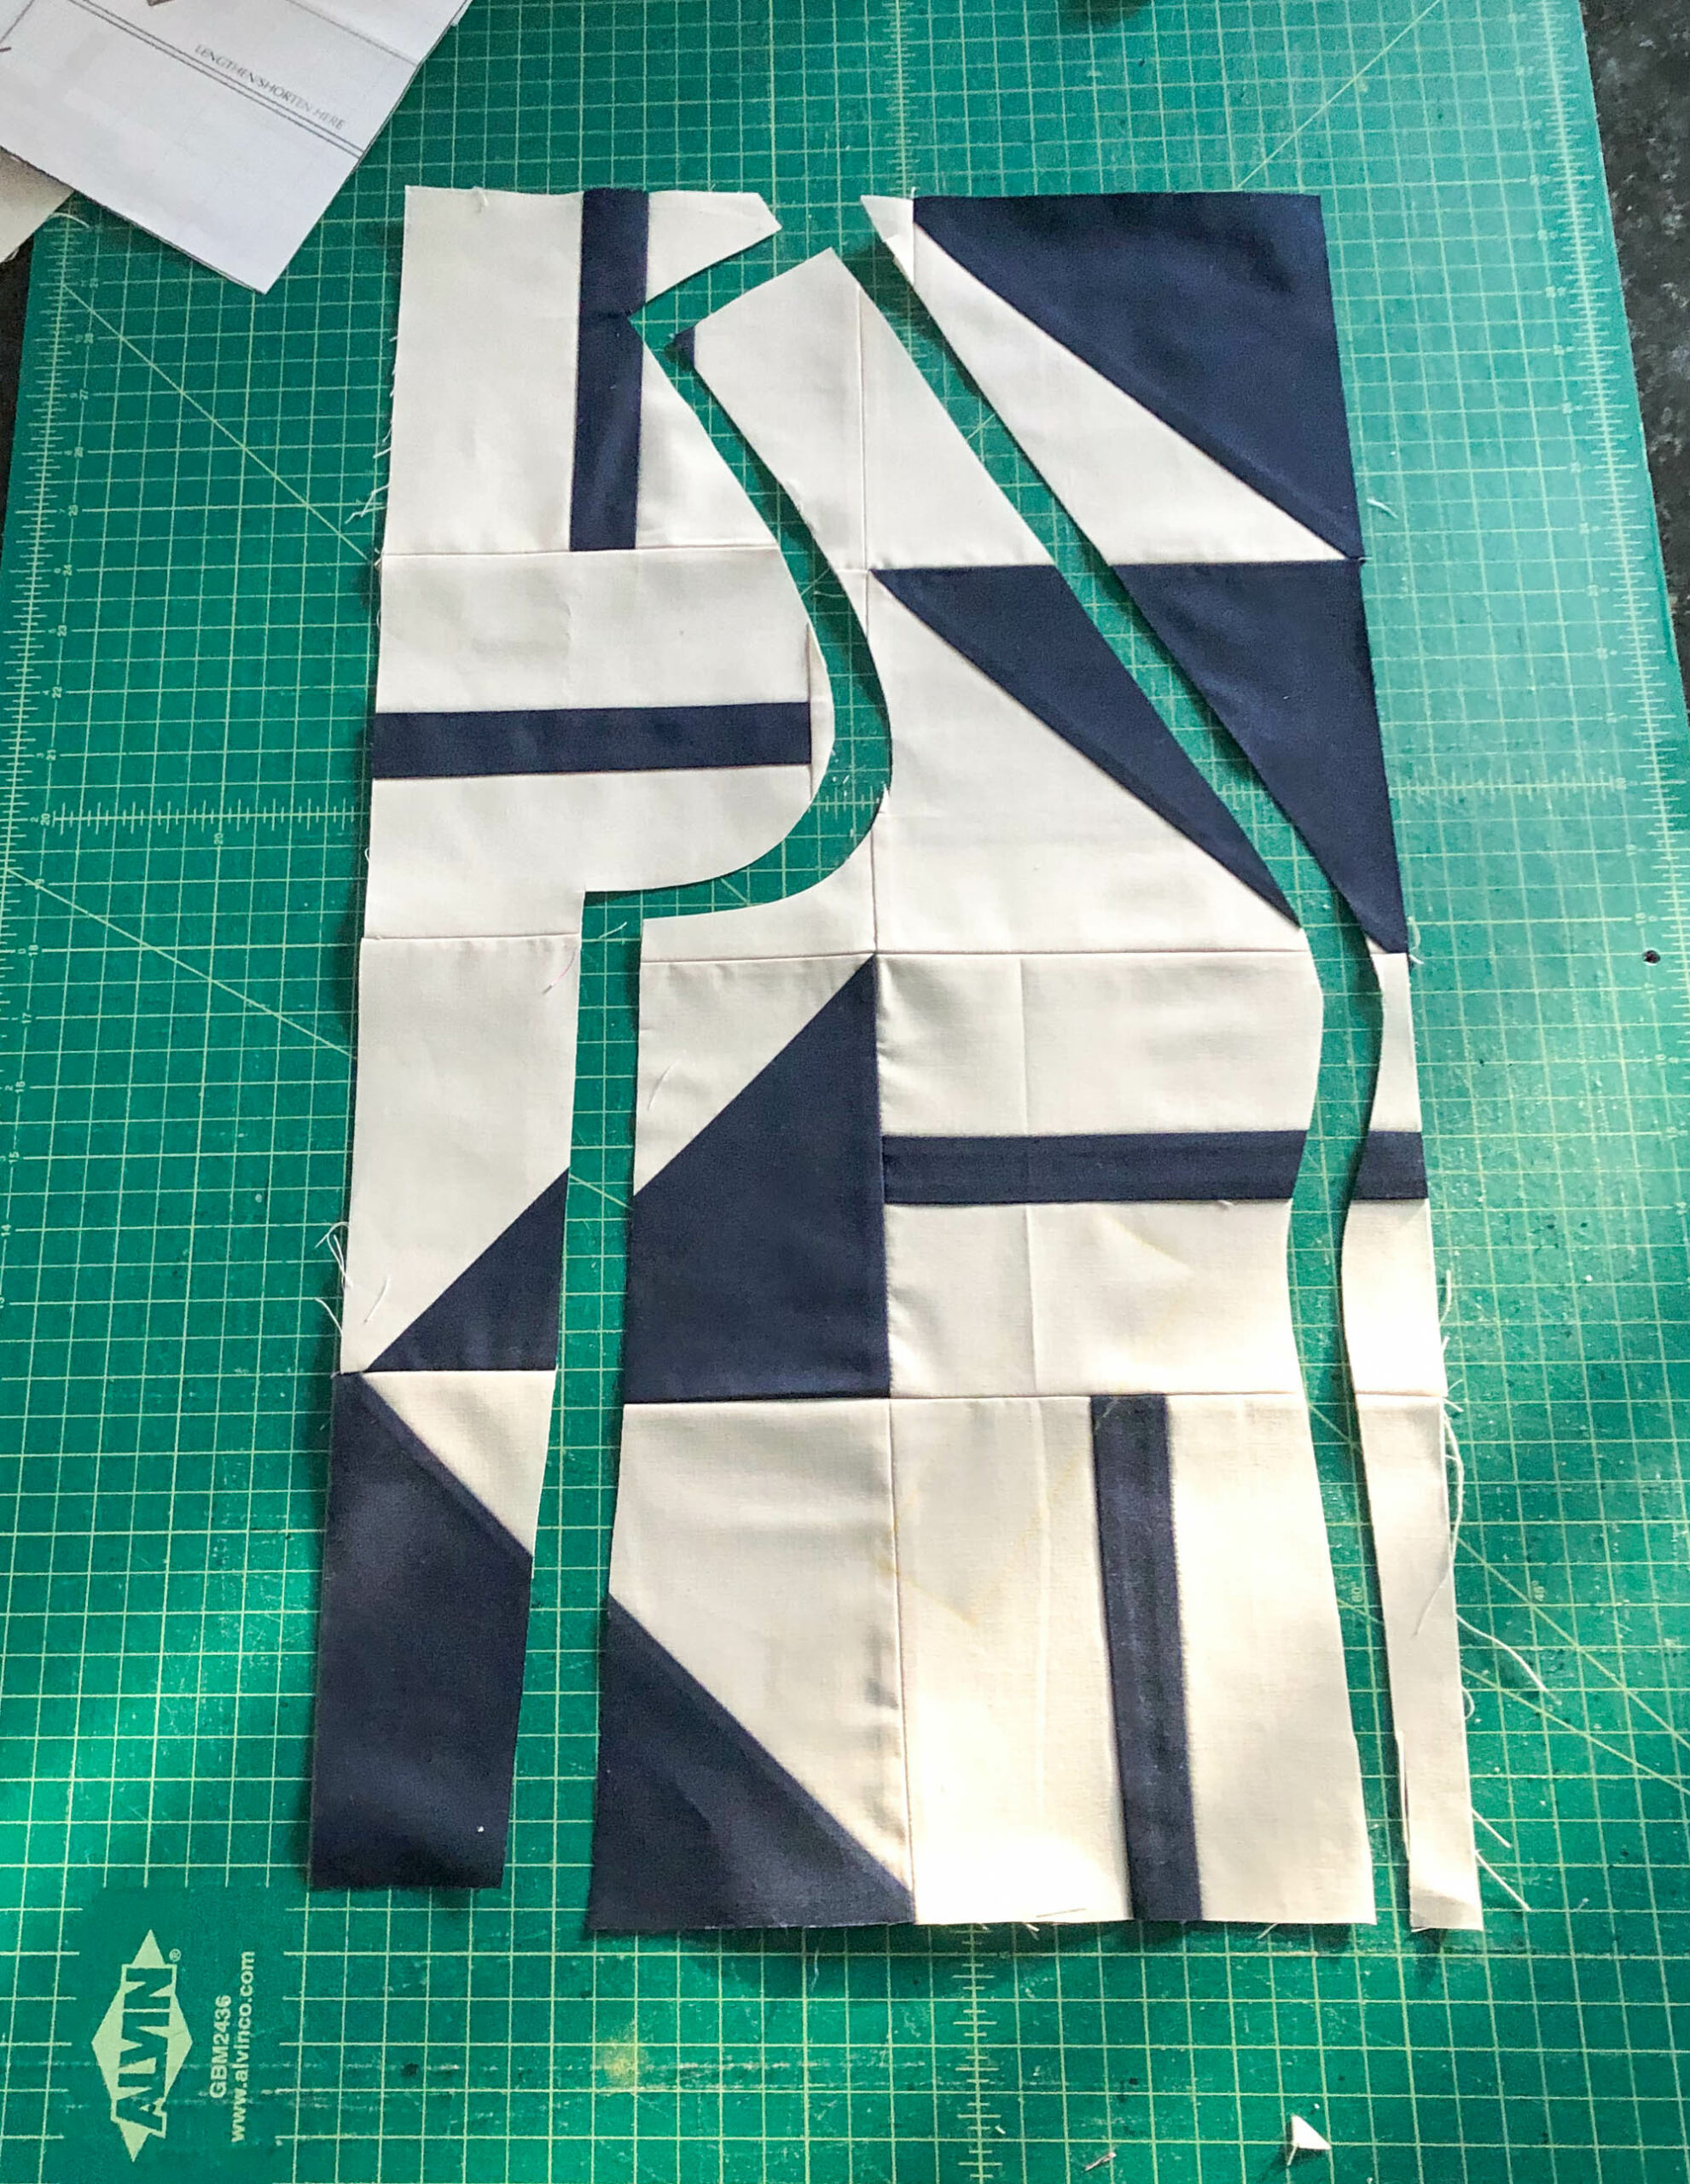
At last, all of my outer pieces were pieced and cut! I also cut my lining and batting pieces as well.
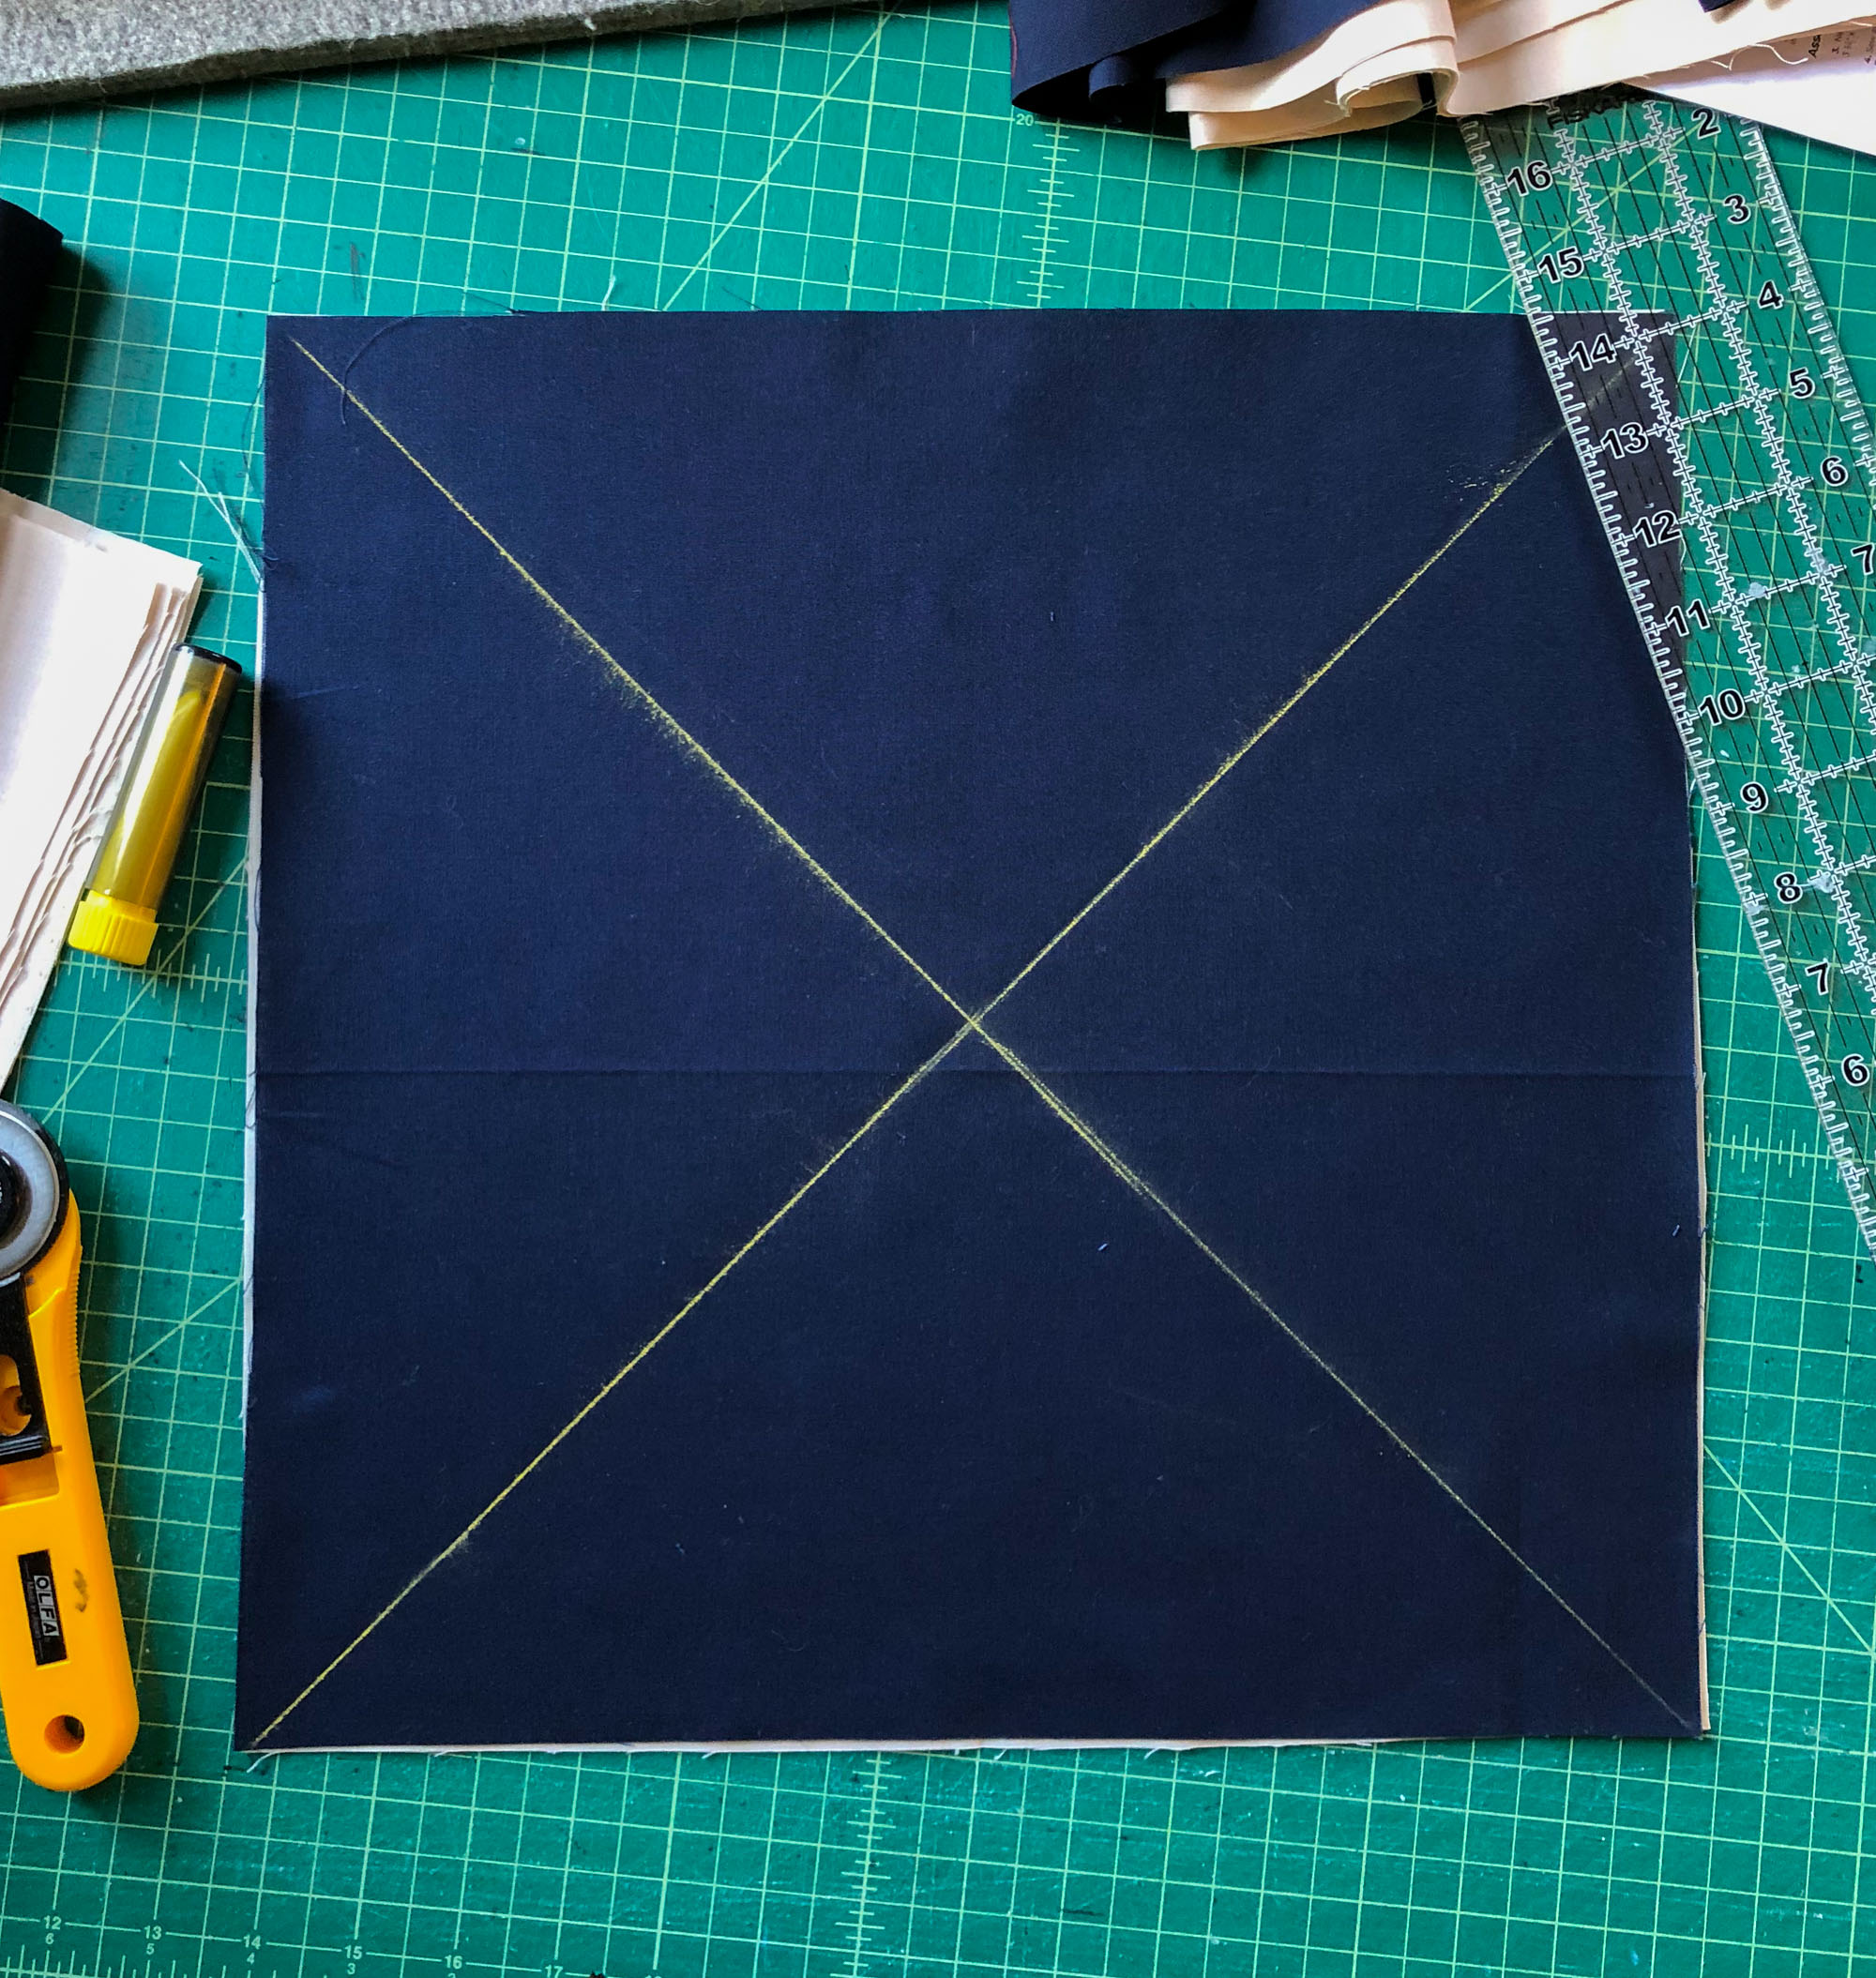
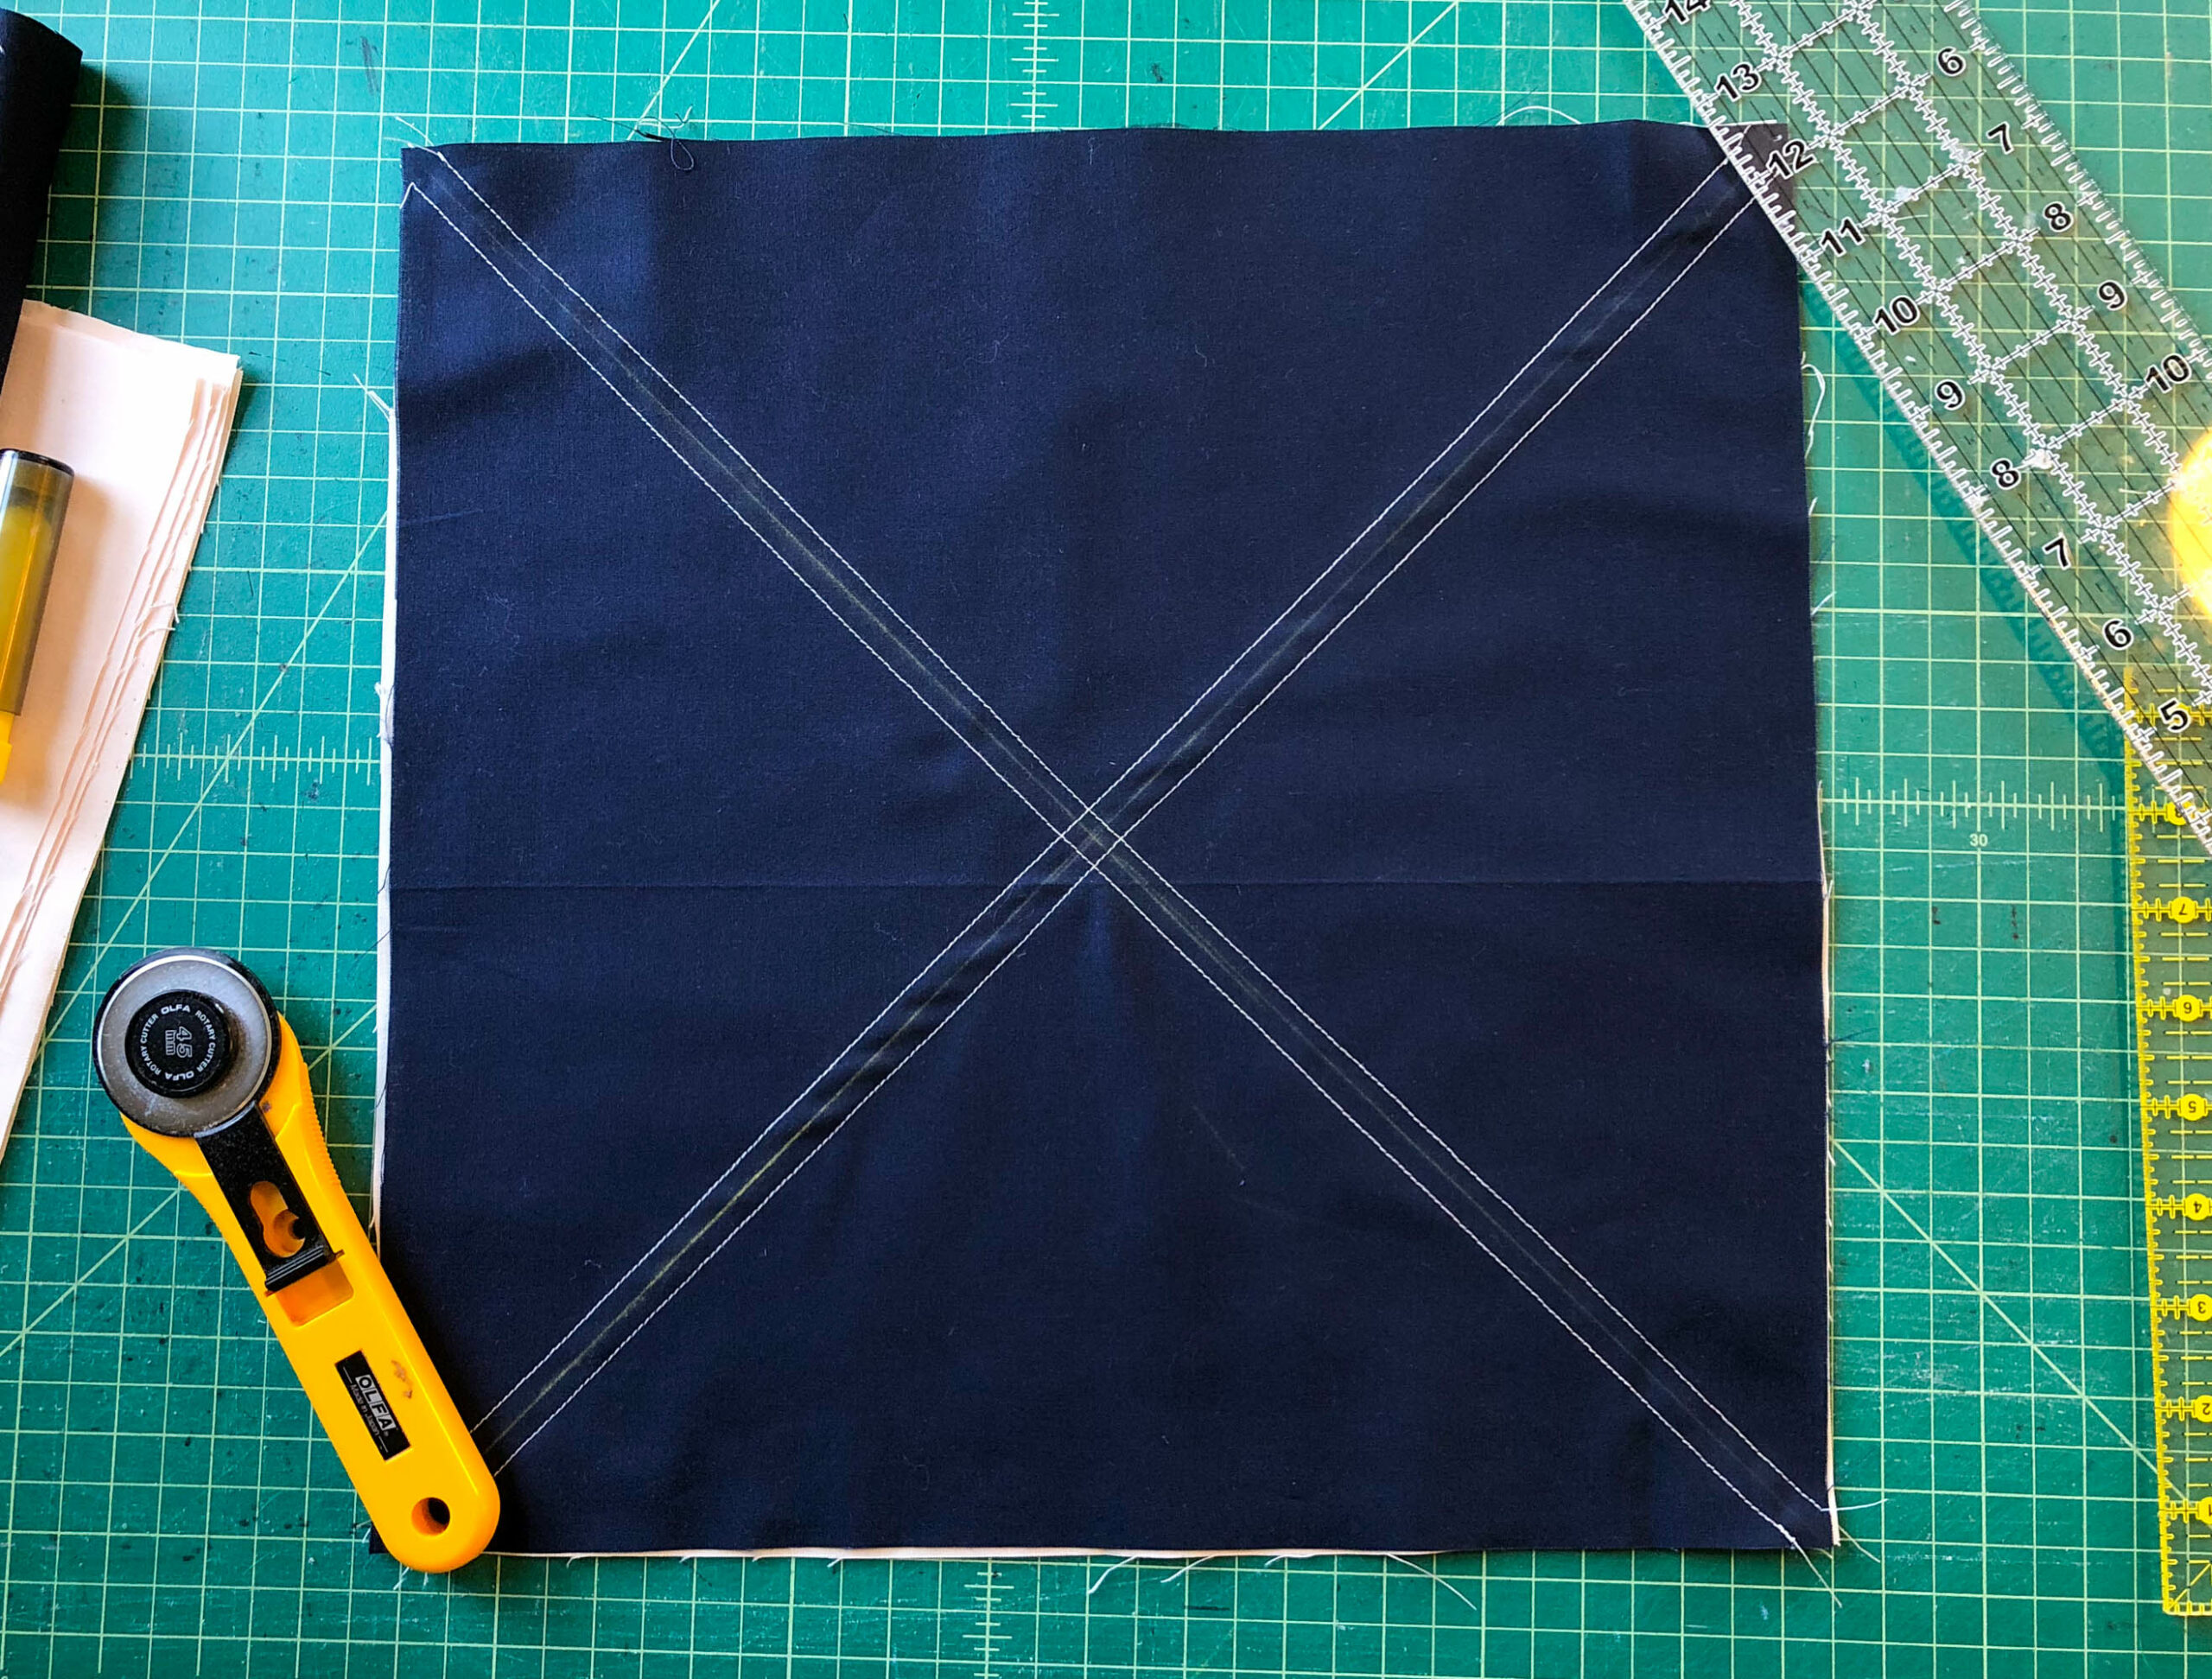
Before starting to sew my Murcot, I drew the quilting lines on the pieces in chalk. Now here was another decision that I agonized over for months: what quilting design to use? I like free-motion quilting and really wanted to do a unique design, but I knew that my very basic sewing machine would struggle as it is with the high-loft batting. So ultimately I decided to use our straight line quilting design, which I think was the right decision in the end.
(And maybe I’ll free-motion the next one—it might be easier with the quilt-as-you-go technique.)
I then sewed up my Murcot following the pattern instructions, and like magic, it’s done!
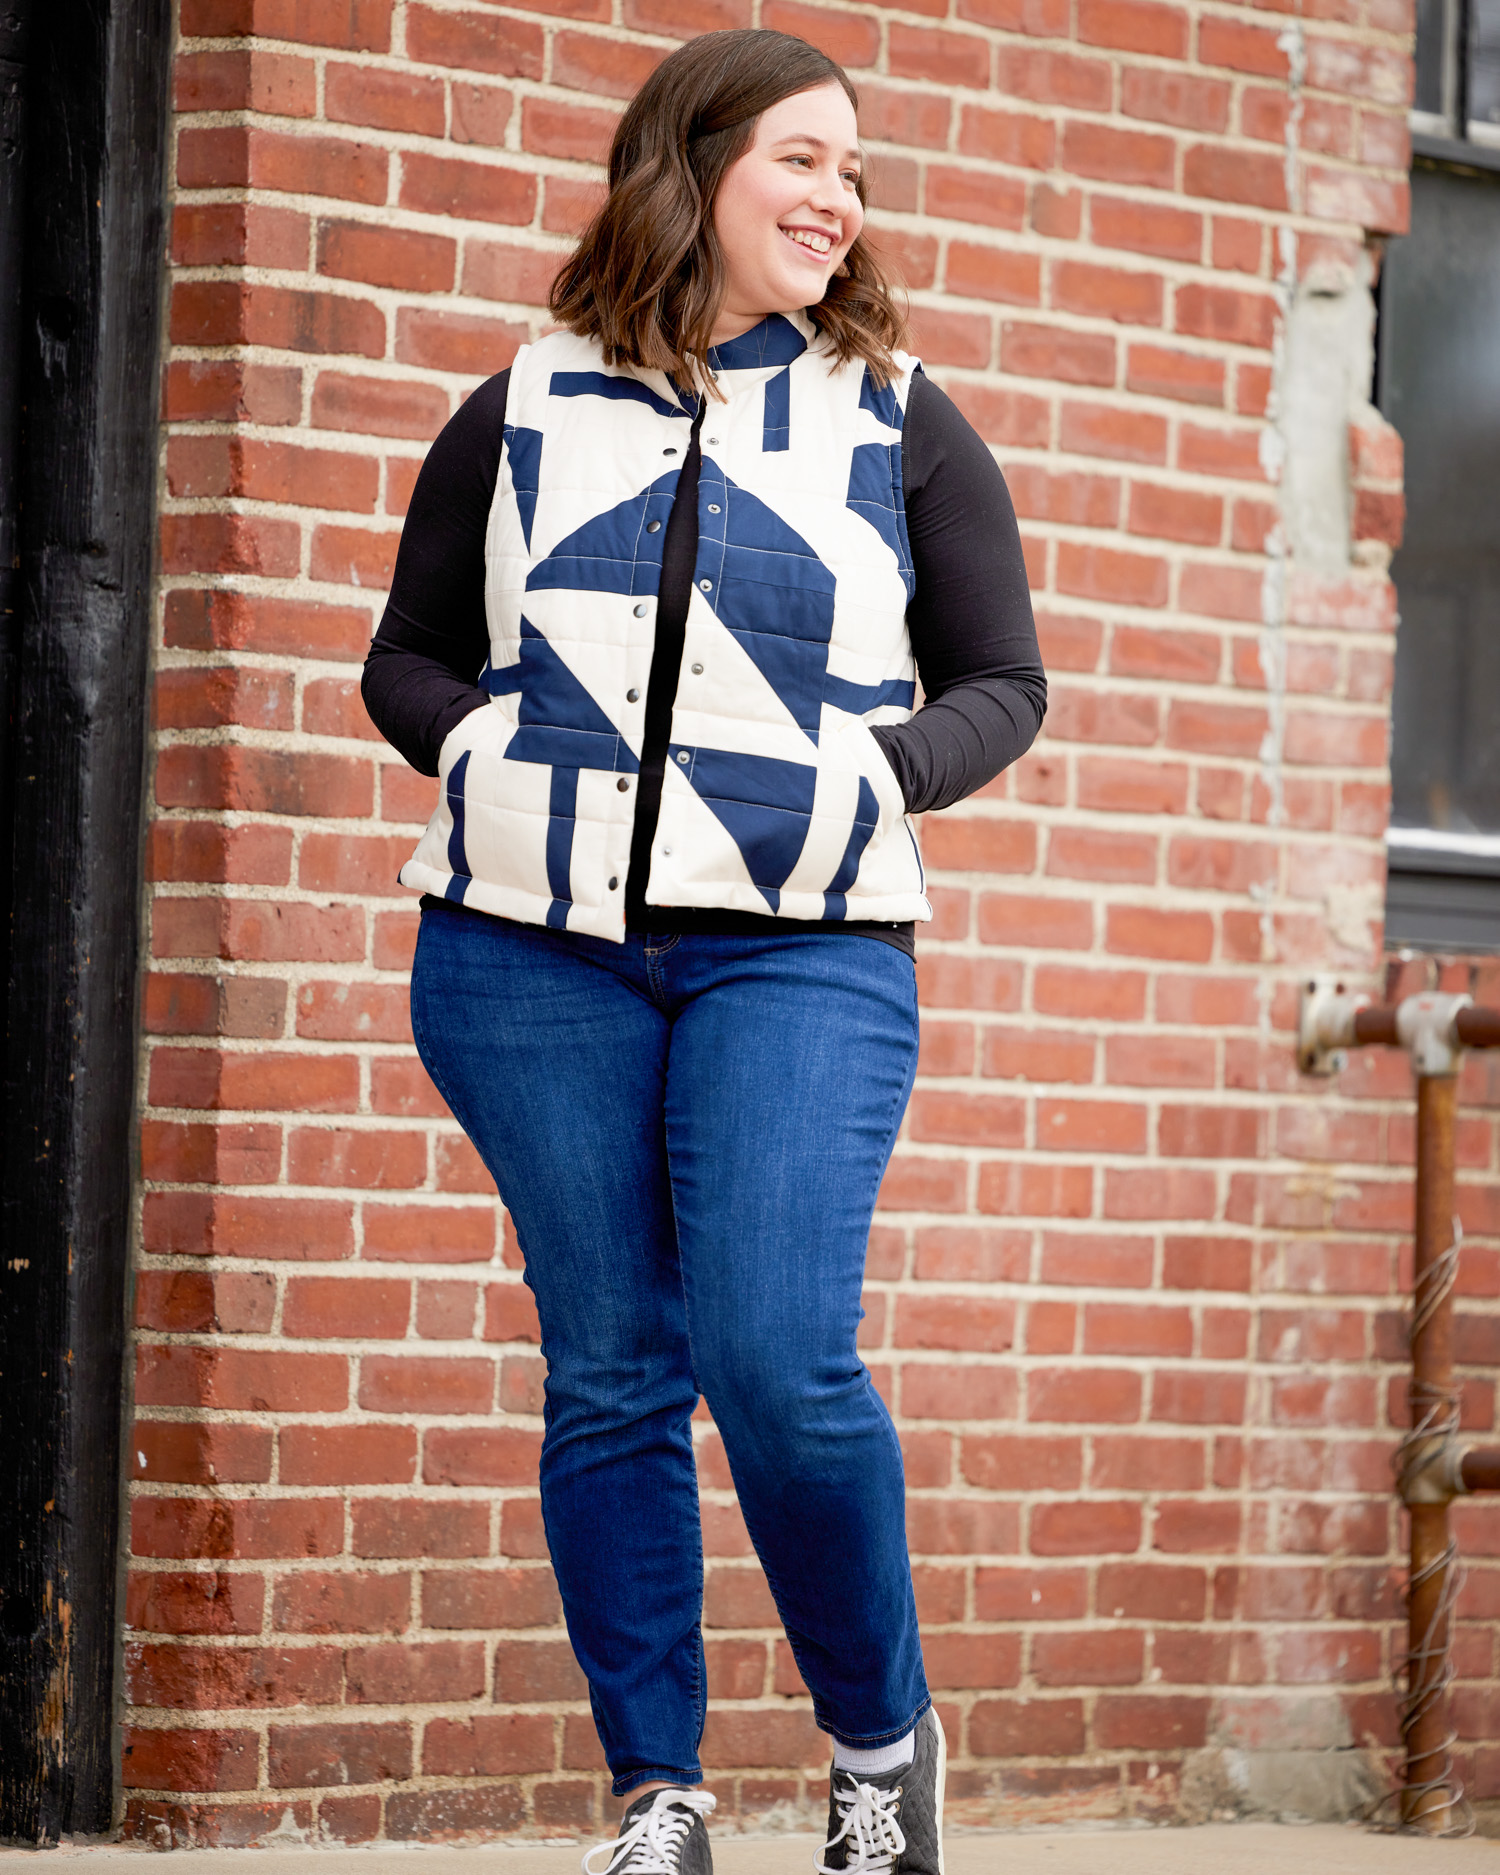
I made a Murcot with size 12 shoulders graded to a size 14 G/H bust and size 16 waist and hips using the 0-16 size range.

What kind of interesting piecing are you planning for your next Murcot? I’m still daydreaming about a foundation paper pieced design, so if you have any suggestions, I’d love to hear them in the comments below.
Want to get the Murcot Puffer Vest pattern? Join Cashmerette Club and get the Murcot for as little as $9 USD during February 2023. After then, you can join at the All Access level to get this pattern.

Love it! As a quilter myself, I think an FPP (Foundation paper pieced) design would be great. I recently made a quilted jacket and my advice from that is that if you’re going to free motion quilt it, do that on each of the panels before you cut out the pattern pieces – you’ll probably find that the pieces will shrink more than with just the straight line quilting and it would be disastrous for it to end up too small. Looking forward to seeing the next version!
Great suggestion, Becky!