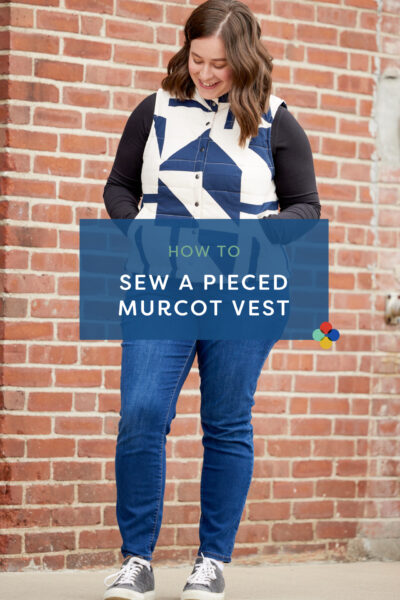
Wondering how to add sleeves to the Murcot Puffer Vest? We’ve got a step-by-step tutorial for adjusting the Murcot pattern to add sleeves.
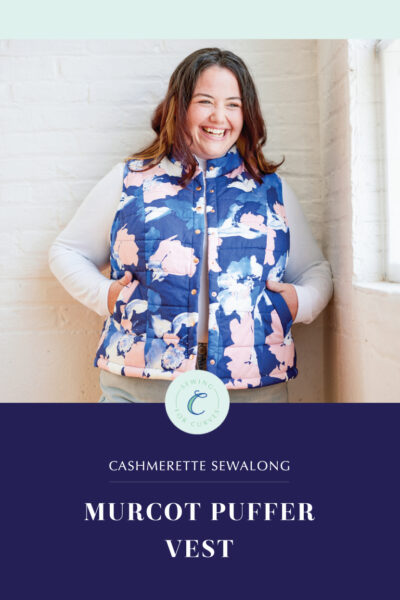
This month’s Cashmerette Club pattern is the Murcot Puffer Vest, a cozy layering piece in sizes 0-32 and cup sizes C-H with shoulder princess seams, standing collar, optional puffy welt pockets, and two quilting templates. (Or get creative and design your own with our worksheet here.)
The Murcot is available exclusively to Cashmerette Club members, and you can join in February and get the Murcot for as little as $9 USD.

What if you want to add sleeves to your vest? Cashmerette’s pattern development lead Jen is here to show you how to add the sleeves of the Kimball Bomber Jacket to the Murcot. The Kimball was our first ever Cashmerette Club pattern, and you can get it plus loads of other patterns and goodies when you join the Club at the All Access level.

Okay, let’s get started!
Step 1: Adjust the Murcot bodice pieces
In order to use the Kimball sleeves with the Murcot bodice, we’ll need to raise the armhole slightly. Vests usually have dropped armholes so the armhole of the Murcot is larger than the armhole of the Kimball.
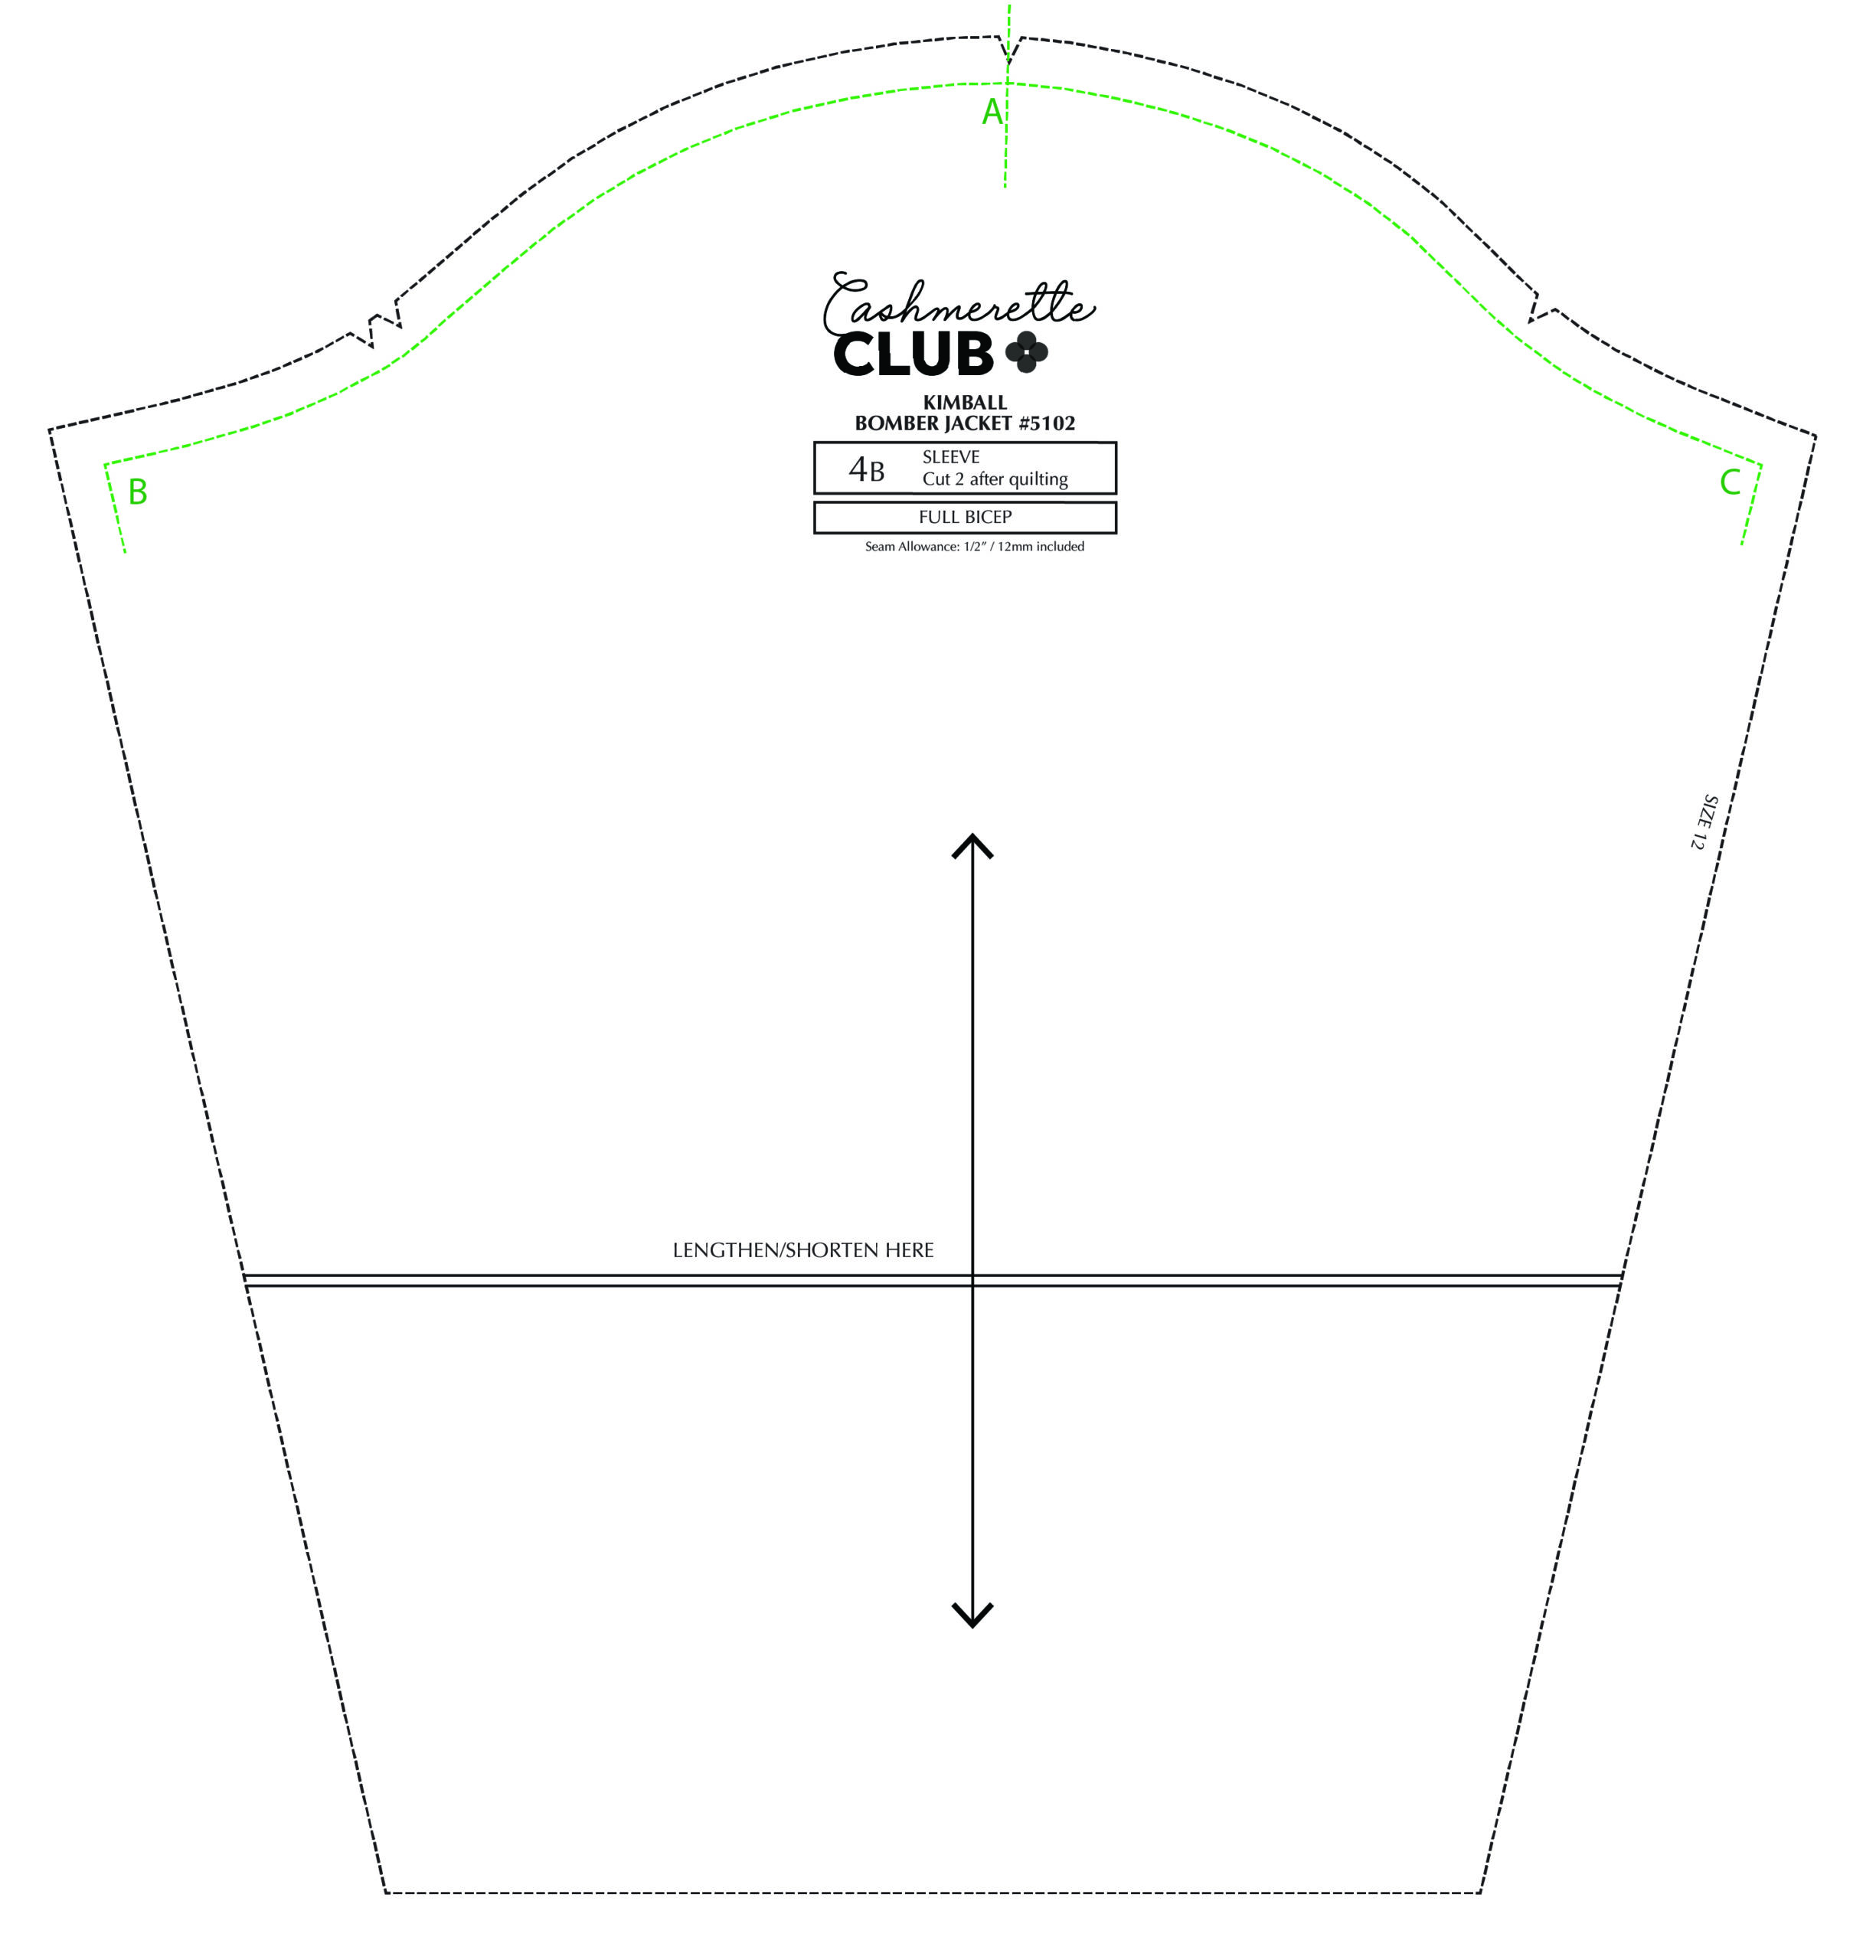
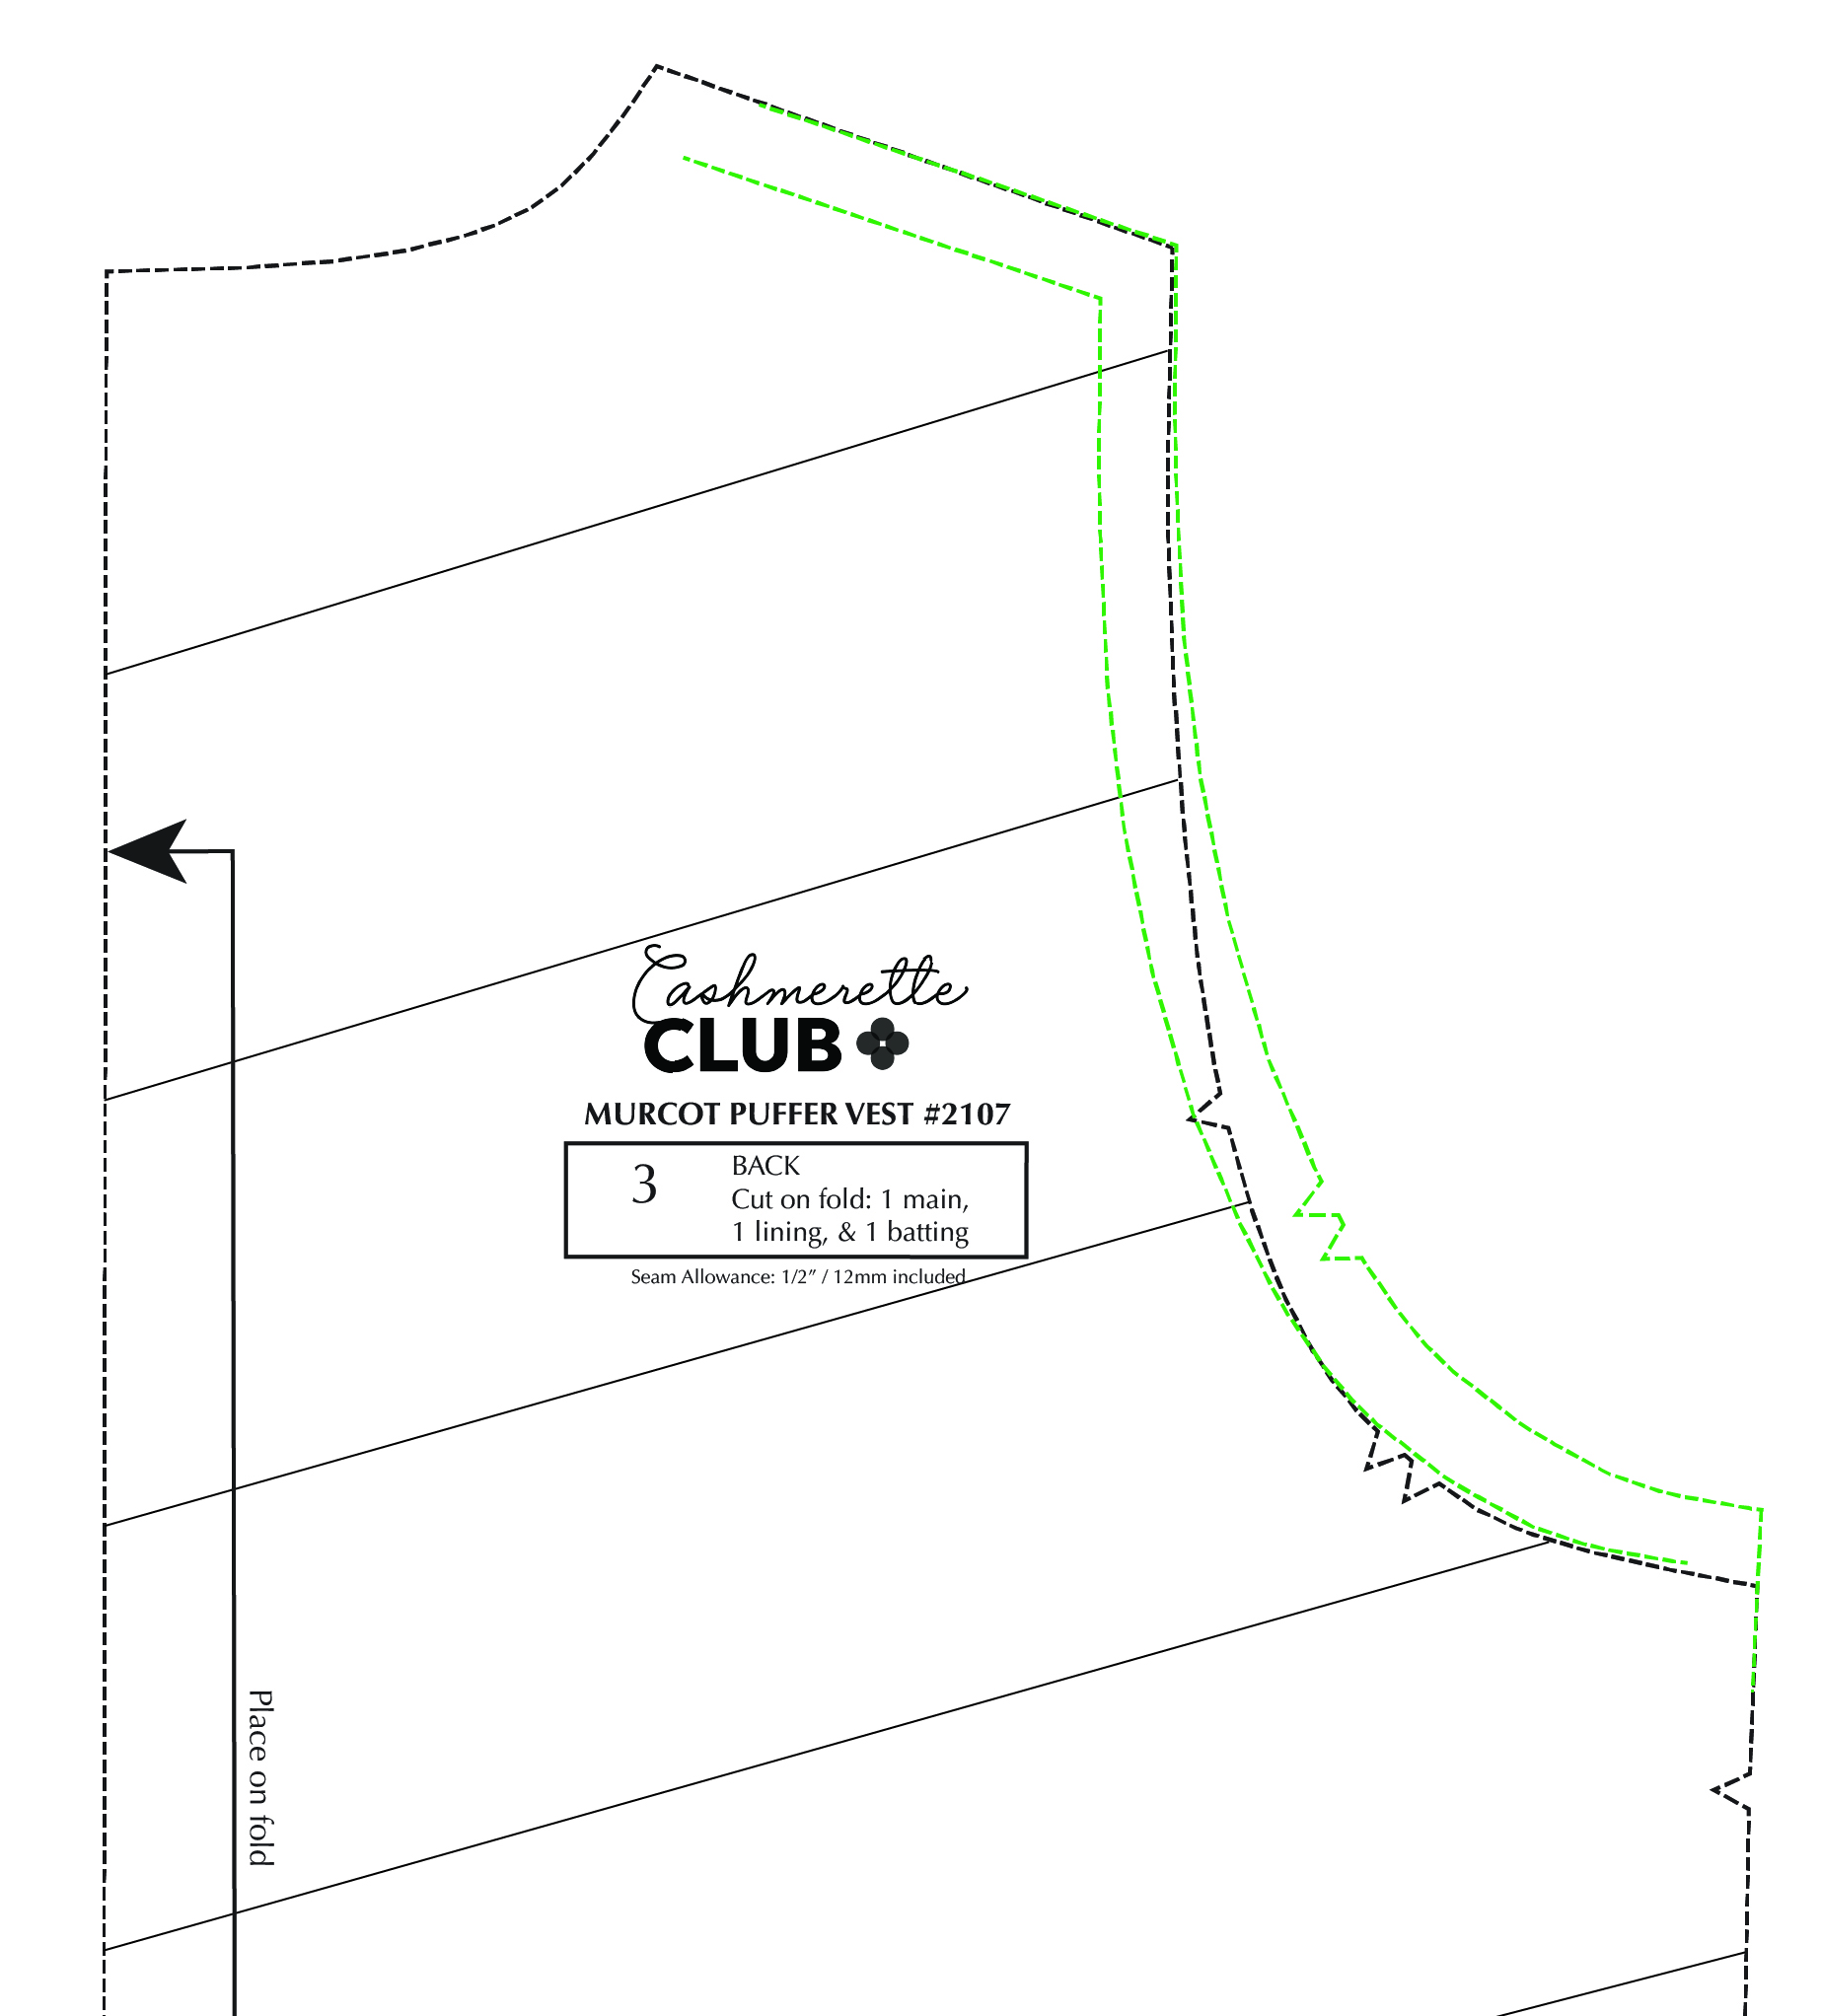
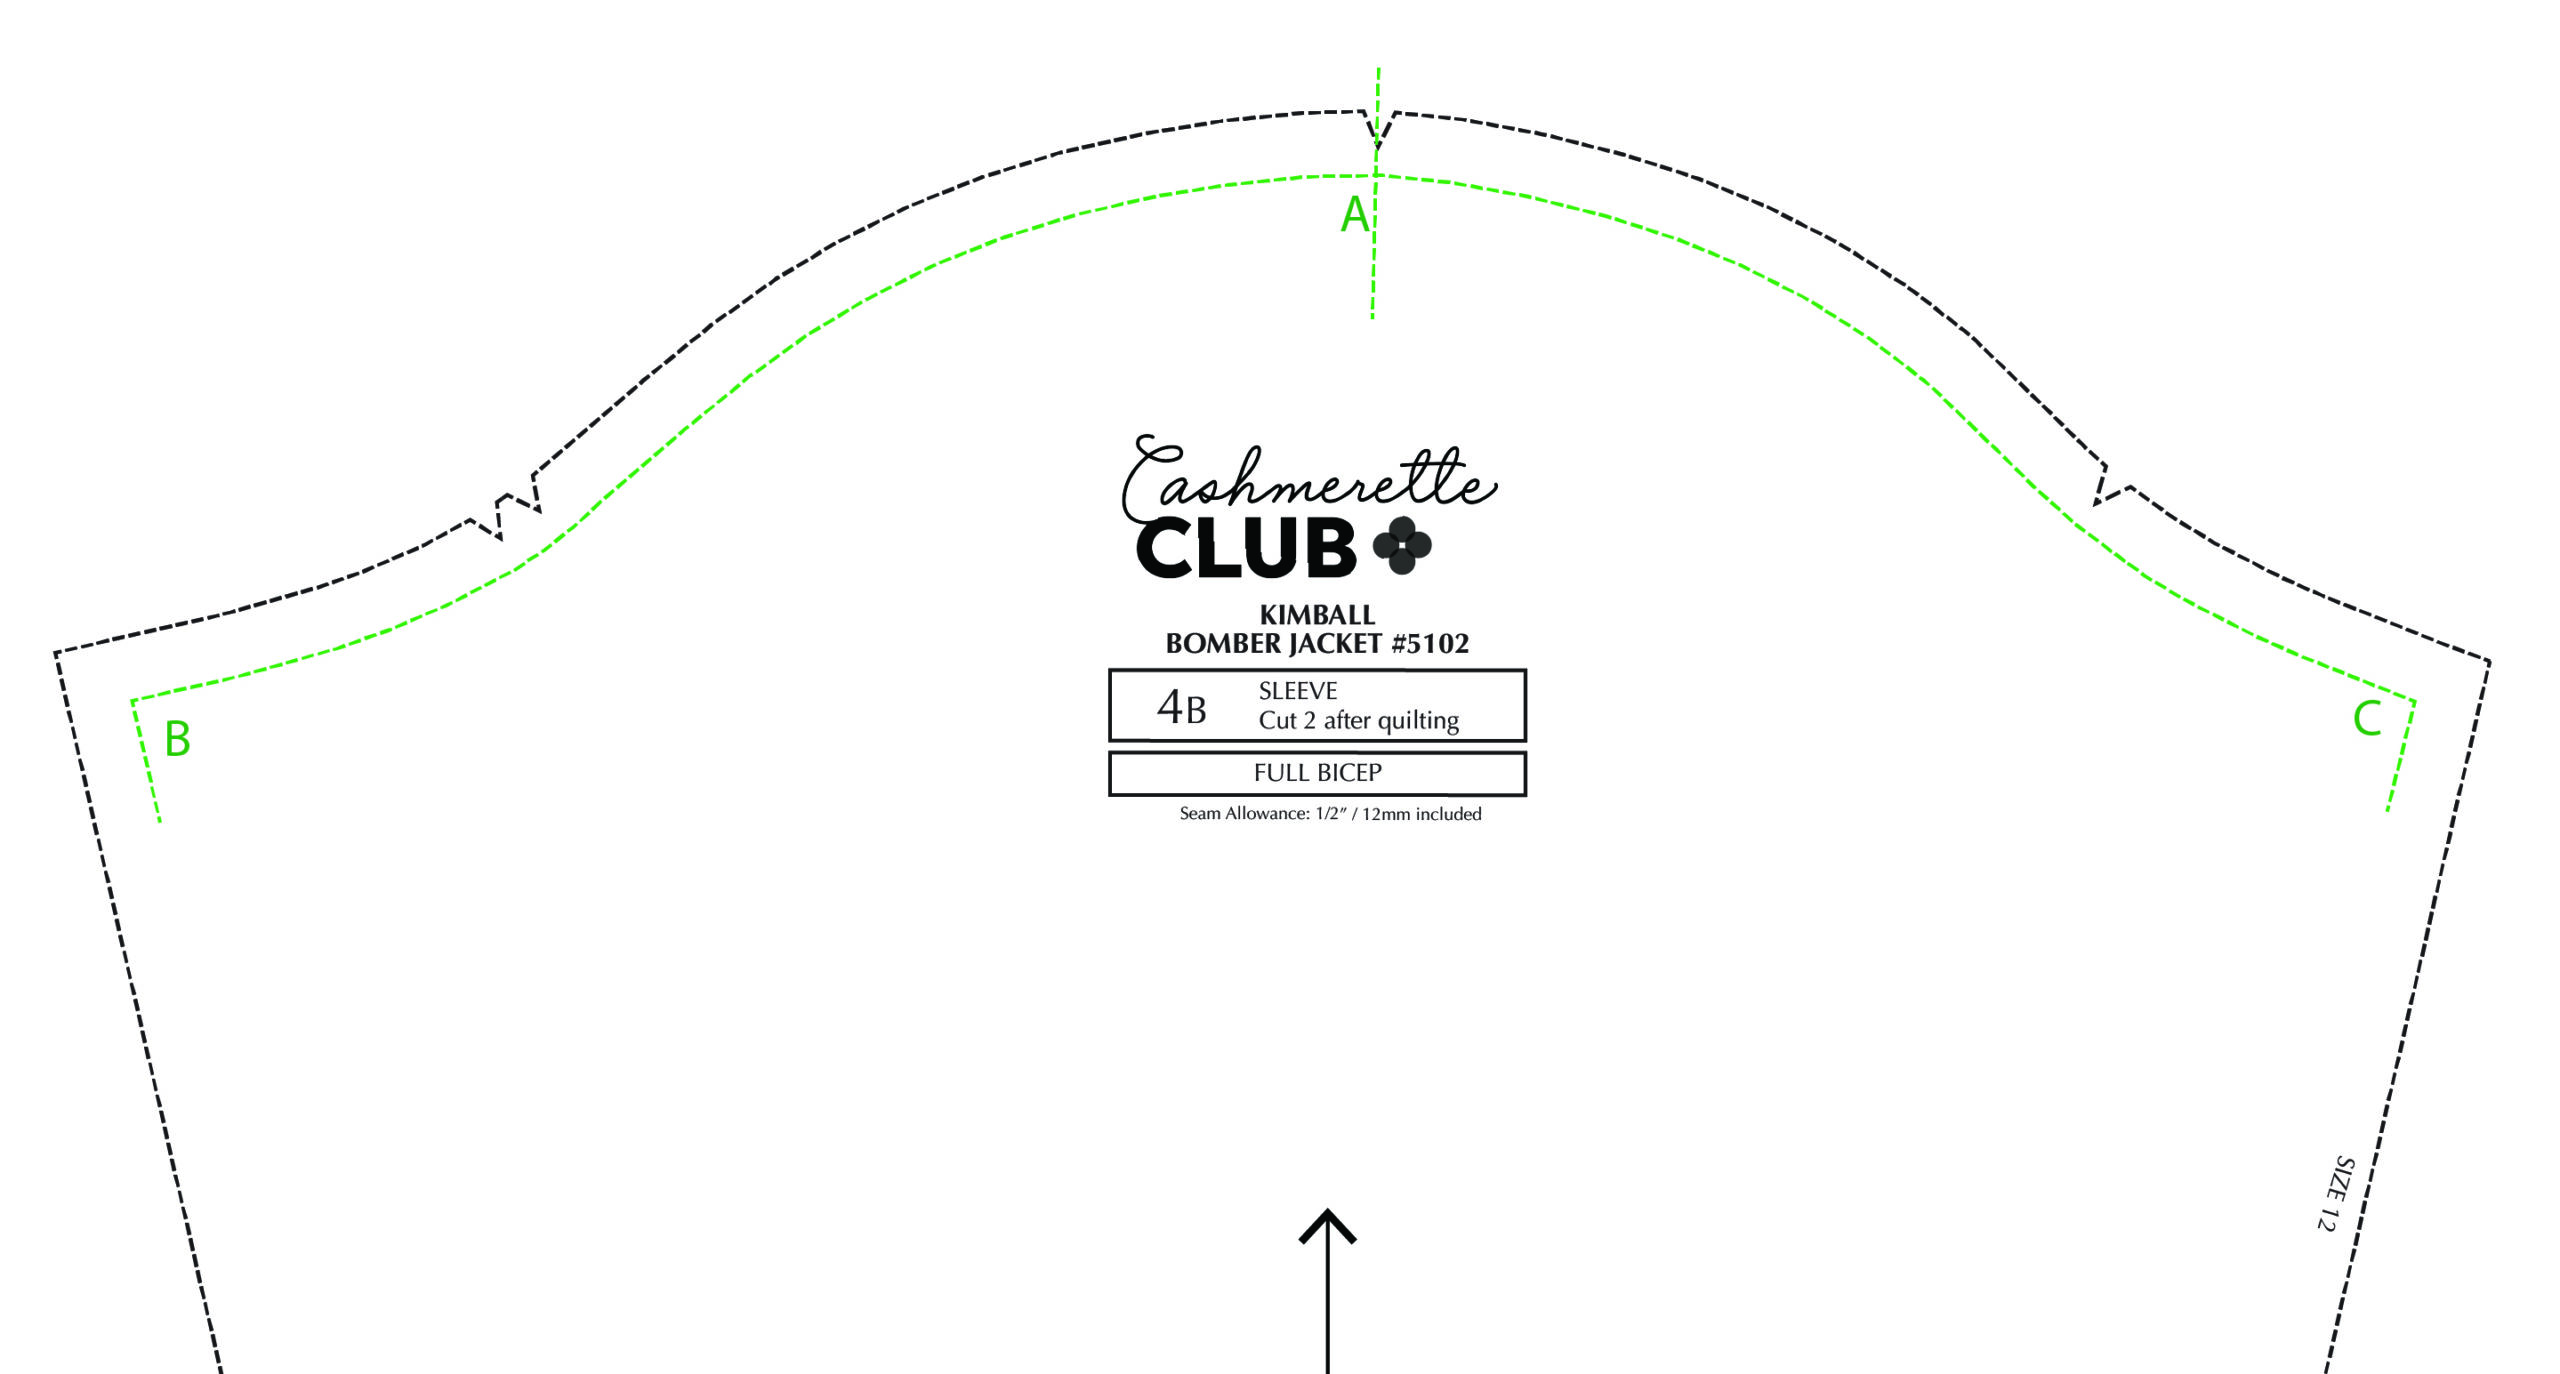
Let’s start on the back bodice piece. To determine the length of the new armhole, draw the seam line on your sleeve piece. This line will be 1/2″ inside the cutting line as shown in green below. Then take a measuring tape or flexible ruler and measure from the shoulder notch A down to the seam line at B, stopping at the seam allowance.
Next, draw the seam lines on the back piece of your Murcot (shown in red below) and extend the side seam upward by 1-2″.
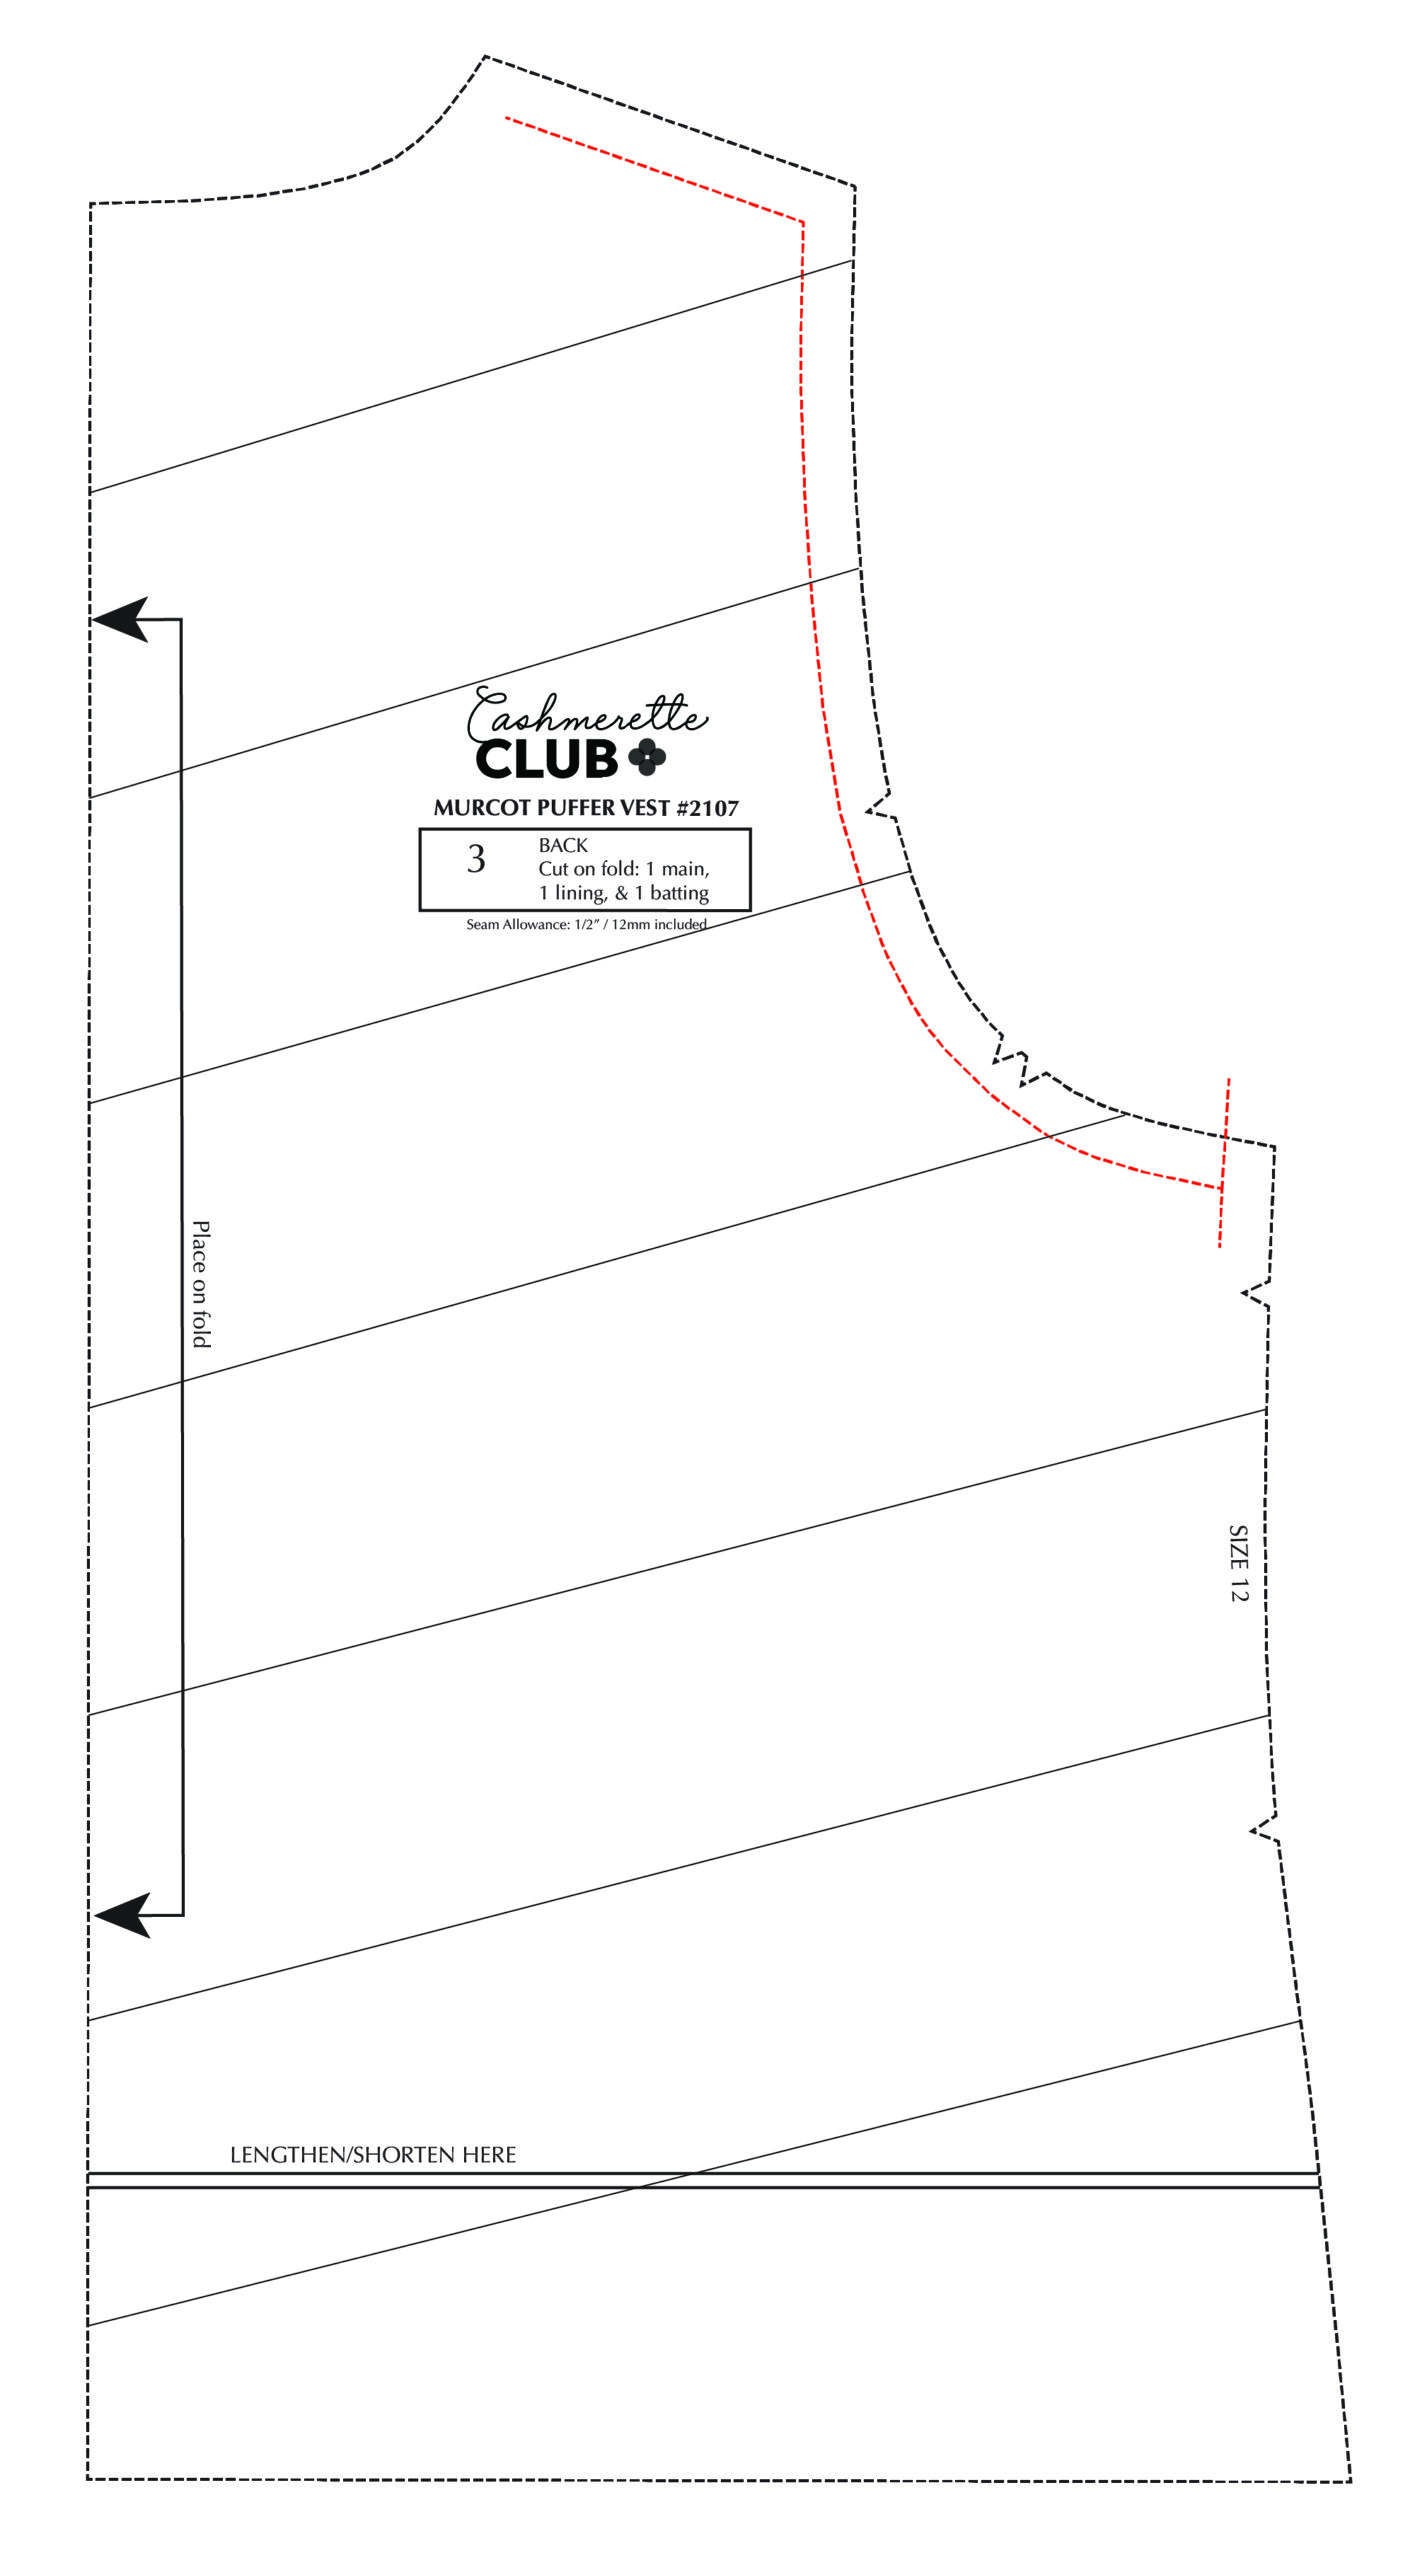
If you’ve cut your pattern piece right up to the edge, add some paper along the armhole—we’ll need that in a moment.
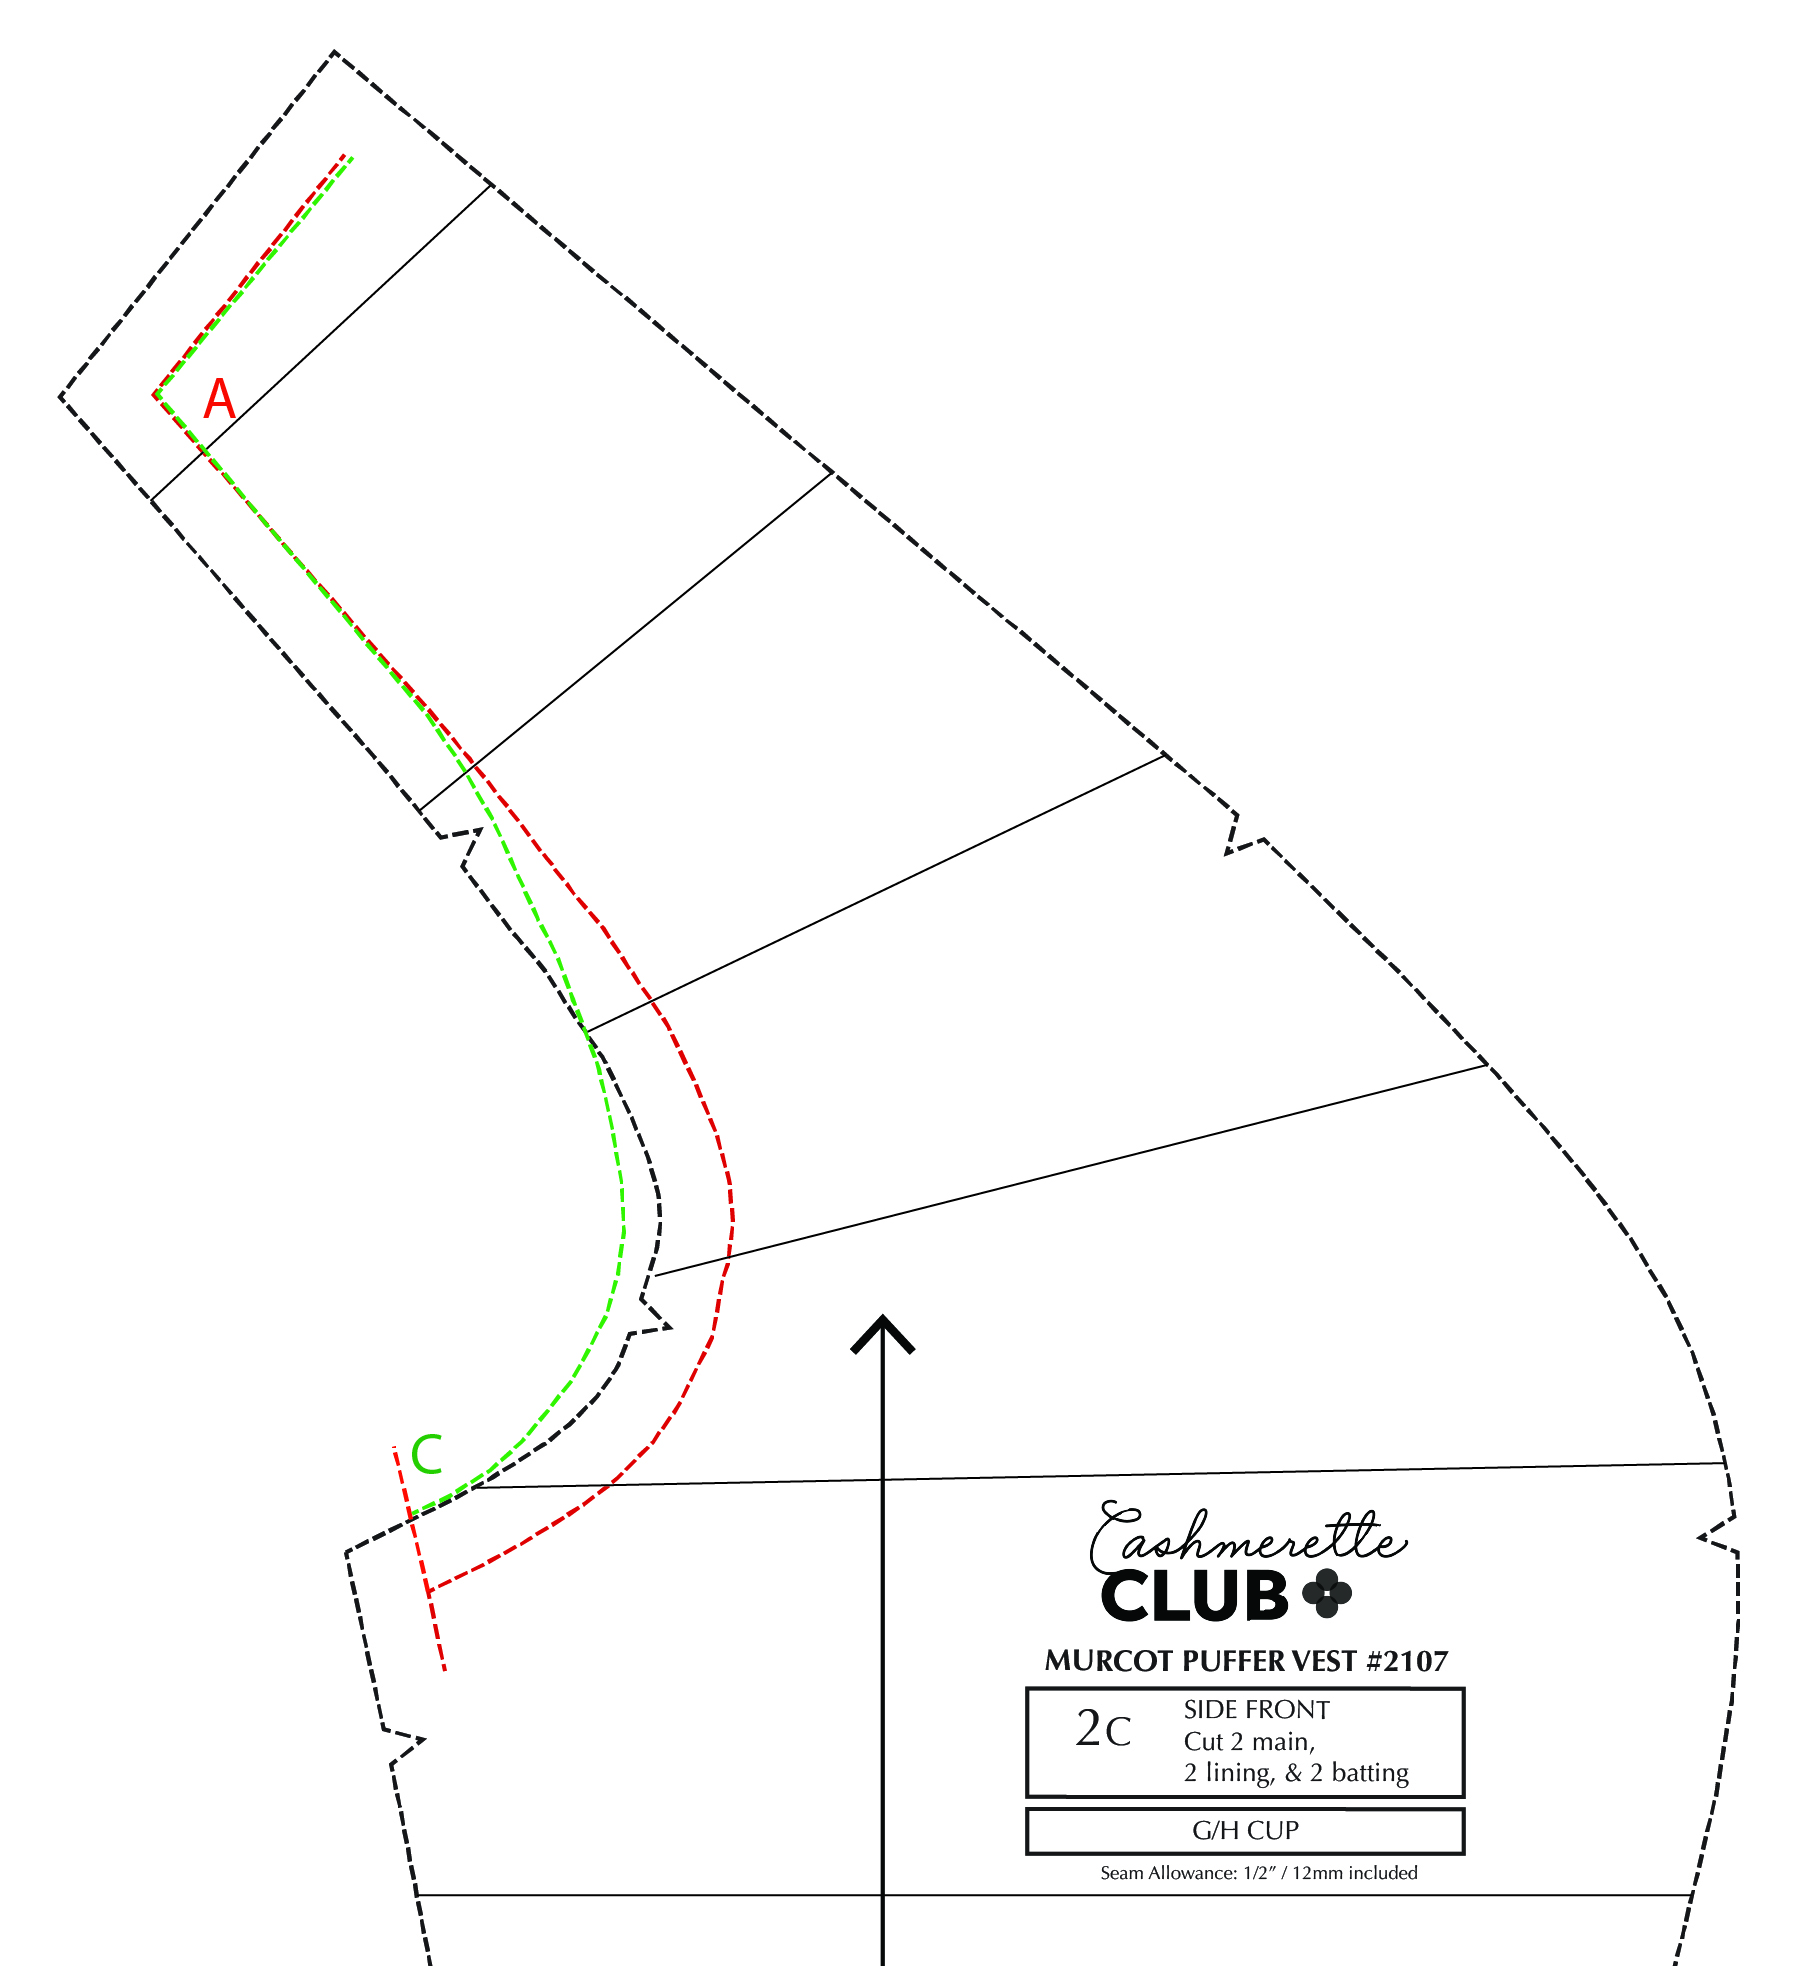
Next we’re going to place the measuring tape or flexible ruler with one end of the measurement from the Kimball sleeve at the seam line of the top of the shoulder (A). Keeping that end in place, we’re going to manipulate the ruler until the zero end lines up with the extended side seam (B).
Try to maintain the same curve of the armhole as much as possible. It should look like this where the red line is the original seam line and the green line is the new seam line.
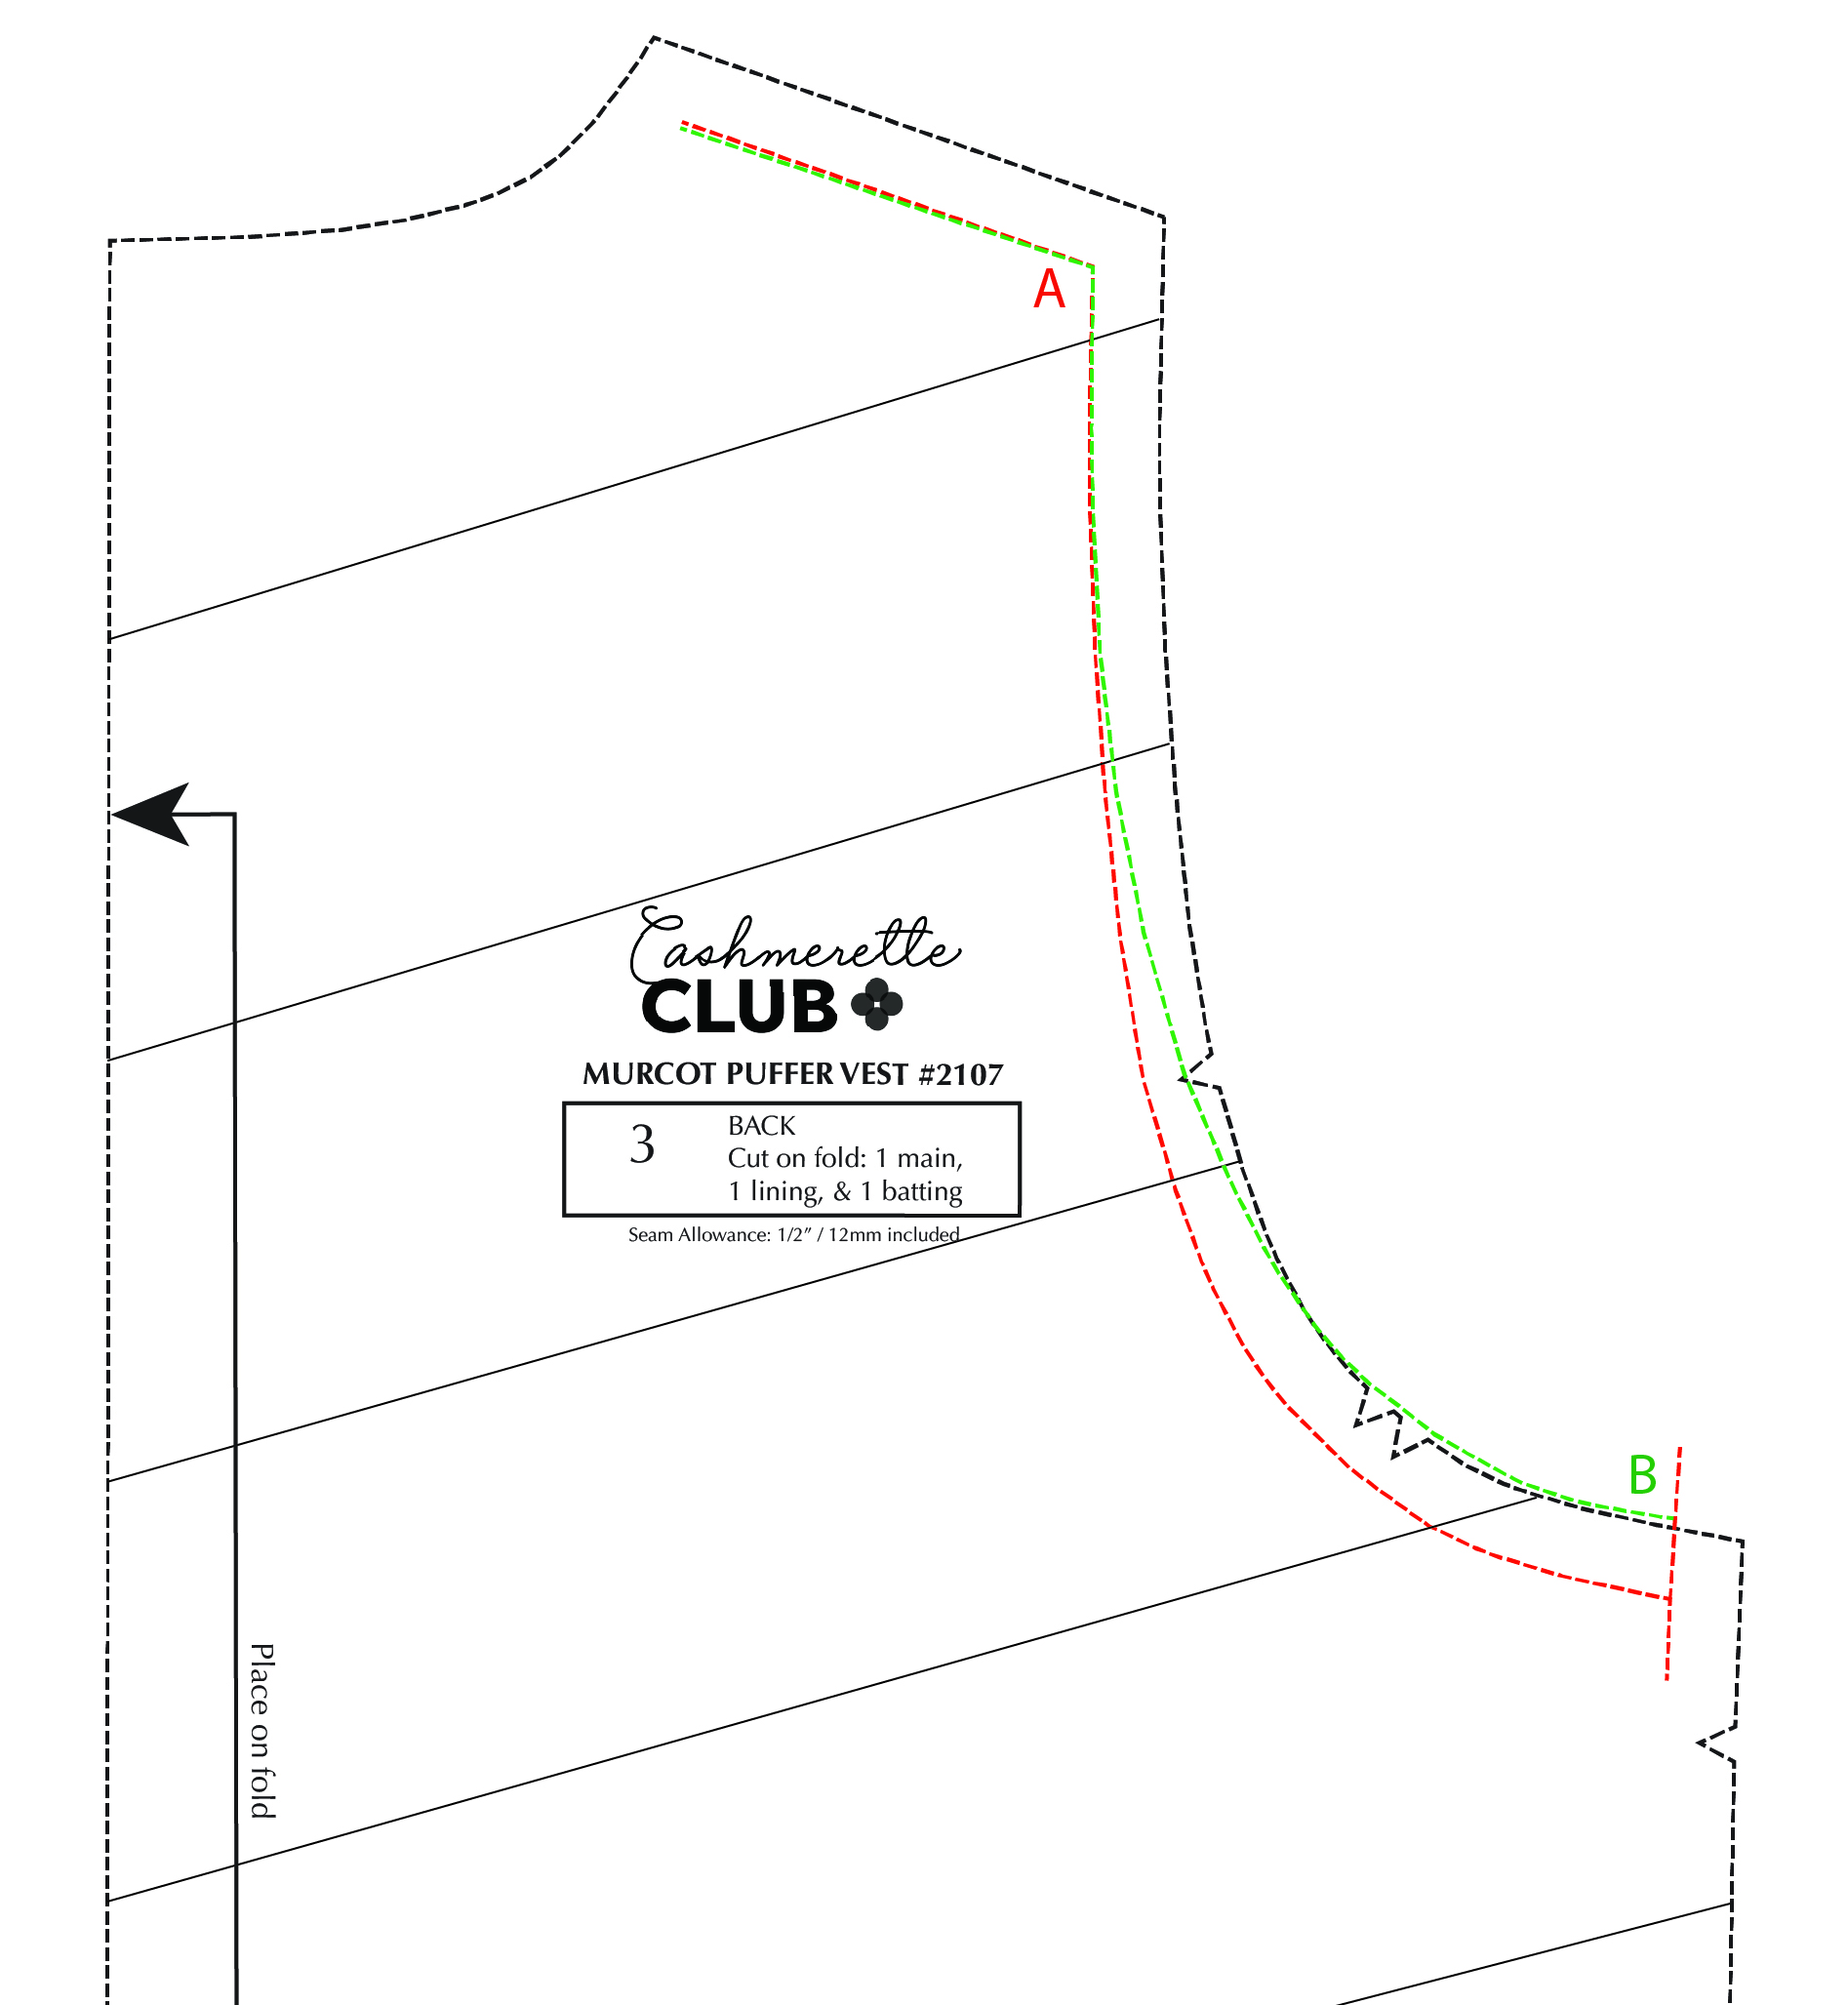
Now we need to add the seam allowance back to this new seam line and transfer the notches from the Kimball sleeve by measuring up from the side seam.
We’re going to repeat the same steps with the front portion of the sleeve and the front side bodice of the vest.
Measure the Kimball sleeve seam line from point A to point C.
Mark your seam line on your front pattern piece and extend the side seam upward.

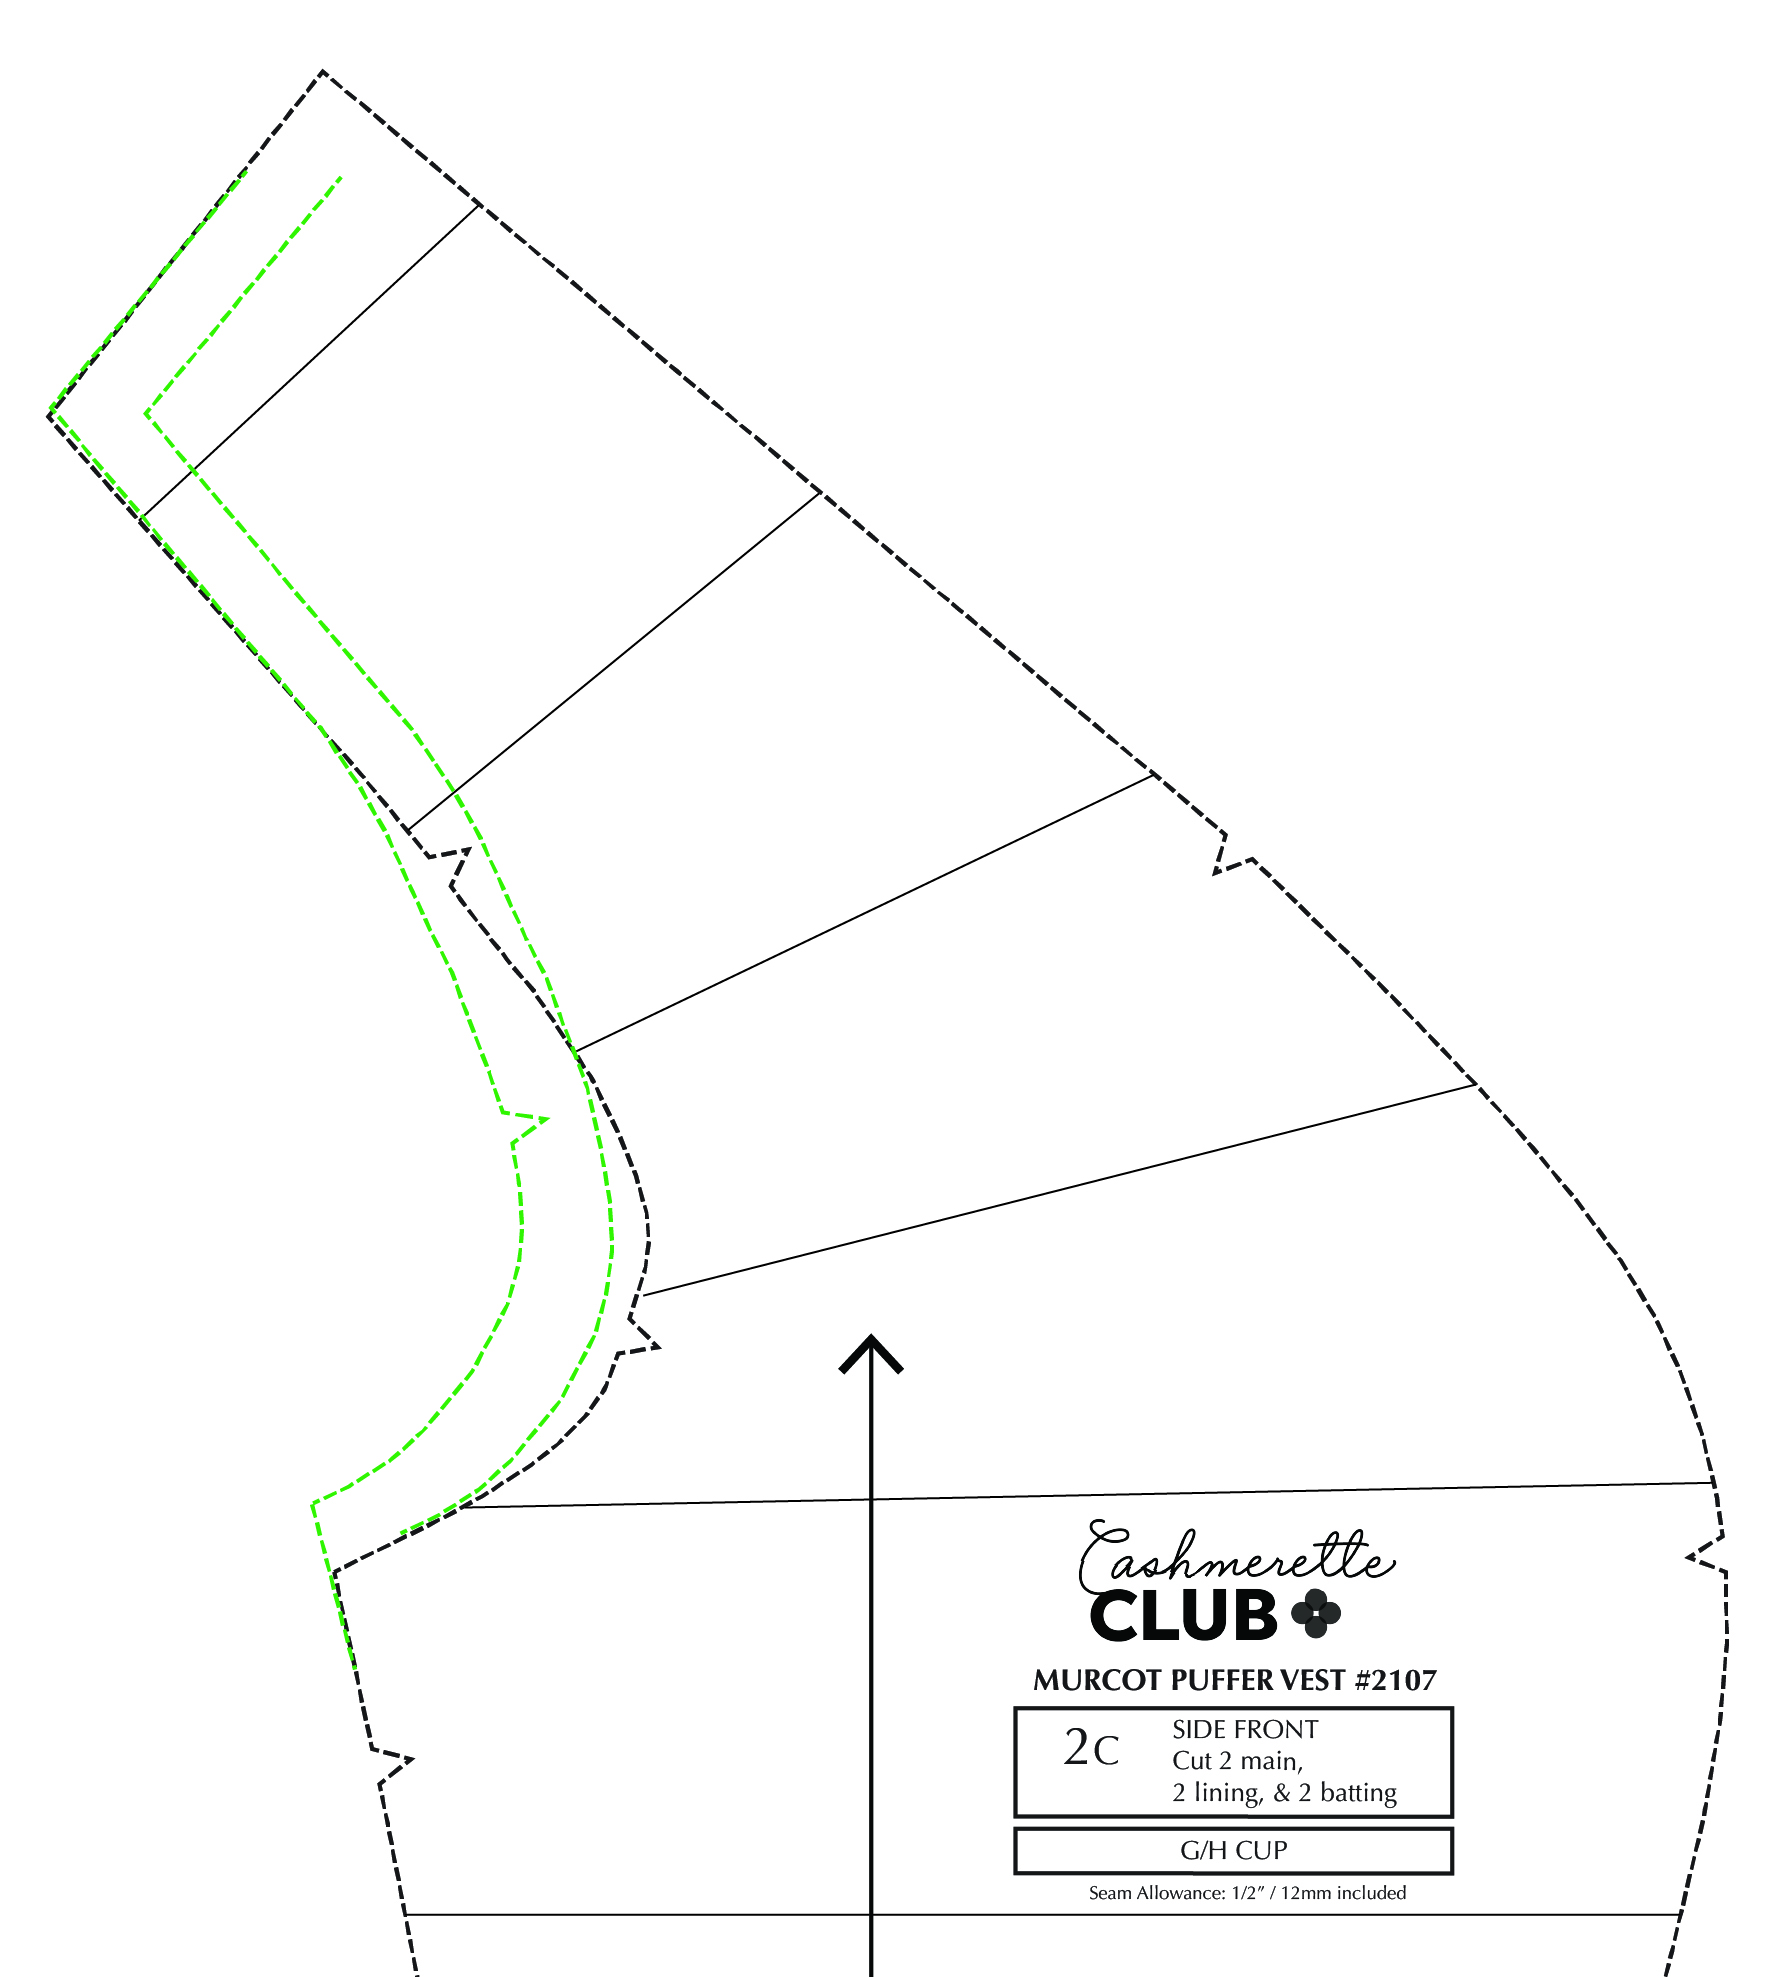
Transfer the new seam line onto the Murcot armhole as shown in green.
And add seam allowance and new notch.
And that’s it for the bodice! This technique will work with both the standard or the full bicep sleeve of the Kimball Bomber Jacket.
Step 2: Adjust the Kimball sleeve
The Kimball’s sleeves are designed to be finished with ribbing at the cuffs. If you want to stick with this look, you don’t need to make any adjustments to the Kimball sleeves—you’re good to go! But if you want to omit the cuff, you’ll need to lengthen the sleeve.
The Kimball’s cuffs add 3″ of length to the sleeve, so if you want to do without them, cut the sleeve piece at the lengthen/shorten line and spread it out by at least 3″. (You may prefer to add even more length—compare with a sleeve you like to determine how much to add).
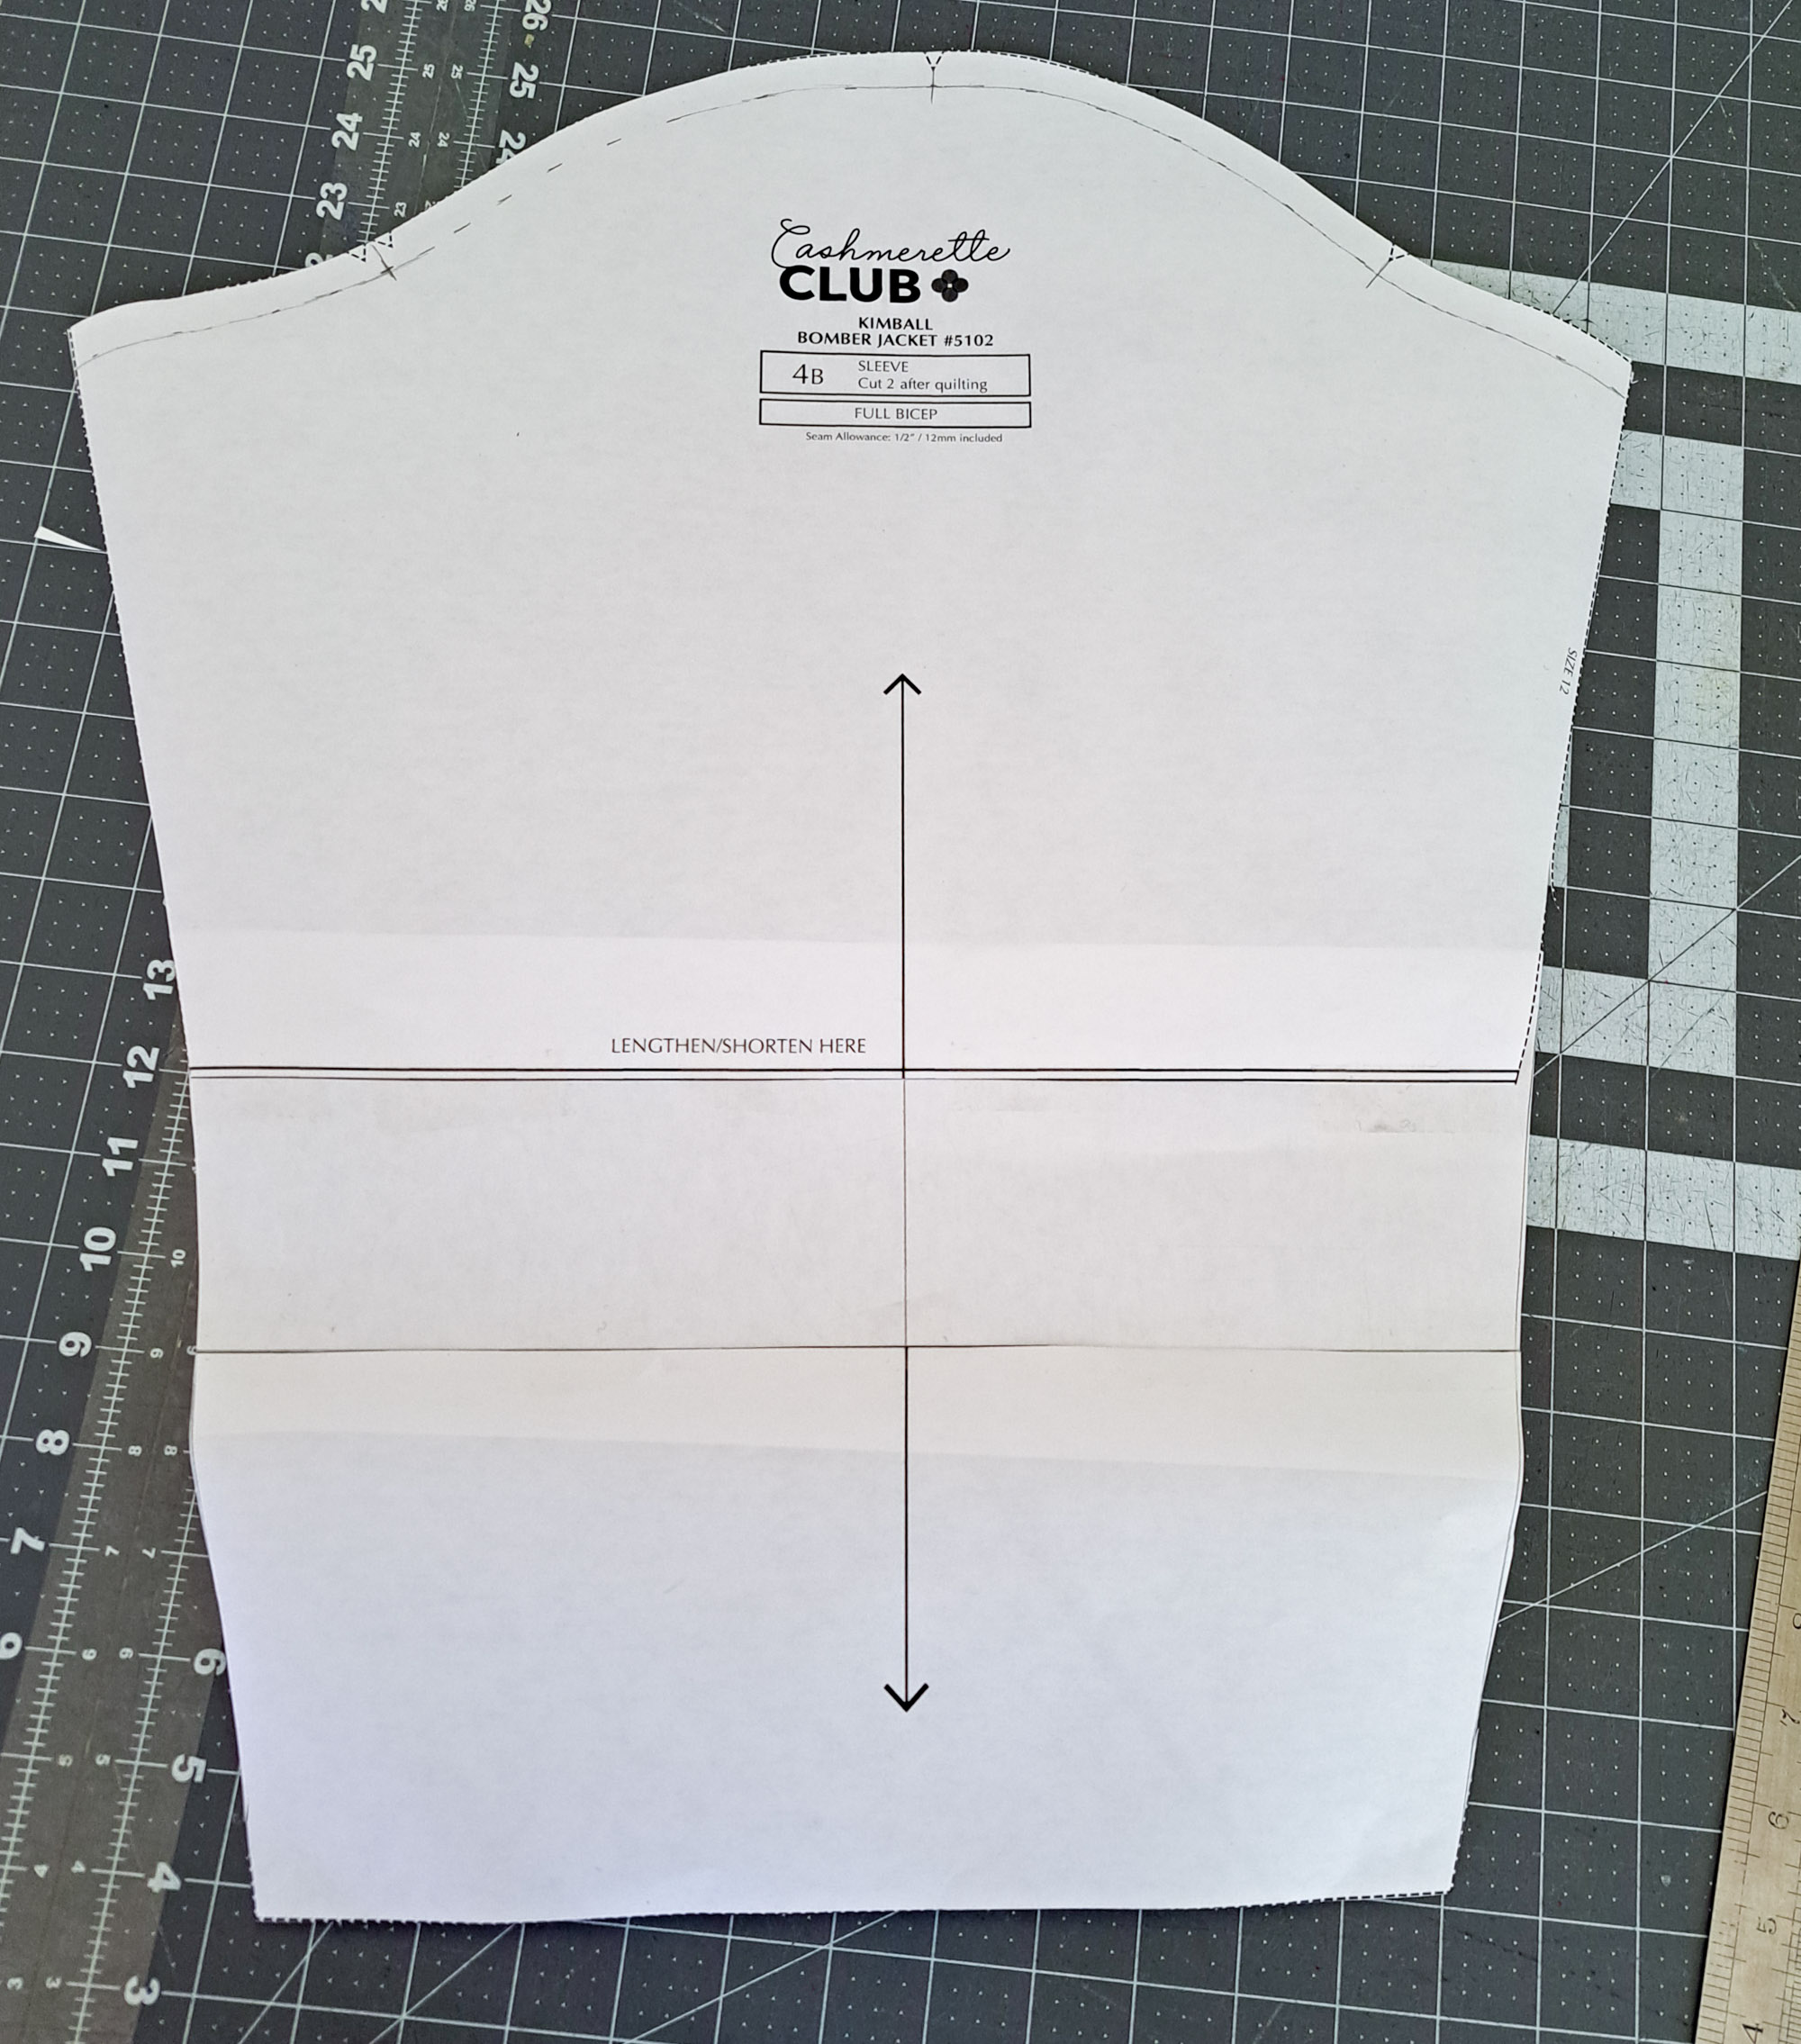
You may end up with angles along the side seam edge of the sleeve, so straighten that out by drawing a straight line from the top edge of the sleeve’s side seam to the wrist edge.
Your sleeve piece is ready to go, and now the sewing begins!
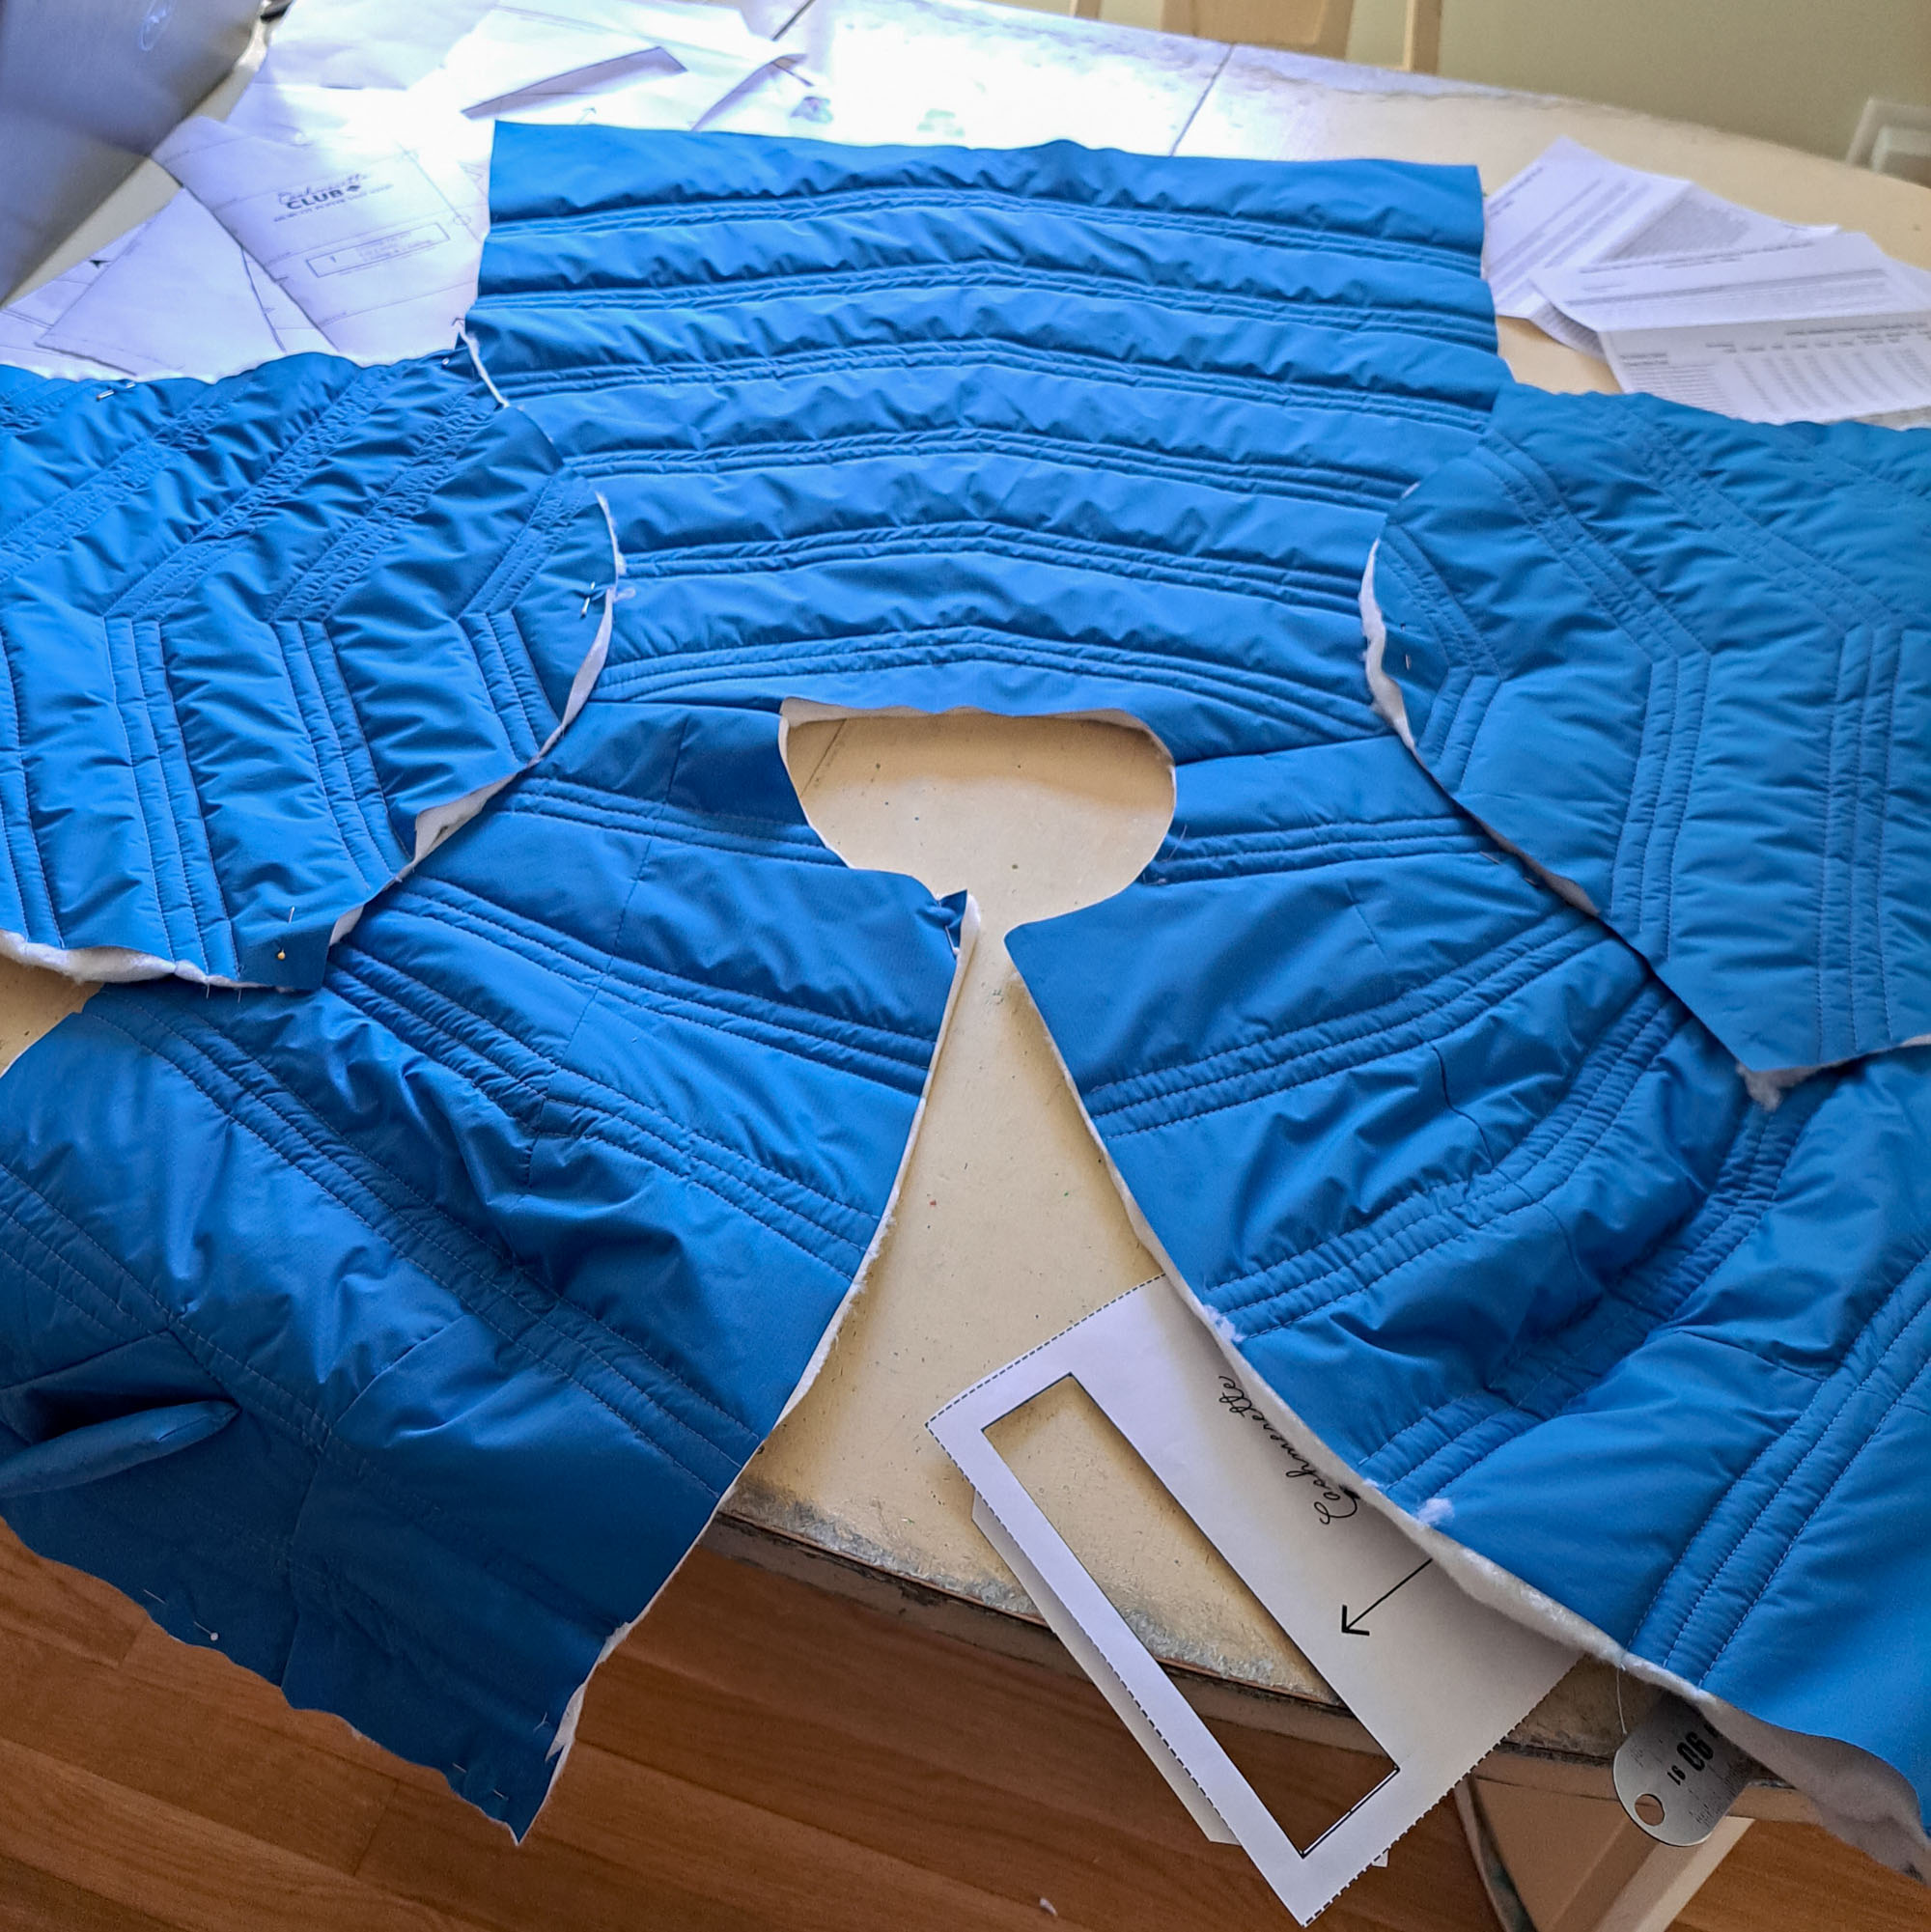
Step 3: Sew it up!
Start by cutting out all fabric, lining, and batting according to the Murcot’s instructions, with the exception of:
- Do not cut the armhole binding (piece 8)
- Cut 2 modified Kimball sleeves from the main fabric, lining, and batting
We’ll need to adjust the construction of the Murcot slightly to accommodate the sleeves. Here’s the new construction order:
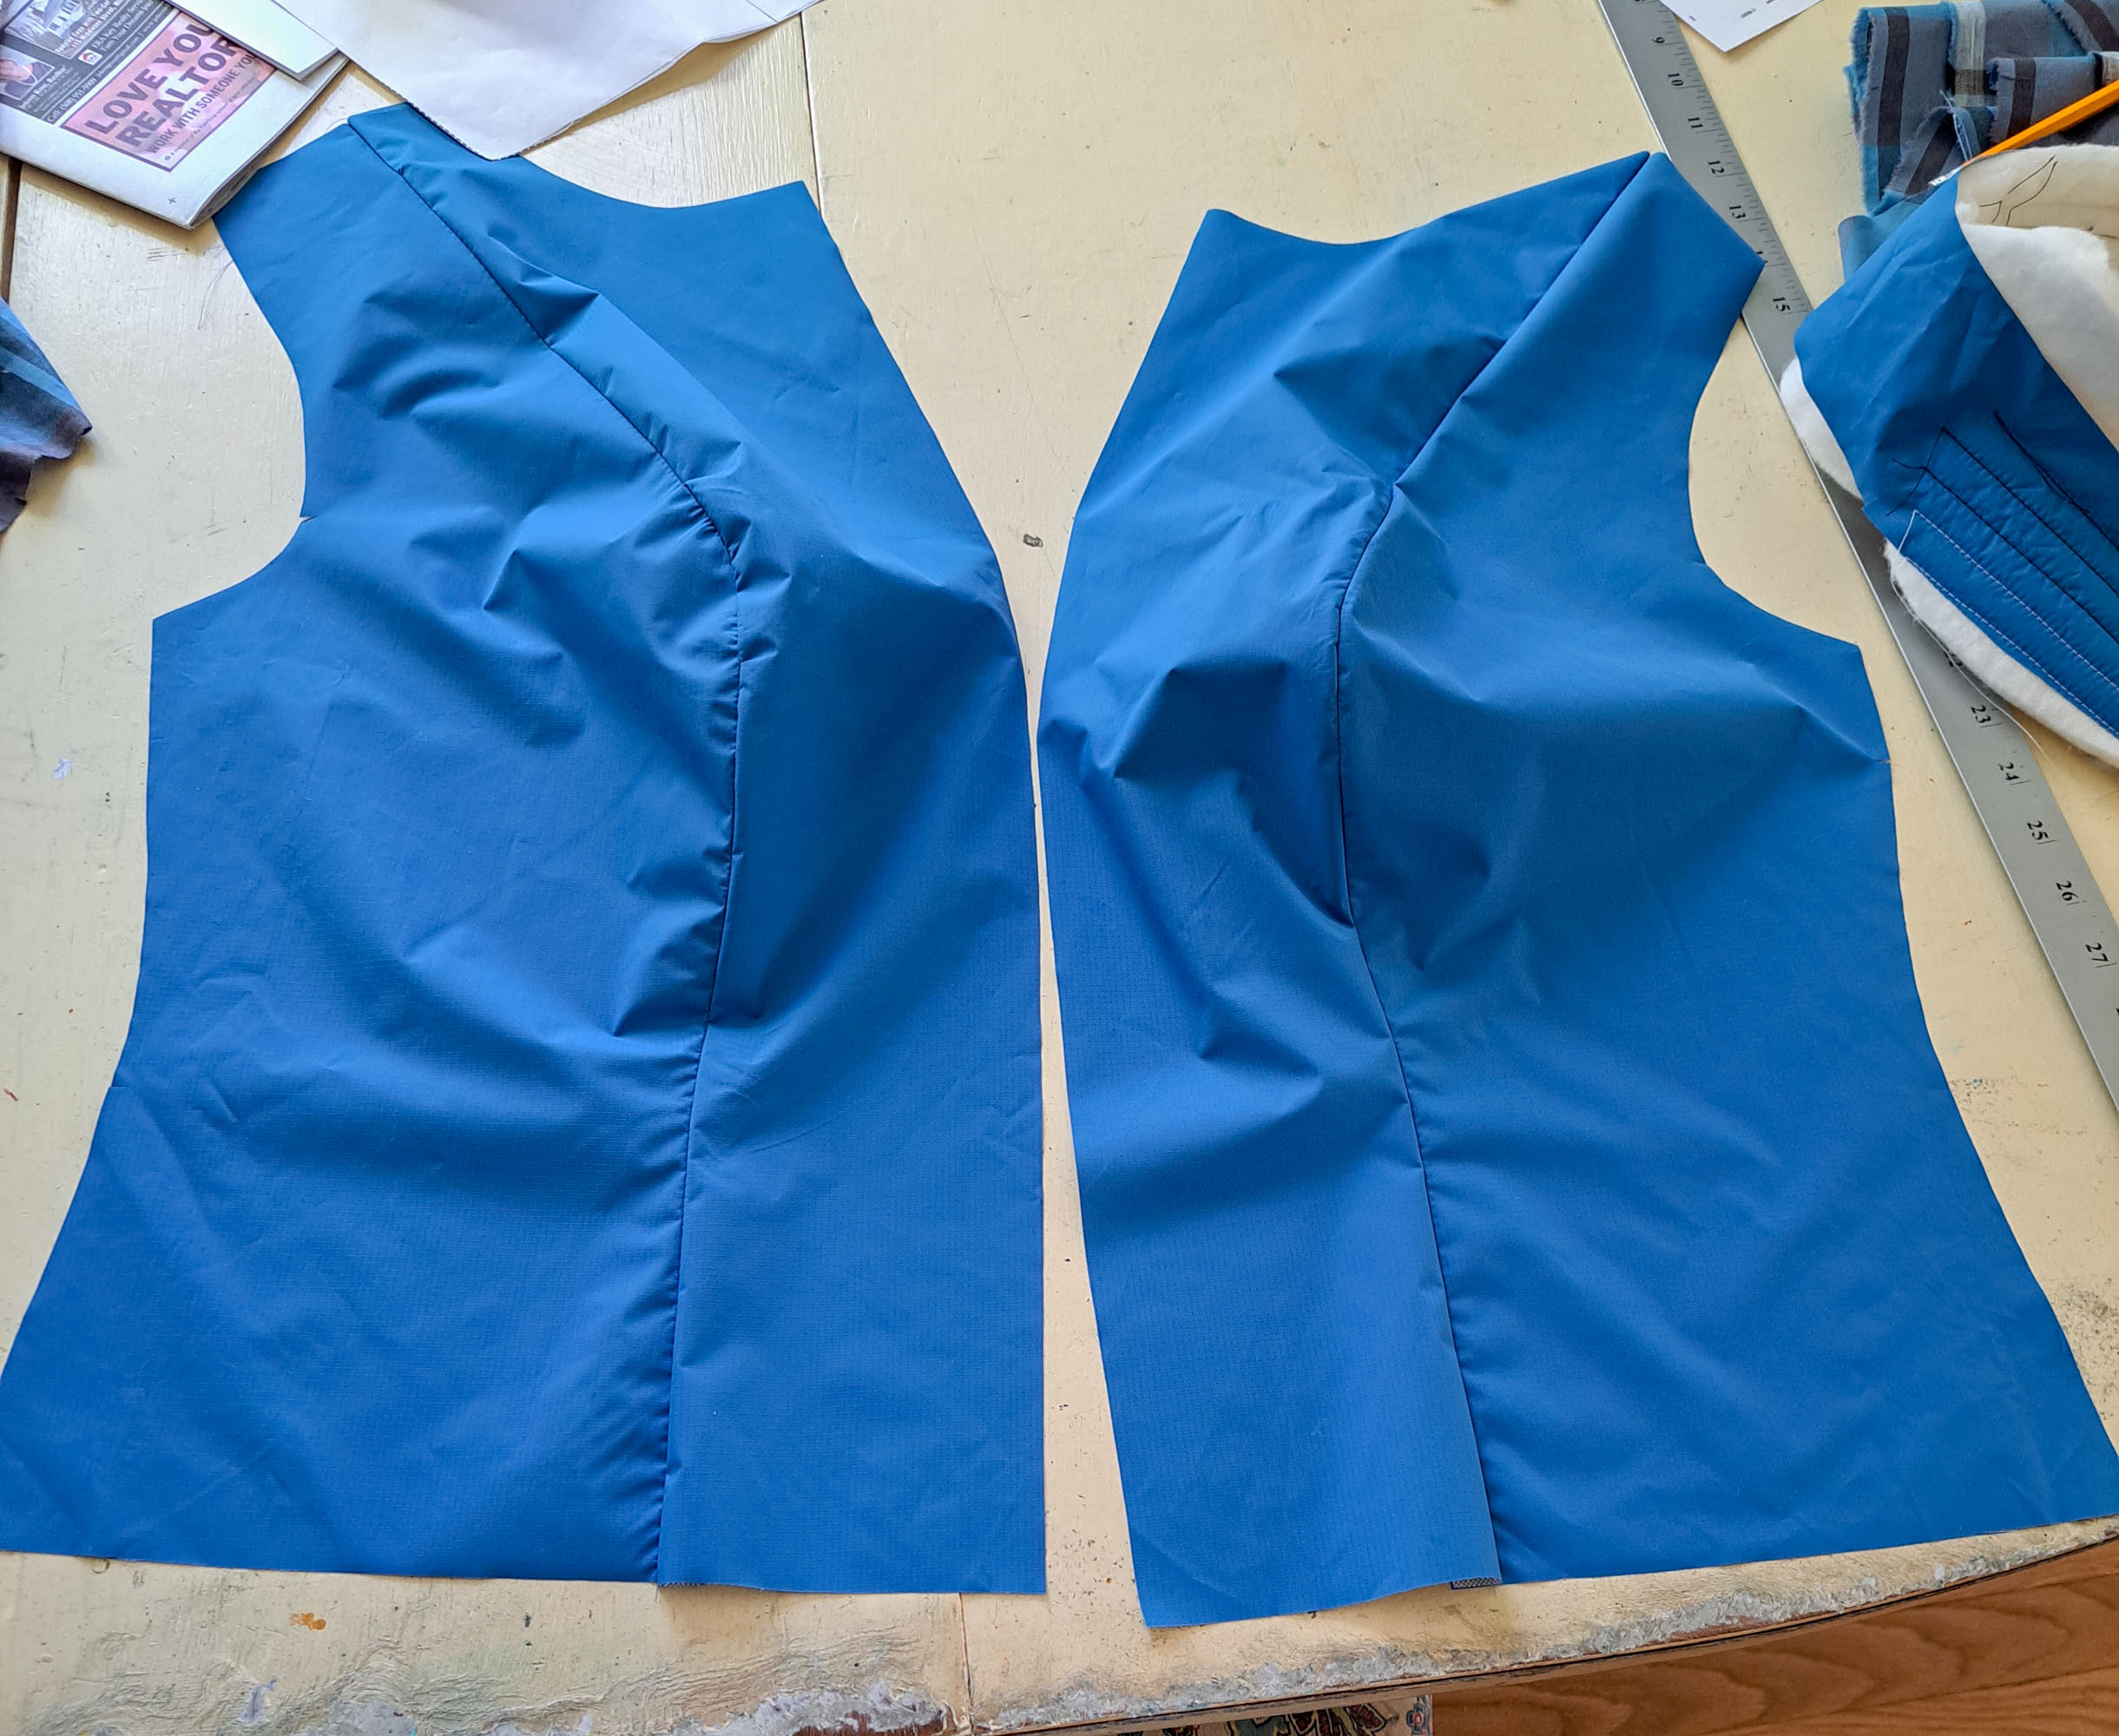
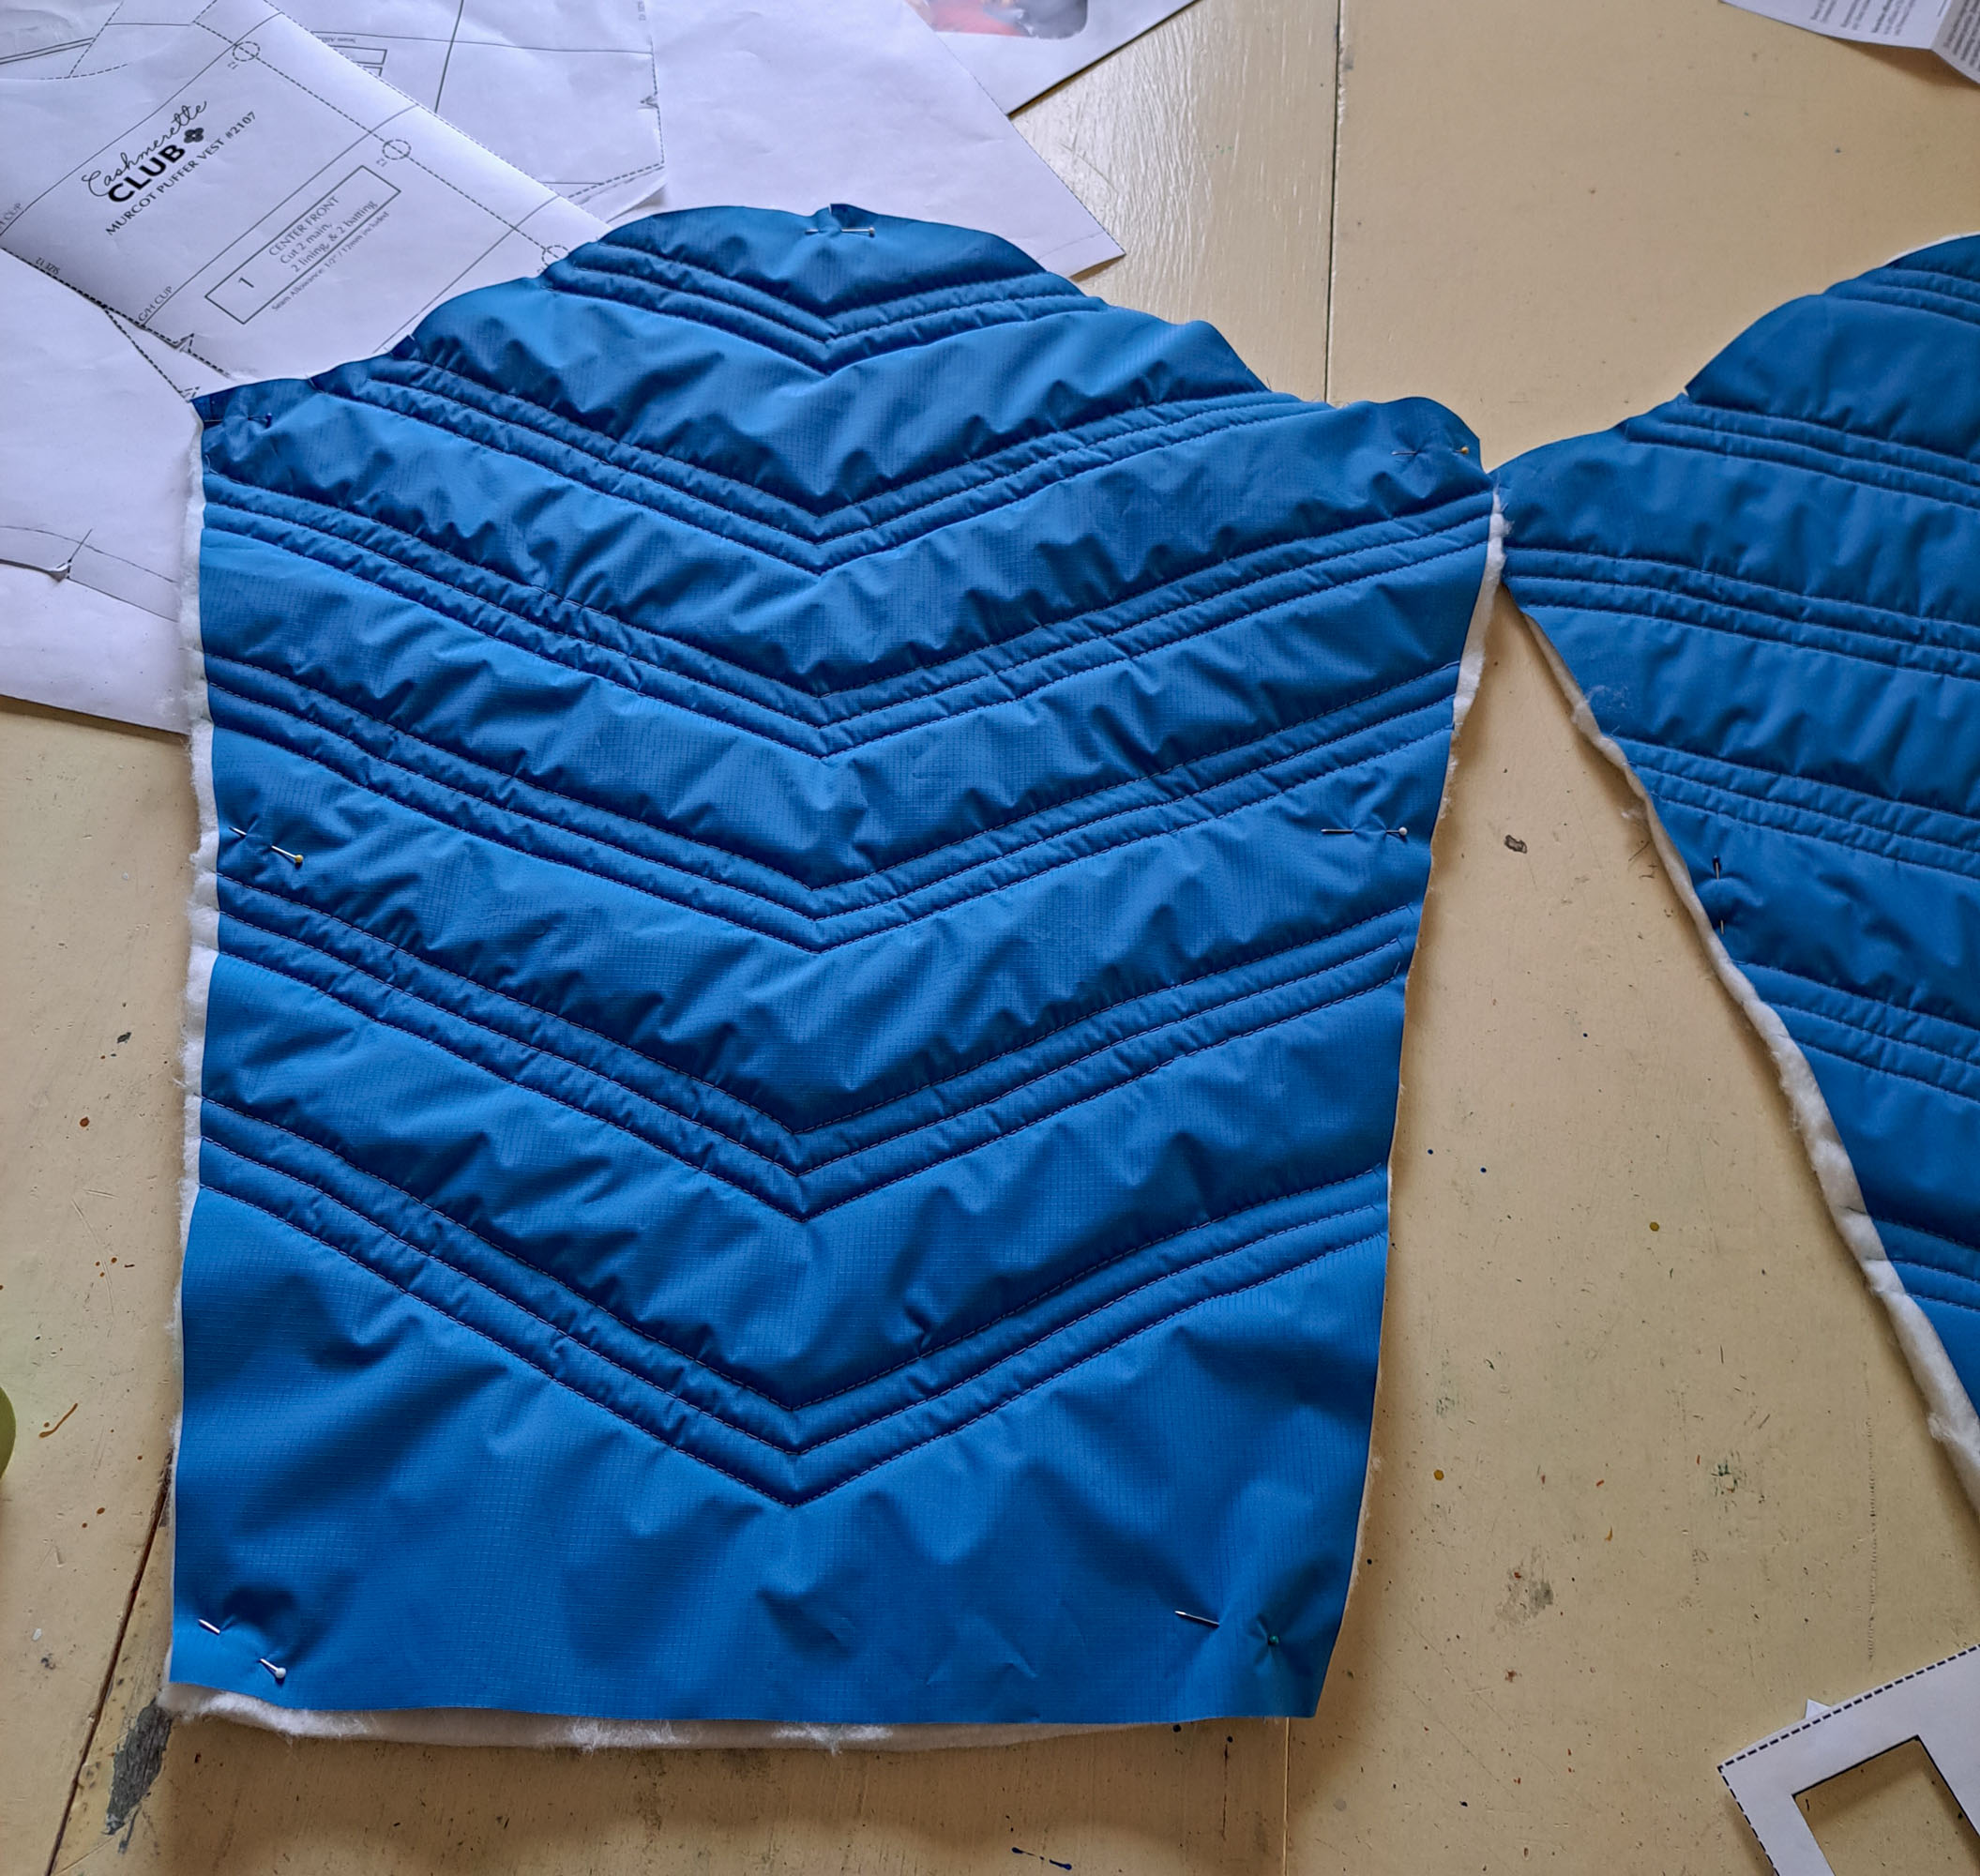
- Sew center front (1) to side front (2 A/B/C). Clip and press seam allowances. Repeat with other center front and side front.
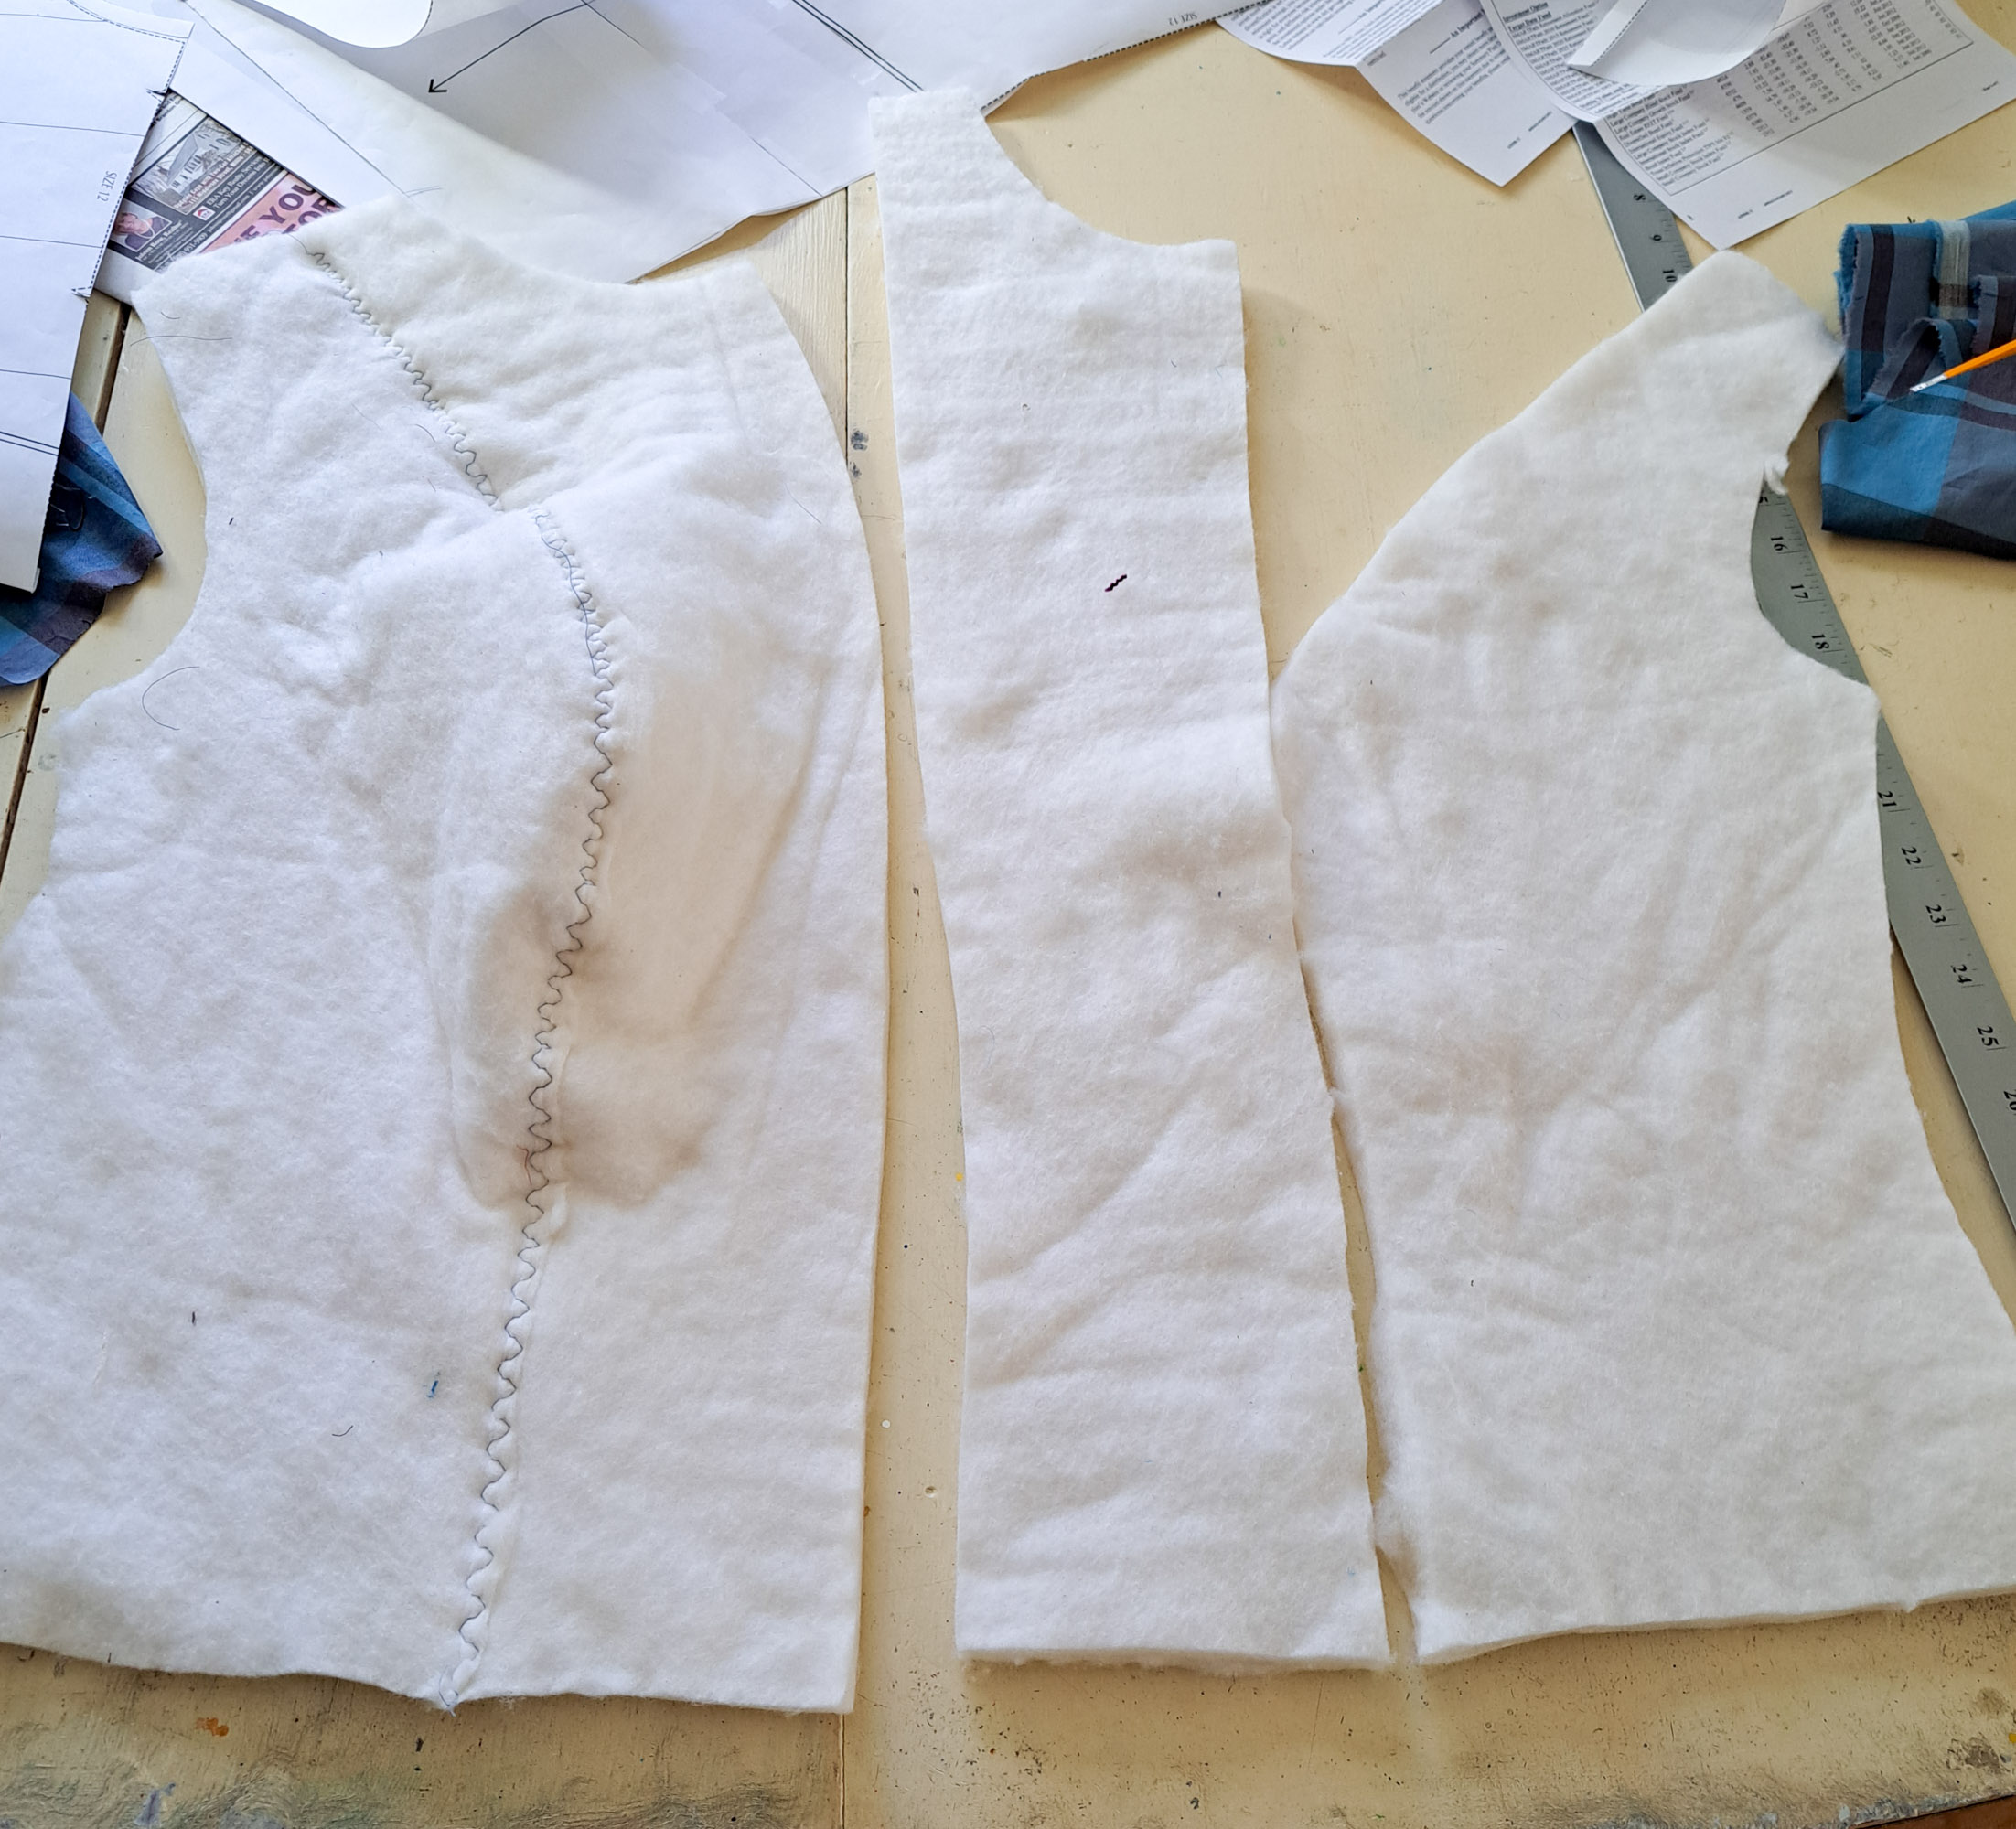
2. Trim seam allowances from center front (1) batting and side front (2 A/B/C) batting where they join and butt them together. Using a large zigzag stitch, stitch the two pieces together. Repeat for other side.
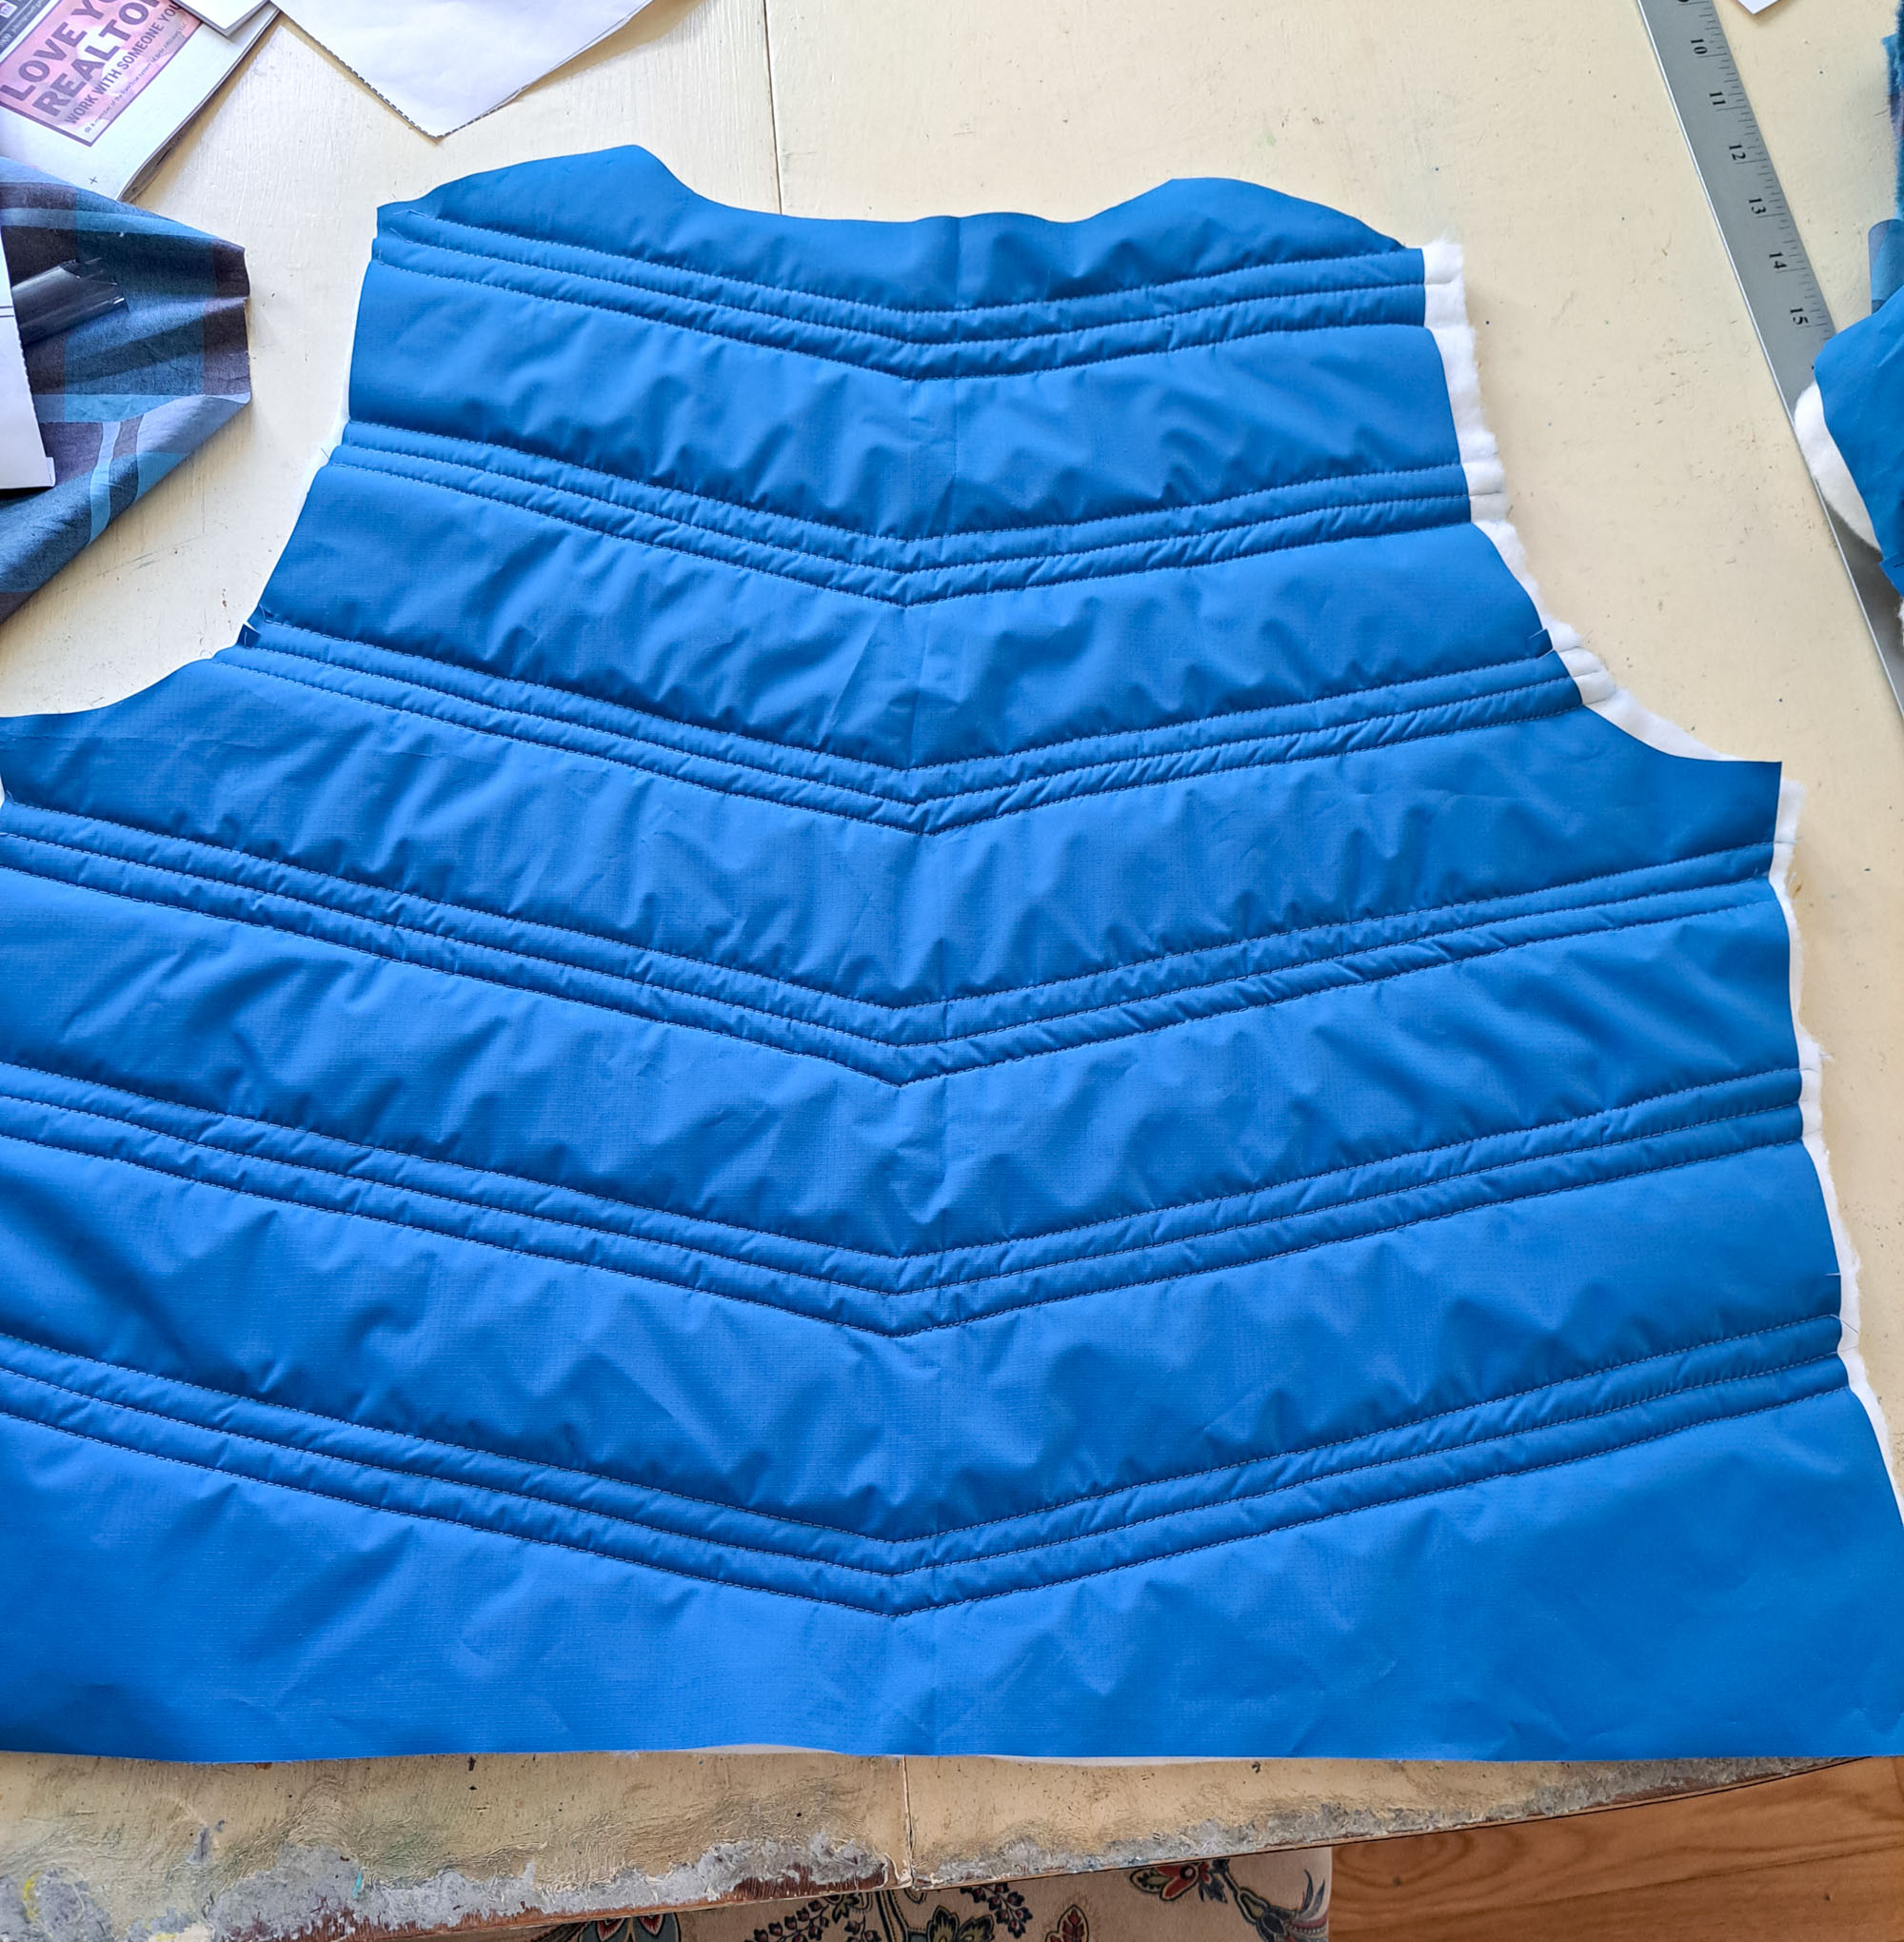
3. Quilt the front batting piece to the front main pieces using your chosen quilting design.
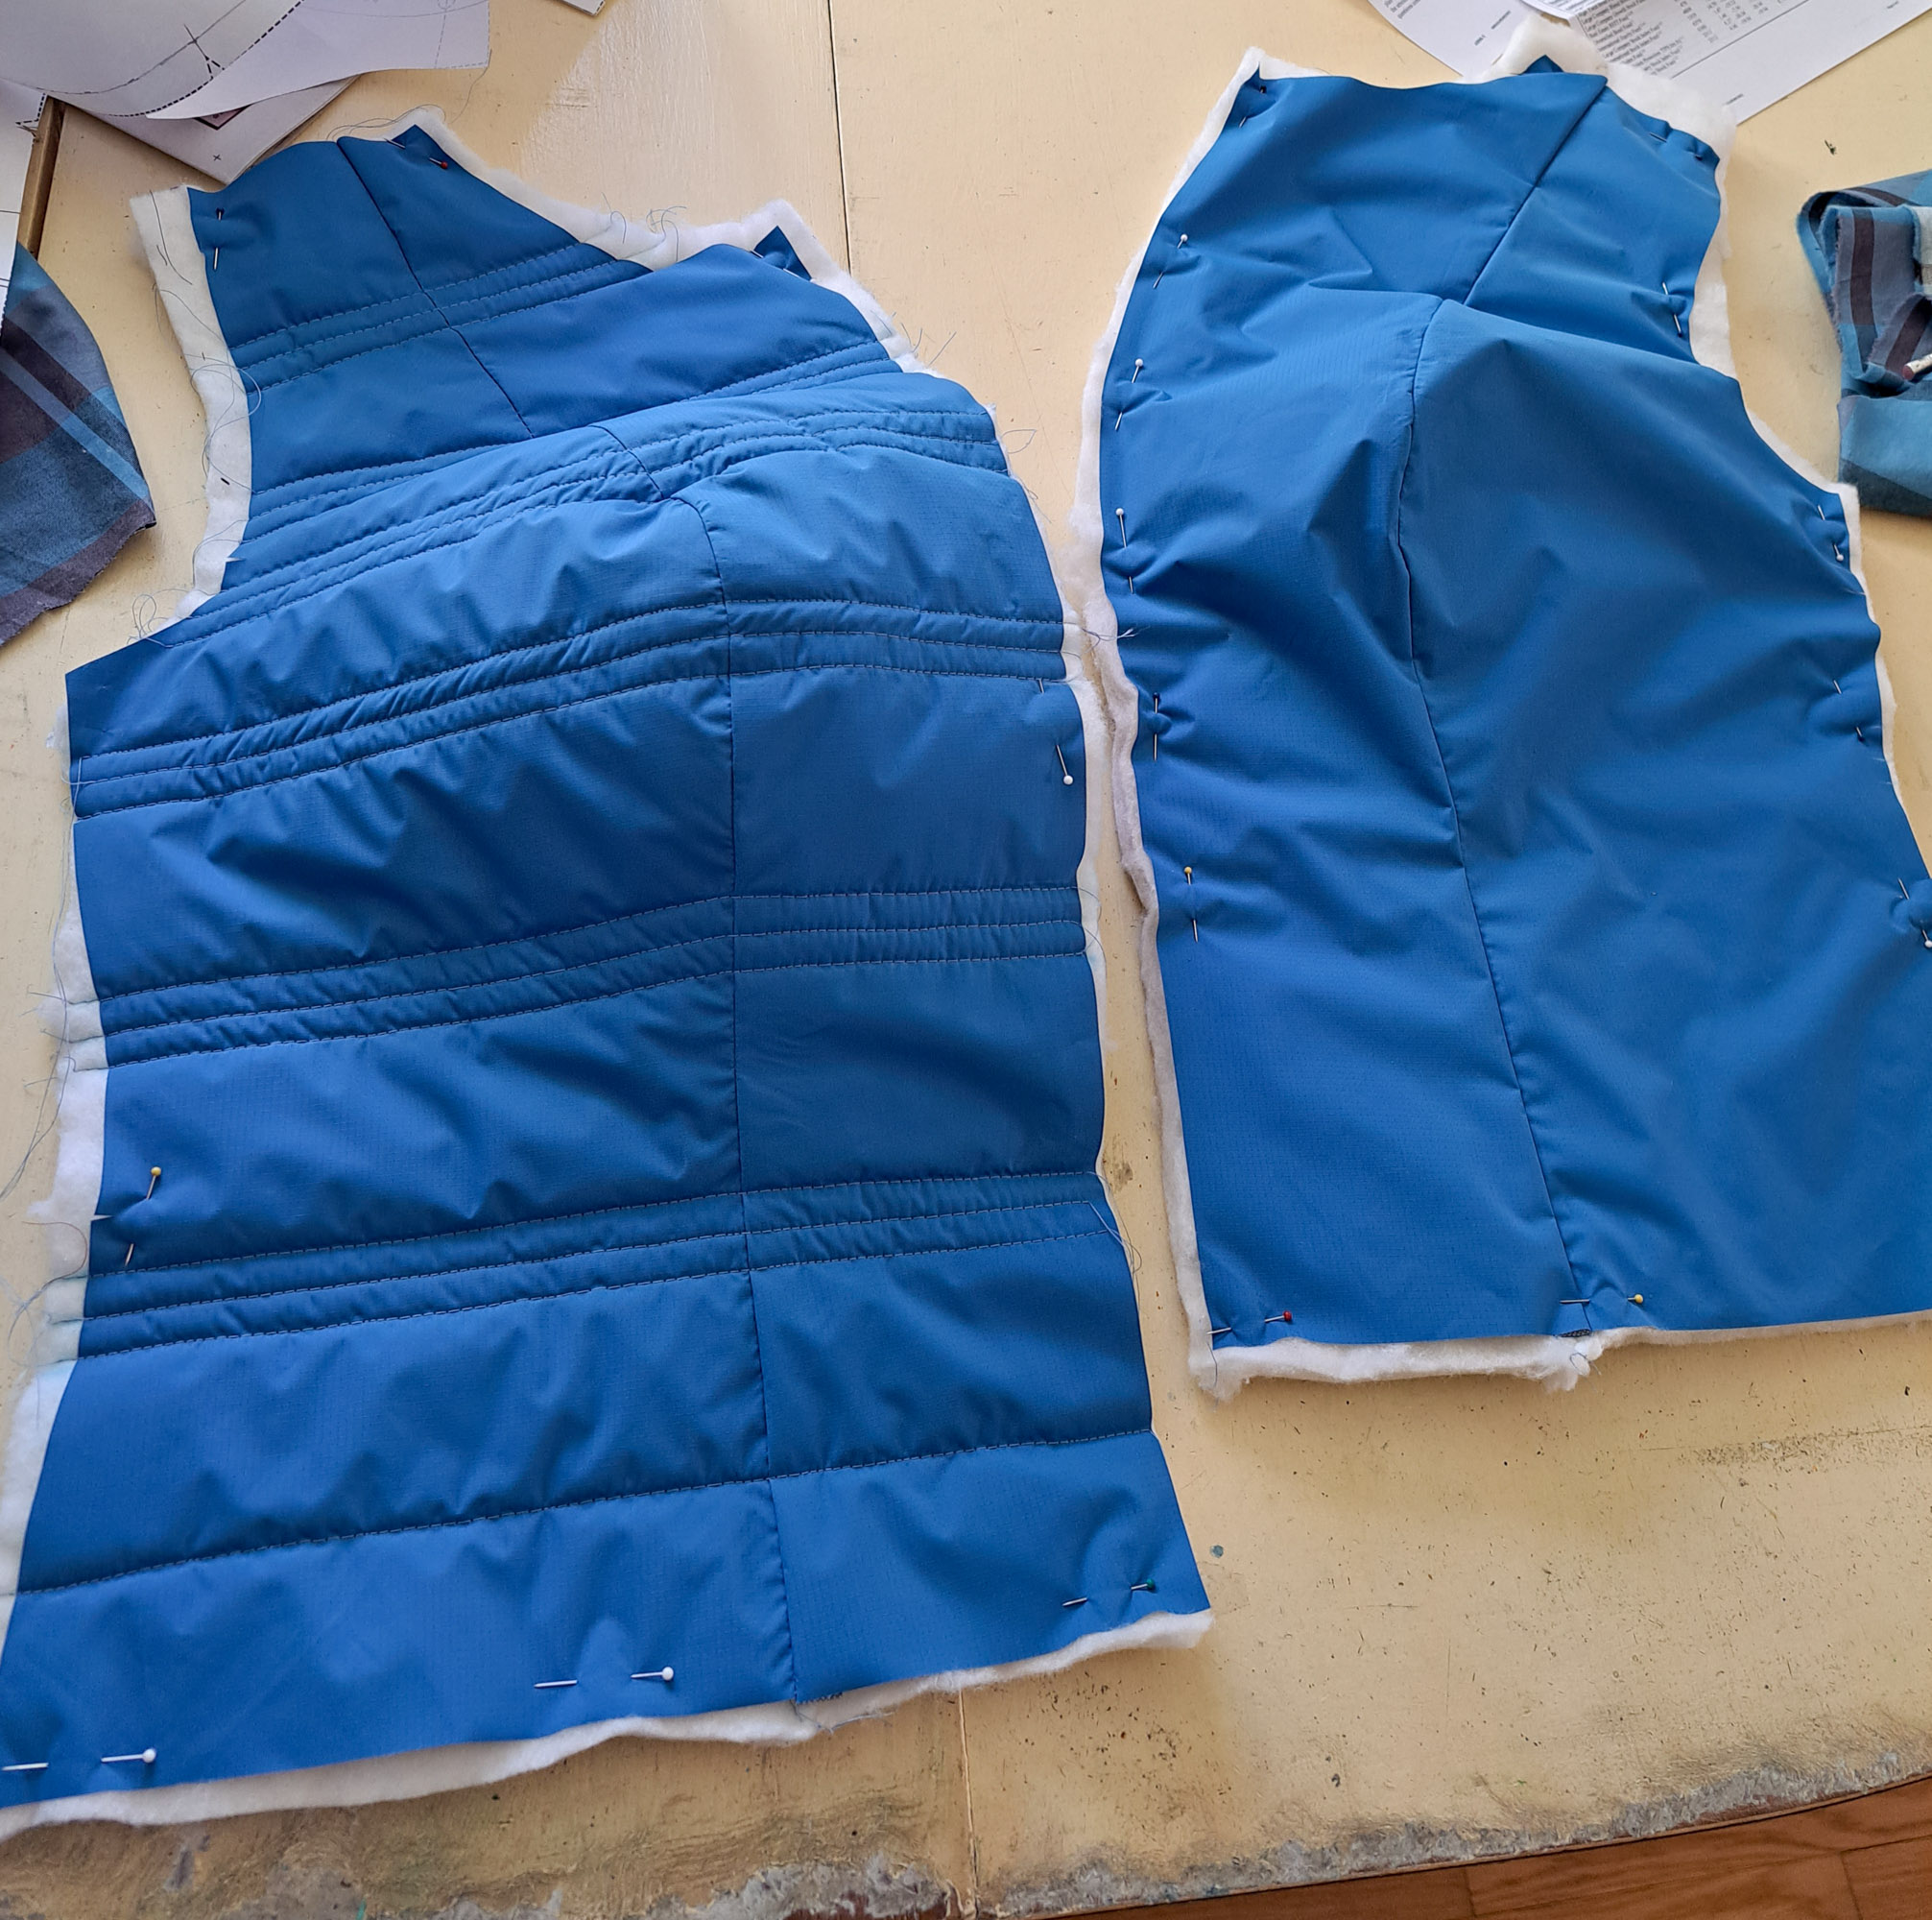
4. Quilt the back (3) to the corresponding batting piece.
5. Quilt the Kimball sleeves (4 A/B) to the corresponding batting pieces.
6. Sew the welt pockets into the front pieces as described in the Murcot instructions. (This step is optional!)
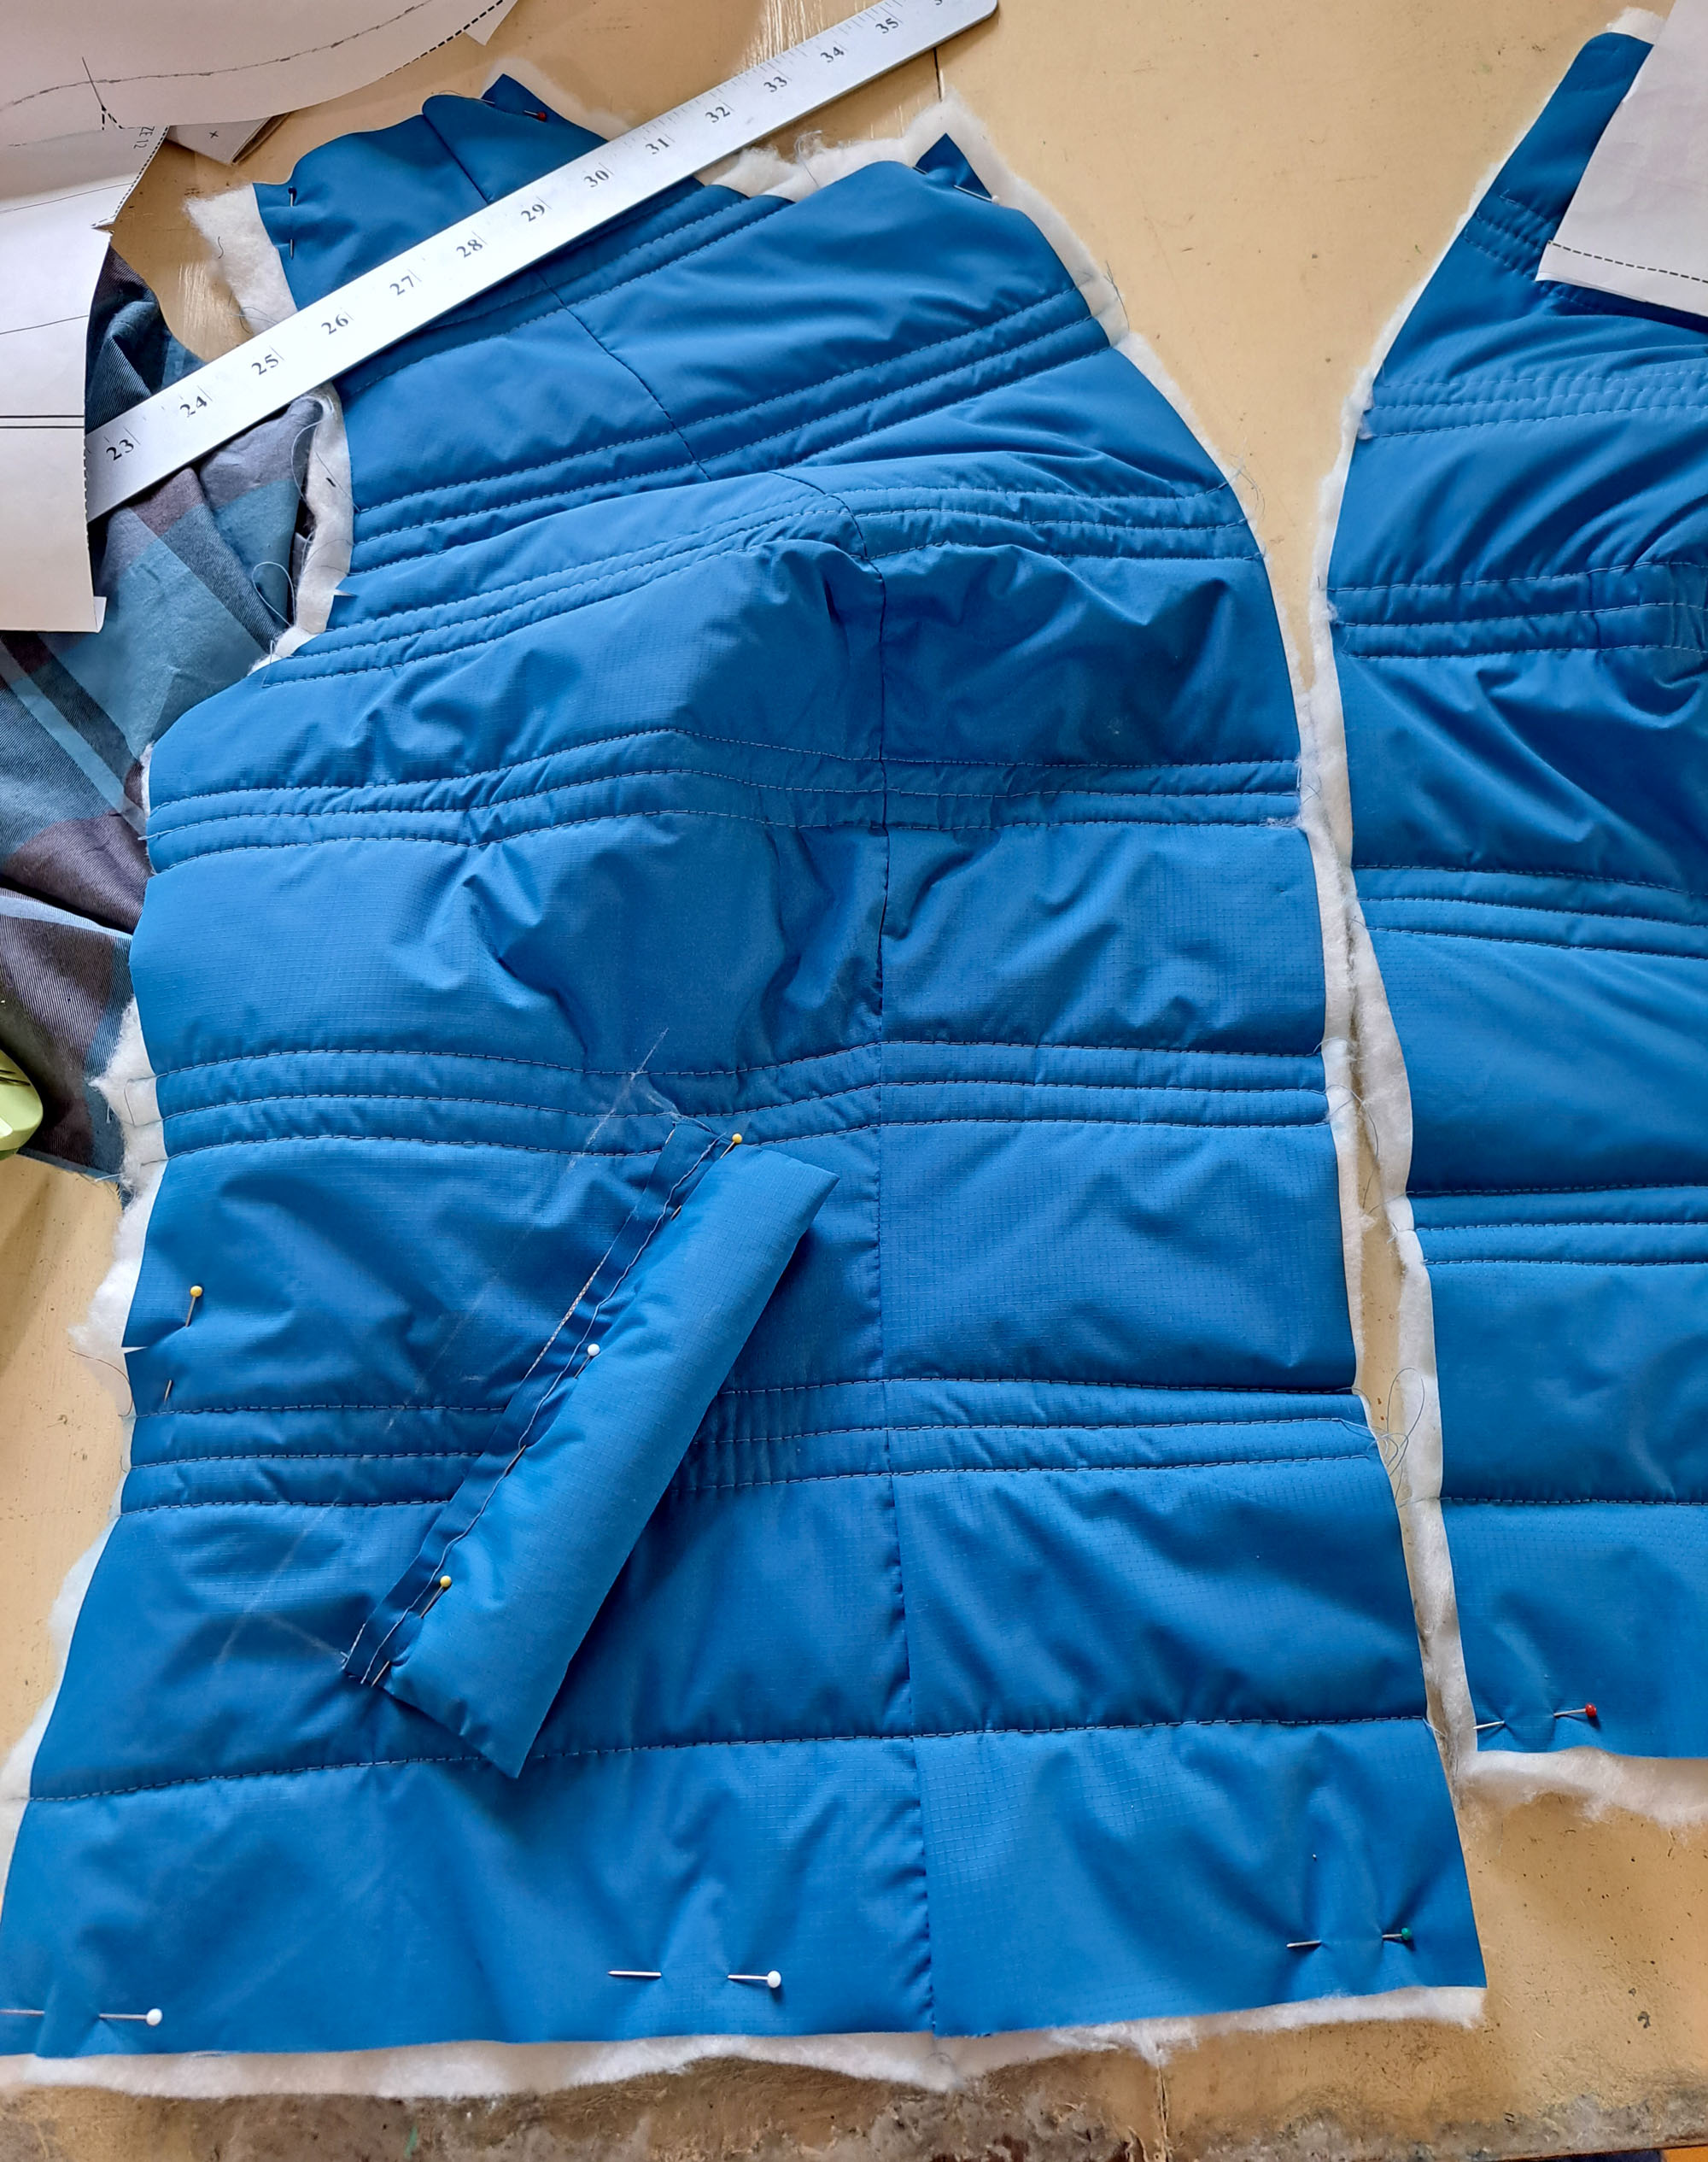
7. Sew the front to the back at the shoulder seams.
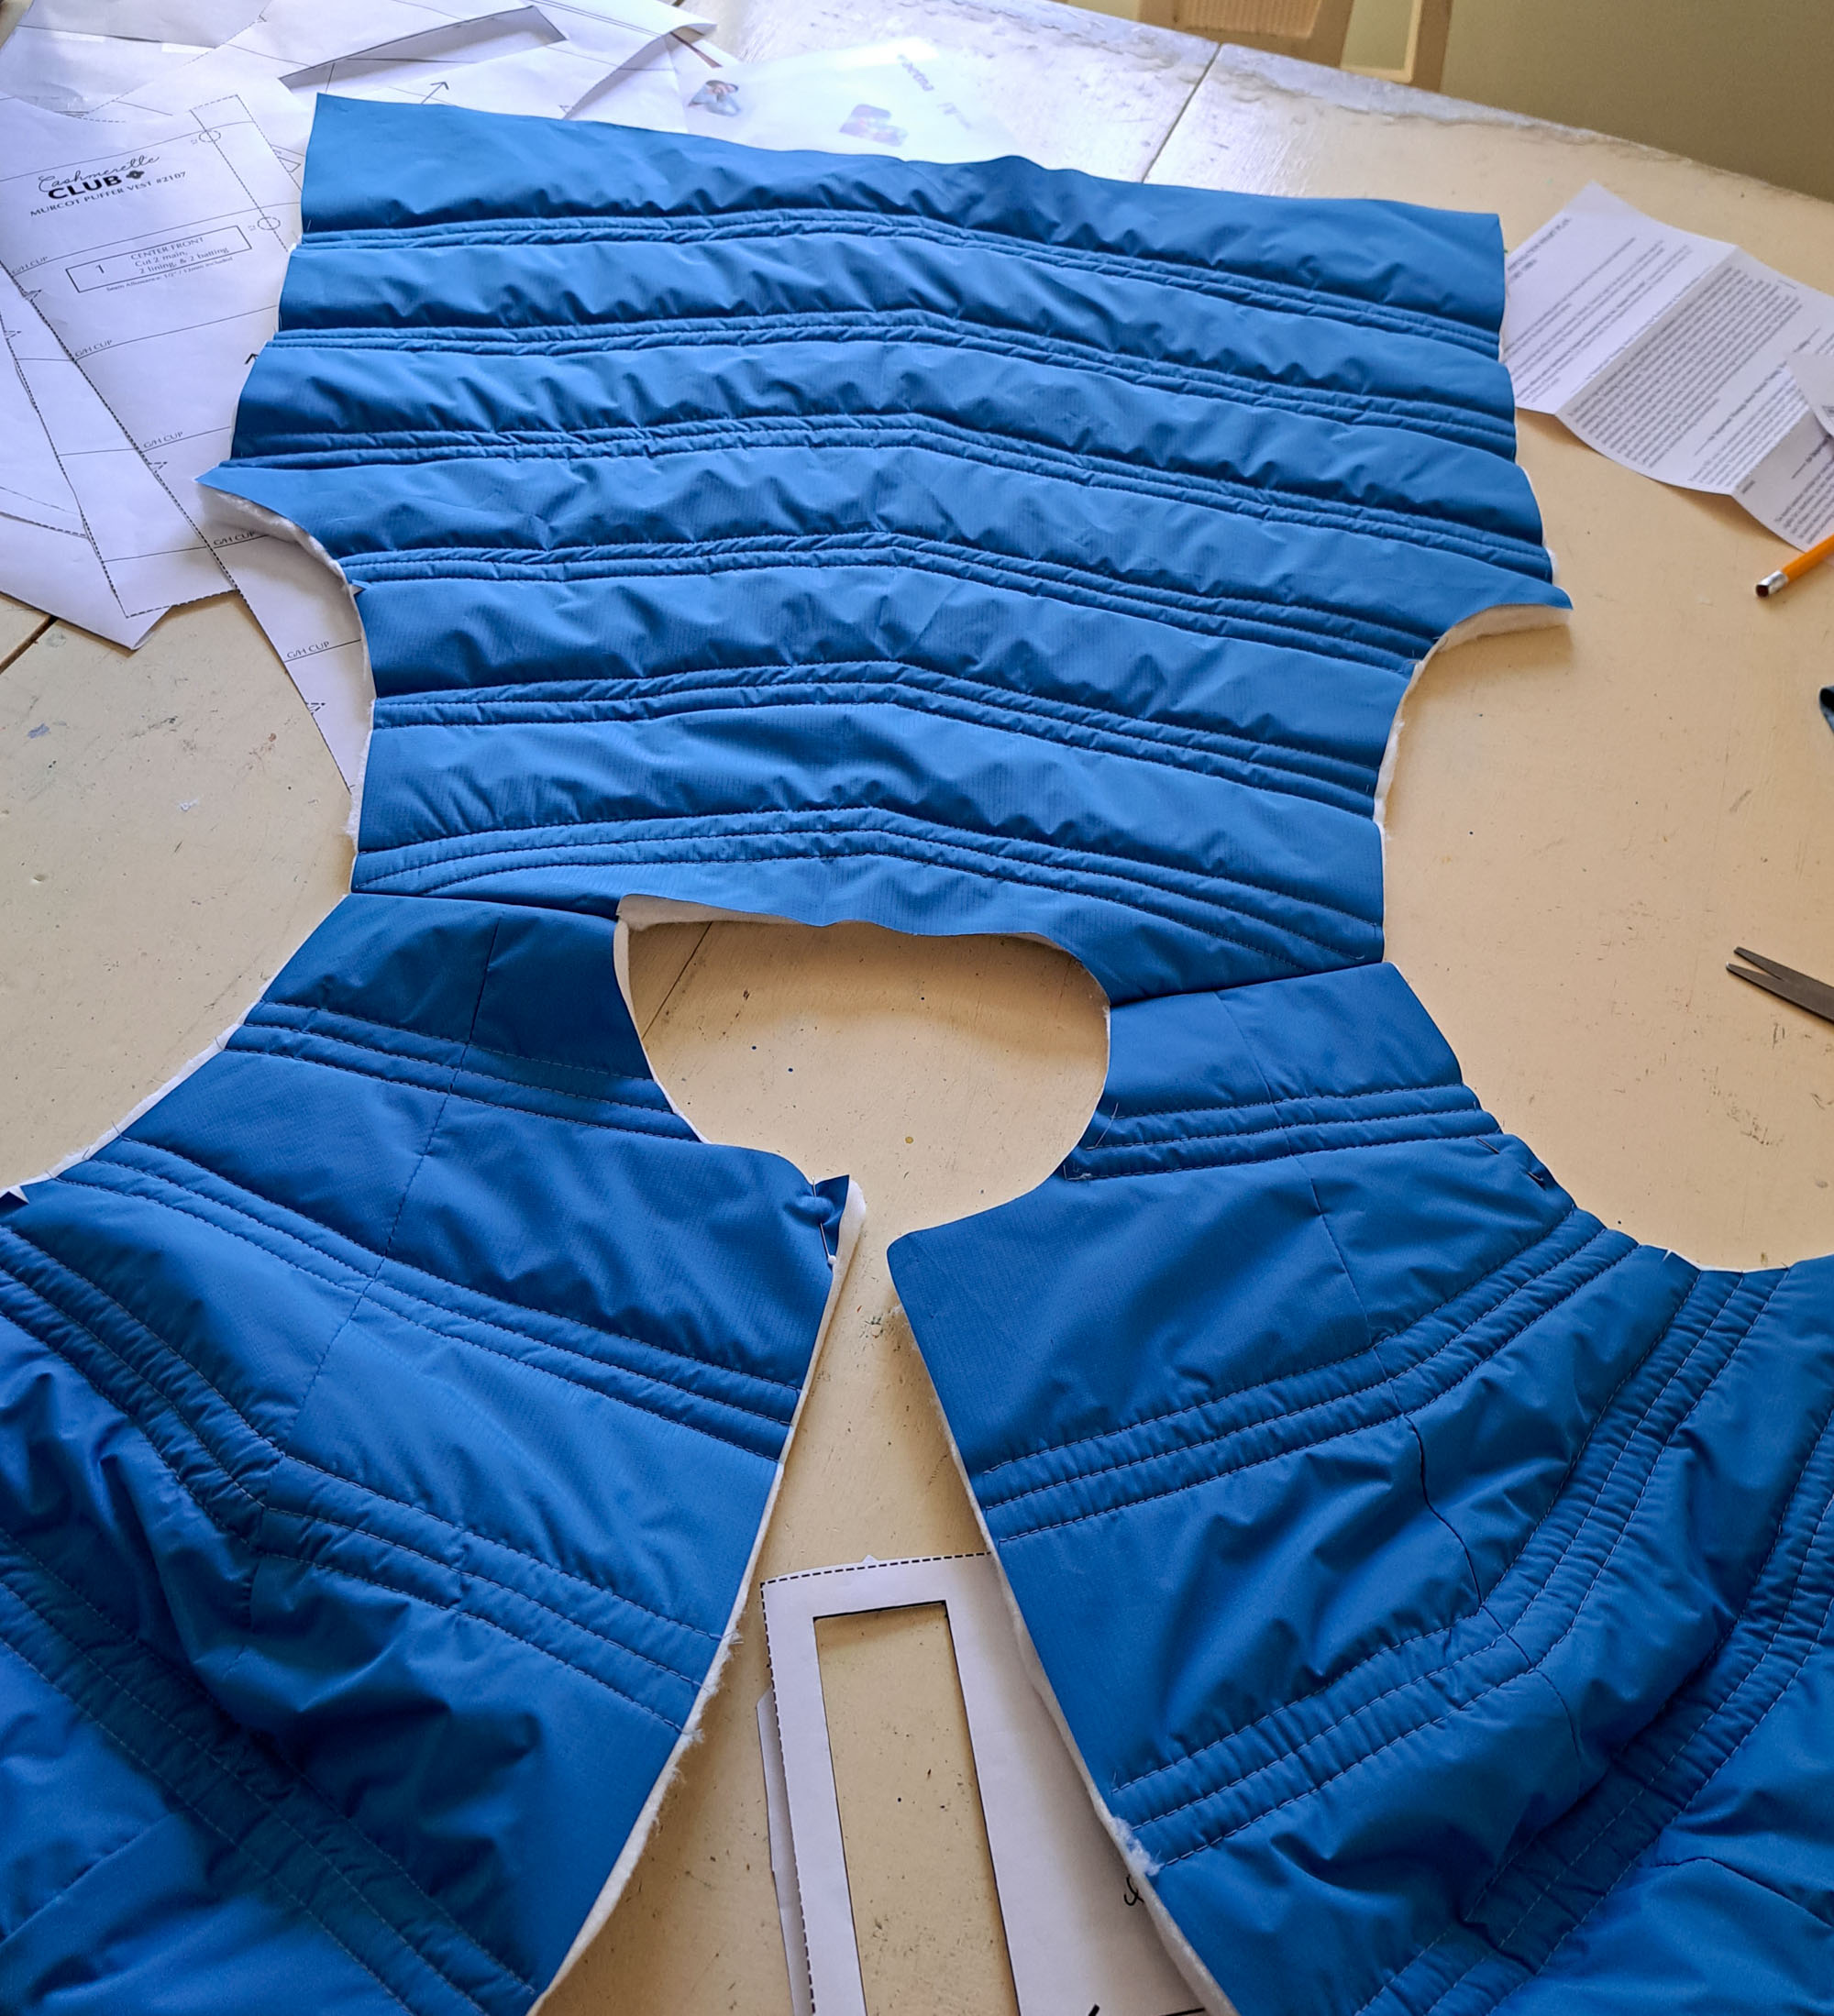
8. Sew the sleeves to the bodice.
9. Sew the side seams together along the length of the sleeve, pivot at the underarm and sew to hem.
10. Attach the collar as per the Murcot instructions.
11. Assemble the lining: sew center fronts to side fronts, sew shoulder seams, sew in sleeves, sew up side seams. On one side seam, leave a gap approximately 6-7” long between bust and waist to be used to turn the garment right side out.
12. Attach lining to main along the neck edge, front edges, and bottom edge as per the instructions.
13. Turn inside right through hole in lining in side seam.
14. Top stitch around front and lower edges as per the instructions.
15. Finish edges of sleeves. There are several ways to do this, and the two simplest ones are (1) turn the two ends inward towards each other and topstitch around the cuff or sew together with an invisible stitch or (2) use fold over elastic to bind the raw edges.
16. Apply snaps as per the instructions.
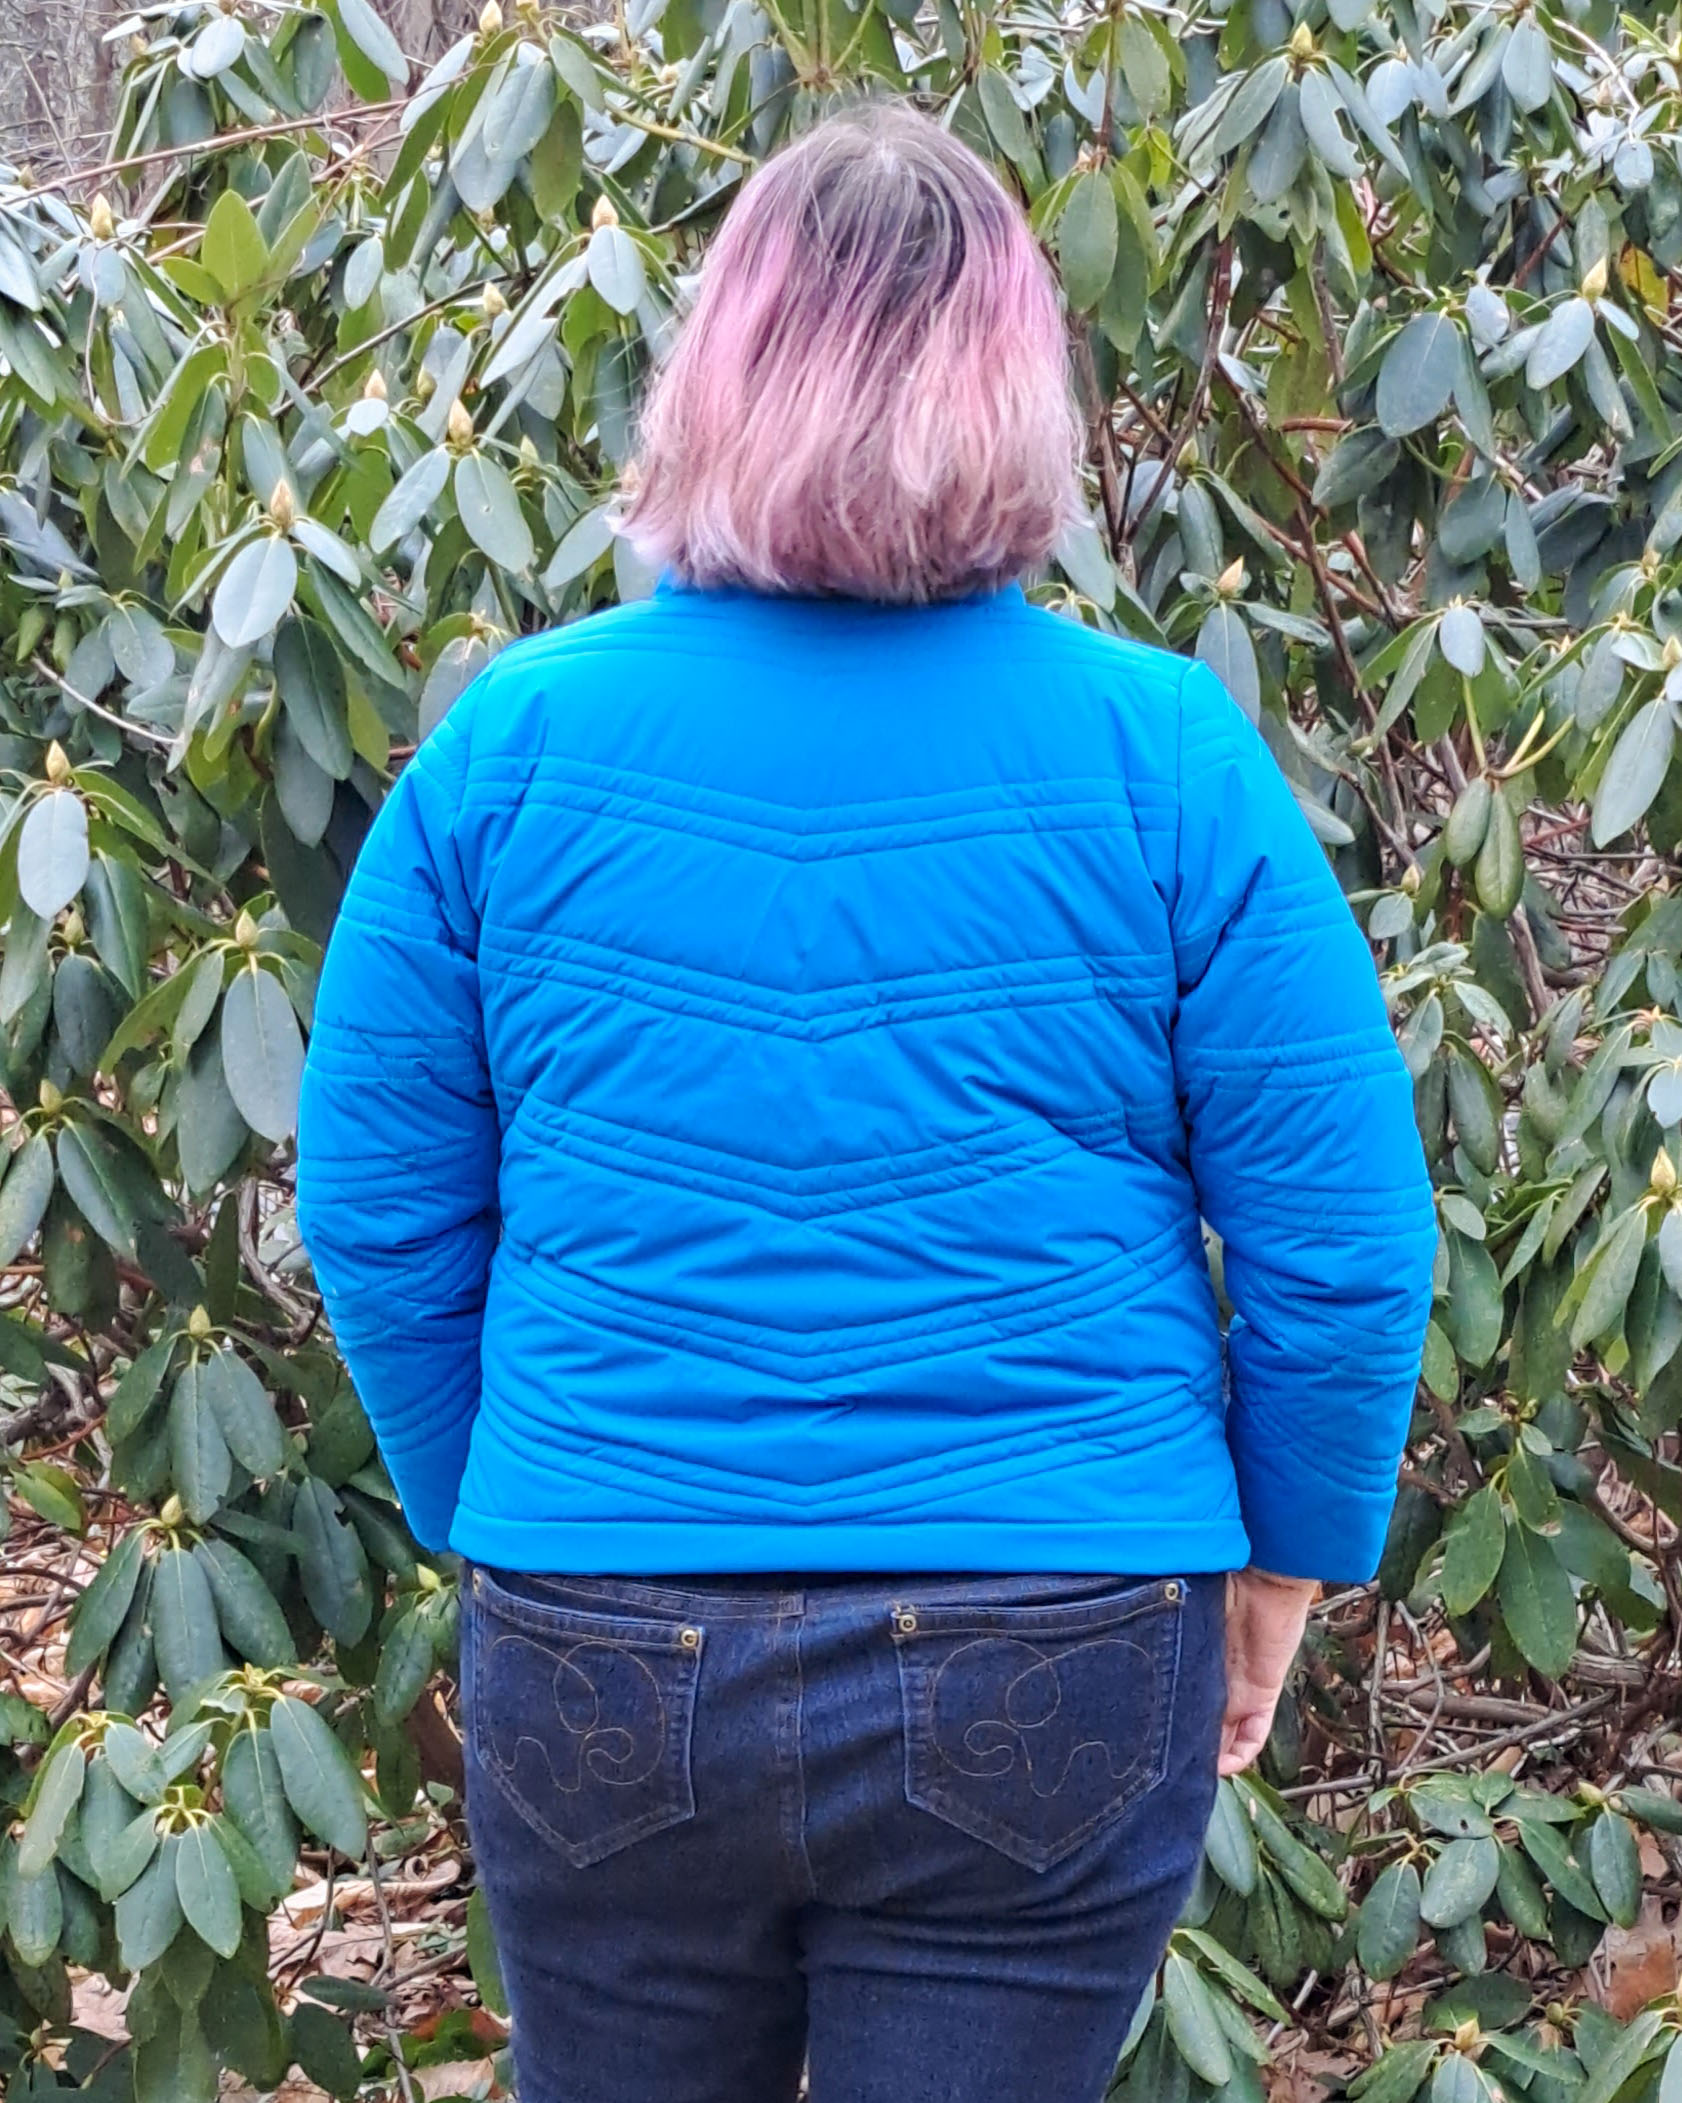
And voila! A beautiful Murcot, now with sleeves:


Let’s start sewing!
Are you ready to try this hack? We can’t wait to see what you do with the Murcot Puffer Vest, so head over to cashmerette.com/club to join the Club and start sewing your dream wardrobe.
Joining after February 2023? You’ll need to join at the All Access level to get the Murcot Puffer Vest.


Fantastic! I was sooo hoping there would be a hack to include sleeves for the Amur to – and here it is!
Oops – auto correct got me! I meant the Murcot, not the Amur to, whatever that is!,
Excelente idea, gracias ! 😉