When I designed the patterns for “Ahead of the Curve: Learn to Fit and Sew Amazing Clothes for your Curves“, simplicity was the name of the game: I wanted basic patterns to make it as easy as possible to learn how to make alterations. Plus, I had to keep the number of pieces down to squeeze 5 whole new patterns into a single book! As a result, the patterns in the book don’t have pockets – but if you’re a Pocket Obsessive no problemo. Generally speaking, it’s pretty easy to add pockets to most garments, and today I’ll show you how.

Adding side seam pockets
If the pattern you’re making has side seams, it’s a cinch to add side seam pockets. In “Ahead of the Curve”, the Foxhill Dress is a great pattern for adding this type of pocket, and the Magna Pants can also have pockets added in this way, but only if you’re not adding the zip (which means that the size of the waist and hip you’re making are the same, or your waist is bigger than your hip size; if your hip is bigger than your waist size, you’ll need the zip and this method won’t work).
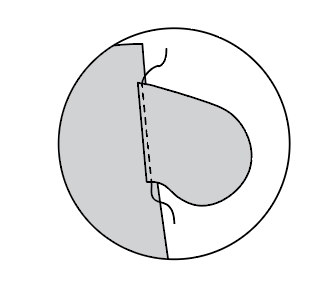
Need a pocket for the Foxhill? No problem! Here’s a free download. Broadly speaking, you can typically use any free-hanging side seam pocket in any pattern (there are other types of side seam pocket that also attach into the waistline which require a specific pattern piece). The Foxhill Dress is made from heavy knit, and I would recommend using a lighter knit, like jersey, if you’re adding pockets, to make sure they’re not too bulky.
Here’s how to install the pocket into the Foxhill Dress (follow the same approach for the Magna Pants once the front and backs are assembled):
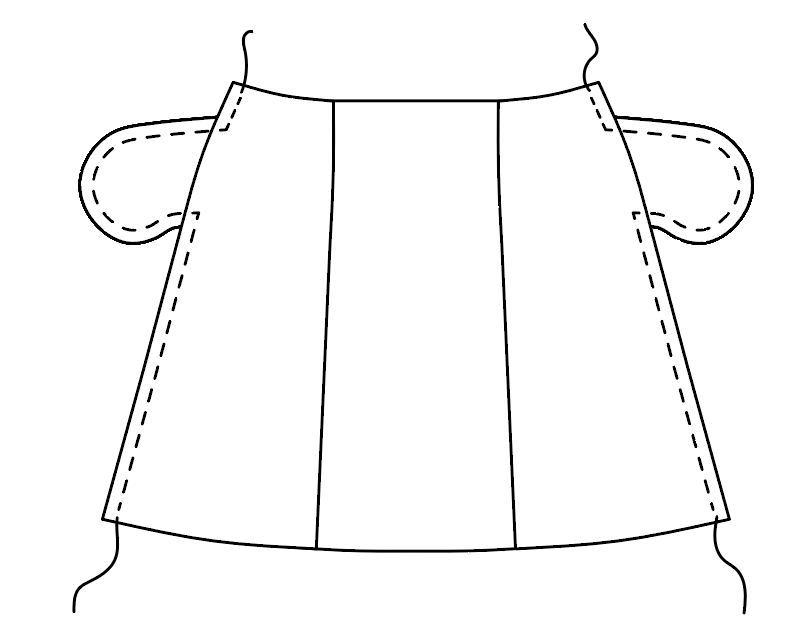
- Once the front skirt is assembled, place the pockets right sides together on the side seams, as shown. Typically you want to place them about 2 – 3 inches down from the waistline, but you can put them wherever they are most comfortable for you based on how long your arms are! Sew the pockets to the side seam at the pattern’s seam allowance.
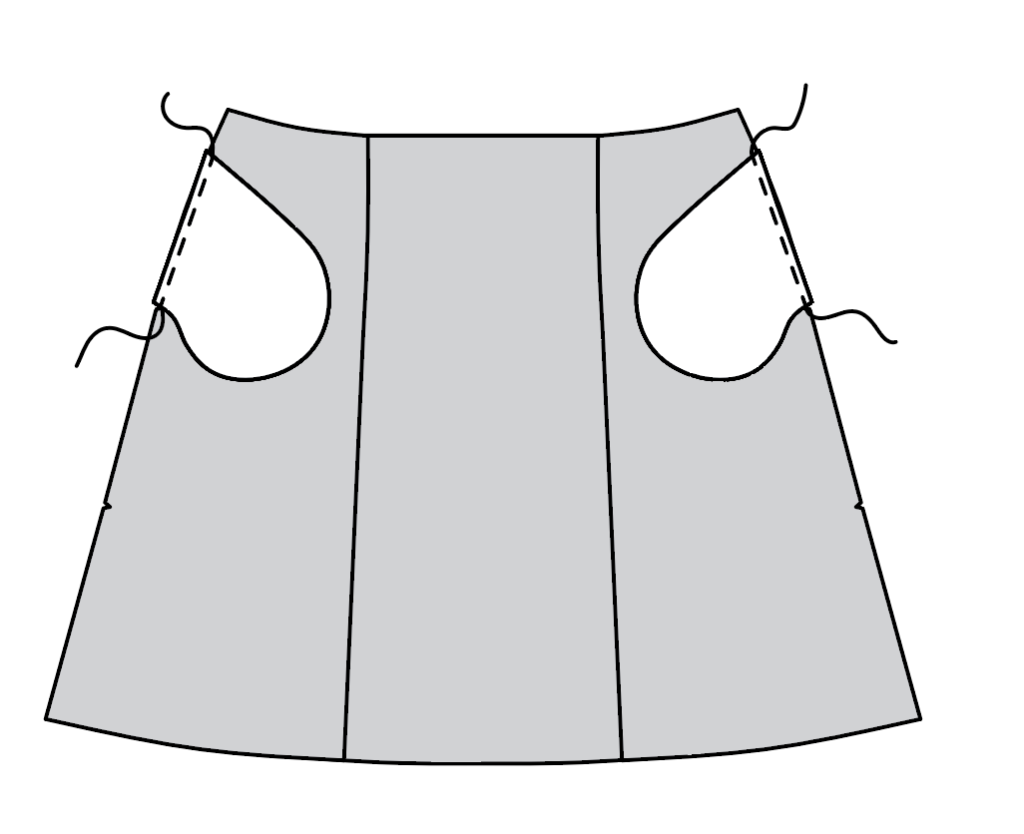
2. Flip the pockets out, and then understitch the edge of the pocket to the seam allowance underneath as shown (this stops the pockets flipping out when you’re wearing the dress).
3. Repeat steps 1 and 2 with the back skirt and other two pockets
4. Place the assembled front and back skirts right sides together, lining up the side seams and pockets (the pockets should be flipped out). Now sew the side seams, going all the way around the edge of the pockets as shown.
5. Continue with the other steps to assemble your dress.
Adding side seam pockets to the Honeybourne Dress
What about if you want to add pockets to the Honeybourne which doesn’t have skirt side seams? Well there’s just one extra step: creating those side seams!
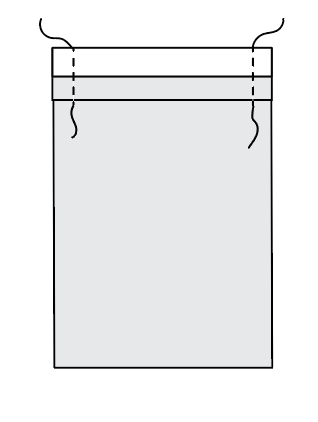
Simply draw a vertical line down the Side Skirt panel, dividing the piece into two (start at the notch at the top):
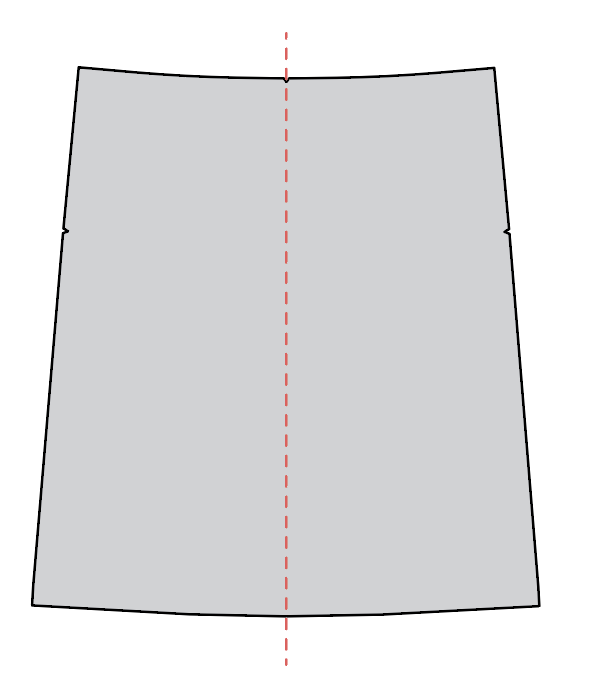
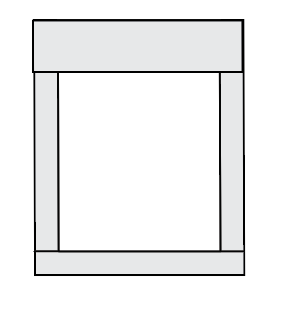
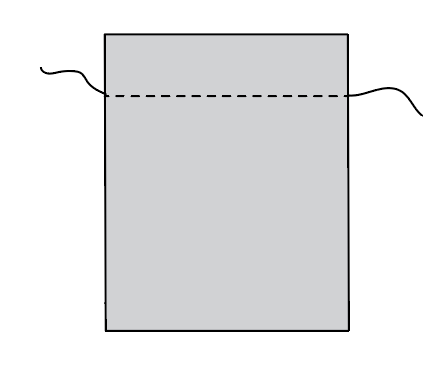
Then, cut the piece into two pieces – you only need to keep one of these (you’ll cut four, two for the front skirt and two for the back skirt). Add seam allowance on at at the side seam:
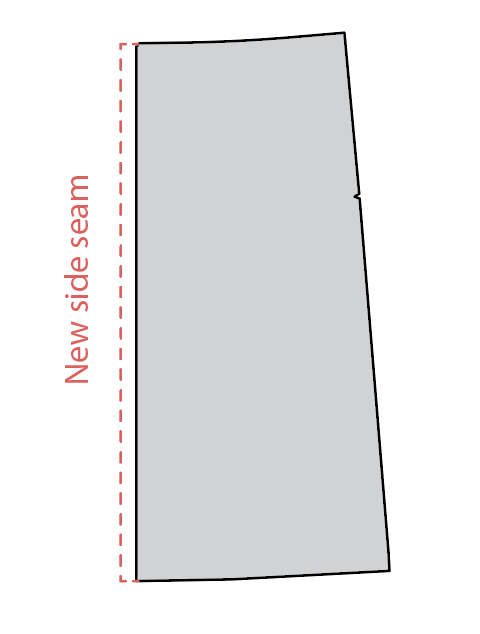
Now proceed as you do for the Foxhill Dress above, using the new side seam to place the pockets.
Adding Patch Pockets
Another approach is to add patch pockets to your garments – this type of pocket could work well on the Honeybourne Dress to give it a casual apron-smock type vibe, or on the Magna Pants on the front or back for more of a combat-trousers look.
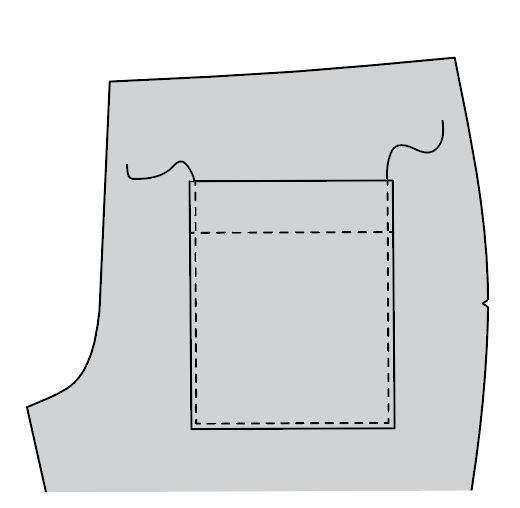
No patterns required here! First, decide what size you want your pockets to be – you can make templates out of paper and hold them up to your muslin to decide the dimensions that work best for you. Then, add 1/2″ seam allowances around the sides and bottom, and 1.5″ at the top. Your pocket also doesn’t have to be square! Experiment away.
Here’s how to sew and attach your pockets – I’m using the Magna Pants as an example.
- Fold the seam allowance at the top of the pocket to the wrong side. Press.

2. Now fold the top of the pocket over to the RIGHT side by 1″ and press. Sew down both edges of the folded down section at a 1/2″ seam allowance.
3. Flip the top of the pocket right side out again – the top of the pocket will now be totally enclosed, and it will start pulling the edges of the pocket over at the top as it’s flipped. Continue folding the edges of the pocket over by 1/2″ and press. Then, fold up the bottom of the pocket by 1/2″ and press (if you like, you can mitre the corners!)
4. From the right side, topstitch the top of the pocket, along the edge of the folded over section.
5. Pin pocket where you want it to be placed. Topstitch around the remaining three edges to secure.
And there you have it! A simple and easy way to customize your garments for more detail and functionality.


I have the book and tried four of the patterns already. I’ve learnt so much about fitting, so thank you so much! Next I will do the Foxhill dress, but I have no knit fabric for the toile yet so it will have to wait a bit. But surely I will put pockets in it.
I love your book!
Greetings from Sweden
Annika Sundell
Pockets are the best! Thank you for these additions. I always try to add pockets to every garment I make. Love the book – your explanations for the adjustments are much clearer than ones I’ve seen in other books.
For the Magna pants, there’s a zip on only one side – can we add 1 side pocket on the other side, if we have to keep the zip because of waist/hip ratio issues? One pocket isn’t optimal, but it’s still a whole lot better than zero 🙂 How feasible would it be to add a partial split / side seam that only goes down enough to add the pocket bag?
It would be easy to do per the directions given. If you are left handed, you could switch the zipper to the other side and then your pocket will be handy for the hand on the favored side.