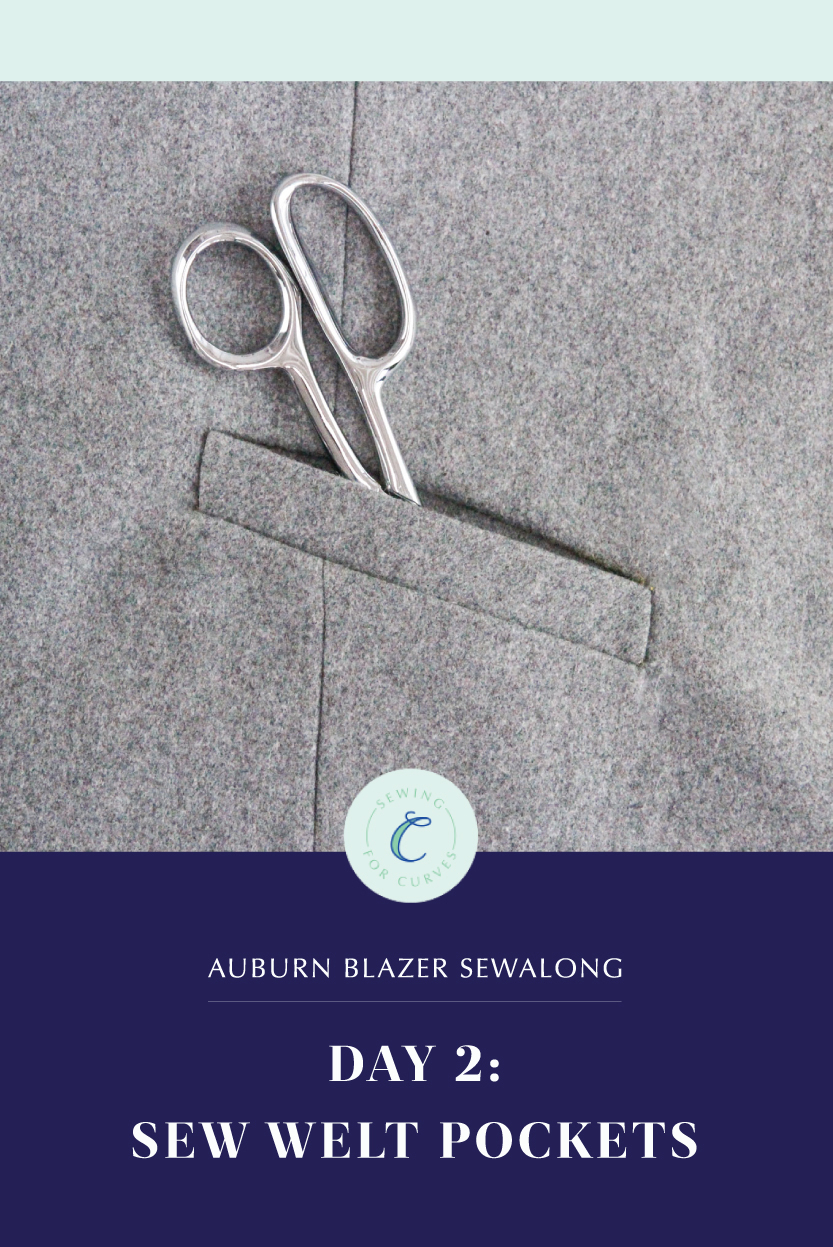
Welcome back to the Auburn Blazer sewalong! Today, we’ll be sewing our beautiful angled single welt pockets. Let’s get started!
(Just joining us? Be sure to check out the main Auburn sewalong page to catch up on everything you may have missed.)
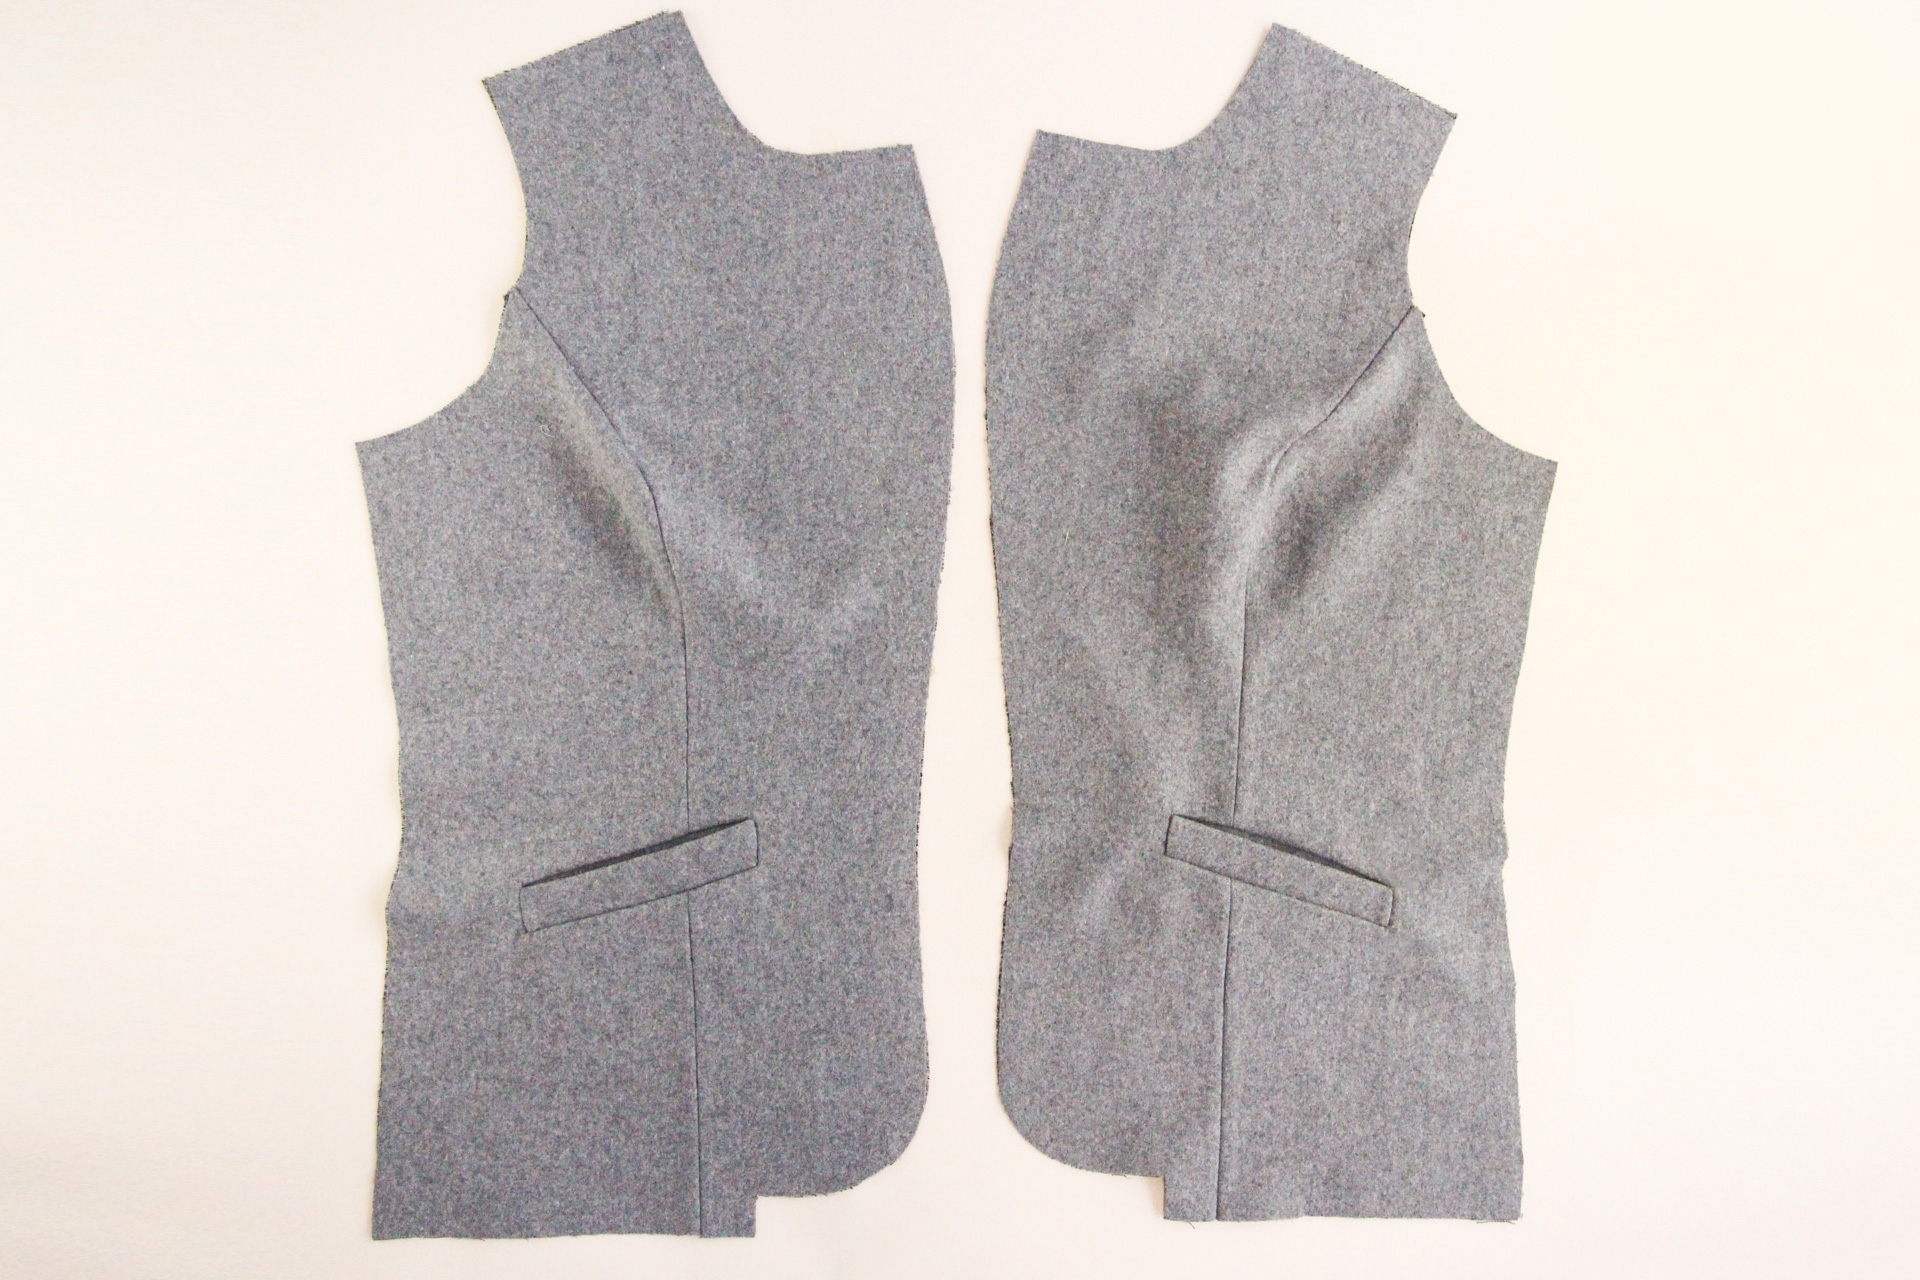
View A of the Auburn includes sophisticated angled single welt pockets, and that’s what we’ll be showing you how to do today. (If you’re making View B, you get the day off!) Welt pockets can be a bit intimidating at first, but once you see how it’s done, you’ll be ready to hit your machine. Cashmerette team member Mallory created this fabulous video tutorial showing how to sew the Auburn’s welt pockets—we recommend giving that a watch all the way through before starting your welt pocket.
And if this is truly your first time sewing a welt pocket, it doesn’t hurt to do a test run using some scrap fabric!
Here are a few additional tips for welt-pocket success:
- Mark and cut all of the pieces extremely accurately, especially the welt piece.
- Use chalk or a washable marker to draw on the sew lines as guides.
- Be extra careful when you cut into the welt not to go through the corner stitching.
- If this is your first time sewing a welt pocket, we recommend doing a test run first on some scrap fabric, before making one on your final blazer.
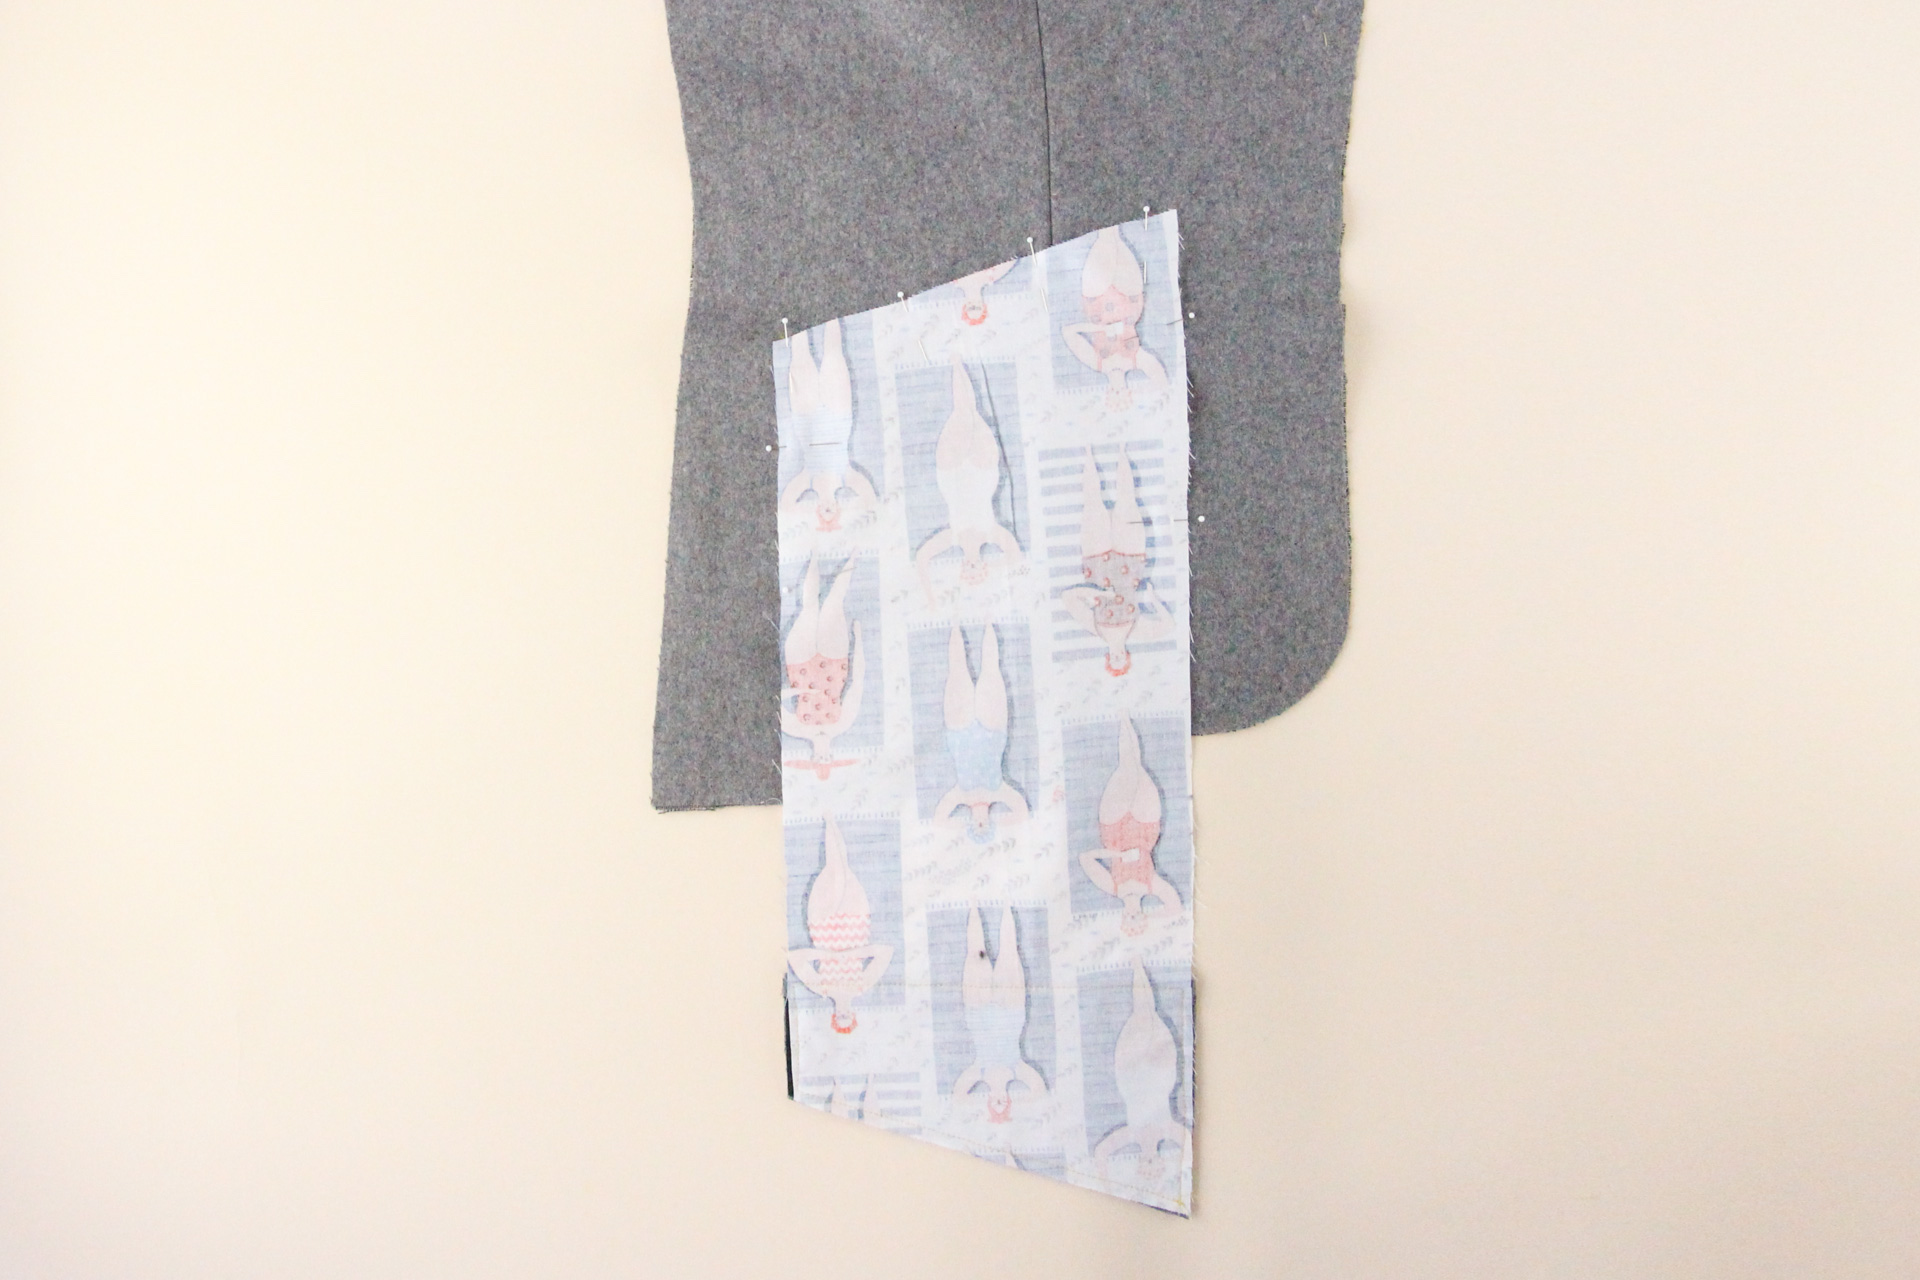
Prepare the Pocket Bag & Welt
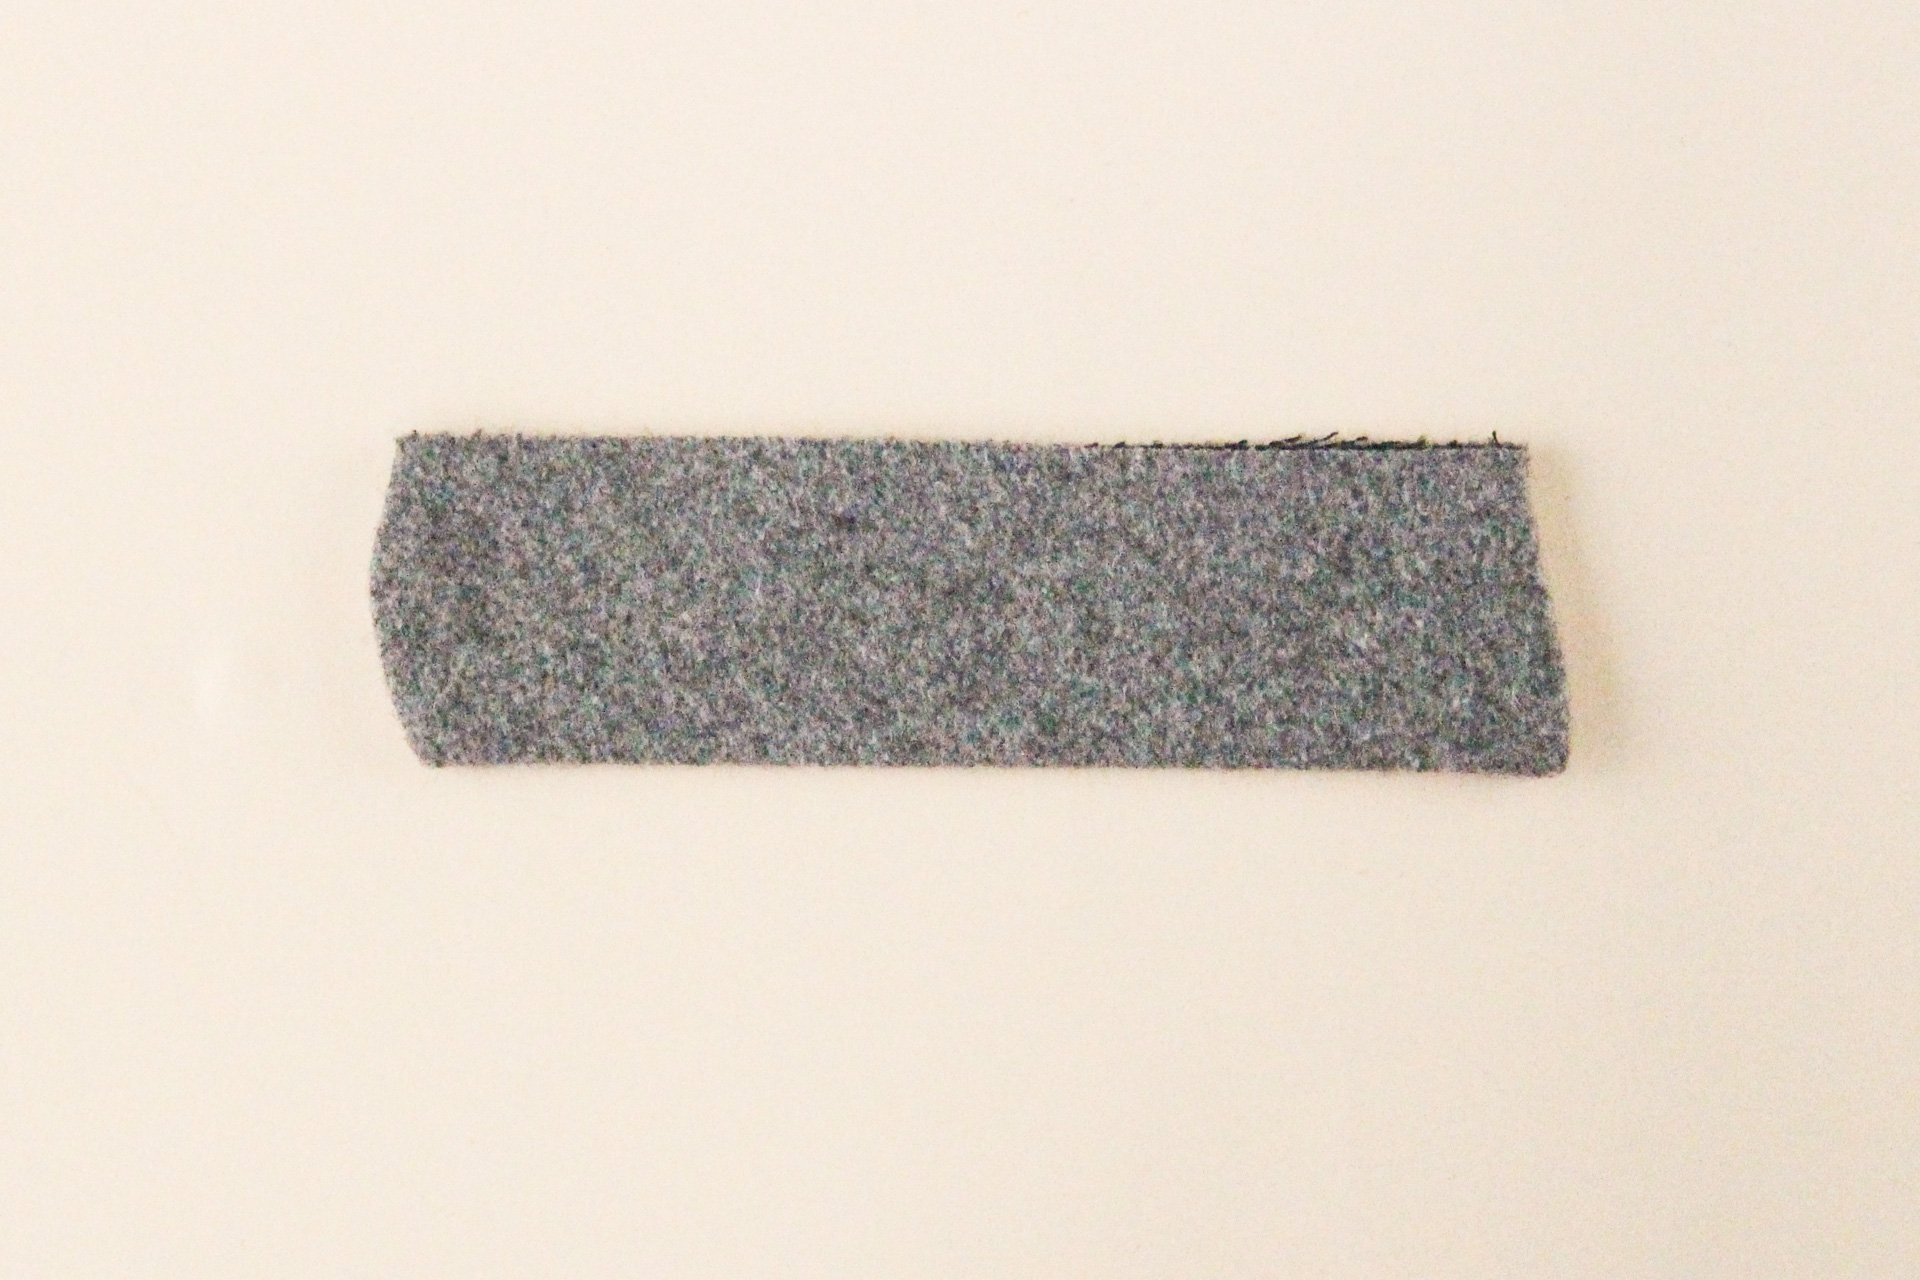
Start by folding the lower edge of the pocket facing to the wrong side by 1/2″ (12 mm) and pressing.
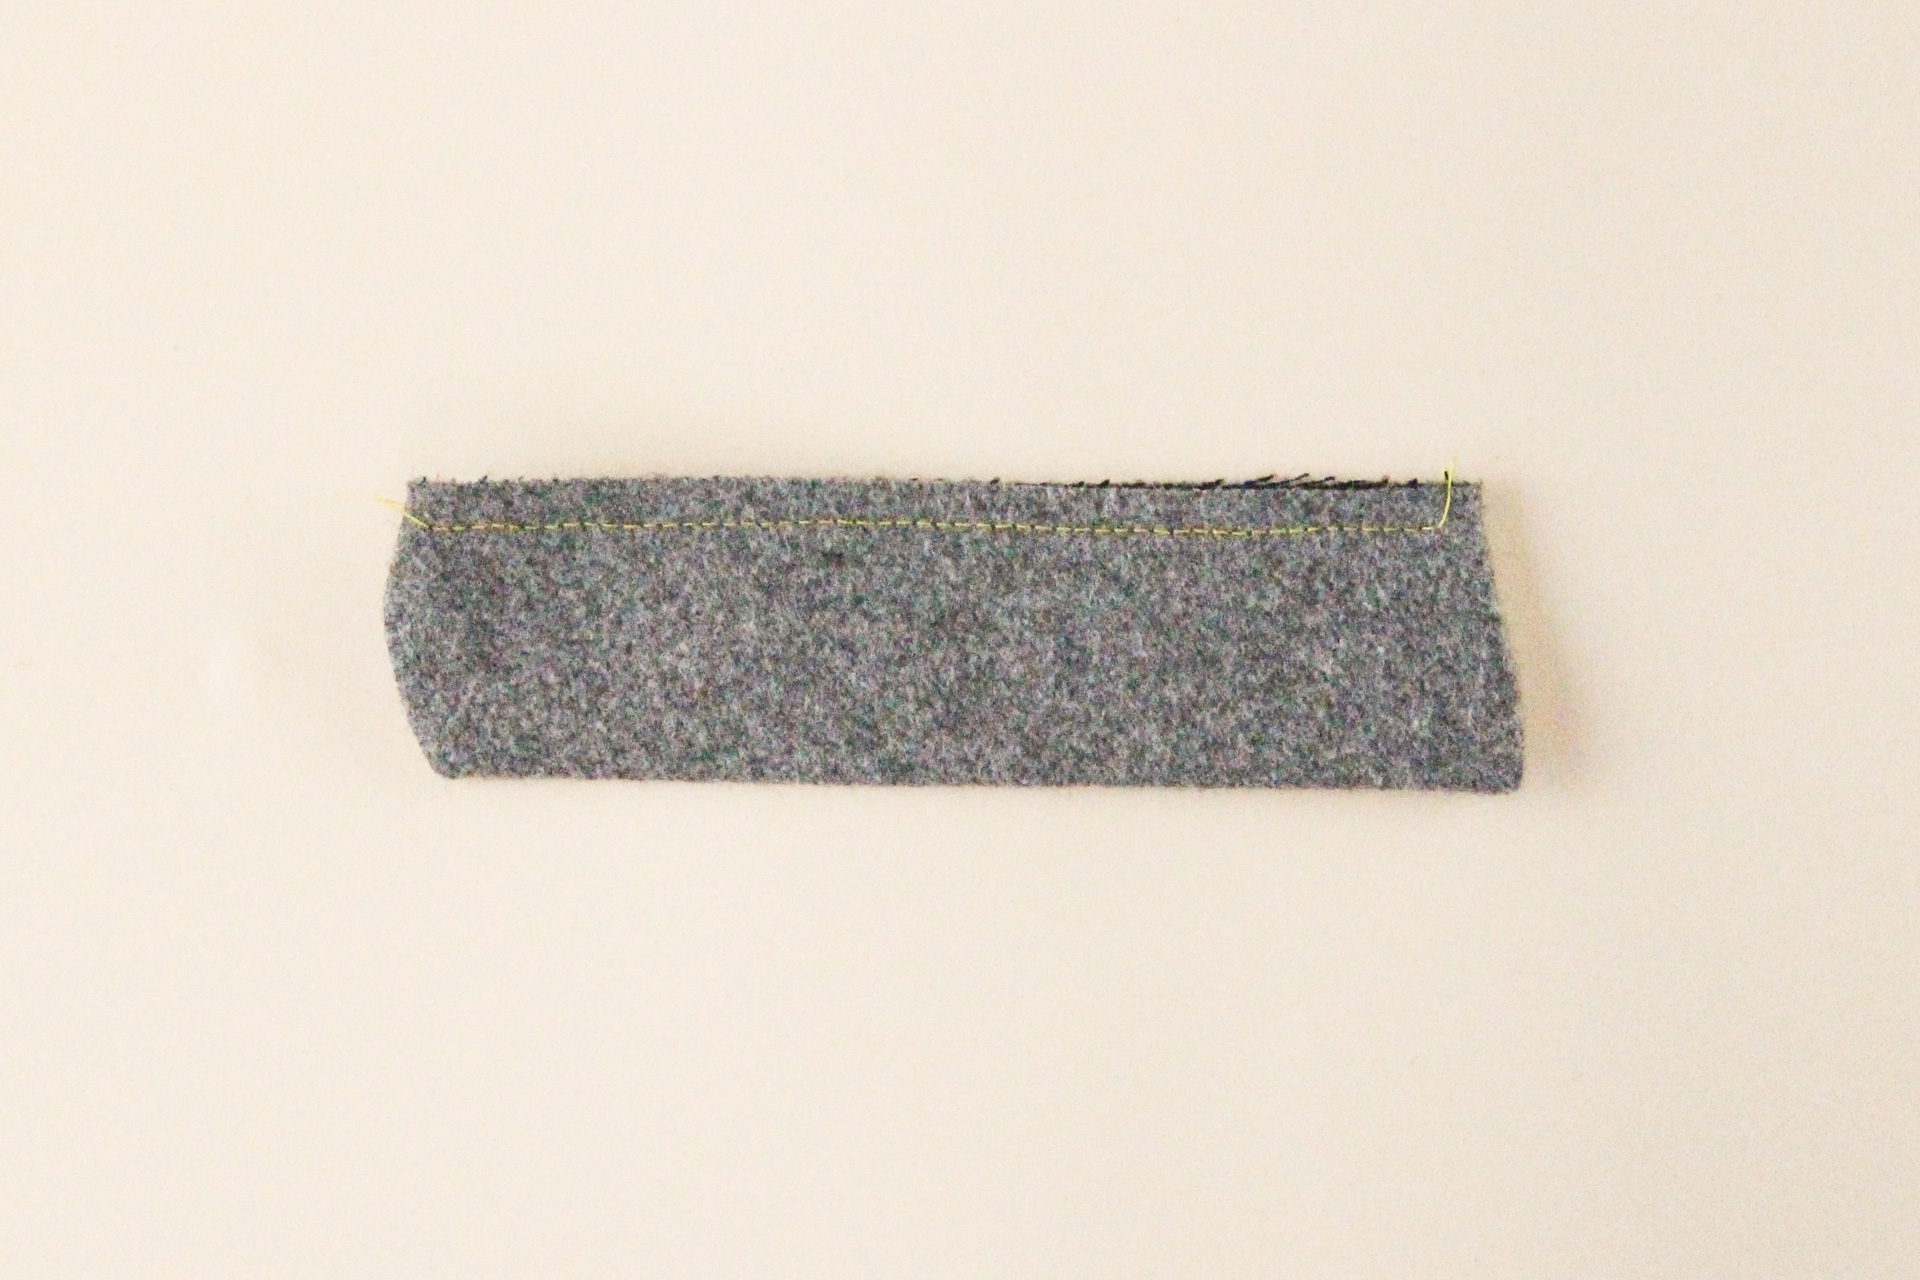
Flip the pocket facing over to the right side, and then pin it to the pocket bag, wrong side of pocket facing to right side of bag. Pin all around the pocket facing.
Now we’re going to sew around the entire edge of the pocket facing, 1/4″ (6 mm) from the edge of the pocket facing.
Repeat with the other pocket facing and pocket bag.
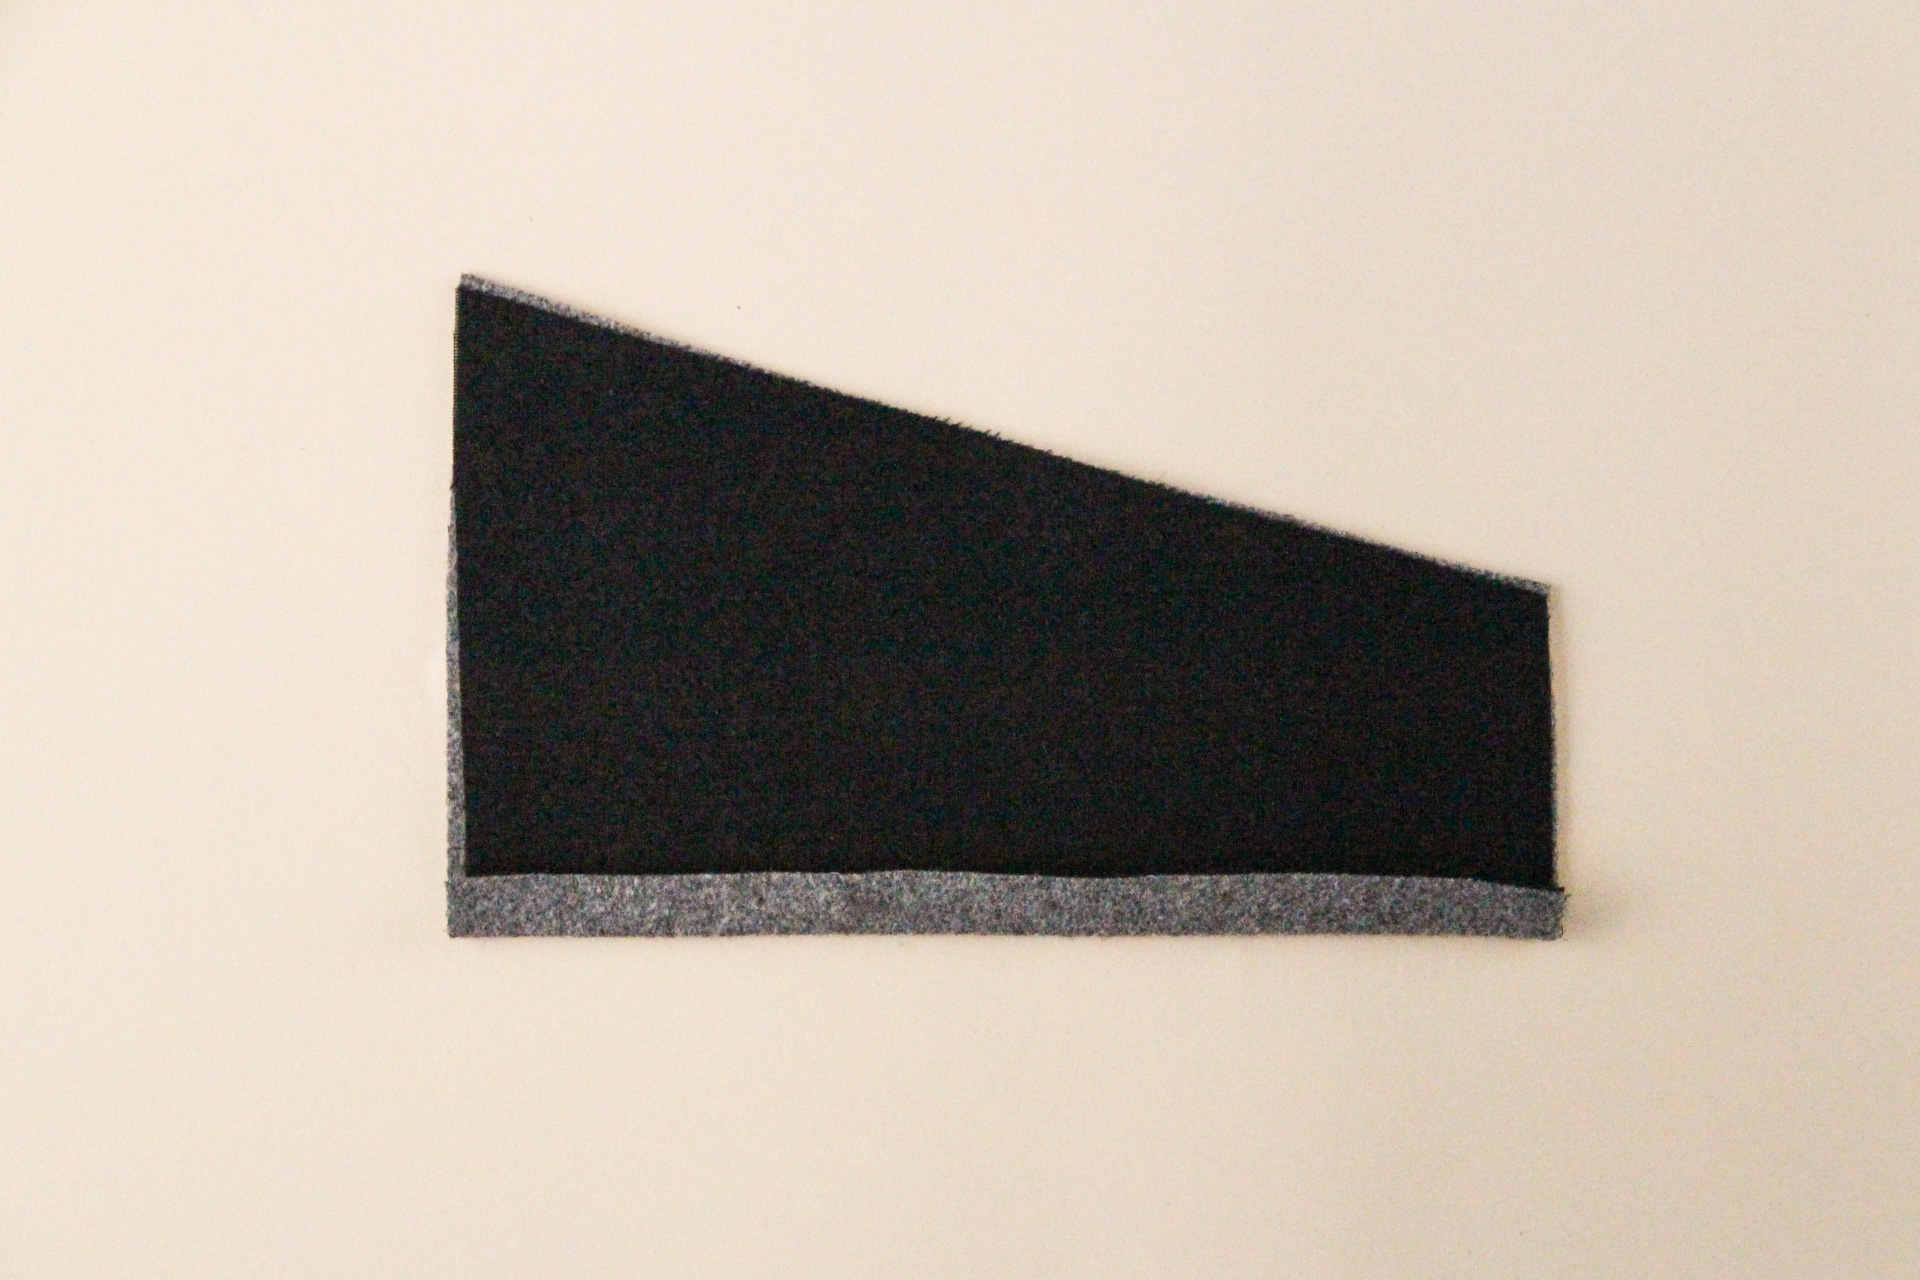
Now we’re going to prep the welt. Fold your pocket welt in half, right sides together, and pin along the short ends.
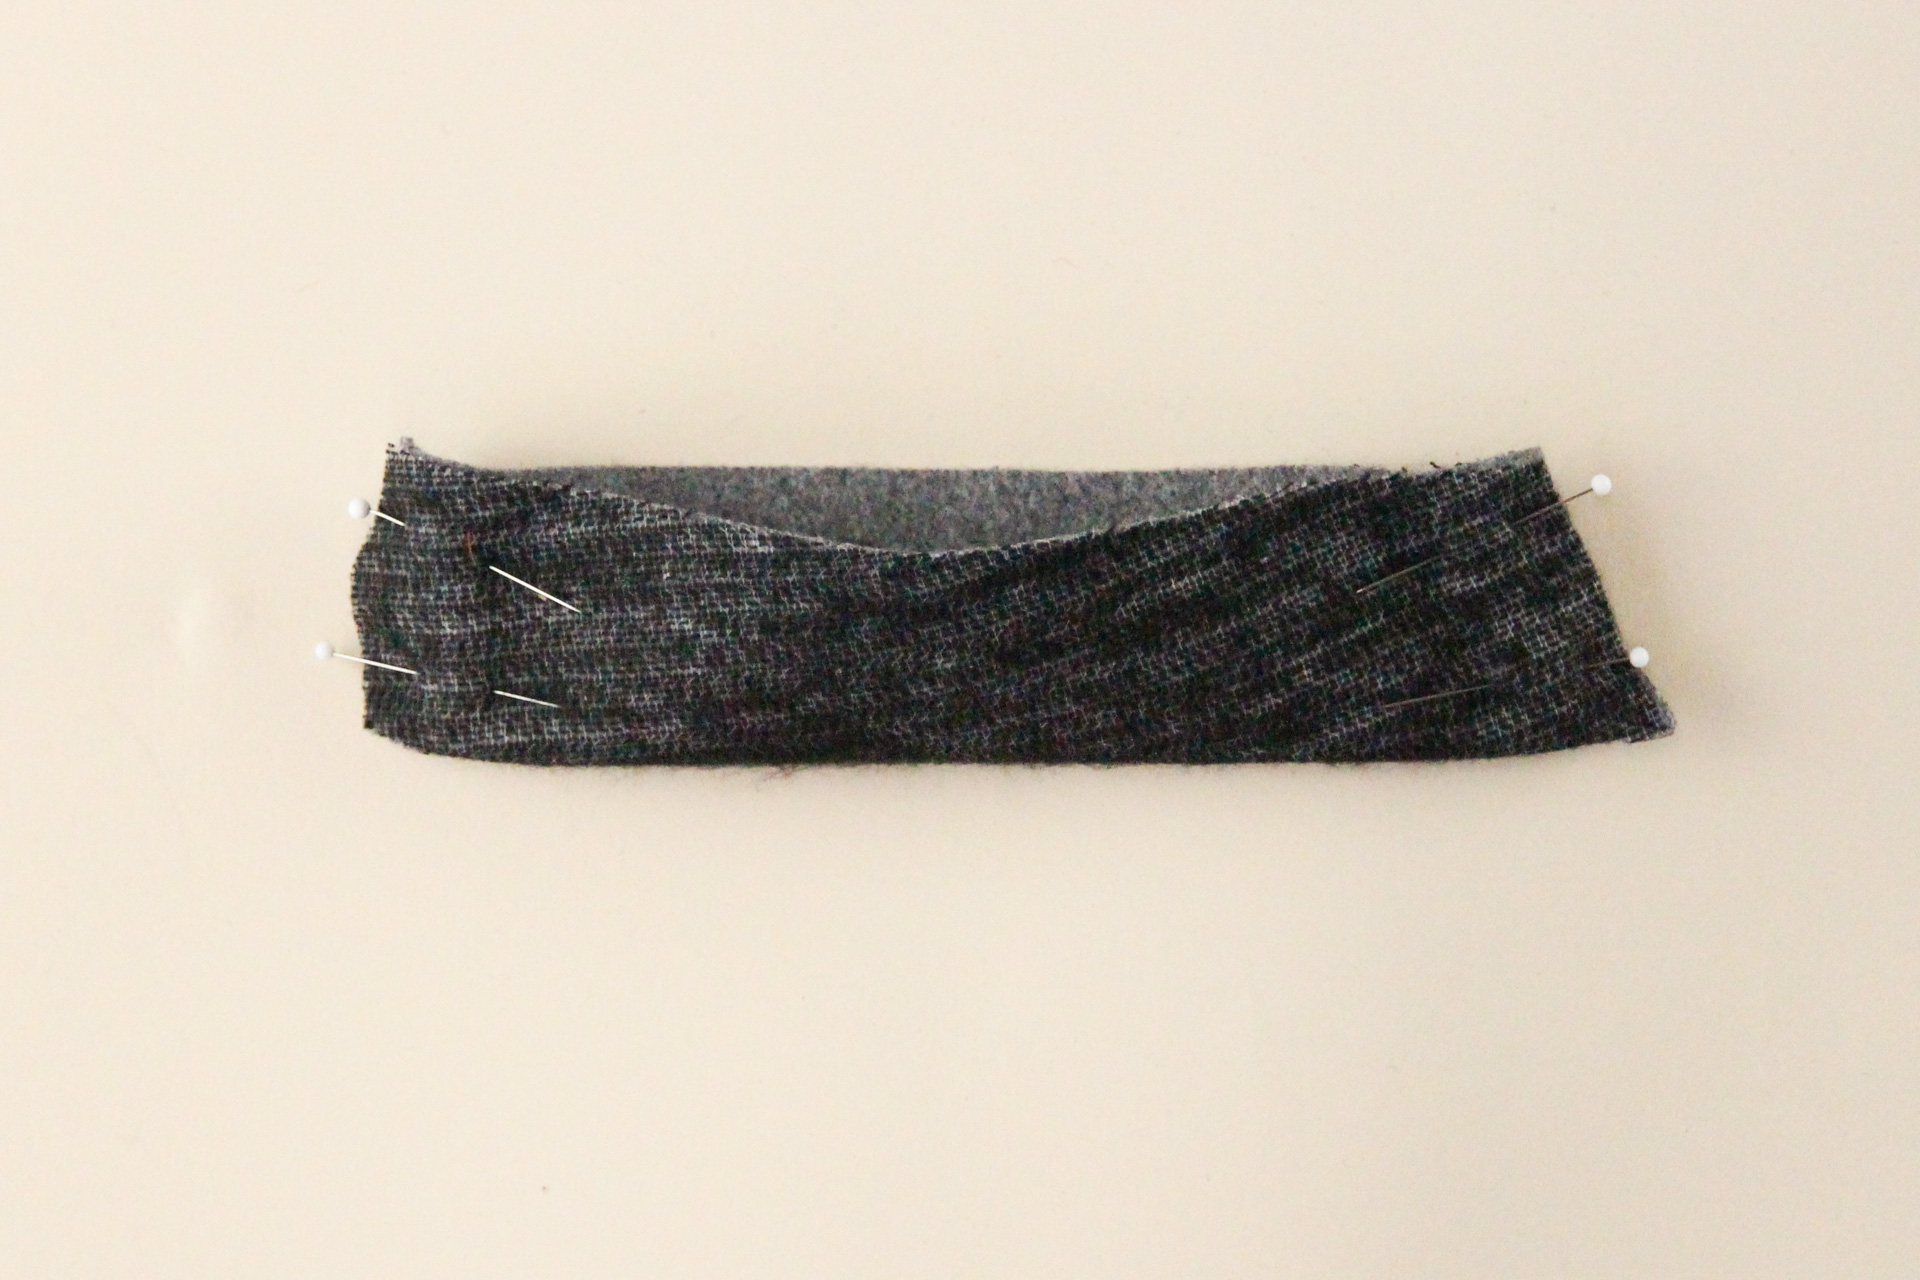
Let’s sew those seams using our 1/2″ (12 mm) seam allowance, then trim them down to 1/4″ (6 mm) and clip the corners.
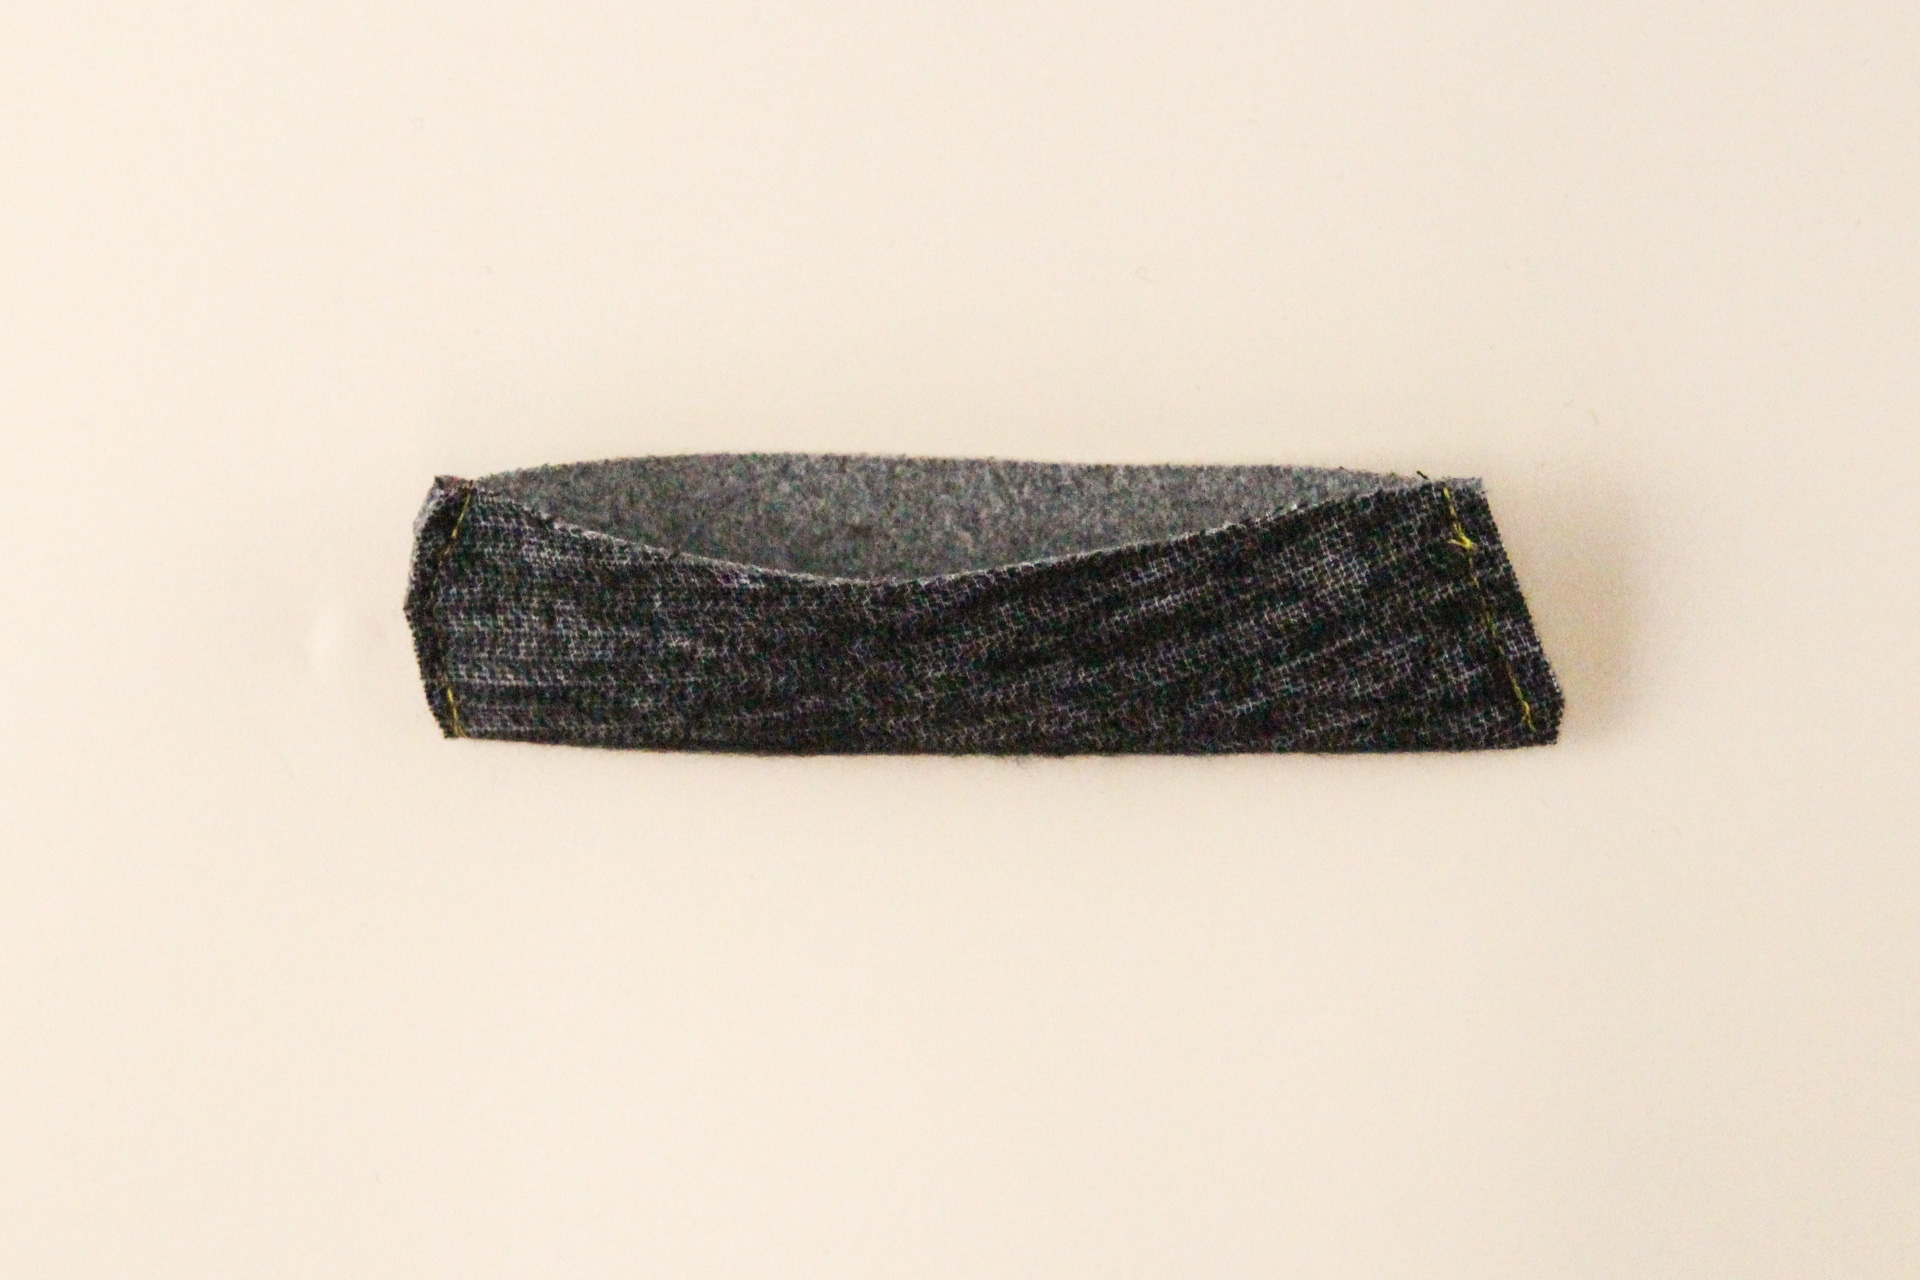
Now we can flip our welt to the right side and use a point turner to push out the corners. Give it a nice press—these corners will be visible from the outside of your blazer, so you’ll want them to be nice and neat.
If you want, you can baste across the top of the open edge at 1/4″ (6 mm) seam allowance.
Repeat with the second welt.
Create the Welt Pocket
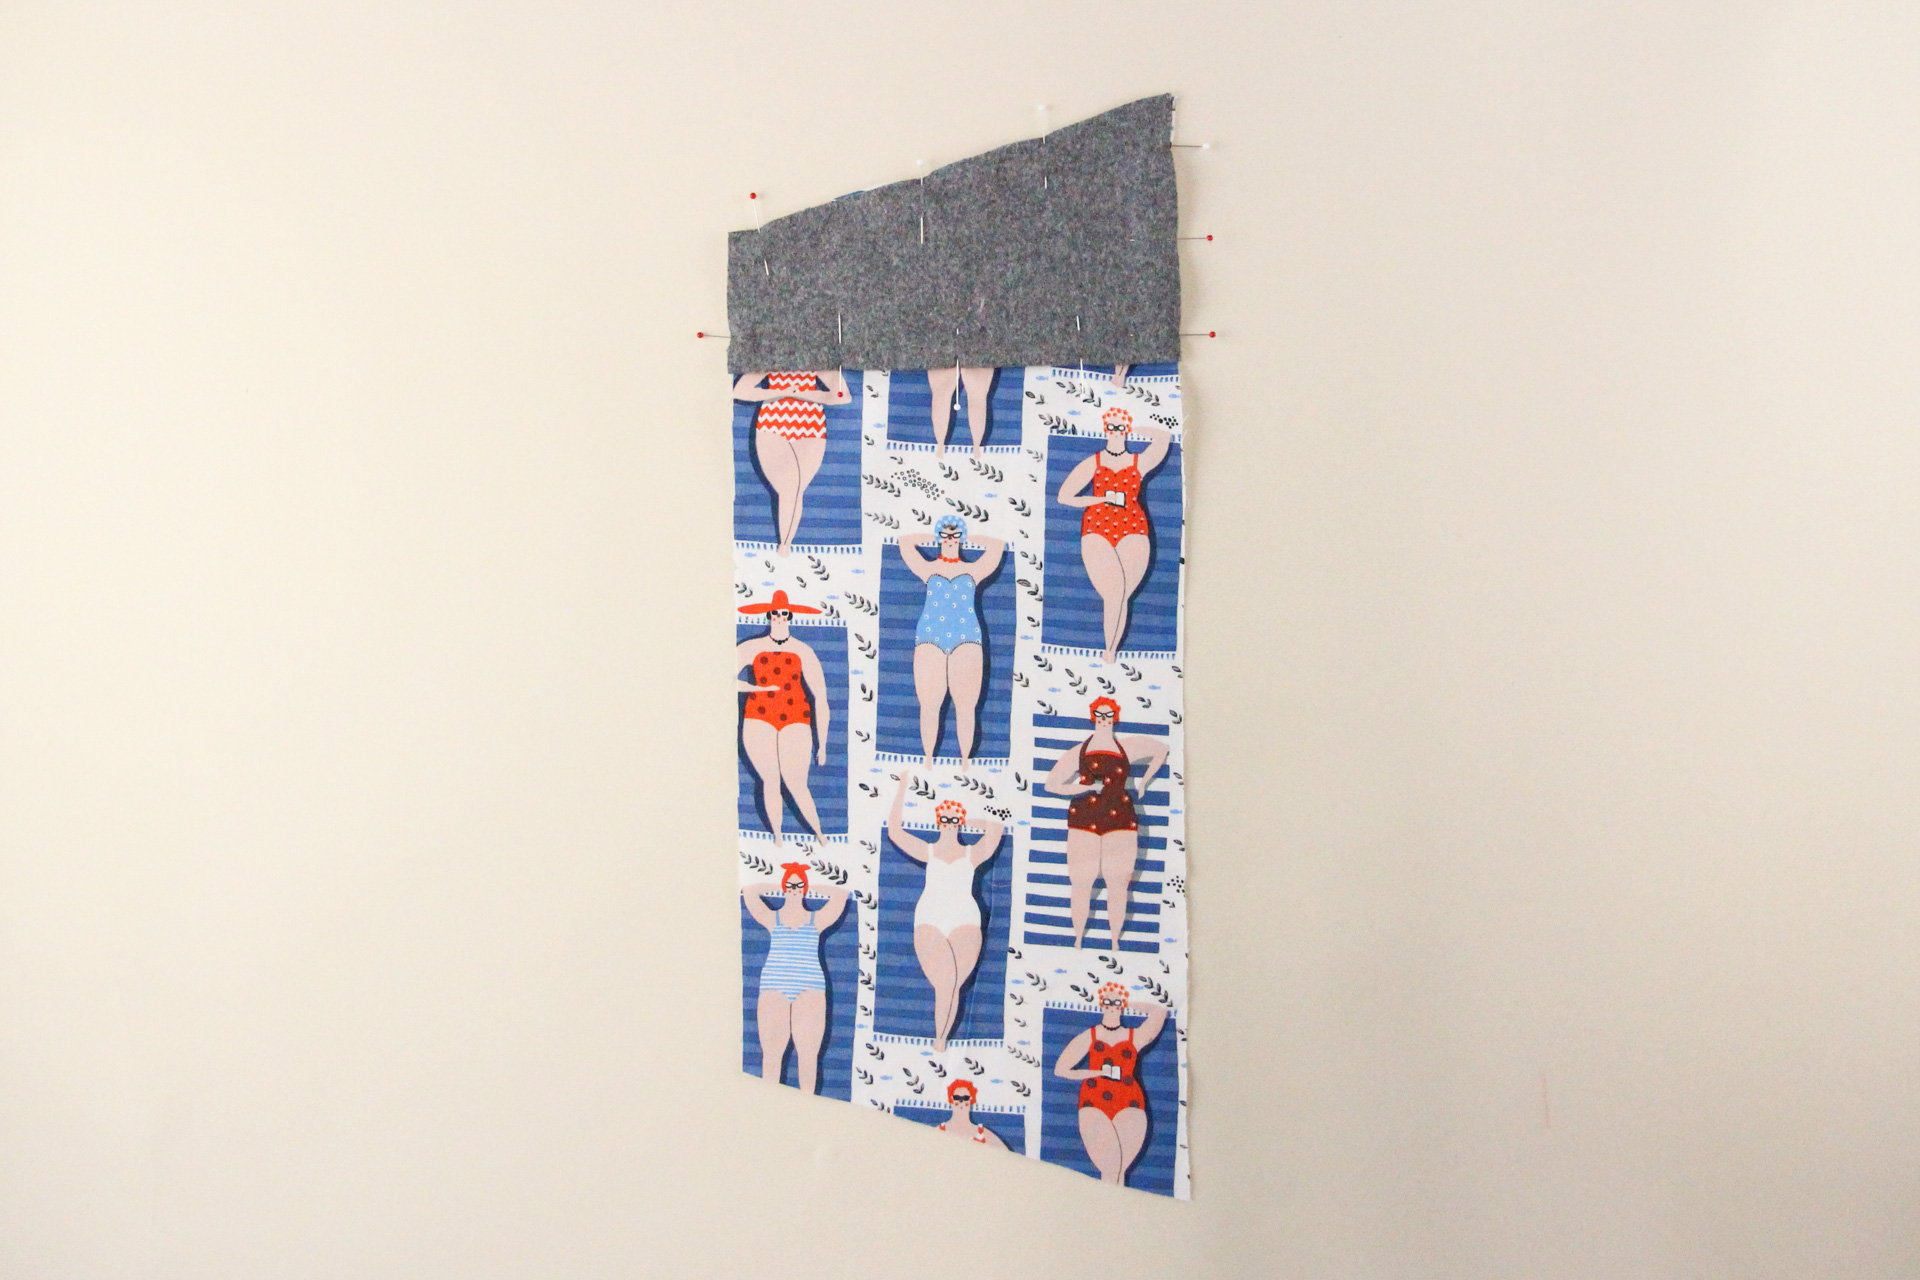
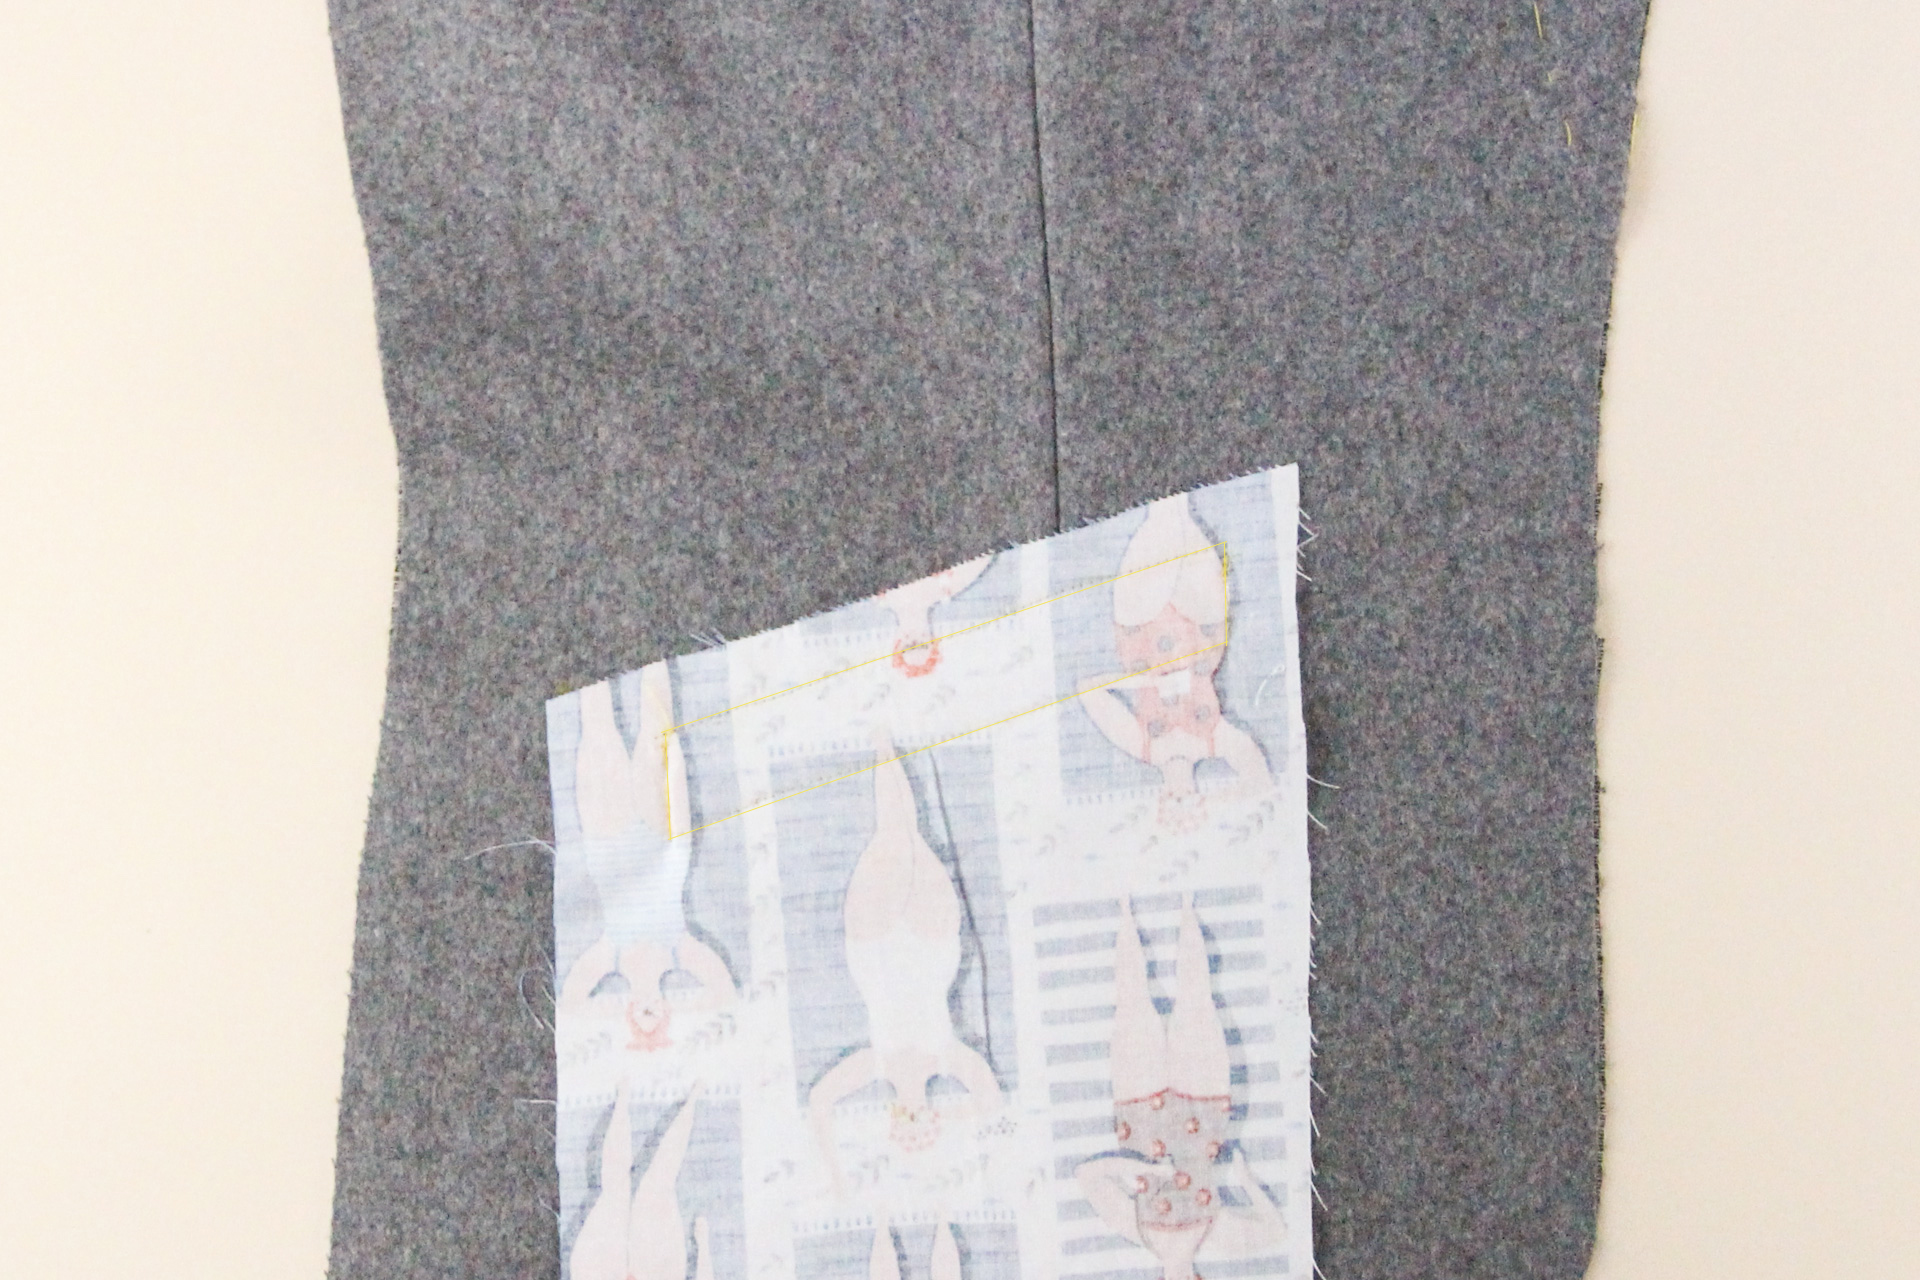
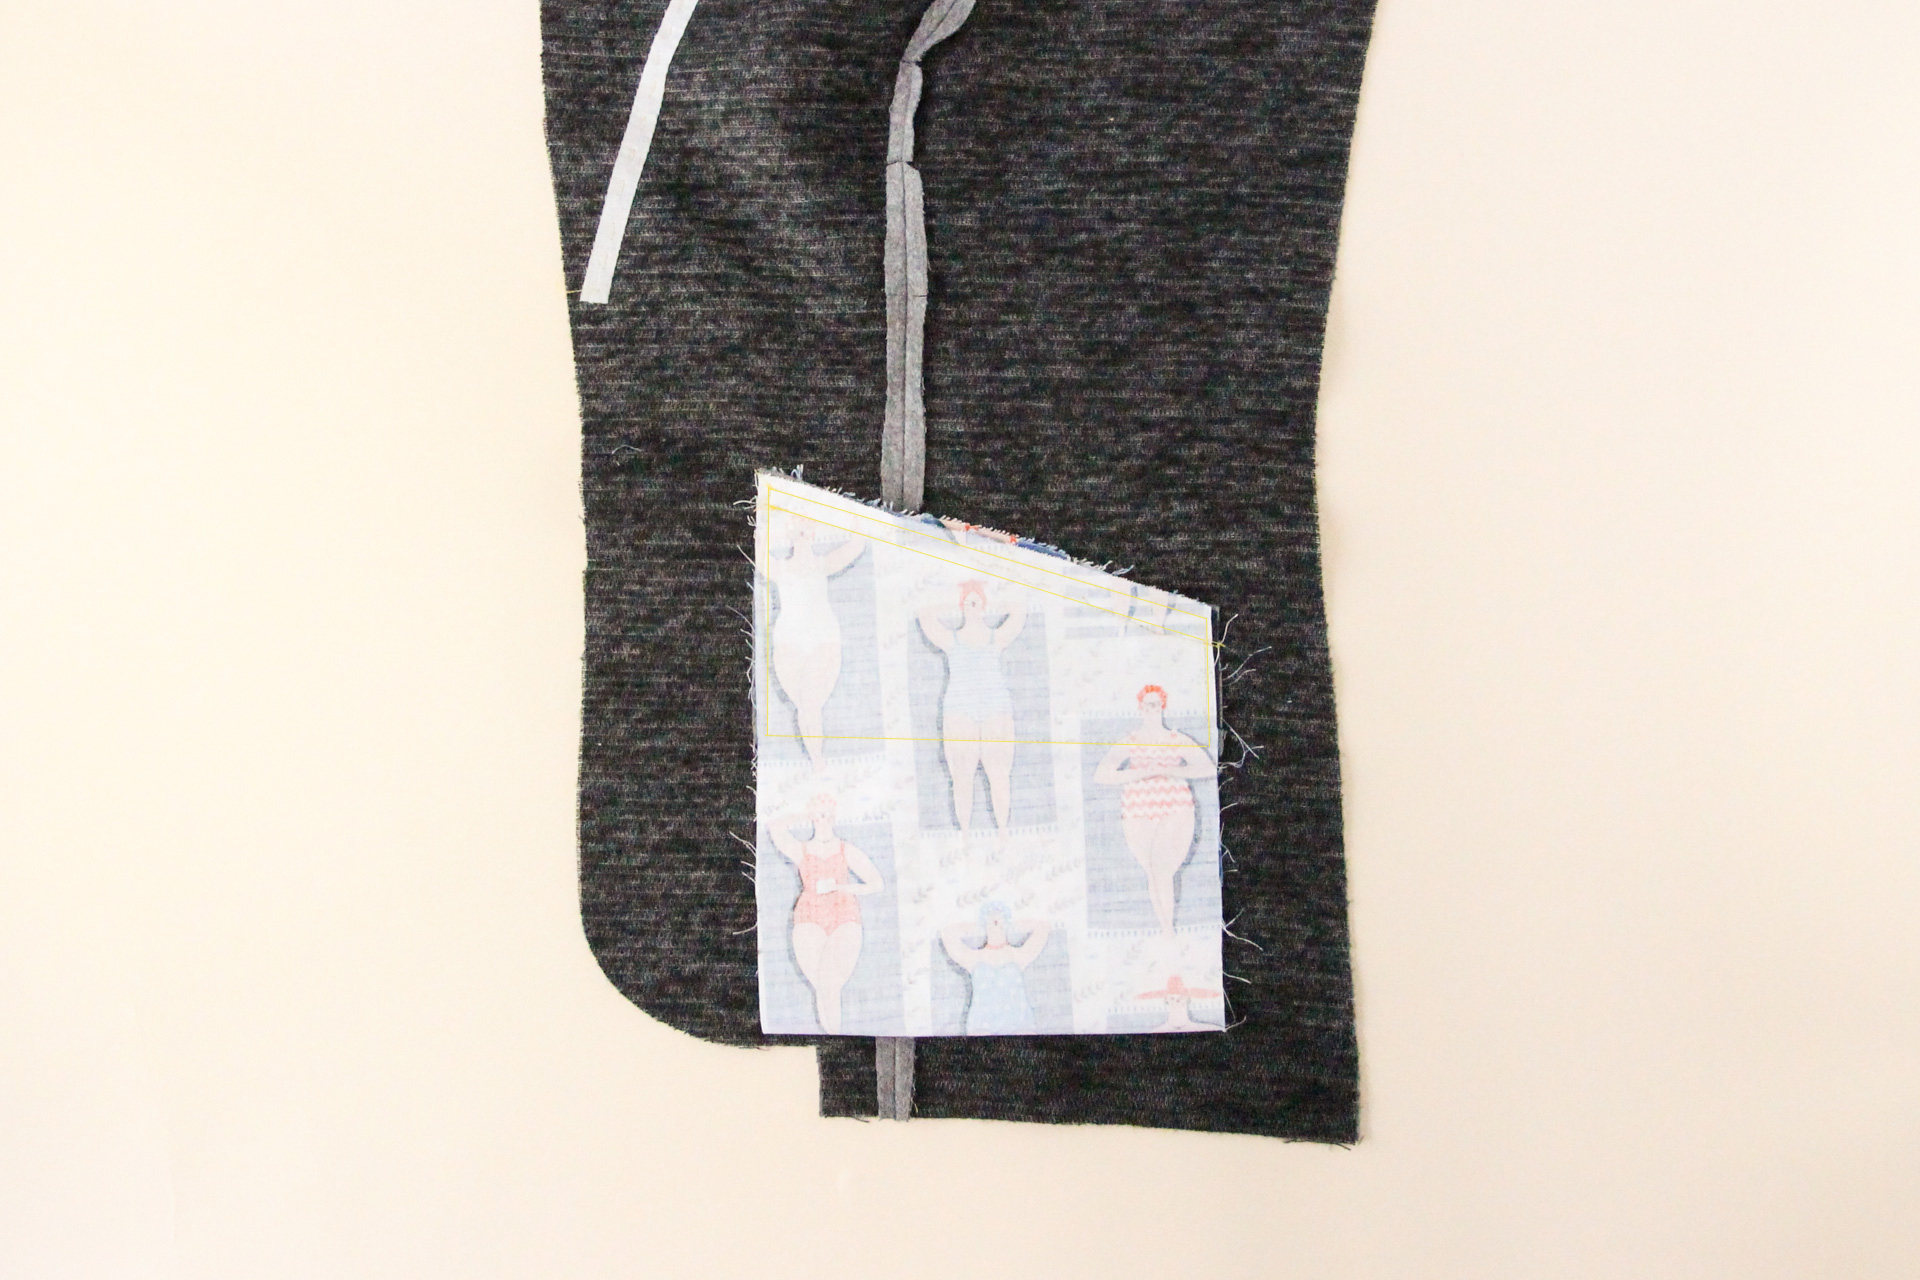
Now it’s time to put it all together. Start by taking your pocket welt and aligning the raw edge with the center line of your welt placement that you marked on your assembled front. The folded edge should be towards the bottom of the blazer, and should match the lower end of the center line but not quite reach the upper end of the center line.
Pin in place.
Now we can baste across the top of the pocket welt, 1/4″ (6 mm) from the raw edge. If you previously basted the pocket welt closed, you’ll be sewing this stitching line over the previous line you sewed.
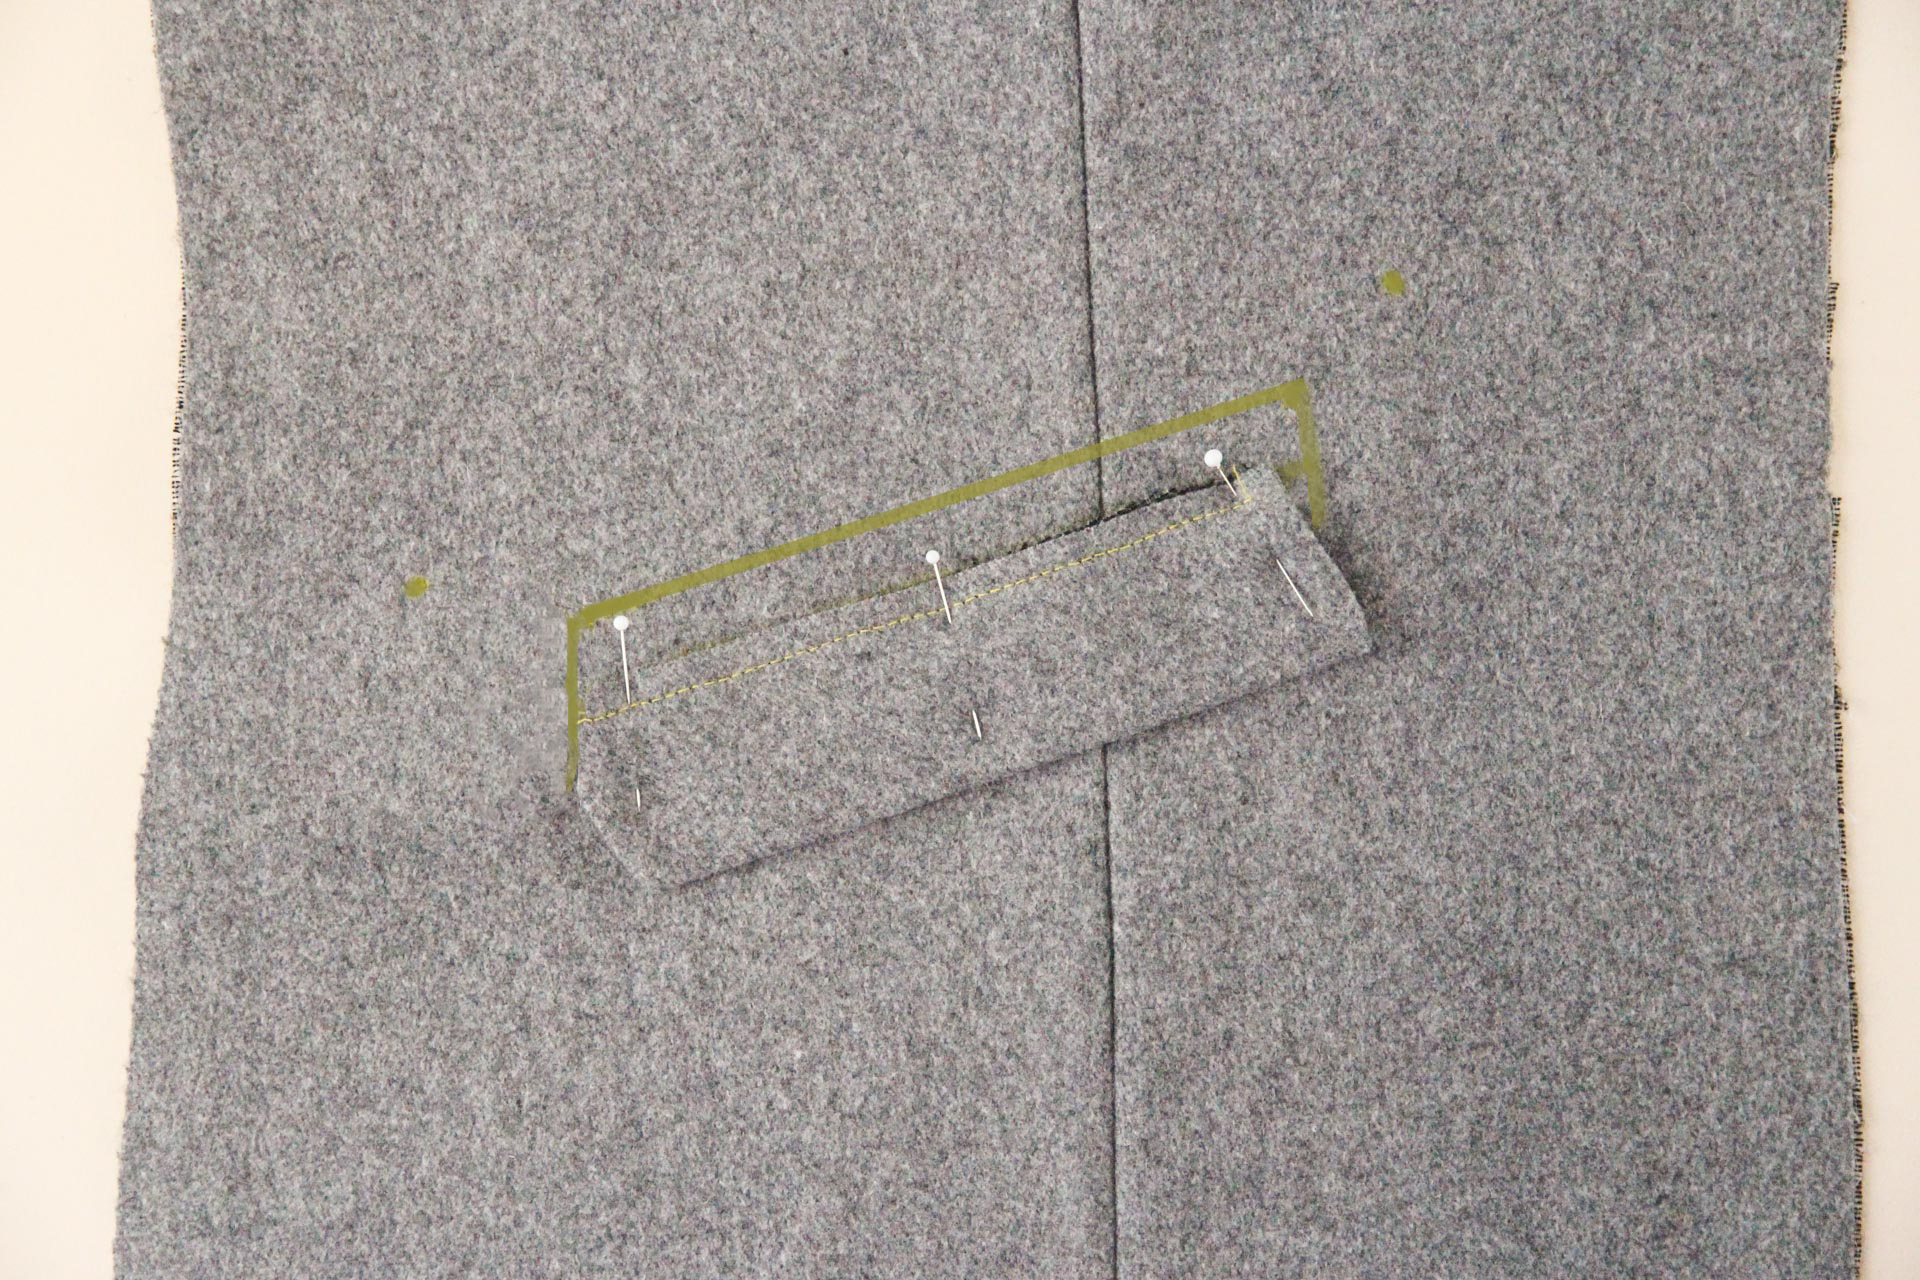
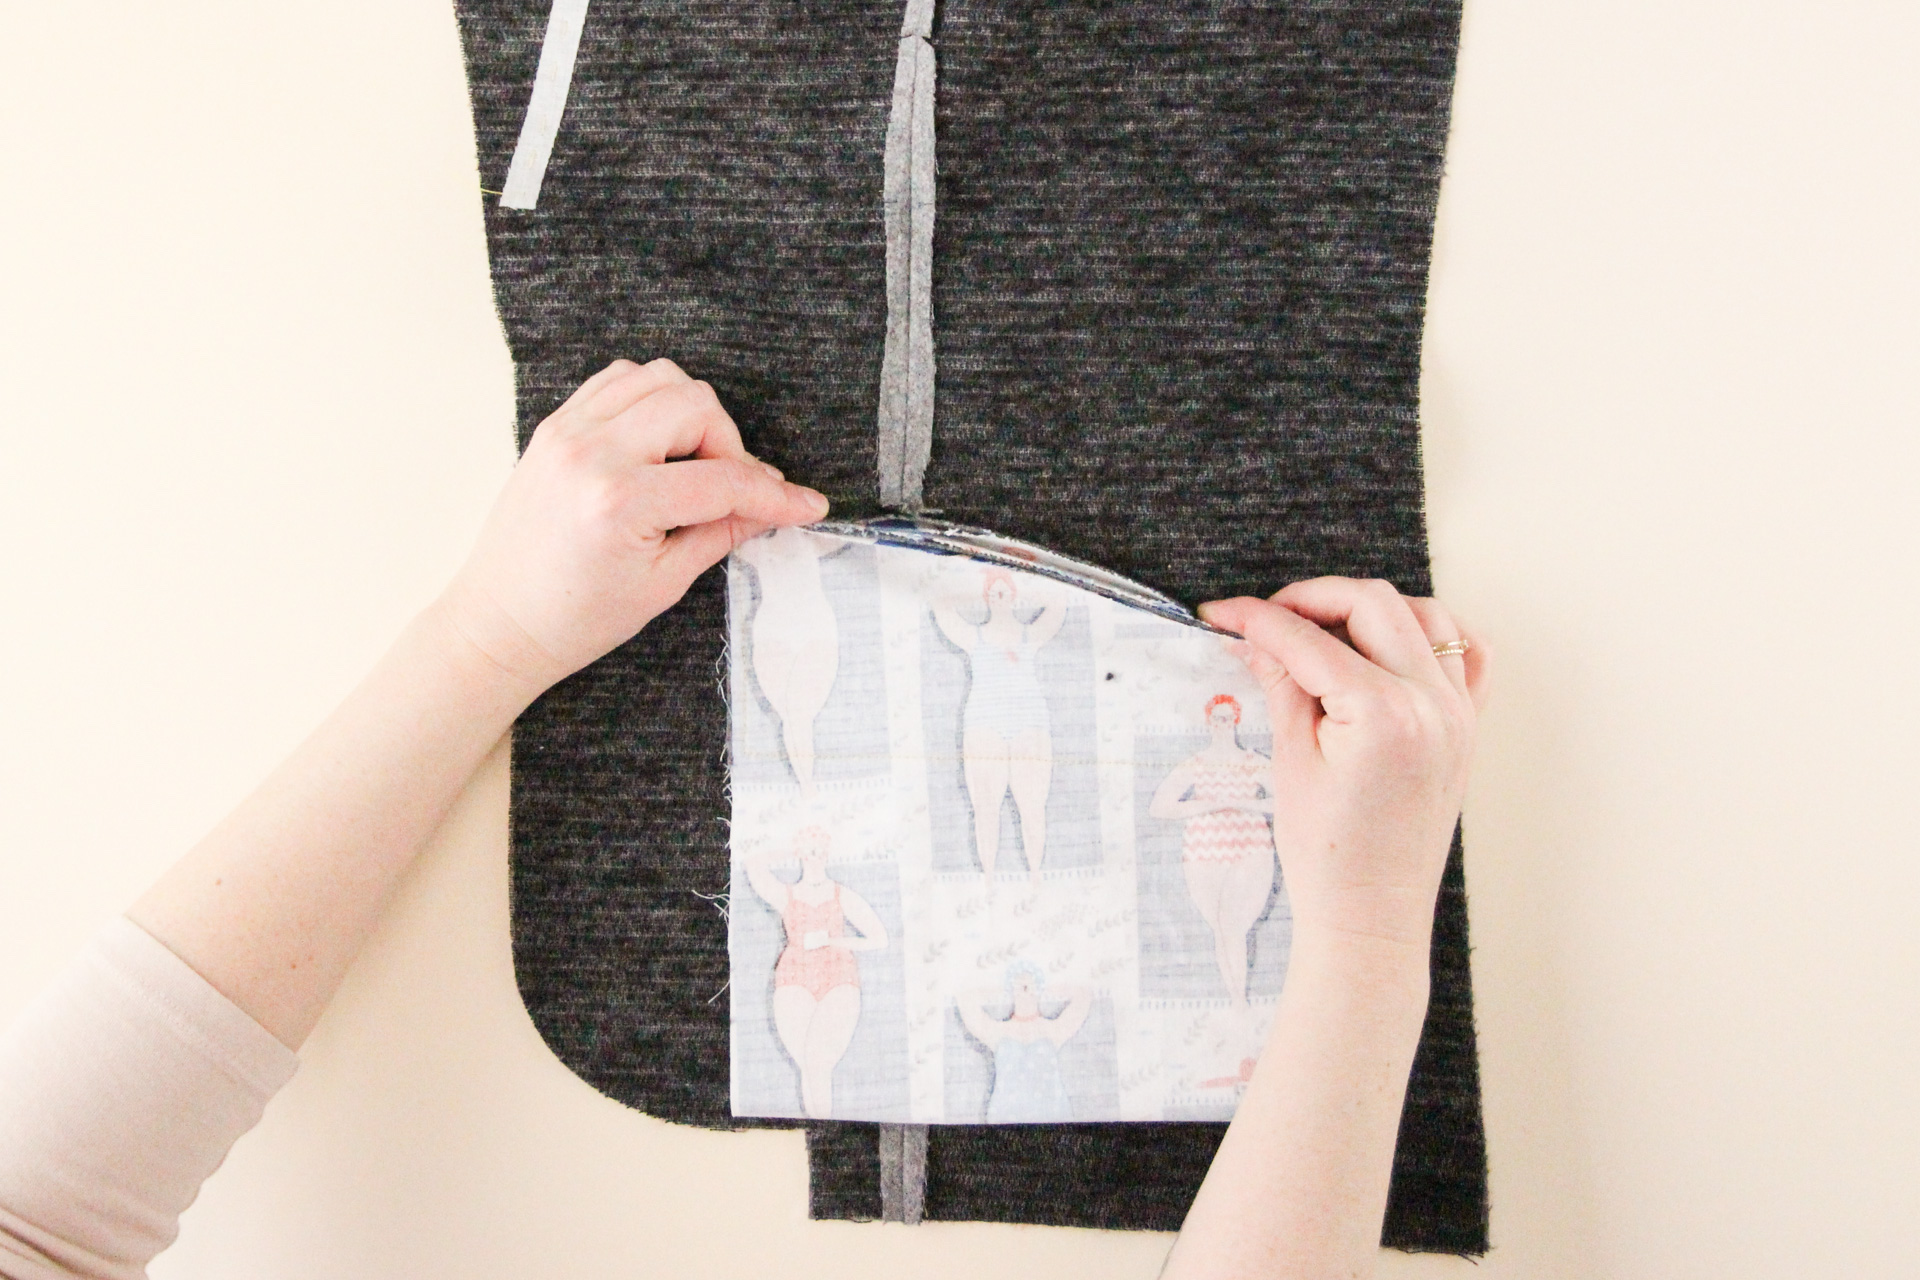
Taking our pocket bag, we’re going to flip it over to the wrong side and then turn it upside down, so that the faced end is hanging out below the blazer. Align the unfaced end to the two square markings (covering the welt we just sewed) and pin across the top of the pocket bag and down a few inches on both sides.
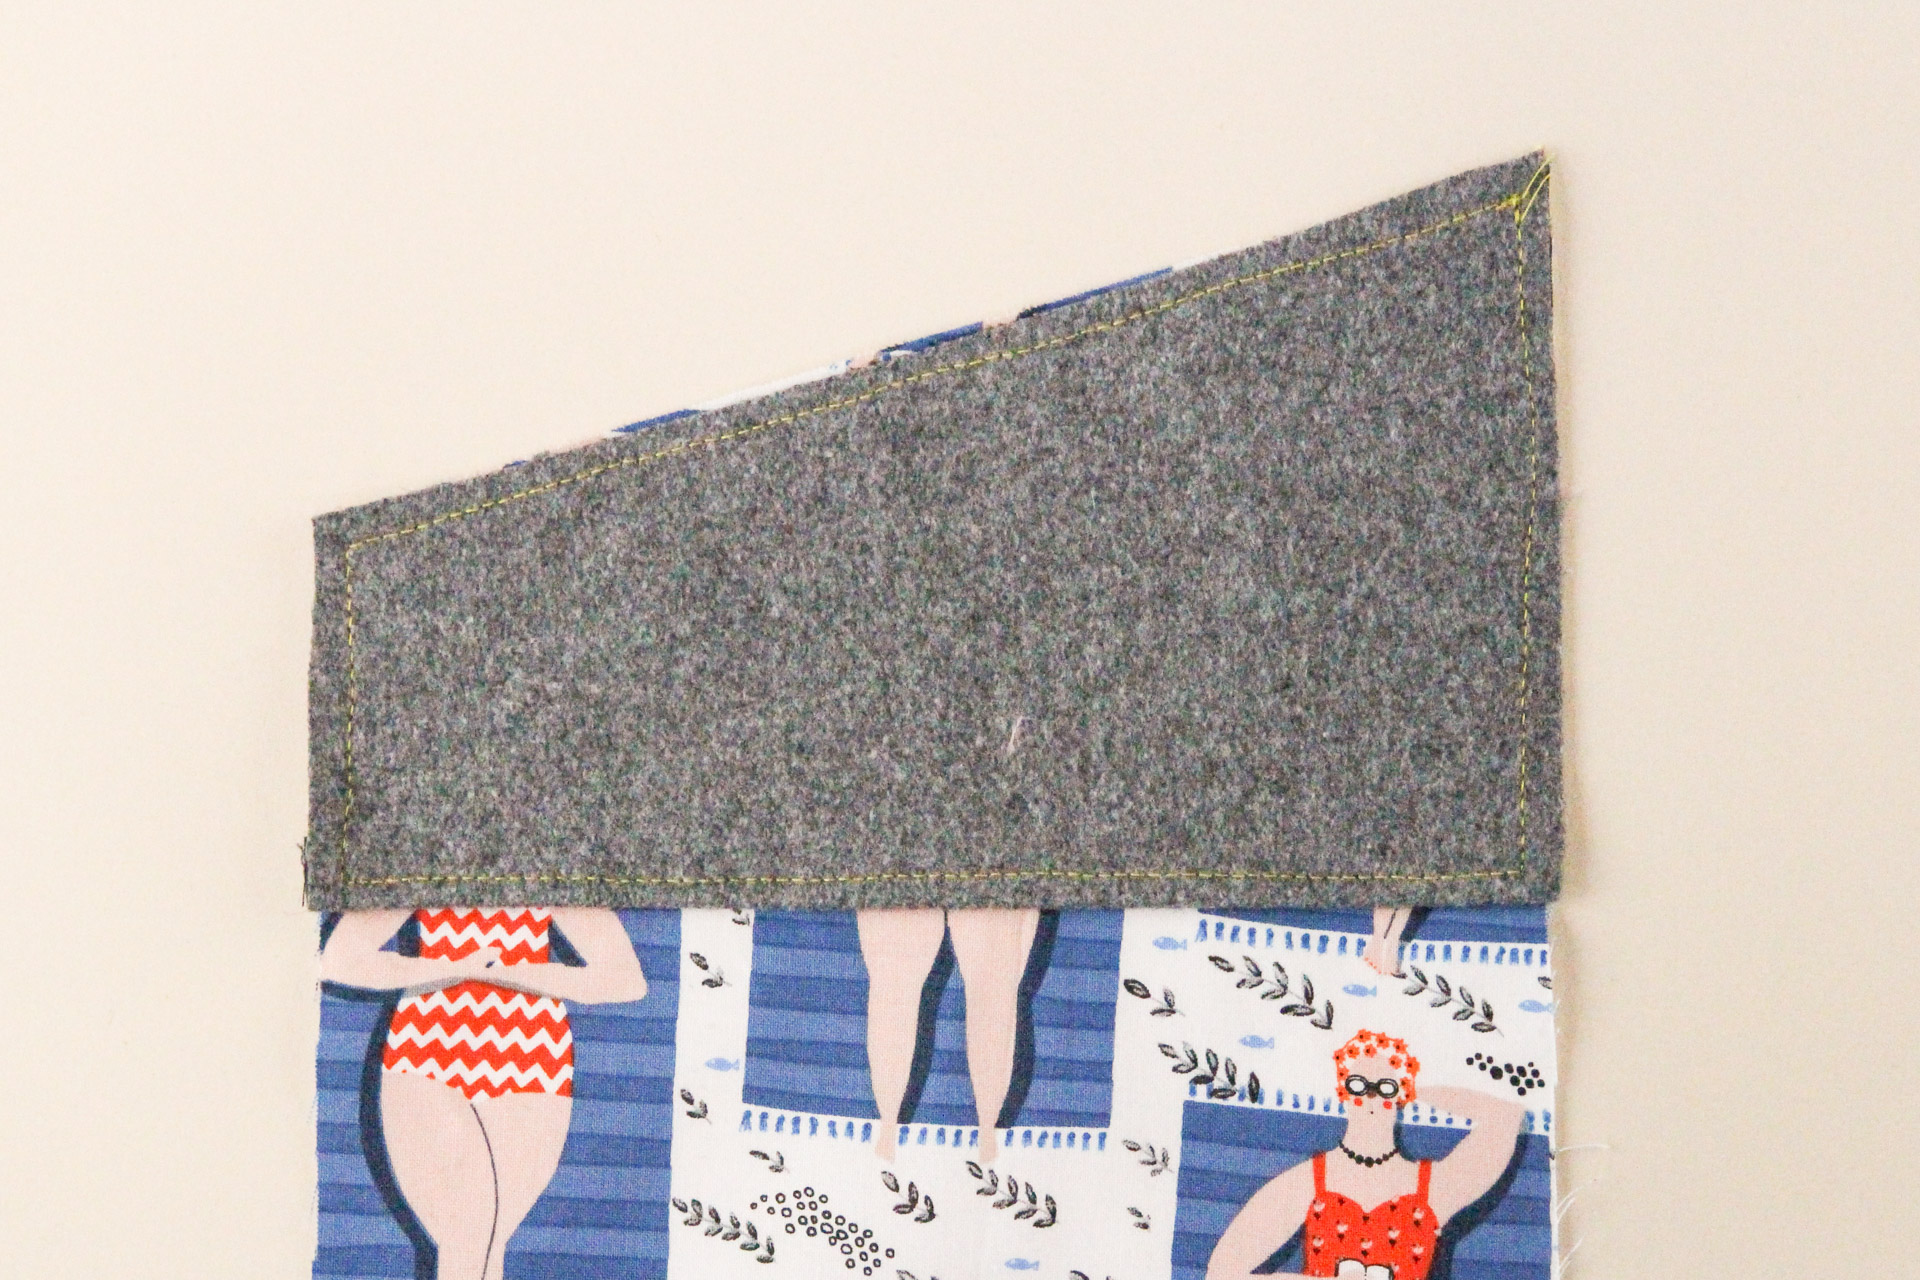
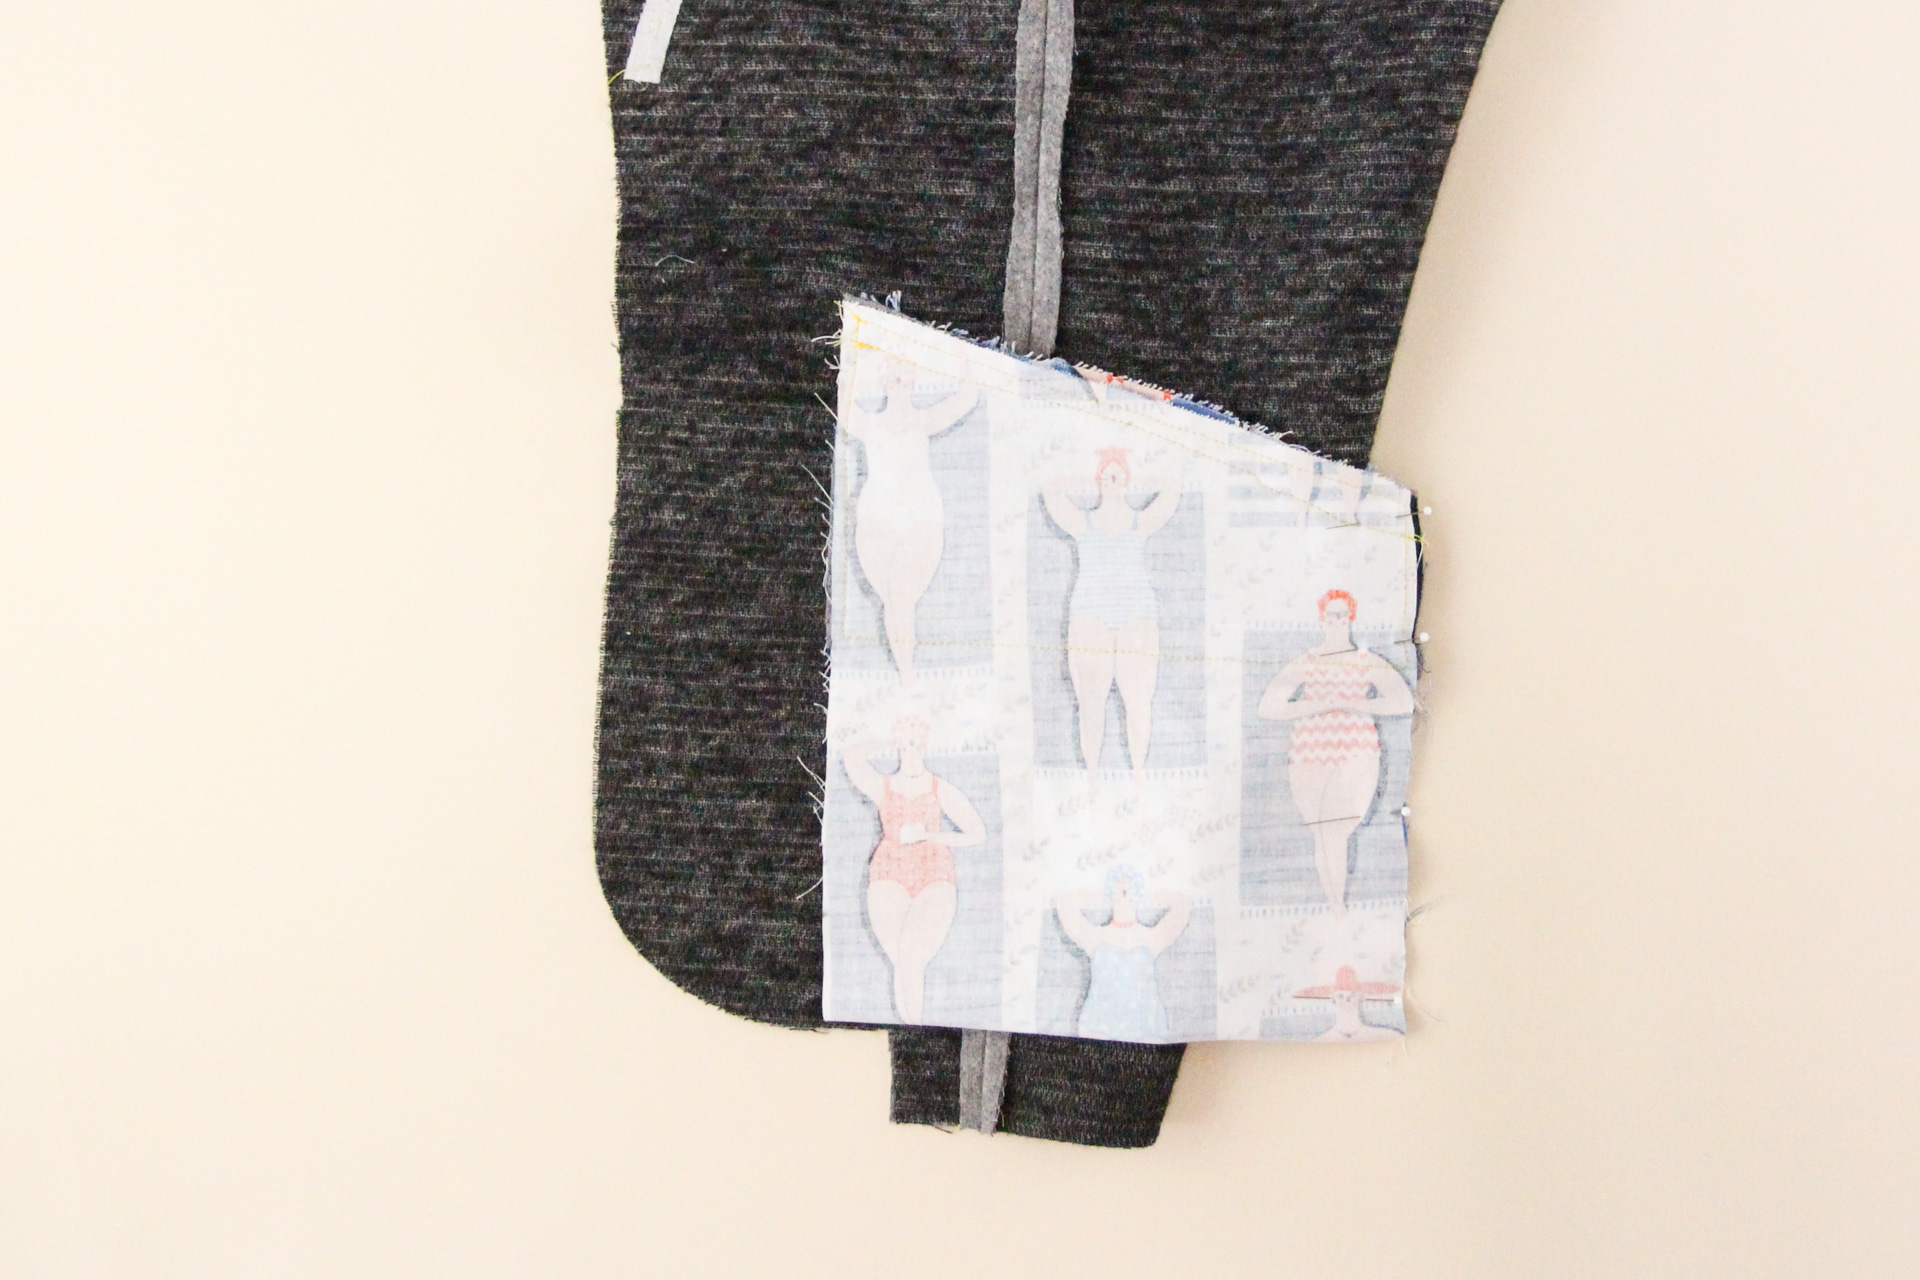
From the WRONG side, we’re going to sew around the welt placement marking using a short stitch—1.5 to 2 mm in length. Make sure that you only catch the welt along the bottom line of the marking, not the sides. This step can be a bit fiddly, so go slow, and make sure you stop and pivot when you get to each corner.
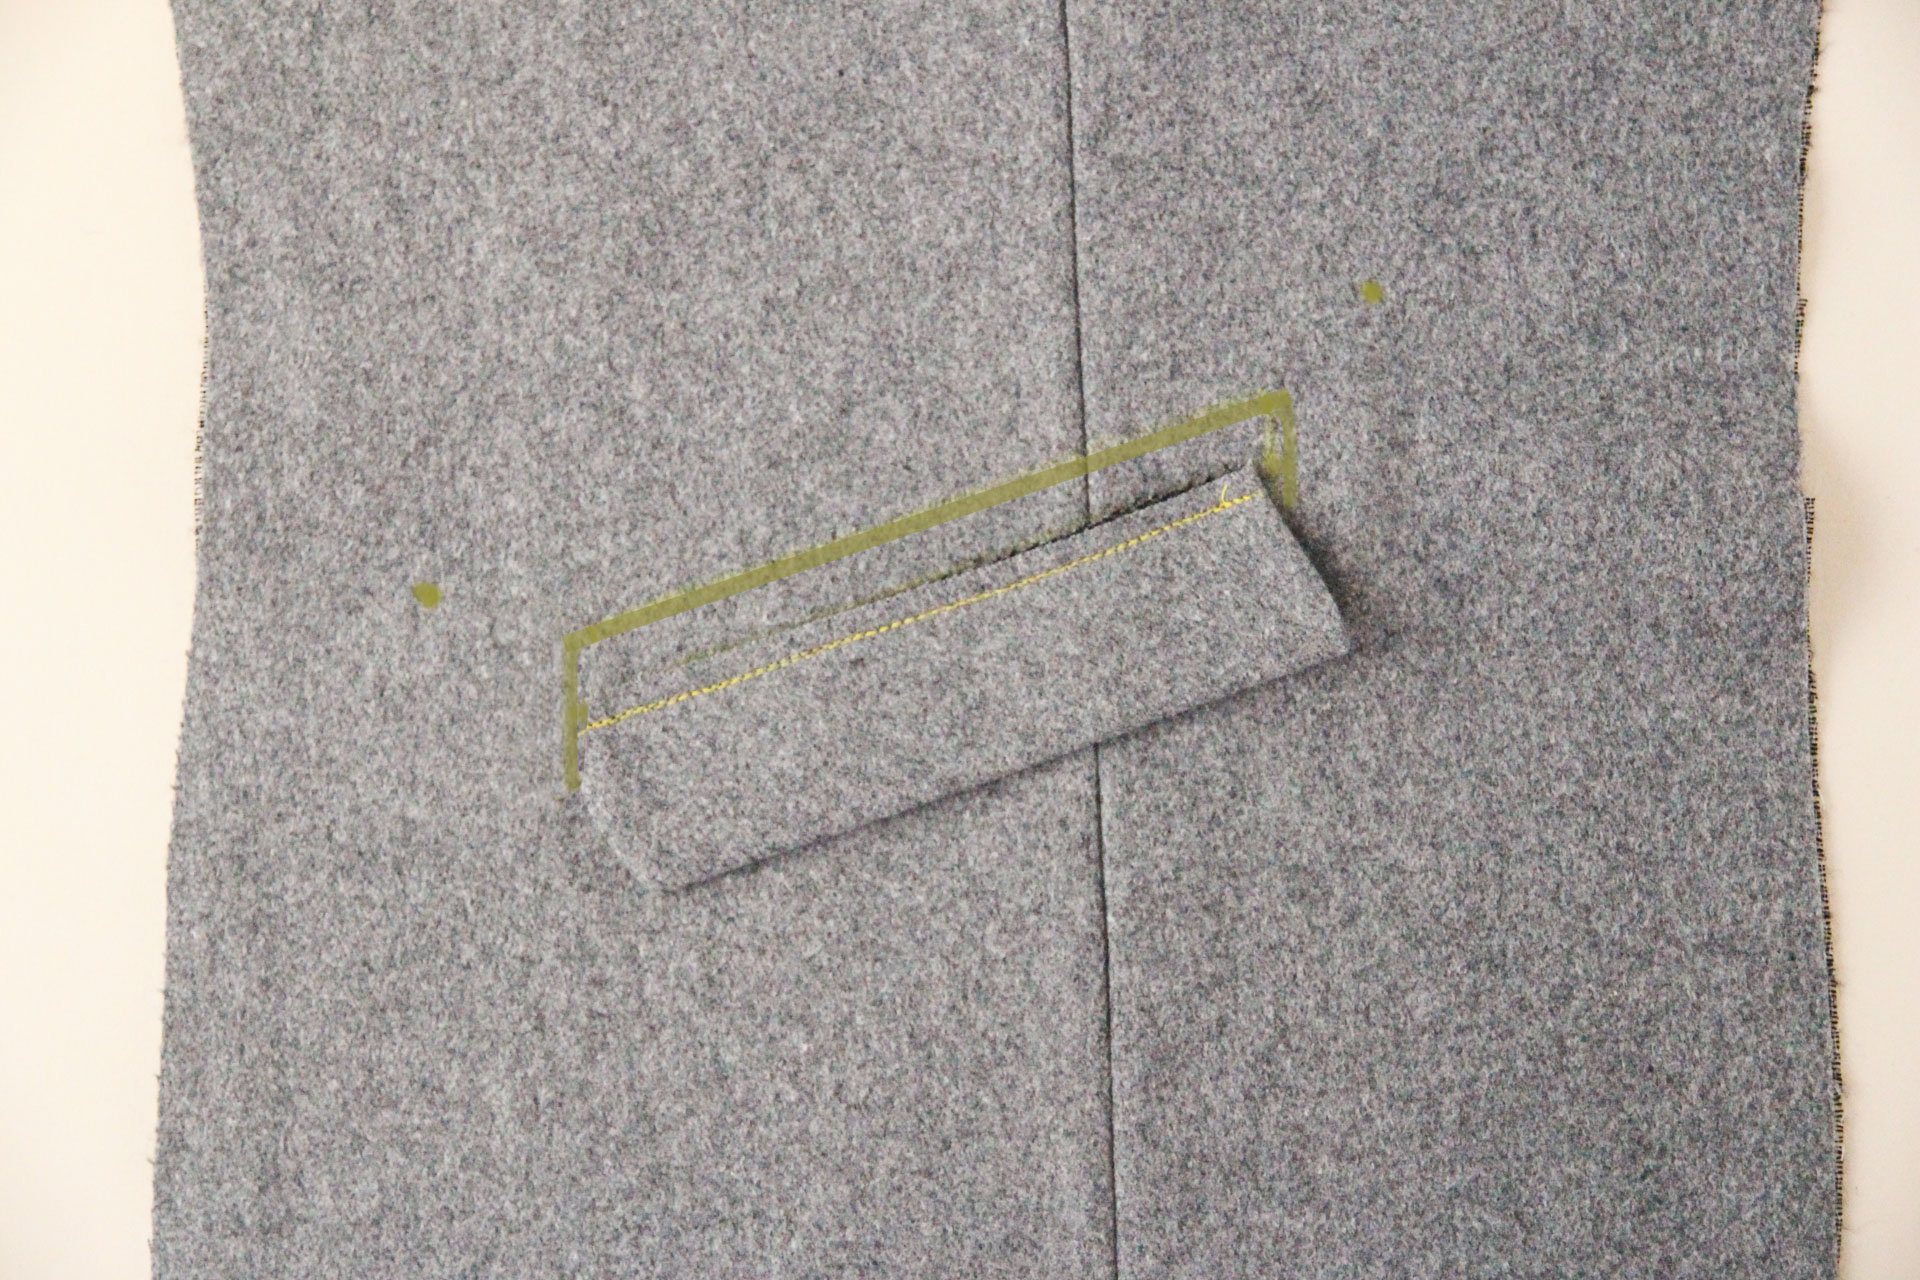
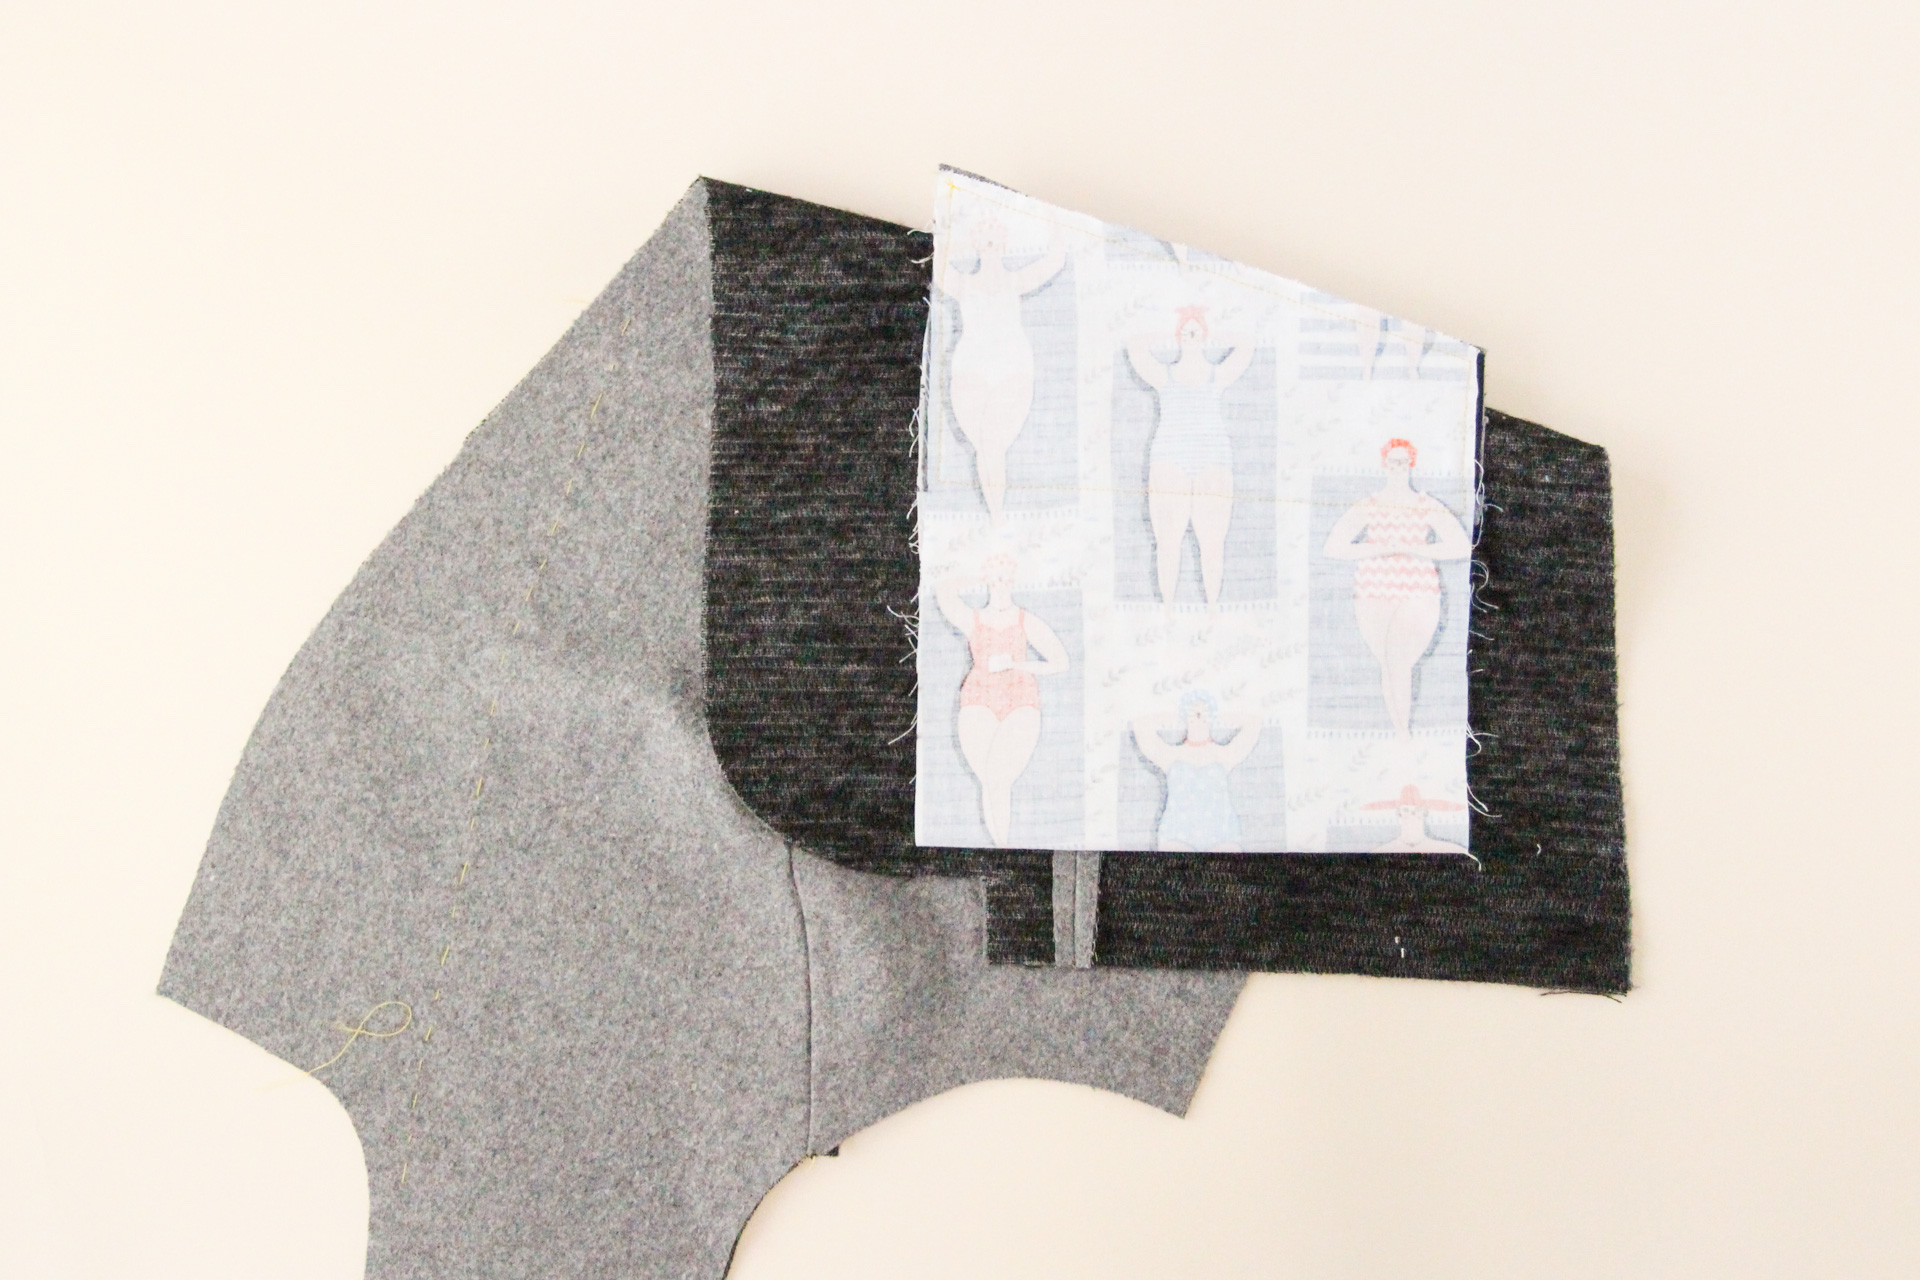
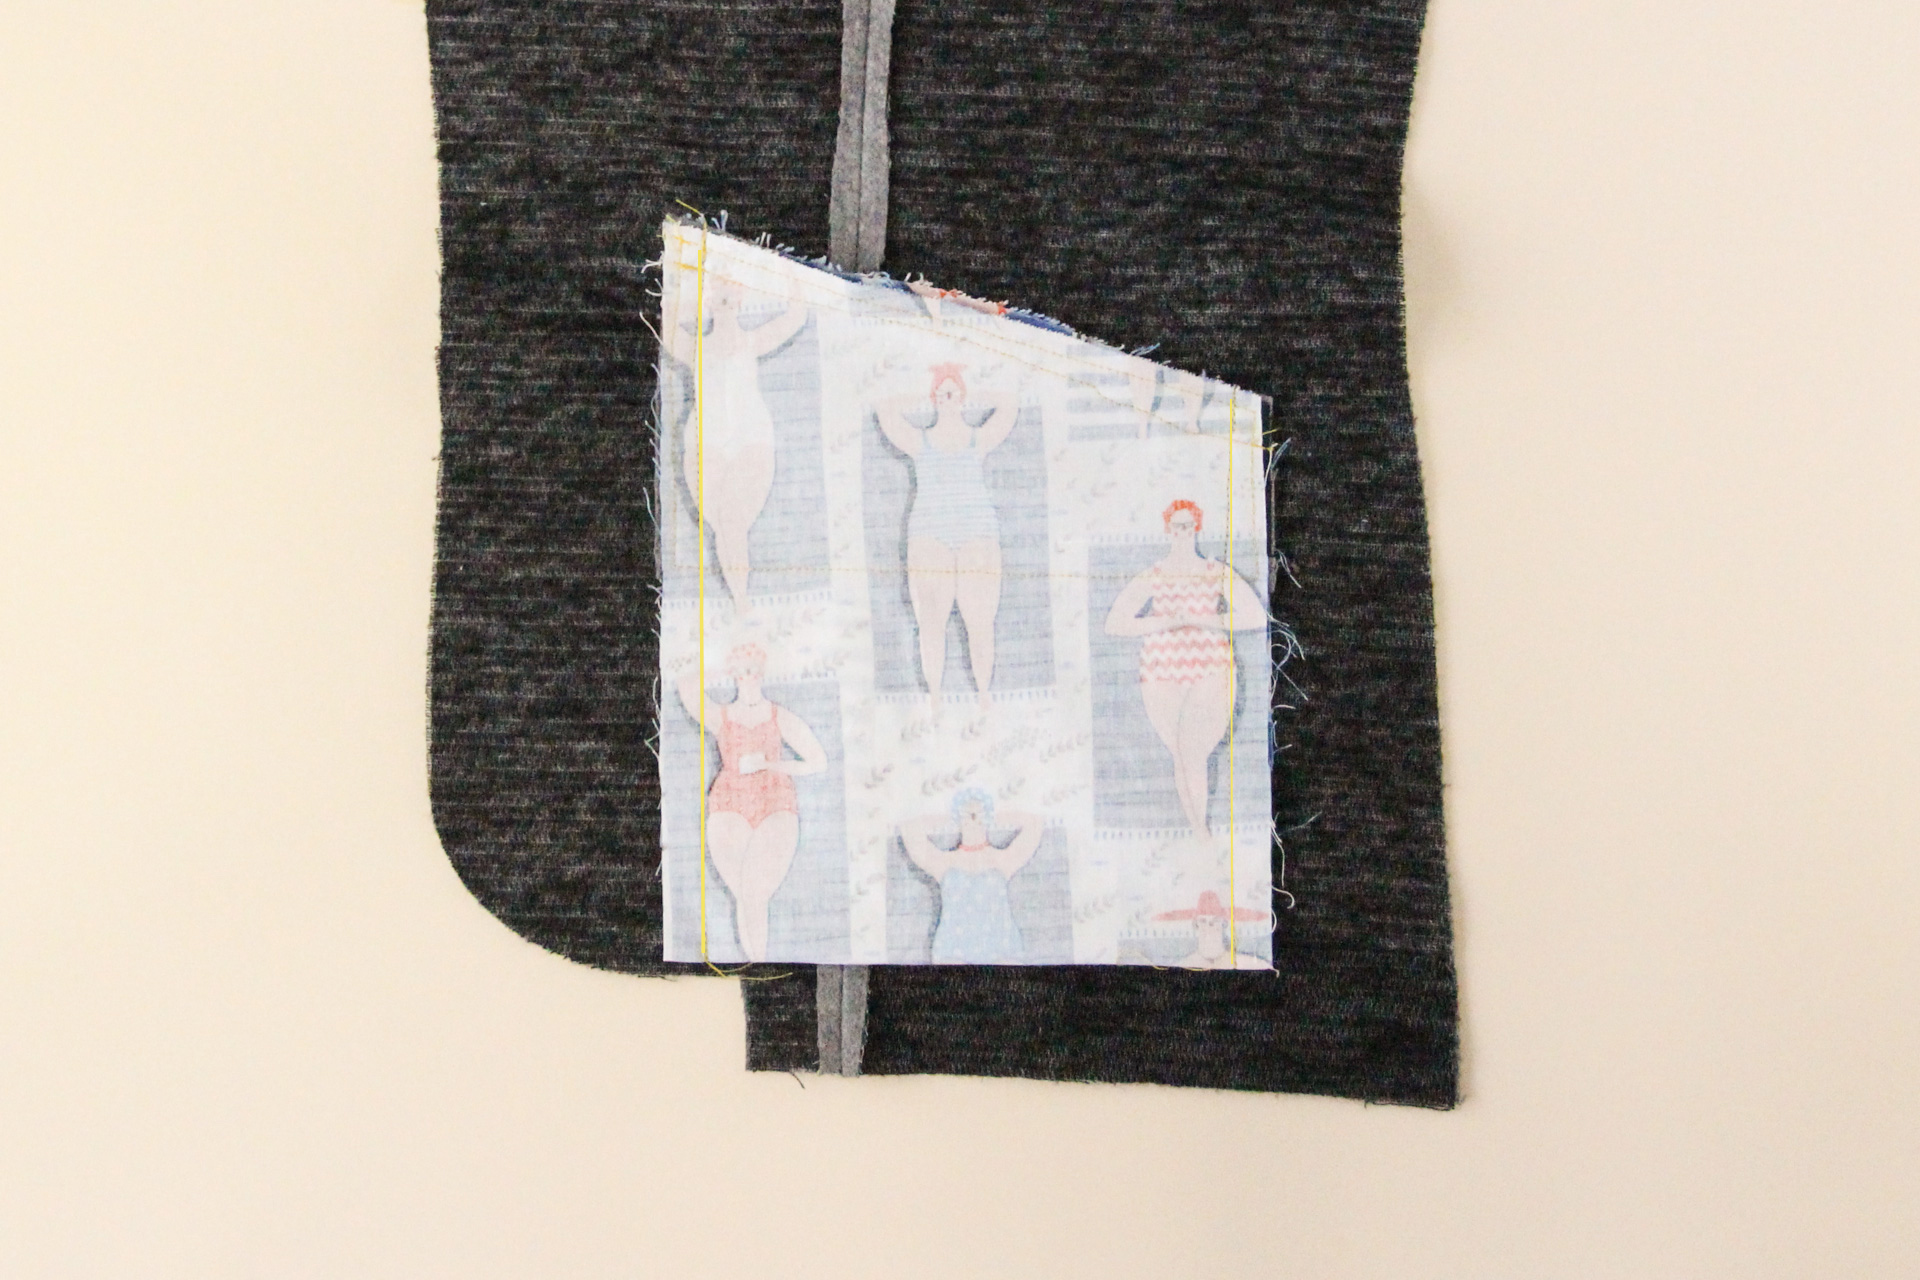
Here’s how it will look from the right side once you’ve sewn around the placement marking.
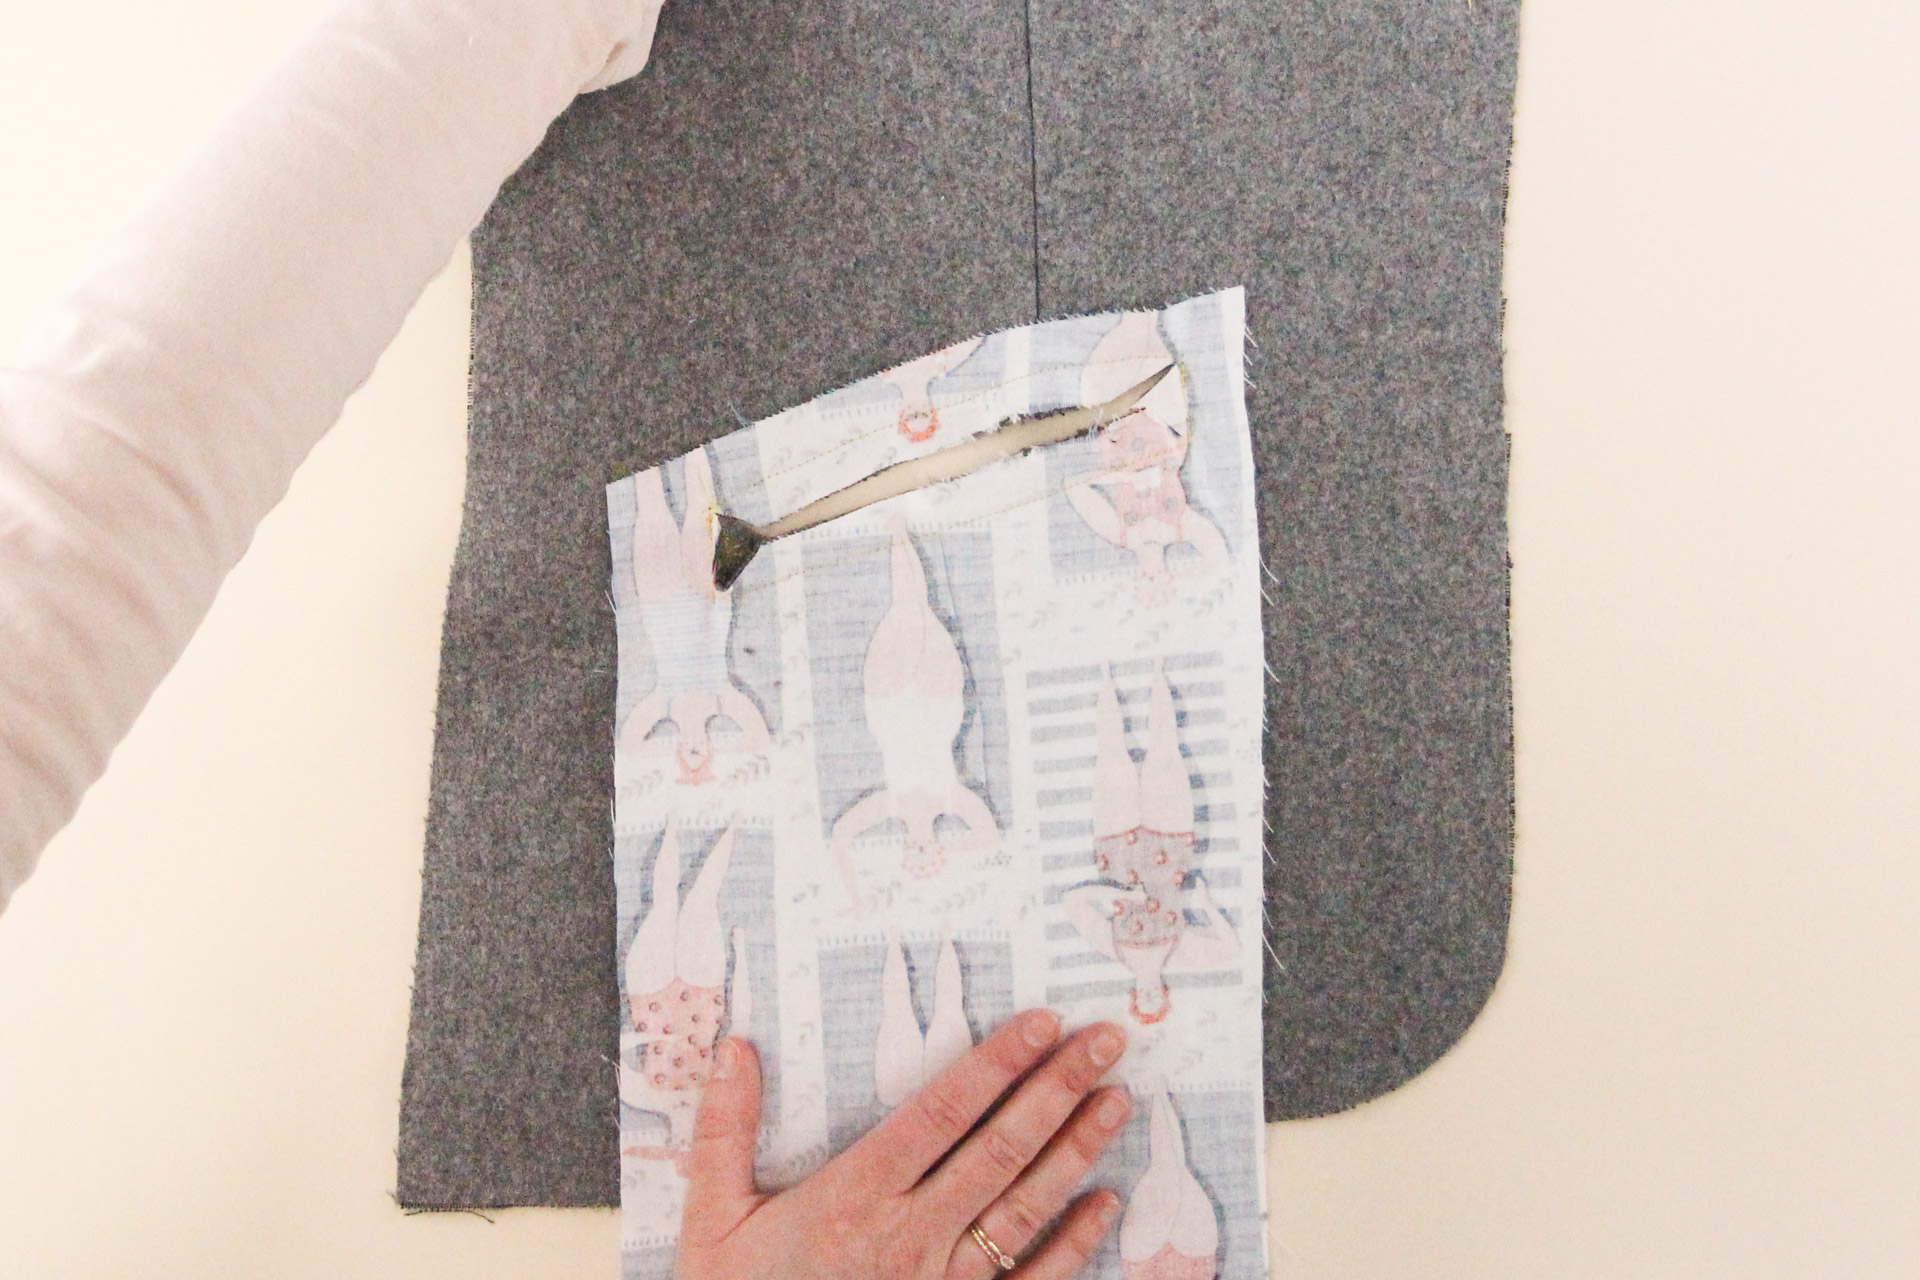
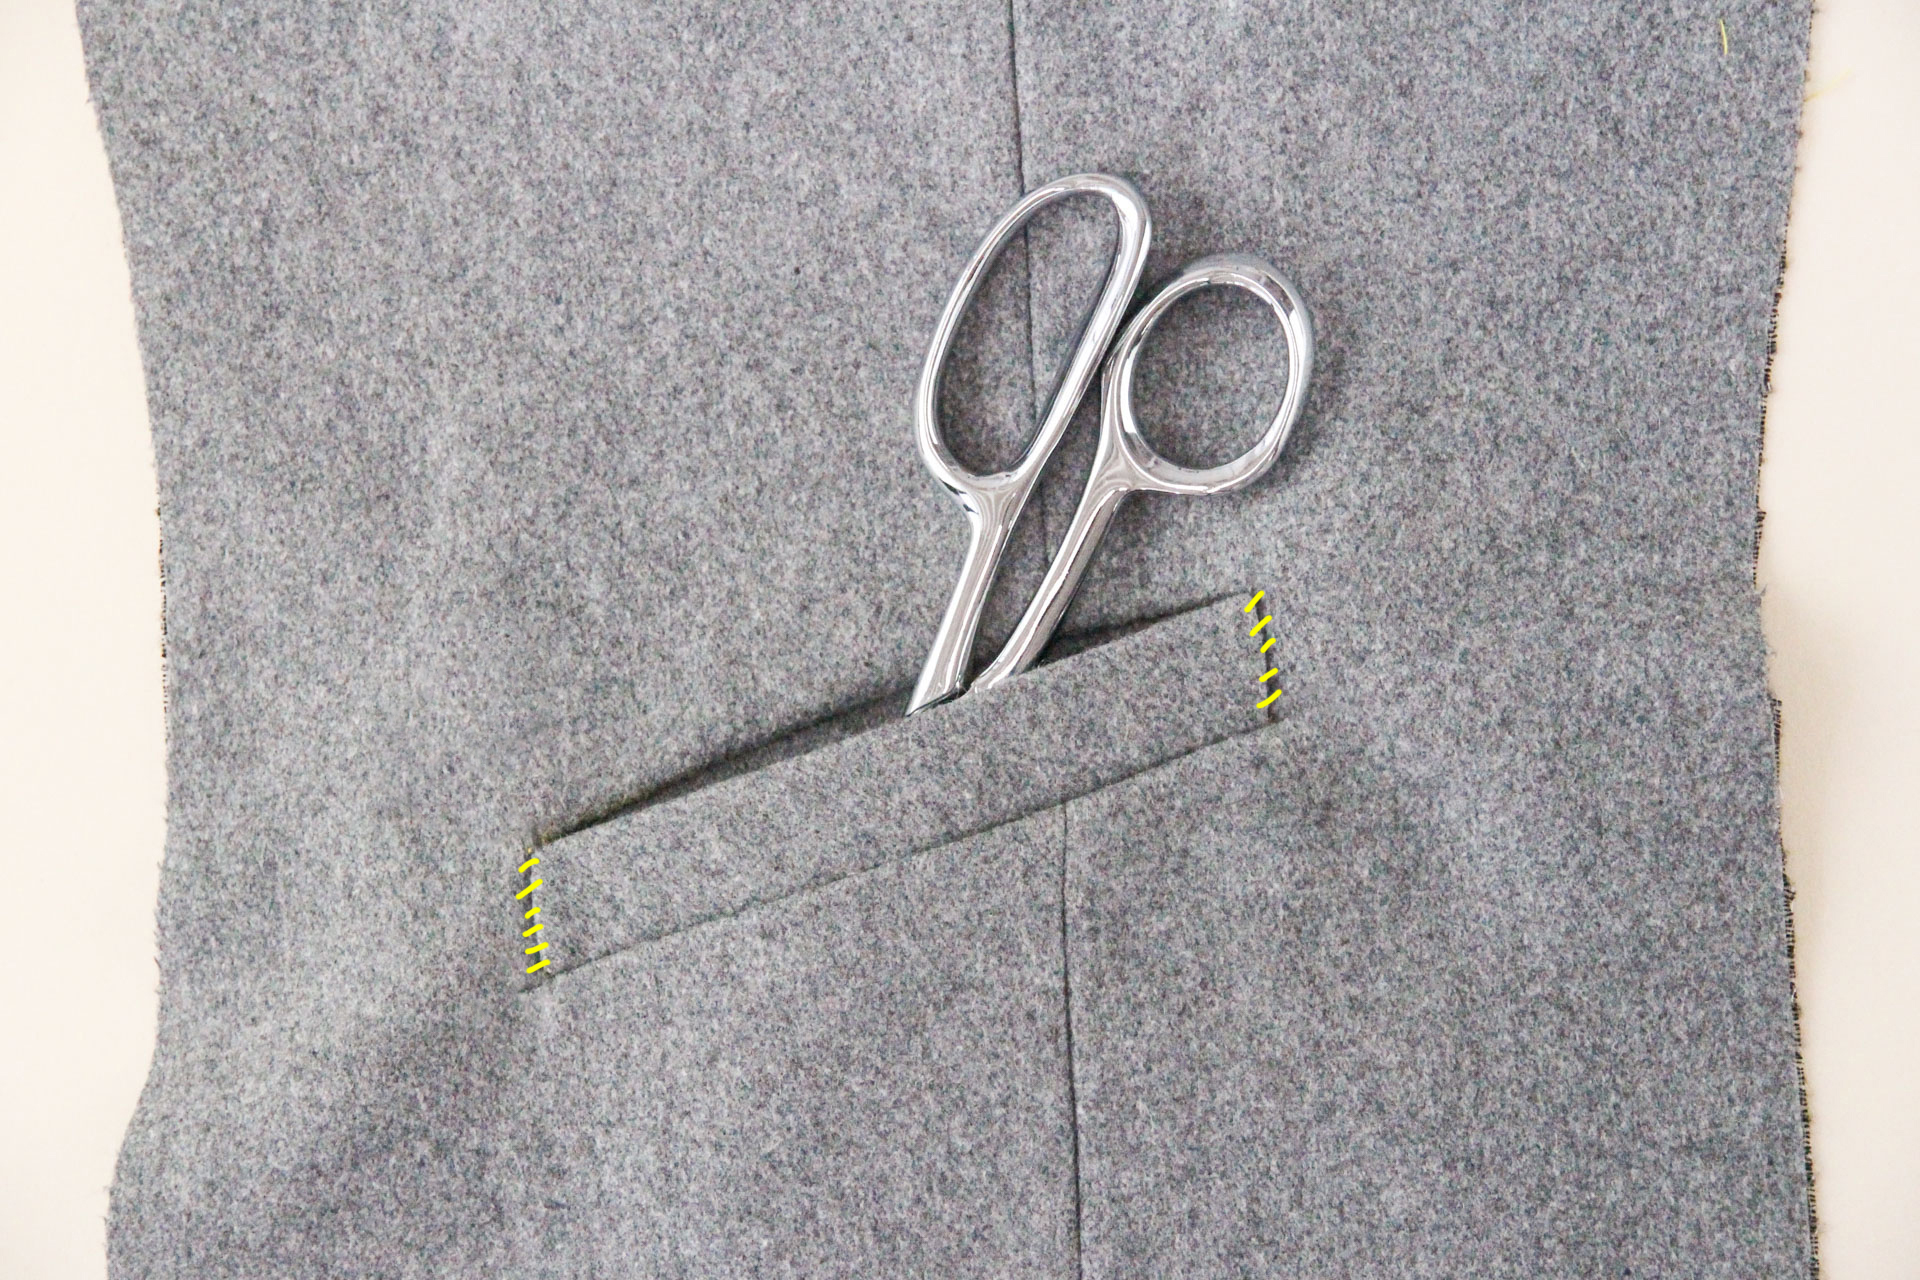
Now it’s time to cut the welt pocket open. Don’t be scared! You totally got this.
Using scissors or a scalpel, cut through along the center line through all of the layers, stopping 1/2″ (12 mm) from either end, then clip towards each corner. Make sure you’re going as close to but not through your stitching line at those corners—the more accurate you are with this, the neater your welt pocket will look.
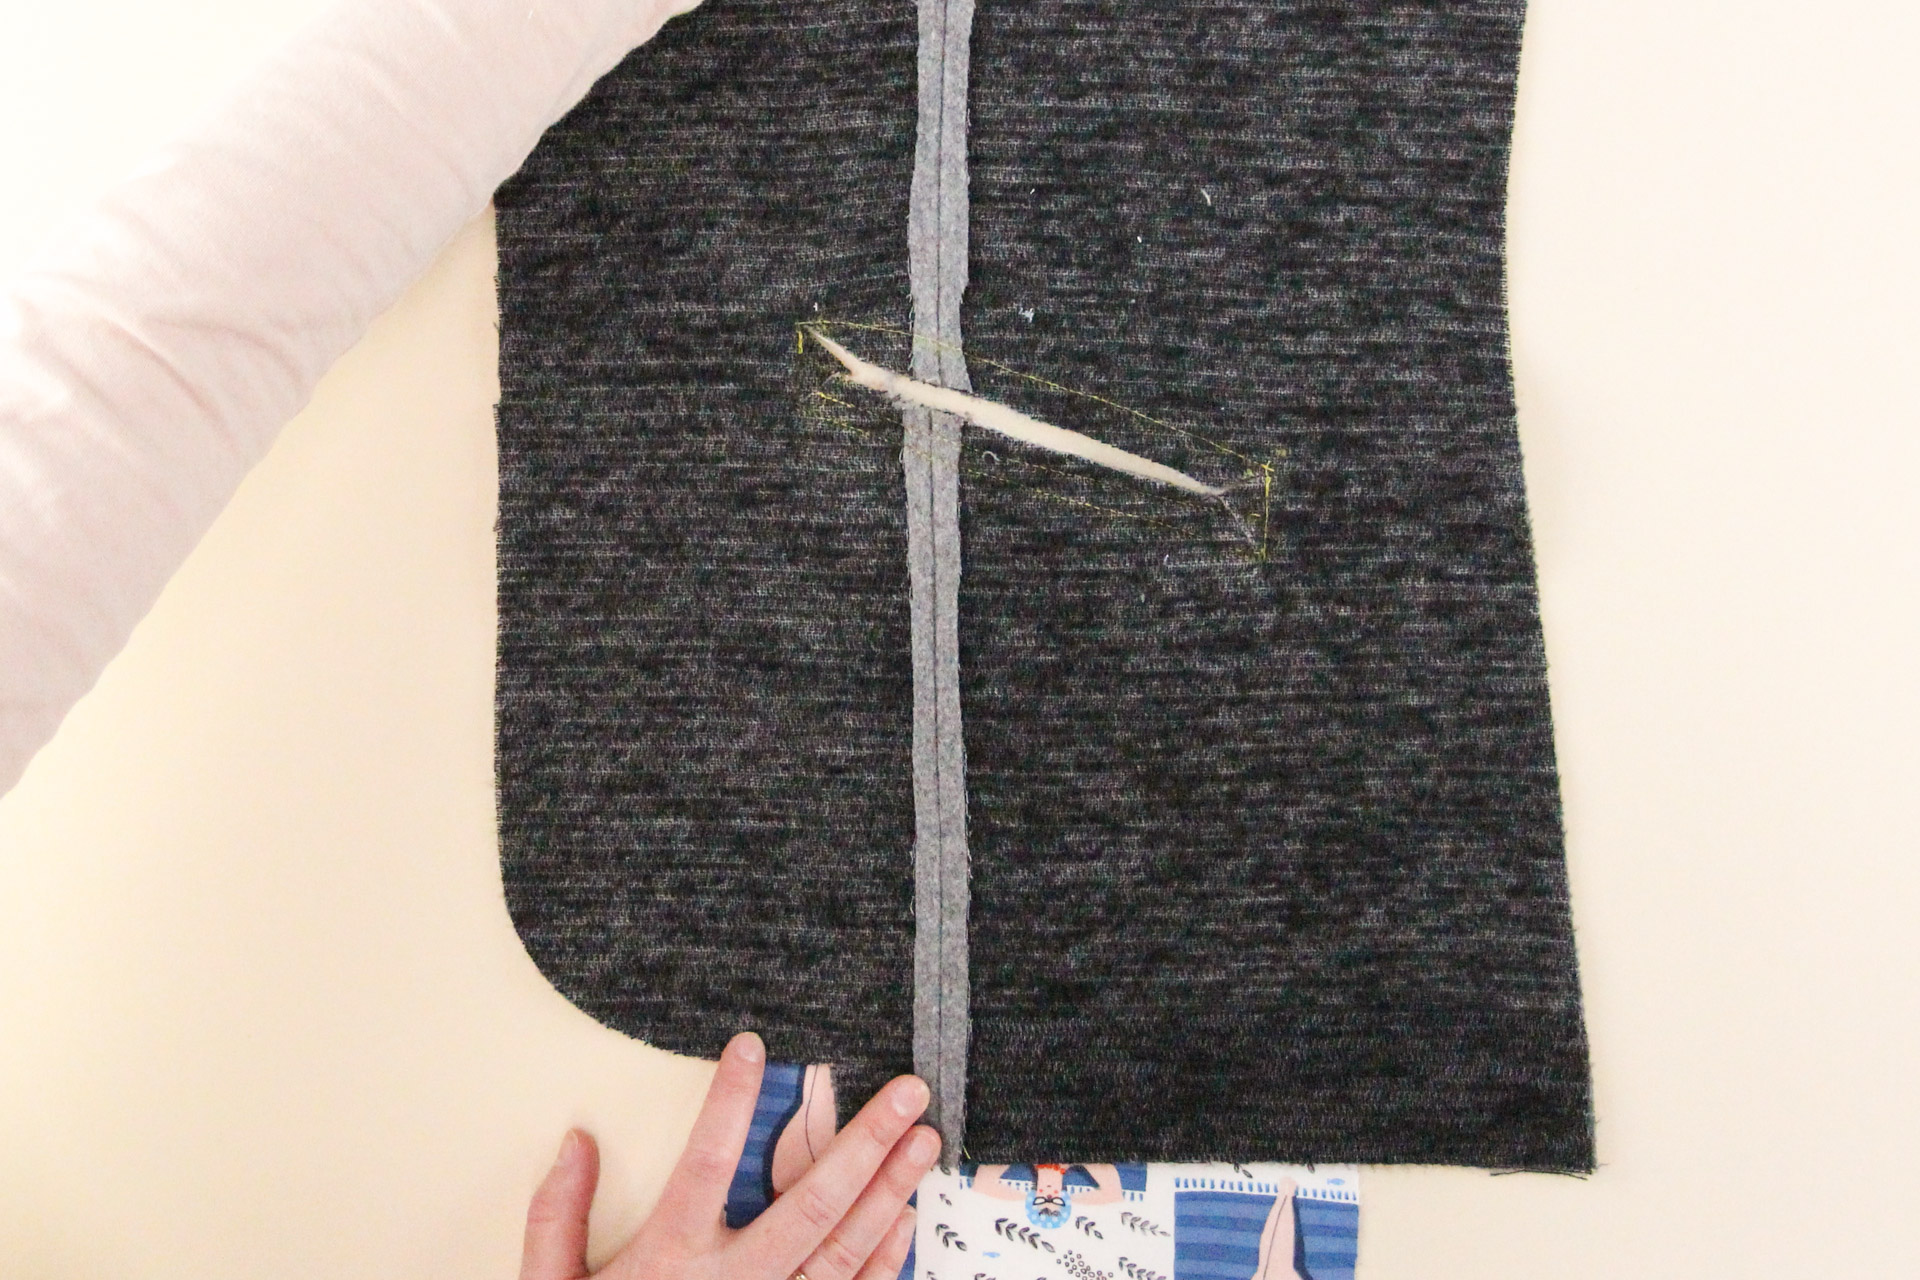
From the right side, push the pocket bag through the hole and all the way to the wrong side. Also flip the welt piece up so that it fills the opening. If you’re having trouble getting the pocket bag to be flat in the corners, you may need to clip a little bit closer to the stitching line. Press the whole thing flat.
Here’s how it’ll look from the right side. So purdy!
Don’t worry if there are small gaps at the short ends—we’ll be closing those later on.
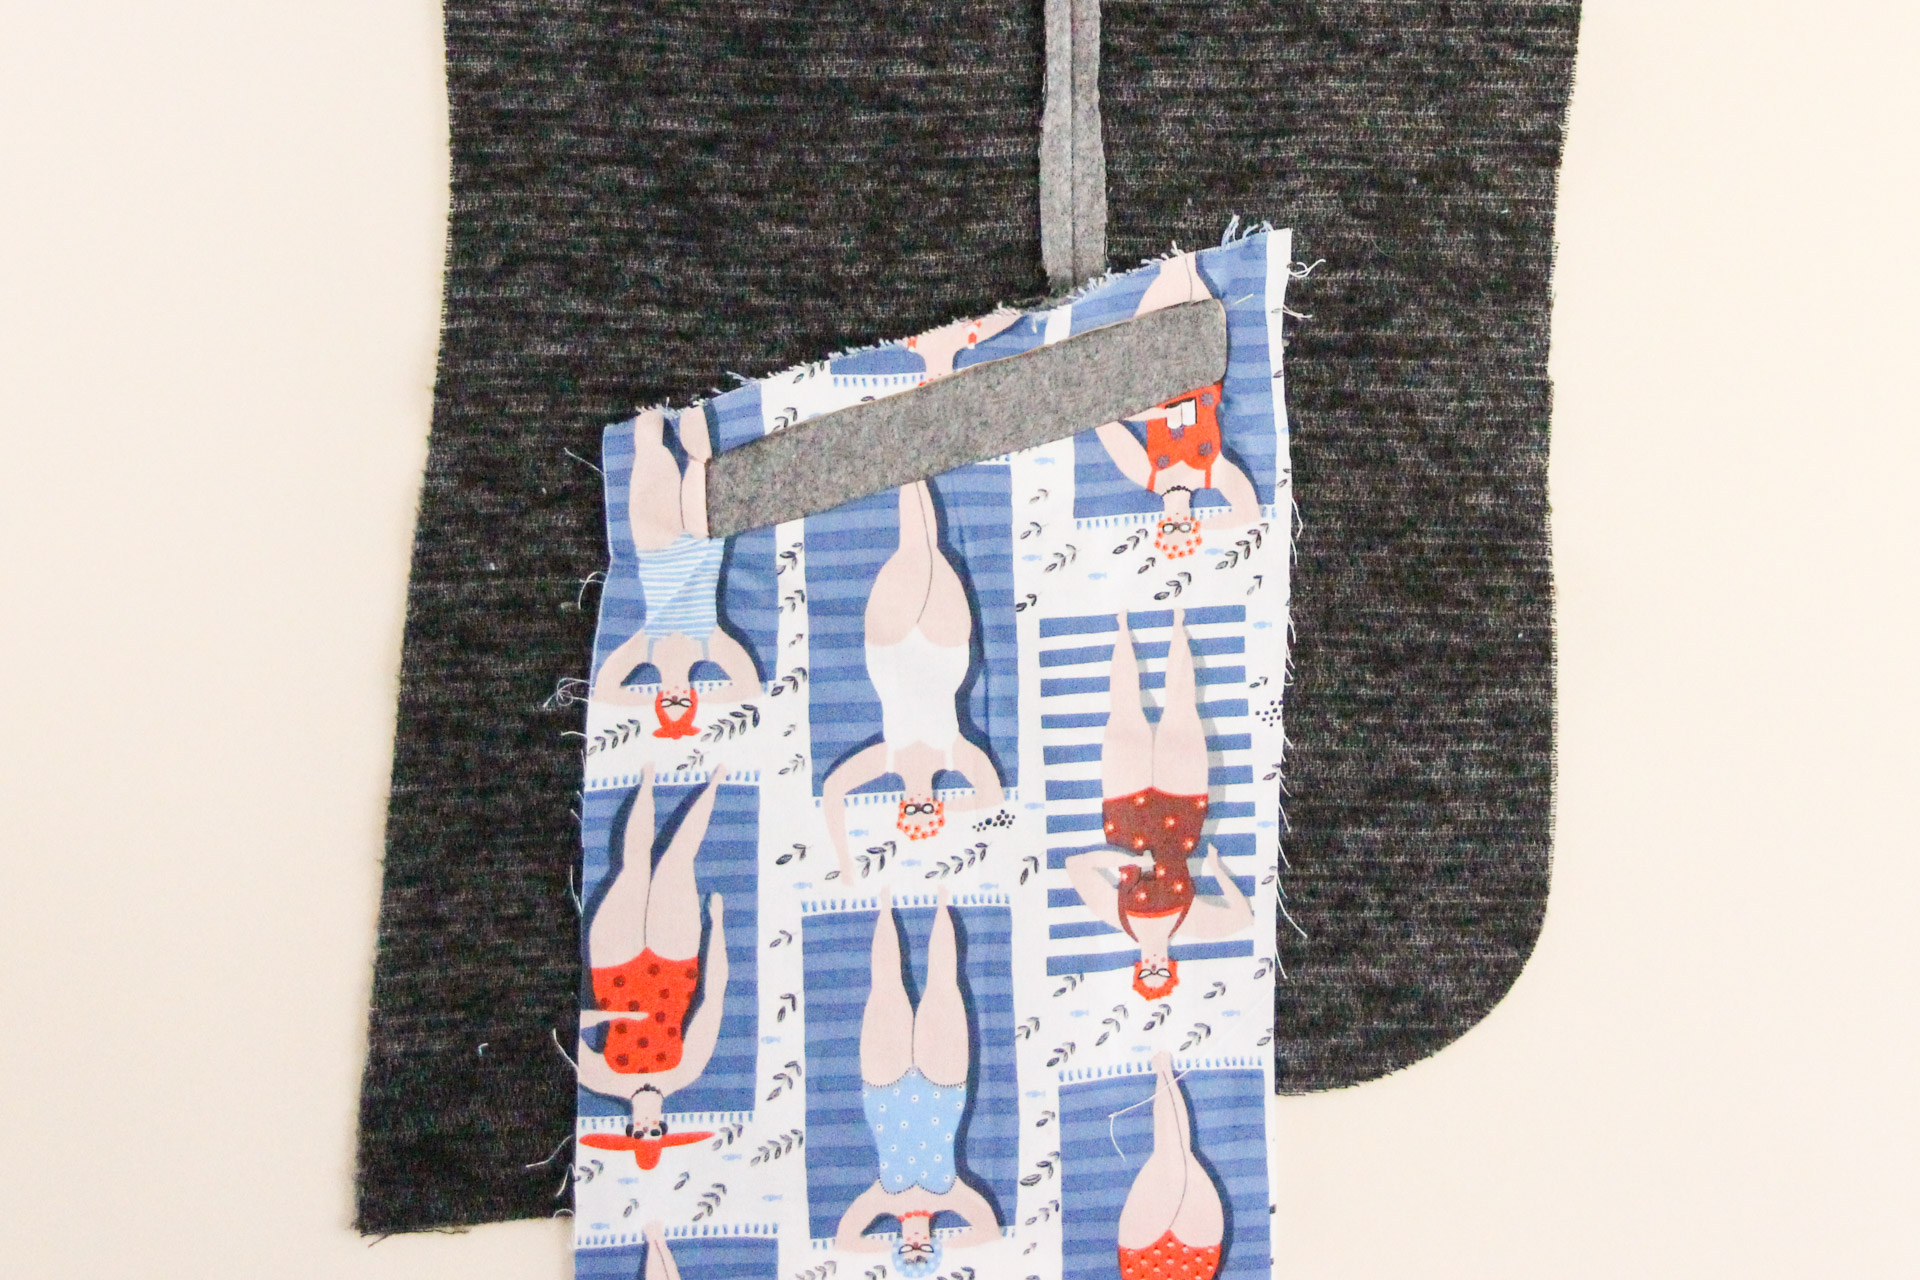
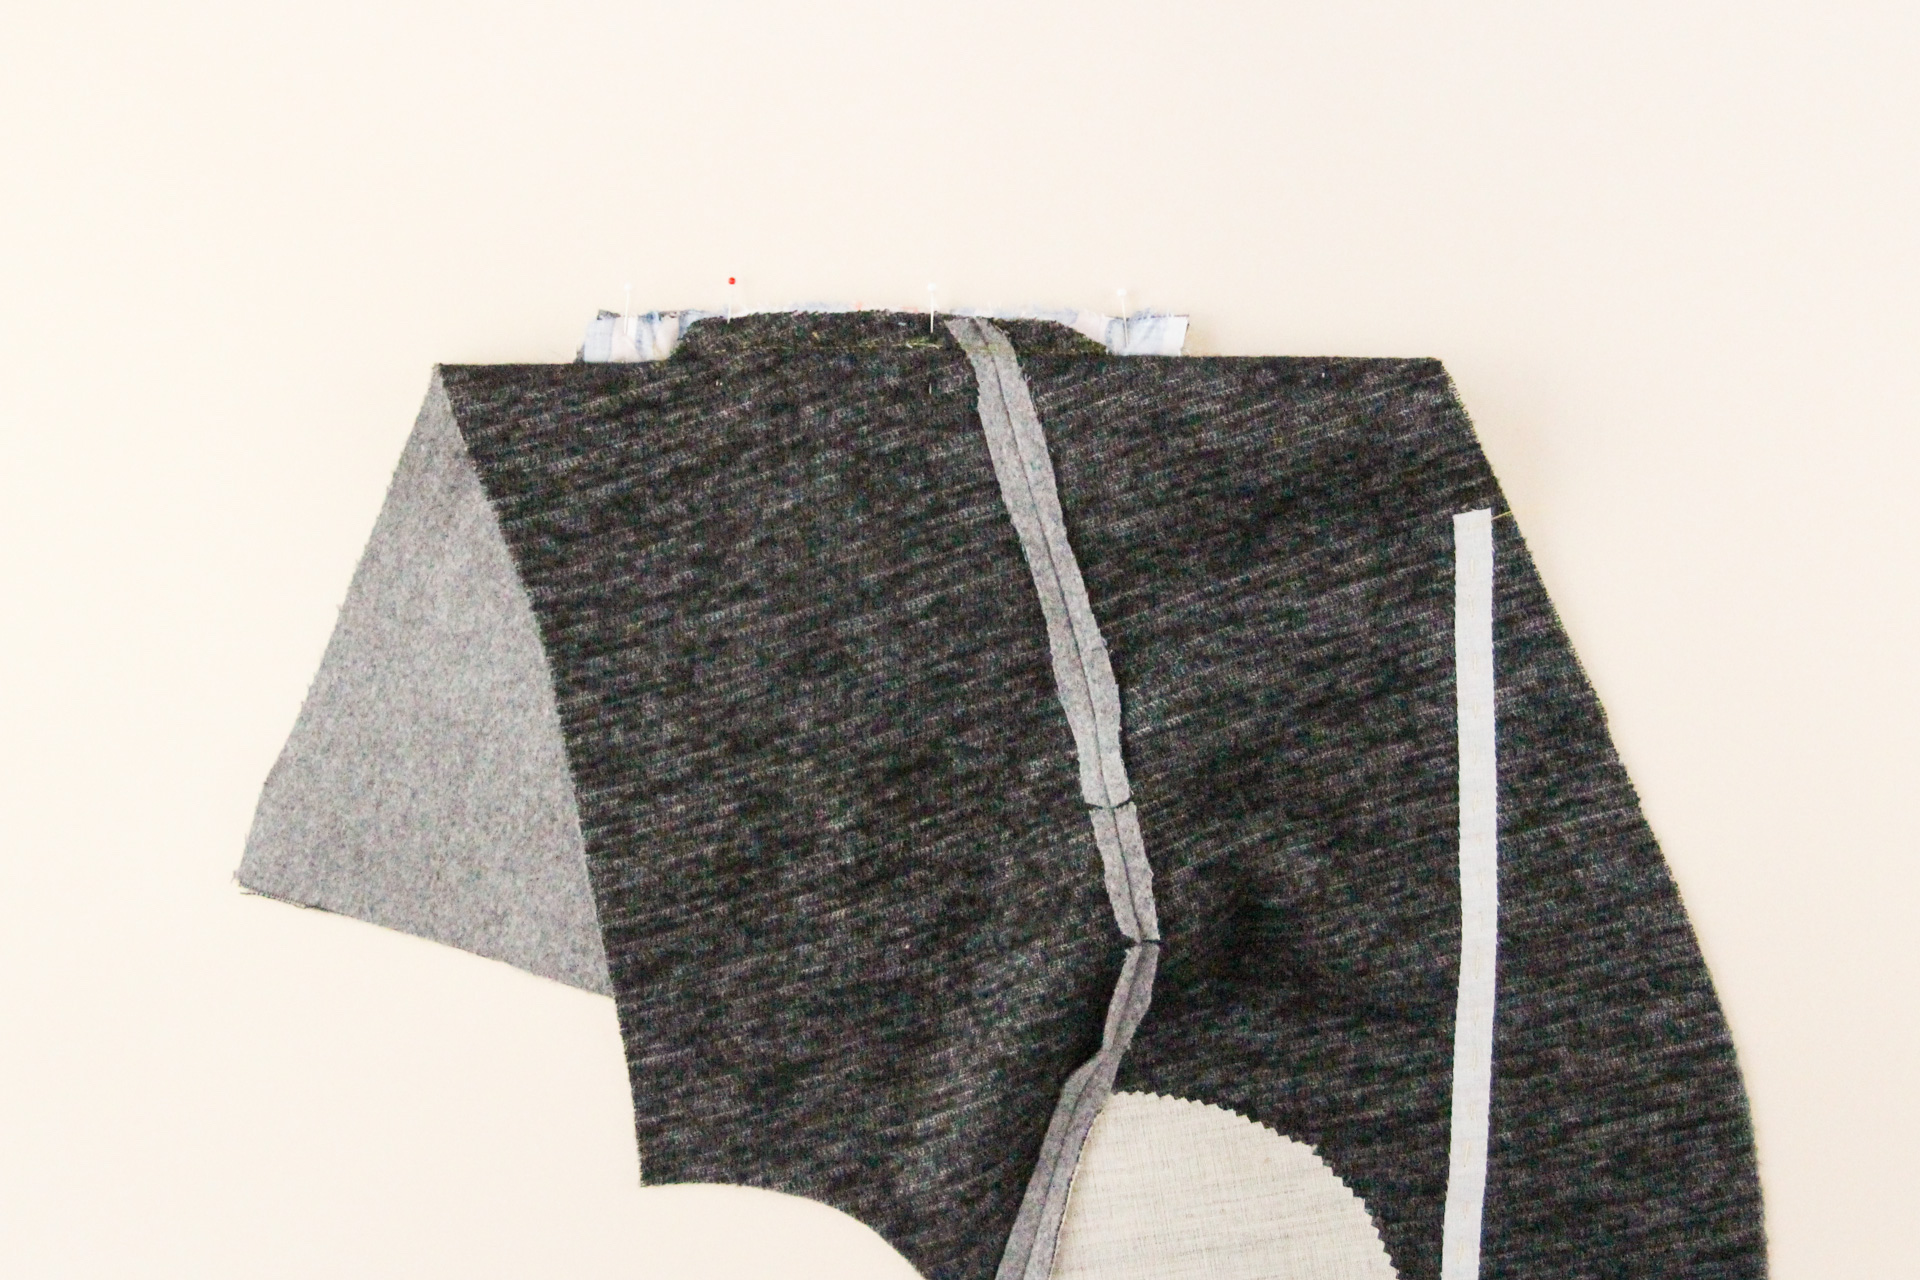
Flipping the front back to the wrong side, fold the pocket bag in half (bringing the faced section up to the unfaced section) and grab the pocket bag and seam allowance of the welt hole together. Flip everything else down and out of the way.
Pin along the top of the pocket bag and through the seam allowance of the welt opening.
Now we’re going to sew along that top line, at a 1/2″ (12 mm) seam allowance. We’ll be sewing over the same stitching line that we created when we sewed around the outside of the welt placement marking.
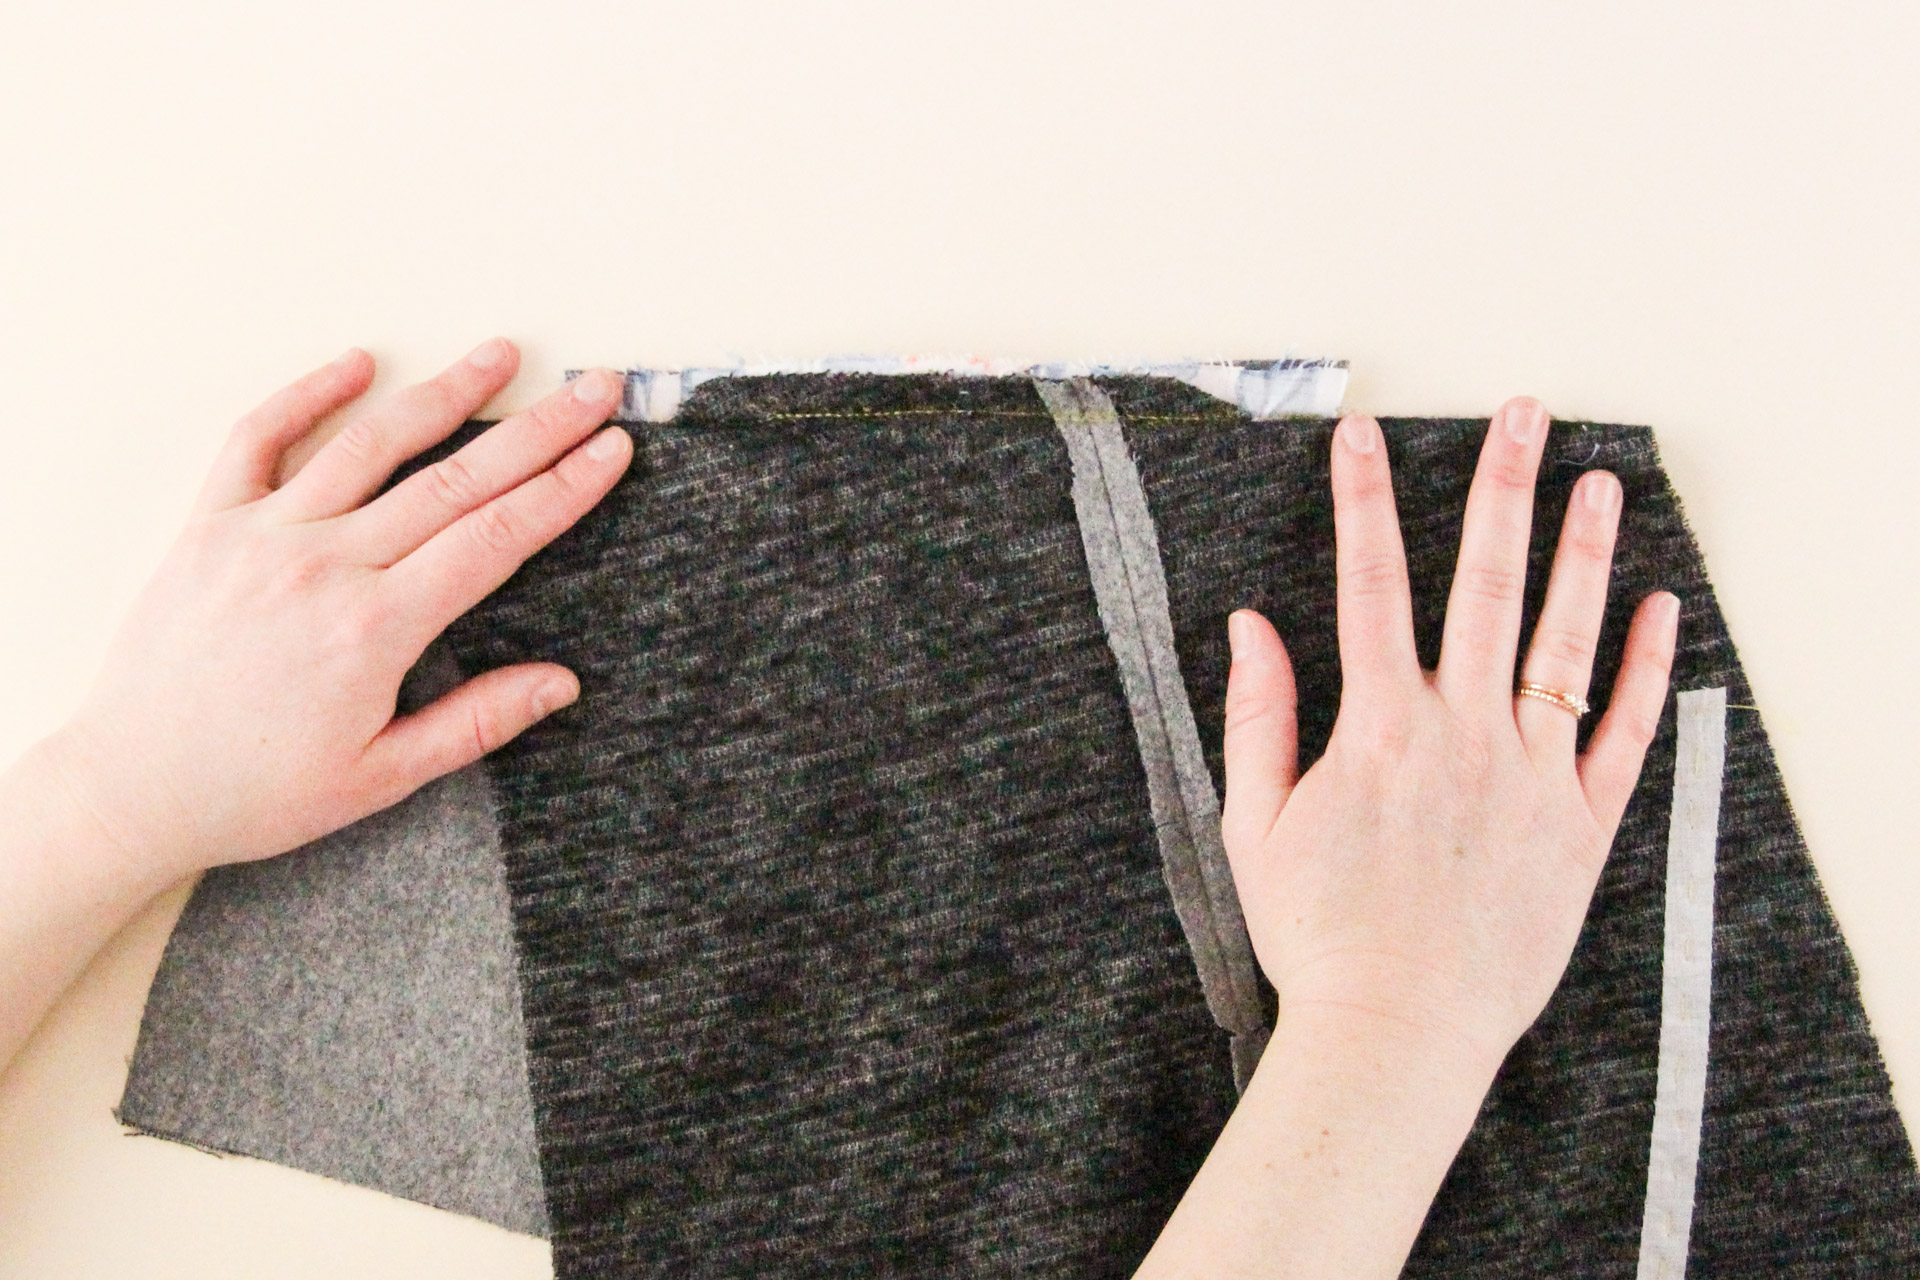
Grooving right along!
Finish the Welt Pocket
To finish our welt pocket, we’re going to pin the pocket back closed on either side. Make sure you’re just pinning through the pocket bag, not your outer fabric.

Sew down both seams at 1/2″ (12 mm) seam allowance.
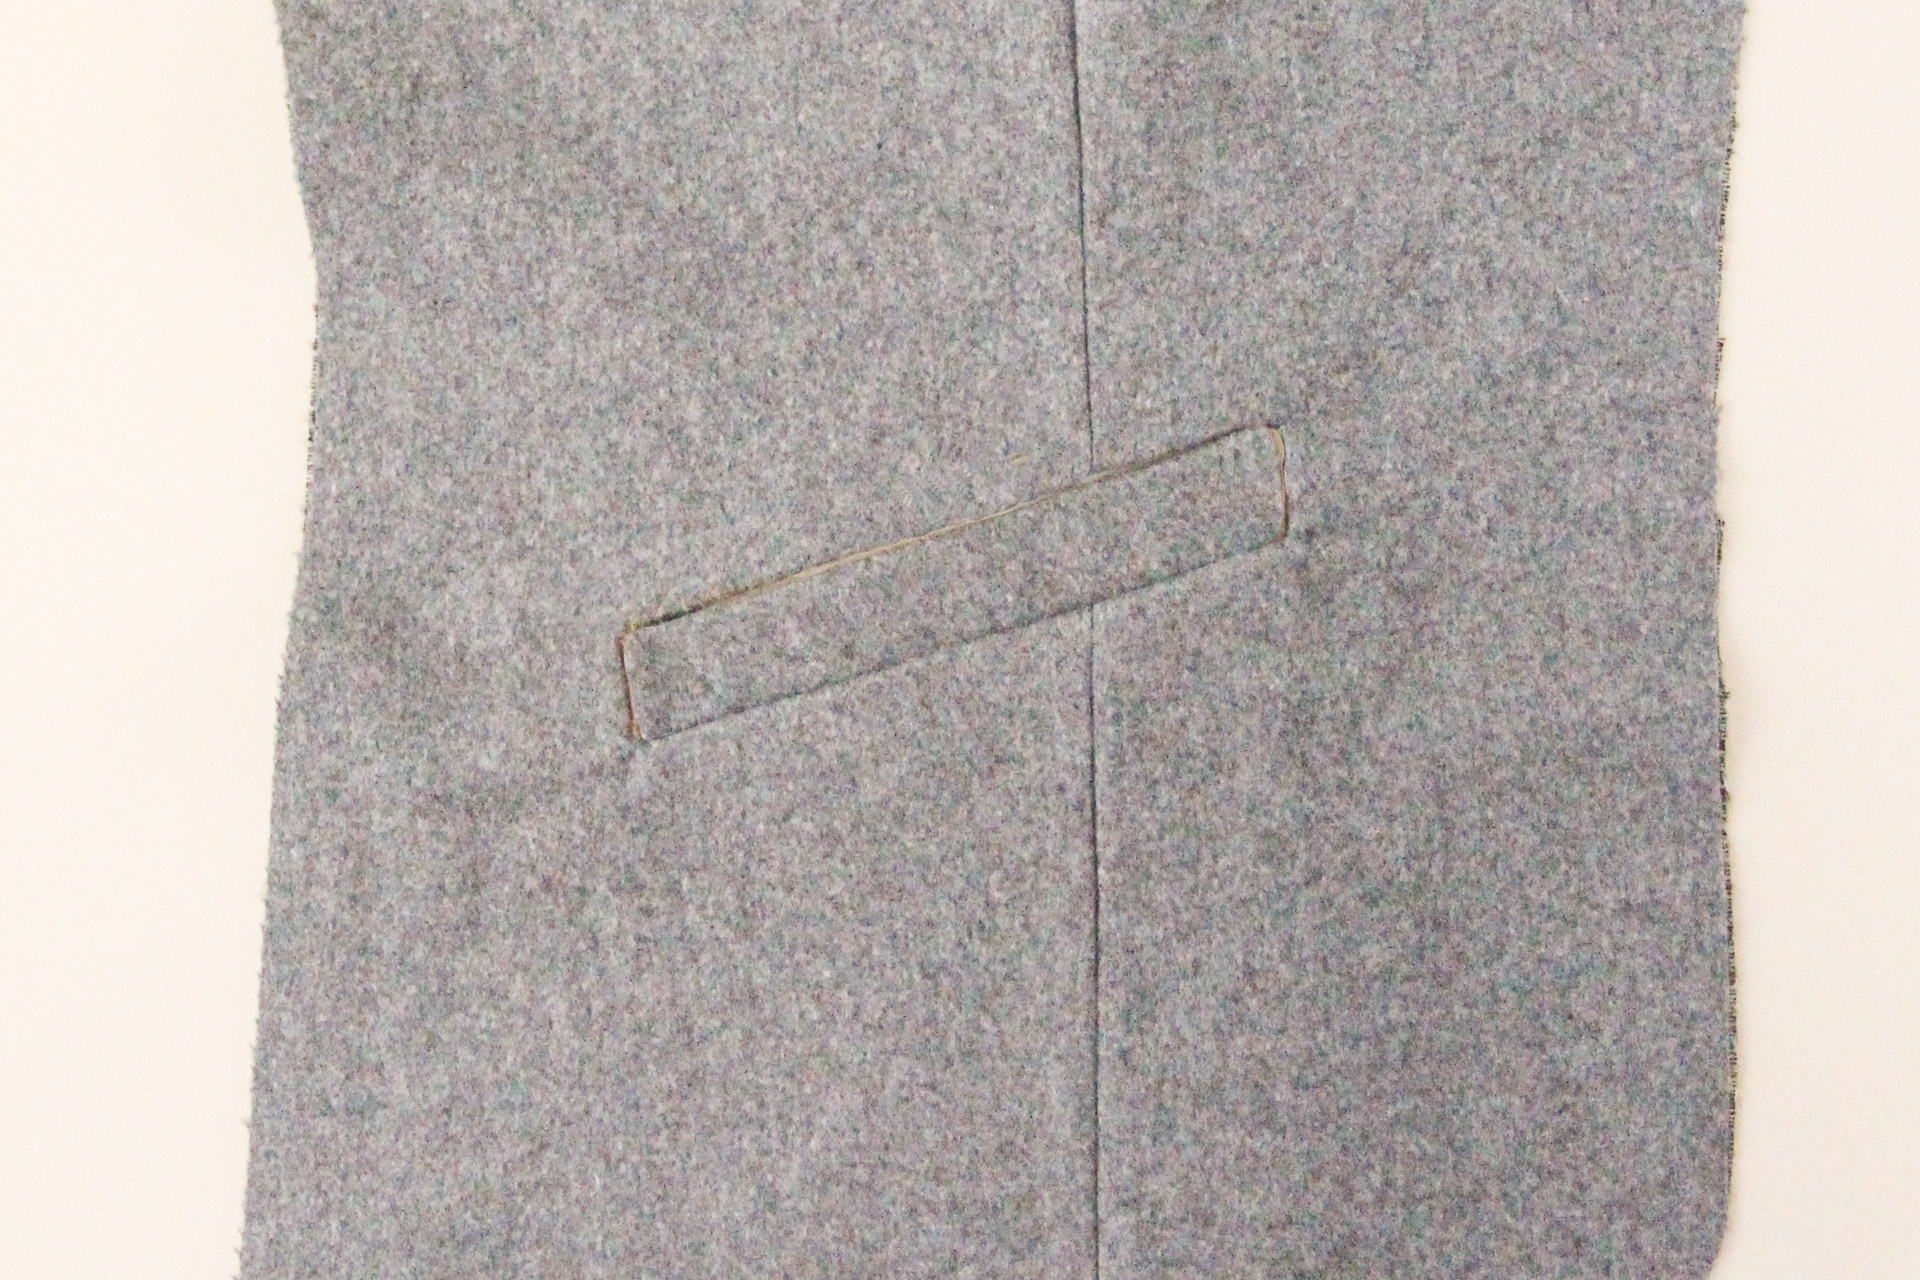
Finally, we’re going to hand stitch the two sides of the welt using a ladder stitch.
And then we’ve got ourselves a beautiful angled single welt pocket!
Repeat all that with the second front, and now magically we have two welt pockets! Oh, the glory.
Nice job! You’ve definitely earned a break and a celebratory cup of tea (or wine). Join us next time as we assemble the back of the blazer—it’ll be much easier than sewing two welt pockets, we promise.
We’d love to see your Auburn Blazer, whatever stage of the process you’re at! Tag your makes with #AuburnBlazer on social media so that we can cheer you to the finish line.
This is wonderful!