The wonderful thing about sewing your own clothes is that you can choose how simple or complex to make your projects. The Cashmerette Auburn Blazer is the perfect project to flex your tailoring muscles or gain some new skills.
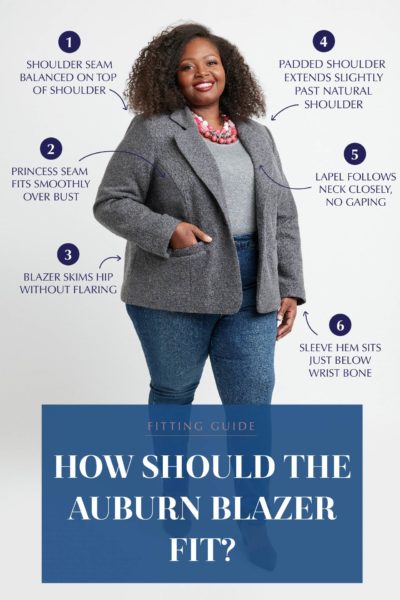
The Auburn Blazer is designed for curves in size 12-32 and cup sizes C-H. So, while you can take or leave some of the tailoring techniques listed here, you don’t have to compromise on fit, no matter what!

The Auburn Blazer comes with a fully illustrated instructions and we also have a fully photographed sewalong to guide you through the construction process. But for those of you looking to incorporate some classic tailoring techniques into your blazer-making experience, this is the post for you!
Add Sleeve Heads to Your Cashmerette Auburn Blazer
Jenny mentioned that she added sleeve heads to her Harris Tweed Auburn Blazer during the Auburn Blazer Launch Party. But what exactly are sleeve heads, and why would you want to incorporate them into your blazer?
Sleeve heads are extra pieces of padding added along the top of the sleeve that create a smooth silhouette from shoulder to bicep. They essentially help the sleeve “stand up” on its own.
Since the the shoulders of the Auburn Blazer stand out a bit from your natural shoulder due to shoulder pads, this extra support to the sleeve shape ensures that you get a tailored look. You can buy sleeve heads or make your own rather quickly.
This video from Threads Magazine on how to quickly install a sleeve head is super helpful. They also demonstrate the same pattern with and without a sleeve head, so you can see the difference it can make, especially on lightweight fabrics.

Add Pick Stitching to the Lapel of Your Cashmerette Auburn Blazer
Pick stitching is the sign of a high end tailored garment that is both functional and decorative. The pick-stitch is closely related to the back stitch, and keeps the edges of your Blazer lapels sharp by preventing shifting and “swelling”.
This article from Sew Guide explain the pick stitch and includes a short video on how to do it!
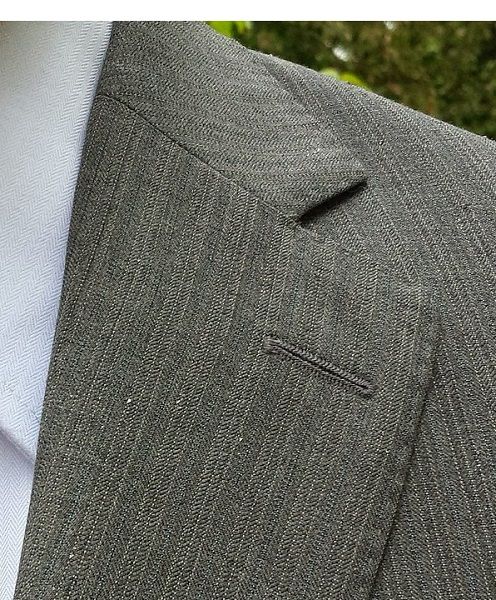
Add Pad Stitching to the Collar and Lapel of Your Cashmerette Auburn Blazer
Pad stitching is time-consuming and not absolutely necessary, but it is the tailor’s secret to the perfect roll of the lapel or collar on a blazer. You’ll shape your garment while stitching together the main fabric and canvas interfacing with a special hand stitch called the “feather stitch”. It’s a fascinating process to watch!
Laurie Kurutz demonstrates pad stitching on the lapel of a tailored jacket in this video:
And the lovely Bernadette Banner has a video all about pad stitching where she interviews a professional, certified tailor about the process. Wait until you see how they transform the shape of the under collar using only pad stitching!
Take the Tailored Blazer Course on Craftsy
In Classic Tailoring: The Blazer, professional costumer and pattern maker Steffani Lincecum takes you through the process of creating a tailored blazer and shows you where you can add details like the ones discussed in this post. Fine tailoring is really all about the foundations and extra layers of stabilization, padding, and shaping that give your garment a structured silhouette.

Steffani uses a Butterick pattern in her class that is currently out of print–but that’s fine– use the Cashmerette Auburn Blazer (drafted for cup sizes C-H) and get a head start on fitting for a curvy, full-busted silhouette.

This was so much fun! I told my husband I was having a sewing “nerdgasm” while watching this. I had read that tailors kept their methods secret for hundreds of years. It is delightful to have all this insider knowledge, like knowing the secret handshake.