Bound buttonholes are a great way to add a sophisticated, couture detail to your handmade outerwear. Today, we’ll be showing you sew a bound buttonhole with easy to follow step-by-step directions!

When you sew your own blazer or tailored jacket, you can really take your time and incorporate as many beautiful details as you want. After all, it’s your blazer, and you deserve to have the best!
One professional detail you can add to your Auburn Blazer—THE blazer sewing pattern if you’ve got a full bust—is a bound buttonhole. It takes a bit more work than a regular buttonhole, but the good thing is that you don’t have to fight with your buttonhole foot!
For this tutorial, I’m using a gray wool with black interfacing applied to the back so that you can tell the right and wrong sides easily. I’m also using contrast thread, but you should use coordinating thread so that it blends into your fabric.
(Loving the fabric I’m using? You can pick up an Auburn Blazer Melton wool kit or fabric by the quarter yard, available for a limited time here.)
Let’s dive right in and start sewing our bound buttonhole.
How to Sew a Bound Buttonhole: Blazer Front
Unlike regular buttonholes, we need to prep our bound buttonhole well before the blazer is fully constructed. You can do this first step before you’ve assembled your blazer outer front, or after you’ve sewn the center front and side front together and inserted your welt pocket. Either way works!
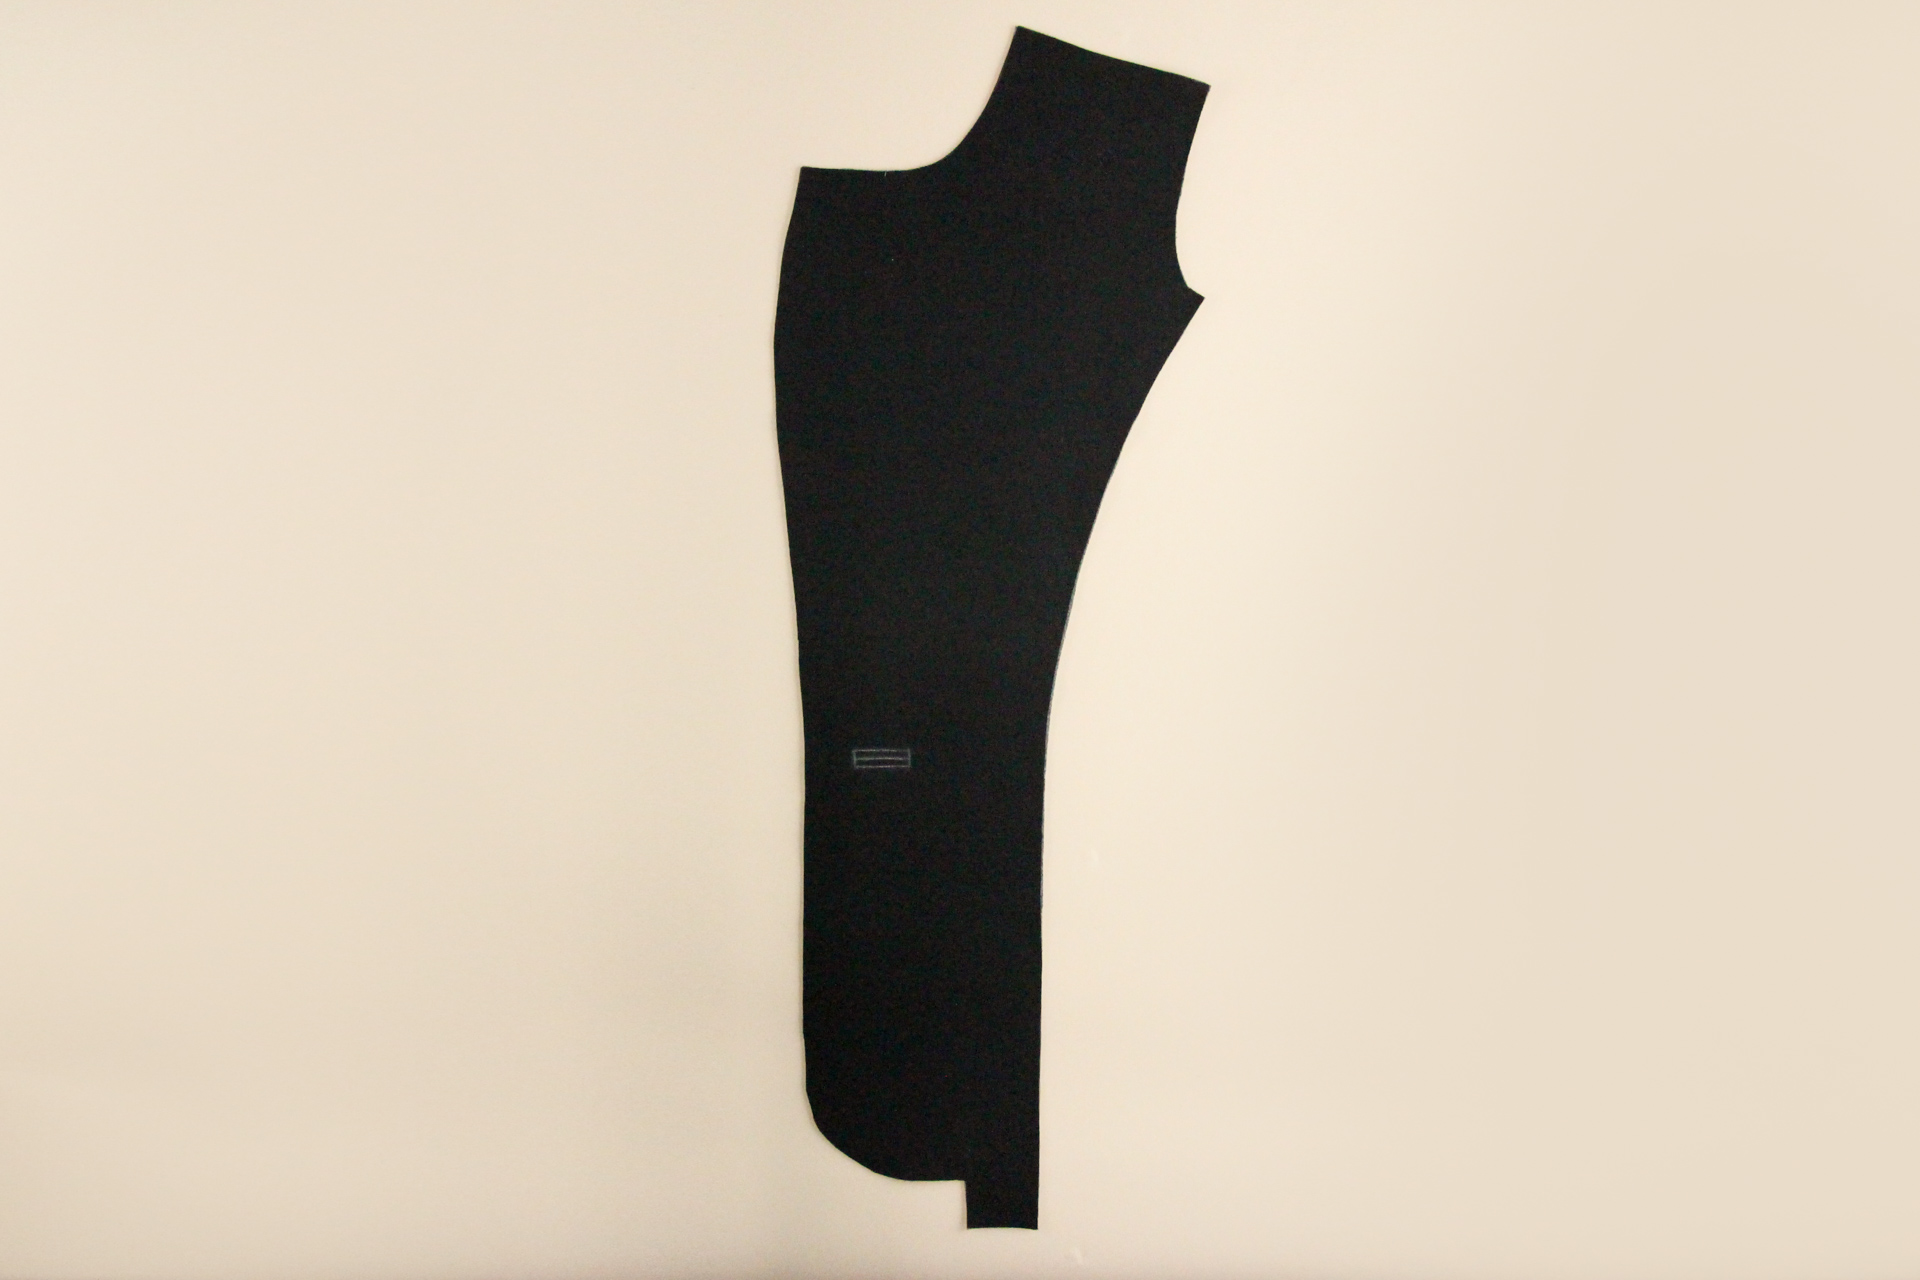
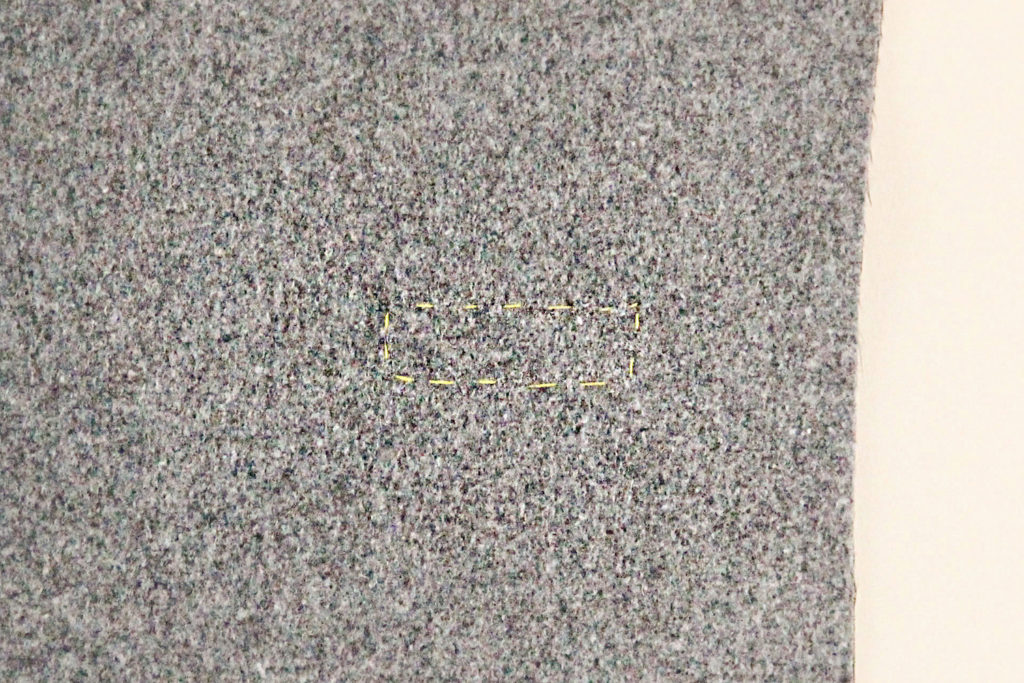
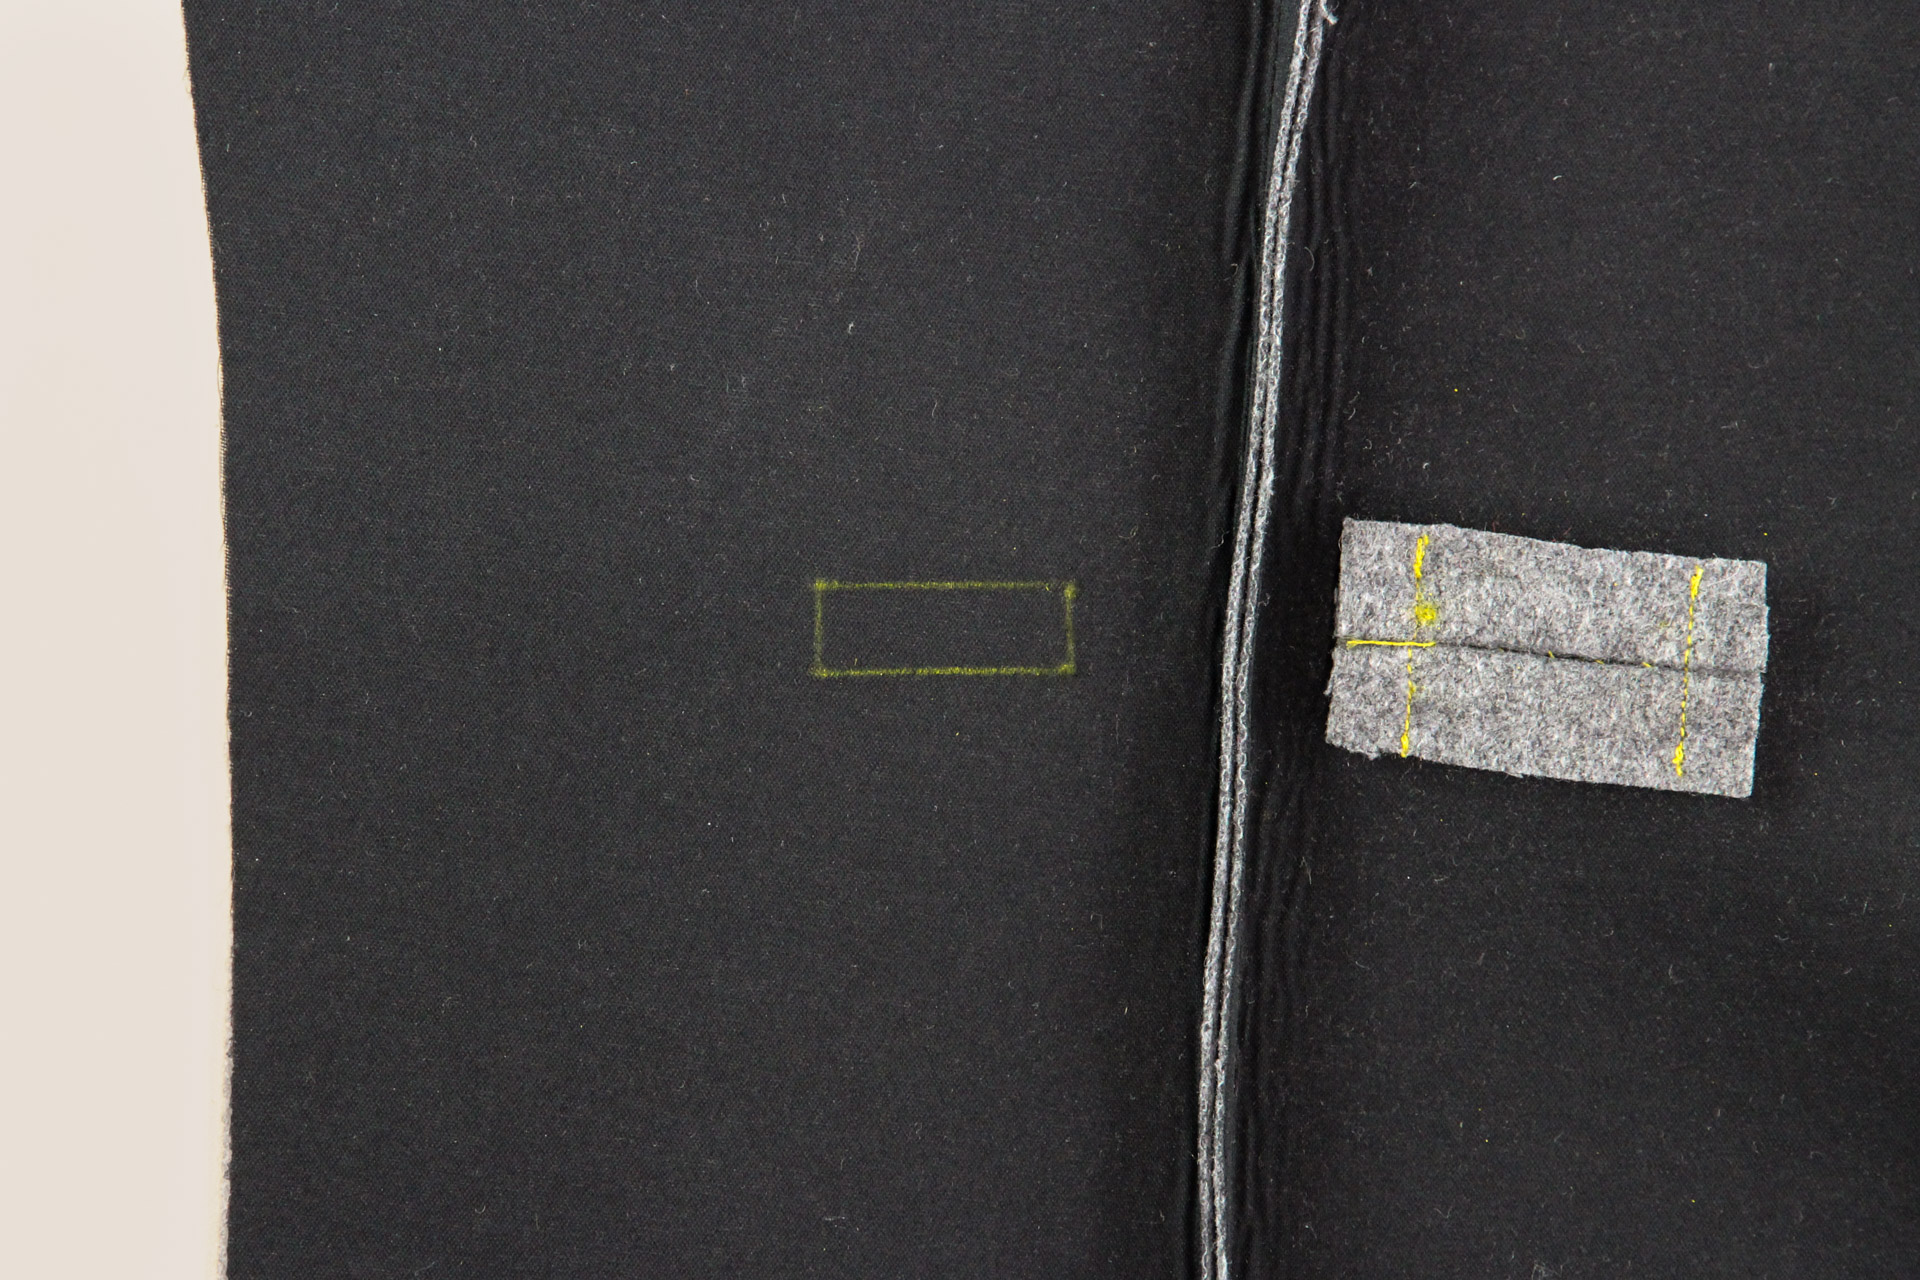
Start by marking the placement of your buttonhole on the wrong side of your front piece. If you’re sewing the Auburn Blazer, this would be the center front piece, #1.
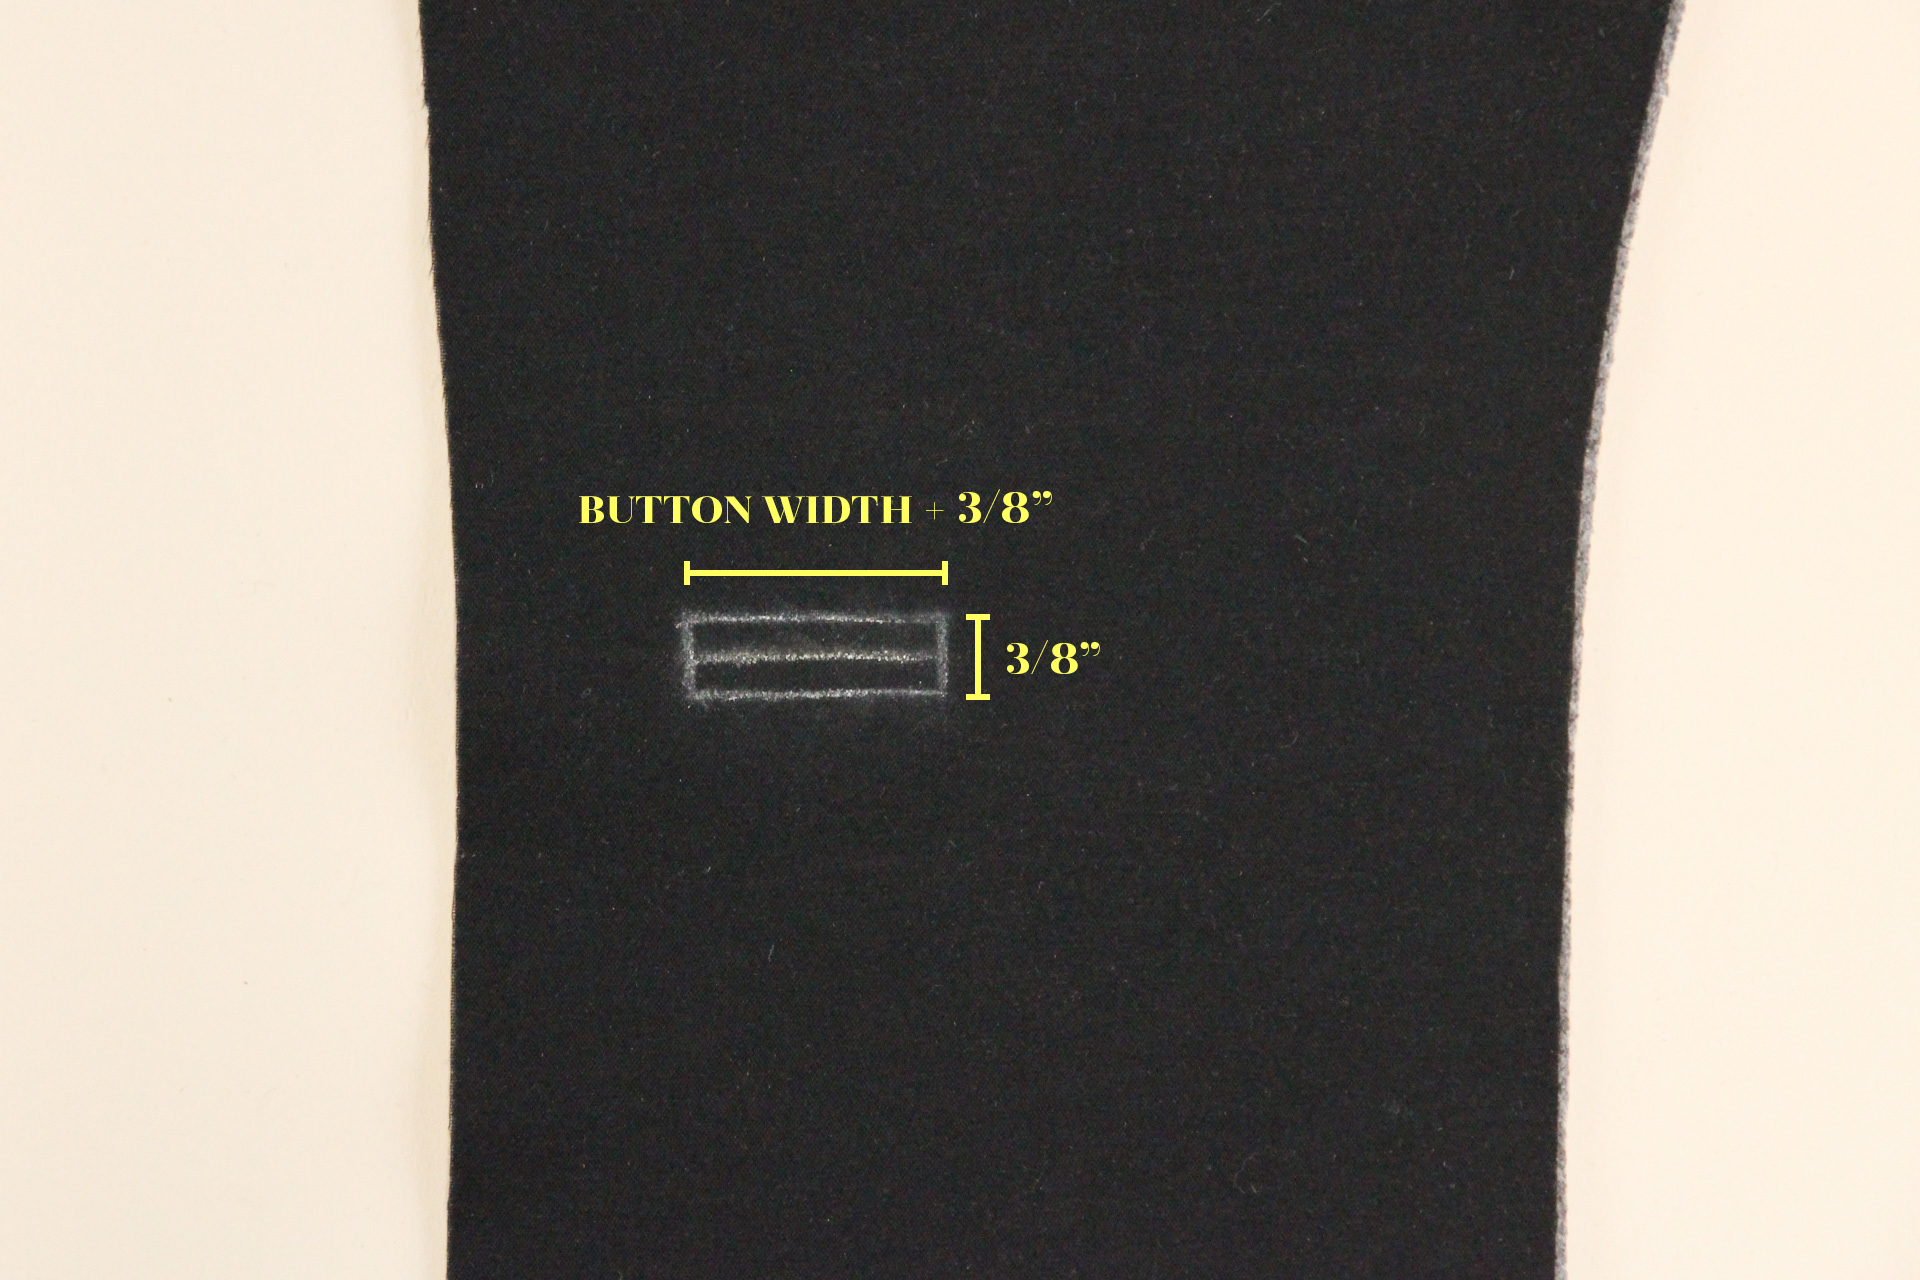
Make a rectangle around your buttonhole placement using the following dimensions:
- Width: Take the width of your button and add 3/8″ (1 cm)
- Height: 3/8″ (1 cm)
Then, divide the rectangle in half the long way. This center line should be 3/16″ (0.5 cm) from the top and bottom lines, and should align with your buttonhole placement marking
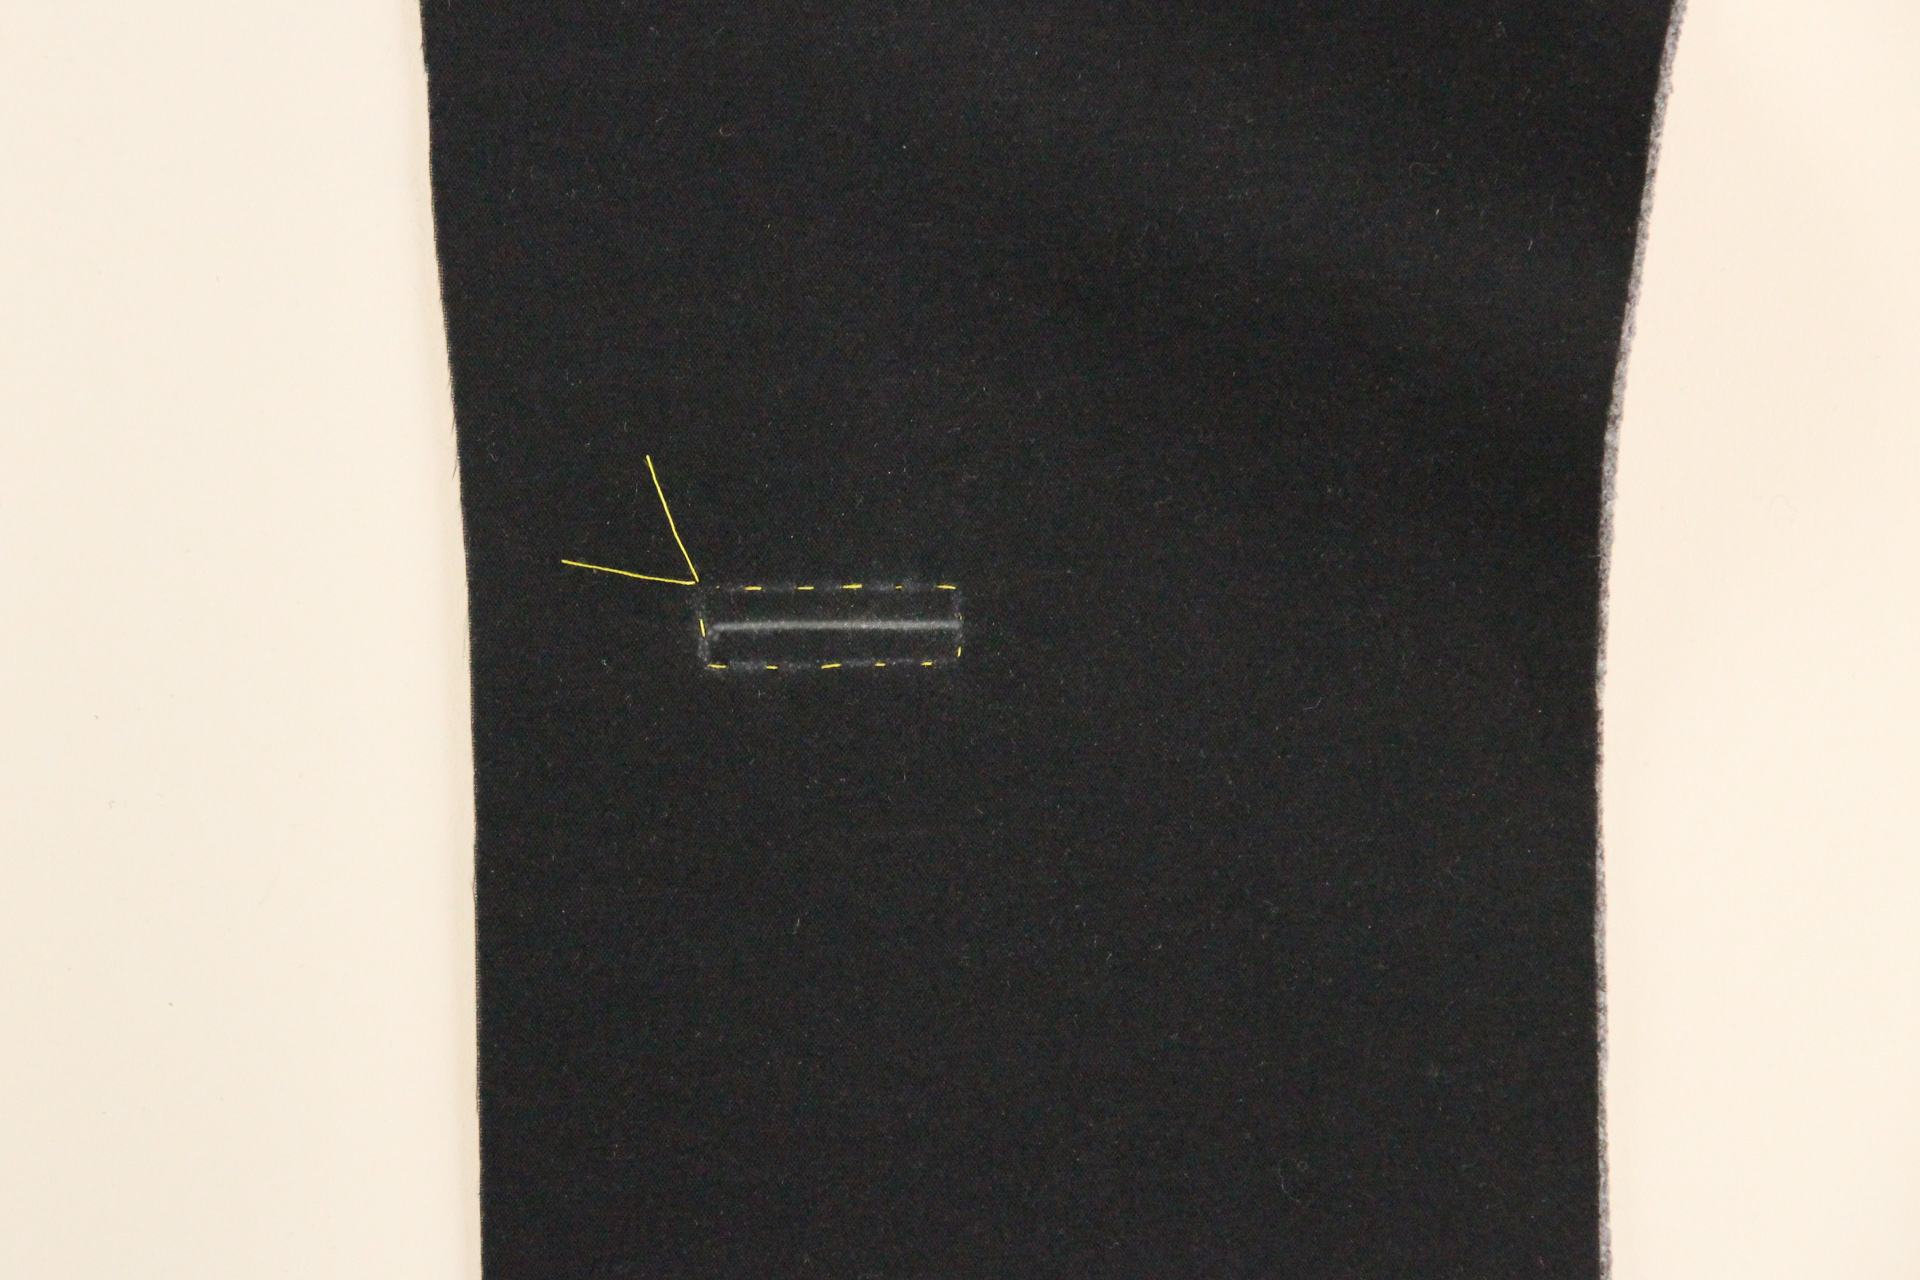
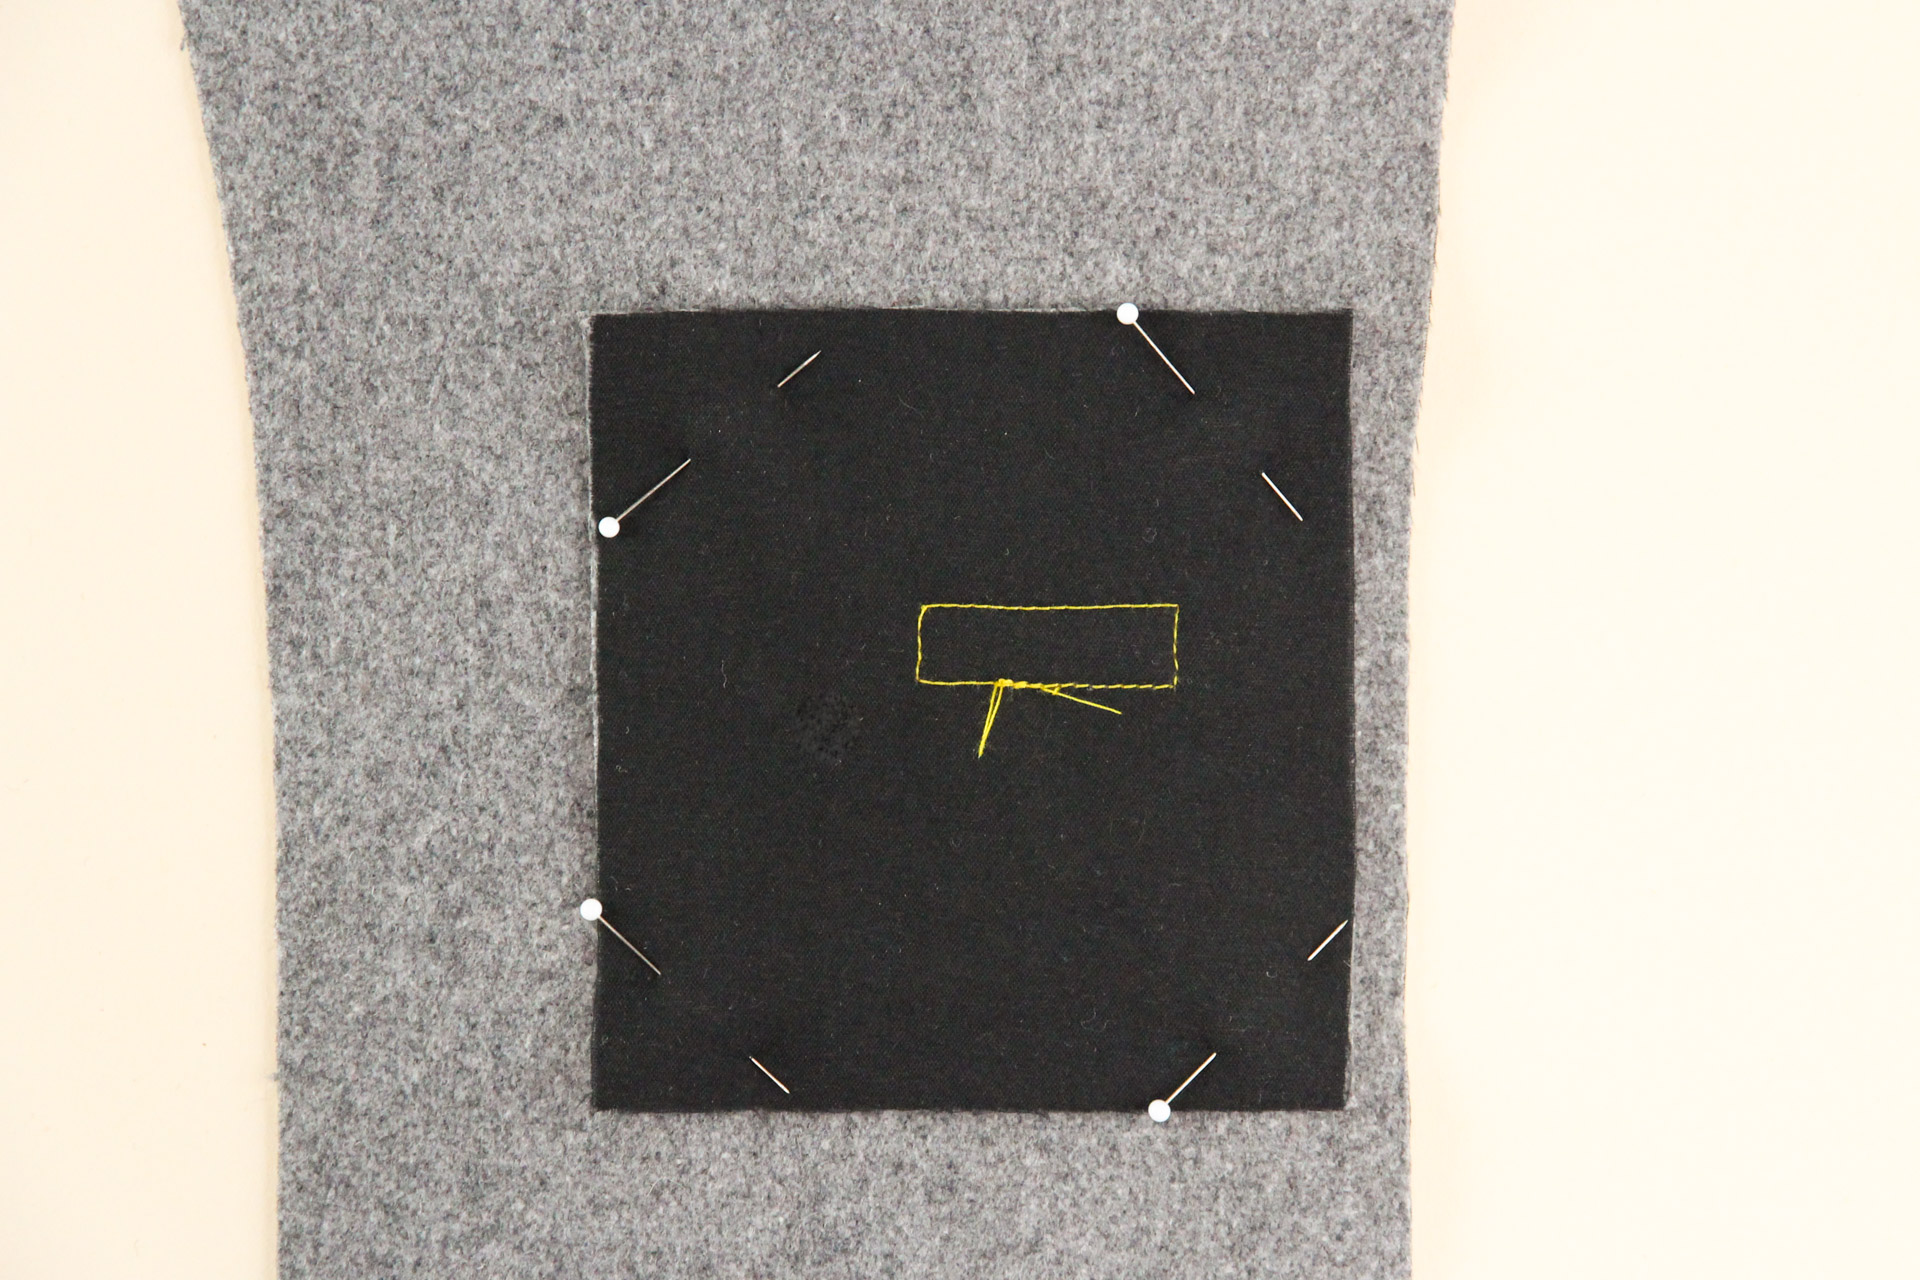
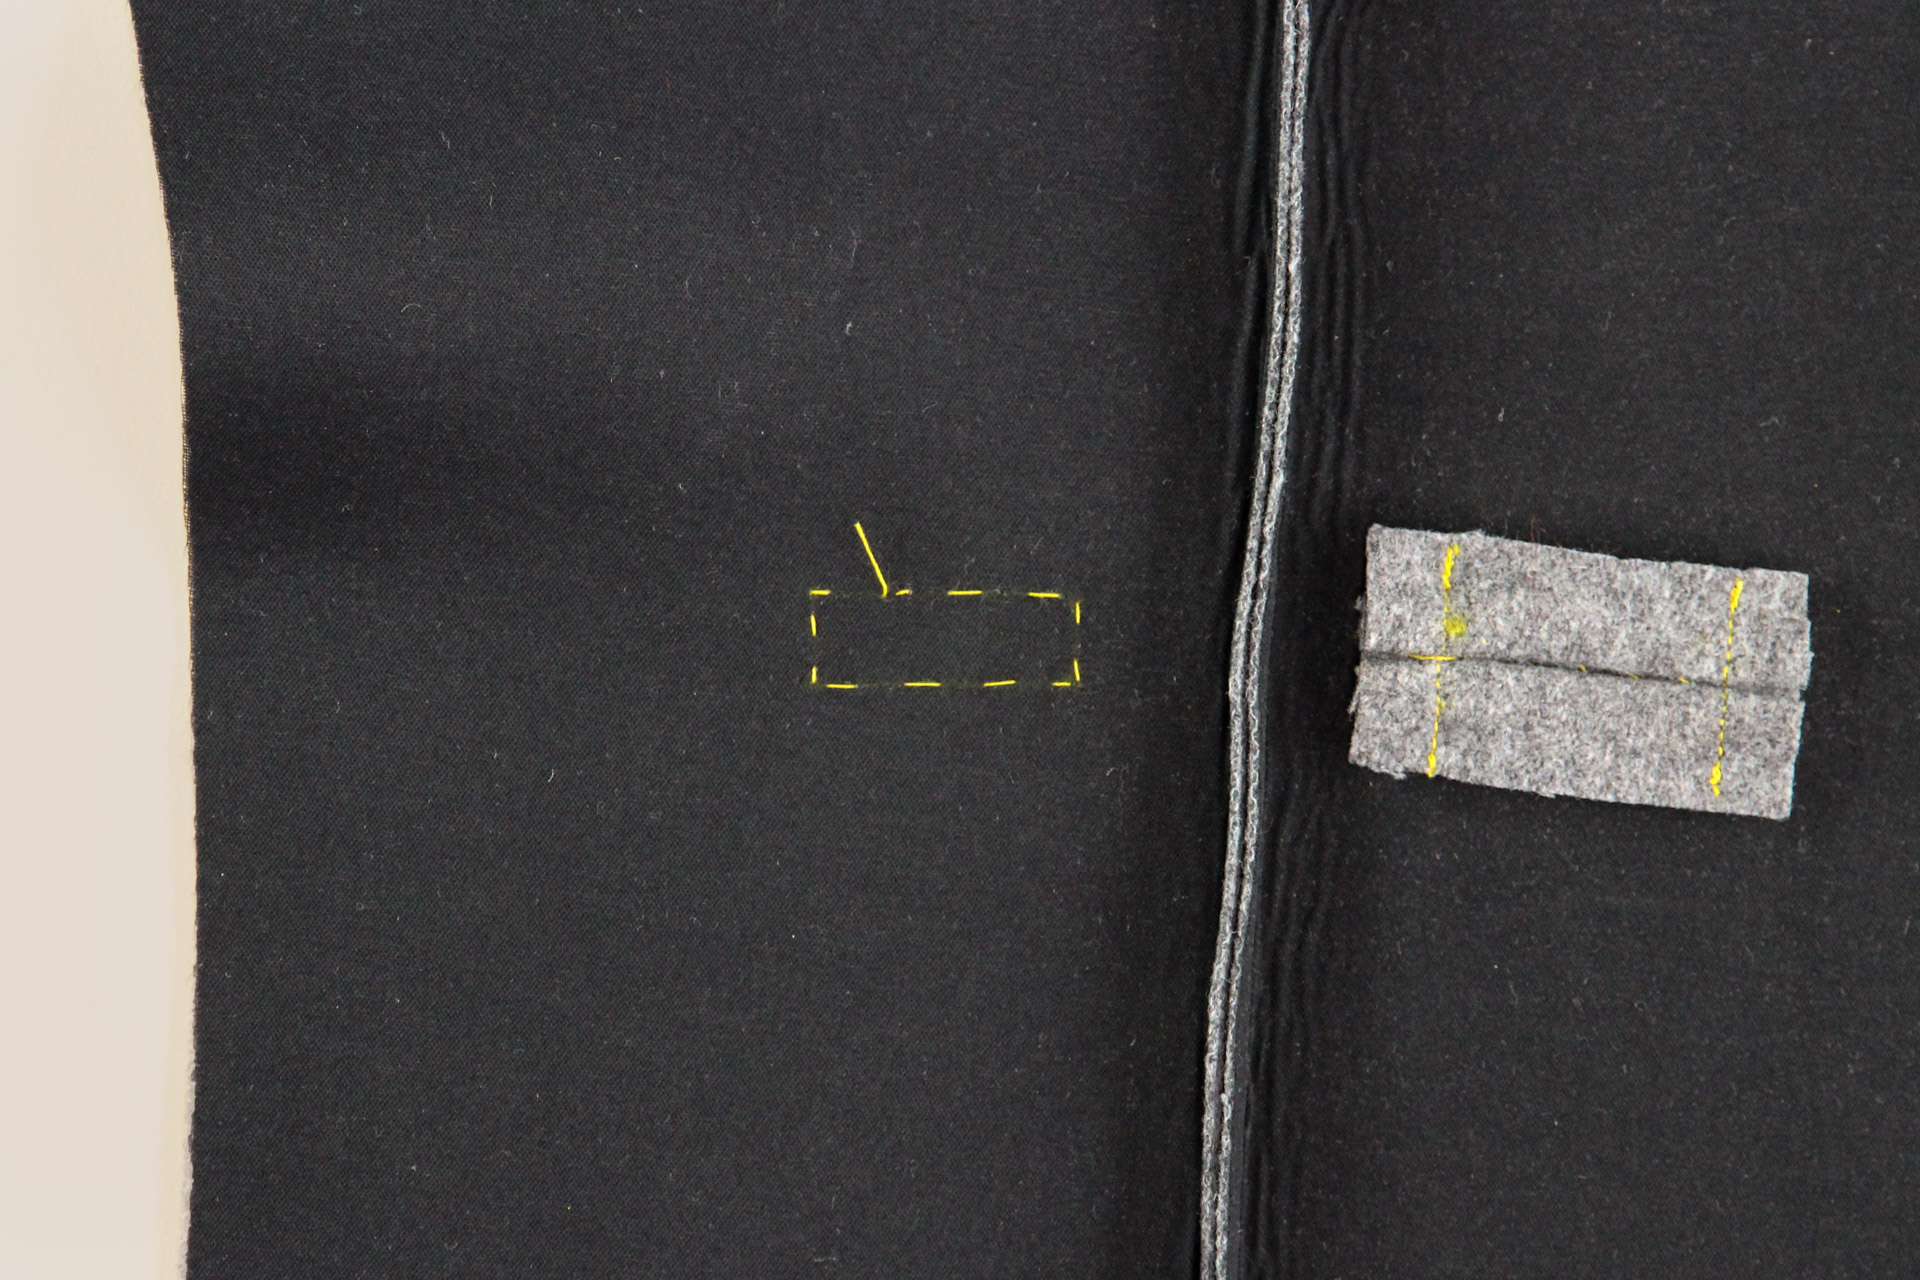
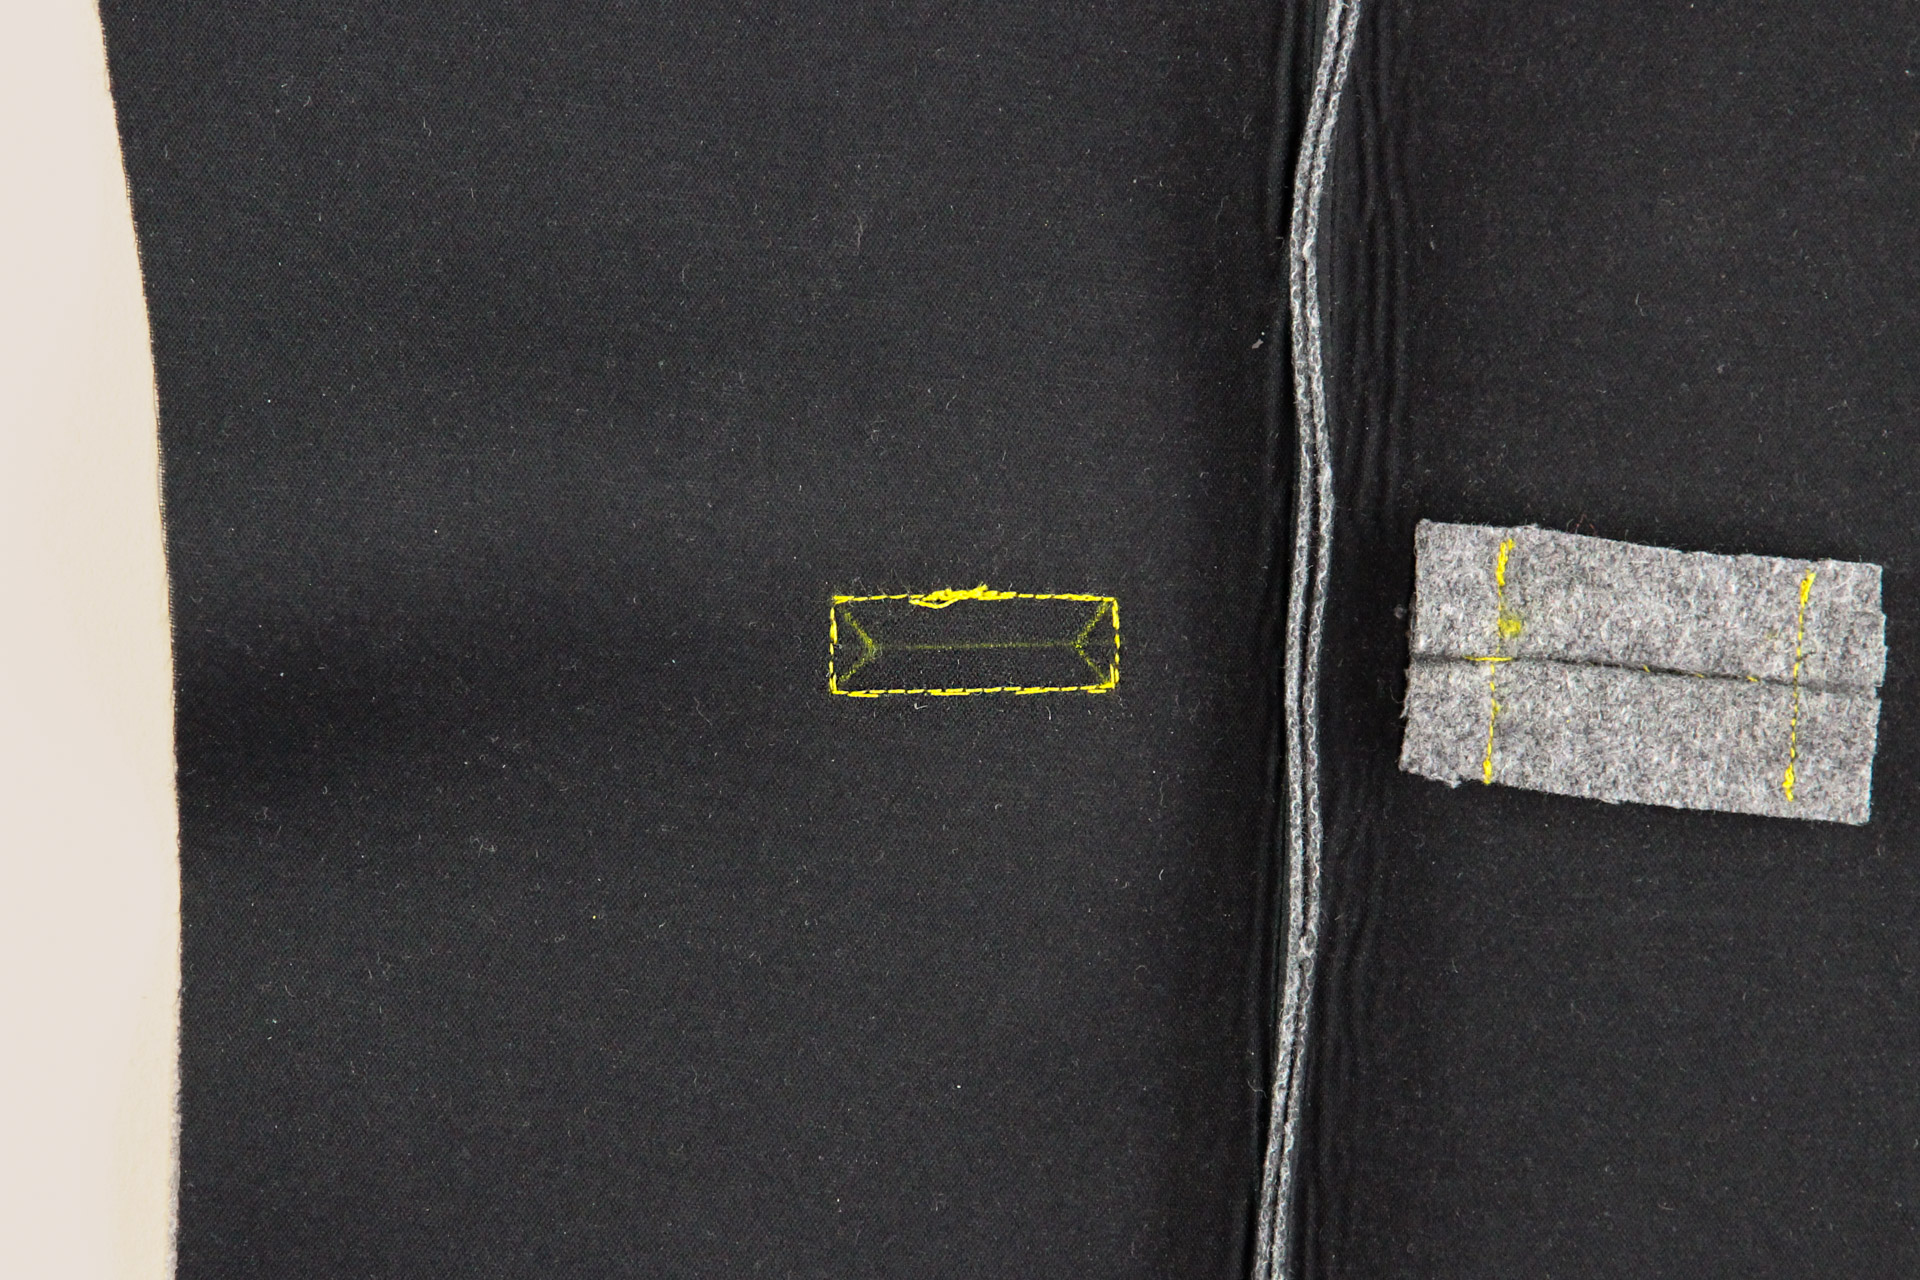
Now, baste around the outer rectangle using a running stitch so that your rectangle will be visible from the right side.
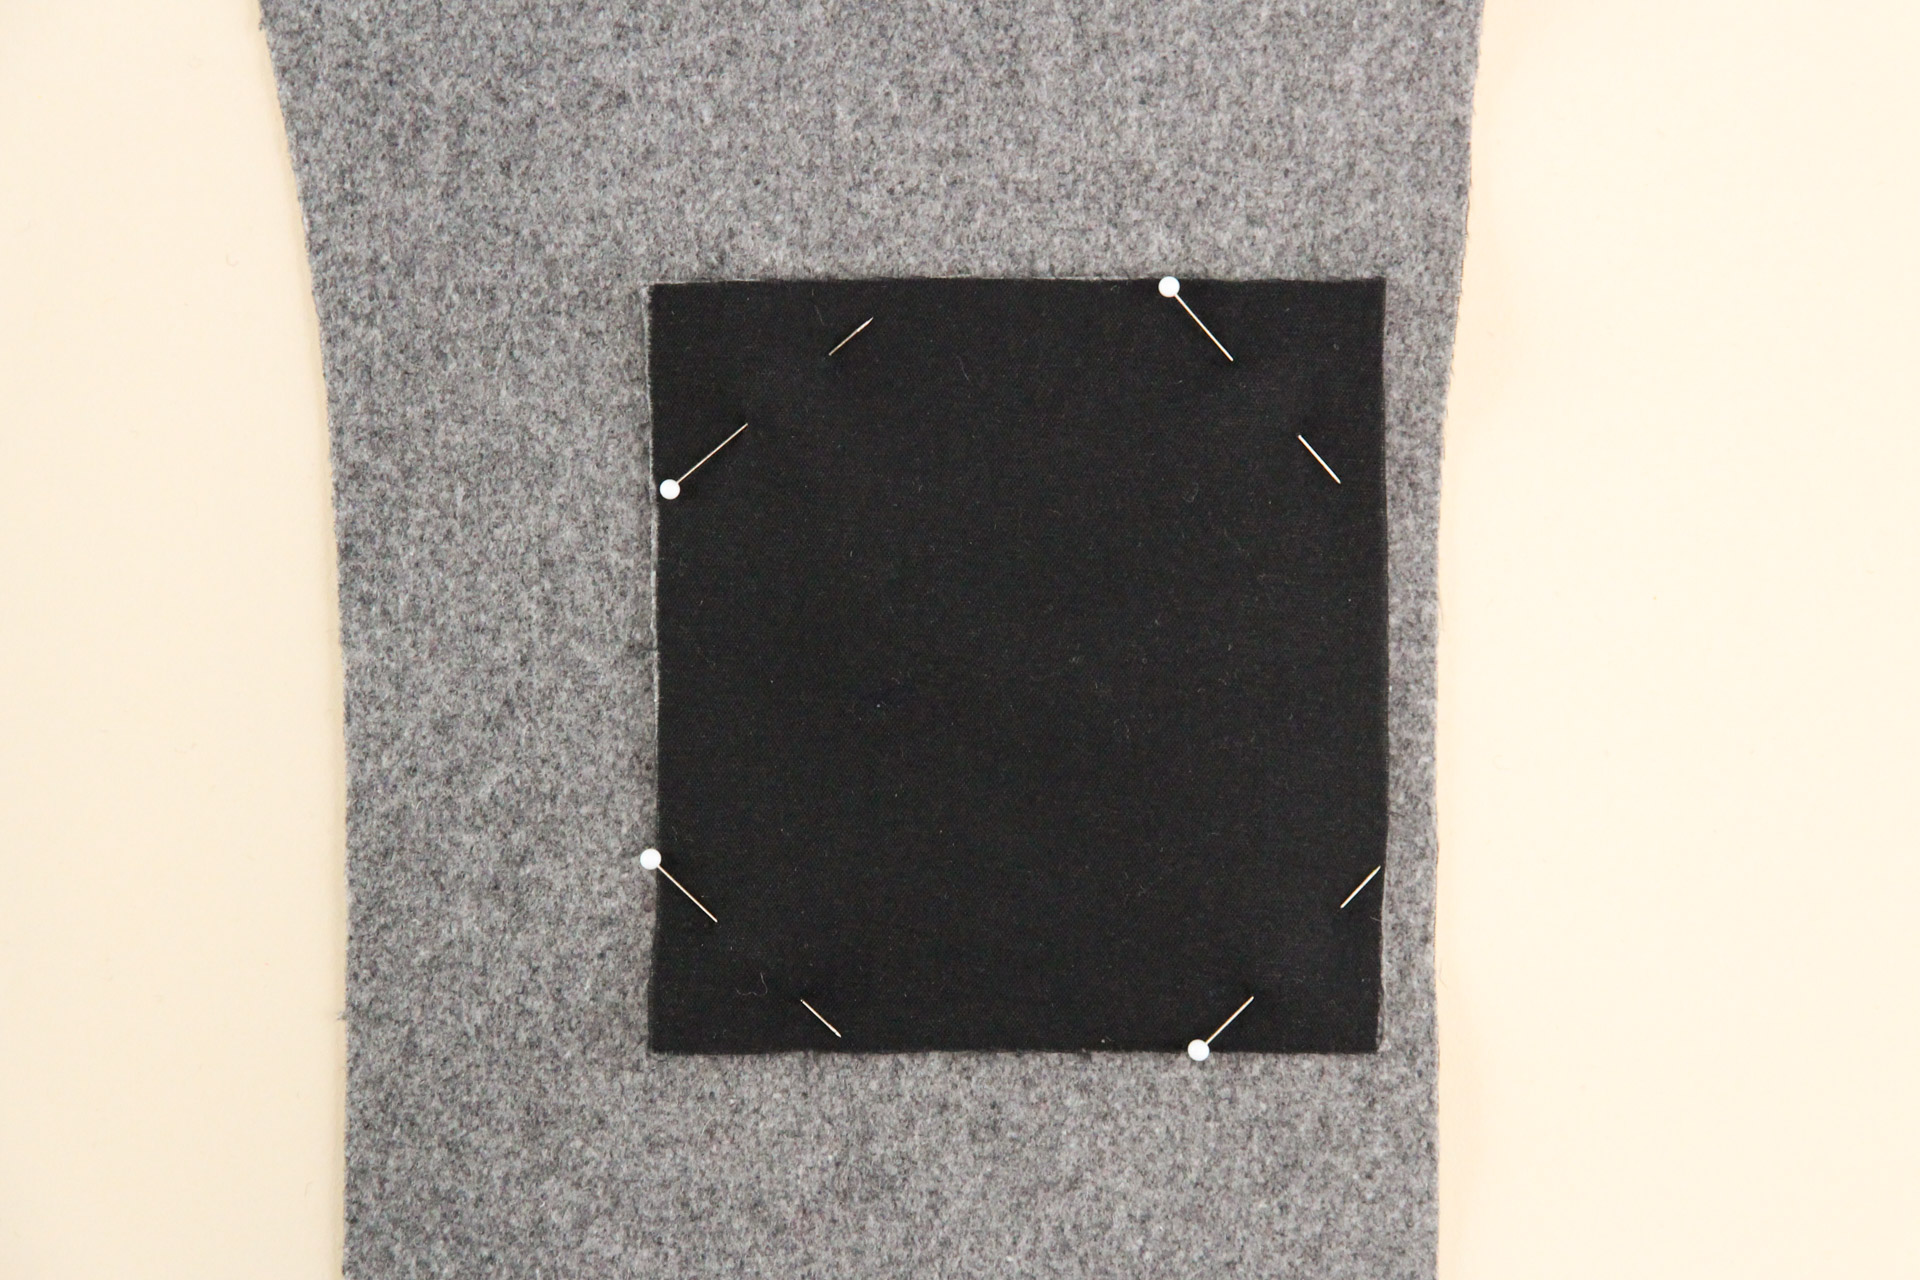
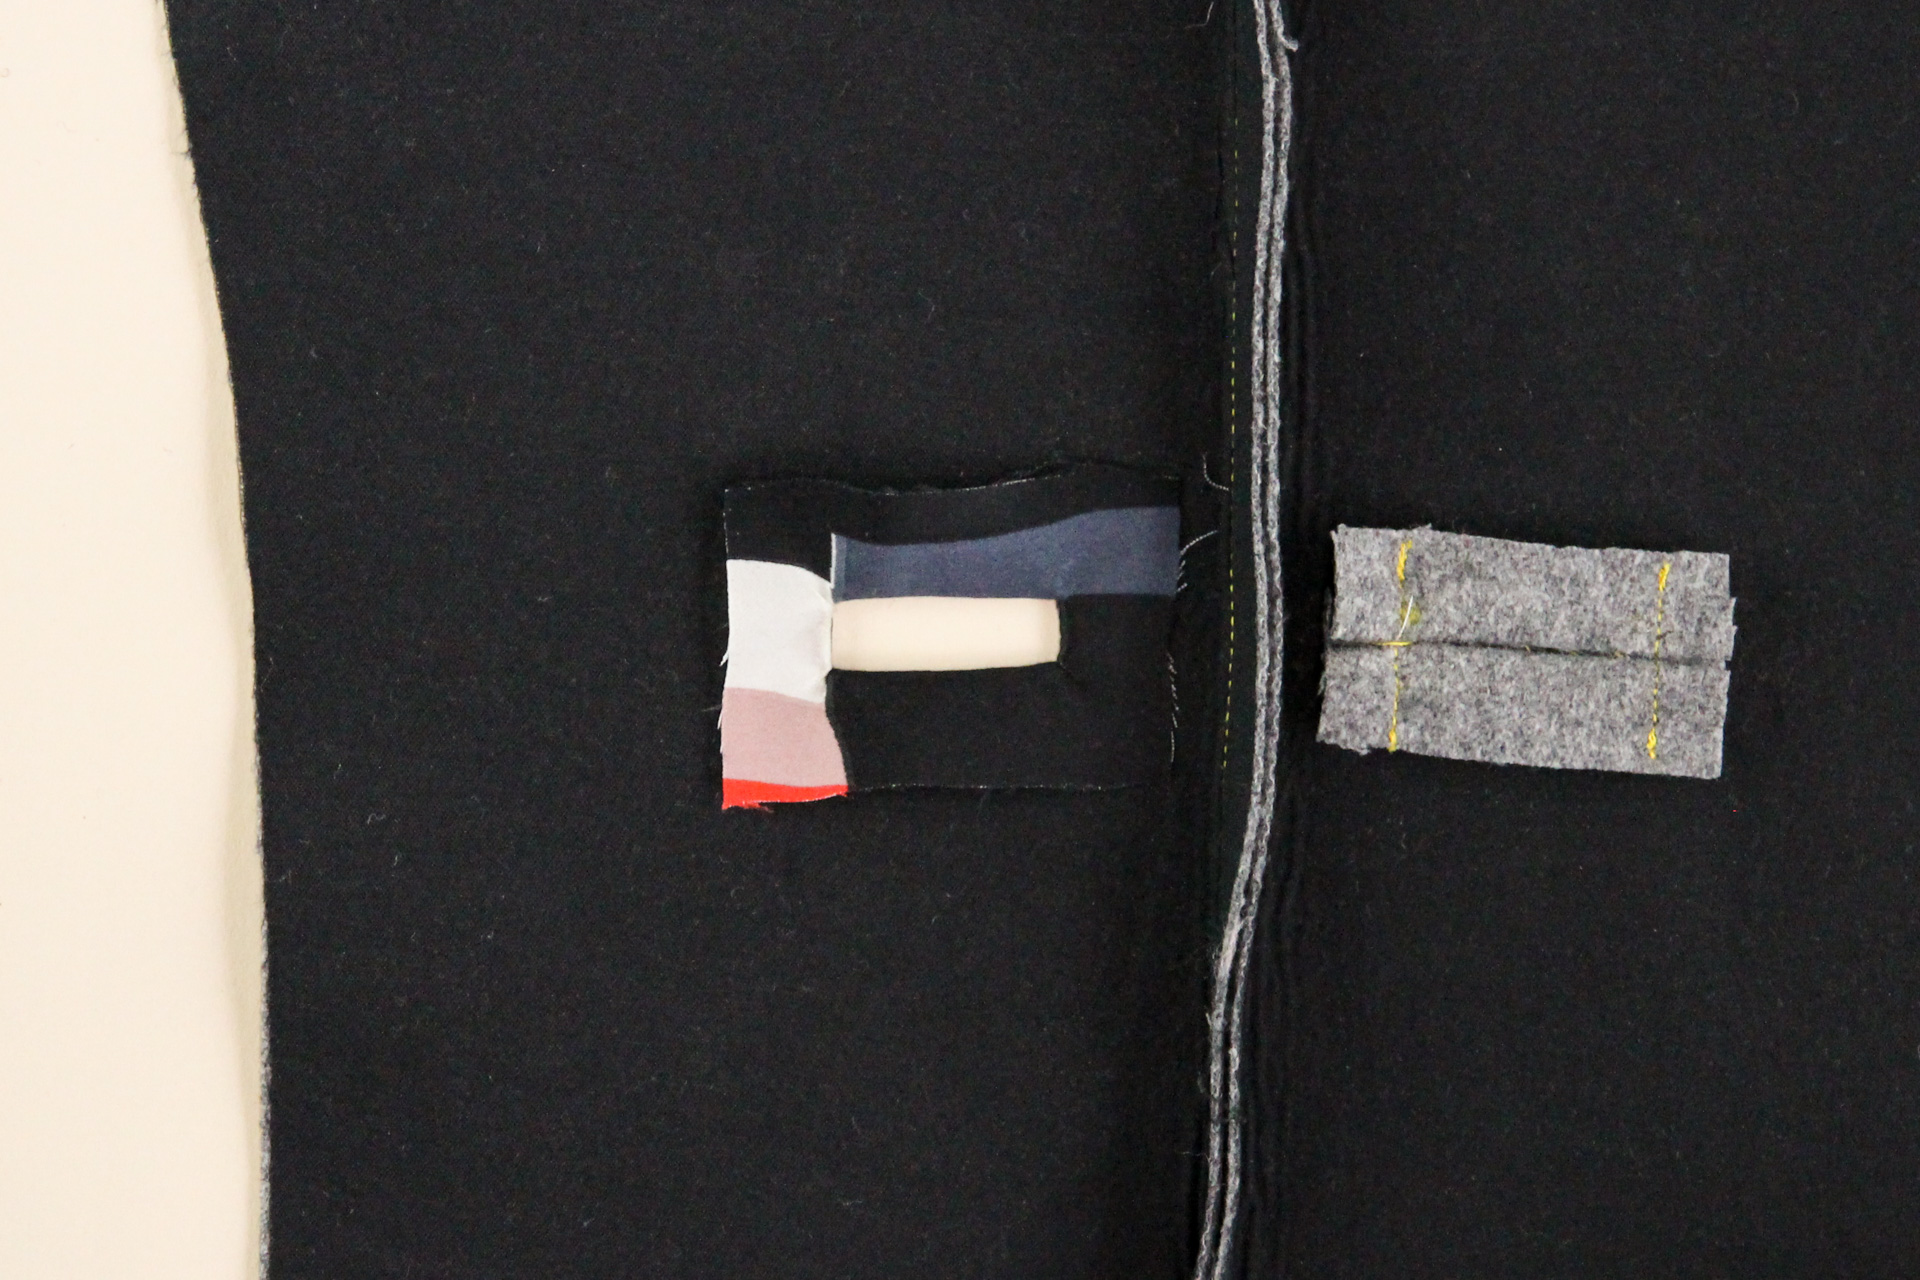
Next, we’re going to cut out a patch of our same fabric and place it over the rectangle we basted, right sides together. It’s best to cut this patch on the bias, and you can do a square that’s about 4″ by 4″ (10 cm by 10 cm). We’ll be trimming this patch down significantly later, so no need to make it perfect.
Pin this patch over the based rectangle.
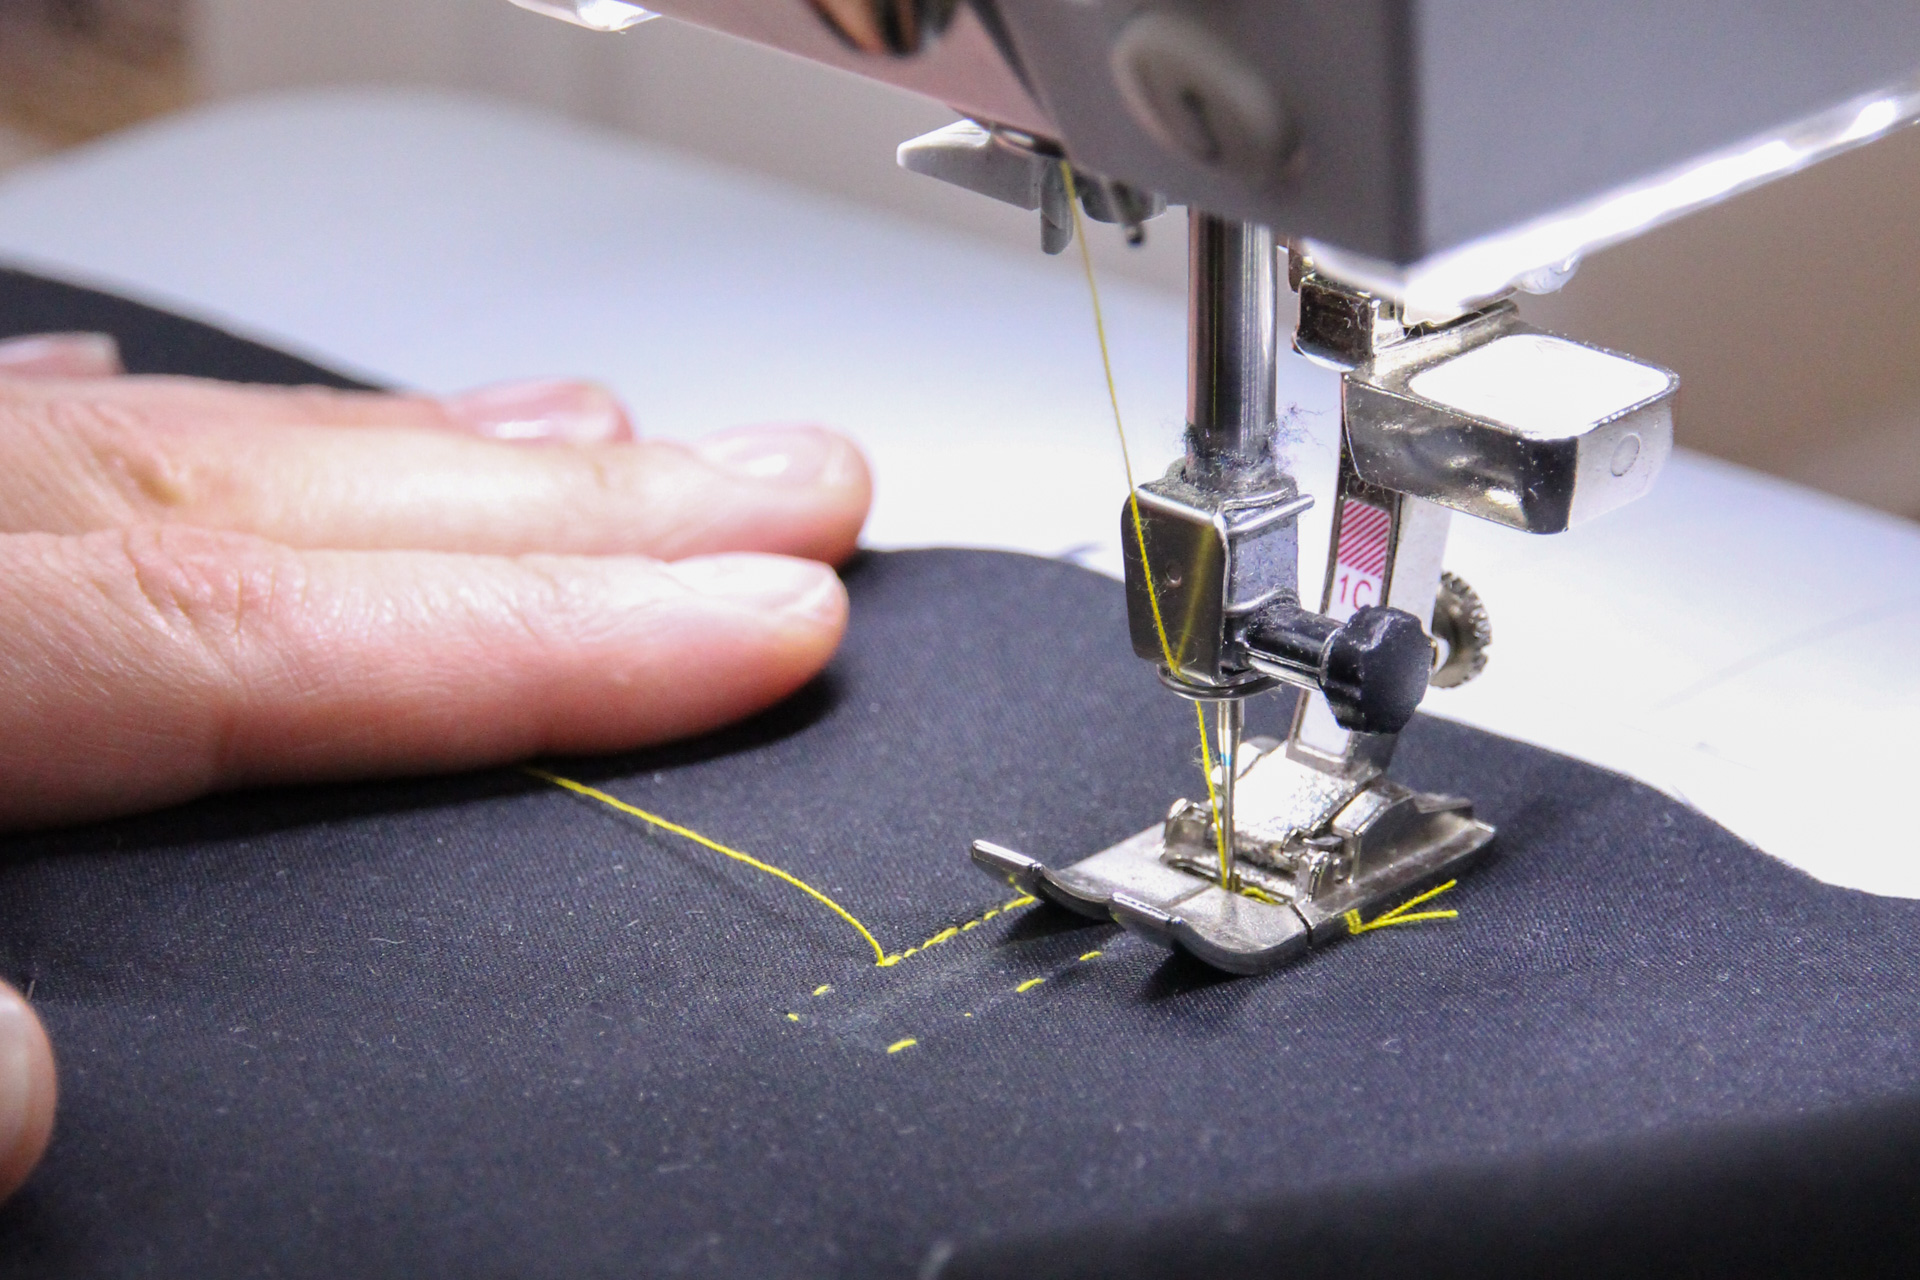
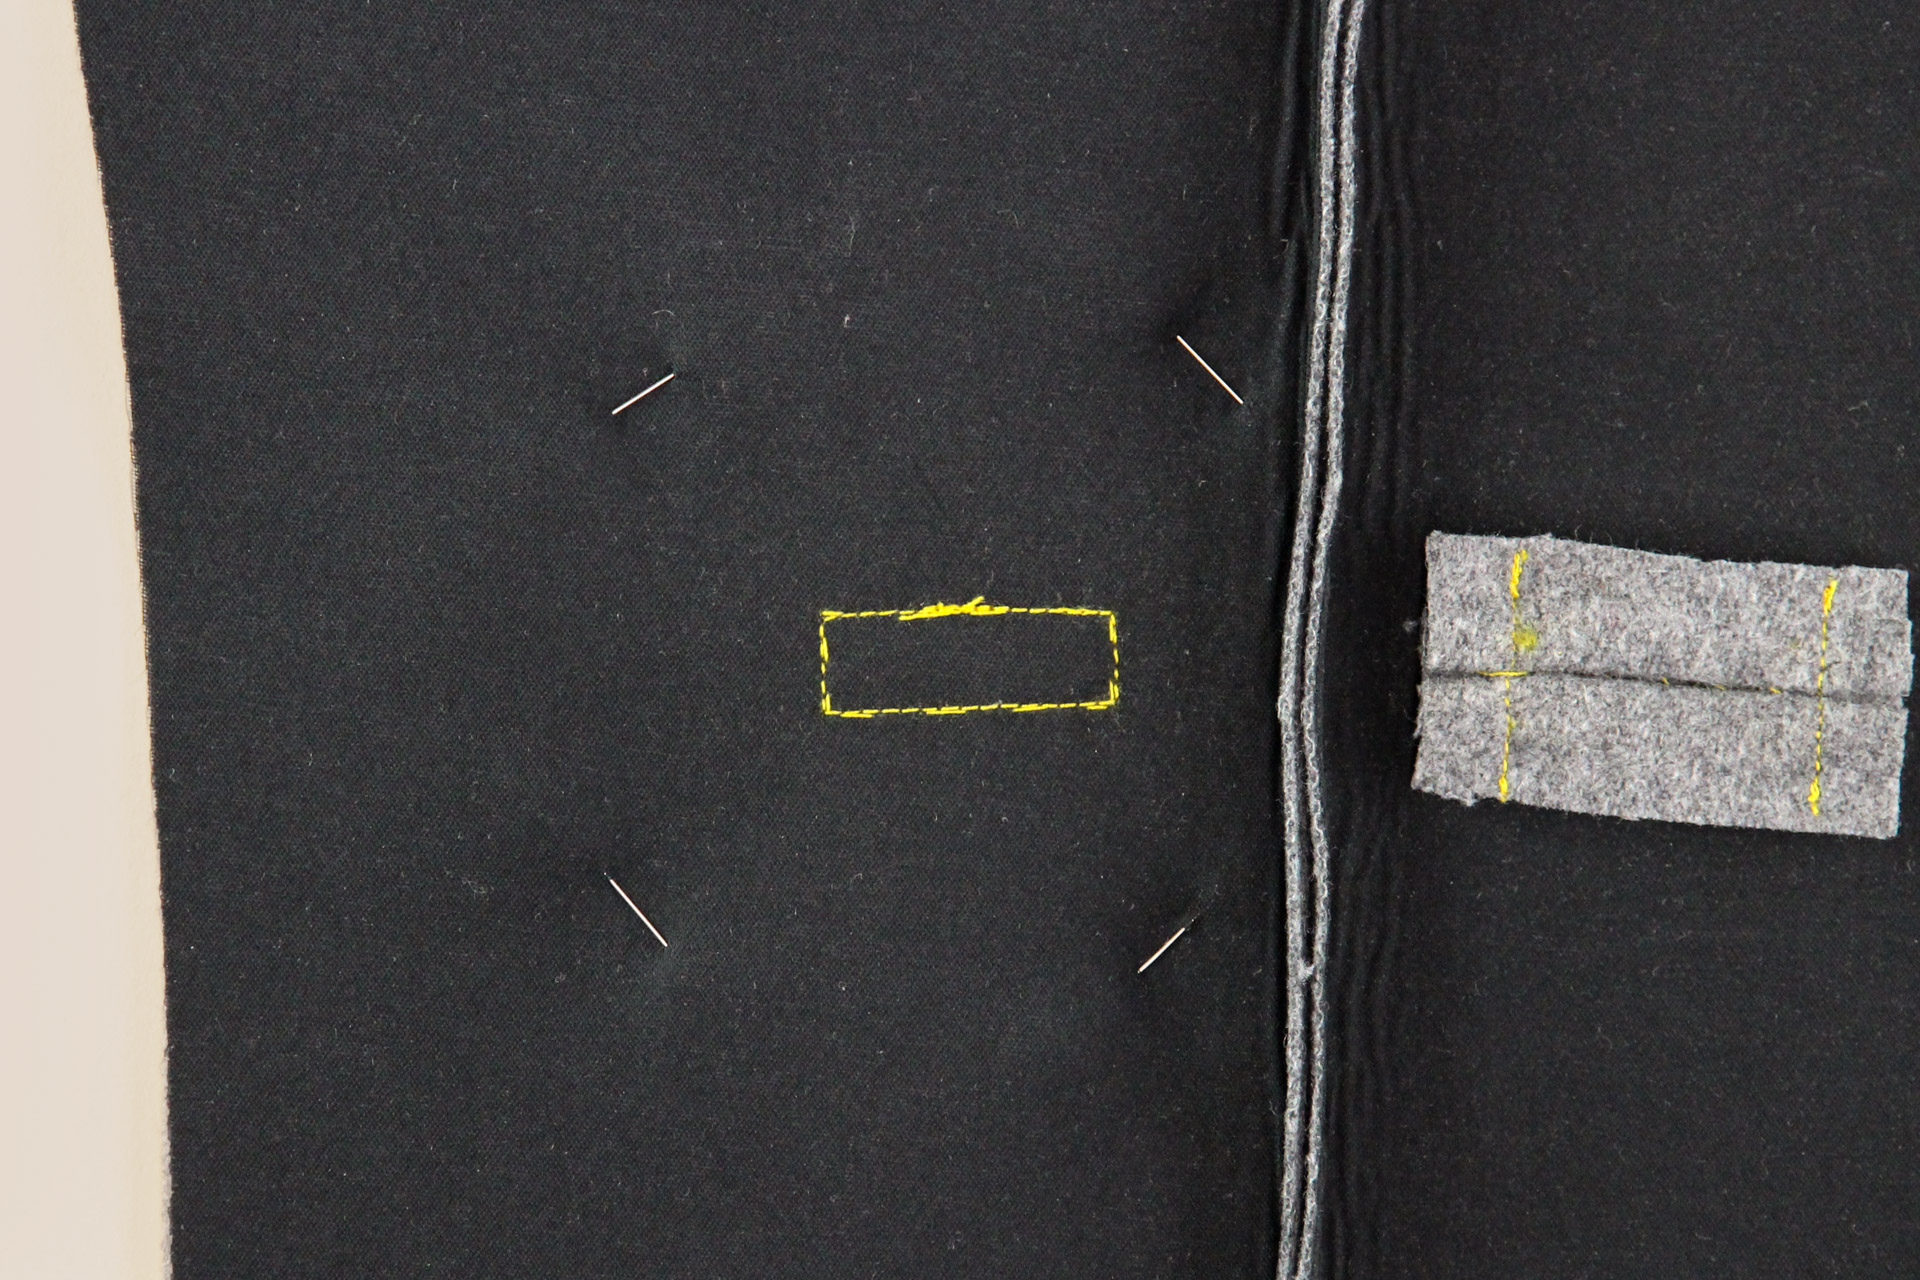
Now we’re going to take it over to the machine and sew around the outer rectangle from the wrong side. You’ll want to use a short stitch length and be very precise here—when you get to each point, stop and pivot your fabric 90 degrees. You can even count the number of stitches on both of the short ends to make sure they’re exactly even.
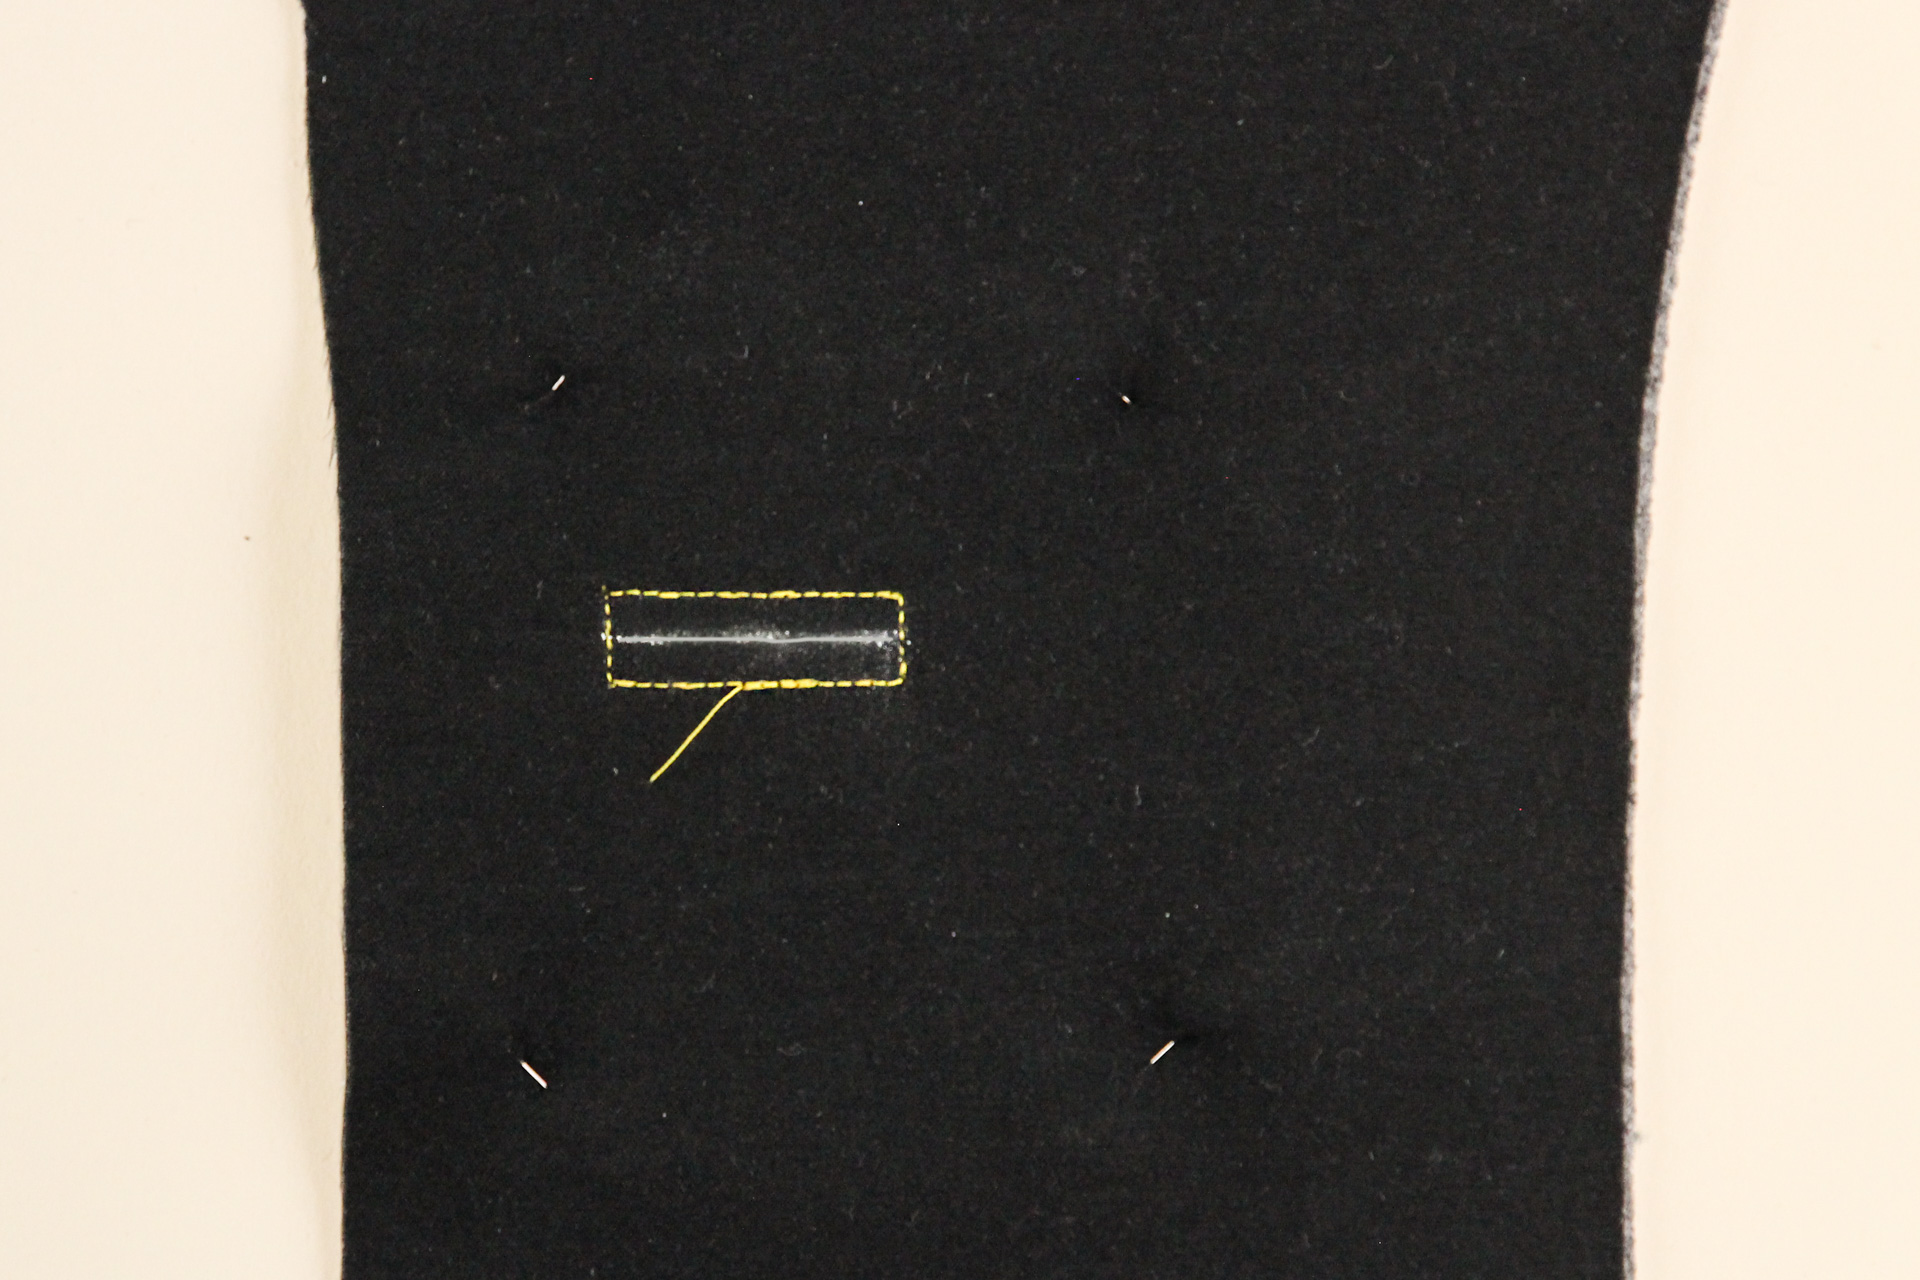
Here’s how it will look from the right side.
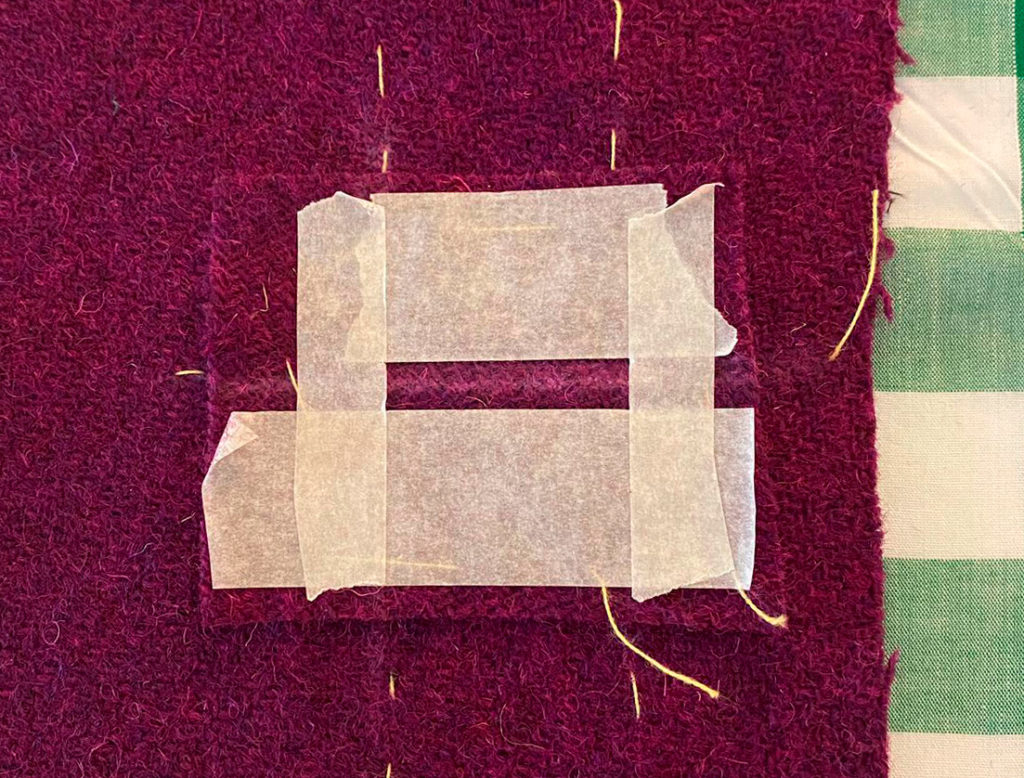
Another technique you can try for a VERY precise rectangle is to tape the edges with masking tape, then sew along the very edges of the tape.
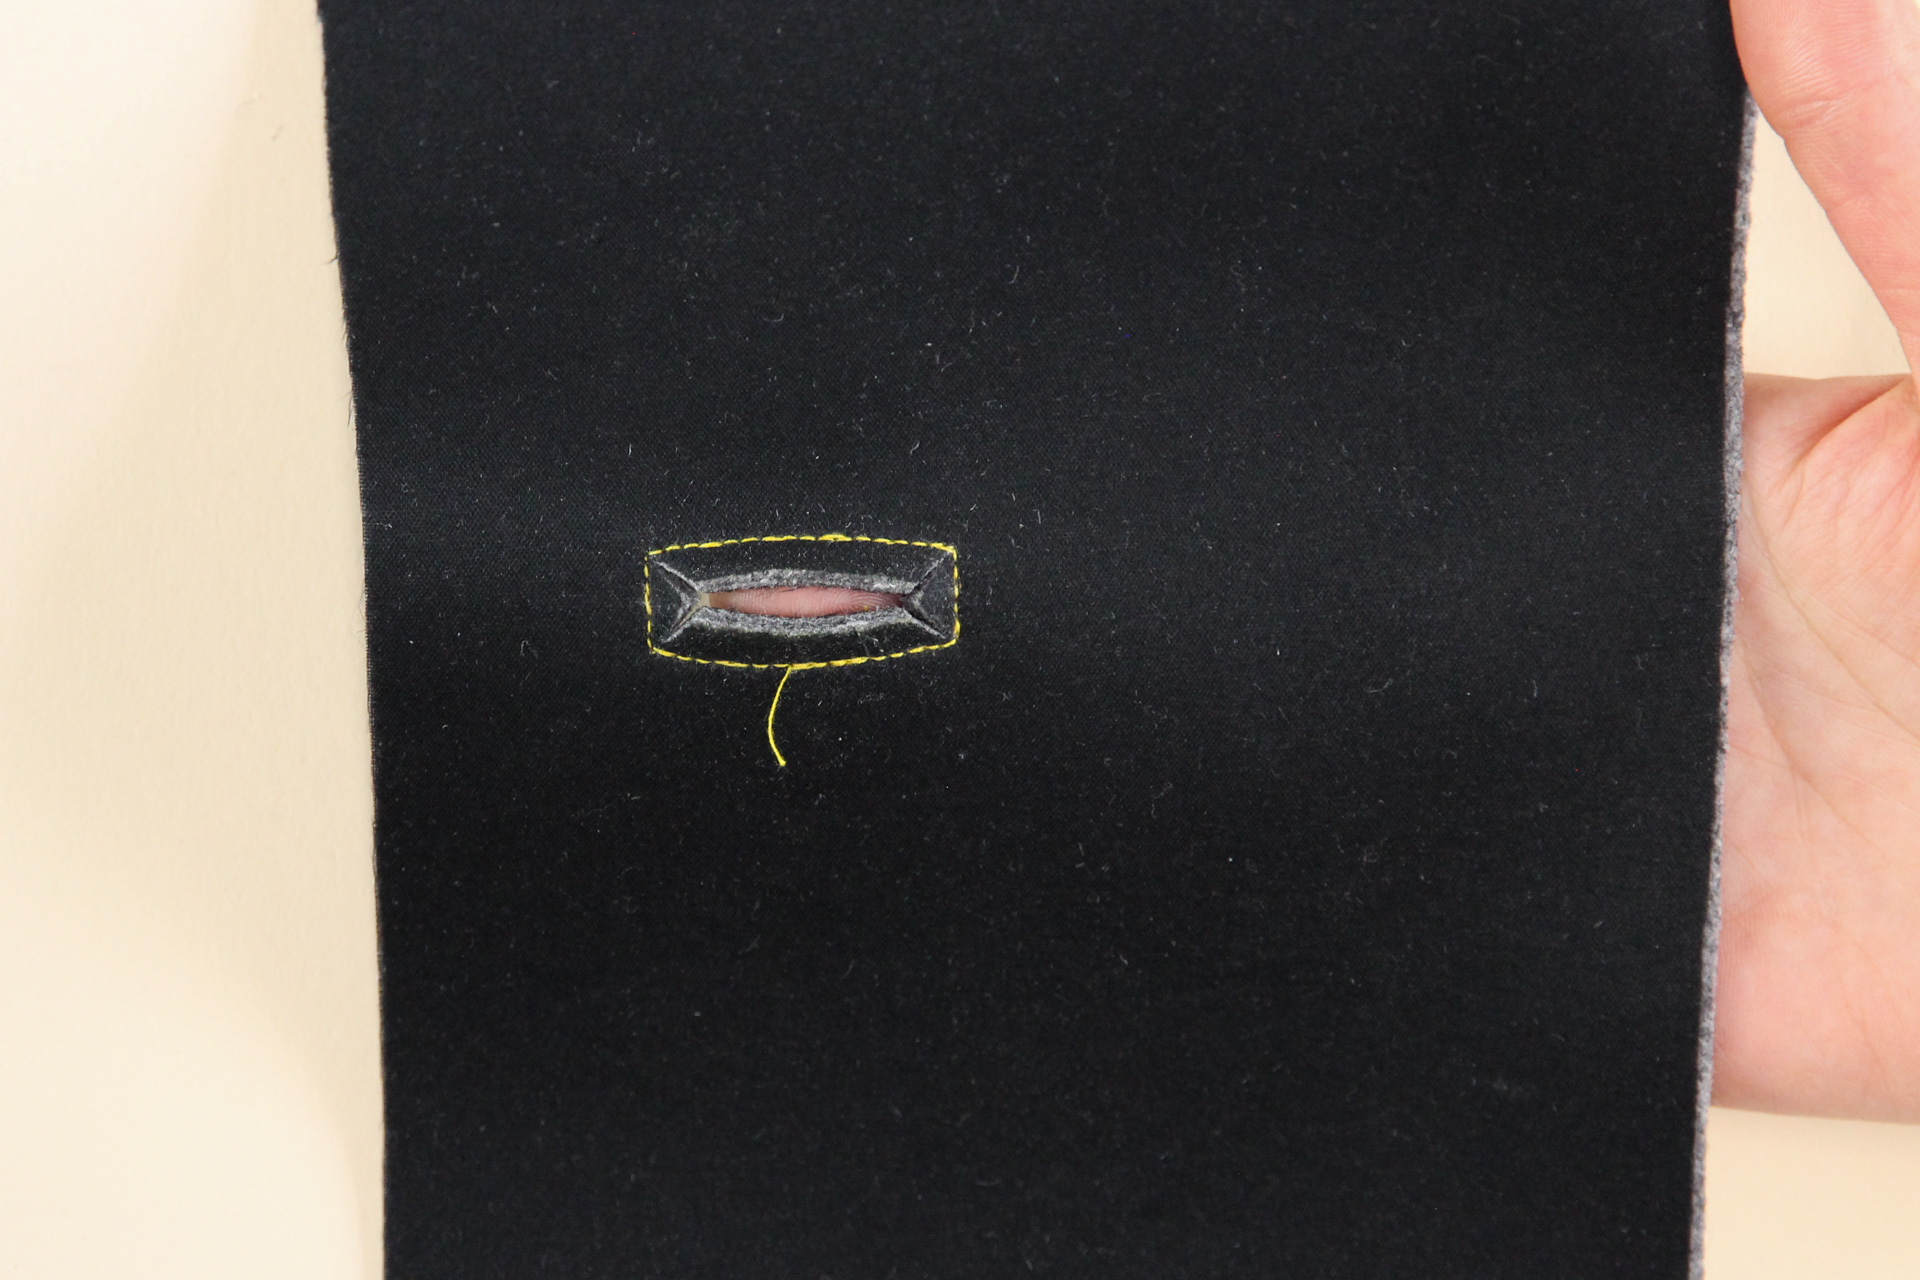
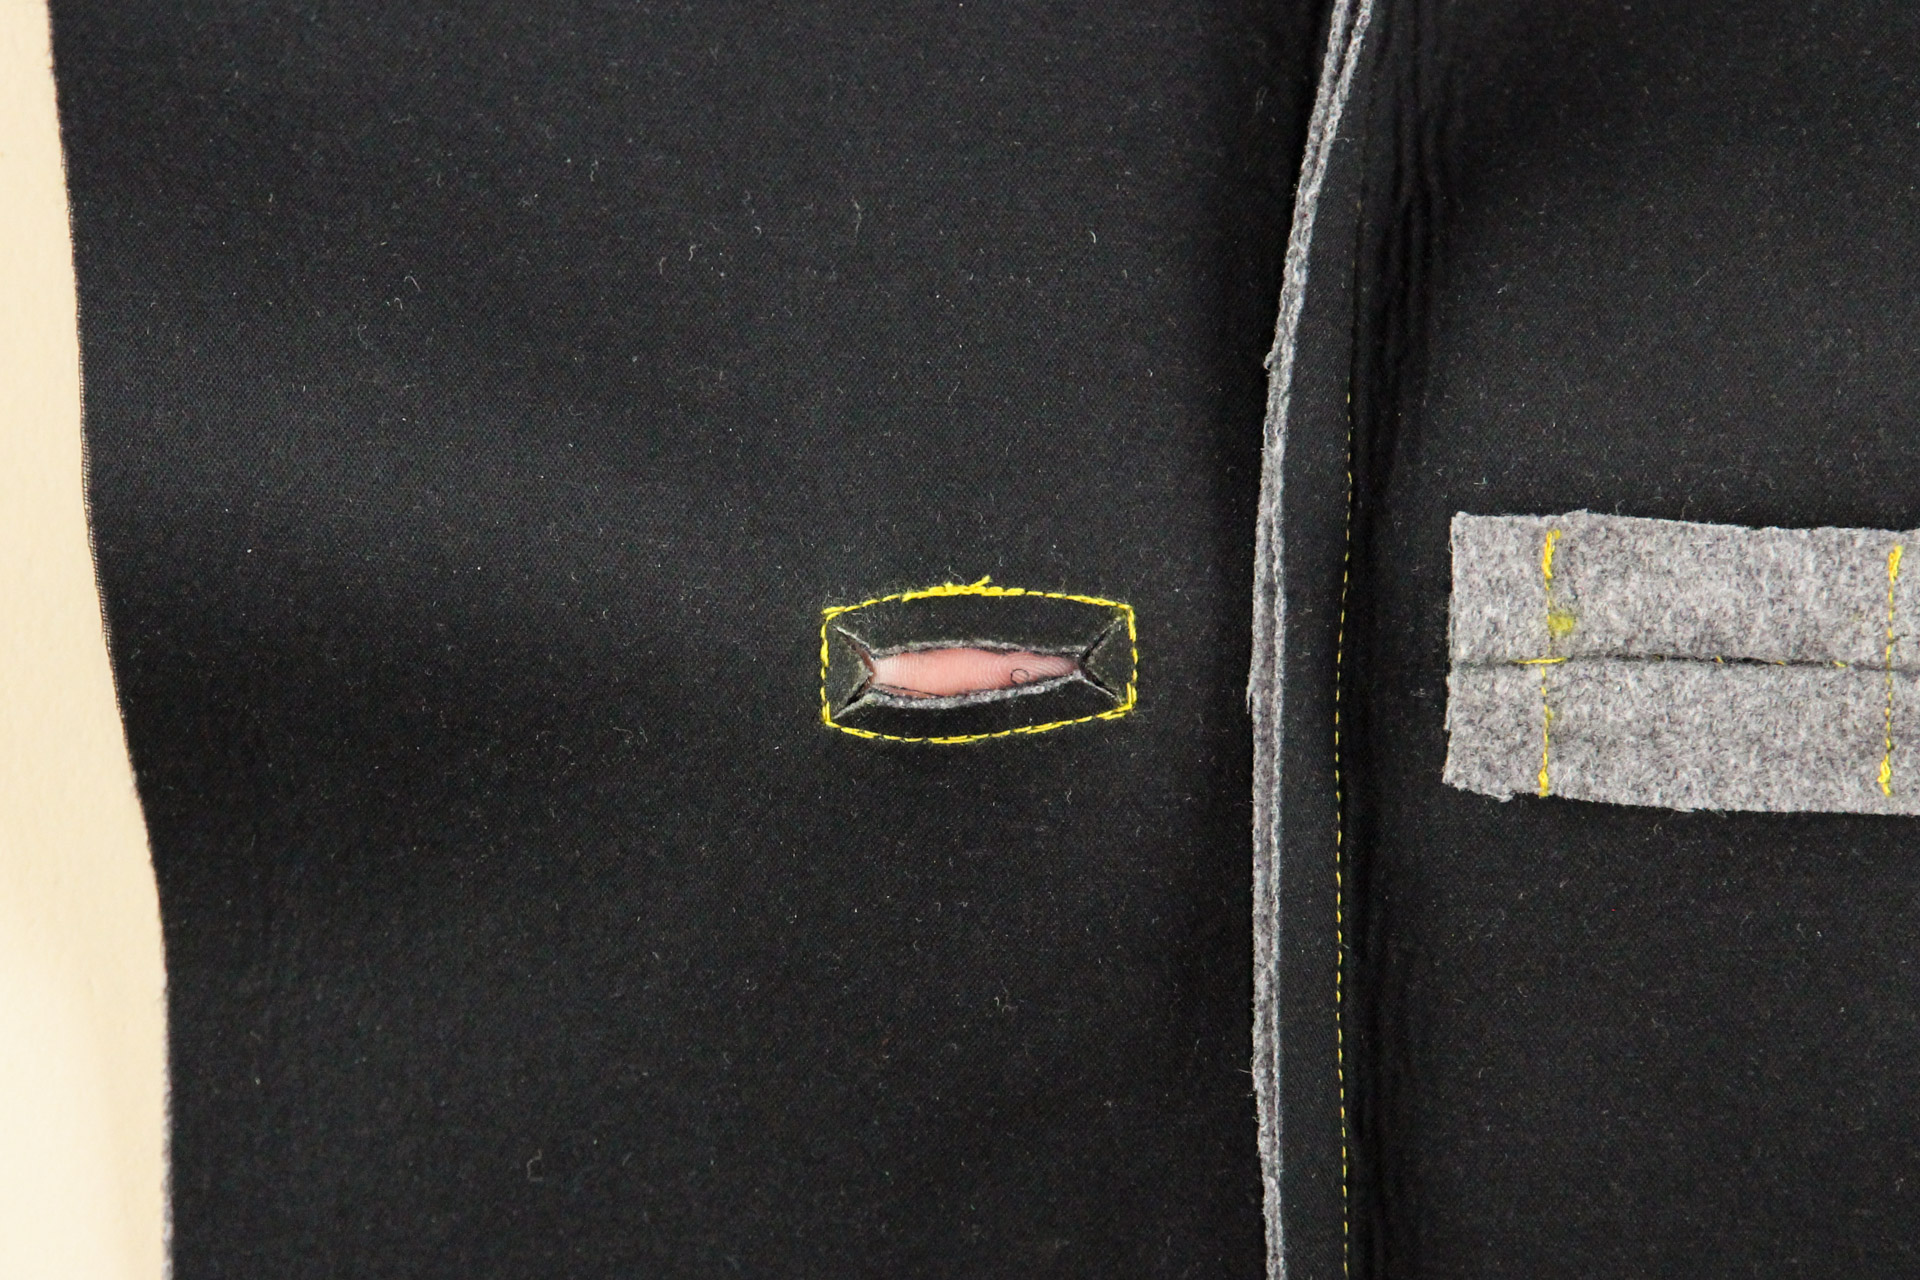
From the wrong side, we’re going to cut along the center line of the rectangle. When you get 3/16″ (0.5 cm) away from the short edges of the rectangle, turn and cut towards the corner.
Cut up to but not through your stitching lines. It helps to use a scalpel and small scissors in order to be very precise.
Next, we’re going to push our patch through the hole and to the wrong side:
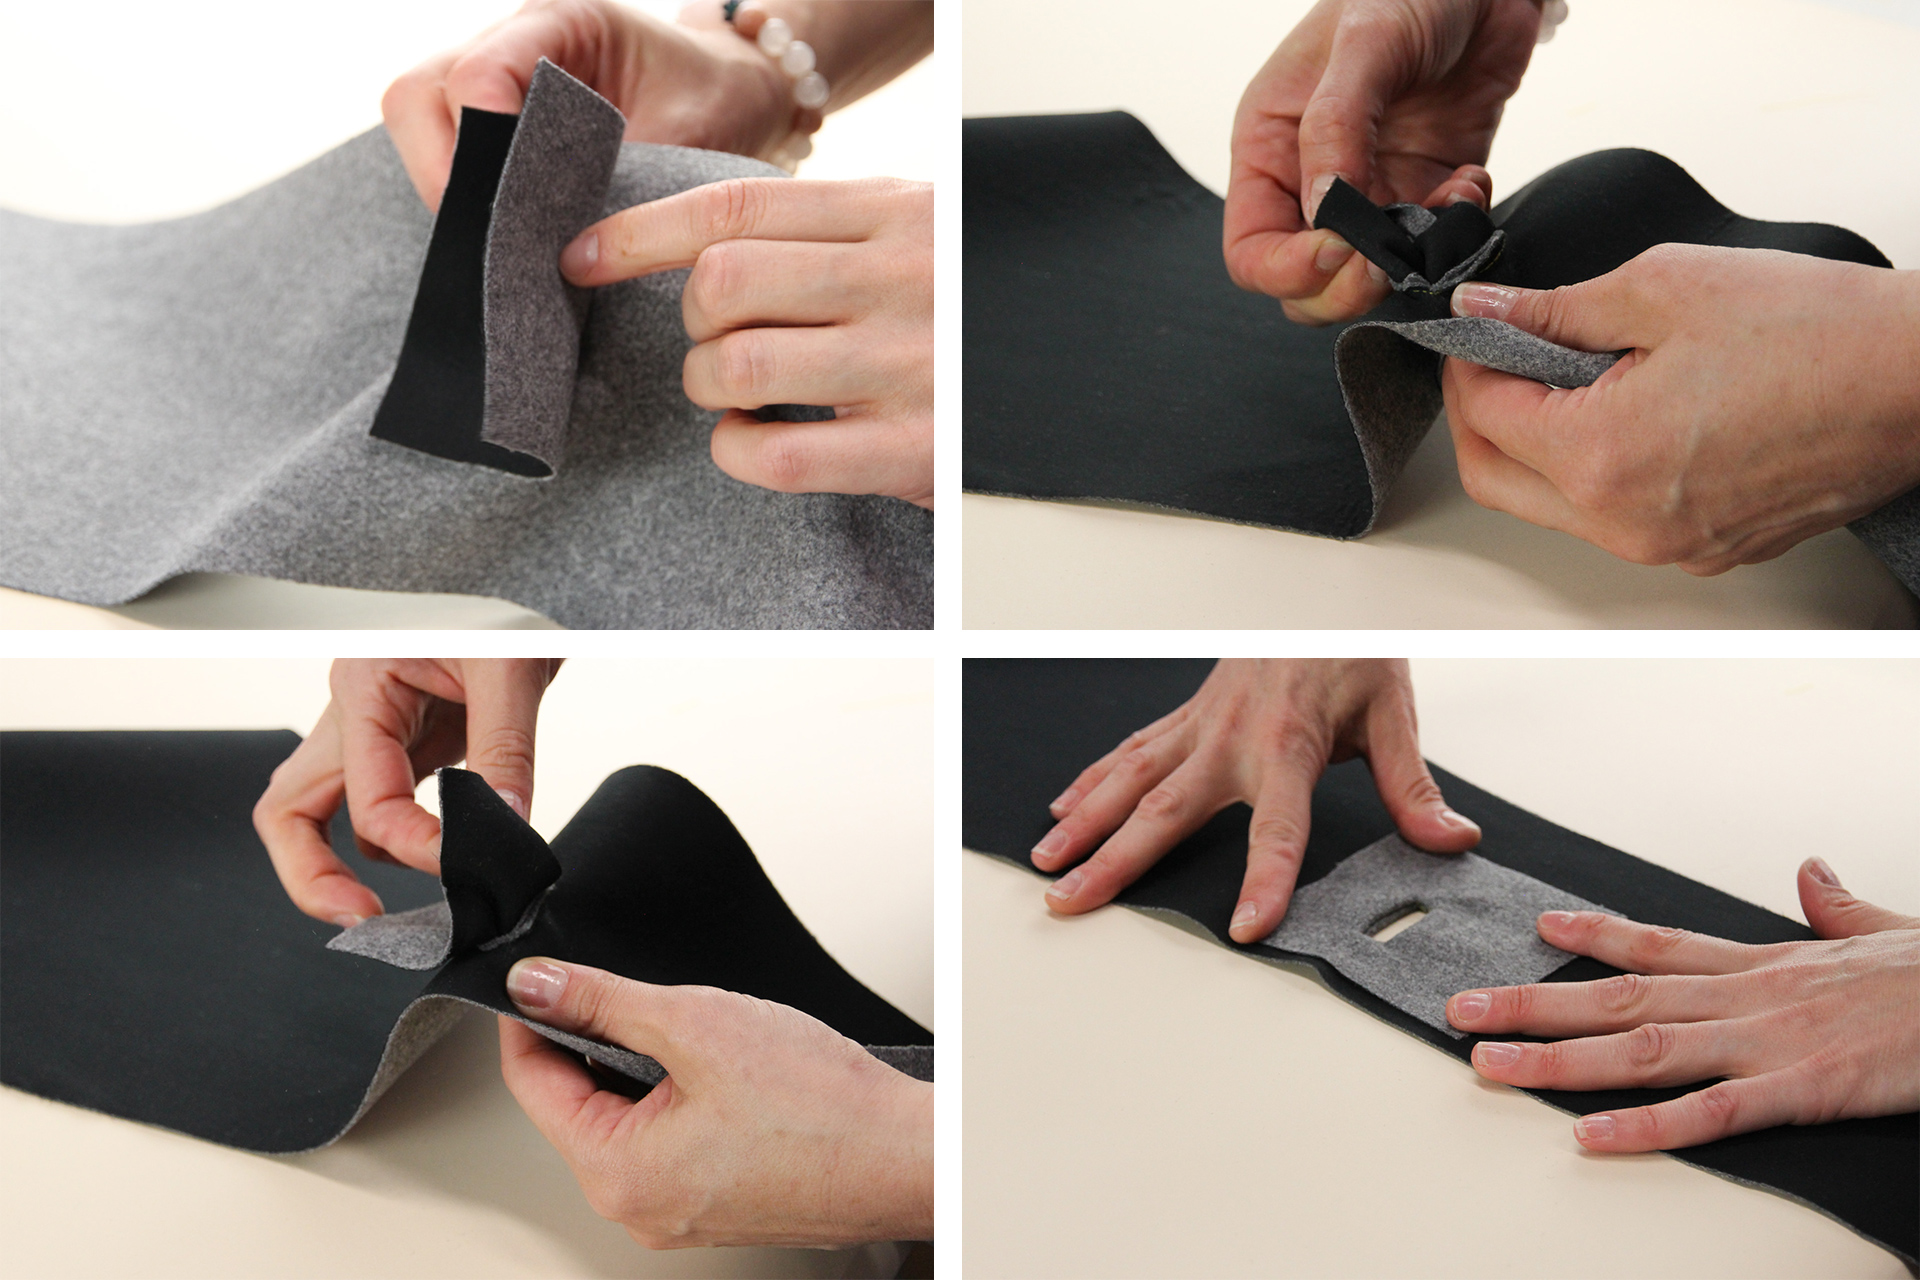
Give it a good press to make sure it lays flat. If you’re getting some puckering, it may be because you haven’t cut close enough to the corners.
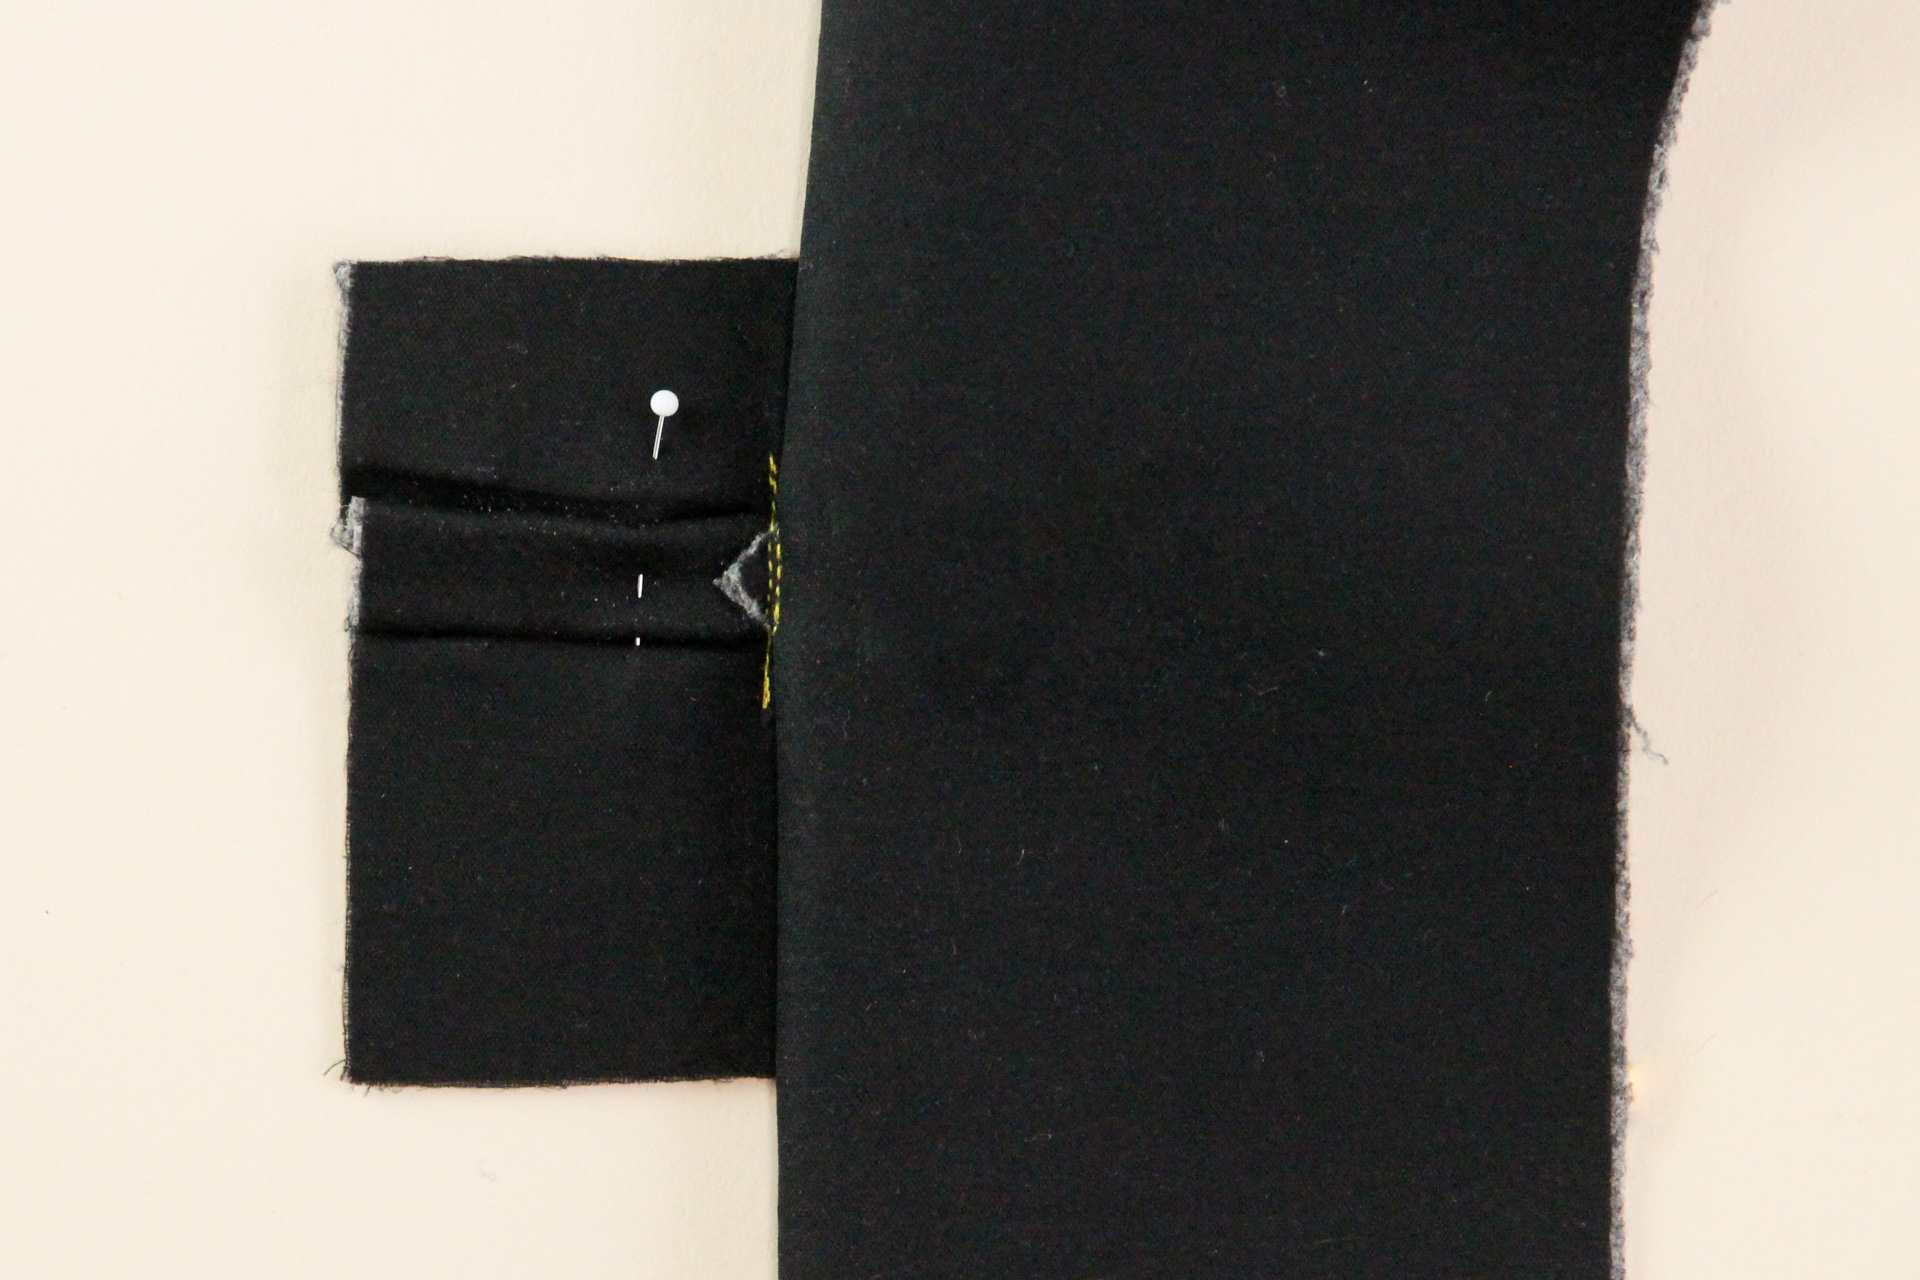
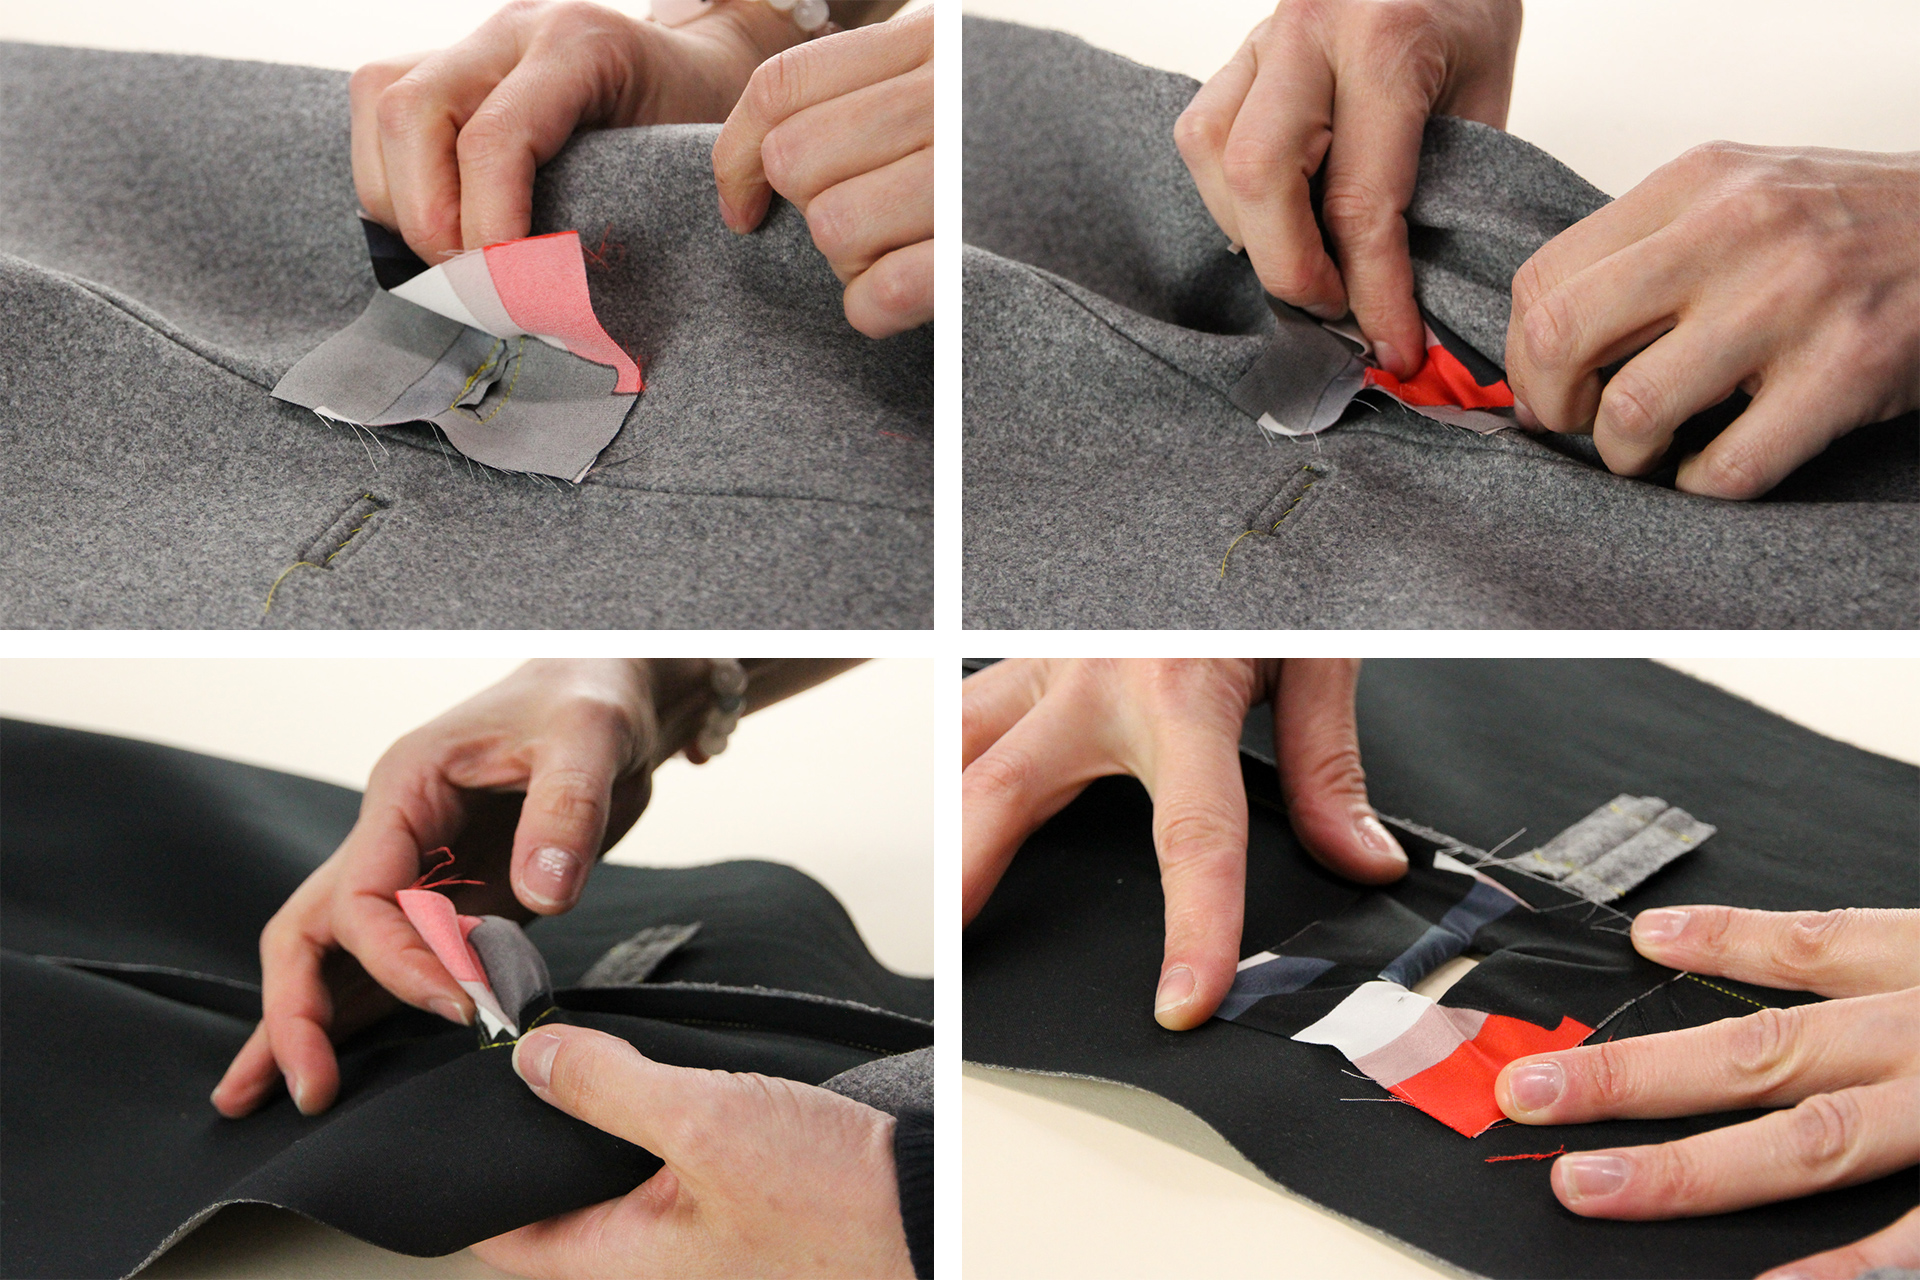
Now we’re going to form the two lips of the buttonhole. Start by folding one sides of the patch down, then up again so the fold is halfway over the window we’ve created. Pin it down, then repeat with the bottom side of the patch.
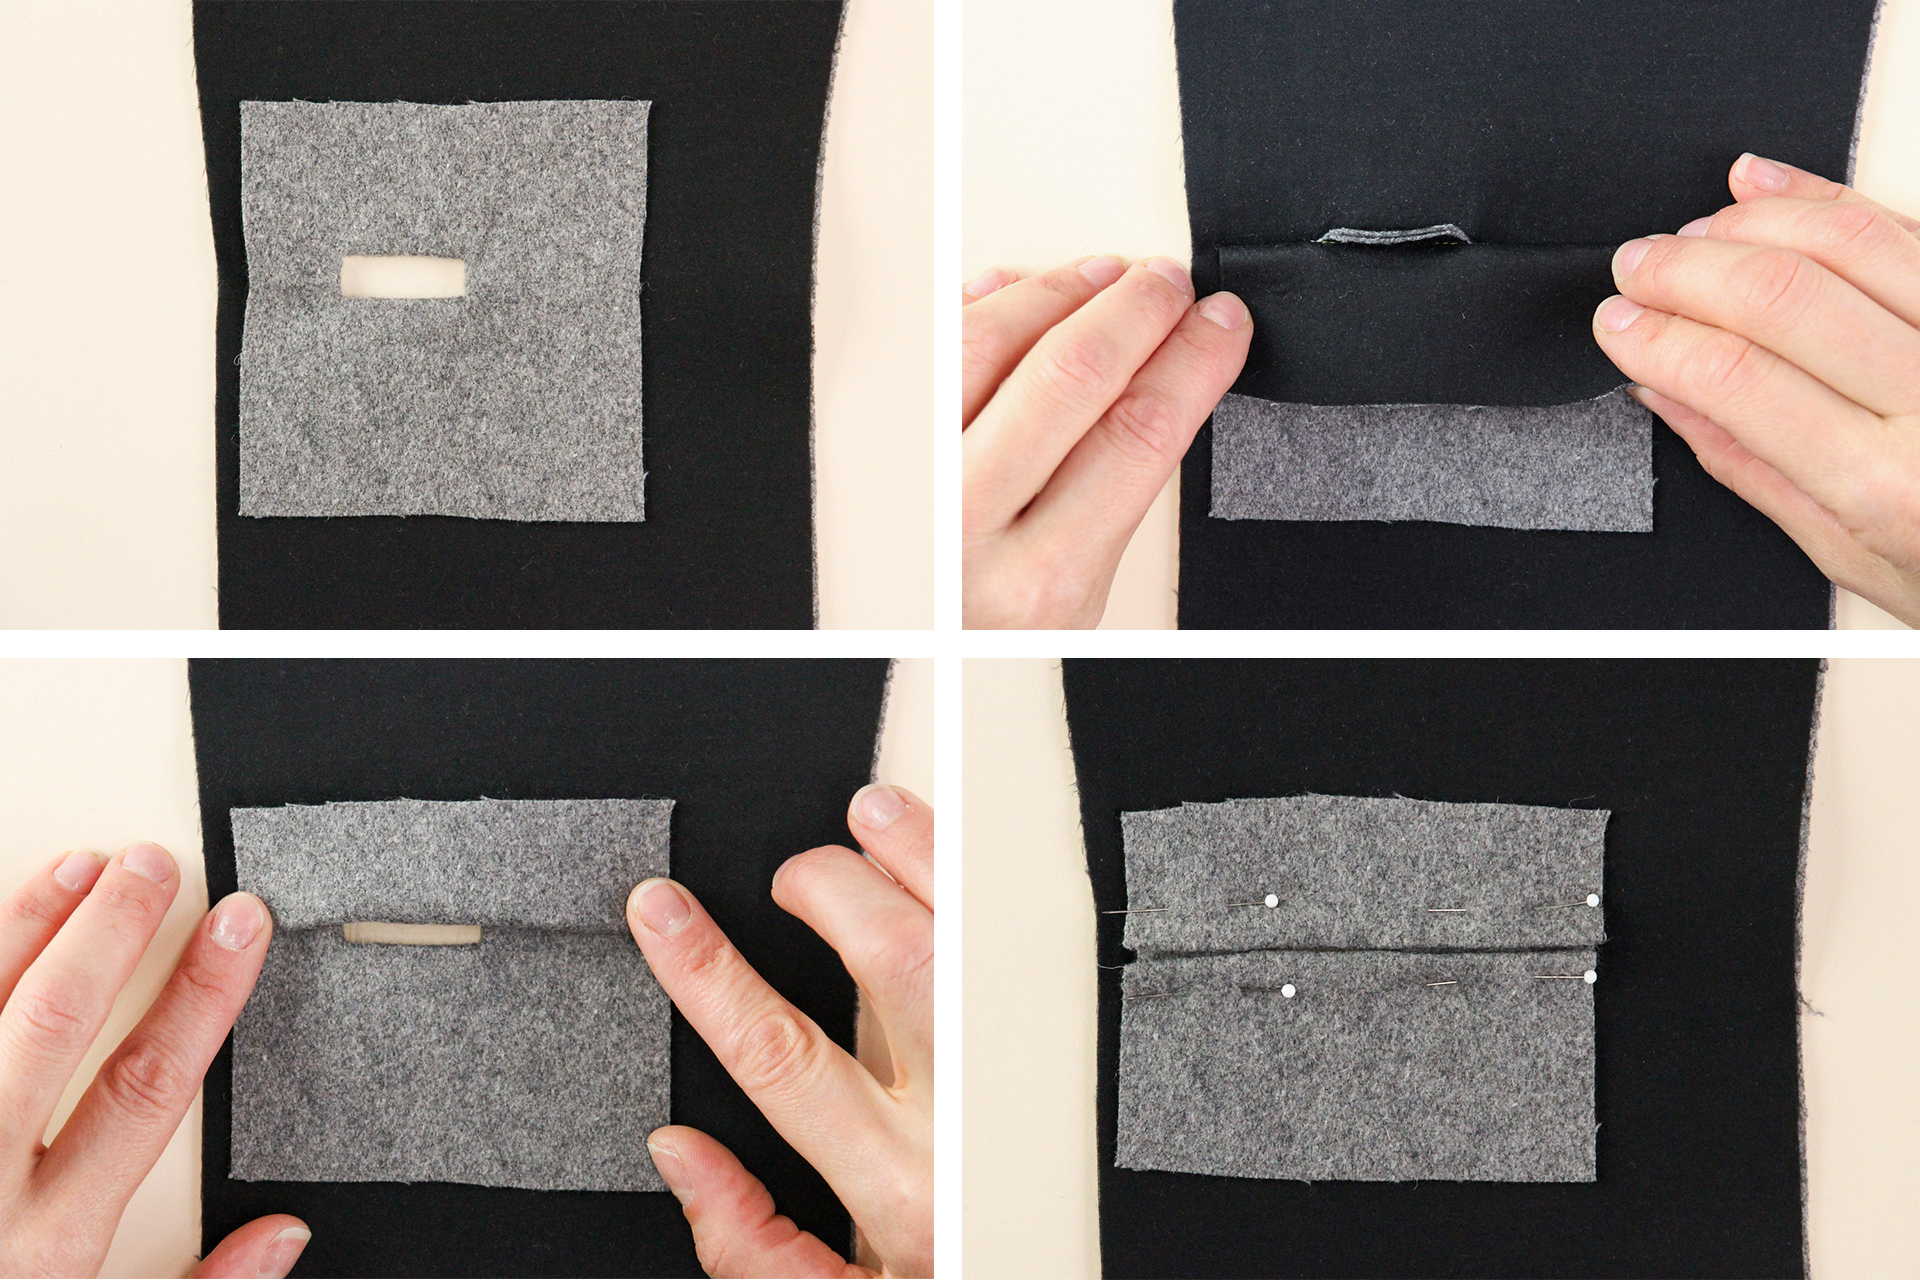
Flip the piece over to check through the window that the two lips are even. If not, you can adjust and repin.

So pretty!
Flip your piece back over to the wrong side. If you lift up the side of the patch, you’ll see a small triangle that was formed when you cut open the buttonhole.
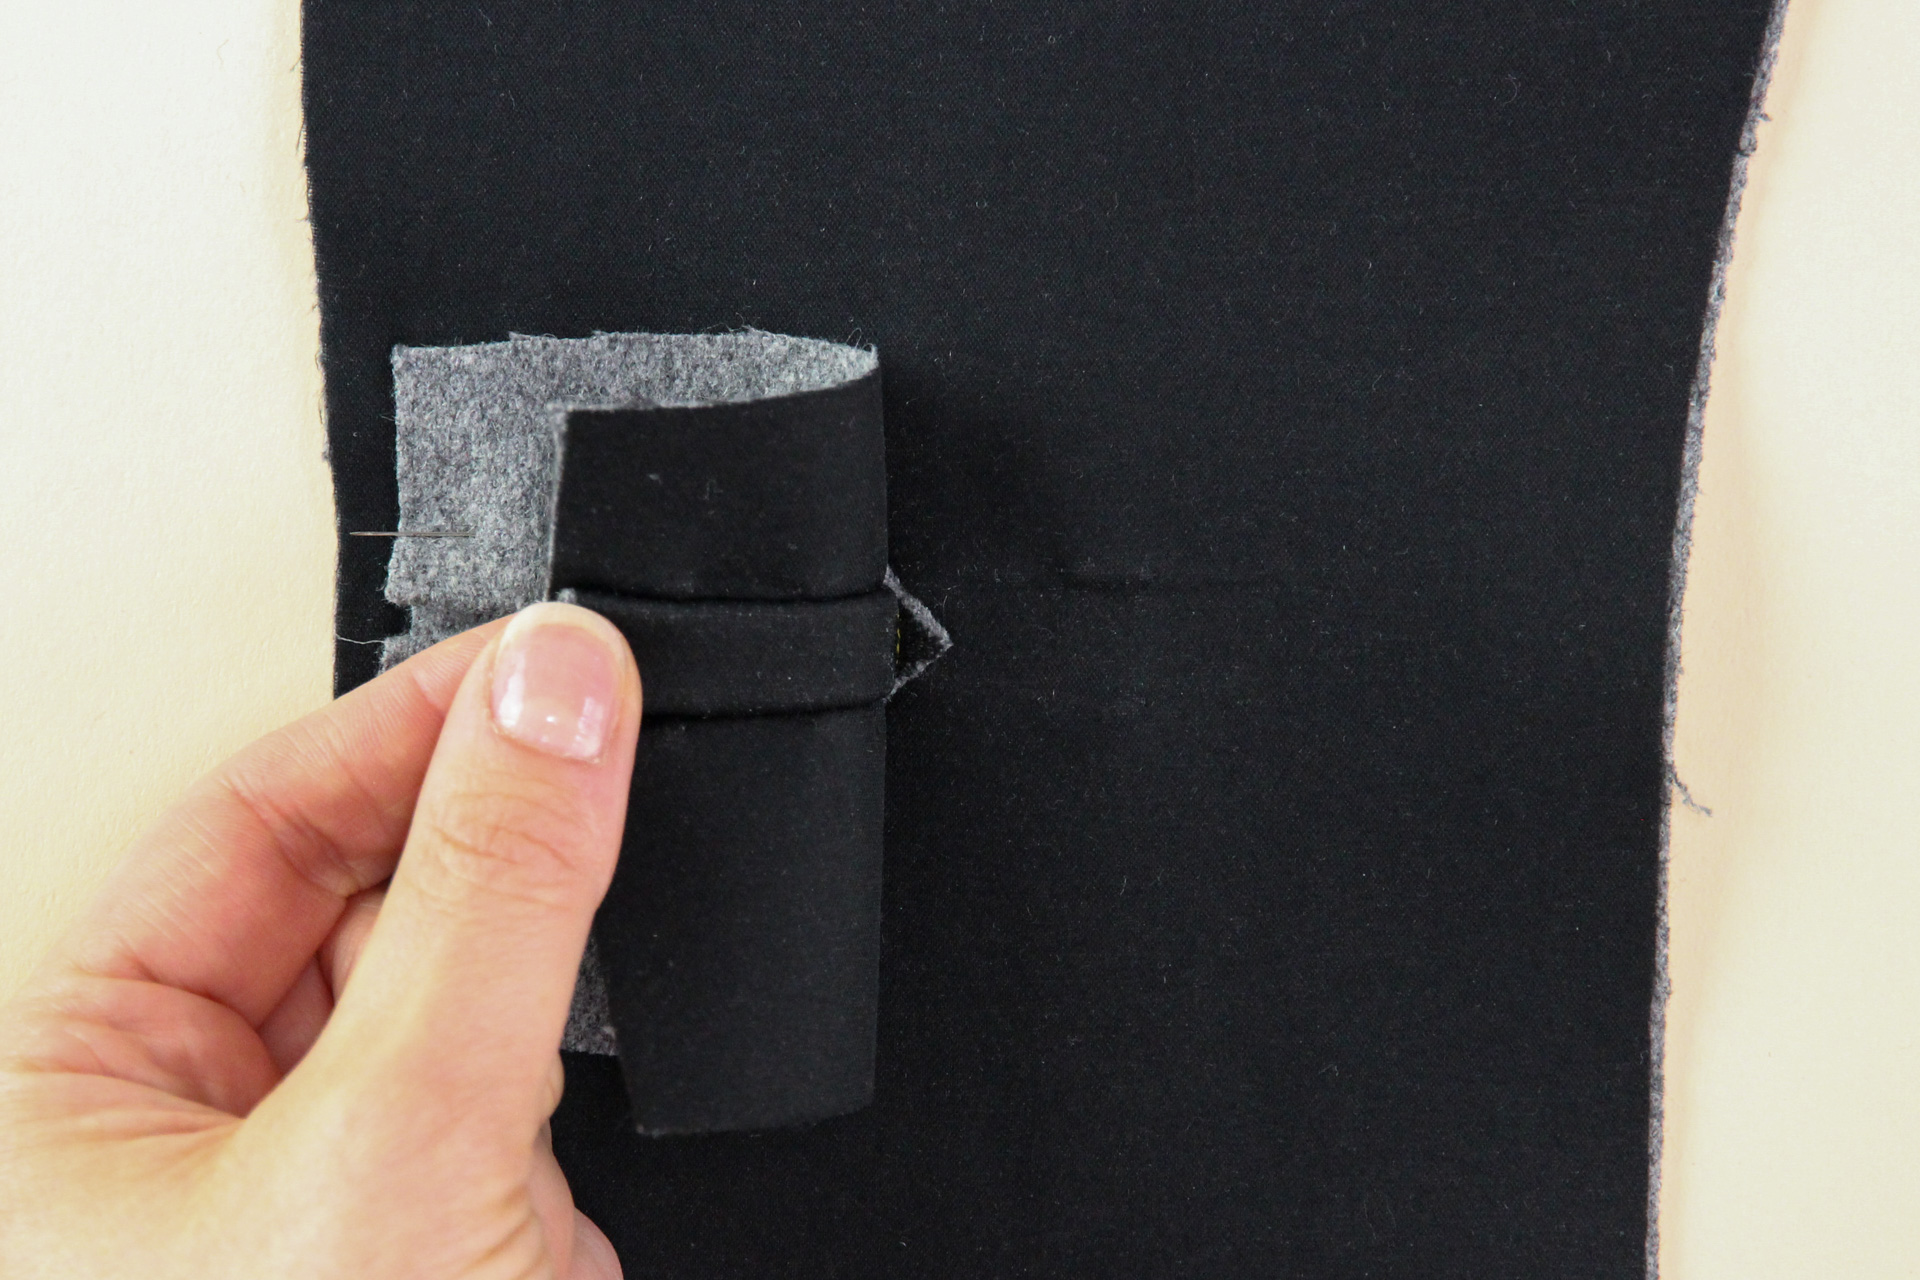
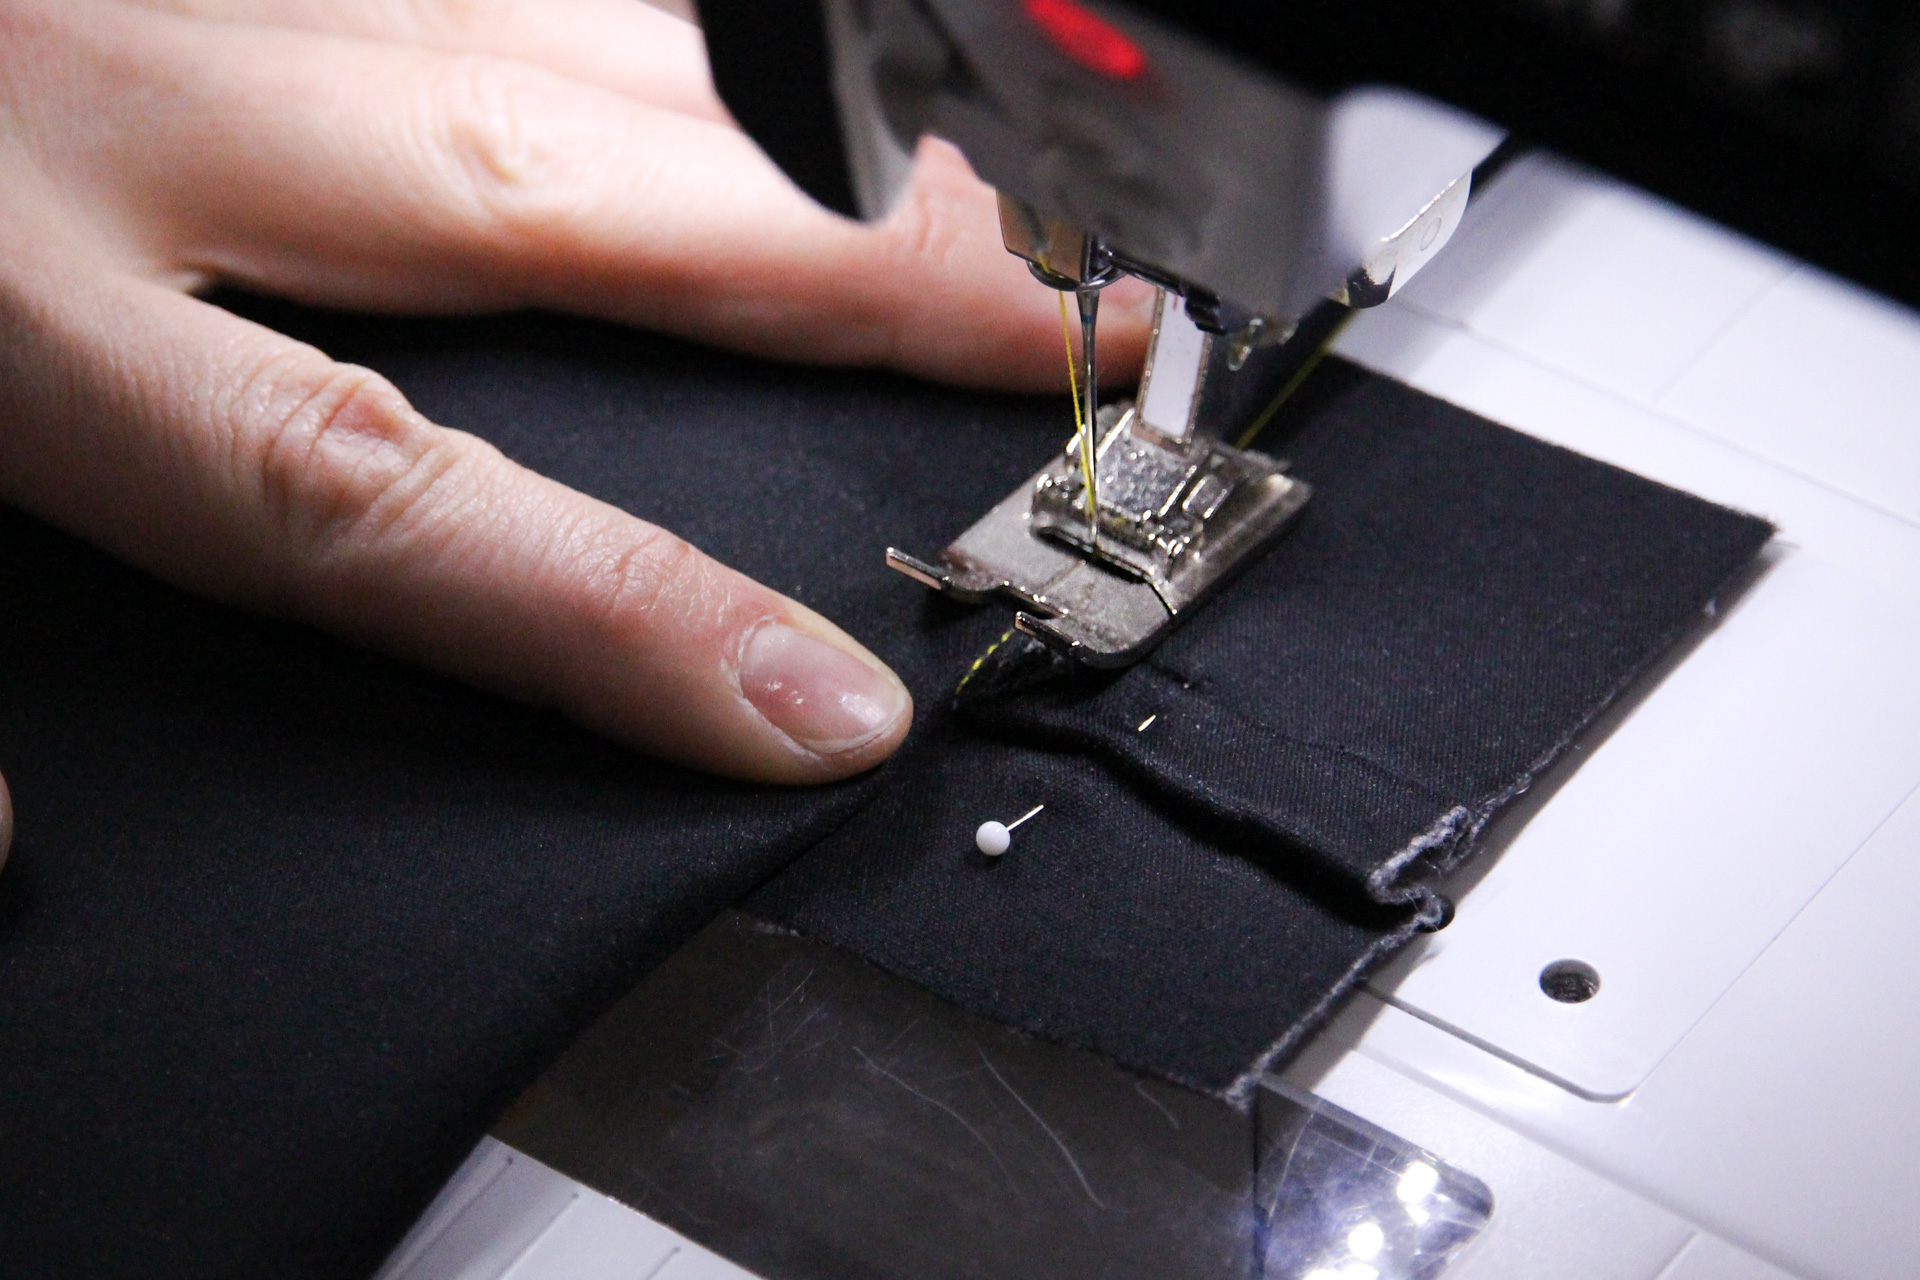
We’re going to sew that triangle to the folds of the patch. To do that, let’s first fold the front piece out of the way.
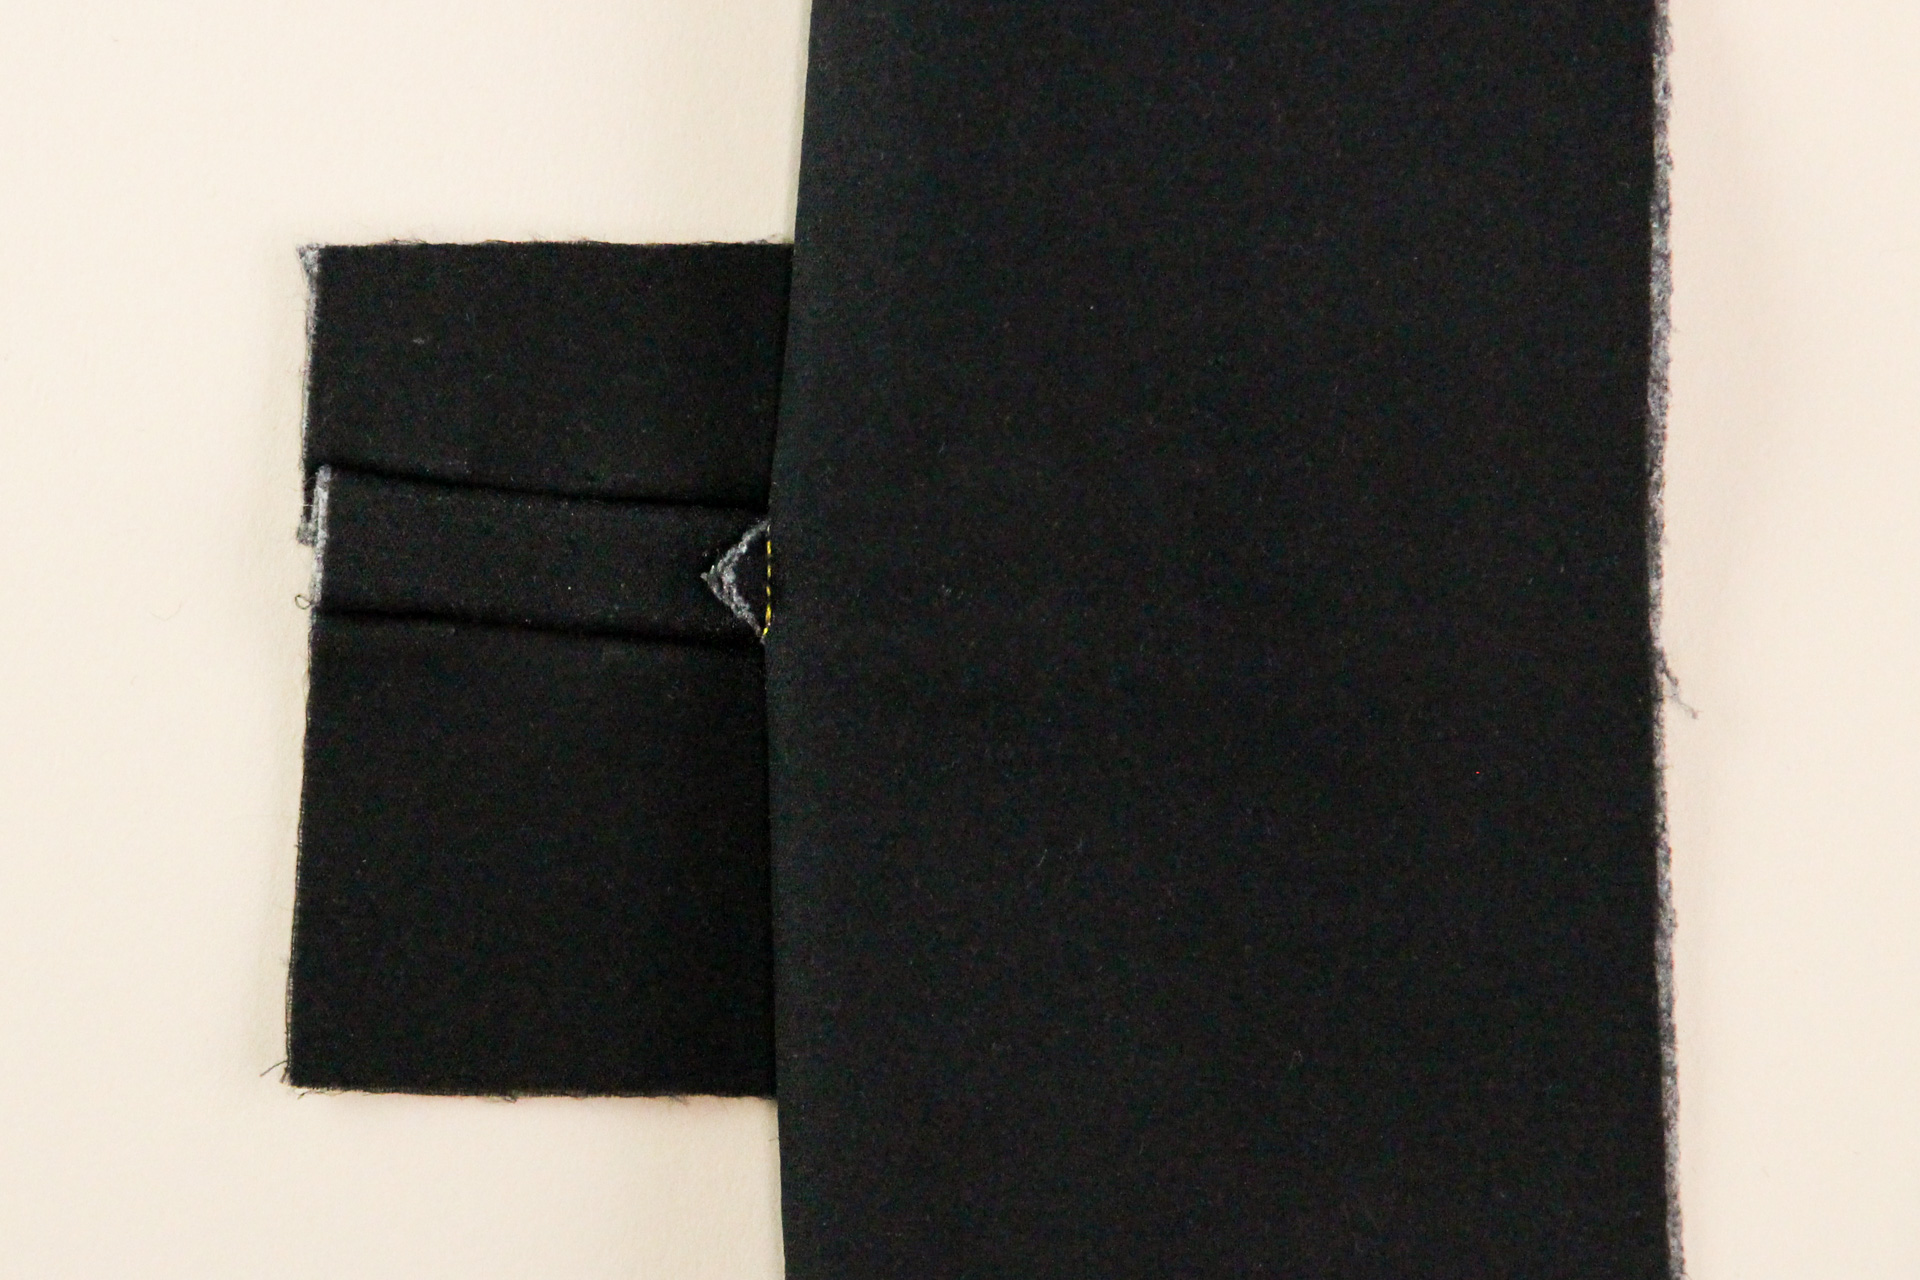
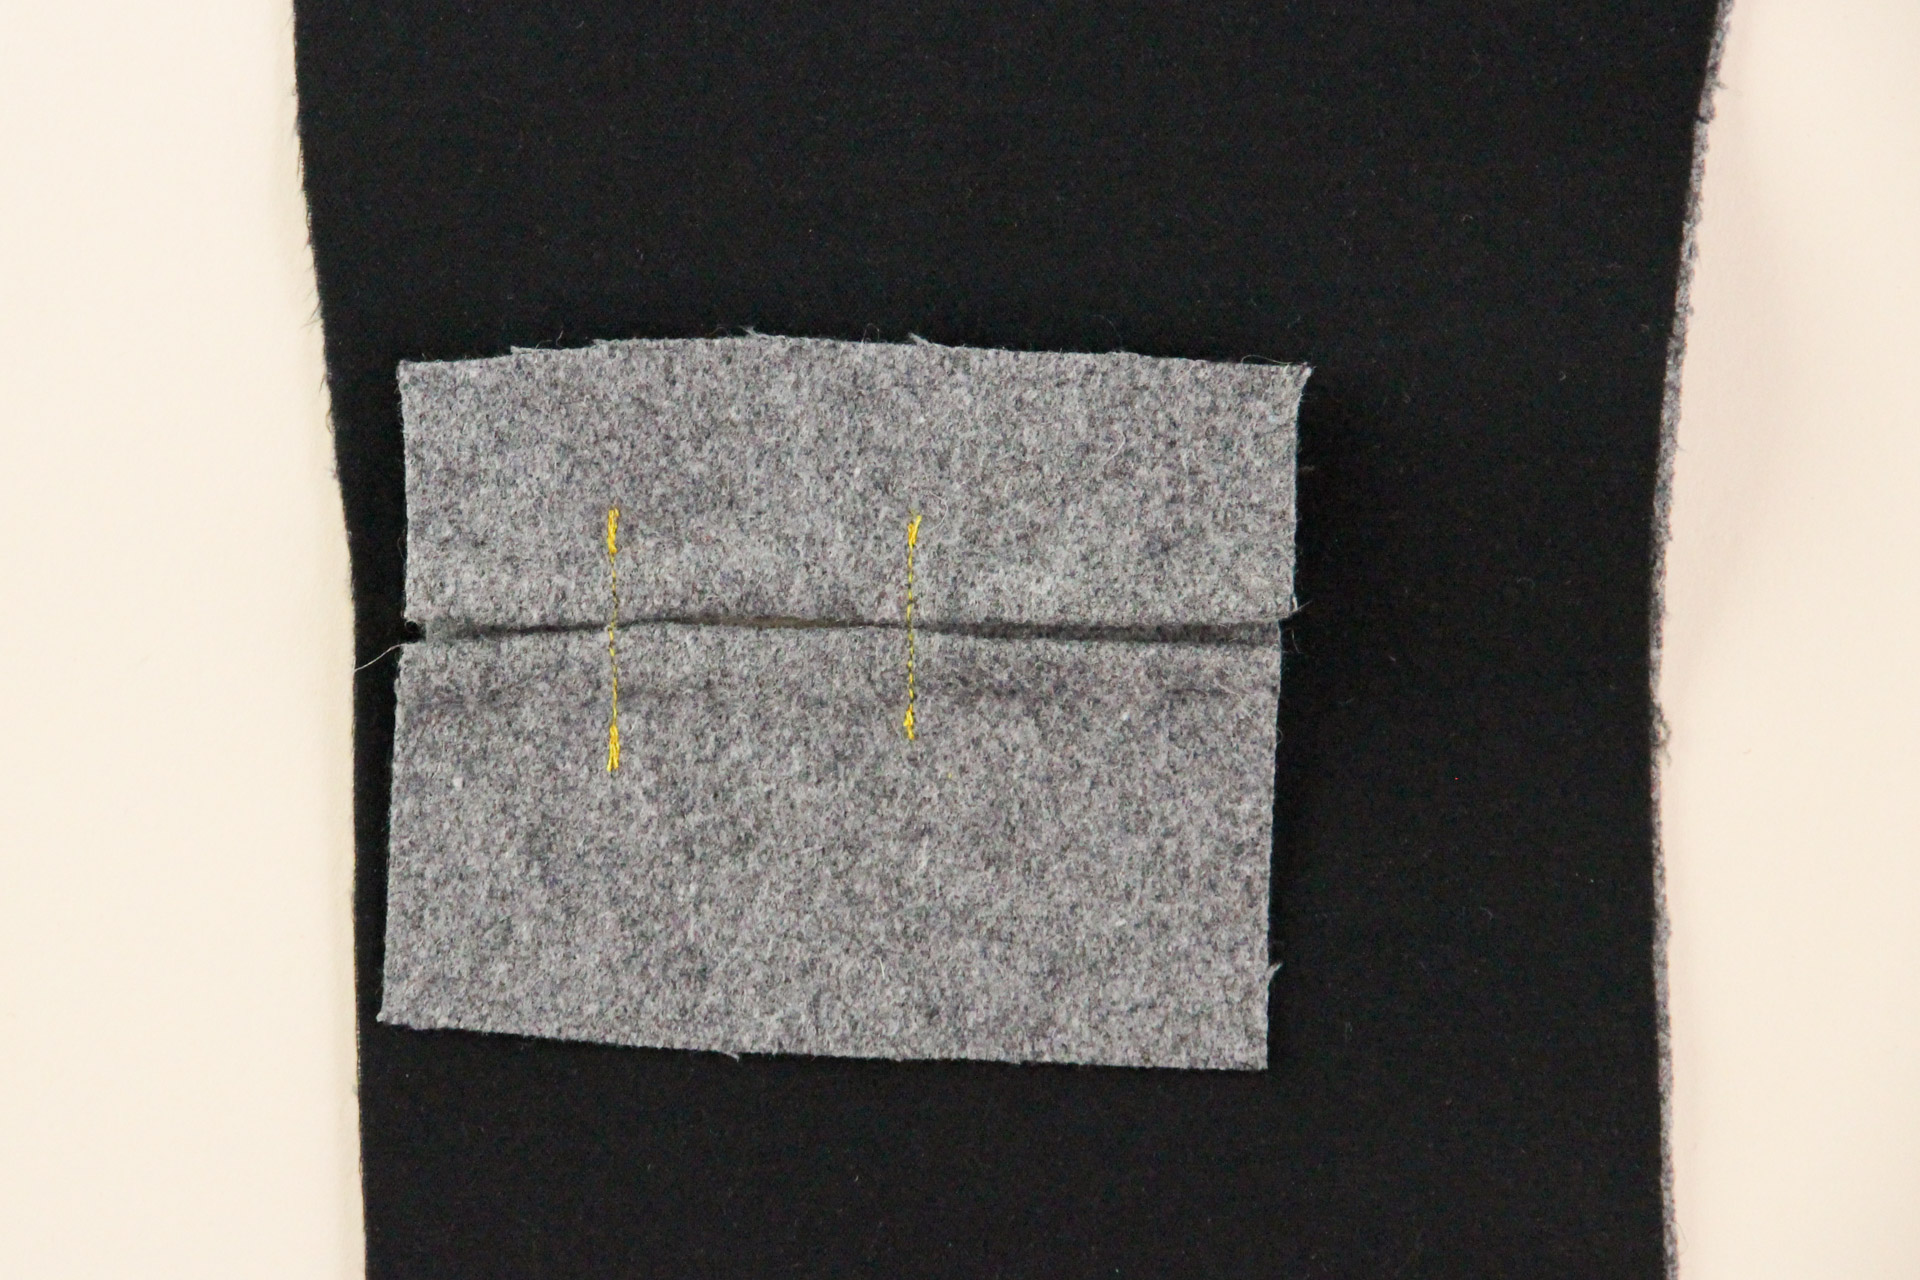
With the front piece folded and out of the way, we can sew across the folds of the patch and the triangle. (It might help to put a pin to secure the folds while you sew.)
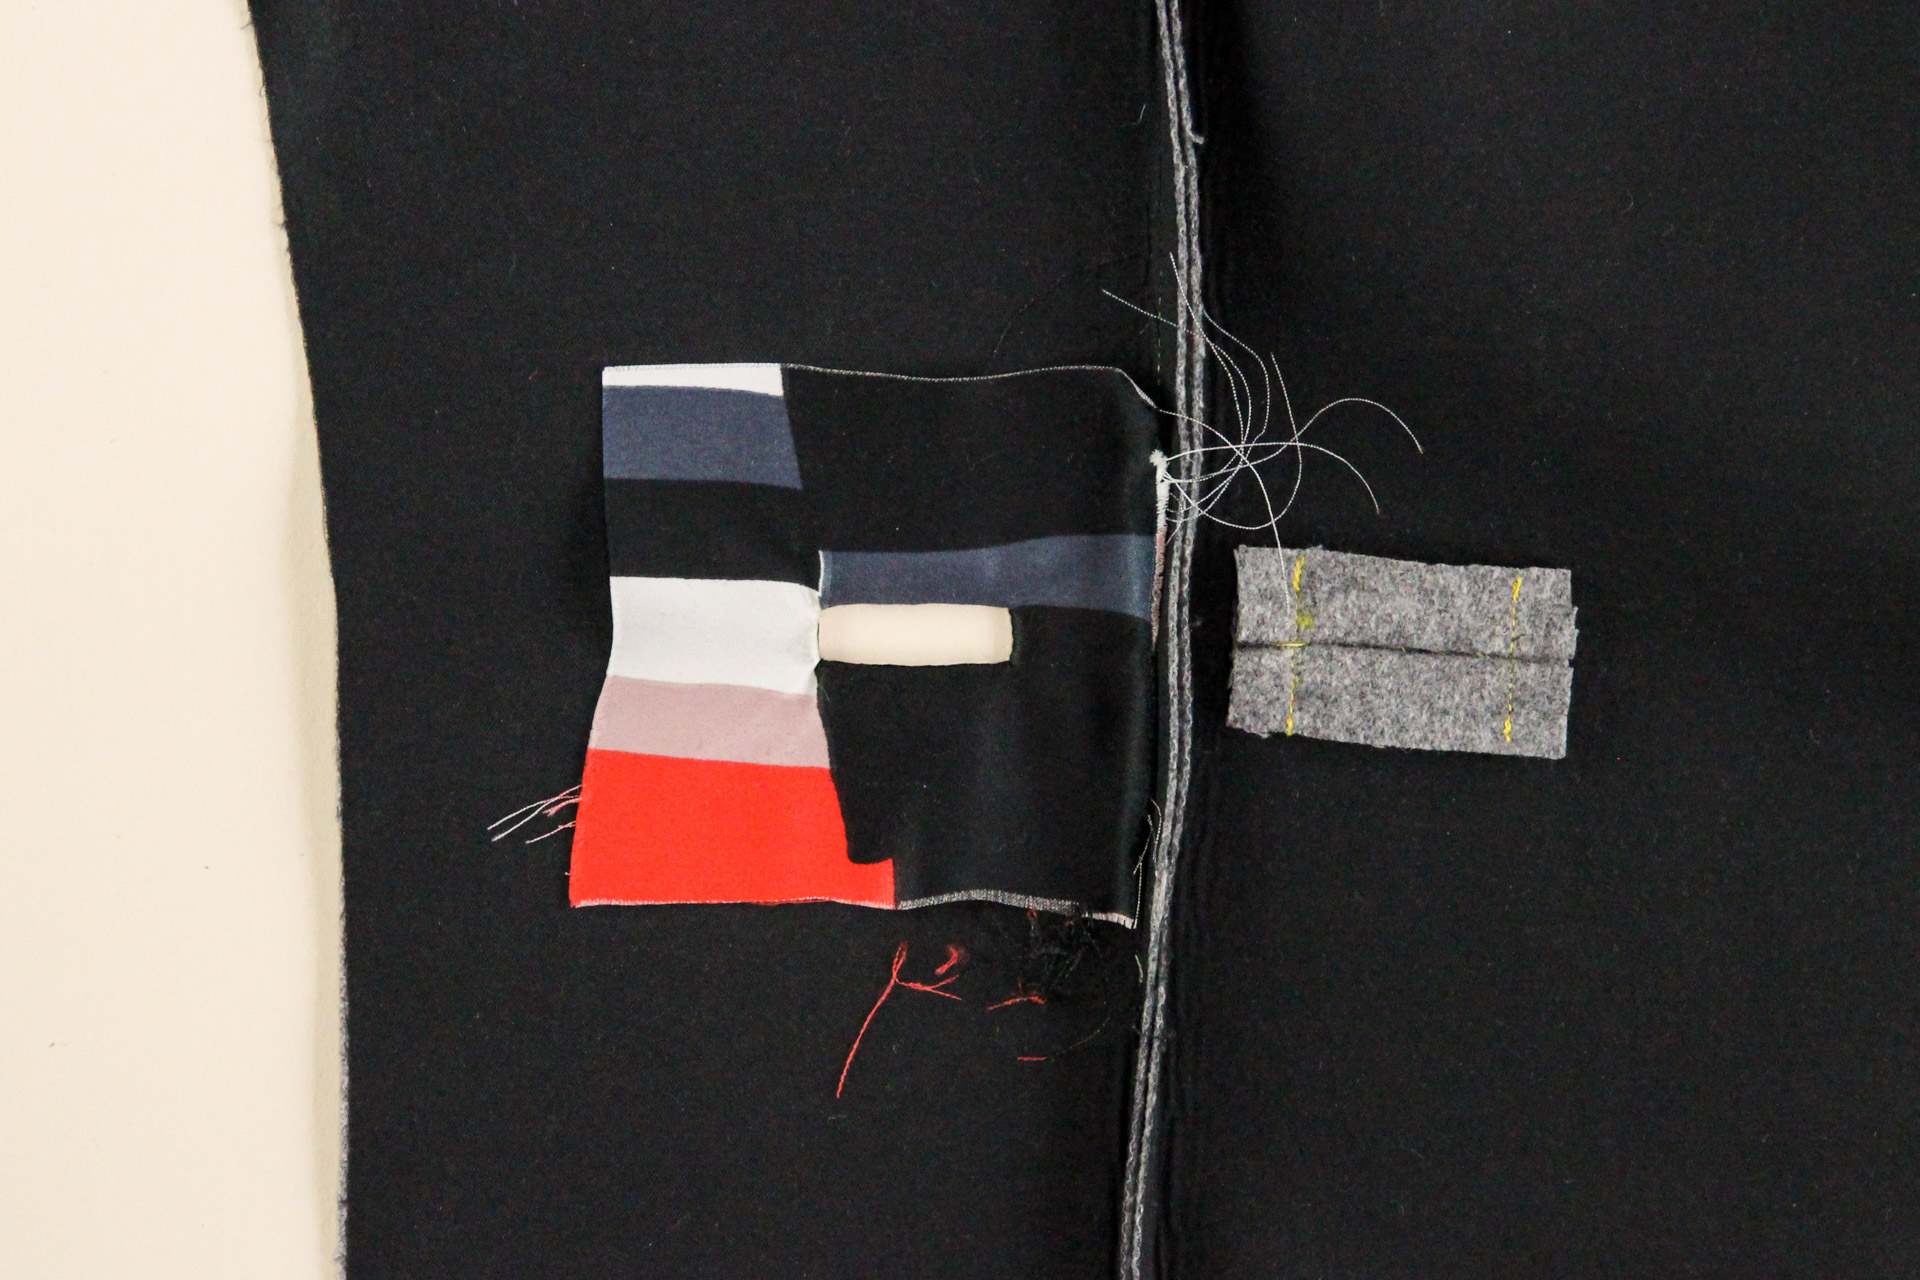
Repeat with the other side of the patch, then lay your front piece flat. Here’s how it will look:
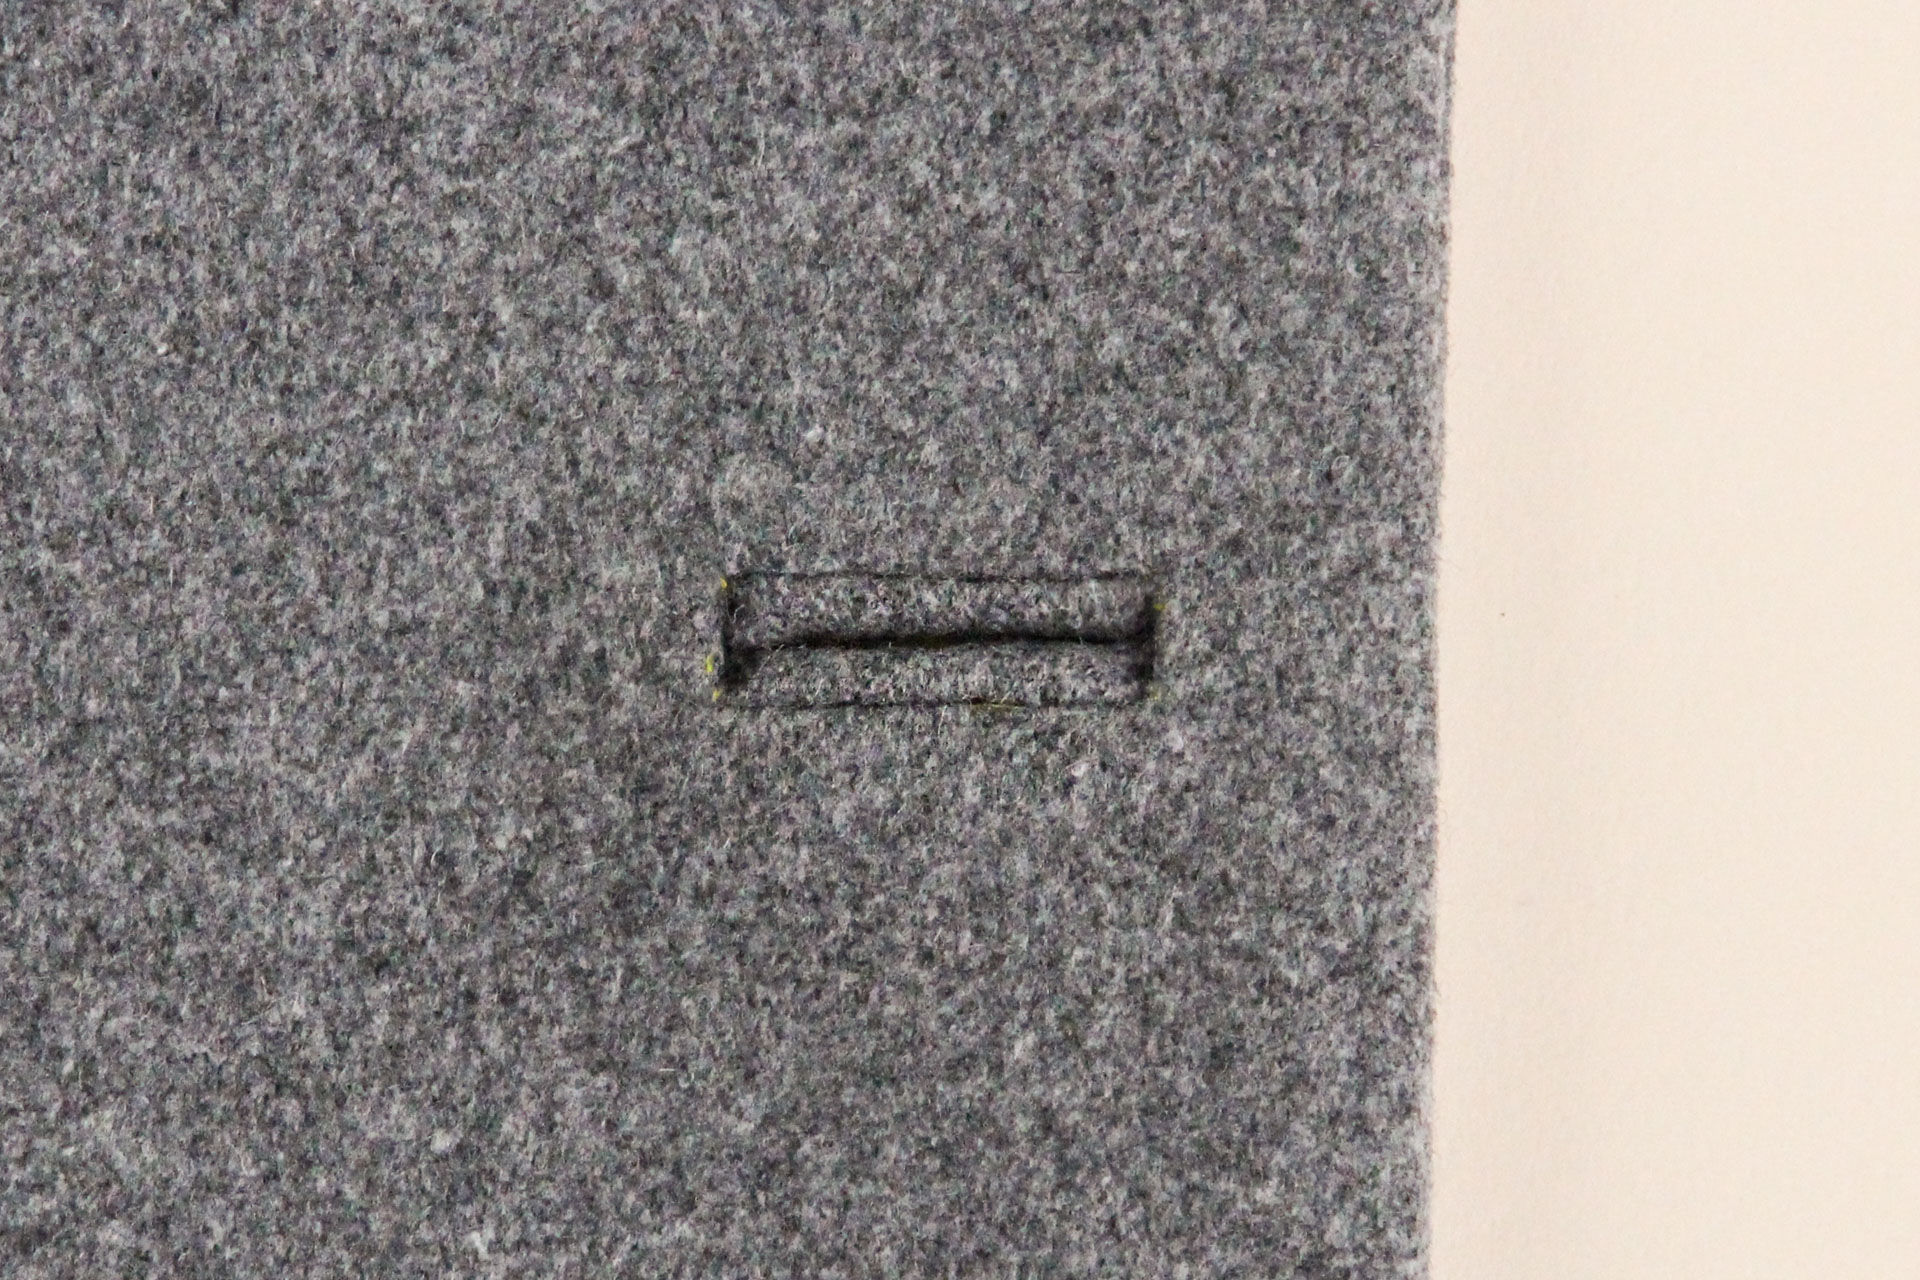
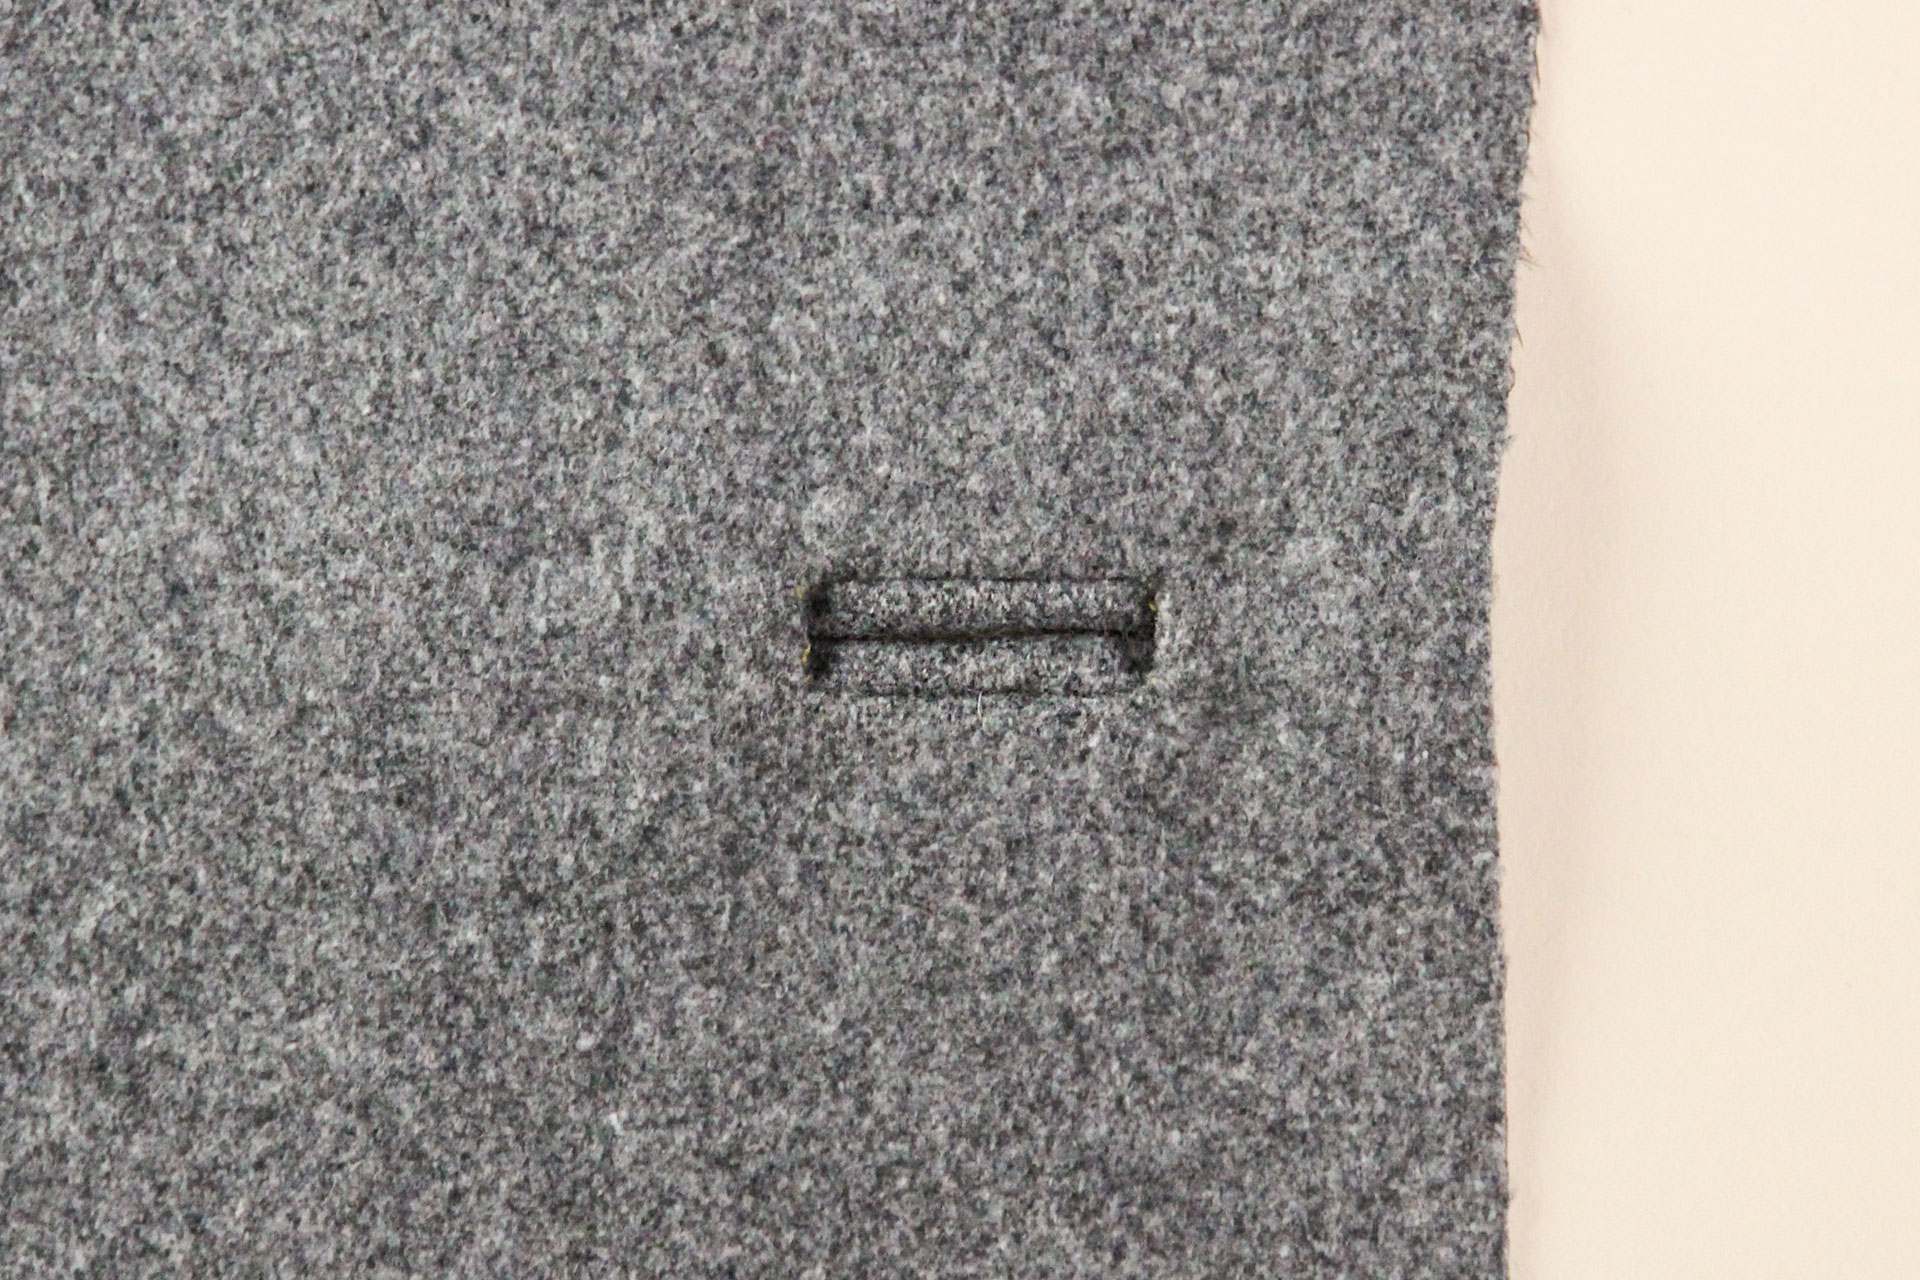
And from the right side, you’ll see this:
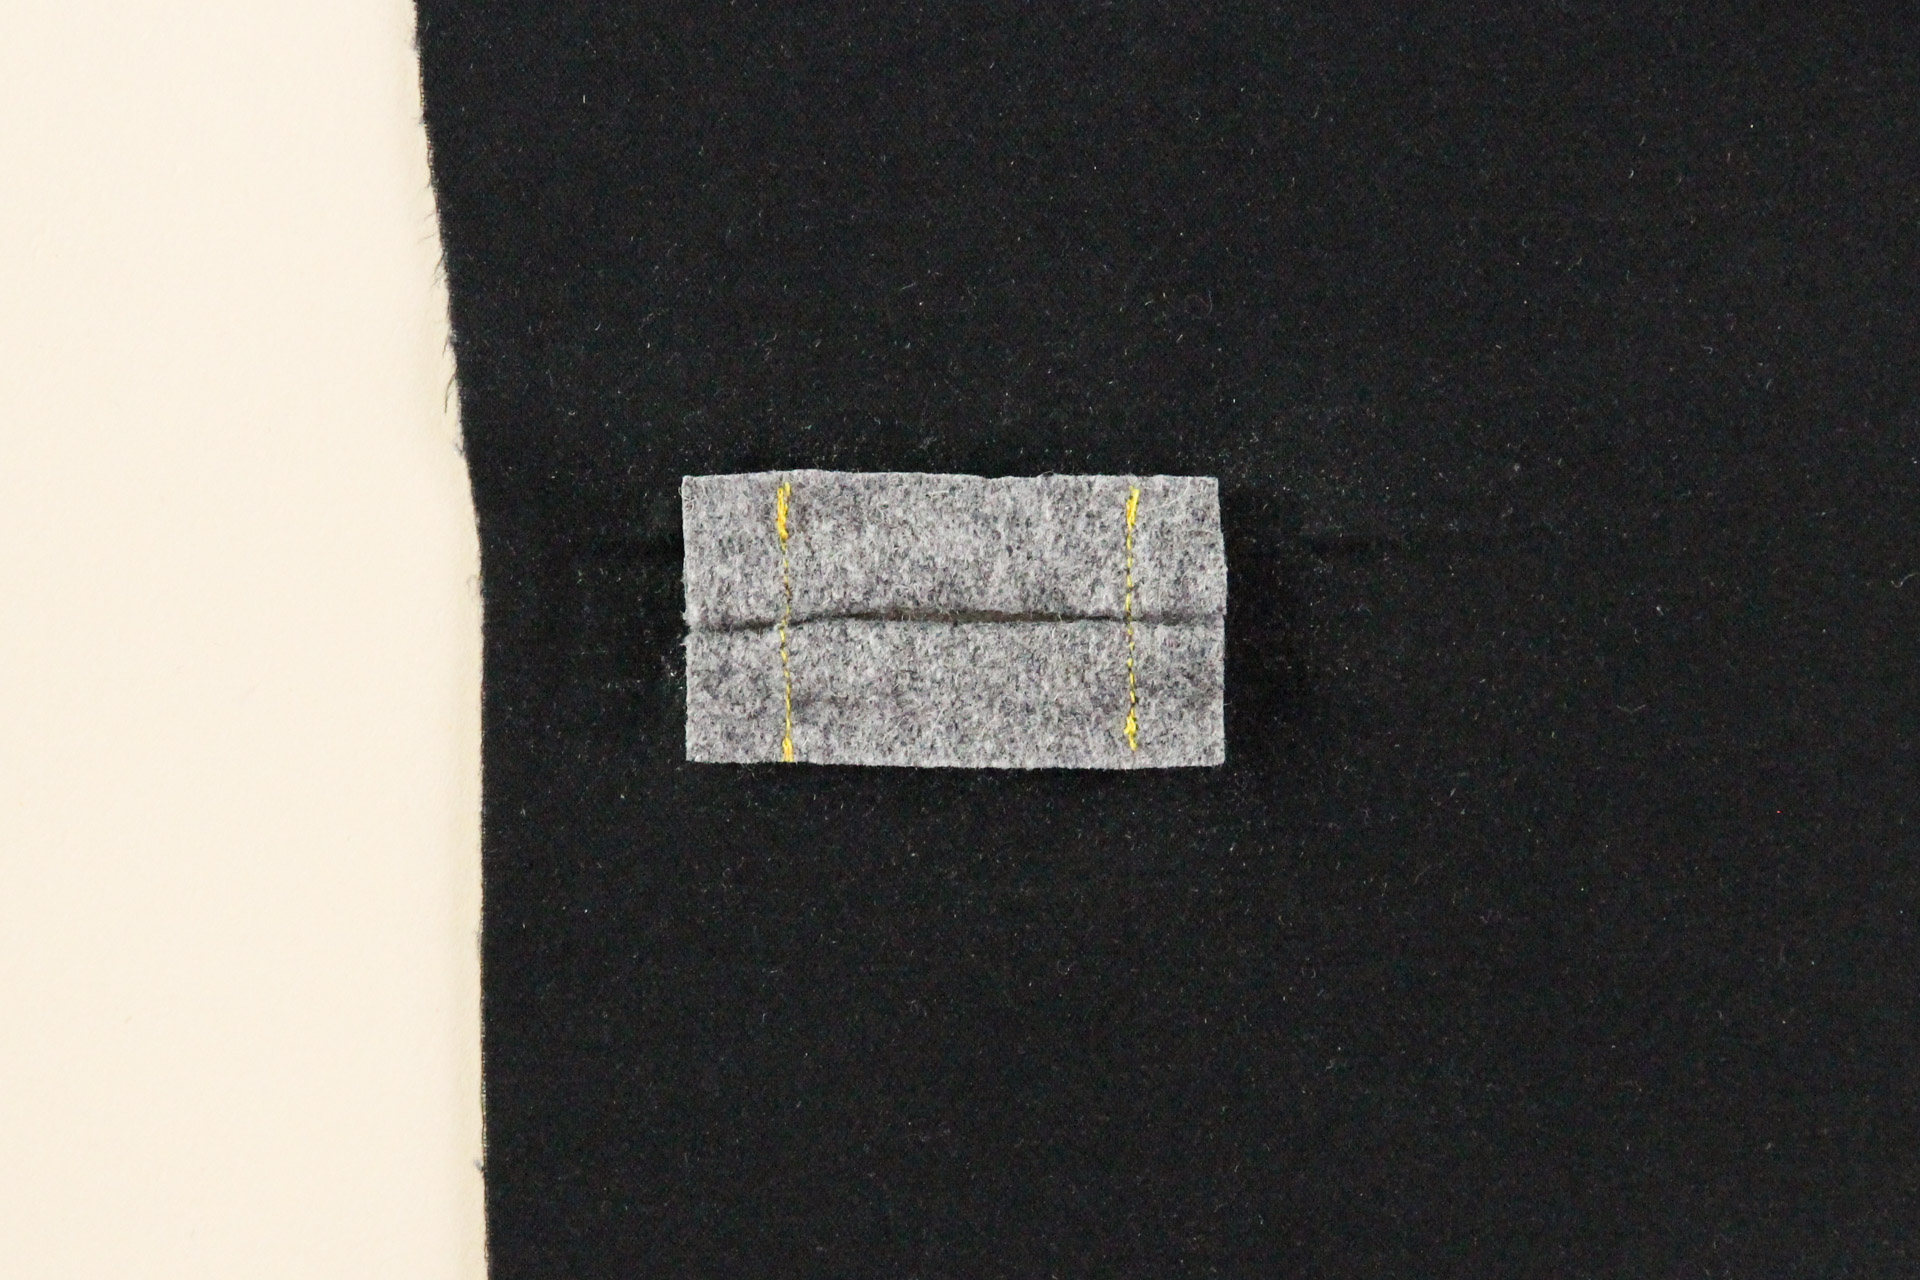
Back on the wrong side, we can now trim our patch down.
One final step to finish out the outer fabric: flip your piece over to the right side and baste the opening closed. This will prevent the lips of the buttonhole from getting distorted as you continue to sew up your blazer.

How to Sew a Bound Buttonhole: Blazer Facing
**IMPORTANT NOTE: This next bit happens once you’ve attached your lining and facing to your outer blazer. The reason for that is that you’ll want the buttonhole of your outer fabric and facing to be lined up exactly; if you do the facing part before you’ve attached it to the outer fabric, you may be off by a bit.
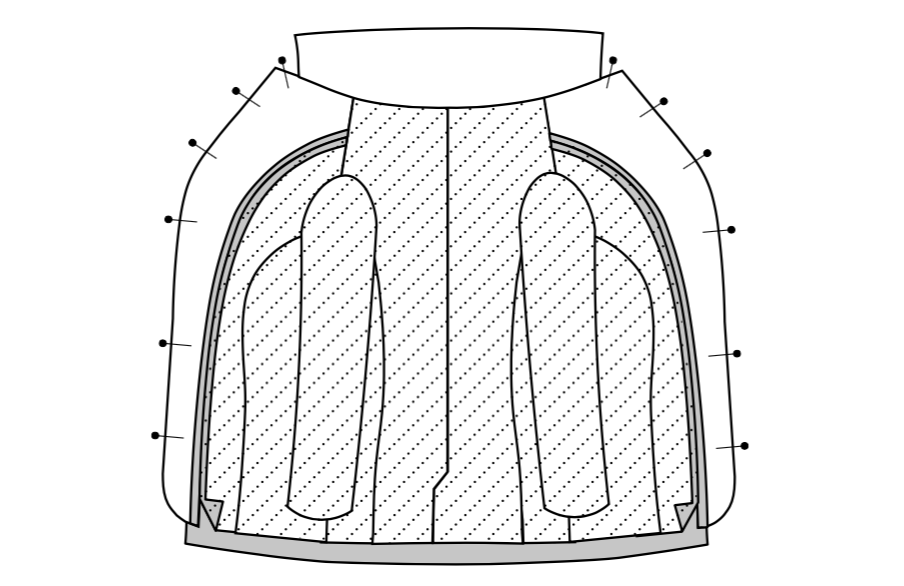
For the sake of this tutorial, we’re only showing the center front and facing pieces, but pretend that there’s the whole rest of the blazer attached to the center front, and the lining is attached to the facing.
Pin the center front (piece #1 of the Auburn Blazer) to the front facing (piece #12 of the Auburn Blazer), right sides together and sew. In the Auburn instructions, this is step 4 of the “Attach Lining to Main” section.
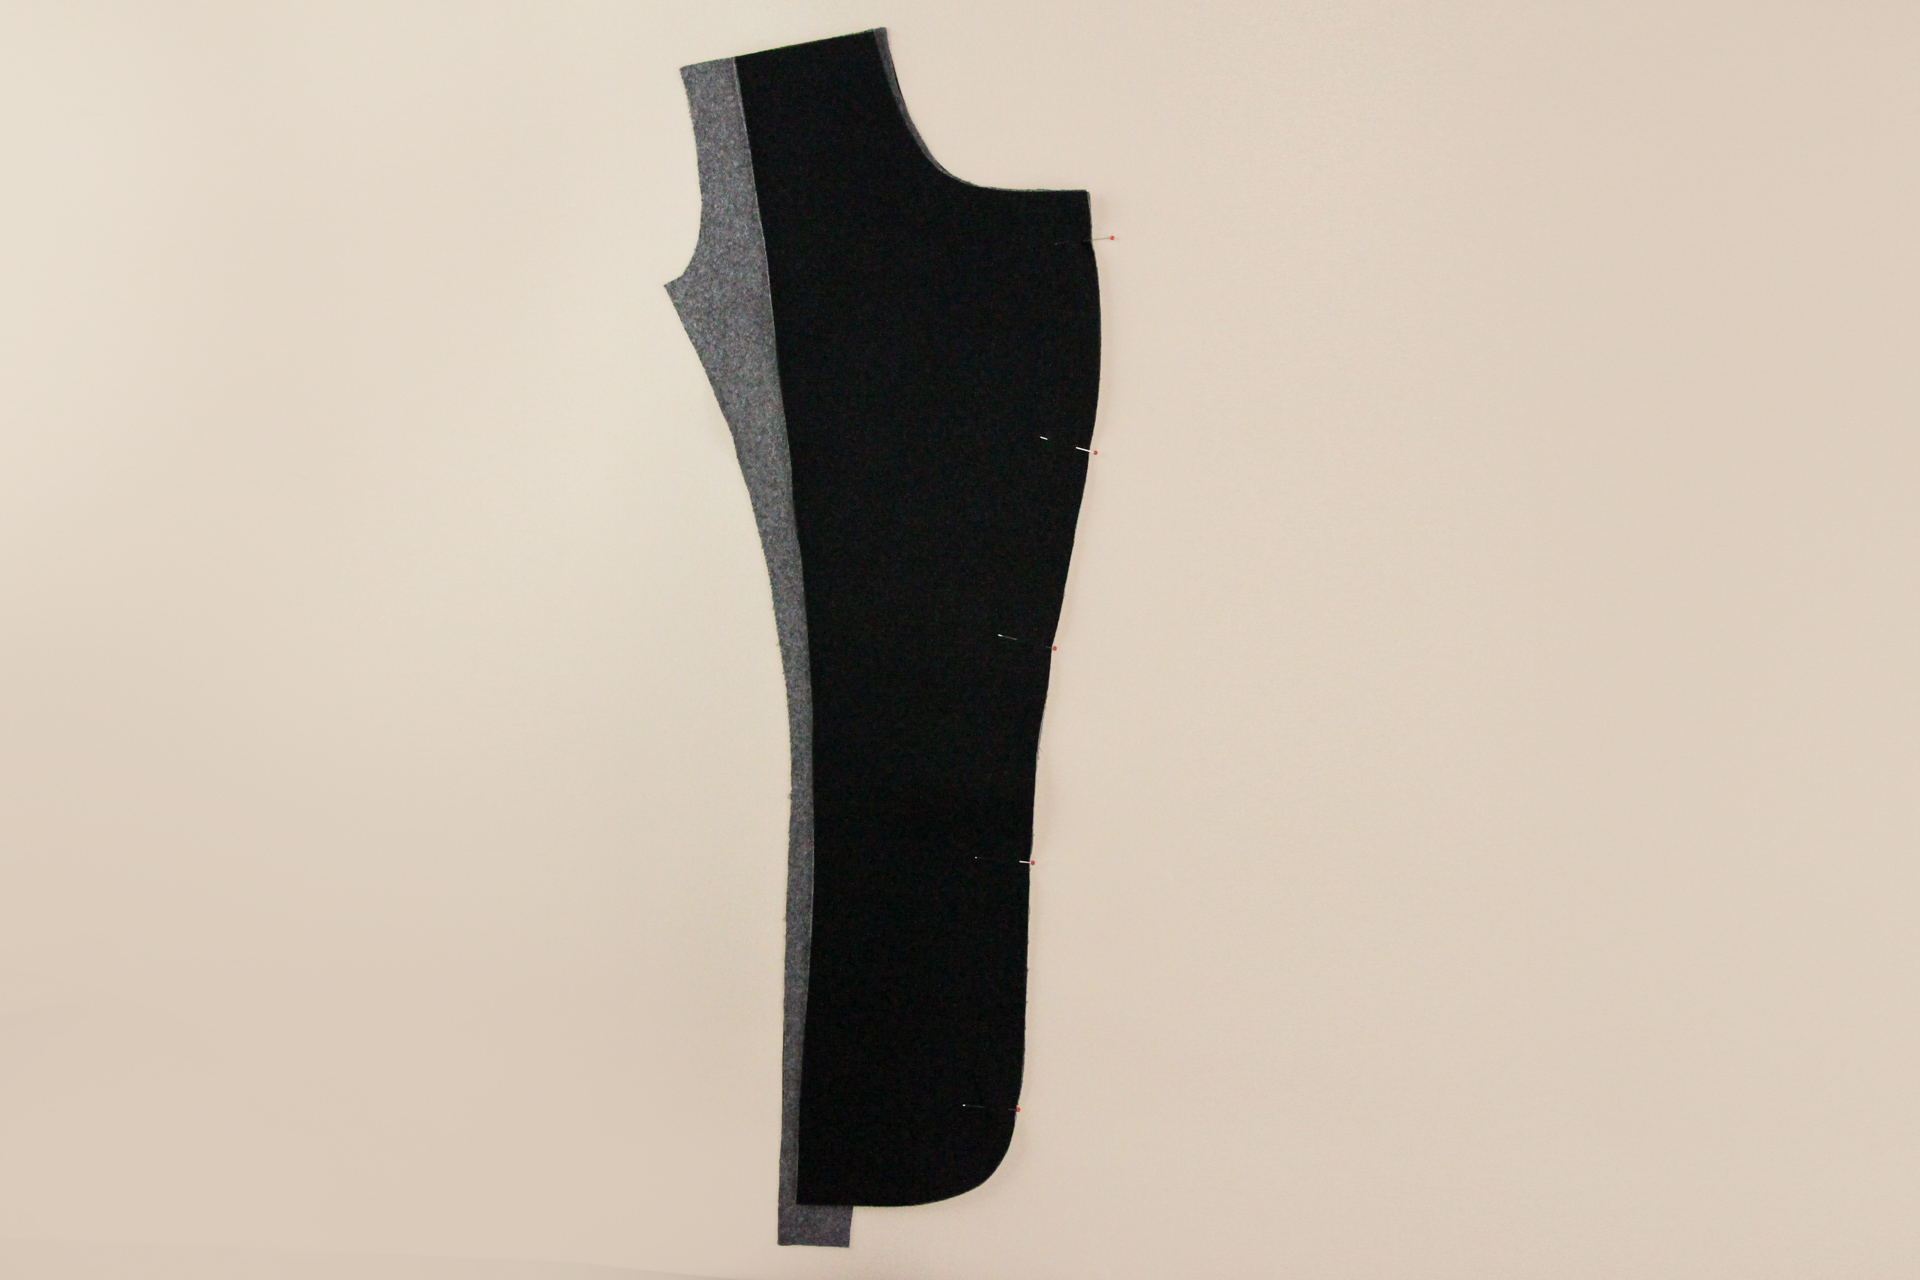
Flip and press your facing/lining to the inside.
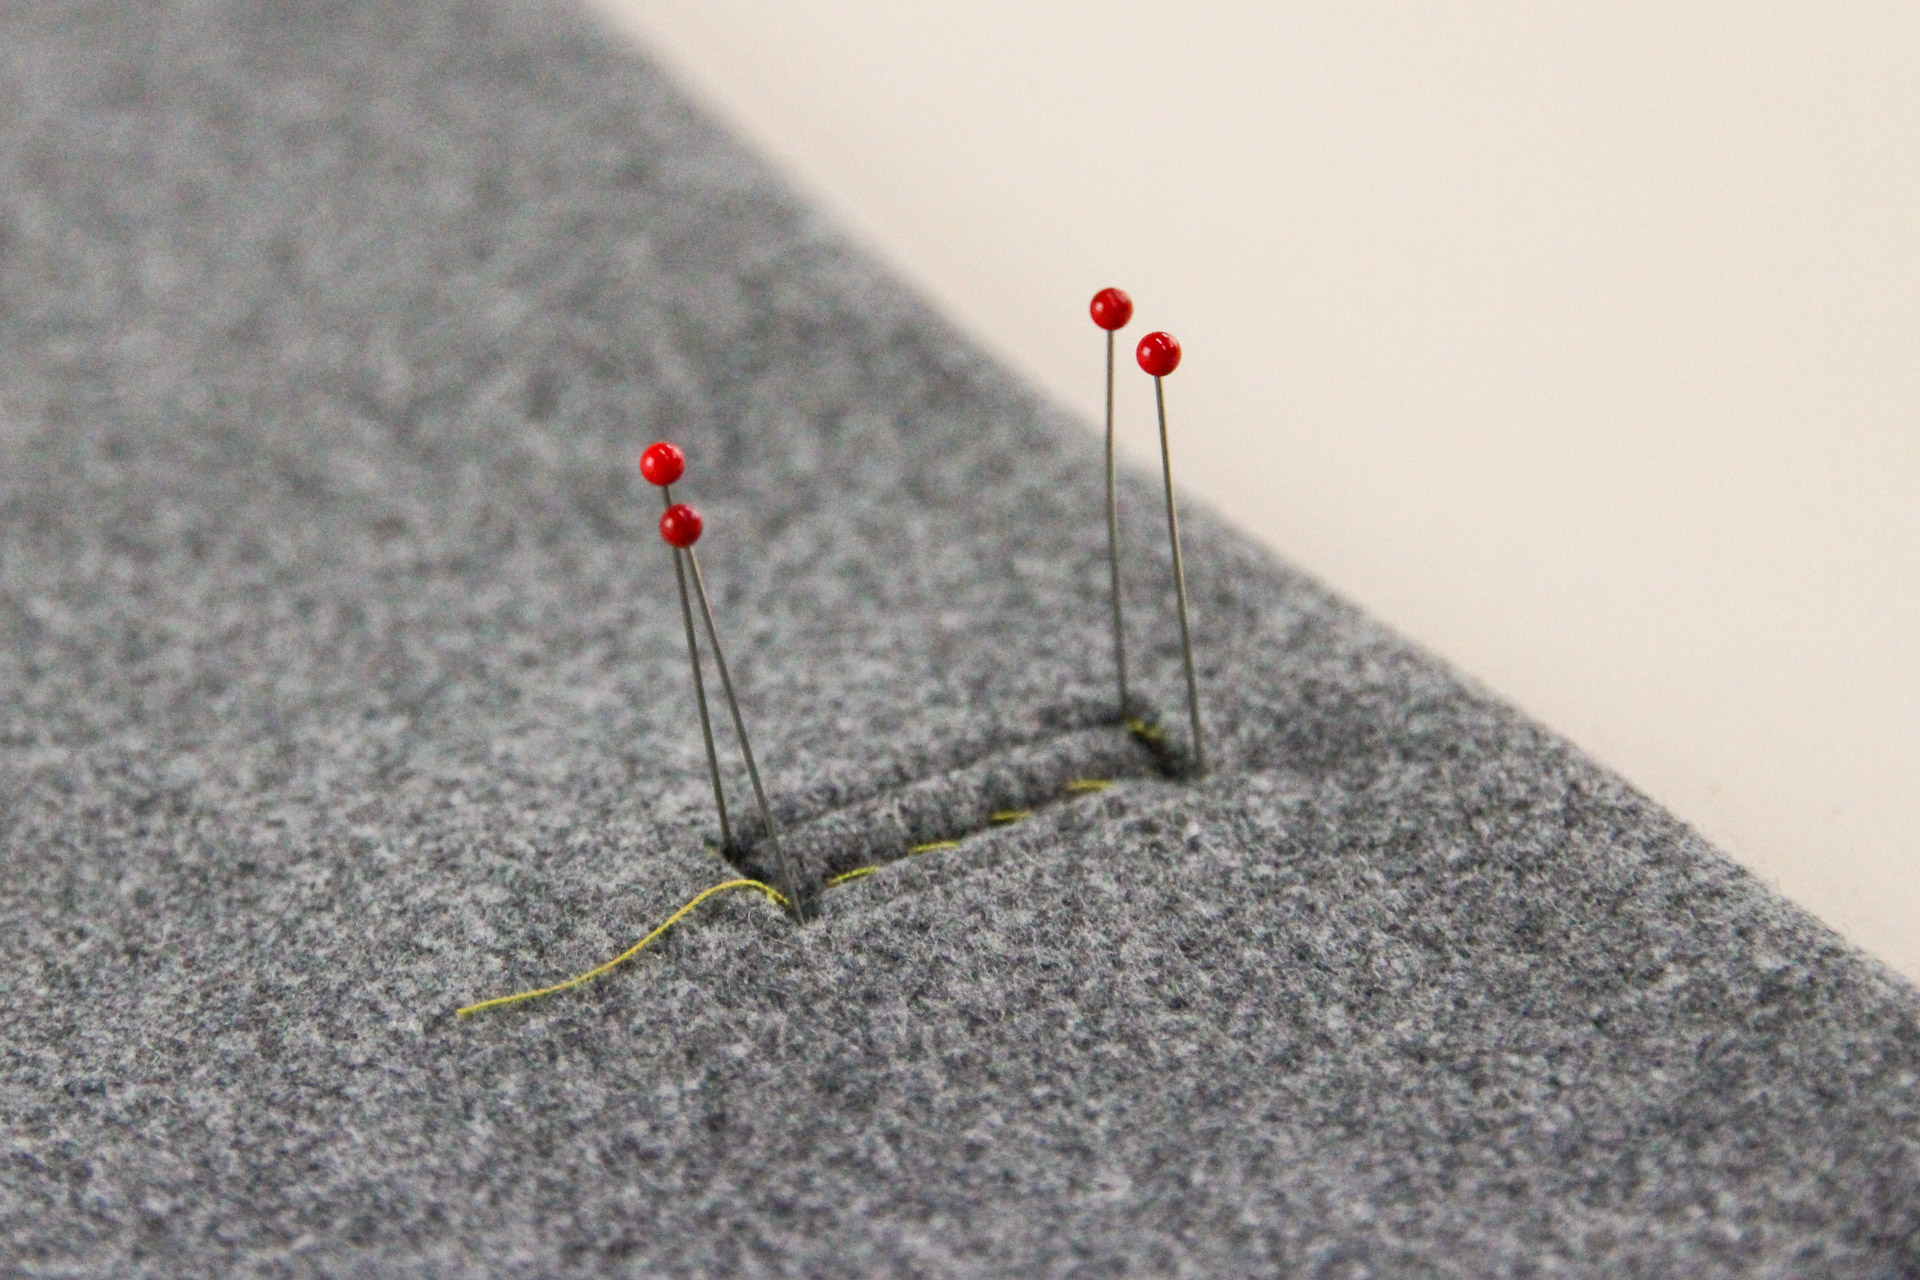
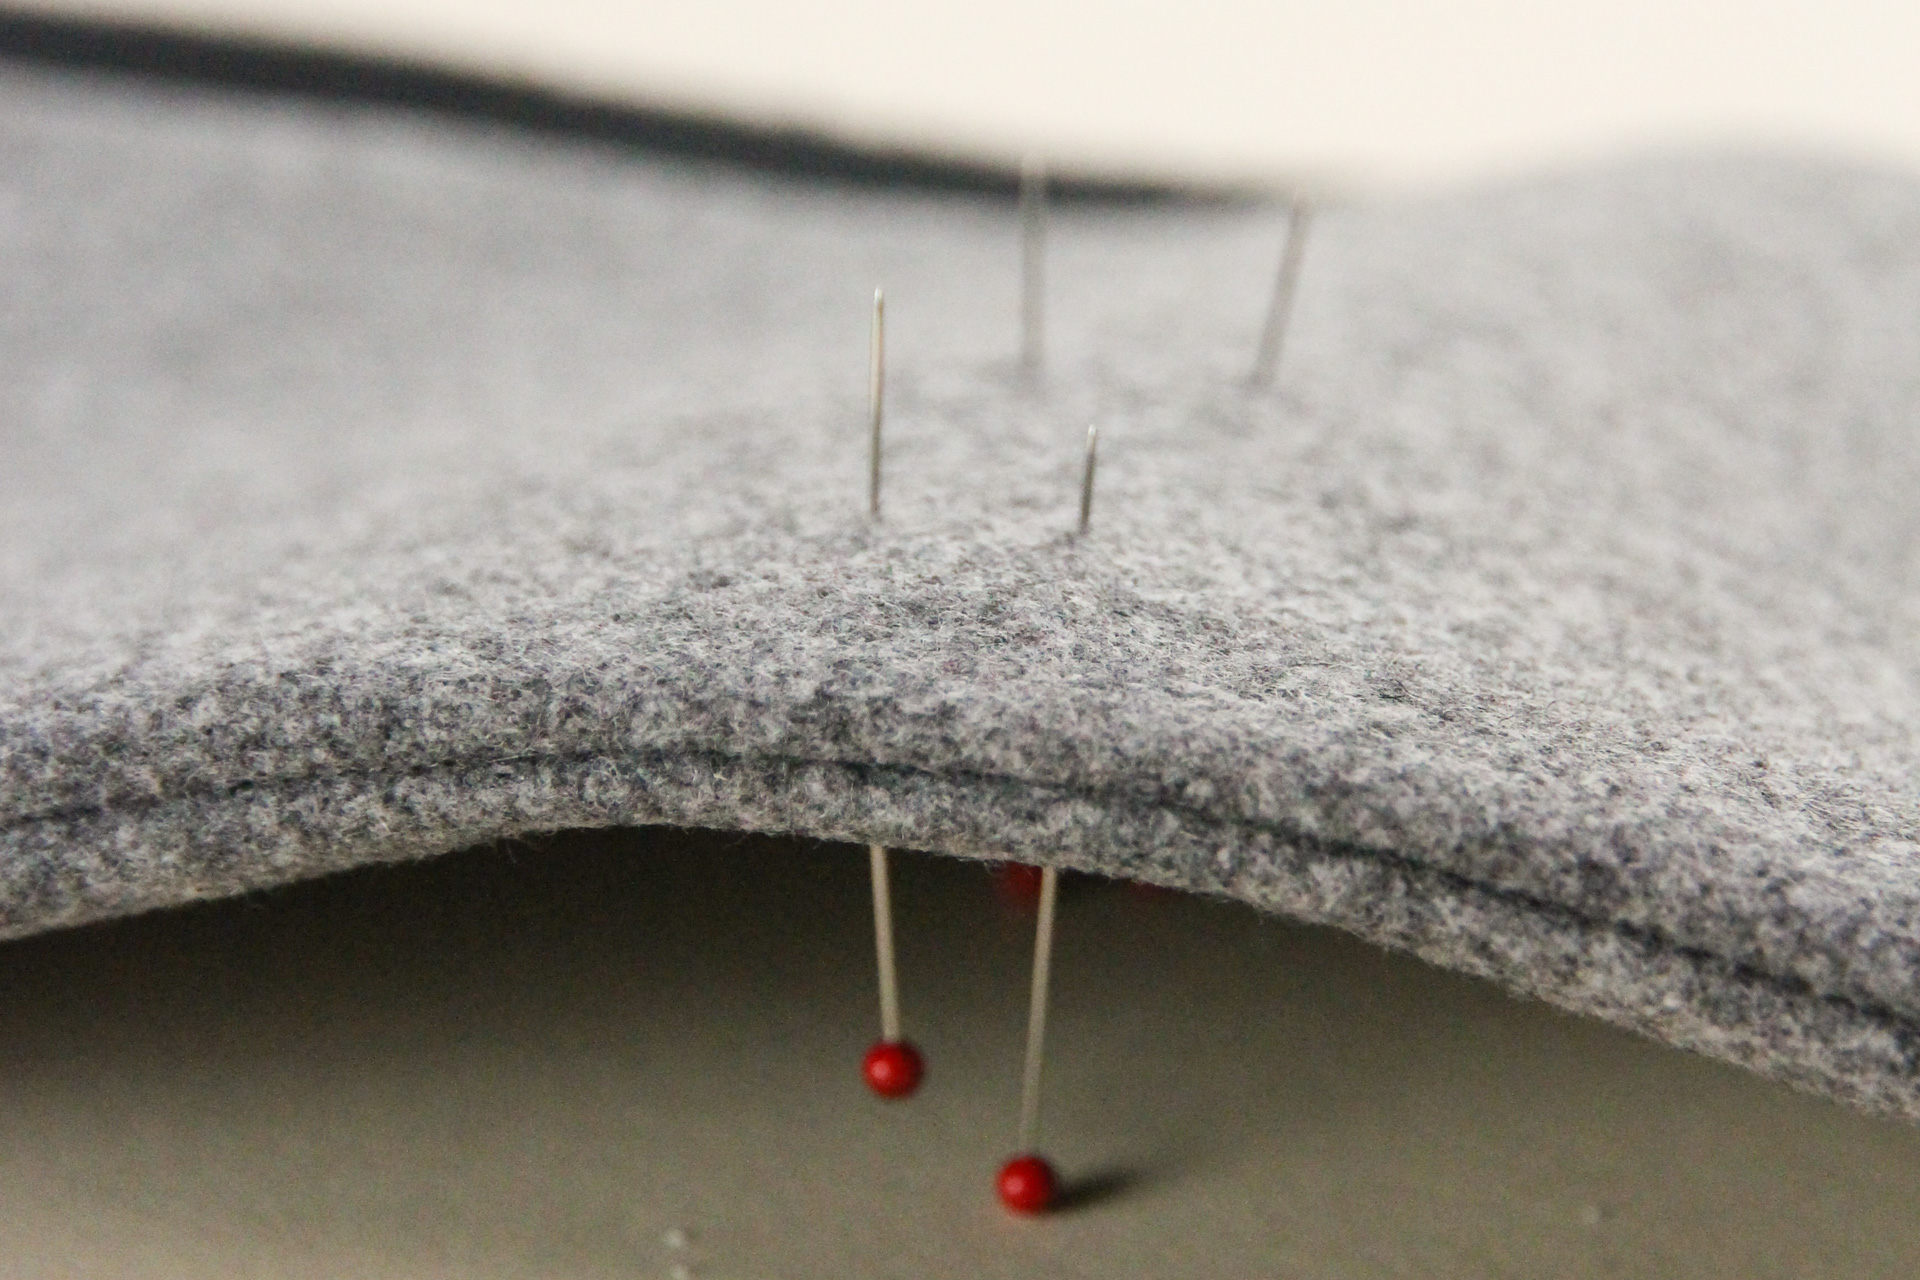
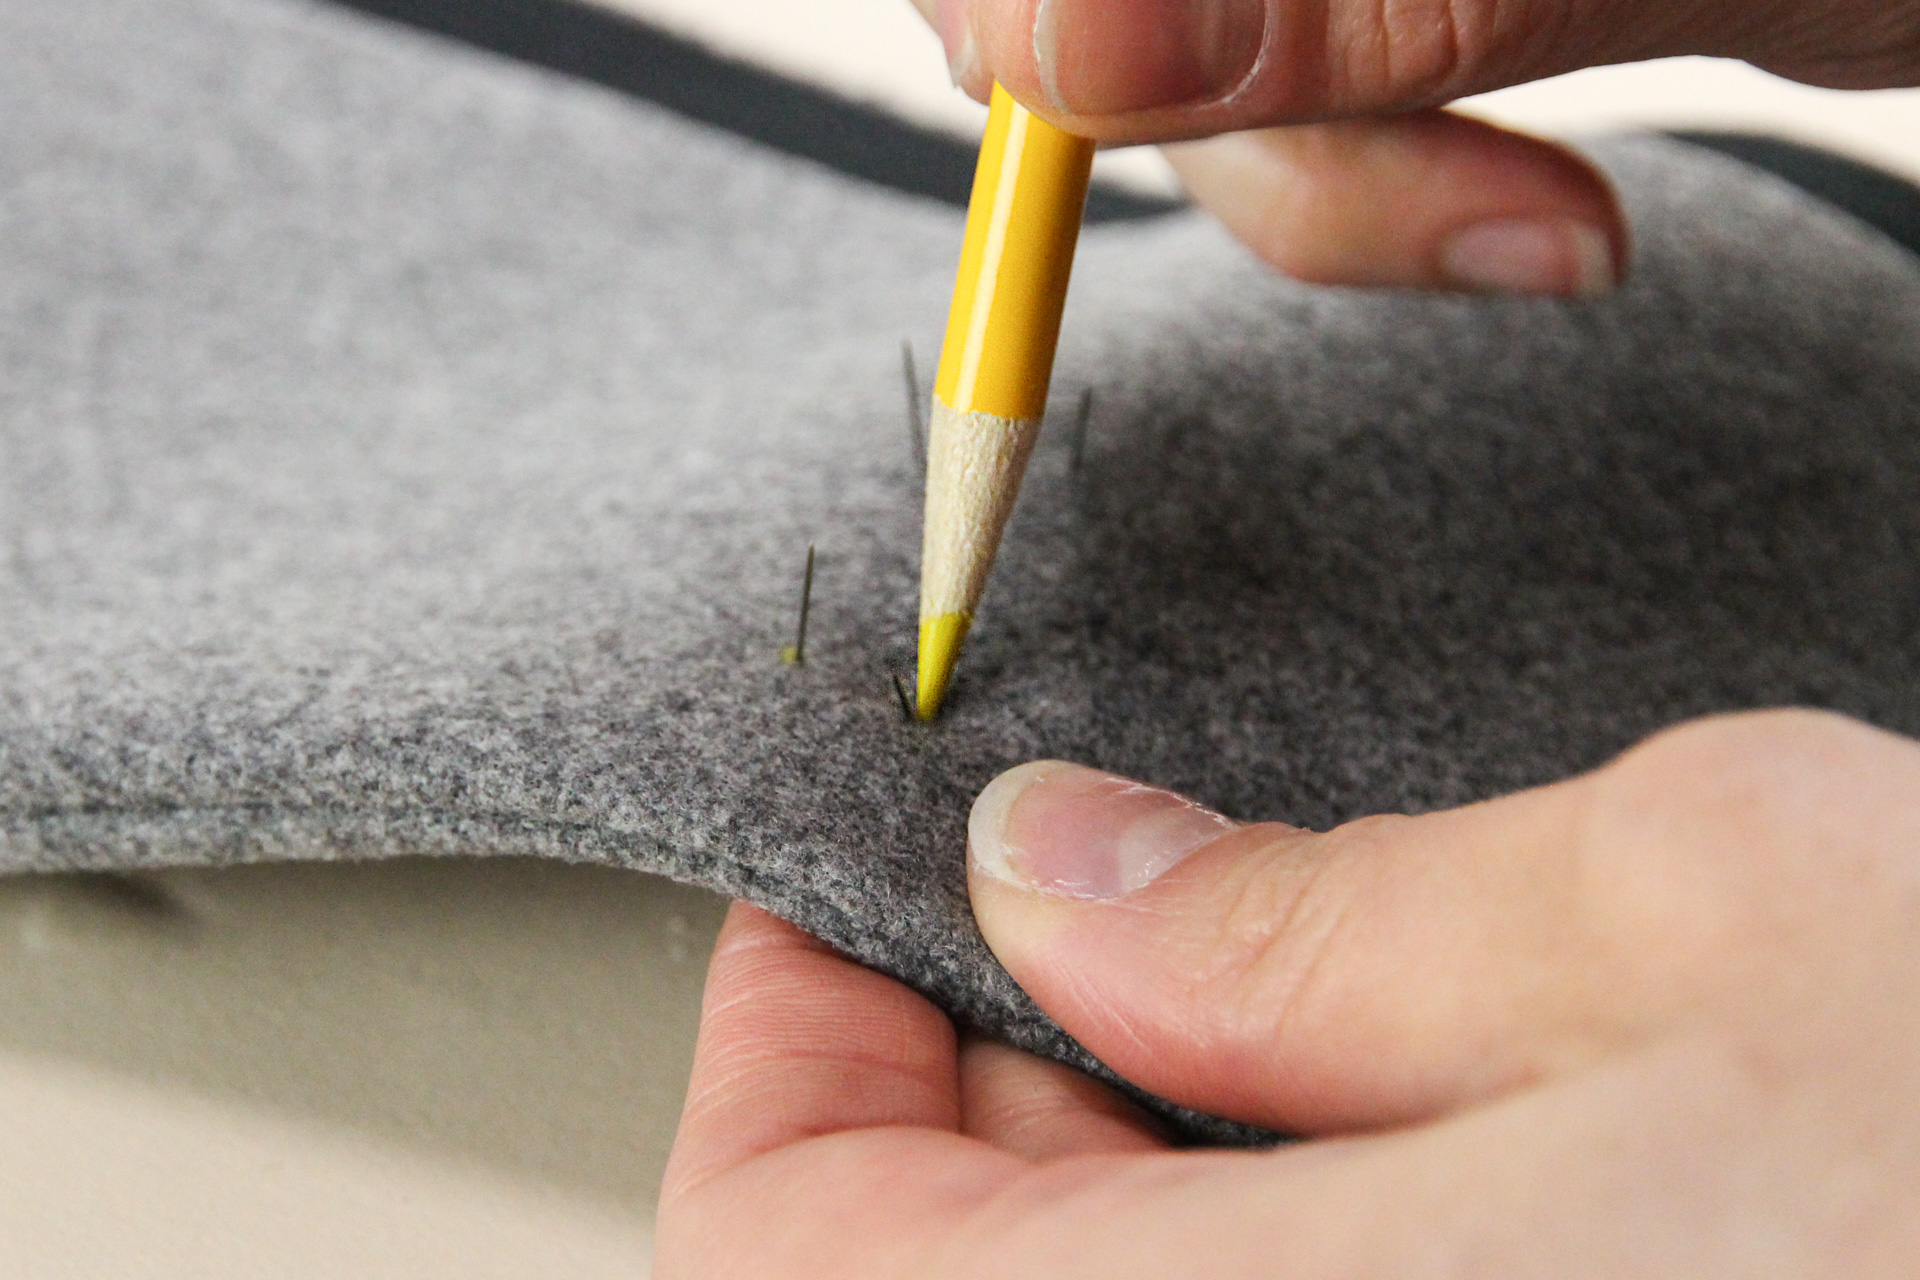
Now, insert pins into each of the corners of the buttonhole from the outer blazer so that they poke out through to the blazer facing. Make sure the pins are going directly through and not at an angle.
Flip over to the facing, and mark the points where the pins are coming out using tailor’s chalk. Be careful not to poke yourself with the sharp points of the pins!
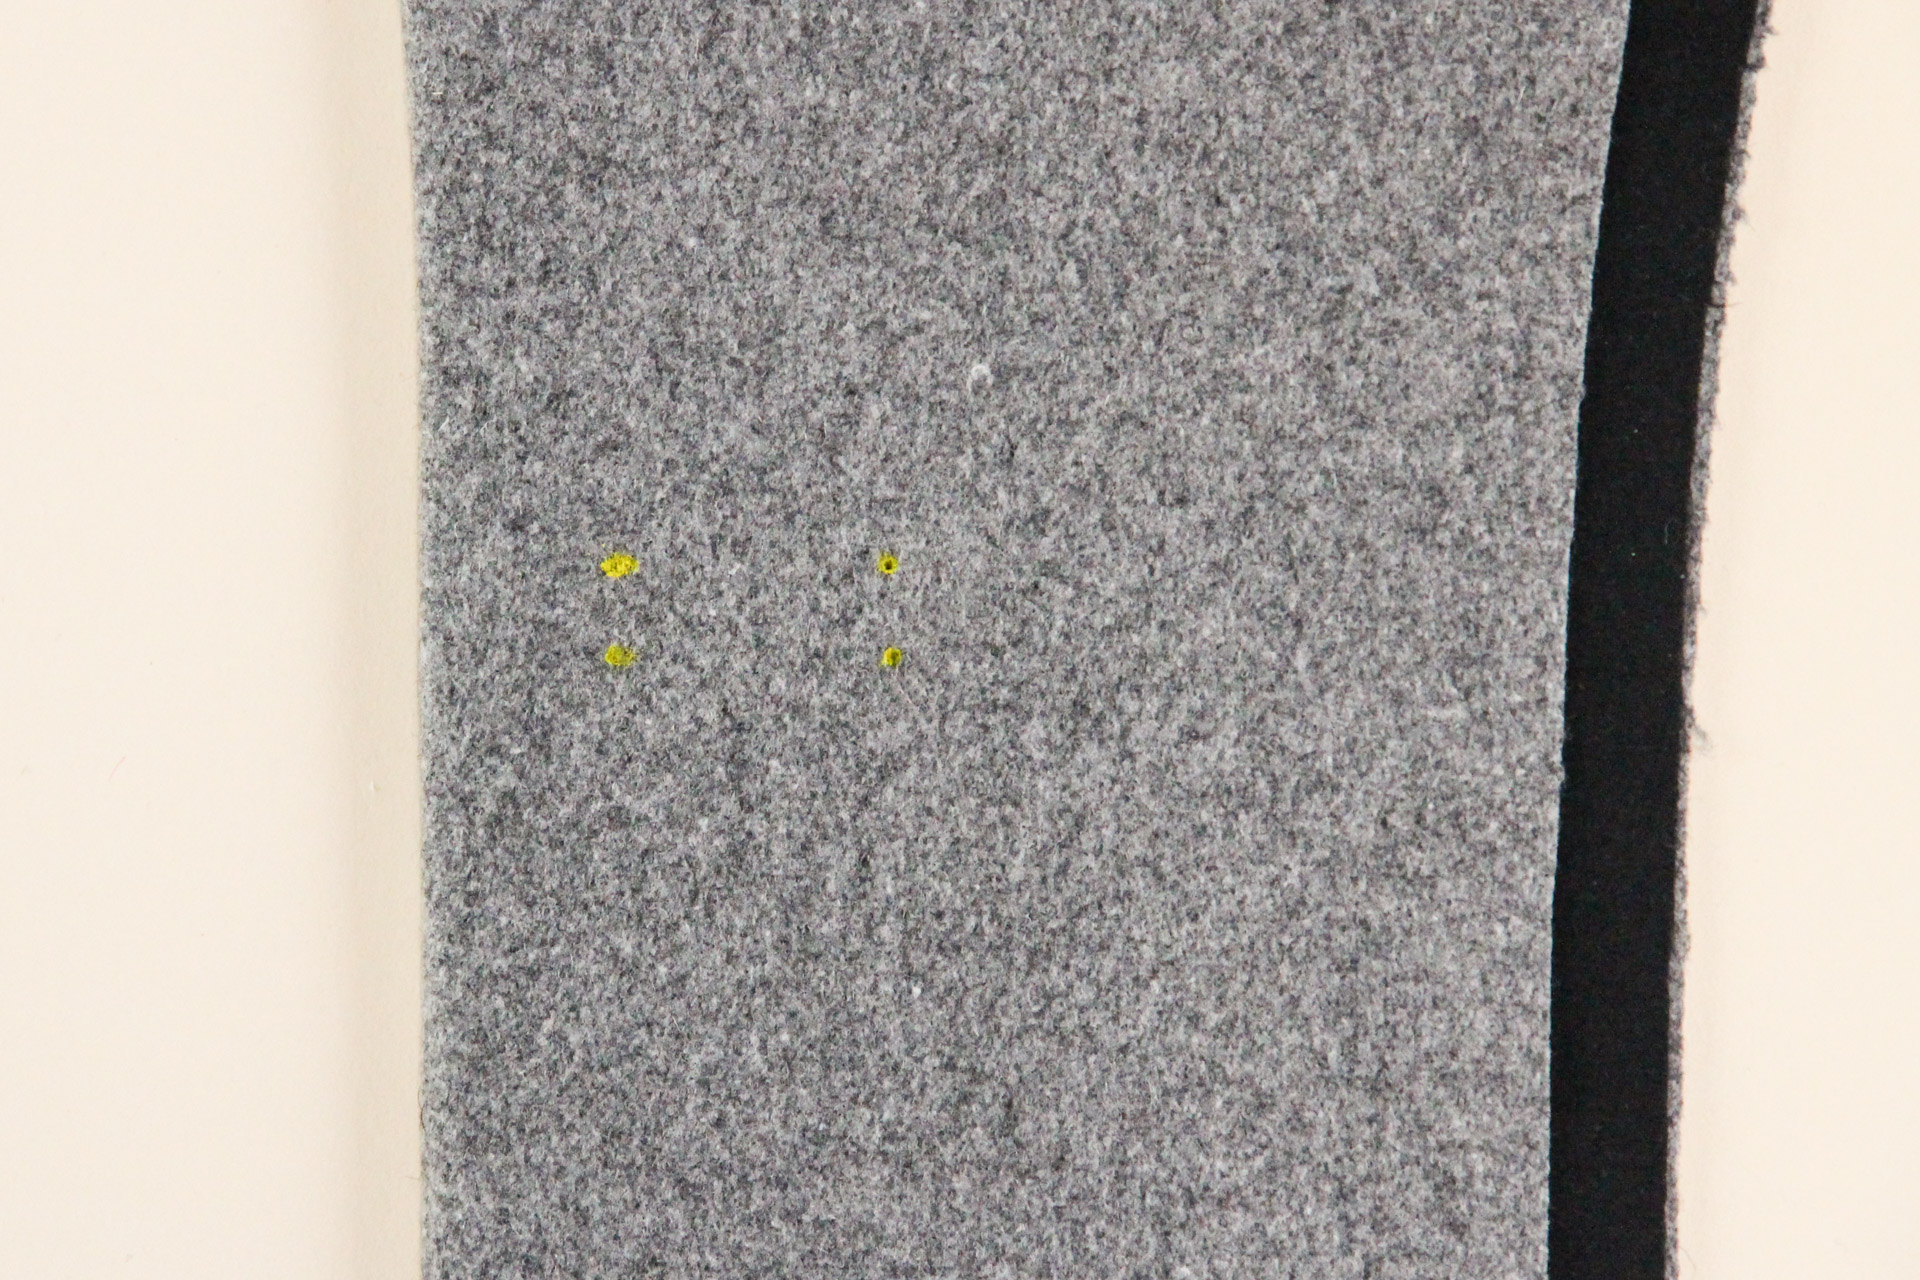
Now, put the pins through the dots you marked, this time going from the side of the facing.
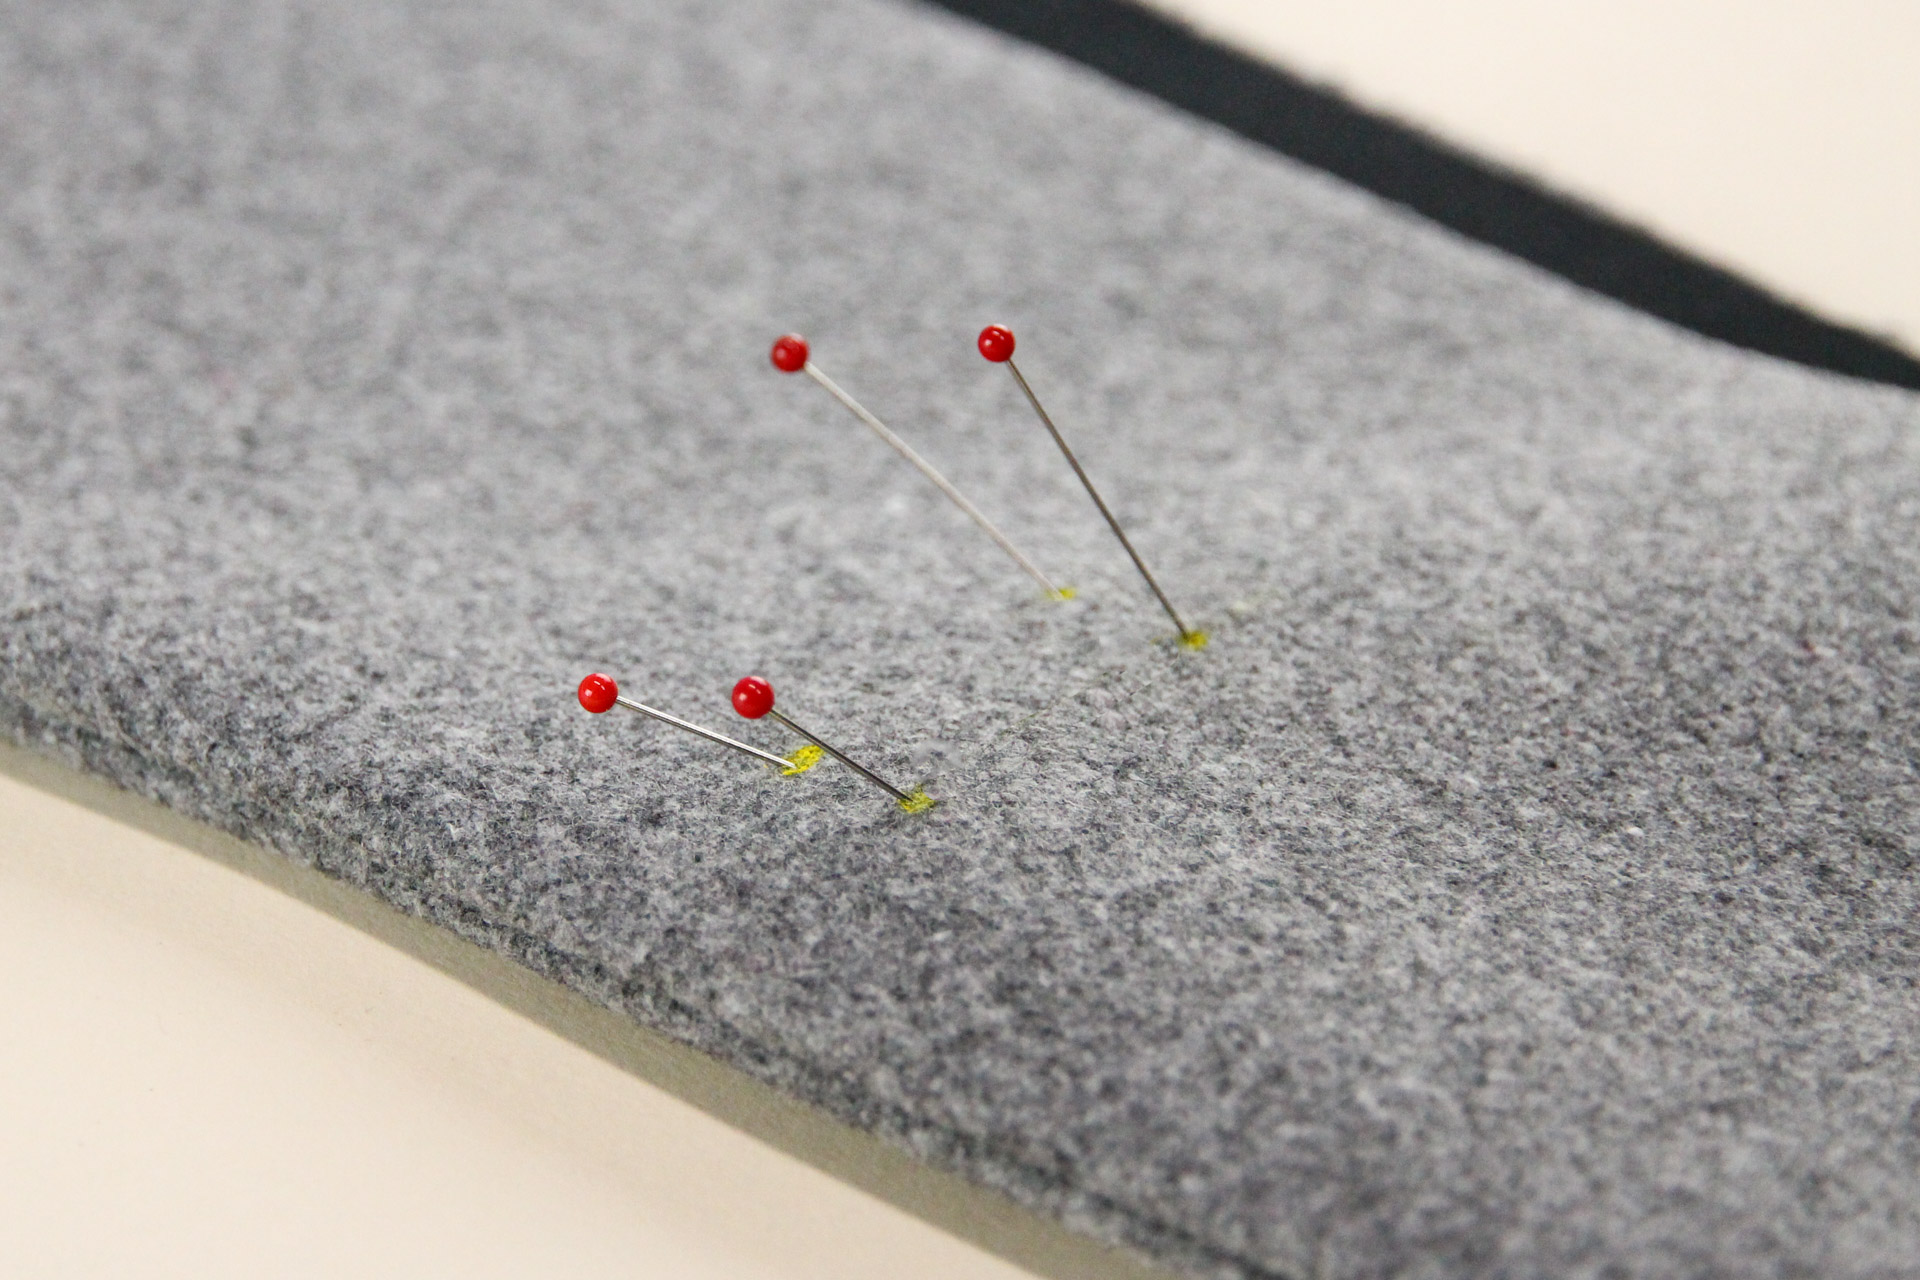
Separate the blazer facing from the outer blazer so that you’re now looking at the wrong side of the blazer facing. Mark where the pins are poking out.
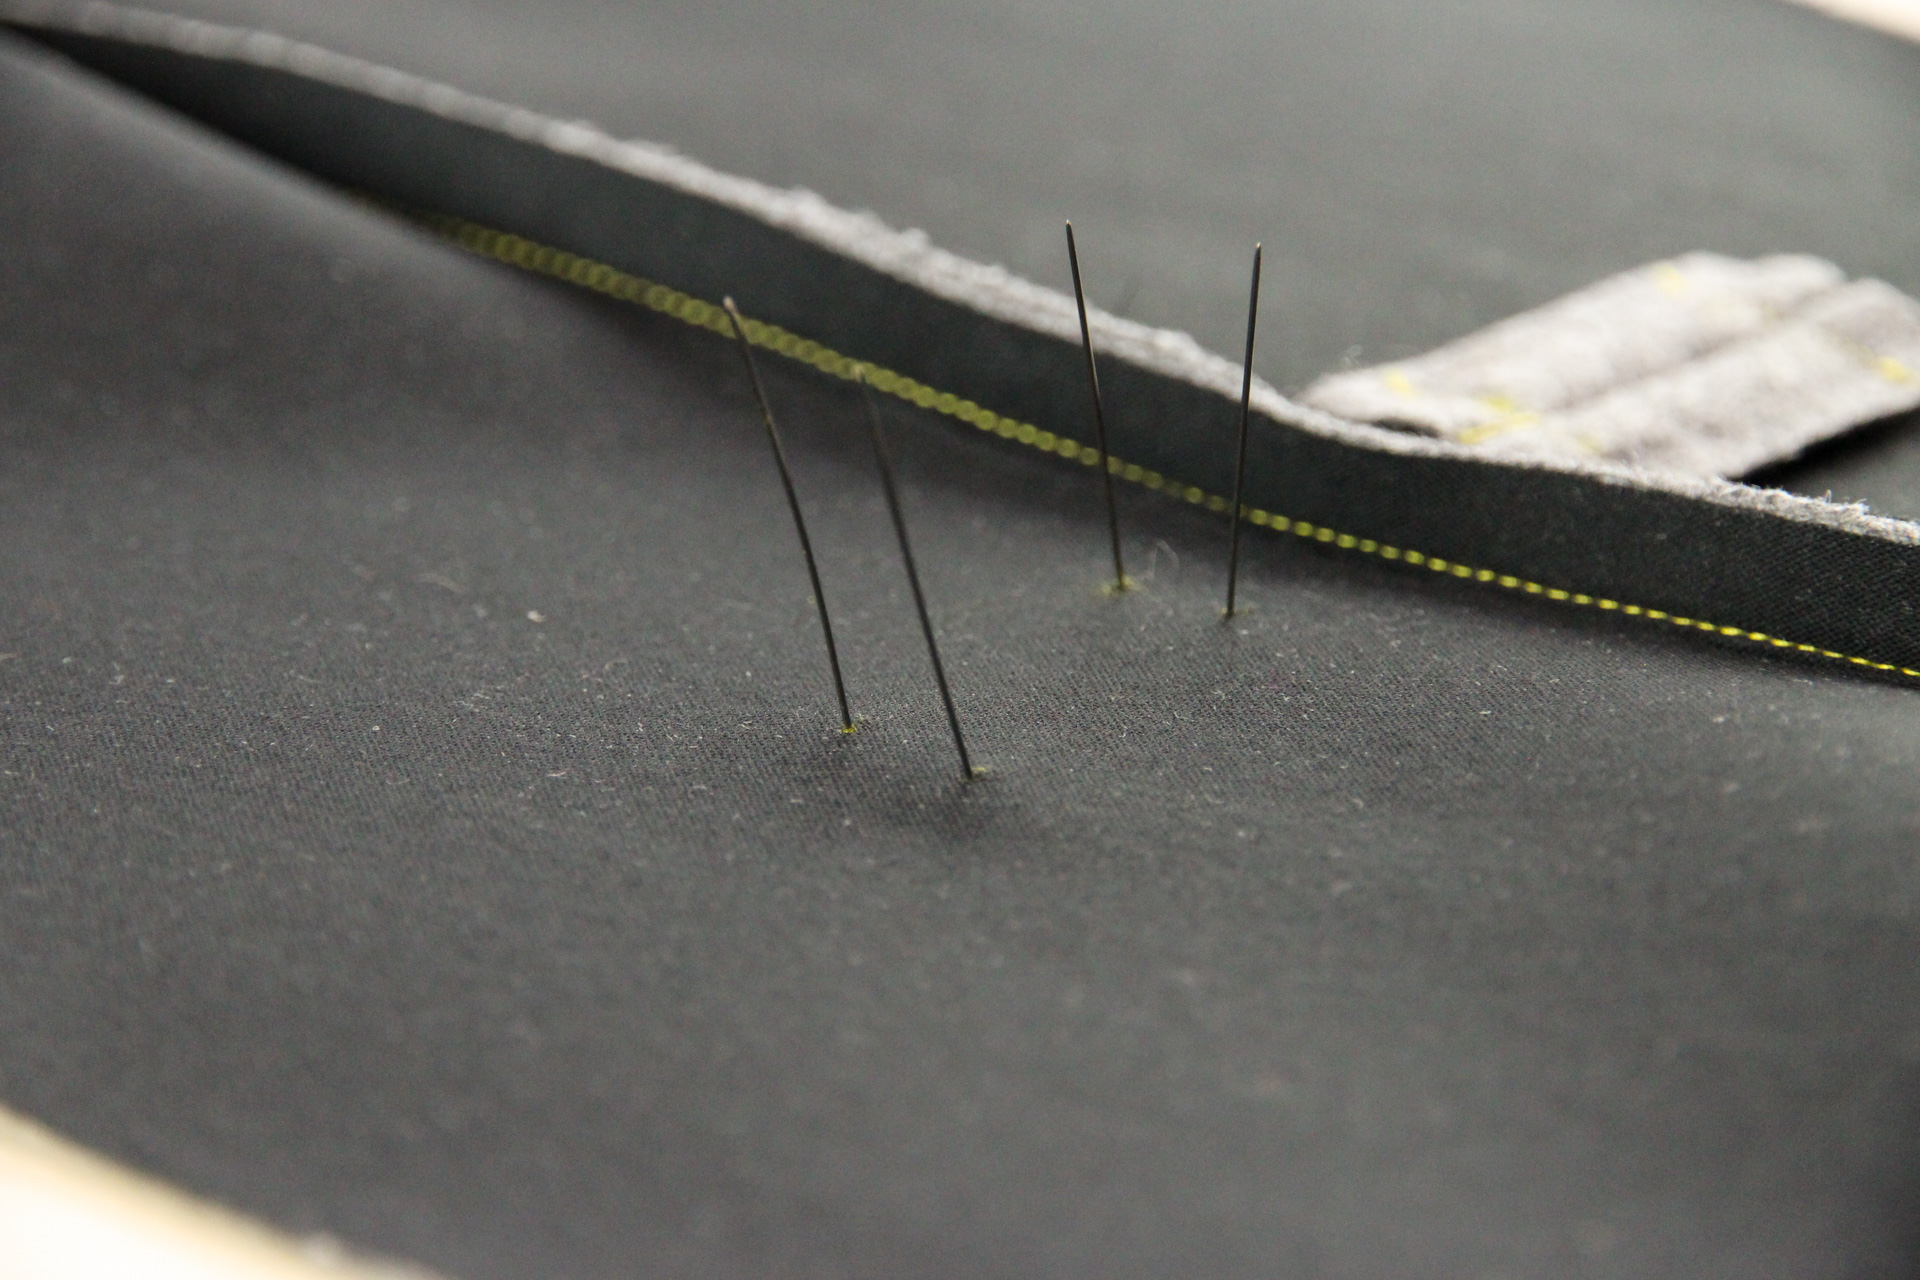
Draw a rectangle on the wrong side of the facing to connect the four dots you just marked.
Now let’s baste around that rectangle.
Flip back over to the right side of the facing, and place a patch of fabric over the rectangle you just basted. You can use a scrap of lining fabric, or some other lightweight fabric that coordinates with your blazer fabric. This patch will not be visible when we’re done, and we want to use something lightweight to reduce bulk in this area.
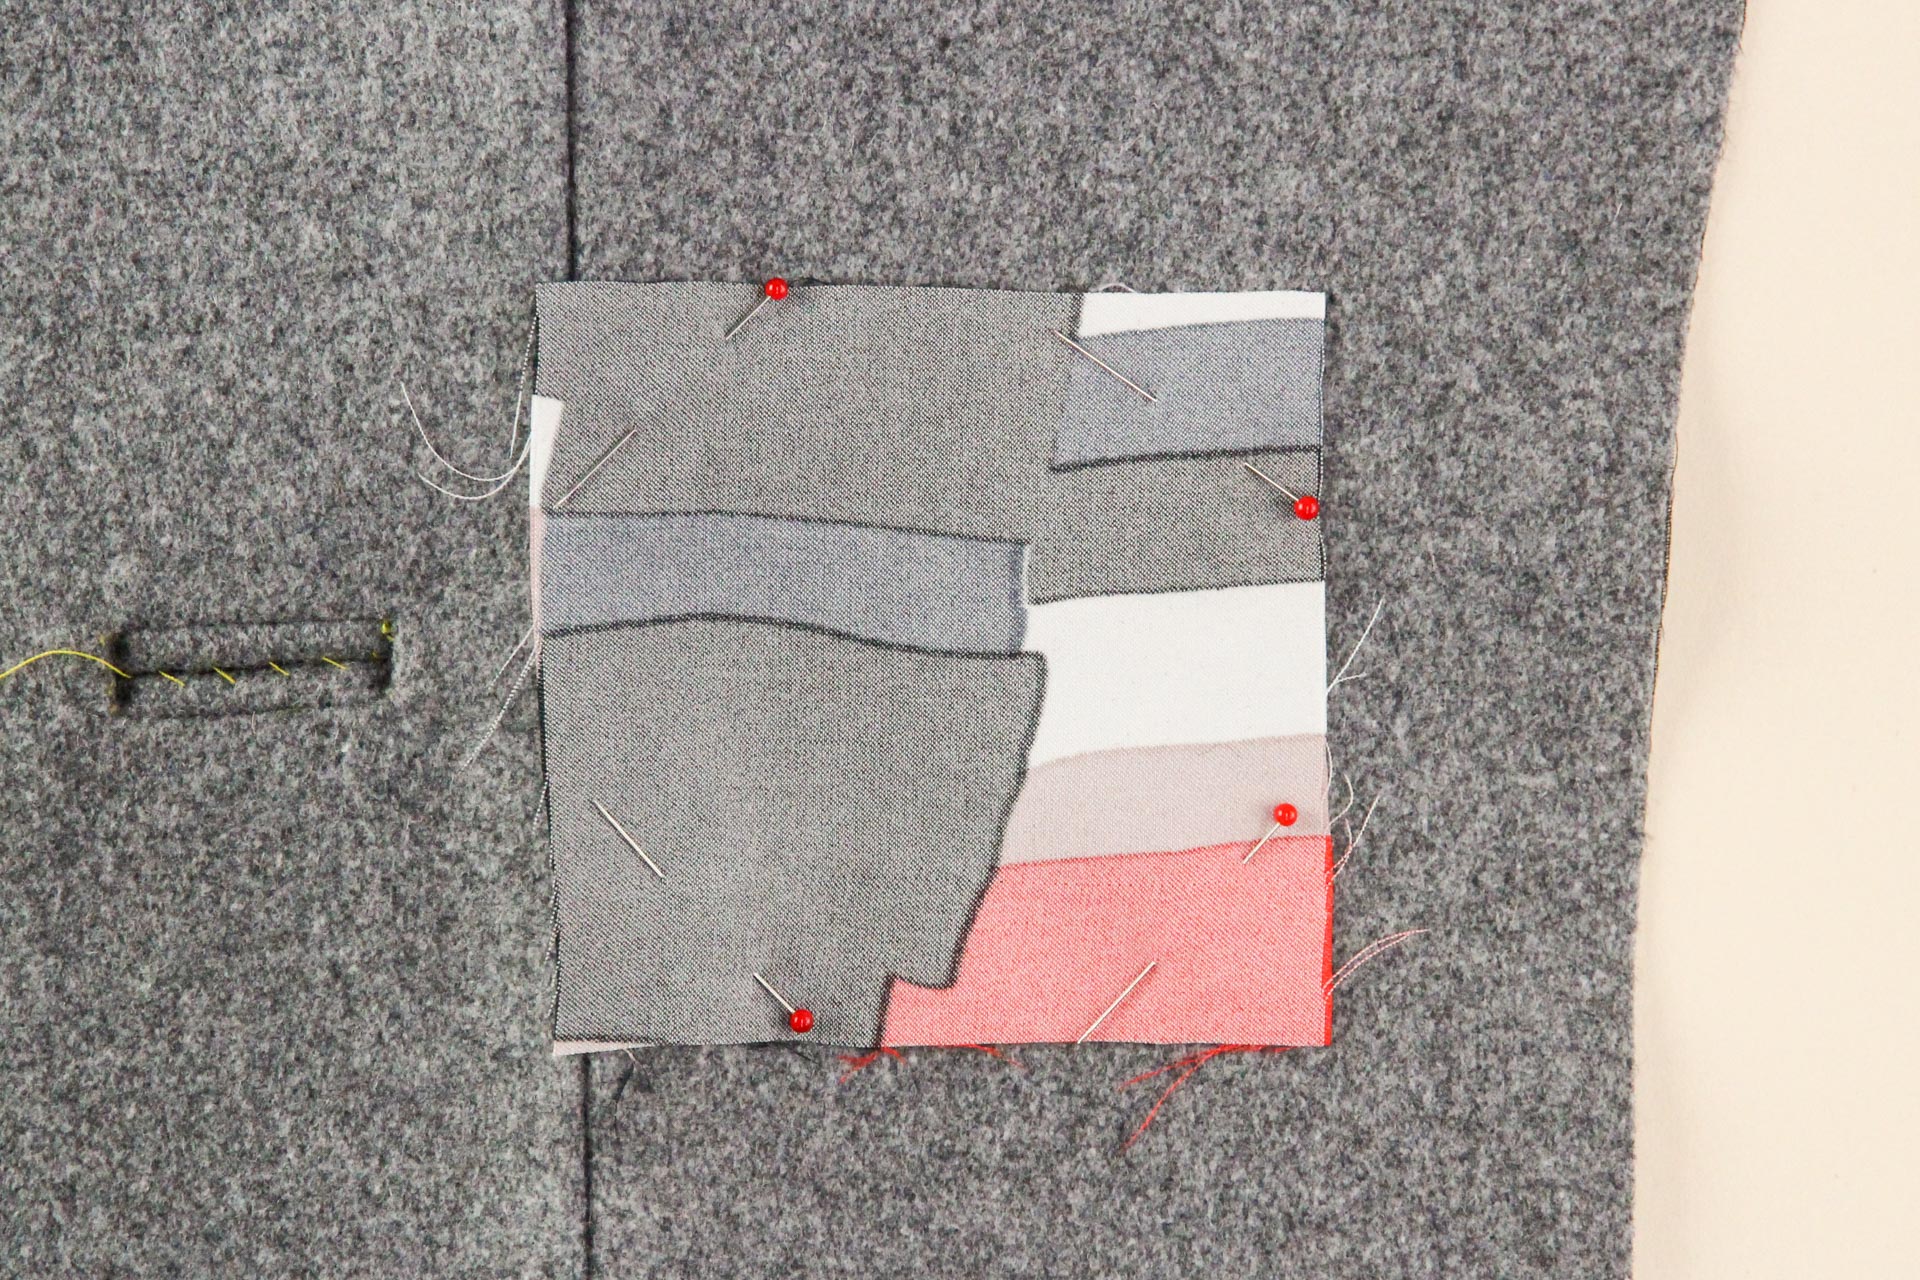
Like we did before, we’re going to sew around the rectangle from the wrong side, being very careful to sew precisely.

Let’s mark our cutting lines and cut this window open as we did before, cutting through the center and to the corners, being careful not to cut through our stitching line.

We’re now going to pass the patch to the wrong side and press it flat. Once again, if you’re experiencing puckering, it may be because you didn’t cut closer enough to the corners.
As you press, roll your patch inward towards the wrong side of the lining so that it doesn’t show from the right side. This is a fiddly step, and don’t worry if you don’t completely conceal the patch; you’ll be able to hide the rest later on.
Now we can trim the patch down, leaving about 3/8″ (1 cm) all the way around the opening.
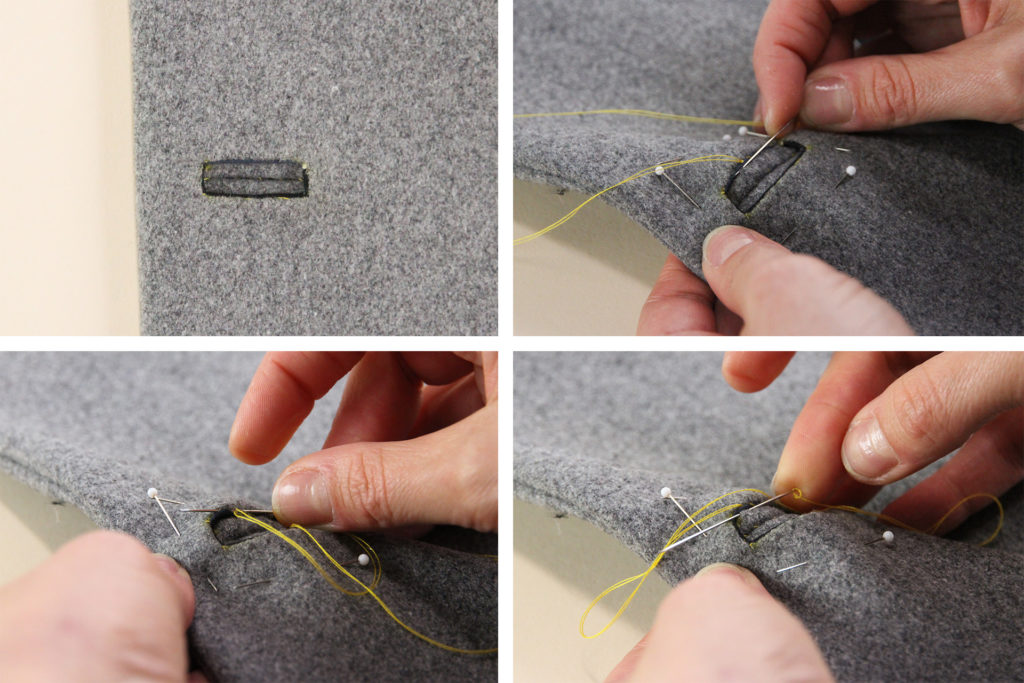
Fold your facing over to the outer blazer and make sure the opening is lined up with your buttonhole.
We’re now going to hand stitch the window of the facing to the outer blazer. Use a ladder stitch to keep your stitching invisible.
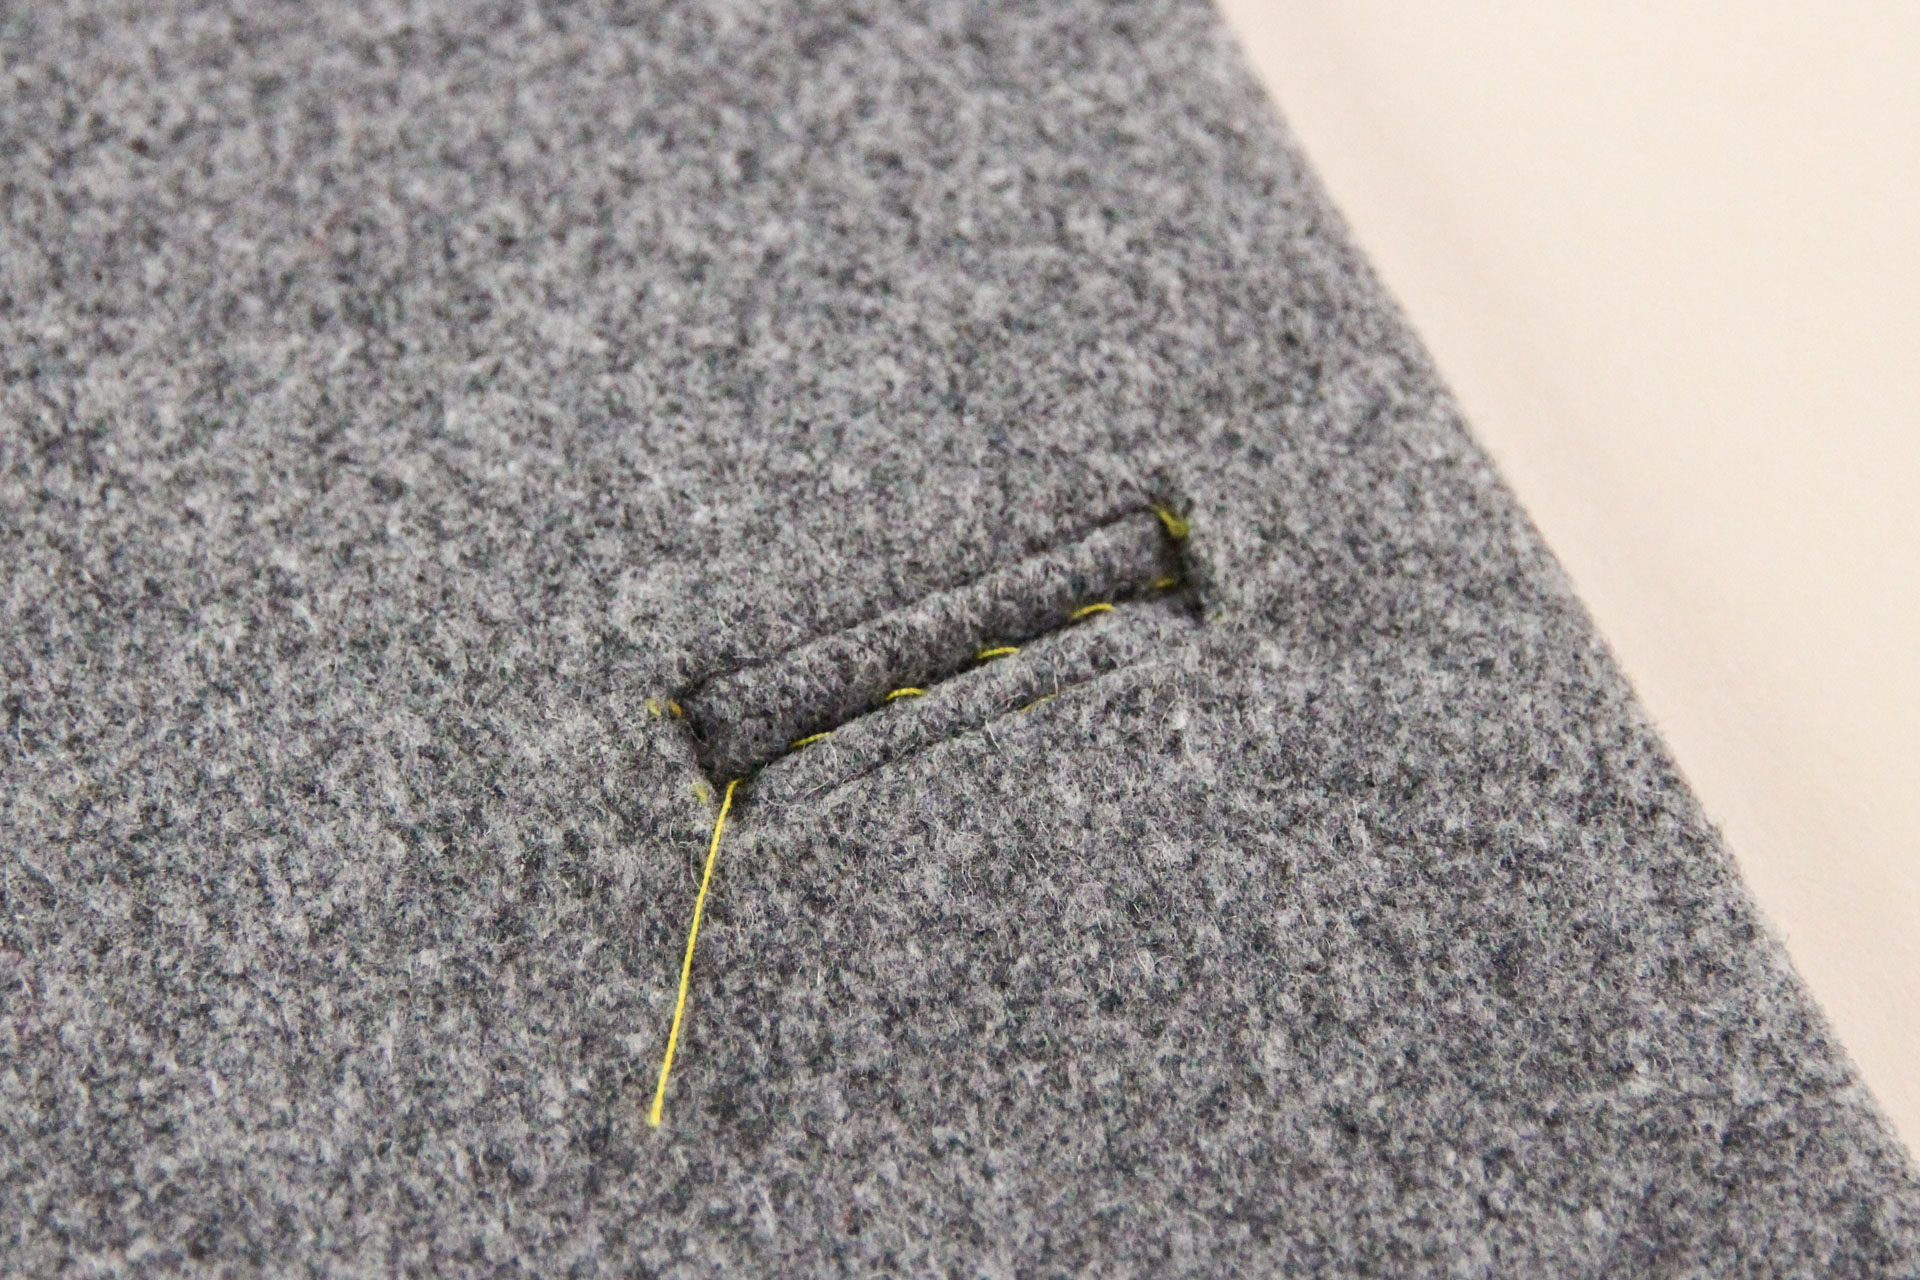
And there you have it! The bound buttonhole is complete, and any bit of your patch that was peeking through should now be concealed.
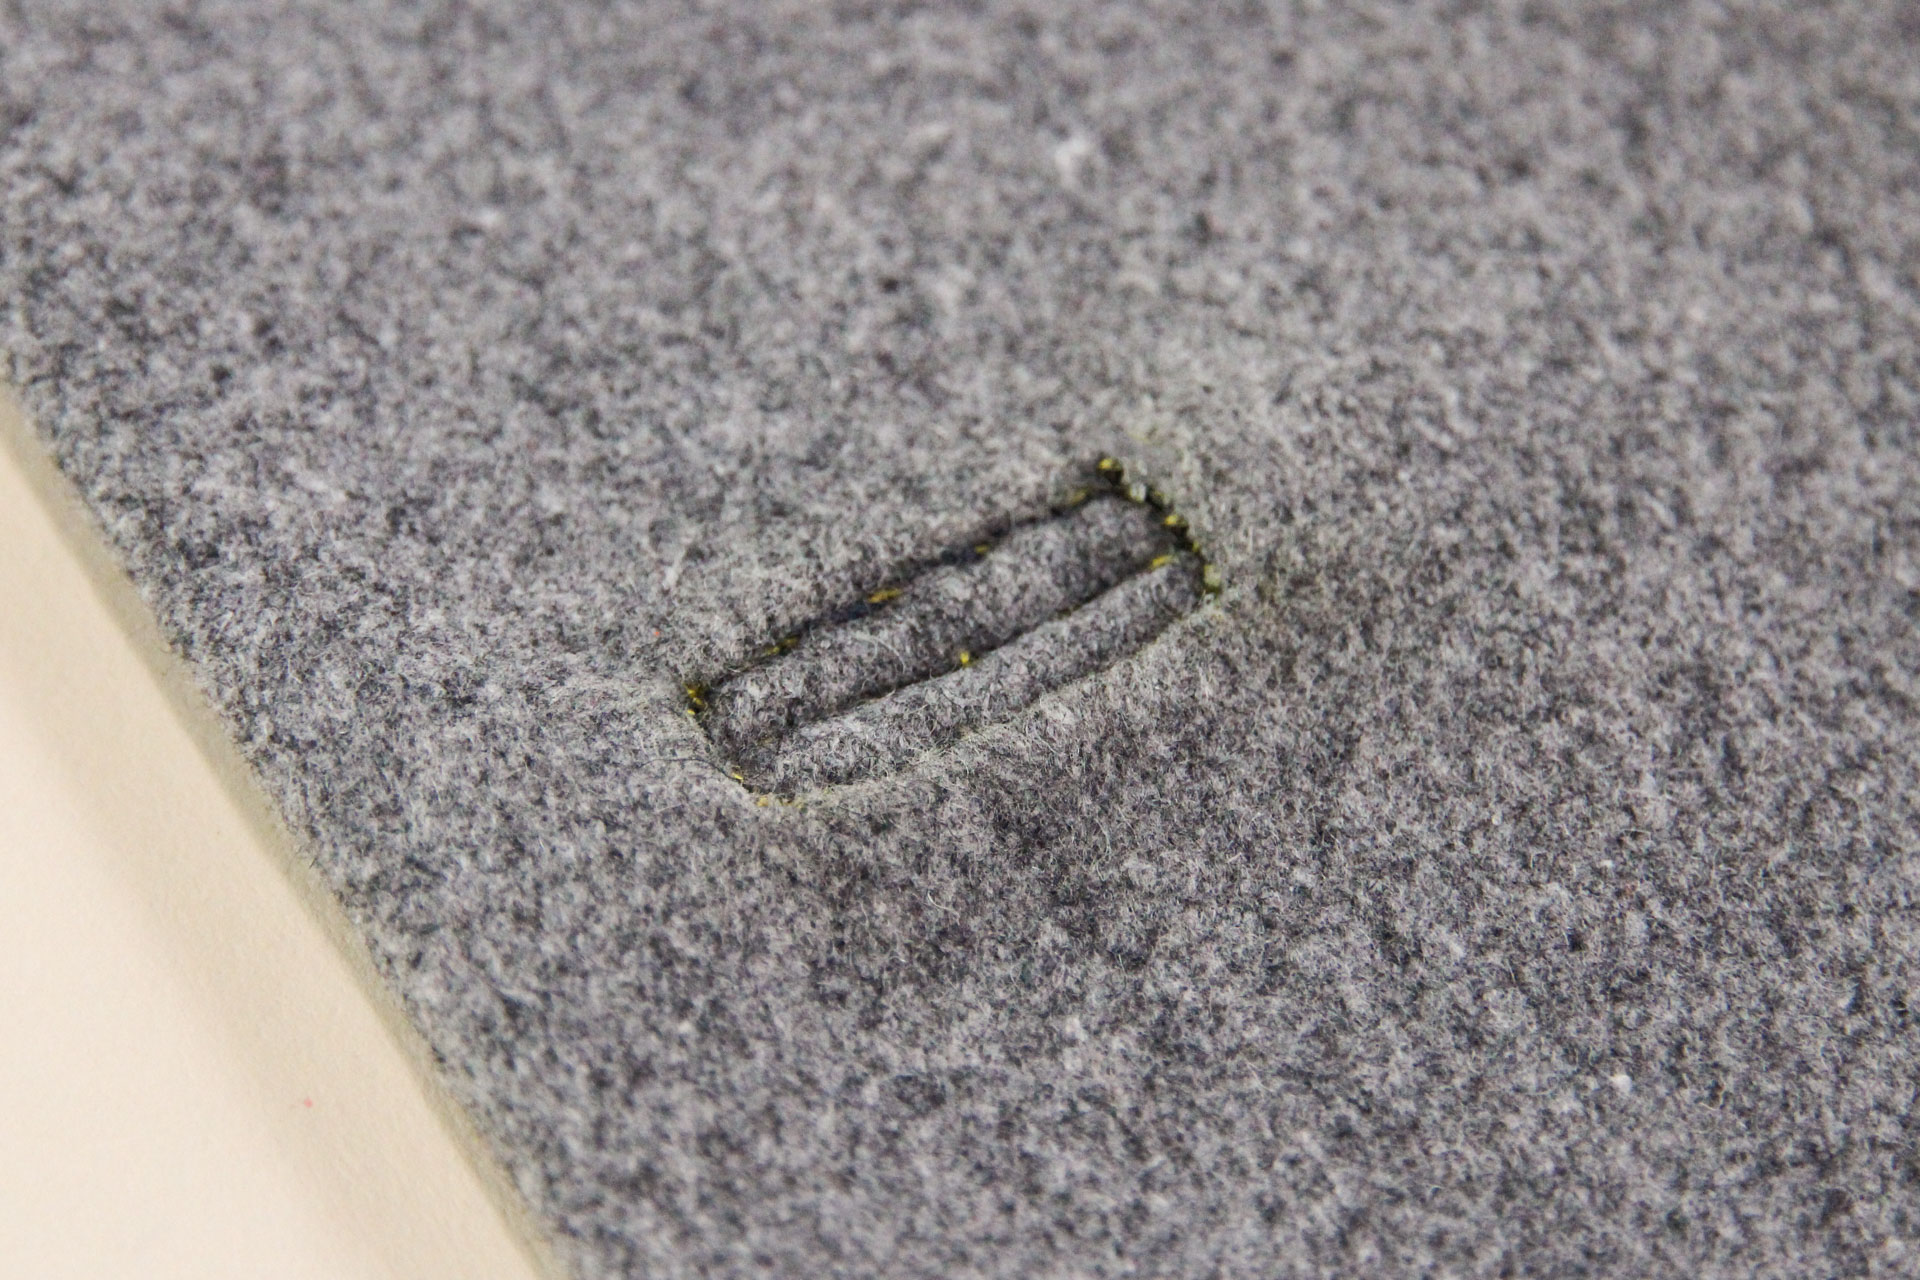
Once we’re done sewing up the blazer, we can remove our basting stitches and confirm that our button fits beautiful through our bound buttonhole.

Well done, you! You’ve sewn a bound buttonhole (and likely an entire blazer or jacket along with it) which is a cause for celebration. Be sure to share your progress on social media using the hashtag #AuburnBlazer so we can marvel at your expert couture skills!


Brilliant. I had been thinking about this in my head and wondering how the guts were hidden! So, you kind of have to do 2 mirror buttonholes. Although I suppose you could do a conventional buttonhole on the facing.
This is such a clear explanation! Thank you so much.
Fabulously detailed, and clear!