Princess seams can do wonders for full busts, but what do you do if the curve of the seam doesn’t follow the shape of your bust? Today, we’ll be showing you how to raise or lower the bust apex of a princess seam curve to achieve a better bust fit.
Busts come in all sizes, of course, but the shape and curvature can vary quite a bit, too! Even if you’re working with a pattern specifically designed for the size of your bust, you may have to make some adjustments to align the princess seams with the way your bust curves. It might sound a bit complicated, but we’re here to talk you through the entire process.
(Working with a darted bodice? We show you how to raise or lower the bust dart in this tutorial.)
There are two different ways to make this adjustment, and you can choose whichever way works better for you. With both approaches, we strongly recommend making a muslin (test garment) and trying it on before starting the adjustment—it’s truly the best way to know how a pattern is going to fit, and how much adjustment is needed. You can use inexpensive fabric for this test version, but make sure you use something similar in weight, stretch, and drape to your final fabric, as all of those factors can affect how a garment fits on your body.
Alright, let’s get into the two adjustment methods:
Adjusting Princess Seams: Technique #1
Put on your muslin, making sure to wear the same undergarments that you plan to wear with the final garment. If your bust shape is different from the curve of the princess seams, you’ll notice that there are spots where it’s too tight (the fabric is pulling) and too loose (the fabric is pooling). (If the entire bust area is pulling or pooling, you may need a different size—consult your pattern’s size chart and measuring recommendations.)
In the areas that are too tight, carefully unpick the portion of the seam using a seam ripper. Allow the fabric to spread apart as needed, then repin with safety pins. In the areas that are too loose, use safety pins to pull the seam in. Make sure you do this evenly on both sides of the bodice.
Once you’re happy with the new bust curve you’ve created, you can mark the seam line directly onto your muslin using a pen. Do this on both the side piece and the center piece.
Take your muslin off and take the pieces apart, then transfer your new seam lines onto your pattern pieces, adding seam allowances. (It’s a good idea to make copies of your pattern pieces first, so that you can later reference the original pieces if needed.) Make a new muslin to check the bodice fit again.
Adjusting Princess Seams: Technique #2
If the bust curve of the pattern is generally the same as your bust curve but just needs to be moved higher or lower, you may prefer this technique.
Start by putting on your muslin with the bust apex marked directly onto your fabric. (The bust apex is the fullest point of the bust curve.) Then, mark where your bust apex is directly onto the fabric, and measure the distance between the pattern’s apex and your apex. That will tell you how much you need to move it up or down.
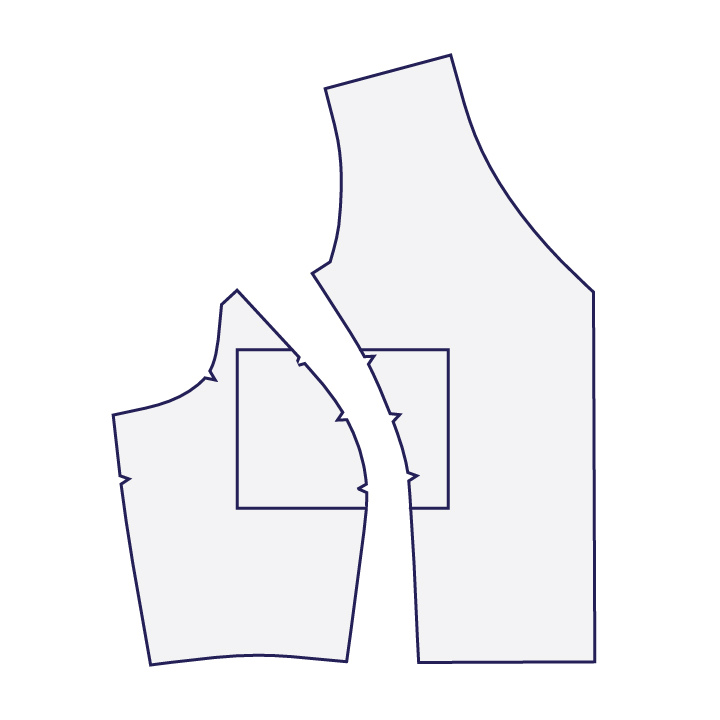
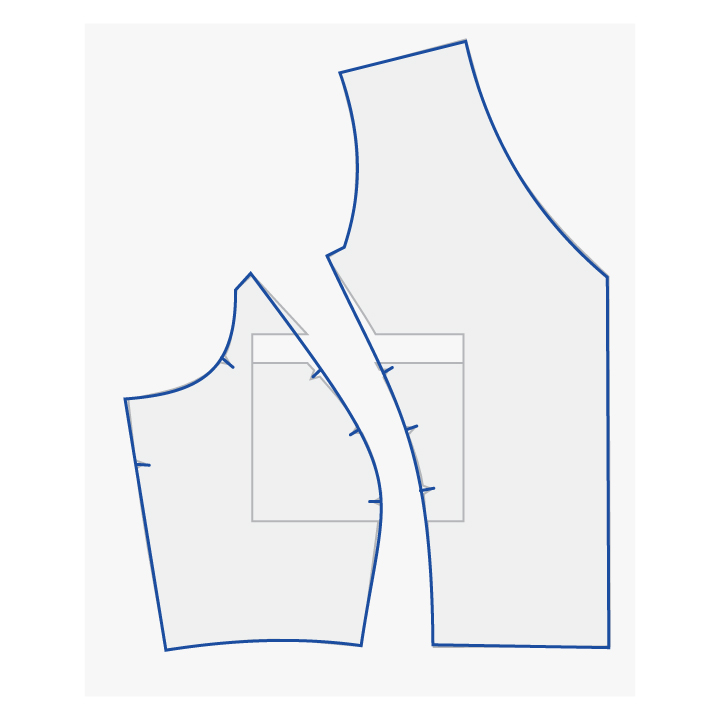
Next, line up the side piece and the center piece of your pattern at the bottom edge. Draw a box around both pieces, enclosing the bust notches. It should look something like this:
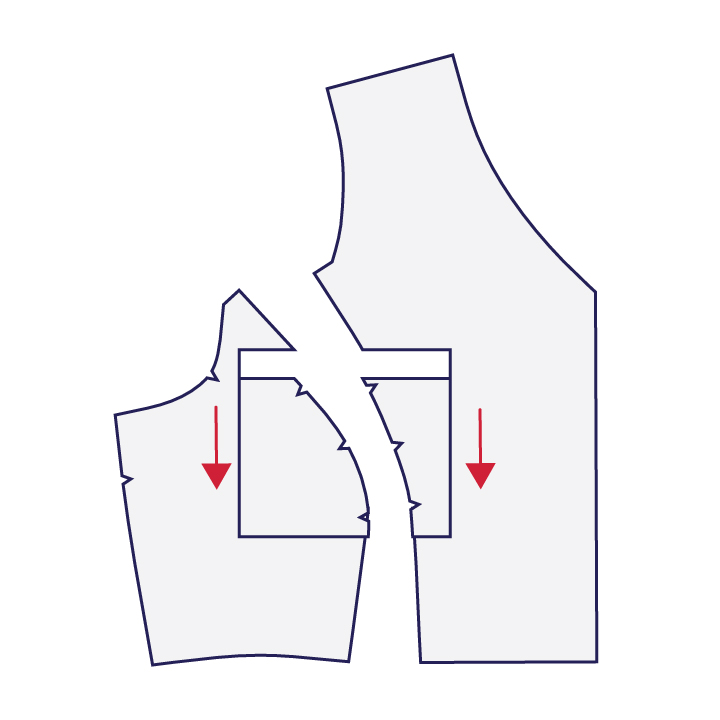
Cut out the box, then slide it up or down by the amount you measured. Tape it down to keep it in place.
Slide it down if your bust apex is lower than the pattern, like so:
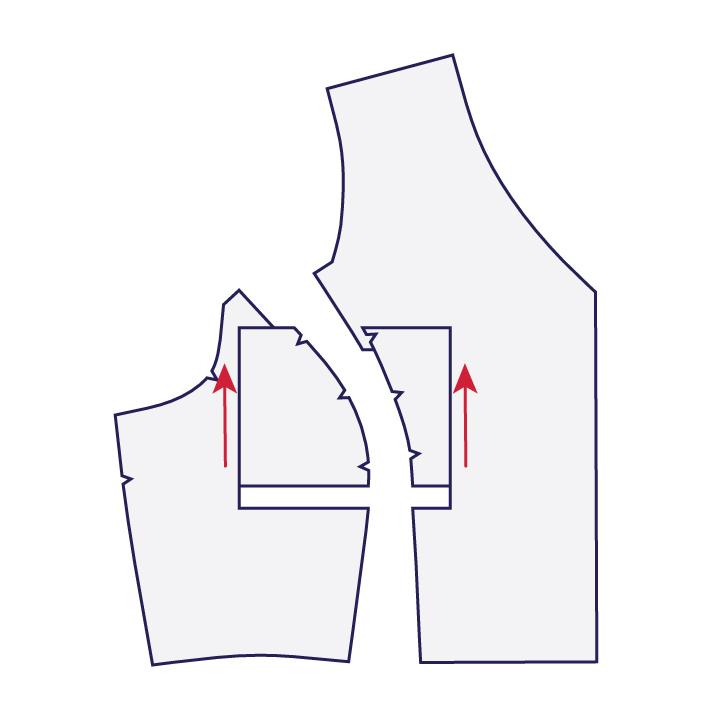
Slide it up if your bust apex is higher than the pattern, like so:
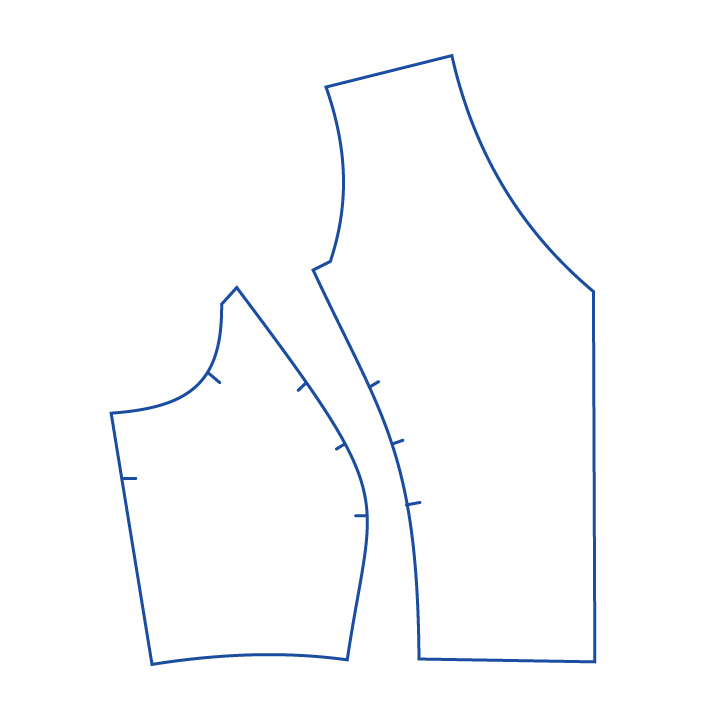
Lay a piece of tracing paper (or tissue paper) over your pattern pieces. You’ll need to smooth out the curve a bit as you trace your new pieces. Make sure to also transfer over your notches.
And there you have it! Two adjusted pattern pieces with the bust apex moved to suit your body. Sew those up into a second muslin to check the fit.
We hope this tutorial helps you achieve a better bust fit with princess seams. Let us know in the comments below if you have any questions!

Is the middle notch the one that represents the bust apex on the pattern as drafted?
I’m a little confused on how to transfer and draw the curve lines in the first method. Are you able to make a video of how to do this?
Sew Over It has an illustrated tutorial as part of the Elsie Sew Along: https://sewoverit.co.uk/elsie-sewalong-full-bust-adjustment-princess-seams/
I just tried method 2 and it worked *perfectly*. Thank you for solving this fit conundrum so handily!
Thanks for the explanation – worked great!
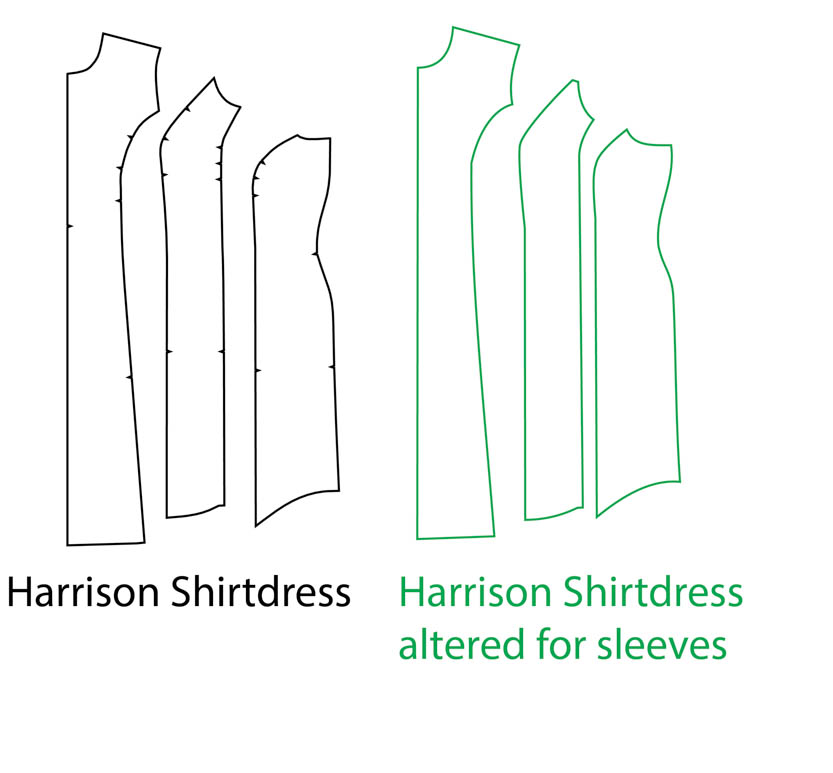
Please do a tutorial for the double princess seaned Harrison Shirt on how to lower the bust point 3″ to 4″. The principles may be the same, but the real estate covered when doing this major change is WAY different than a single princess seamed garment. Pattern piece #2, the FRONT MIDDLE, has two sections that need to be moved down. This is a total of four rectangles that need to be drawn to begin the process. This is only easy in theory and has prevented many a Harrison Shirt purchaser from making the pattern.
Love this method!!! The box preserves the notches. The arm hole measurement is not affected. Genius! Thank you!!!!!
If you need to lower the apex by 2 to 3 inches, you’ll find that truing the bust curve will be a bit of a challenge. Once completed, when you make up your first garment, you will find the fabric length on the top curve of the middle pattern piece has lost length in the upper curves.
This tutorial looks easy and will probably work for smaller alterations, but it’s NOT as easy as it looks for larger changes when you lower the bust apex.
Hi, I’m wanting to lower the bust point before making a muslin as I know where my bust point is. Which point would I measure to on the Harrison shirt for each princess seam please?
Hi Amy, the second notch from the top on the princess seams is the bust apex on the Harrison. On the side seam, it’s the first notch from the top.
-Ayelet at Cashmerette
Could you please provide a diagram? If I draw a perpendicular line from the first notch from the top of the side seam, it doesn’t match up with the bust apex line on the front sections.
If you’re trying to draw in the bust line, you would connect the side seam notch to the second notch on the princess seam.