If your bust is smaller than a B cup, or the difference between your high and full bust measurement is less than 2″, then you may need to do a small bust adjustment. Here’s how to do an SBA on a princess seam bodice.
In this tutorial, we’re showing how to do a small bust adjustment on a pattern that has princess seams – it’s the same technique for armhole or shoulder princess seams. If haven’t done an SBA before, check out this post which will help you work out if you need to do one, and if so, how much you need to adjust by.
Preparing for an SBA
Here’s what you need on hand for doing your SBA: your front bodice pattern, some tracing paper (we like Swedish tracing paper, but anything that you can see through will do), a pen or pencil, a ruler, scissors, and some tape. It helps to be working on a cutting mat or a surface that you can tape things down onto temporarily—you’ll see why pretty soon.
We always recommend tracing your pattern piece before starting to cut into it. This is so that you can refer to the original piece later on if needed—once you cut into the real thing, it’s hard to go back.
How to do a princess seamed SBA
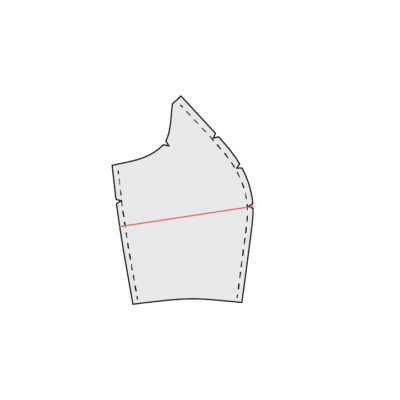
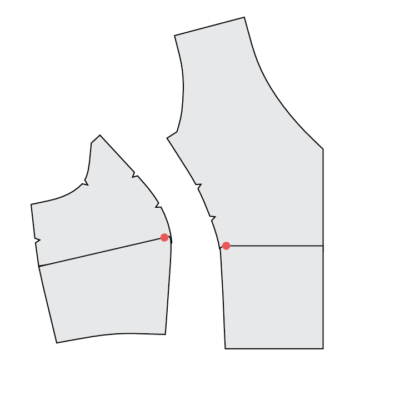
- We’ll start with the side front piece. Draw the seam allowance around the edges, and then draw a line from the bust apex to the side seam, at a slight angle, as if it was a dart.
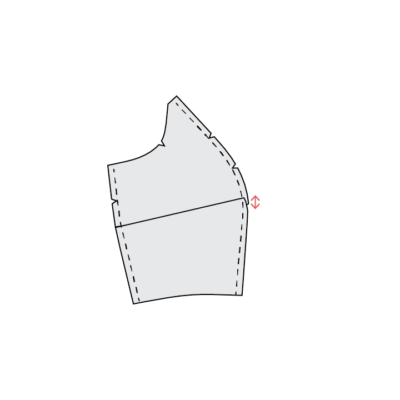
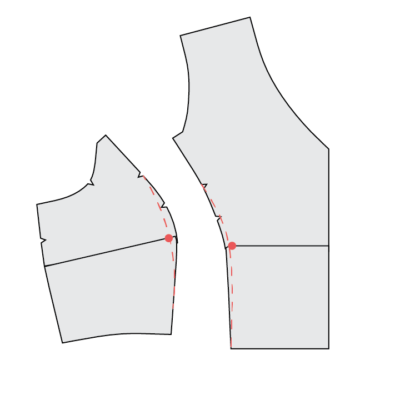
2. Starting at the apex, cut down the line, ending at the seam allowance. Then create a little hinge by snipping into the other side of the seam allowance. Then, swing the pieces to overlap, so that they are overlapping at the *seam allowance* by the amount of LENGTH you need to remove. Tape the piece shut.
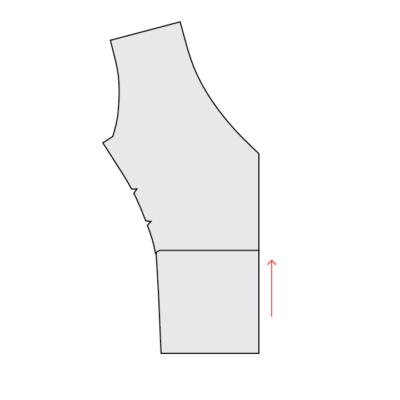
3. Now we need to remove the same length from the center front piece. To do that, draw a line across the piece horizontally at the same height as the bust apex (typically there’s a notch there). Now, draw a second line above that one, the distance you need to remove in length.

4. Cut along the first line, then overlap the two pieces so that the bottom piece comes up to meet the second line. Tape the pieces shut.
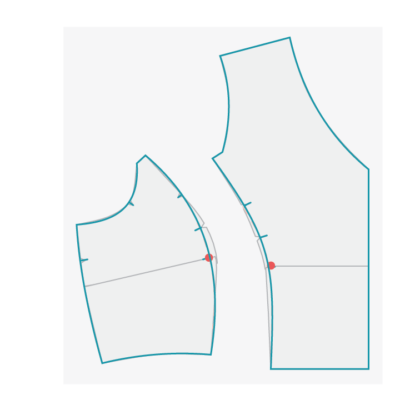
5. Now we need to remove the width too. Divide your total SBA by 4 (e.g. if you’re doing a 2 inch SBA, that would be 0.5 inches). Draw a mark that distance in from the bust apex (where the pieces are overlapping), on both front pieces.
6. Re-draw the curve on both pieces – a French curve or other curved ruler is great for this! – creating a new gentle smooth curve that goes to the new apex markings.
7. Put tracing paper on top of the pieces and re-trace, making sure you add all the notches (use the overlap as the bottom notch.
And voila! You’ve removed the length and width you need from your princess seam pattern. 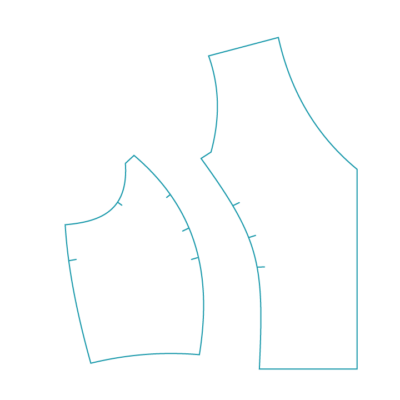
Want to learn more about fitting clothes to your body?
Check out our Fitting for Curves: Pattern Adjustments for the Upper Body online workshop.


Thank you!
Do you have to shorten the back piece also. The side seam of the bodice part is shorter because of the SBA? The harrison shirt has a front middle piece and front side piece. Which part do I use for a SBA?
Does this make the waist smaller since it took away from those pieces? How do we make sure the bodice waist still fits with the skirt or jumpsuit pant waist?
Hi Dana, this approach shouldn’t impact the waist seam so the pieces should still fit.
-Ayelet at Cashmerette