The Calder Pants & Shorts are wide-leg trousers with a chic flat front and comfortable elastic back waistband. Today, we’ll show you how to adjust the rise of the Calders.
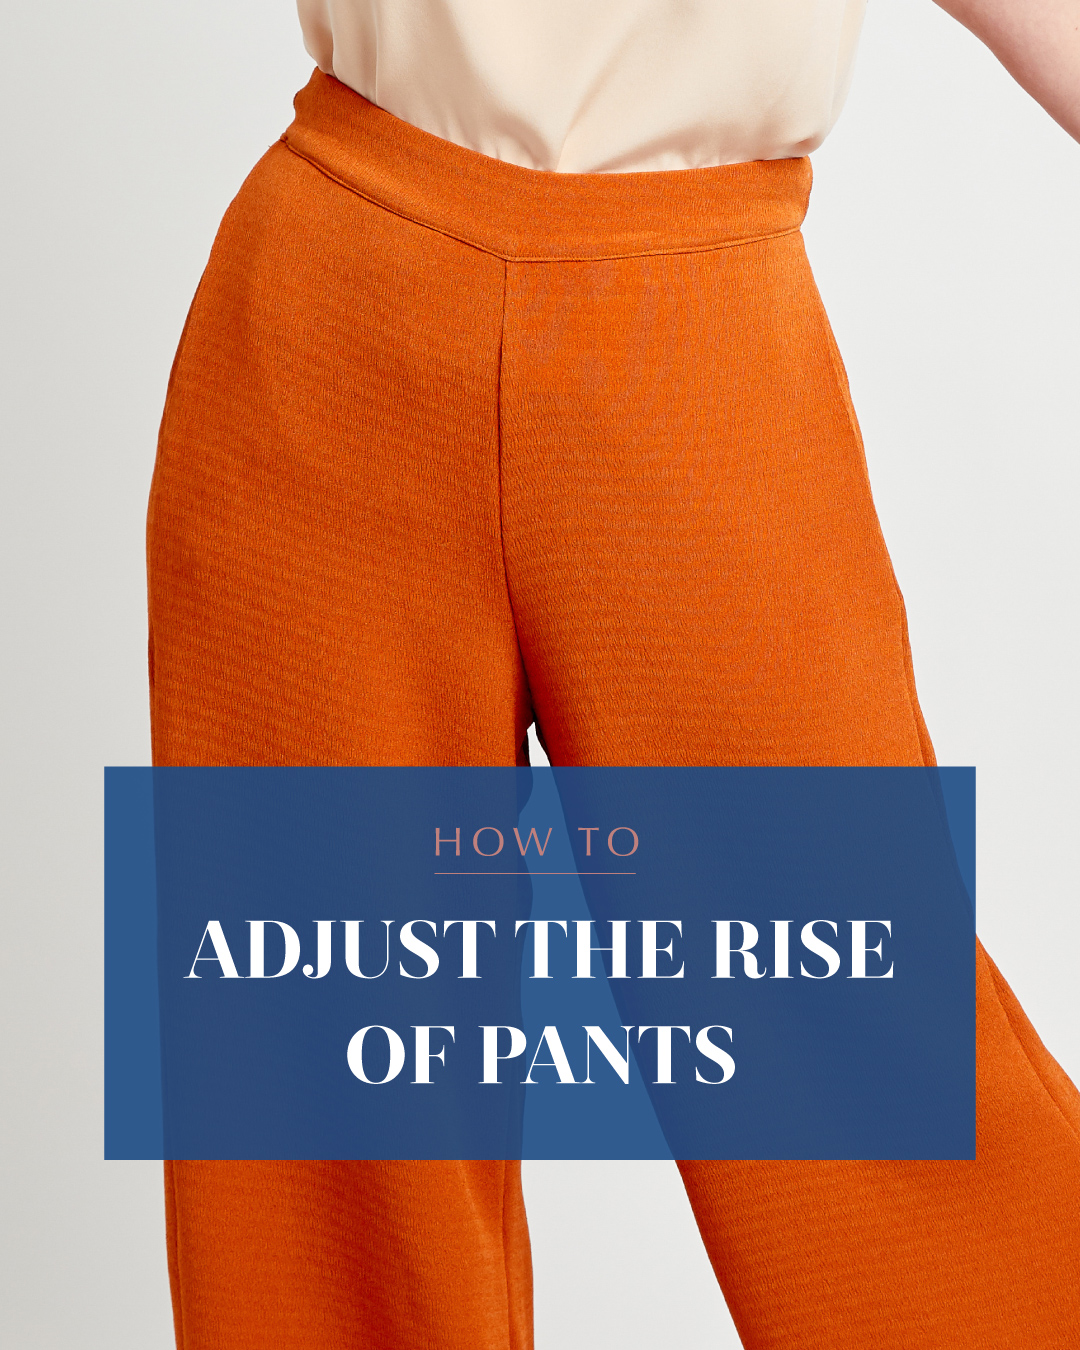
The Calder Pants & Shorts are high-waisted trousers, designed to sit at the natural waist and drafted for a height of 5′ 6″. Depending on your proportions, you may find that your torso is shorter or taller than the Calder is designed for.
The best way to determine whether you need to adjust the rise is to make a muslin (use View C, the shorts version, if you want use less fabric) and try it on. If the crotch is lower on your body than you’d like, you can shorten the rise, and likewise if the crotch is digging into your body, you can lengthen the rise. For more details on how the Calder should fit, check out this guide.
How to Shorten the Rise of the Calder Pants
If you find that you need to shorten the rise of the Calders, you’ll want to first determine by how much. The best way to do this is to put on your muslin, and then make a horizontal fold around the middle of your pelvis, all the way around your body. Adjust this fold until the crotch is sitting where you want it to be, and then pin it all around. Carefully test this new length by sitting down—you’ll want to make sure that there is enough room between your body and the crotch of the pants to be comfortable while seated.
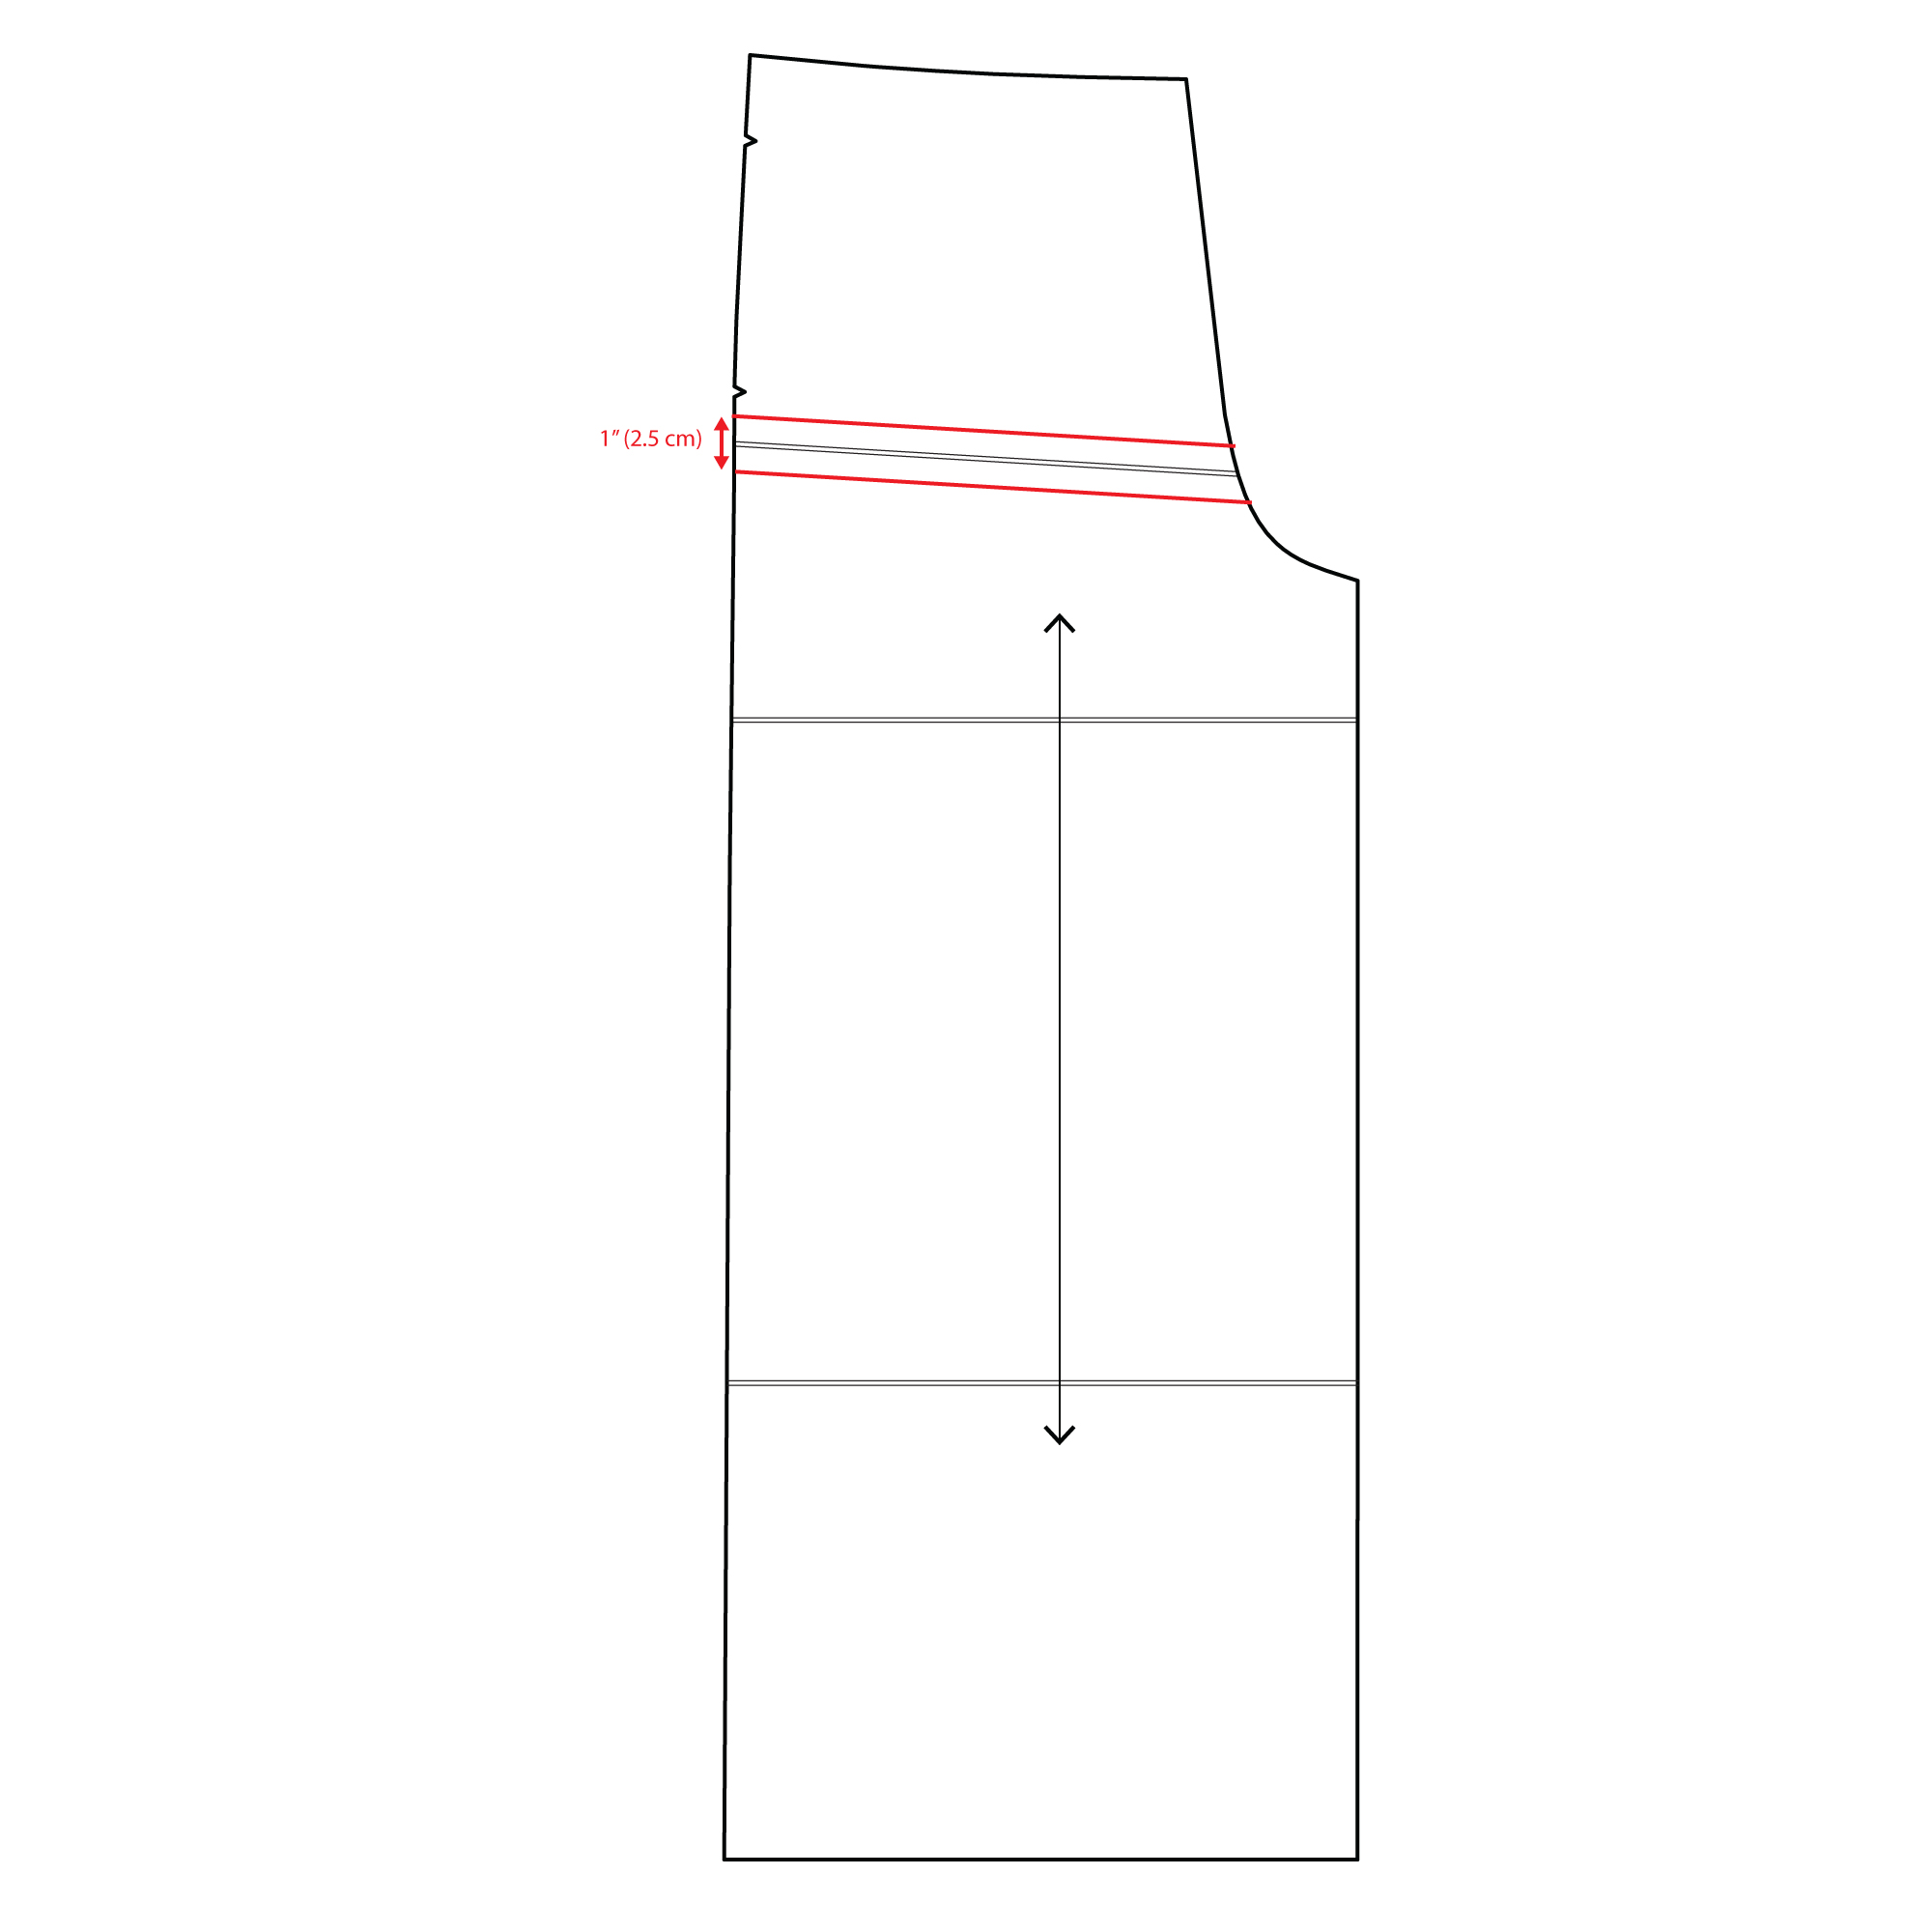
Measure the two sides of the fold and that will give you the amount by which you need to shorten the rise. For example, if your fold is 1/2″ (12 mm) on both sides, the amount you’ll reduce the rise by is 1″ (2.5 cm).
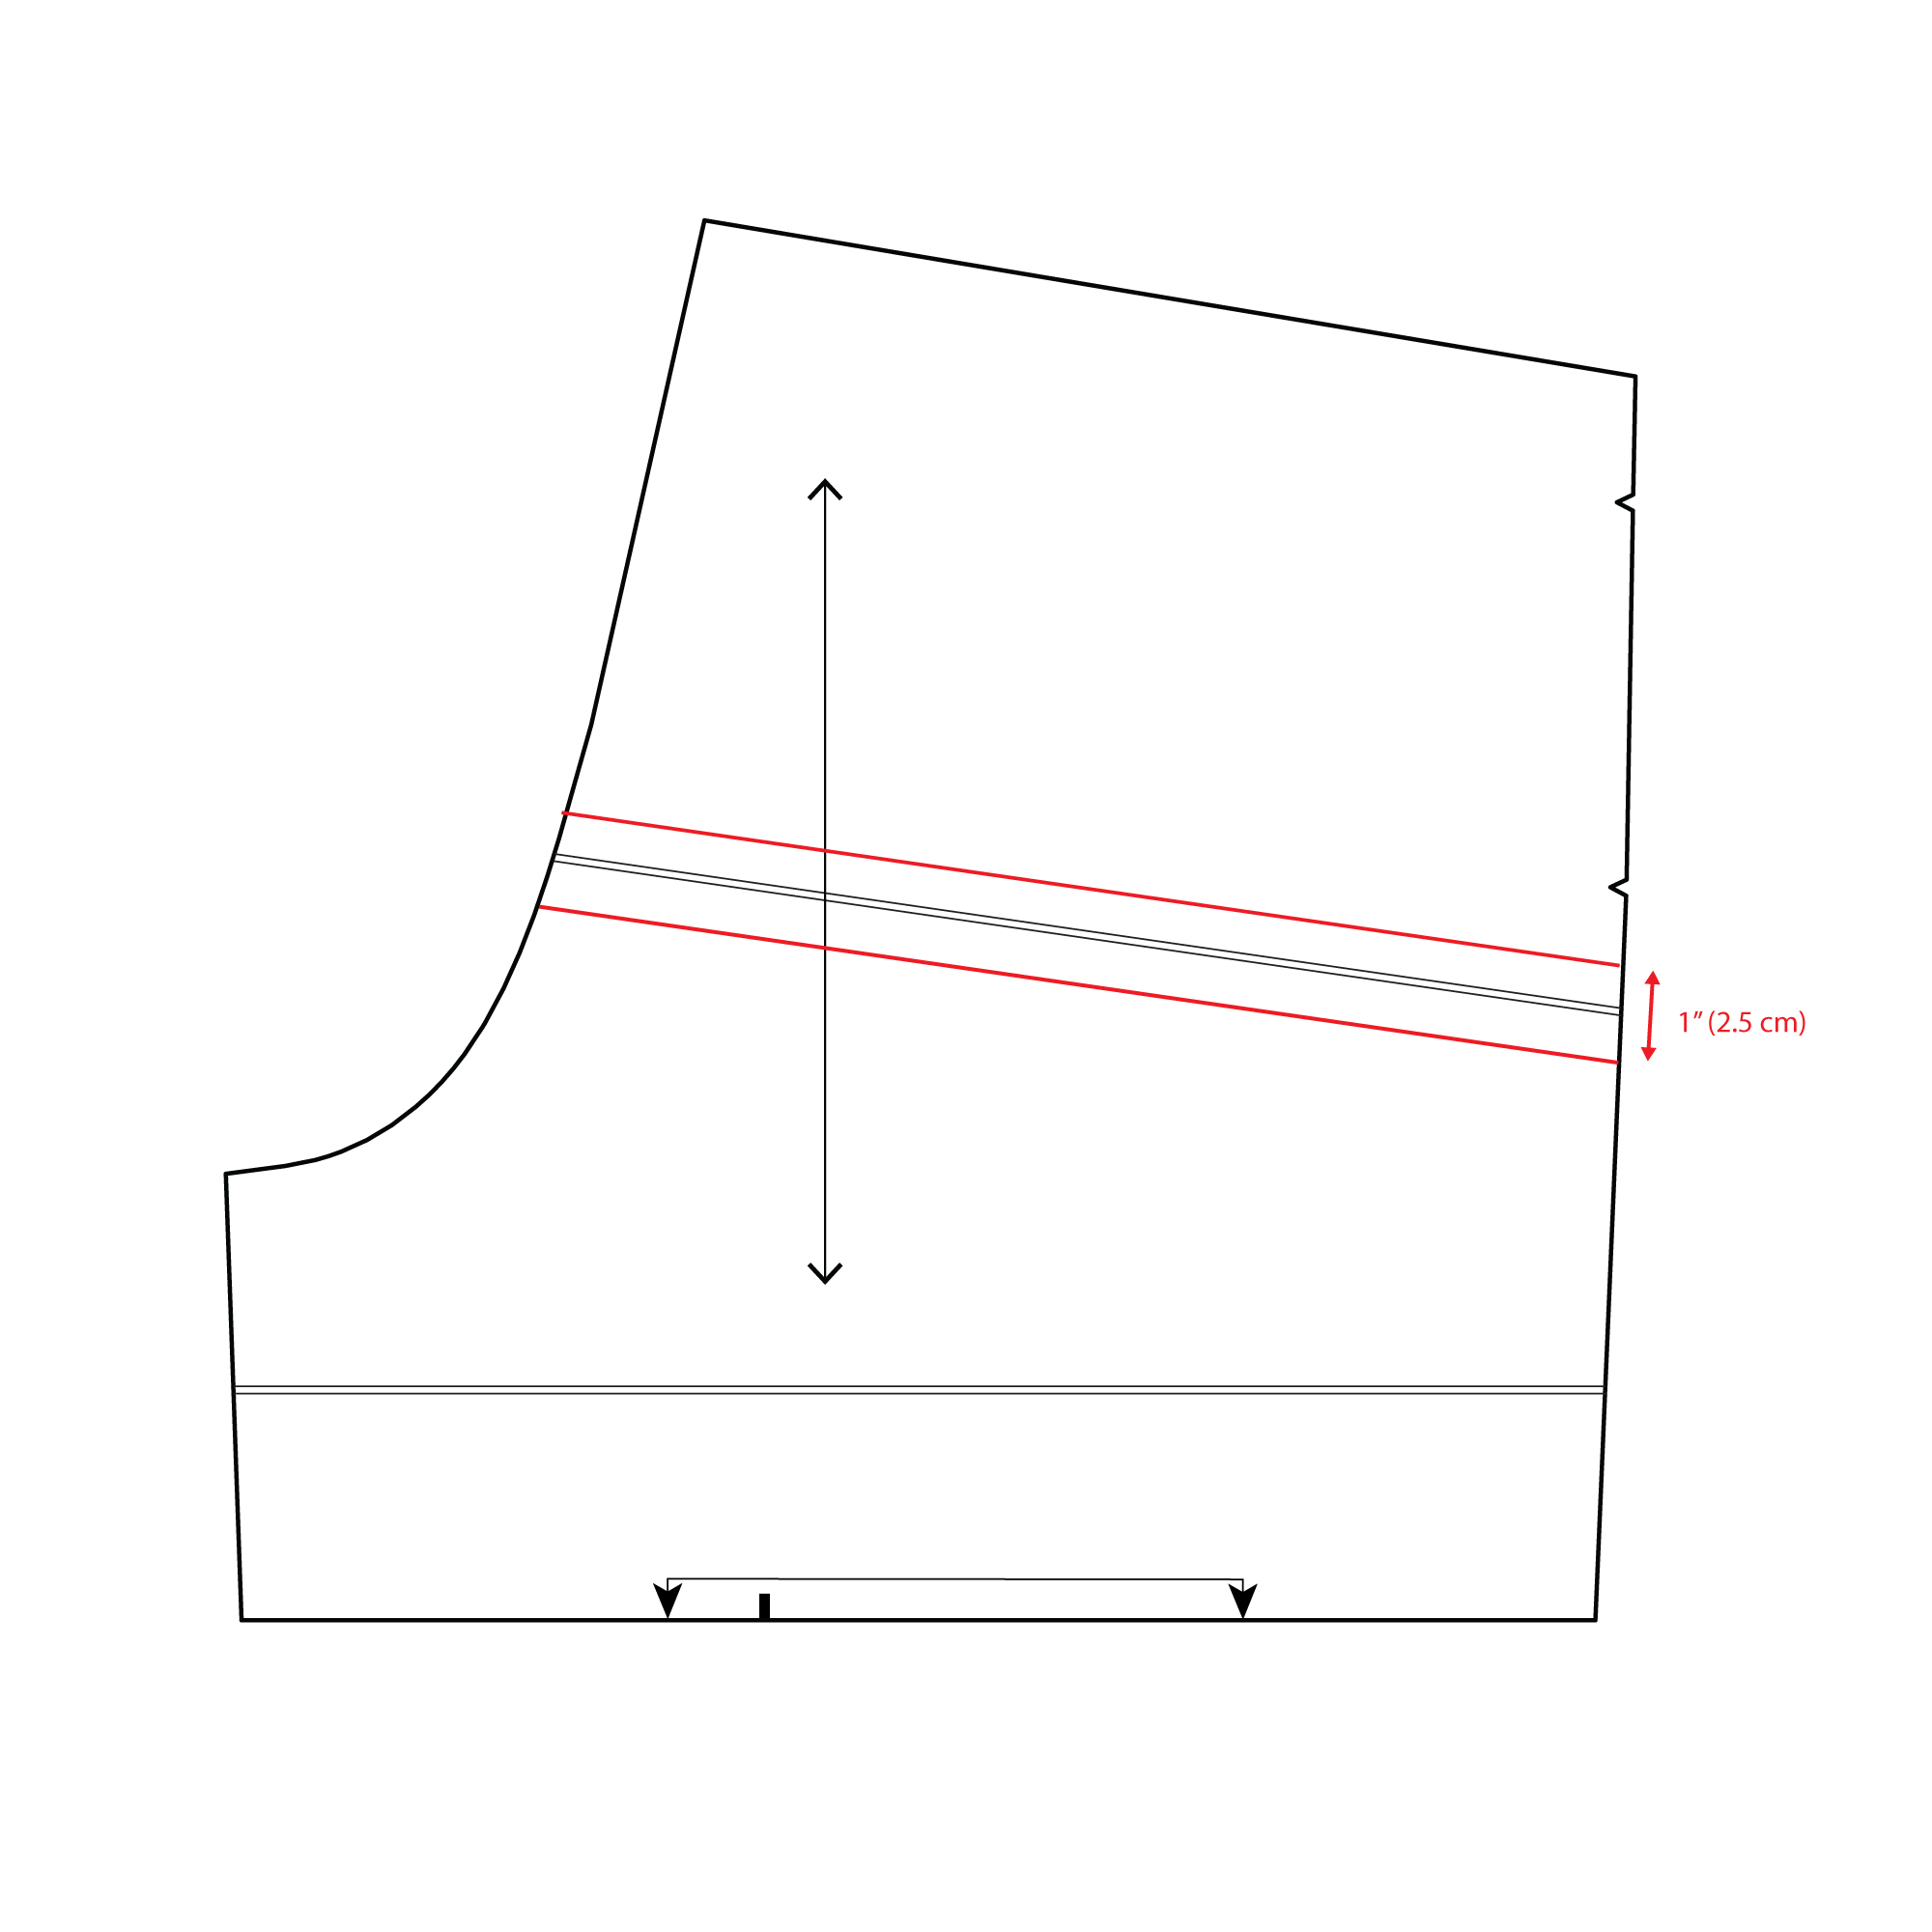
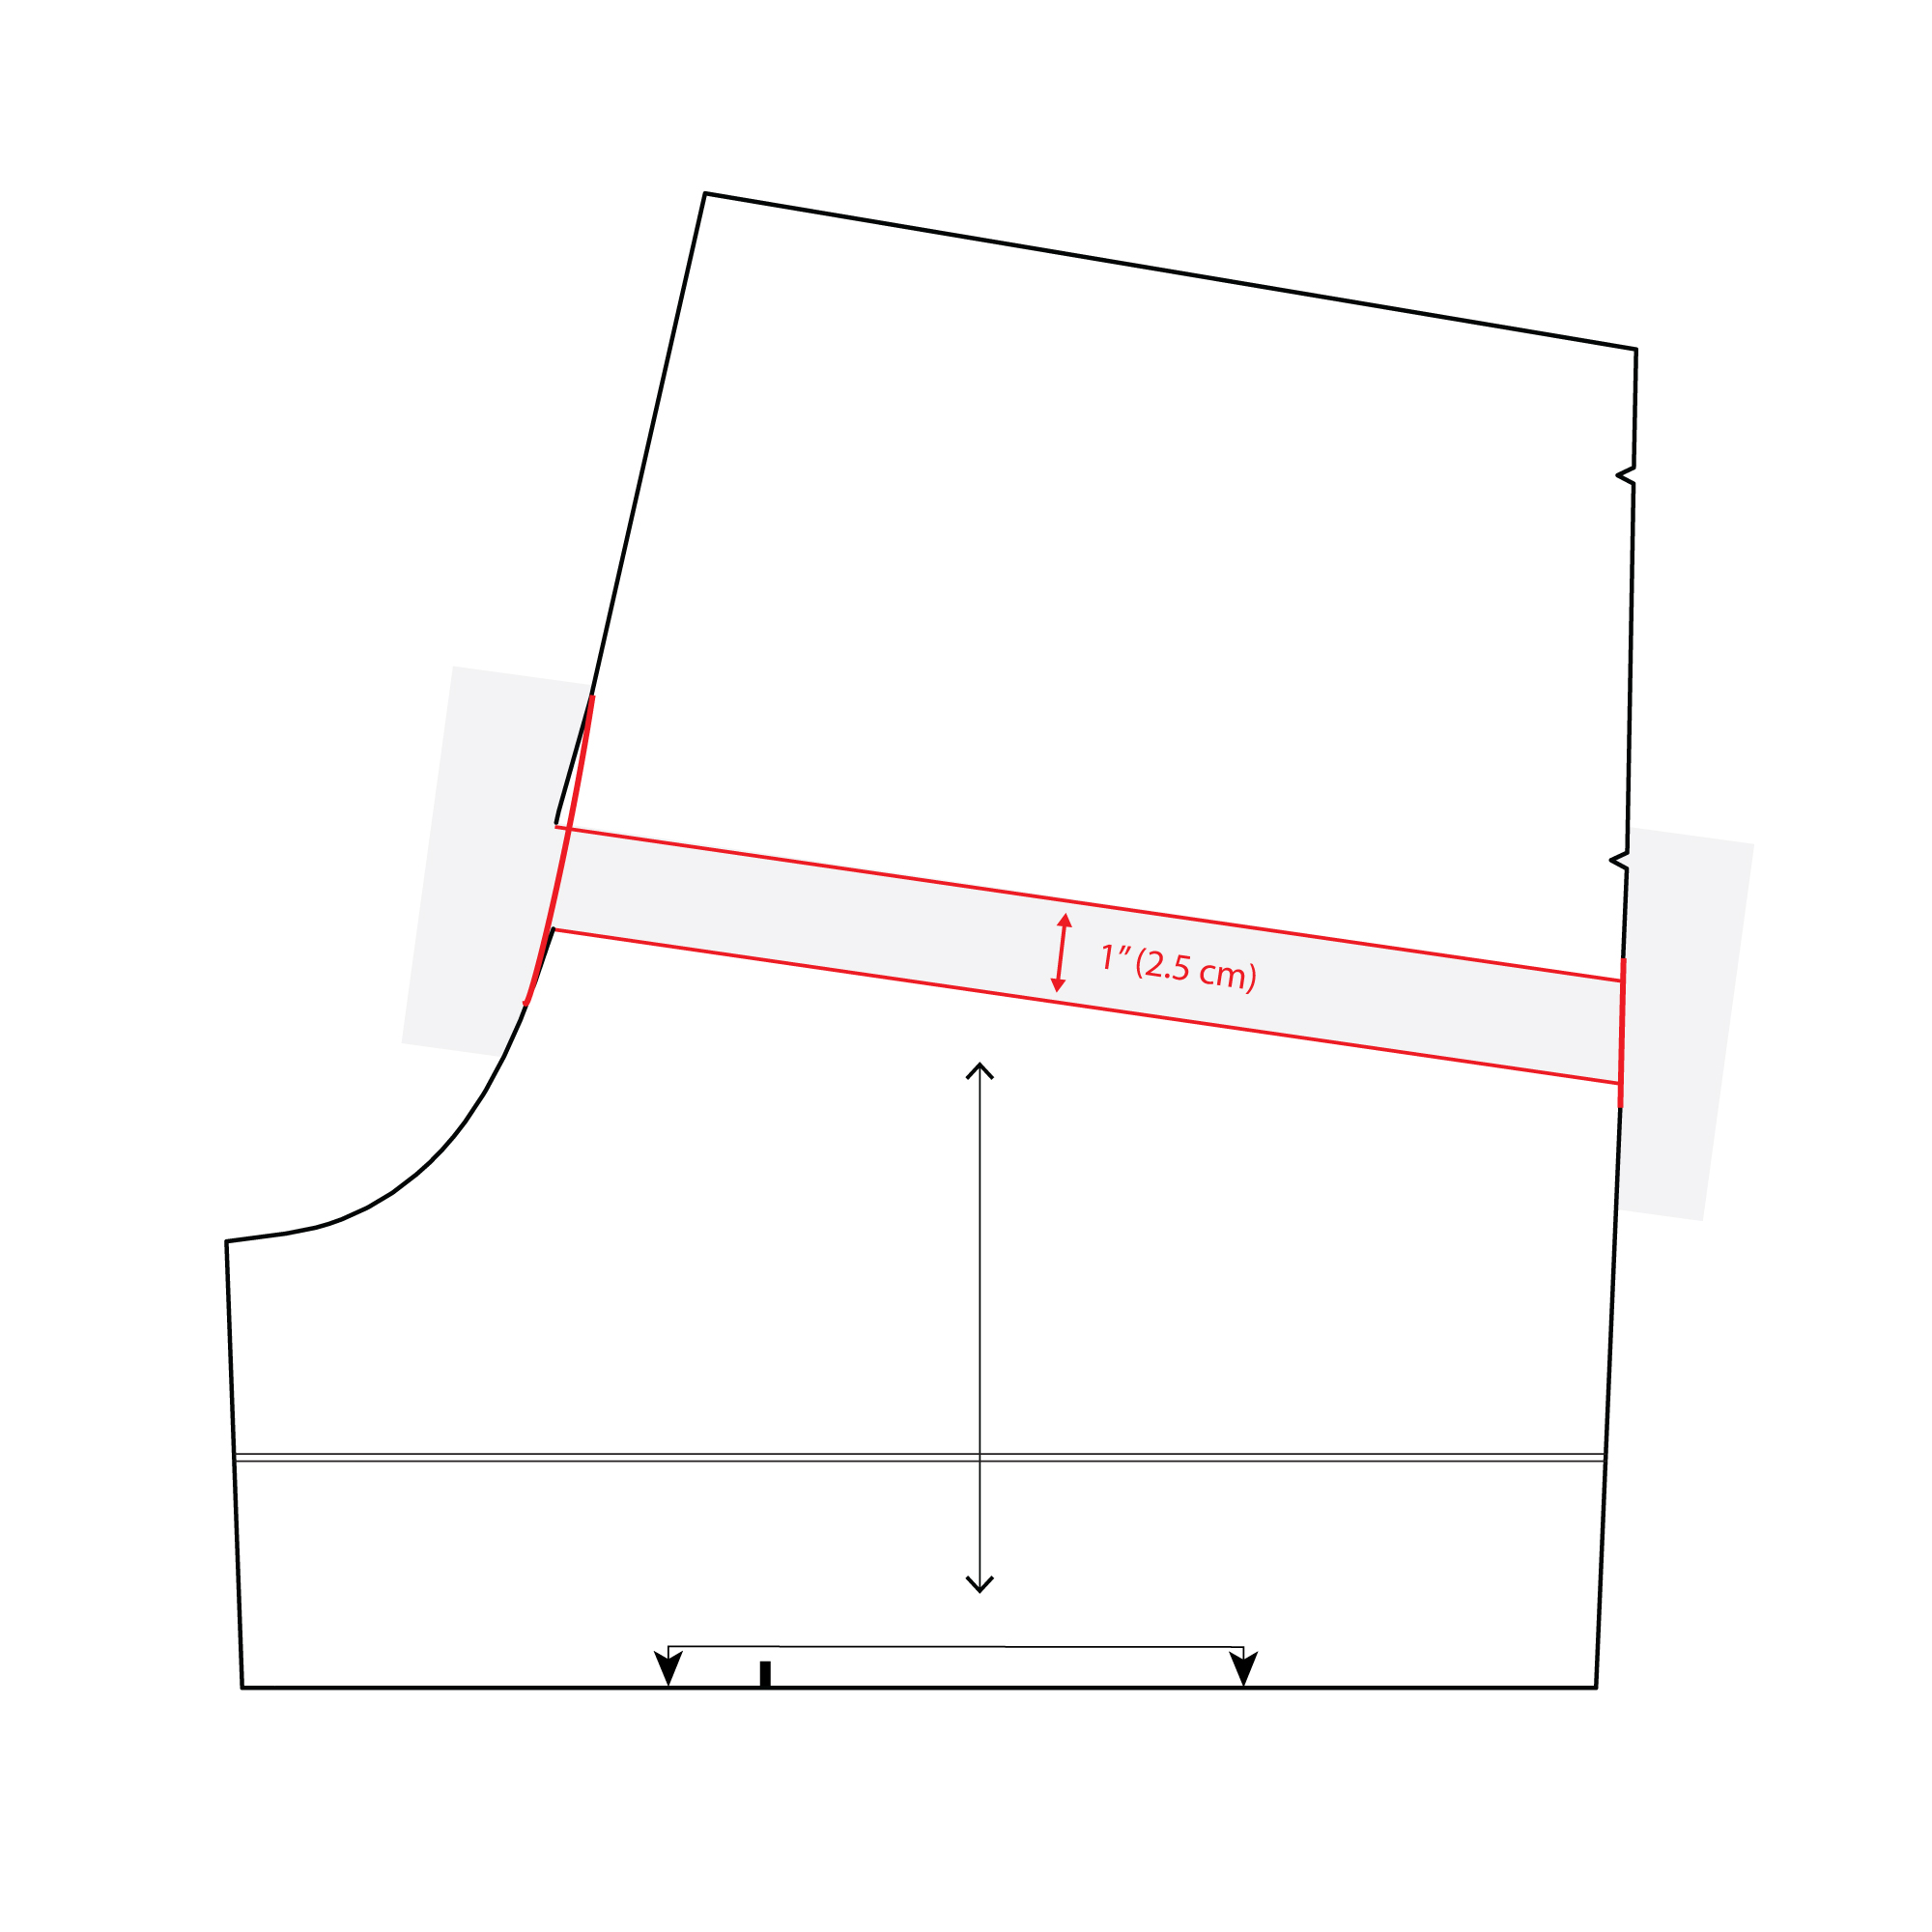
Now let’s take our front leg piece. You’ll notice that there are multiple lengthen/shorten lines on this piece. We want to focus on the top one, since this is the one that impacts the rise (the rest allow you to adjust the length of the legs).
Continuing with our example above, we’re going to draw two lines parallel to the lengthen/shorten lines, 1/2″ (12 mm) up and down from those lines.
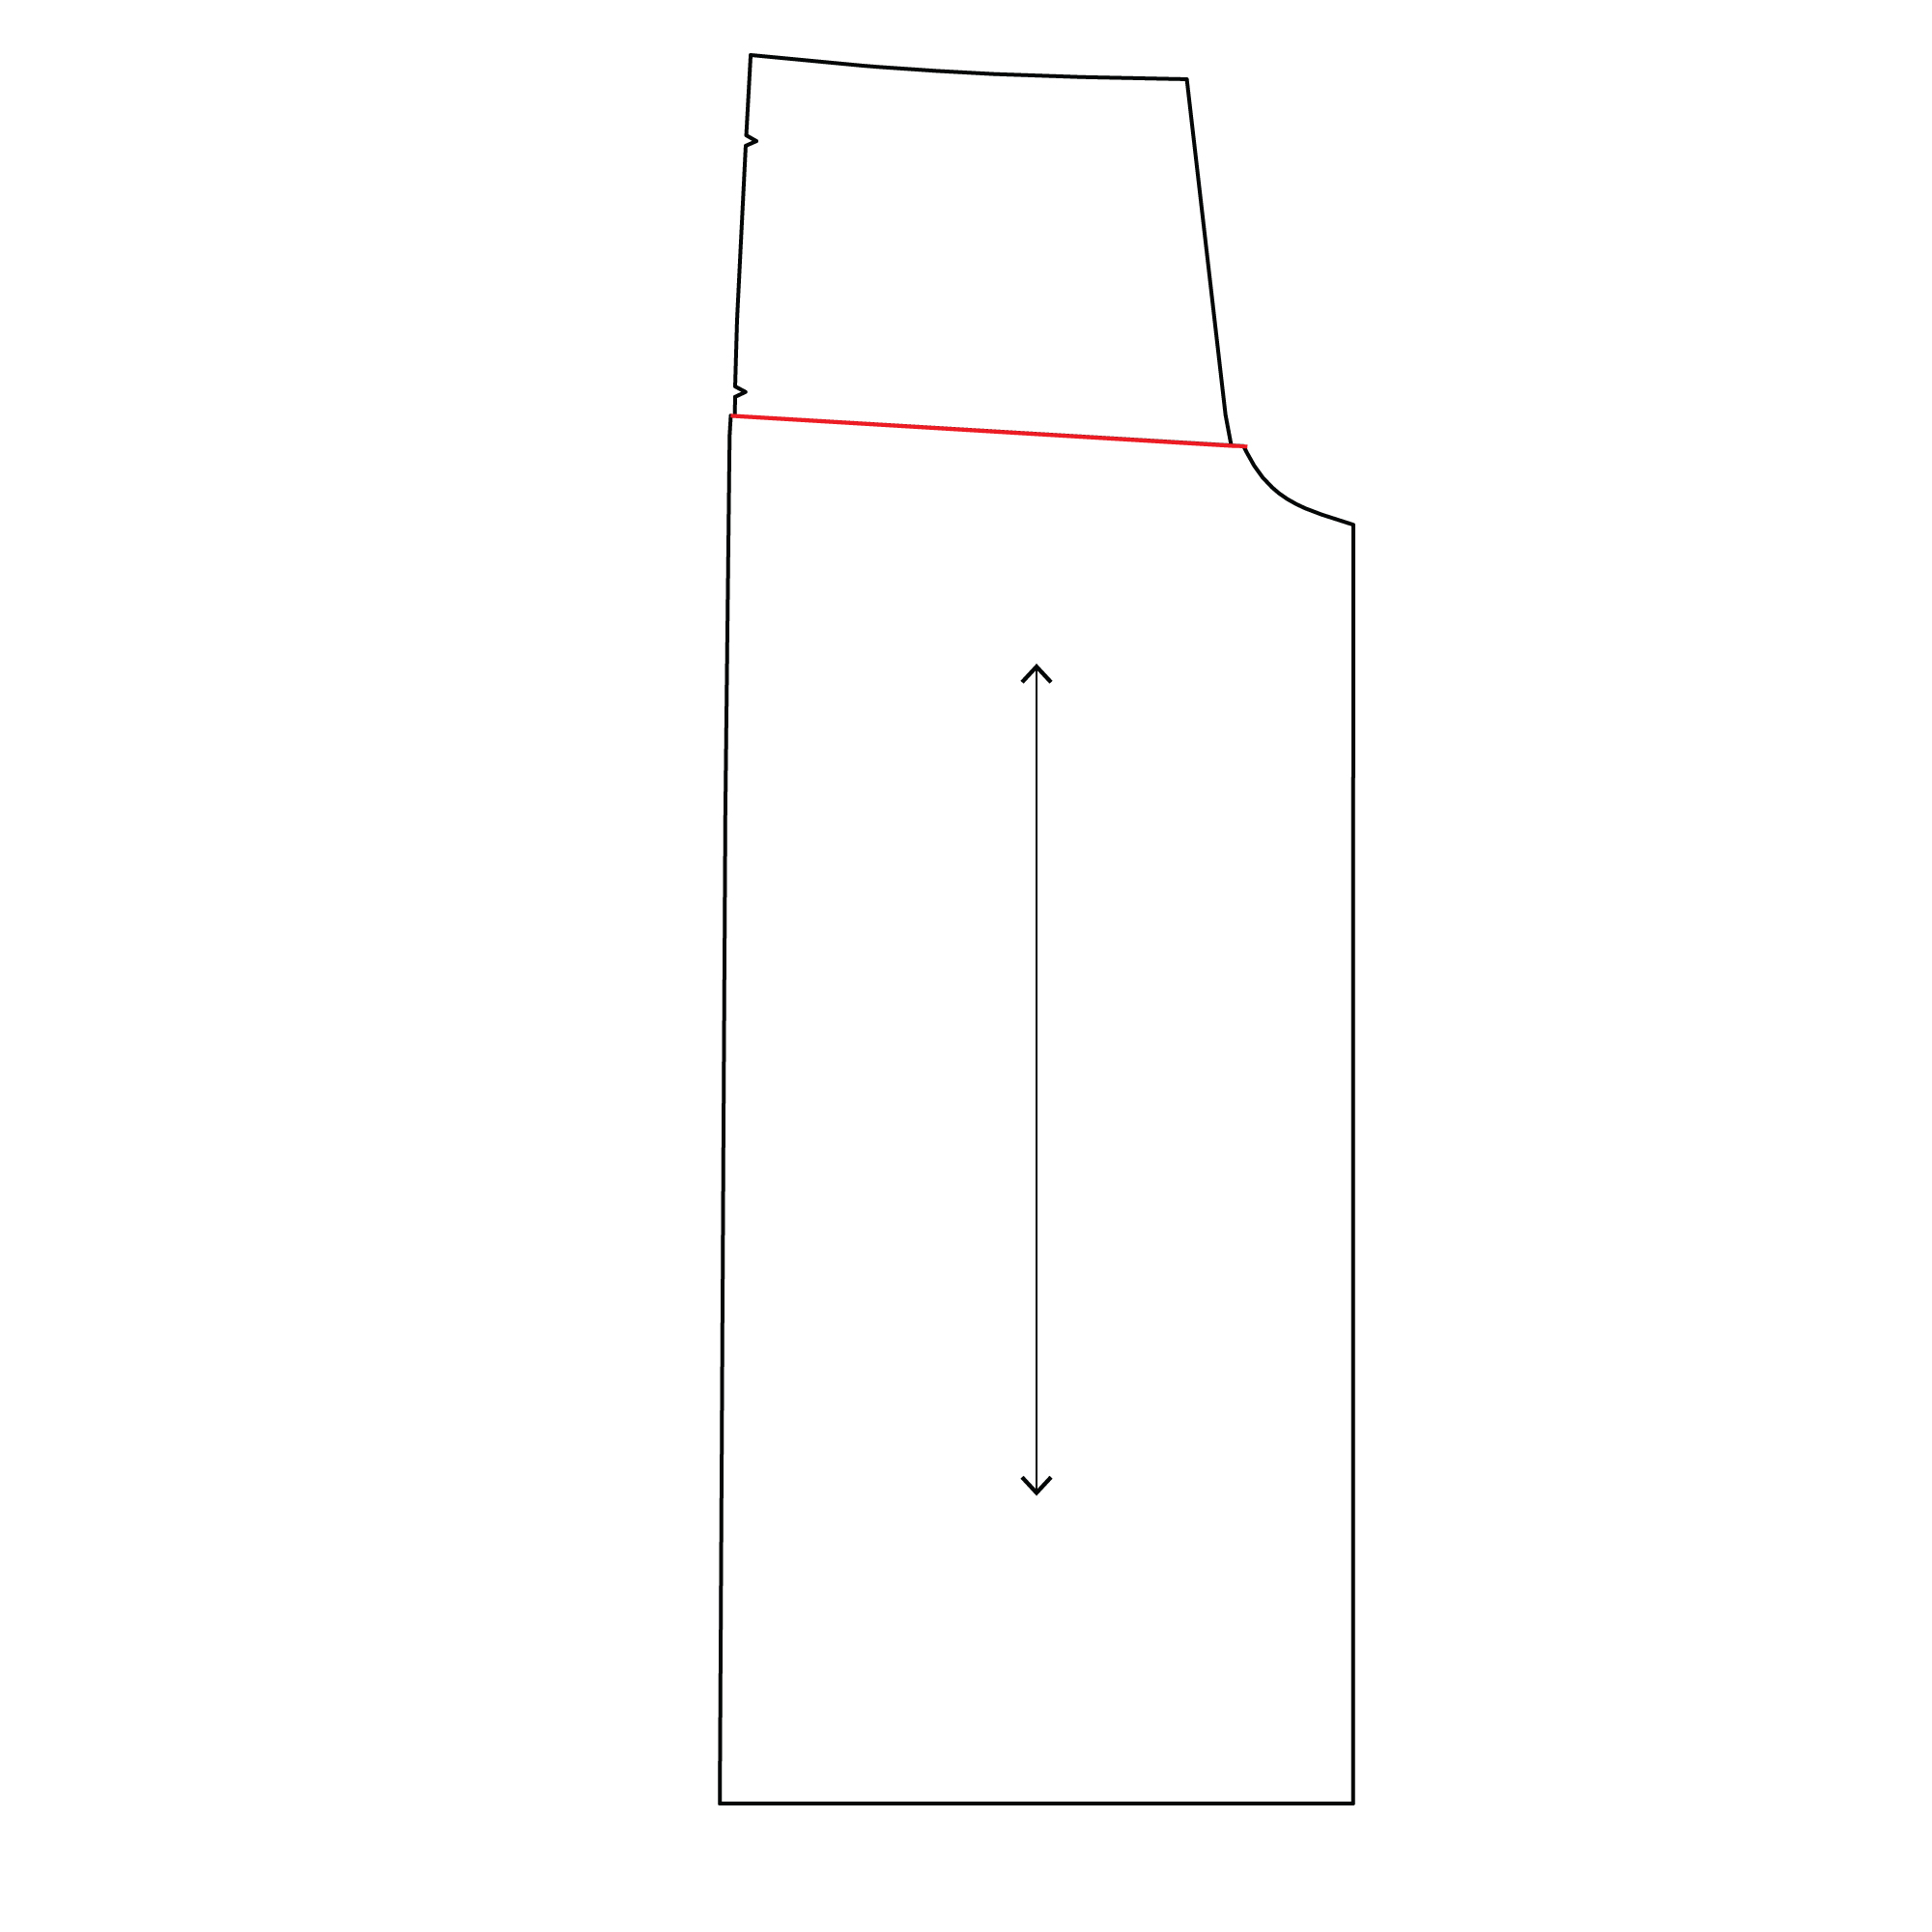
Fold the bottom line you drew up to meet the top line you drew, and tape in place. We’ve now removed 1″ (2.5 cm) of length from the rise.
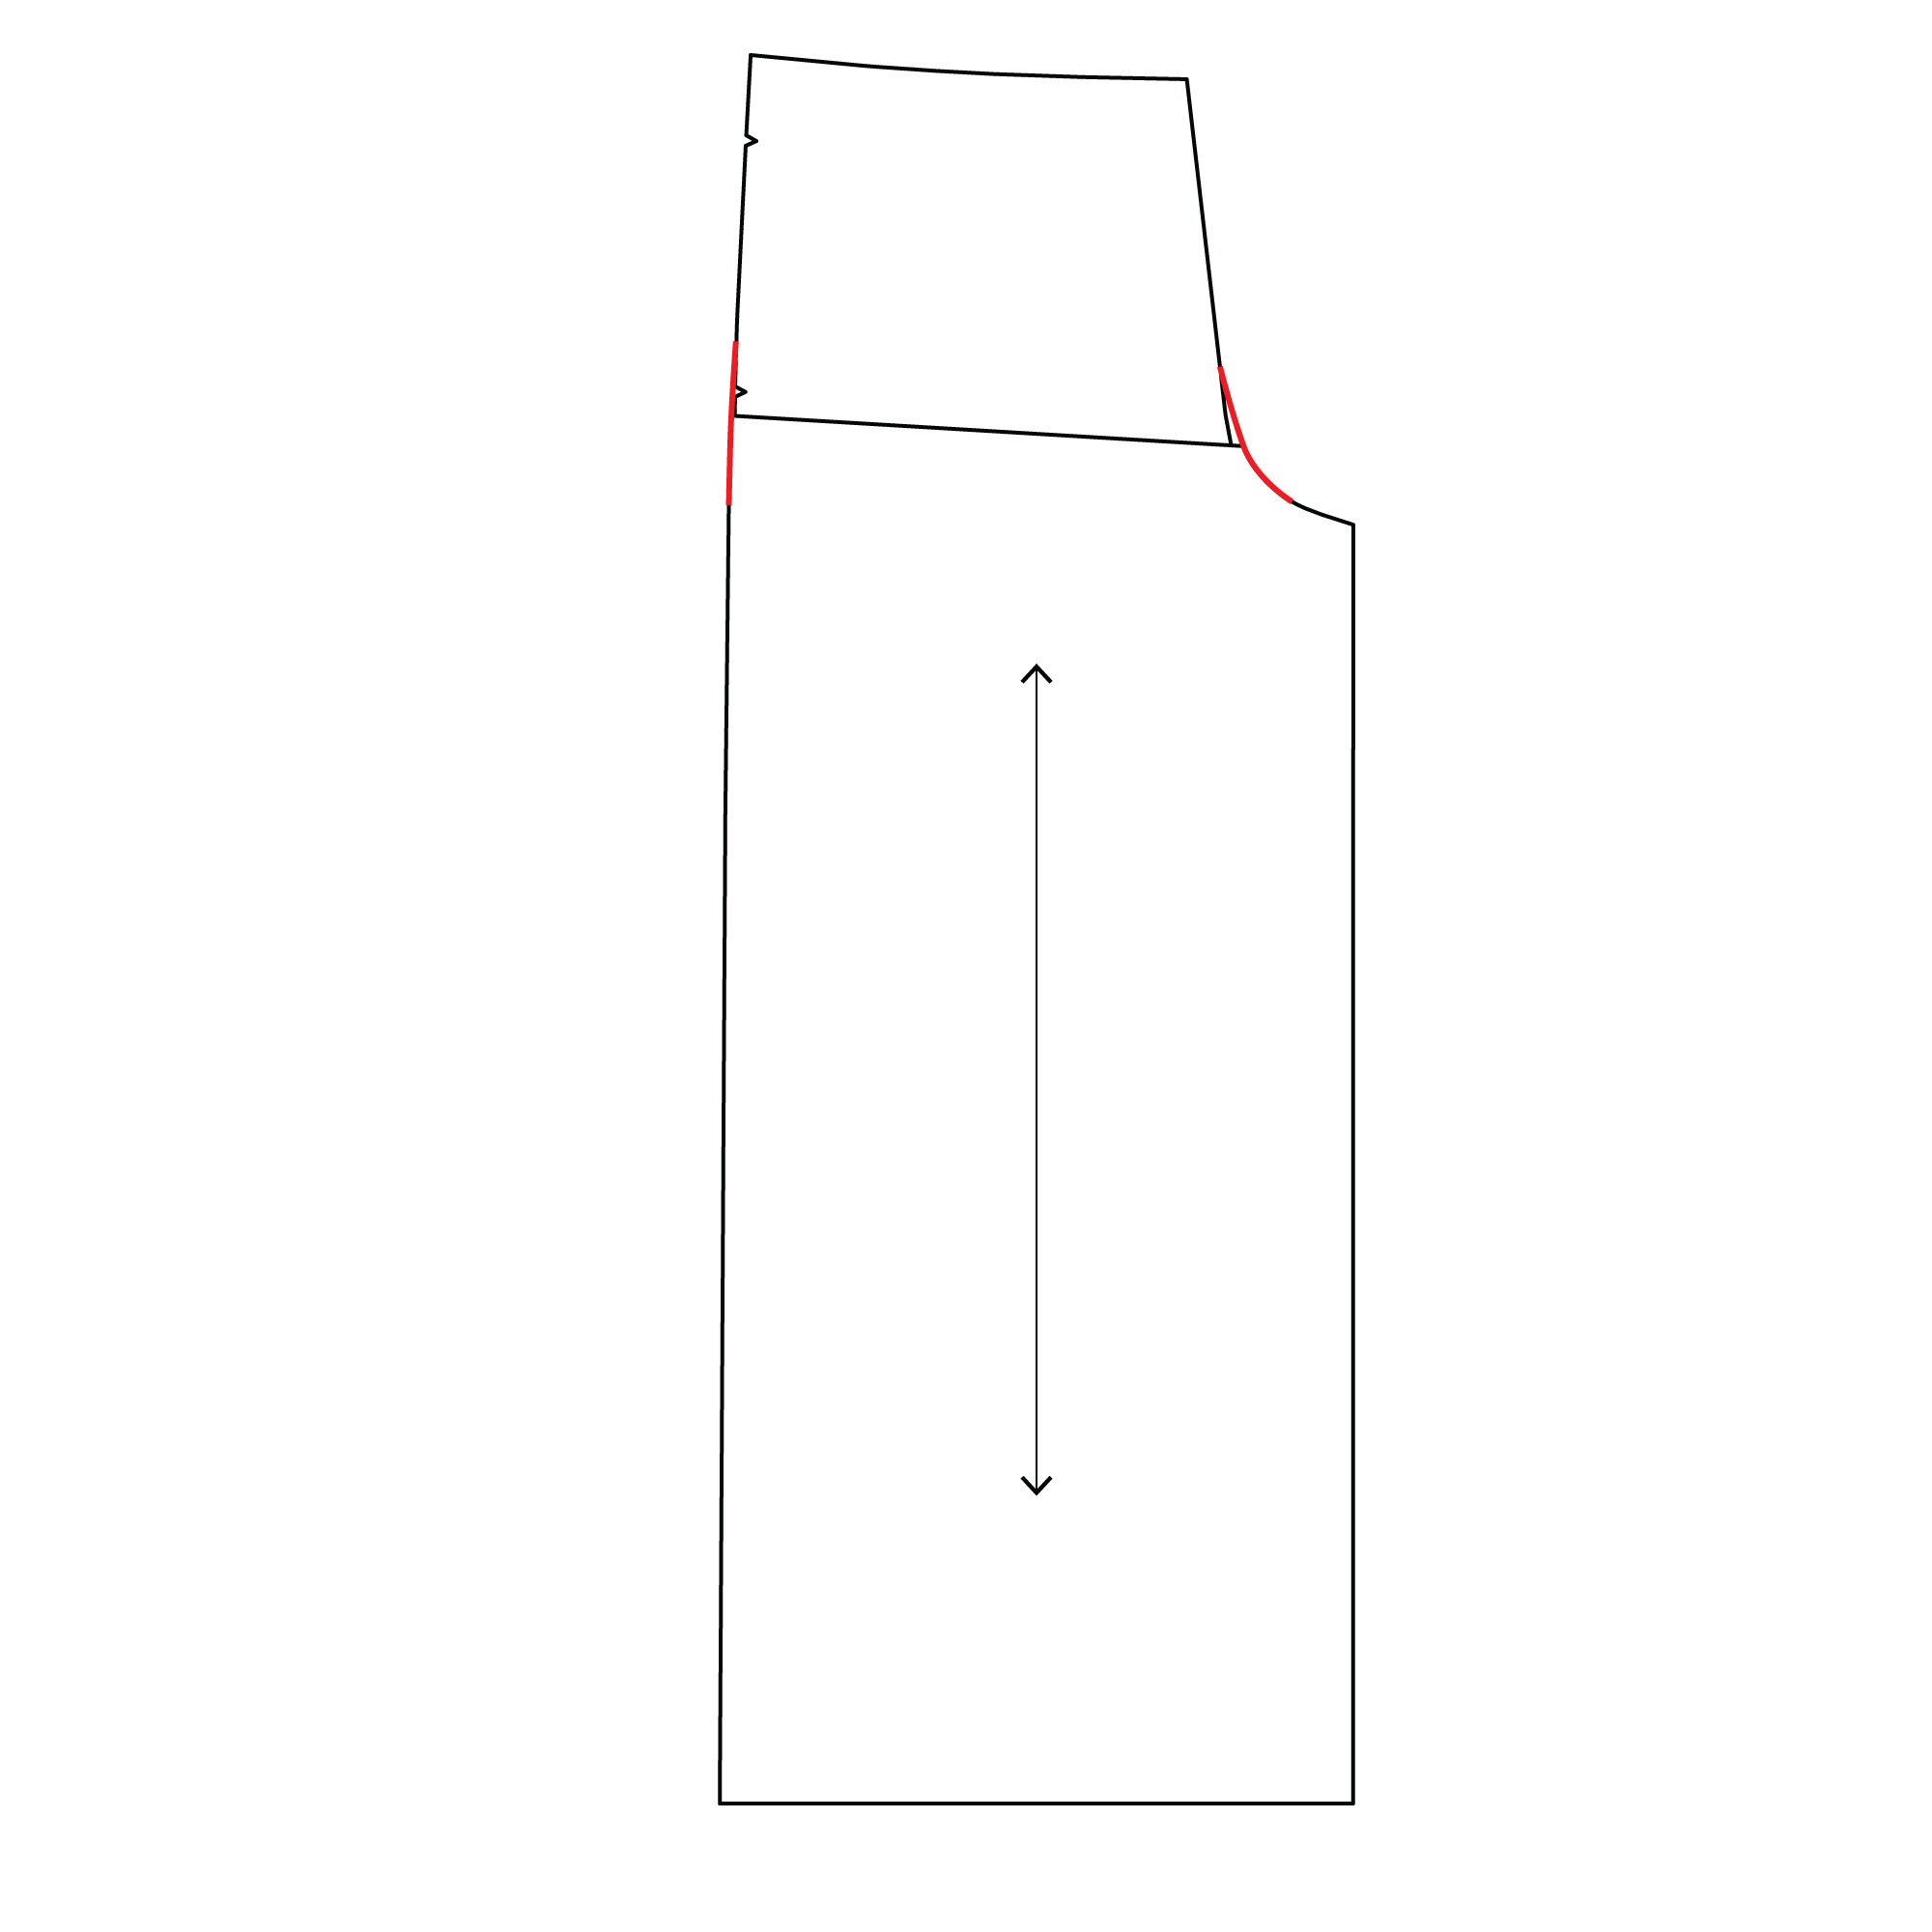
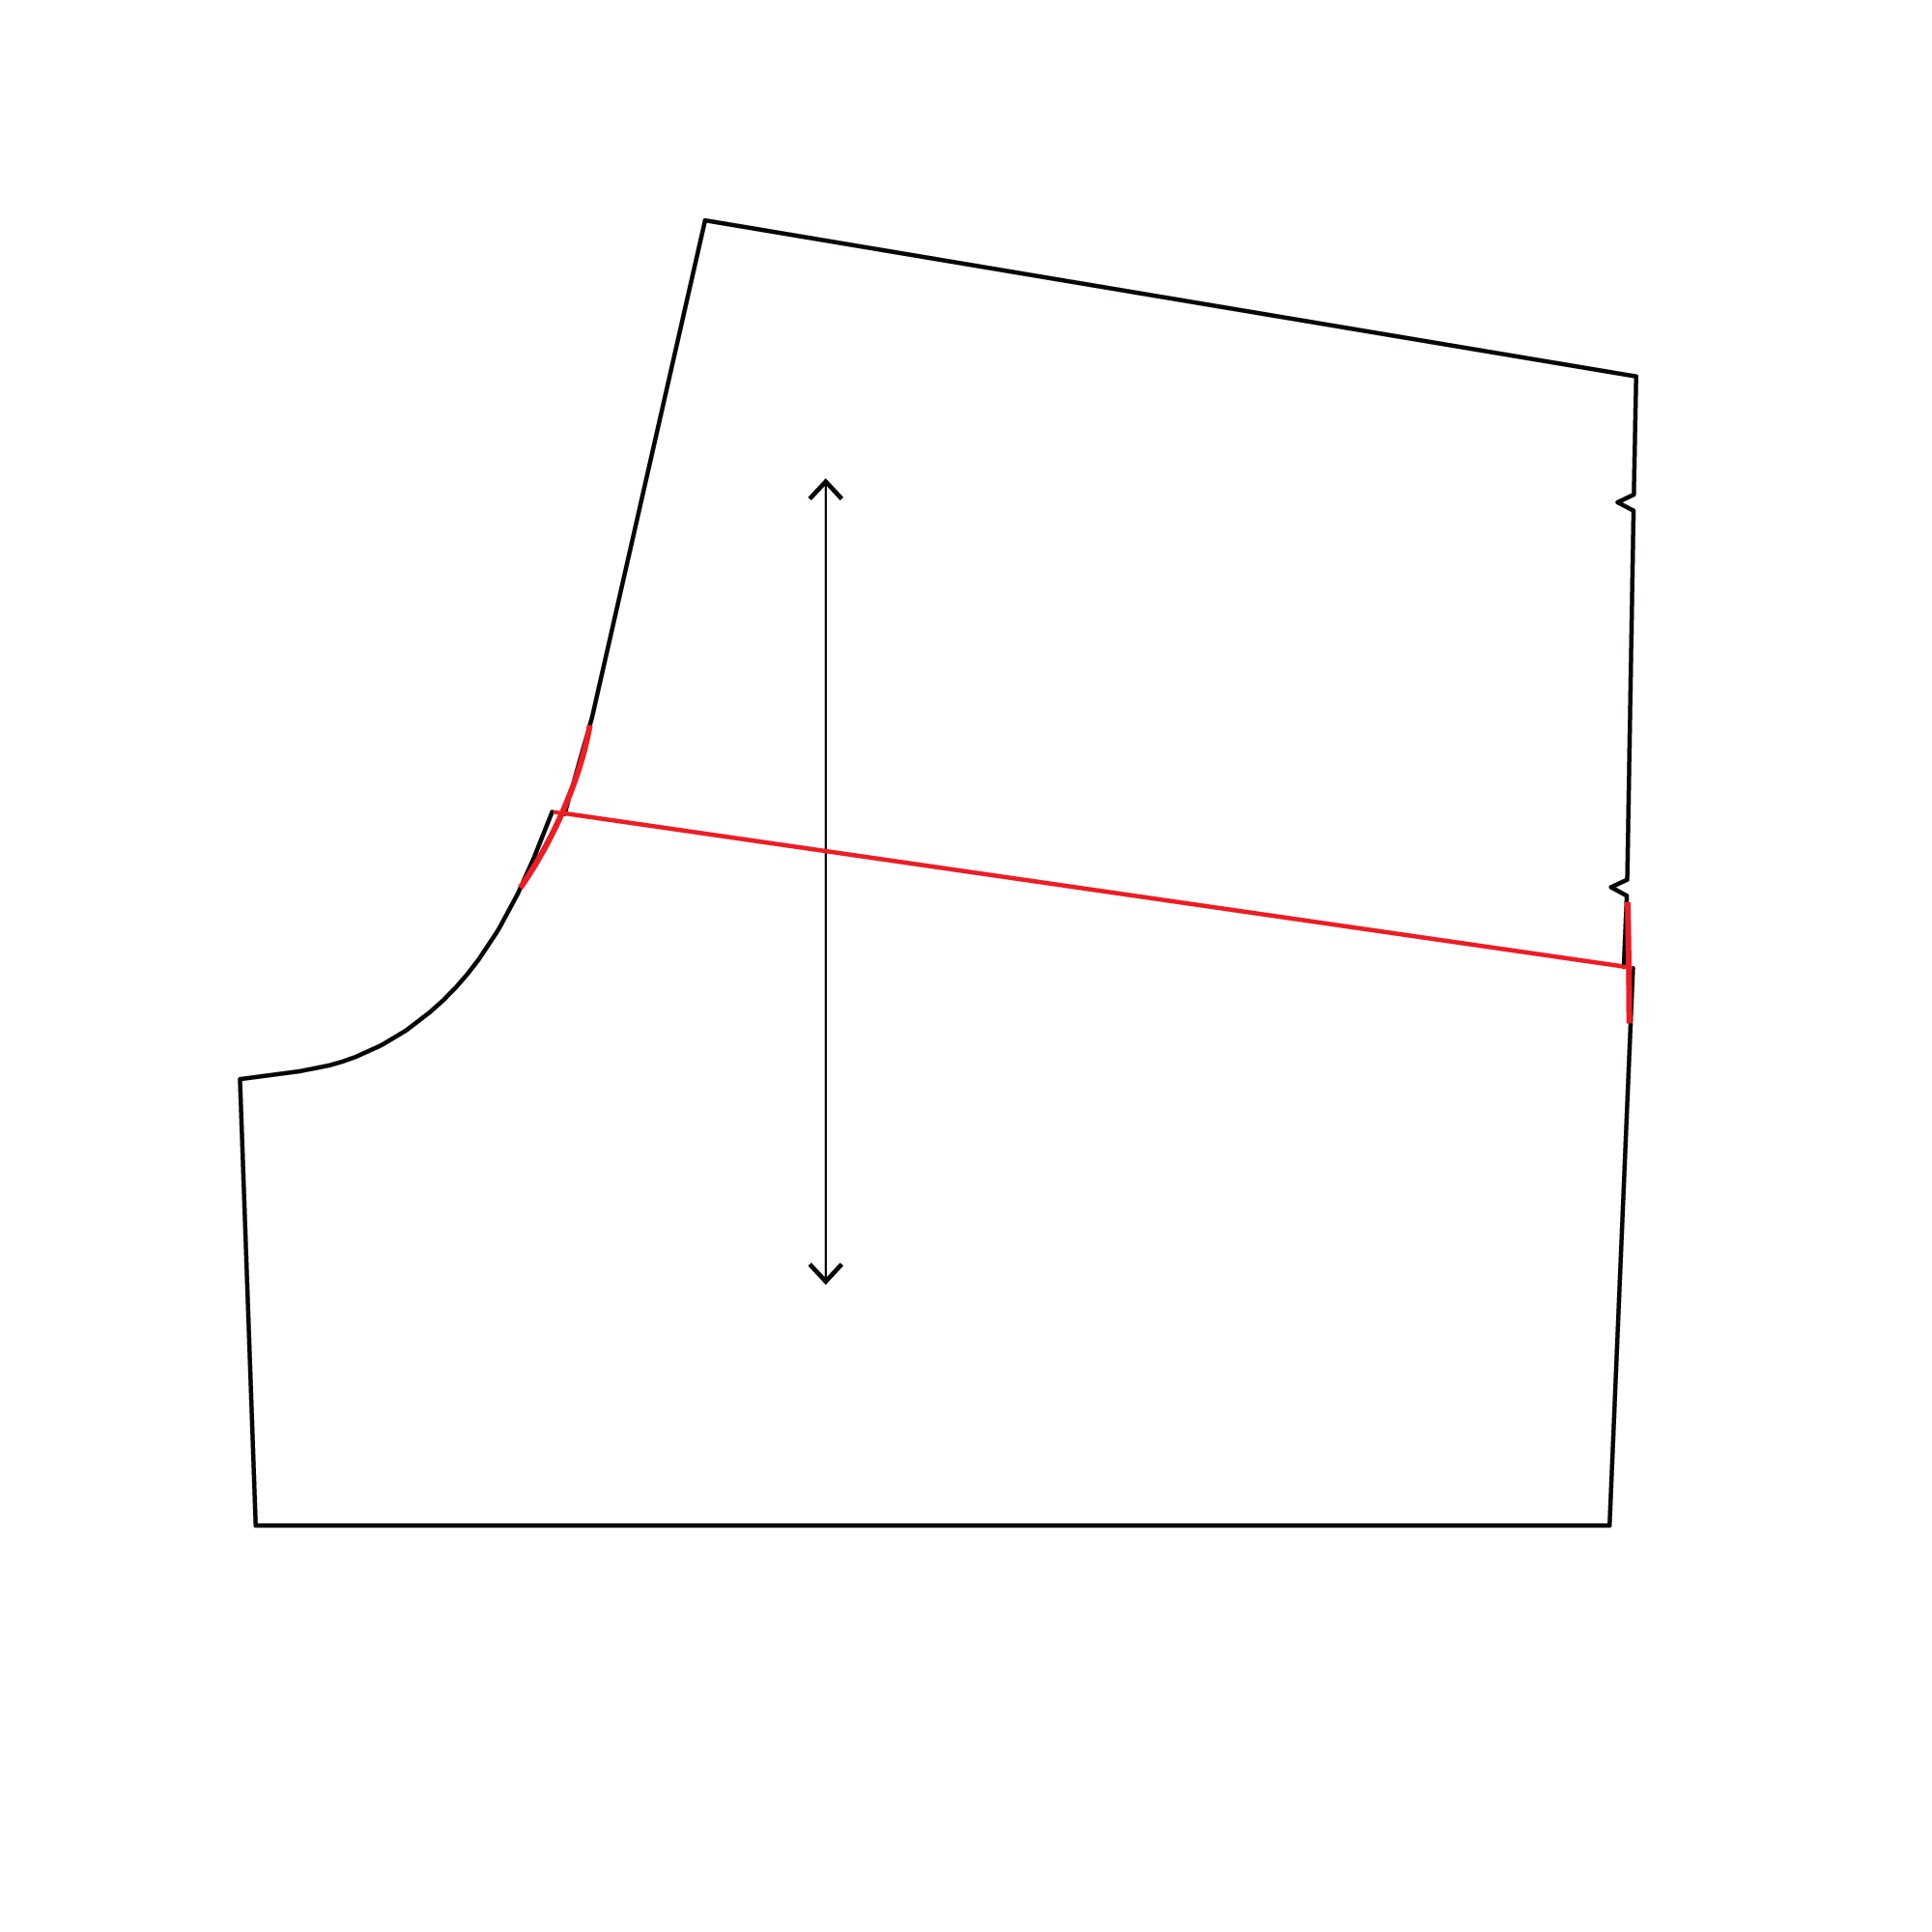
You’ll notice that the crotch curve and side seam need smoothing out now. Using a French curve, smooth out both edges of your pattern piece.
Our front piece is now done, and we can move onto the back piece!
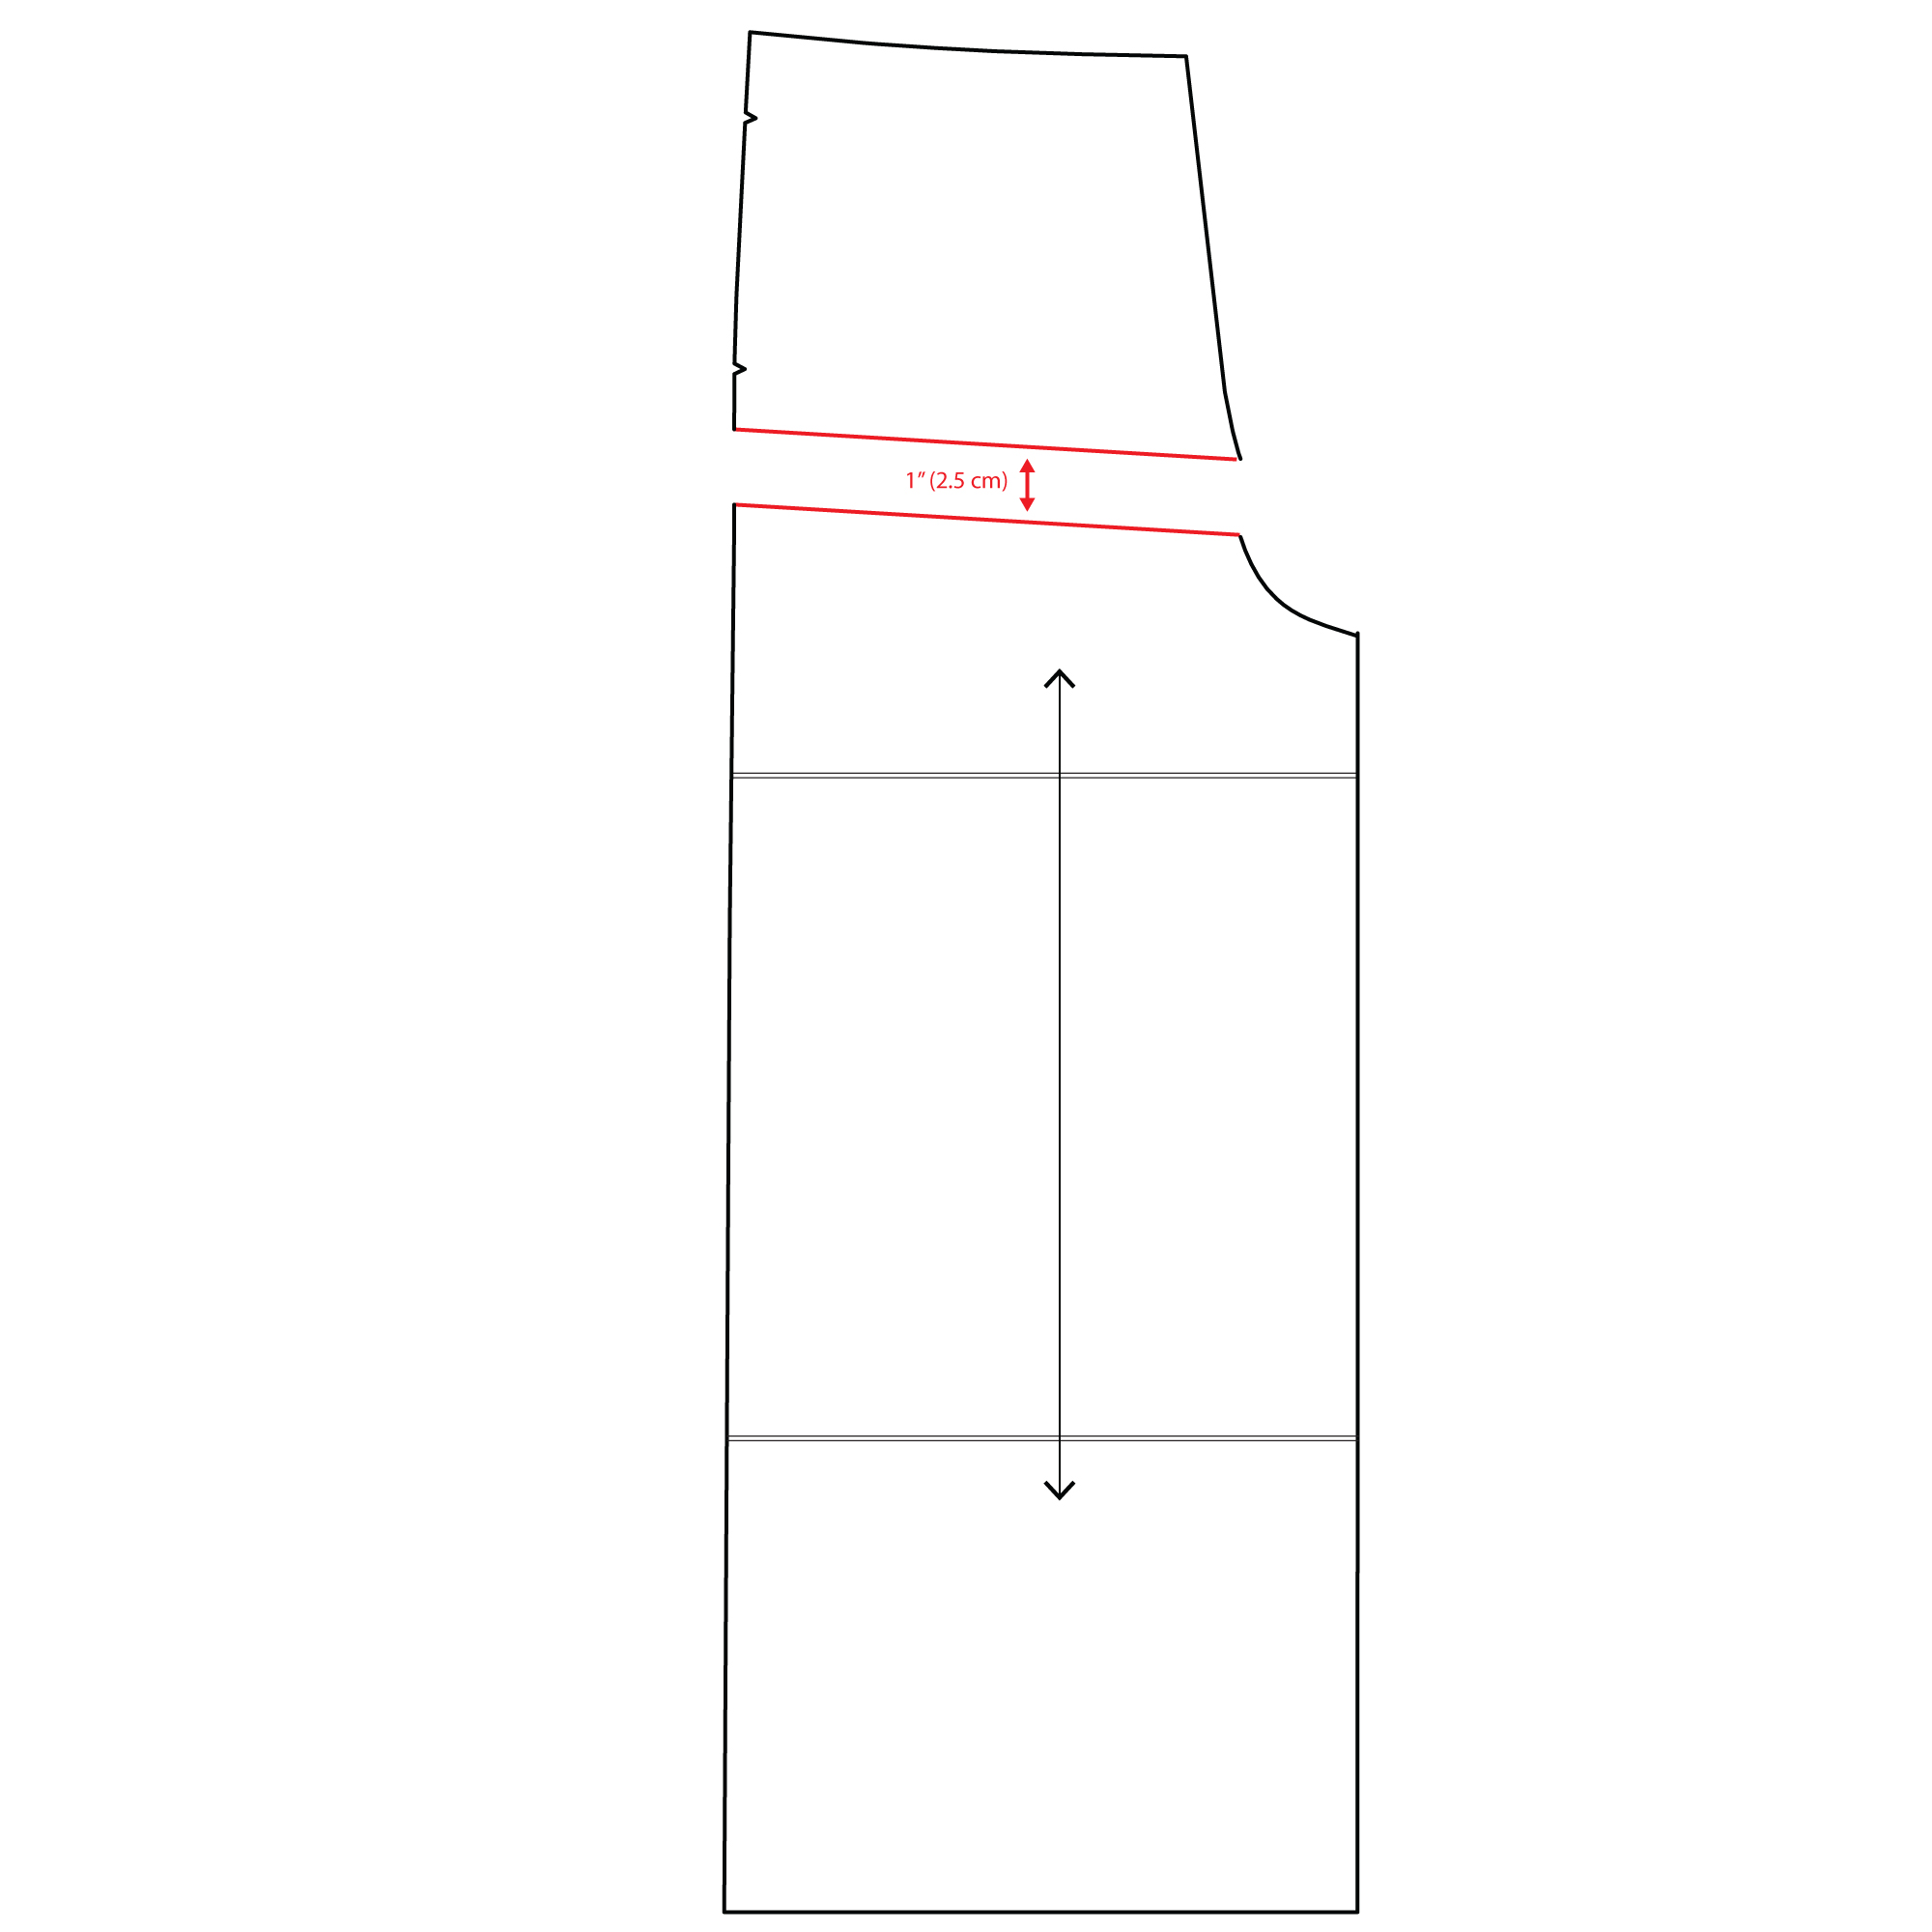
We’re going to do the same thing here: draw two parallel lines to the top lengthen/shorten lines, 1/2″ (12 mm) away from those lines. I prefer to do this adjustment before I’ve attached the bottom portion of the leg, to make the pattern piece easier to manage.
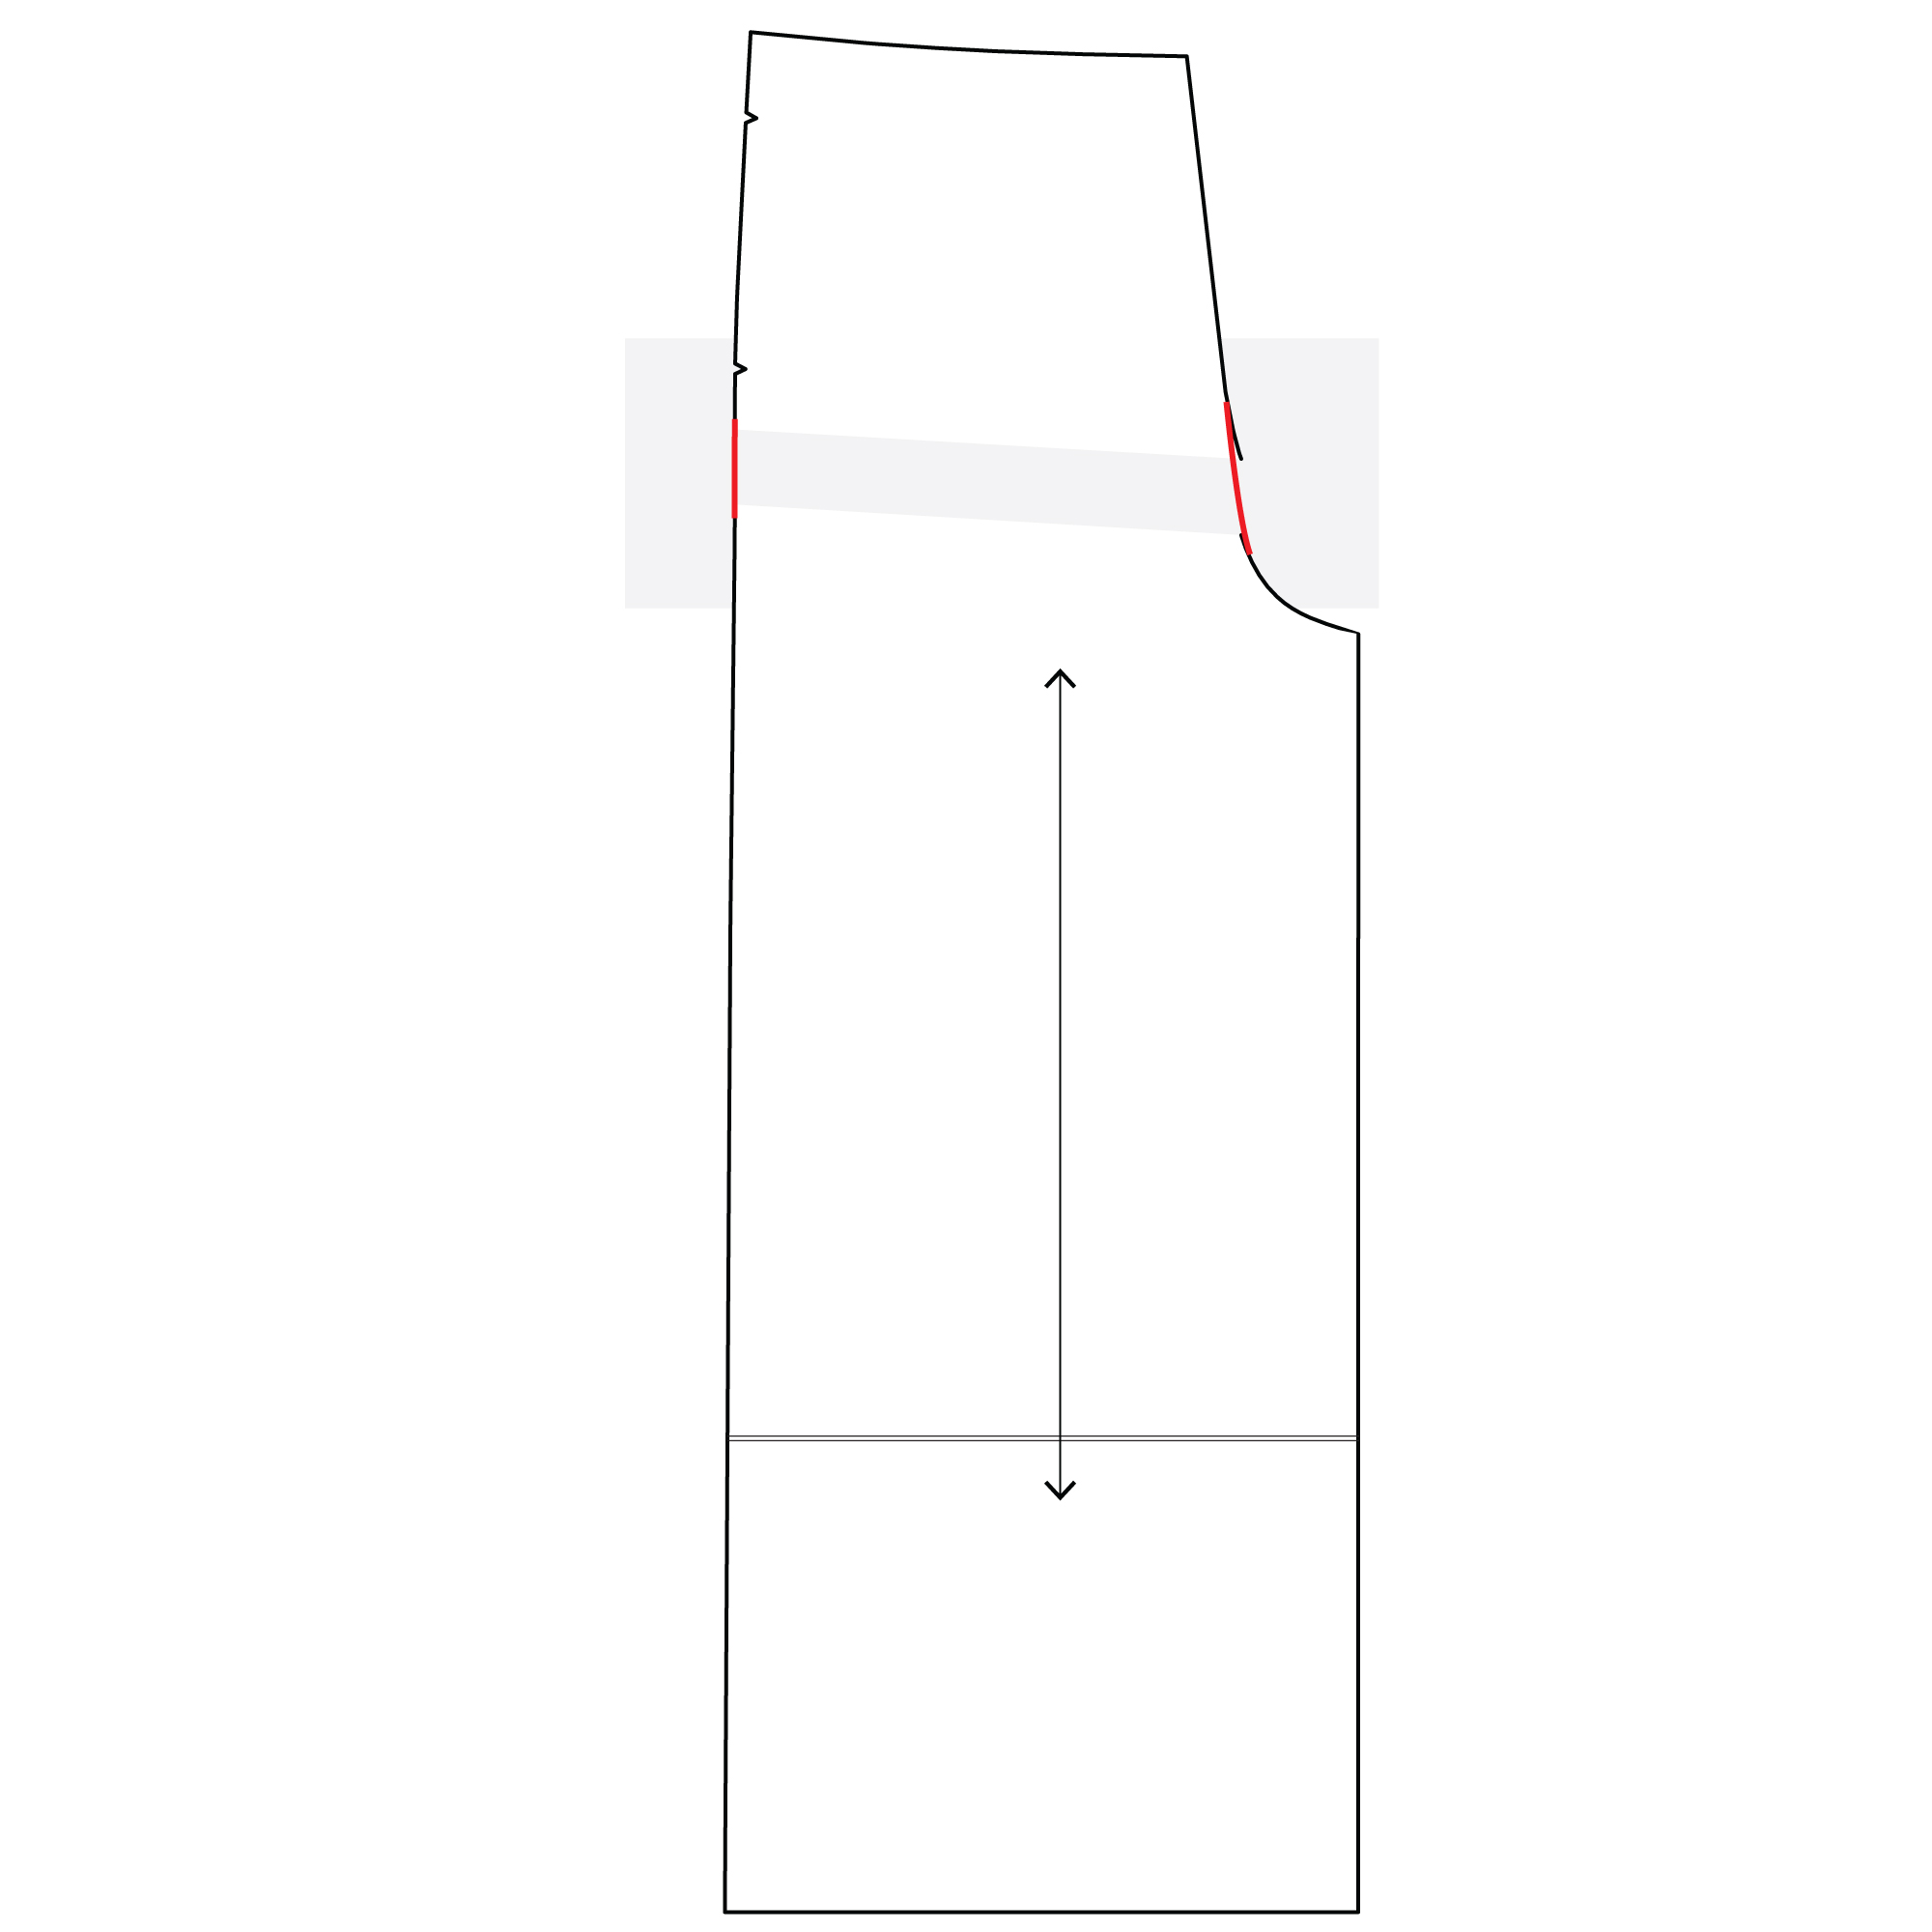
Now we can fold the bottom line up to meet the top line, and smooth out the crotch curve and side seam.
And there is our adjusted back pelvis piece. If you’re making View A (mid-calf) or View B (full length), remember to attach the lower leg piece to the back pelvis piece before cutting into your fabric.
When you make an adjustment like this, it’s always a good idea to make a second muslin to check the new fit. For a quick-and-dirty version of the Calder, sew up View C (the shorts) and leave out the pockets. Pin your back waistband elastic with safety pins rather than topstitching so that you can reuse the elastic on your final pair of Calders.
How to Lengthen the Rise of the Calder Pants
If you’re taller than 5′ 6″, or have a longer torso than the Calder is drafted for, you may want to lengthen the rise. If so, you’ll first want to determine how much to lengthen it by. The best way to do this is to put on your muslin at your natural waist, and gradually move it lower down you body until the crotch is at a comfortable spot for you. Measure the distance between your natural waist and where the waistband is currently, and that is the amount by which you’ll want to lengthen the rise.
We’ll start by taking our front leg piece. Let’s say that we want to add 1″ (2.5 cm) to the rise. Carefully cut the front leg piece at the top lengthen/shorten lines.
Tape the top of the front leg piece to your work surface if you can. Slide the bottom portion of the front leg piece straight down to create a gap that measures 1″ (2.5 cm) in height. Tape the bottom leg piece down to your work surface.
Now we’re going to slide a piece of paper or tissue paper under the two pieces to fill in the gap. Tape the leg pieces to that paper, and then draw your side seam and crotch curve in with a French curve.
And now we have a new front leg piece! We’re going to do the same with our back pelvis piece.
Cut the back pelvis piece into two pieces at the top lengthen/shorten lines. Slide them apart by 1″ and tape to a piece of paper or tissue paper, and then draw your side seam and crotch curve back in.
Your front and back leg pieces are now adjusted and ready to go. If you’re making View A (mid-calf) or View B (full length), remember to attach the lower leg piece to the back pelvis piece before cutting into your fabric.
When you make an adjustment like this, it’s always a good idea to make a second muslin to check the new fit. For a quick-and-dirty version of the Calder, sew up View C (the shorts) and leave out the pockets. Pin your back waistband elastic with safety pins rather than topstitching so that you can reuse the elastic on your final pair of Calders.
Sew a Calder Along With Us!
Making your first pair of Calder Pants & Shorts? You can find a complete step-by-step photo sewalong for the Calder here. We walk you through every step of the construction process, and show you two different ways to attach your pockets.
We hope this tutorial was helpful. Here’s to well-fitting pants that are comfortable to wear and show off our unique style!