Are you ready to sew your first pair of Calder Pants & Shorts? Today, we’re kicking off our sewalong by going through our prep checklist to make sure our pattern and fabric are ready for us to start. Thanks for joining us!
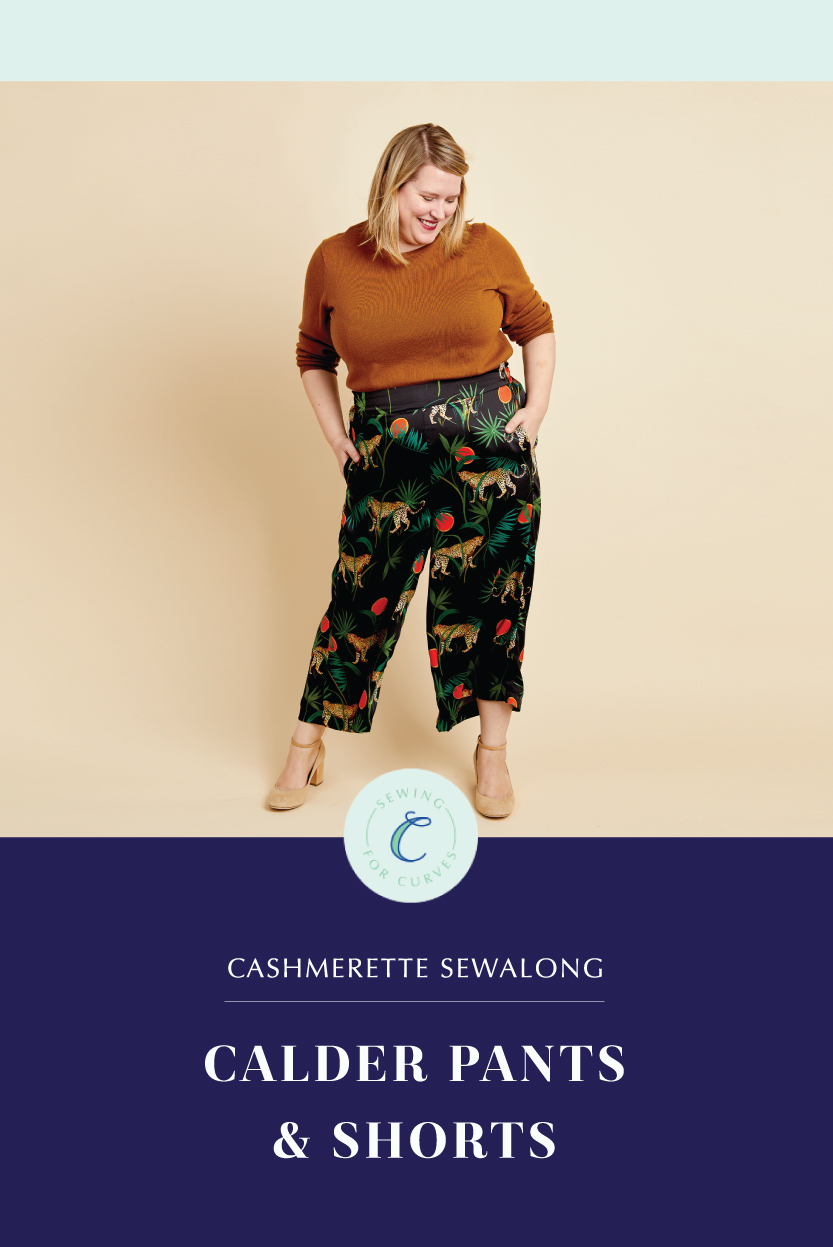
Yup, you can have it all: maximum style and maximum comfort! The Calder Pants & Shorts are wide-leg woven trousers that feature a chic flat front with a comfortable elastic back. Plus, choose from pear and apple pelvis options for the ideal bum fit.
Okay, so once you’ve checked out our Calder Pants party with Blackbird Fabrics and loaded up on fabric inspiration and ideas from ready-to-wear fashion, the time has come to start sewing.
First up, we need to pick our size. Thanks to the two pelvis options it’s more likely that you’ll fit in a “straight” Cashmerette Pattern than many other companies, but of course we all vary and chances are you may not be perfectly in one size. The good news is that sewing gives you tons of flexibility, and it’s easy to grade between sizes.
How to Choose Your Size
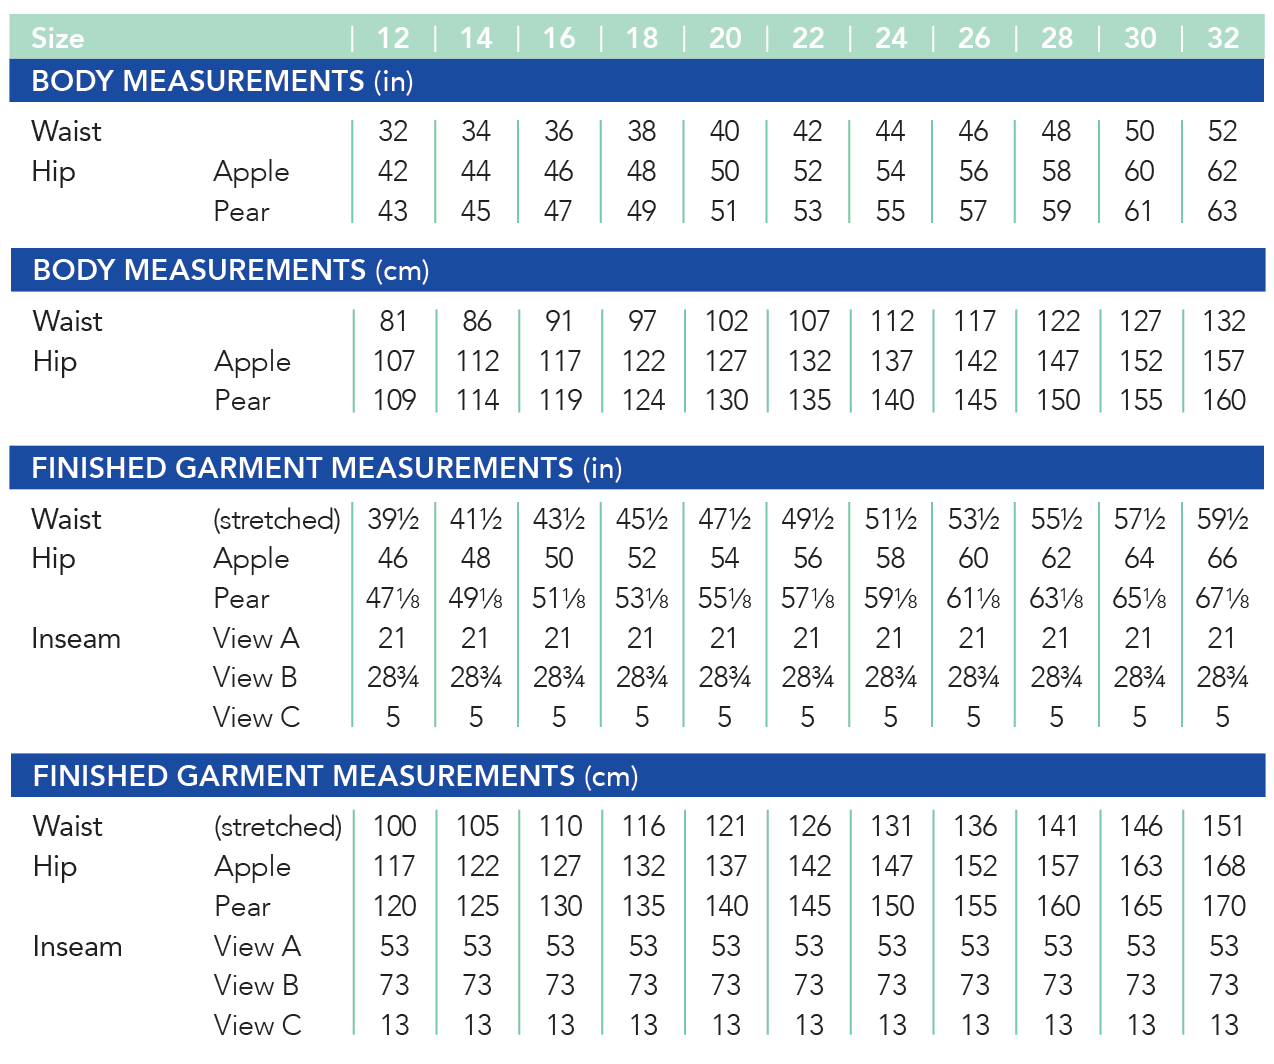
There are two measurement charts: one is the Body Measurement chart, and the other is the Finished Garment Measurements chart. The Body Measurement chart helps you choose your size based on what numbers you get when you measure your body with a tape measure—in this case, it has numbers for your waist and hip.
(Not sure how to measure yourself? Check out our guide here.)
The Finished Garment Measurements chart shows you the size of the actual sewn garment. The difference between that and the Body Measurement chart is called “ease”, and it’s the amount of extra room or stretch in the garment that the designer recommends for the clothes to fit well and allow movement.
Generally, you want to start by comparing your measurement with the body measurement chart. However, if your measurements are between sizes you can take a look at the Finished Garment Measurements chart to see if you can fit in just one.
Grading Between Sizes
If your waist and hip measurements are in different sizes, you may want to grade between sizes. For a run-down of how to grade between sizes on pattern like the Calder, check out this tutorial here.
If your hips are one or two sizes smaller than your waist, you can decide not to grade between sizes if you don’t want to—you’ll just end up with flowier legs, and who can say no to more flow?
If your hips are more than one sizes bigger than your waist, you may want to consider adding an invisible zipper at the size seam. This is because the waist needs to be able to stretch over your hips when you pull your pants up. It’s fine to grade one size up for the hips (like from an 20 waist to 22 hips), but beyond that, you’ll have some trouble pulling up your pants without a side zipper.
You should choose your pelvis fit (apple or pear) based on your measurements, but if you consult the chart and are still not sure which pelvis option to use, check out this guide here.
Still not sure what size to use? Try our easy-to-use Size Calculator or write to us here.
Preparing the Pattern and the Fabric
Now that we’ve chosen our size and graded if necessary, it’s time to prepare our pattern and fabric so that we’ll be all ready to sew next time!
Here’s our fabric prep checklist:
- Wash and dry your fabric to make sure it’s pre-shrunk and you’re not going to get any nasty surprises later!
- Press your fabric so it’s nice and flat. Check to see if you get any iron shine when you press the right side. If so, you’ll want to use a press cloth when pressing between steps.
- If this is your first time making a Calder, we recommend using an inexpensive fabric that has similar weight and drape to your final fabric, in case further adjustments are needed. Pants rise especially can be a matter of personal preference, so you’ll be glad you checked the fit first.
And here’s what you need to do to prepare your pattern:
- If you’re using the PDF pattern and are printing your PDF pattern at home, you’ll need to print and assemble it. Here are some pointers to help you. If you want to get it printed, here are some suggestions.
- Either cut or trace off your pattern pieces. If you’re using a paper pattern, making adjustments, or are going to make any other sizes in the future, we definitely recommend tracing.
- If you’re making View A or B (calf or full length), remember to tape the back pelvis (4A/4B) to the lower back leg before cutting it out of your fabric. If you’re making View C (shorts), you won’t need the lower back leg.
Finally, it’s time to cut into our fabric!
- Cut all pieces, following the layout diagrams in the pattern.
- Transfer all the markings to the fabric. For the notches, make a little snip into the fabric within the seam allowance (so no more than 1/4″ / 6mm).
- Apply interfacing to the pockets facings and front waistband pieces following manufacturer instructions.
Made it this far? Give yourself a pat on the back—the hard part is over and now comes the sewing! Check back tomorrow when we get started sewing our Calder—you’ll be amazed at how quickly it comes together!
We want to see your creations, whatever stage of the process you’re at! Tag your makes with #CalderPants or #CalderShorts on social media so we (and the whole sewing community) can cheer you on to the finish line!


Have sewn two pairs of shorts this summer and they were great! Was not sure about doing pants though. I’m more of a triangle than a pear so wasn’t sure if the pants would make my lower half look huge.