Getting accurate measurements of your body is the first step to creating beautiful, handmade garments that fit. Today, we’ll be showing you how to take your measurements for sewing your own clothes.
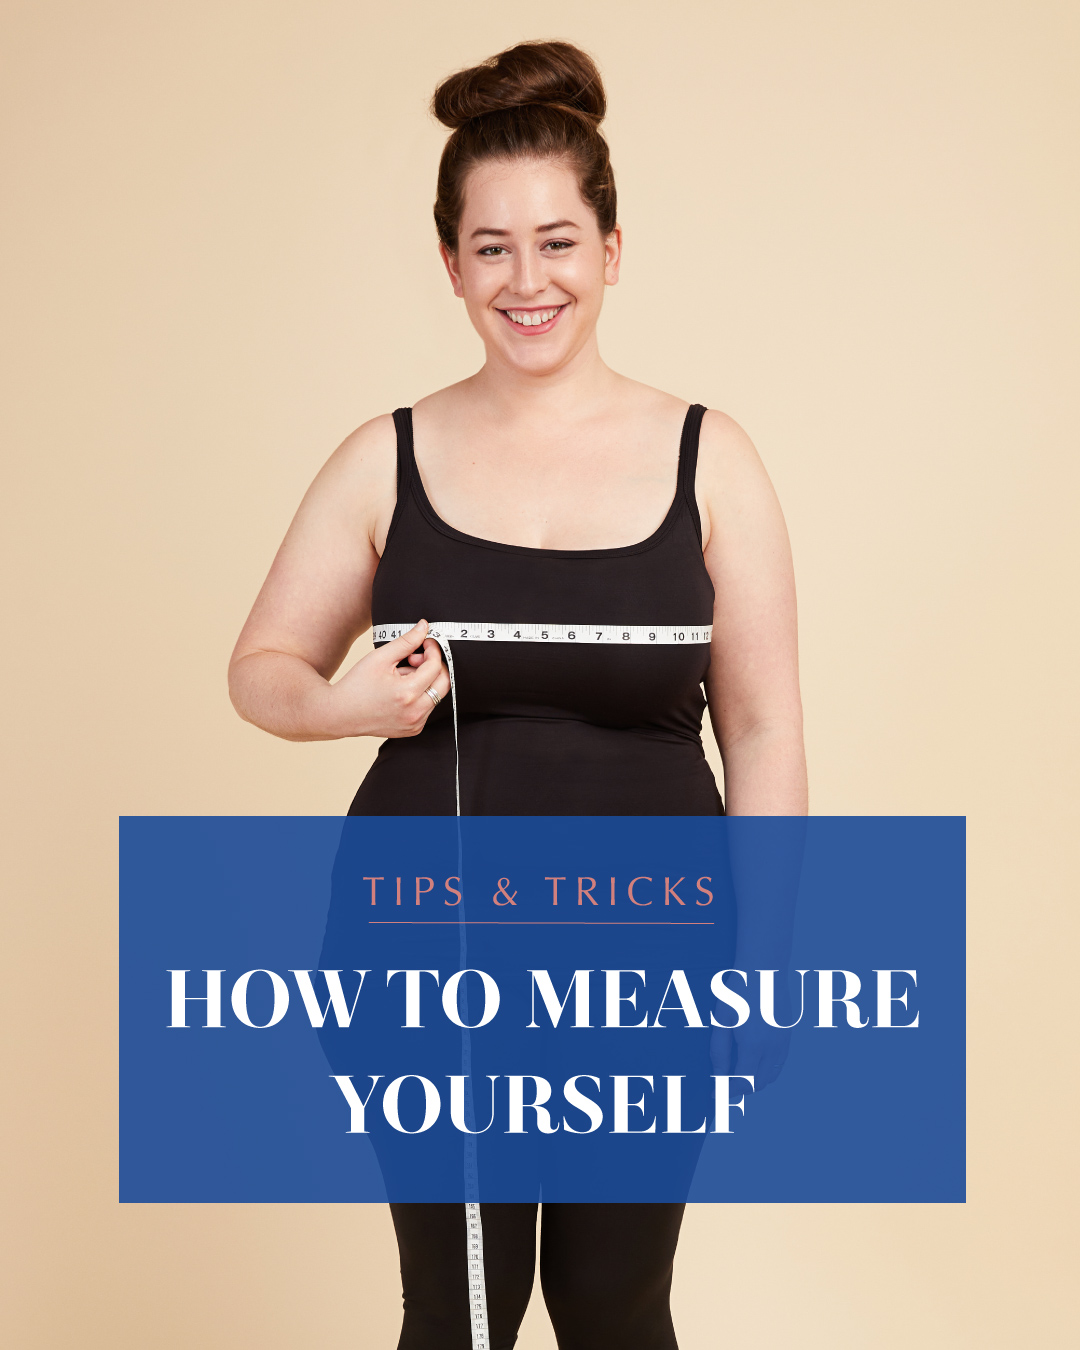
Like with ready-to-wear brands, sizing across sewing pattern companies varies quite a bit, and selecting your size might be intimidating or confusing at first. But we’re here to help! Today, we’ll be showing you how to take your measurements in order to identify your ideal starting size. This is something we recommending doing at the start of every project, since most of us fluctuate quite often (and sometimes quite dramatically), but thankfully it’s quick and easy.
One tip before we get started: for many of us, seeing our measurements can trigger certain feelings about our bodies. If you find it difficult emotionally to take and record your measurements, you’re not alone! One trick we like to recommend as way to avoid being confronted by those measurement numbers is to use the other side of the measuring tape. What we mean by this is that if you commonly measure in inches, use centimeters instead! If you commonly use centimeters, use inches instead! We’ve found that switching a different measuring system takes some of the emotion out of the numbers, since they don’t have quite the same meaning to us.
Okay, let’s start measuring!
Preparing to Take Your Measurements
When you get ready to take your measurements for sewing, you’ll want to have a measuring tape on hand, as well as a pen and paper to write down your measurements.
Additionally, you should wear tight-fitting clothes (or just your undergarments) so you can better see where you’re measuring and reduce any bulk from your clothing. Wear the undergarments that you’ll be wearing when you wear the garment you plan to make—this especially important with bras, because the type of bra you wear can change your bust measurement.
Finally, you’ll want to stand in front of a mirror. Ideally, a full length one, but if you don’t have one, use a mirror where you can see as far down as your hips. Checking your measuring tape in the mirror as you’re measuring yourself is important for accurate measurements.
It can be helpful to have a friend on hand to help you take your measurements, but it’s not necessary. In the photos below, you’ll see our model taking her measurements by herself.
How to Measure Your Bust
When selecting your size in Cashmerette patterns, we use two bust measurements: high bust and full bust. This makes it easier for you to pick your right cup size, since Cashmerette patterns come in three cup sizes (C/D, E/F, G/H). Learn more about our new high bust measurements here.
High Bust
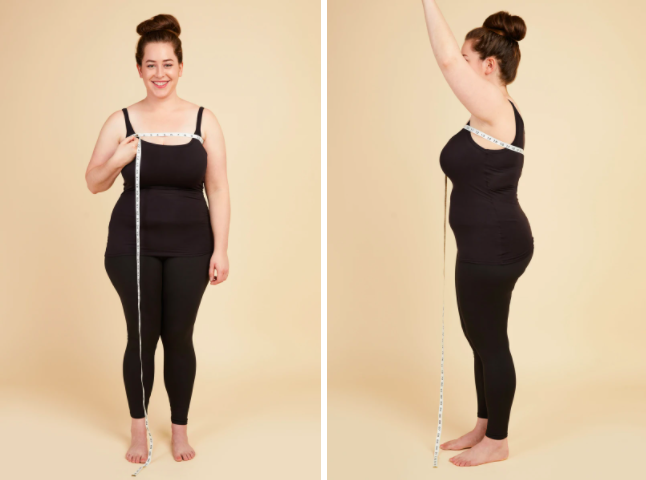
Take this measurement while NOT wearing a bra. Place the measuring tape over the top of your bust and underneath your armpits. The tape will be horizontal at your back and front, and diagonal at your side. Keep your arms down when recording your high bust measurement (the model is lifting her arm so you can see where the tape goes).
Full Bust
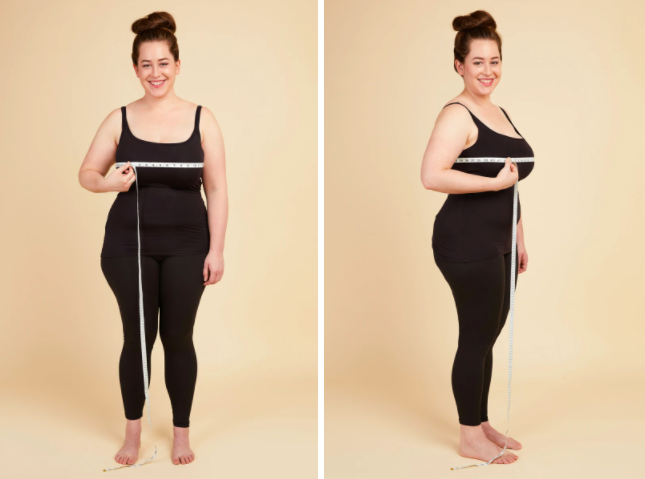
Take this measurement while wearing a bra, ideally the one you intend to wear along with the garment you’re making. Place the measuring tape around the fullest part of your bust. Keep your arms down when recording your full bust measurement.
How to Measure Your Waist
Knowing where to measure your waist can be tricky (we wrote a blog post all about it here). In Cashmerette patterns, you’ll want to use your natural waist, which is the smallest bit of your waist.
Be sure to take both you standing waist and your sitting waist. For stretchy garments, you can use your standing waist, but for fitted woven garments, you’ll want to use your sitting waist so that you have room to spread a bit (and breathe!) when you sit down.
Standing Waist
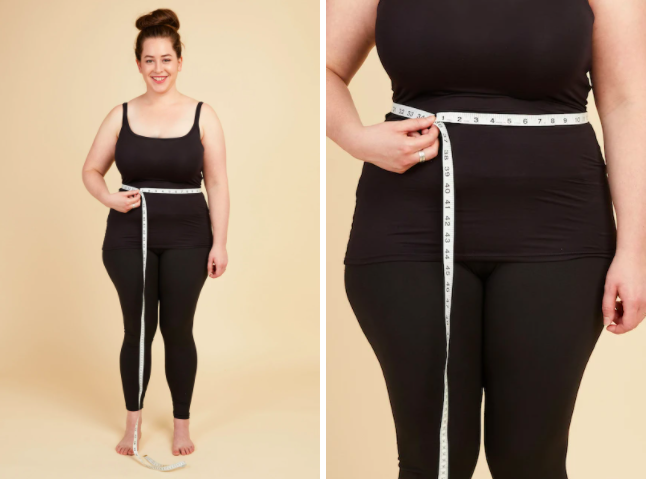
Place the measuring tape at the narrowest part of your torso (your natural waist). Use this waist measurement for garments that have stretch, or have a lot of ease (are flowy).
Sitting Waist
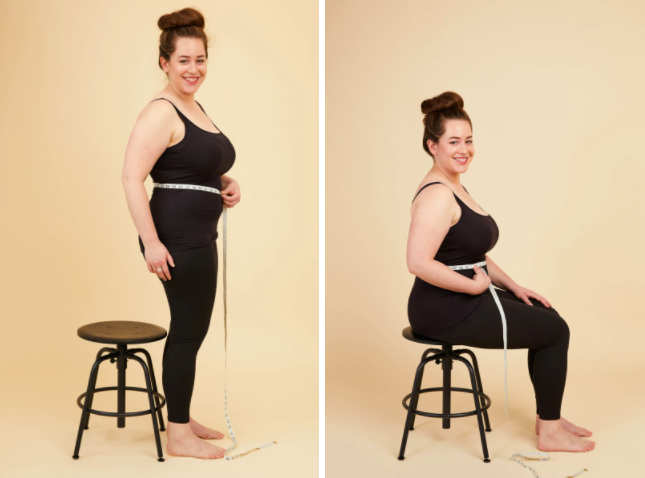
While standing, place the measuring tape at the narrowest part of your waist (your natural waist), then sit down in a chair, allowing the tape to slide as your waist expands. Use this waist measurement for garments that do not stretch and are closely fitted.
How to Measure Your Hips
Like with the waist, there can be different places to measure your hip. In Cashmerette patterns, we use the fullest bit of your hip, where your hips and bum are the widest. Again, make sure to measure your hips both while standing and while sitting to get the best range of motion during your day.
Standing Hips
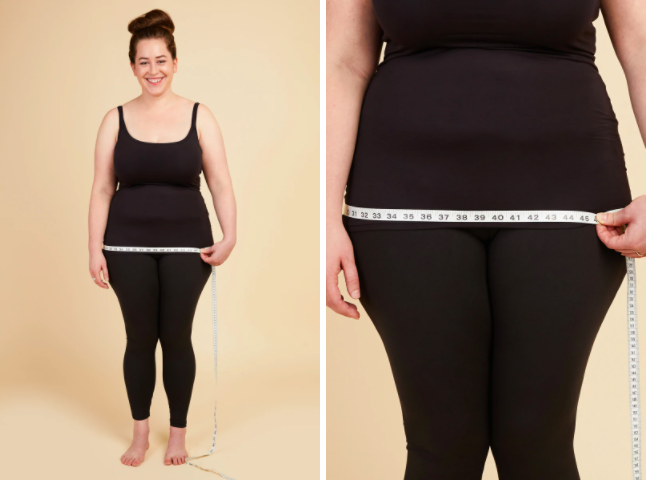
Place the measuring tape around the widest part of your hips. Use this hip measurement for garments that stretch or have a lot of ease (are flowy).
Sitting Hips
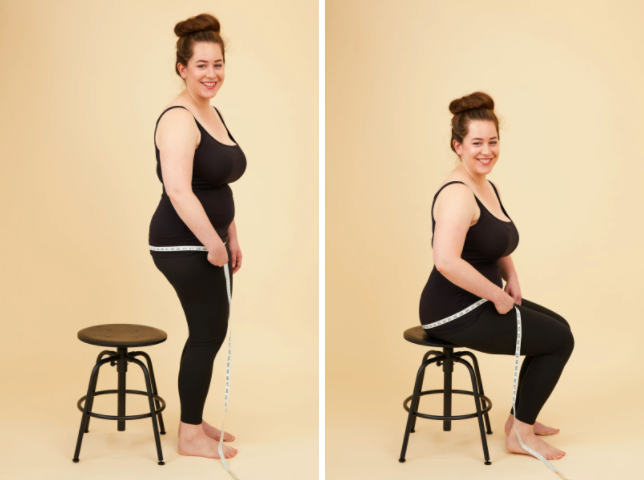
While standing, place the measuring tape around the widest part of your hips, and then sit down in a chair, allowing the tape to slide as your body expands. Use this hip measurement for garments that do not stretch and are closely fitted.
Other Useful Measurements
Bust, waist, and hip measurements are the most commonly used in sewing patterns, but it can be helpful to take a few other measurements, too. This will allow you to know if the finished garment has enough ease for you in other parts of your body.
Bicep
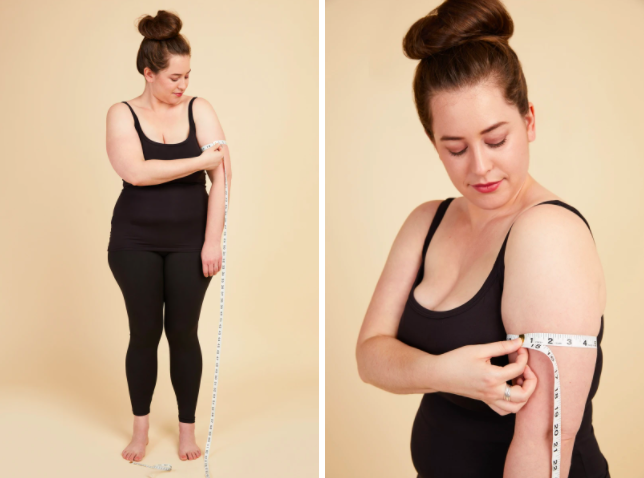
Place the measuring tape around your arm at armpit level, around the fullest part of your upper arm. Keep your arm down and relaxed while taking this measurement.
A number of Cashmerette patterns include full bicep sleeve pieces, but here is a tutorial on how to make this adjustment if your pattern doesn’t include a full bicep sleeve.
Thigh
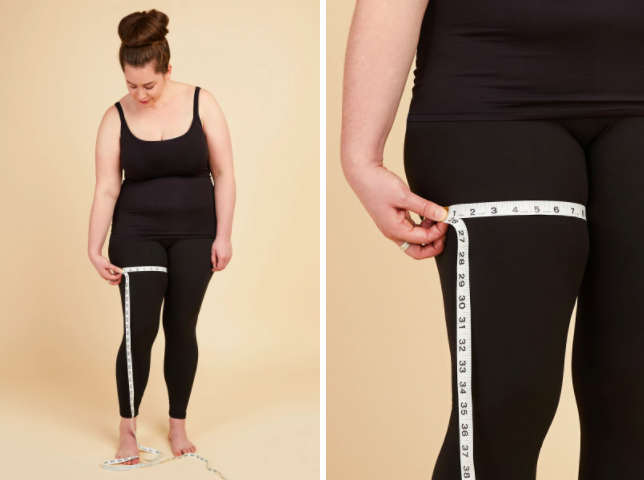
Place the measuring tape around the widest part of your thigh.
What Now?
Once you’ve recorded your measurements, you can use them to determine your size (or set of sizes to grade between) using our size guide. And then you’re off on an incredible journey of sewing your own beautiful, well-fitting garments—we can’t wait to see what you make.
So that’s how to take your measurements for sewing! Let us know in the comments if you have any questions.


What shall i do. I have bust size 45in E/F cup. Waist 45in and hips 43in
I want to make the Appleton dress. Tbese measurements take me from 16 to 24and back to 14!
Help please
Hi Janet, you could try grading from a size 16 E/F to a size 20 waist–the Appleton waist is a bit variable since it depends on how you tie it. I would keep it at 20 for the hip as well and then you can take it in as needed once you try it on.
-Ayelet at Cashmerette
I want to sew a Harrison Shirt to wear at the office.
Checking may measurements to your chart (pattern bought in 2018) I should be okay with a size 20 G/H but I will need to enlarge to a size 22 waist and 24 hip.
But then my hip measurement “sitting” is more than 1″ larger than the 24 garment measurement given in the pattern details.
How much ease would you recommend to add to my “sitting” hip measurement?
Will 1″ be sufficient? This would add up to 5″ ease to the “standing” hip.
Hi Rita, if your sitting hip measurement is more than 1″ larger than your standing hip measurement, you may want to go up to the next size in the hip so that you can be comfortable when sitting and moving around during the day. On the Harrison, the finished garment hip measurement increases by 2″ for each size, so you can add 2″ of ease to the 24 hip or go up to a 26. Making a muslin would be a great way to test whether the ease is to your liking!
We have a tutorial on grading between sizes on the Harrison here: https://blog.cashmerette.com/grading-between-sizes-top-or-dress-with-princess-seams
-Ayelet at Cashmerette
I love the sitting versus standing measurements for waist and hips. It would certainly explain why something that is fitted and doesn’t stretch – both me-made and RTW – get a bit uncomfortable when I sit. Brilliant! And the high bust measurement and FBA is a game-changer. Thanks so much.
I love Cashmerettes blog posts! Quick question. What about the bigger tummies, bottom of the B shape, or aprons? Do we include them in the measurements or measure underneath them?
Hi Nikki, it depends on how you’re going to wear the thing you’re making. For example, if you’re planning on wearing your pants over your tummy, you should measure over, but if you’re going to wear it under, you should measure under.
-Ayelet at Cashmerette
I’m always uncertain whether I should breathe while measuring my bust. A deep breath can enlarge my measurement by an inch or two. Also how snugly should the measuring tape be? Held as tightly as possible? snug against the skin? with room for a fingertip underneath? My measurements are wildly different especially when working with the squishy parts, like my bust..
We definitely recommend breathing while taking your measurements! 🙂 You want to make sure you’re accommodating your largest measurements because you’ll need to breathe/move around while wearing the garments. So if your bust expands 1-2″ when you take a breath, go with that, especially if you’re making a fitted woven garment. (If you’re making a knit garment, the fabric will stretch as you breathe so it’s less of a concern.)
Hold the measuring tape so that it’s snug but not digging into your skin or clothing. Again, the goal is to get an accurate reading so that your clothes accommodate your actual size.
-Ayelet at Cashmerette