If your bust is smaller than a pattern is drafted for, you may need to do a small bust adjustment. Here’s how to do an SBA on a darted or dartless bodice, the stress-free way.
Cashmerette patterns include three cup sizes: C/D, E/F, and G/H. If you have less than a 3″ difference between your high bust and full bust, or wear a bra smaller than a C, then you may need to do an small bust adjustment.
In this tutorial, we’re showing how to do an SBA on a pattern that has a bust and/or waist dart, or no dart at all. This tutorial will work on patterns designed for woven or knit fabric. If you’re new to SBAs, check out this guide to figure out whether you need to make this adjustment, and how much circumference you’ll need to remove.
Let’s get started!
Preparing for an SBA
Here’s what you need on hand for doing your SBA: your front bodice pattern, some tracing paper (we like Swedish tracing paper, but anything that you can see through will do), a pen or pencil, a ruler, scissors, and some tape. It helps to be working on a cutting mat or a surface that you can tape things down onto temporarily—you’ll see why pretty soon.
We always recommend tracing your pattern piece before starting to cut into it. This is so that you can refer to the original piece later on if needed—once you cut into the real thing, it’s hard to go back.
How to do a darted or dartless SBA
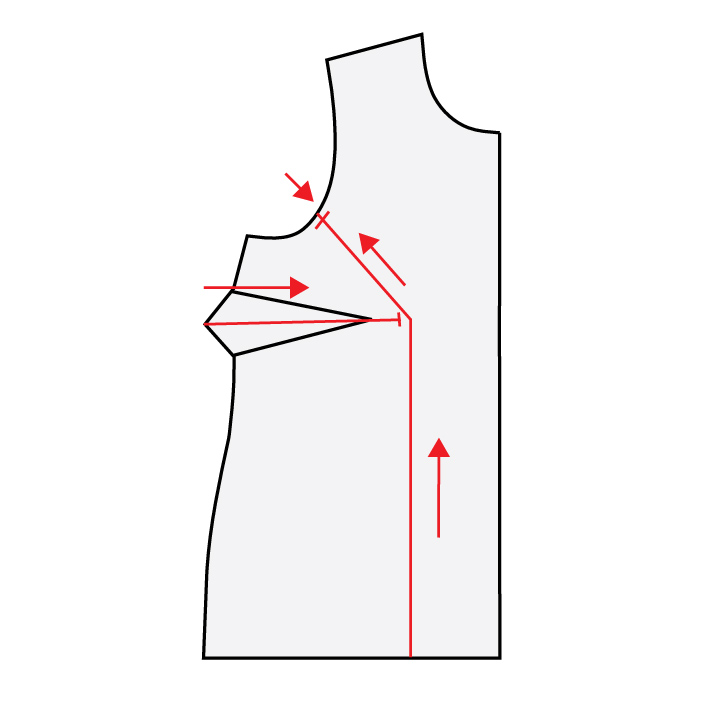
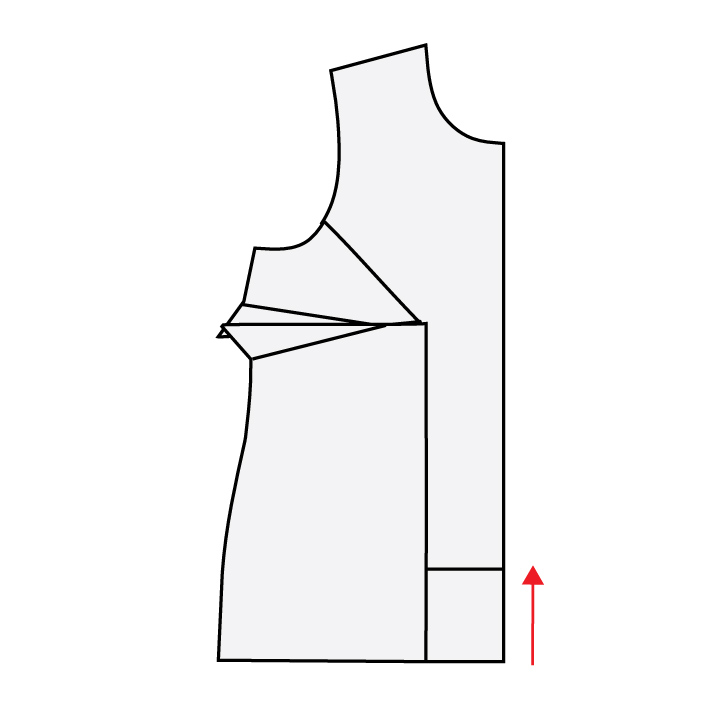
1. Start by drawing three lines onto the front pattern piece:
- The first line (marked A in the illustration below) goes through the center of the bust dart to the bust apex. If your pattern has no dart, draw a line from the bust apex horizontally across to the side seam.
- The second line (B) goes from the bust apex down to the waist, parallel to the center front. If your pattern has a waist dart, this line will likely go through the middle of the waist dart.
- The third line (C) goes from the bust apex up diagonally to the armscye, about a third of the way along the armscye from the underarm. The exact point isn’t important, so no need to stress about this bit. Mark the seam allowance at the top of this line at the armscye.
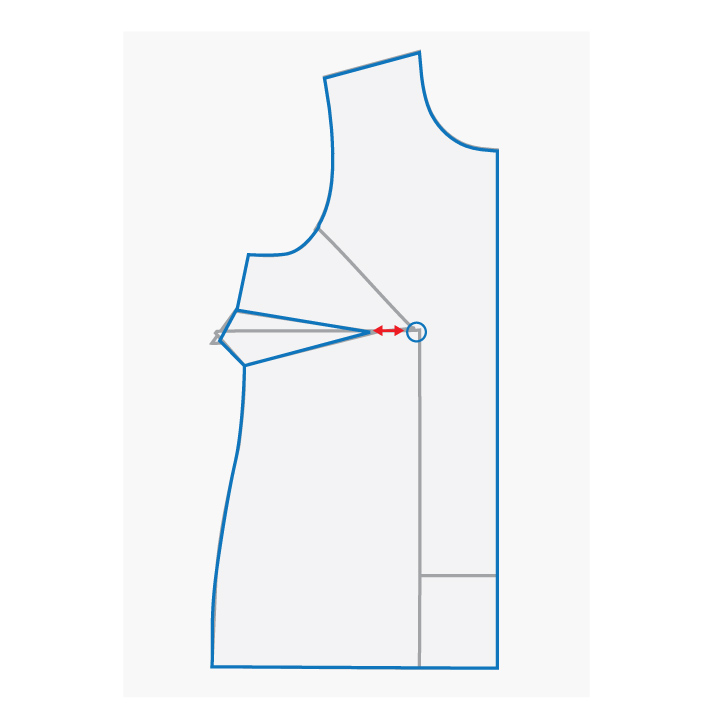
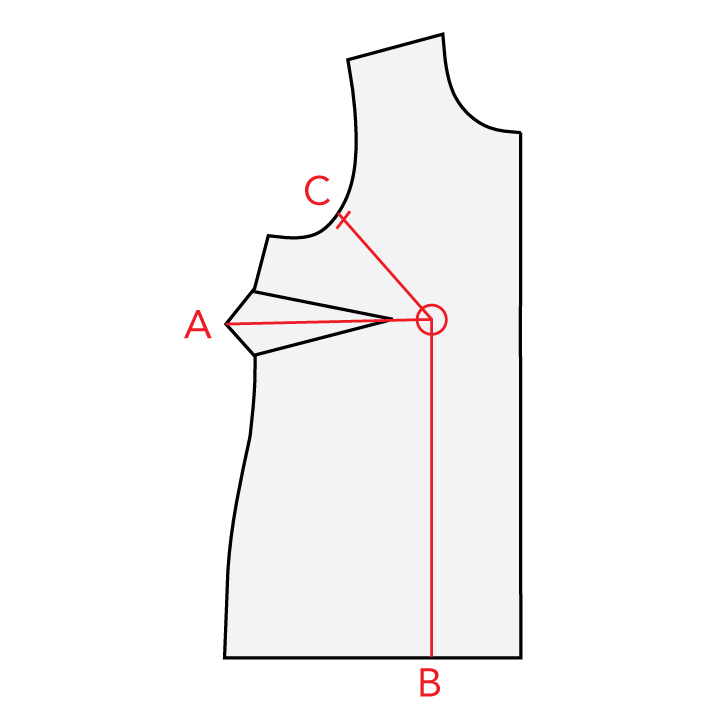 2. Now it’s time to cut. First, cut up line B to the apex, and continue cutting up line C, stopping at the armscye seam allowance. Snip into the seam allowance from the other side, leaving a little hinge there. (Don’t worry if you accidentally cut through the hinge—you can just put a piece of tape over it and cut into it again.)
Also cut line A, starting at the side seam and leaving a small hinge at the end.
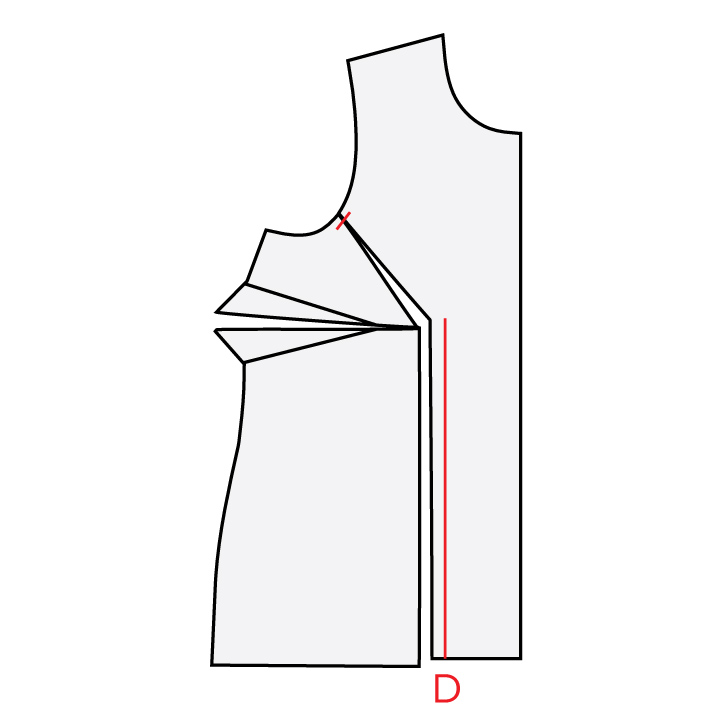
3. Now we need to draw a line parallel to line B, on the other side of the dart (the center of the garment). Let’s call this line D. This line should be the width away from line B that you need to remove from your garment—but remember to halve the total amount you need taken out because this piece reflects half of your body.
For example, if you need to do a 1″ SBA, you should draw line D 0.5″ from line B.
4. Swing the bottom left section of your pattern piece up and over, so that line B lines up with our new line D. As you’re doing this, the top left bit should swing down and overlap the bottom section, which results in the dart getting smaller.
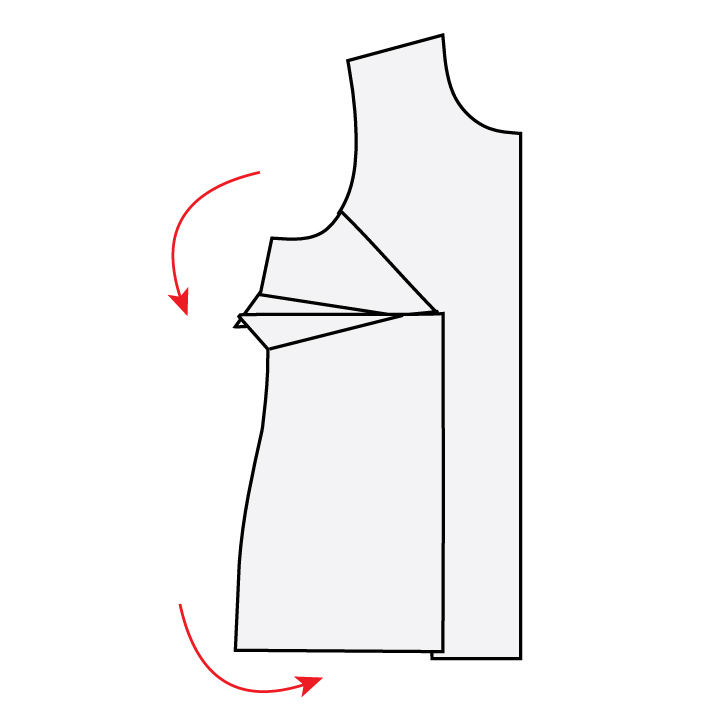
5. You’ll see now that the hemline is uneven. To even it out, we’re going to do a line on the right-hand section of our pattern piece, parallel to the hem.
6. Now we can cut the piece at that line and slide it up until the hem is even again.
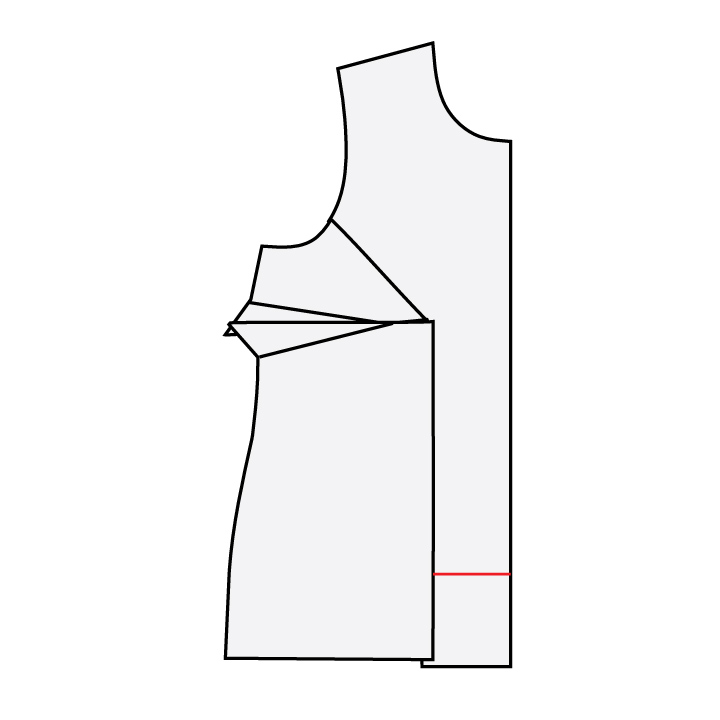
7. Now we can trace out our new pattern piece onto tracing paper. To make our new bust dart, we can make new dart legs that start from the original legs and end 1-1.5″ from the bust apex. Make sure to true up the dart legs.
If you’re working with a pattern that didn’t have a dart, you still won’t have one, so you can just ignore this step. (Hurray!)
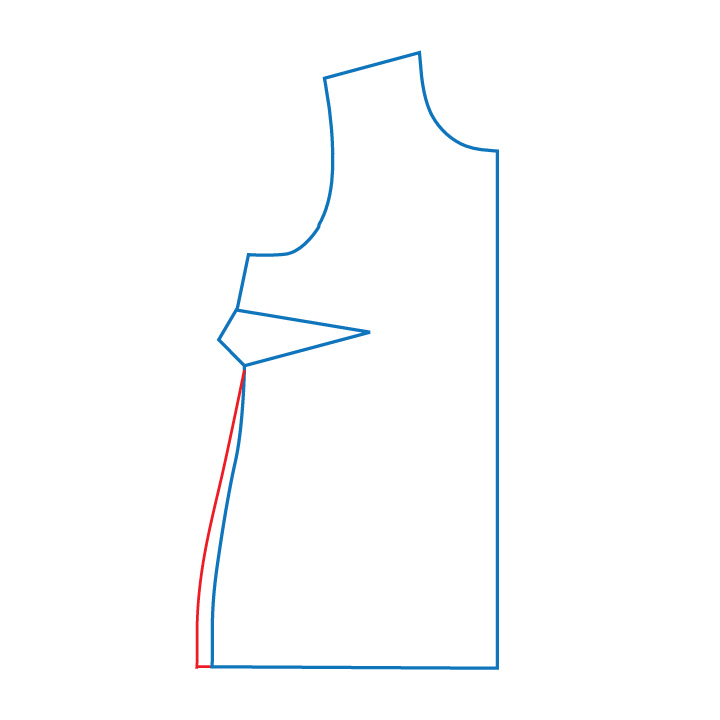
8. One final thing: you’ll notice that we lost a bit of width in the waist and hip while we were making this adjustment. If you want to get that width back, you can add it at the side seam.
And that’s all there is to it! How easy was that? You can now start sewing up your garment—we recommend making a muslin first to check the fit before cutting into your good fabric.