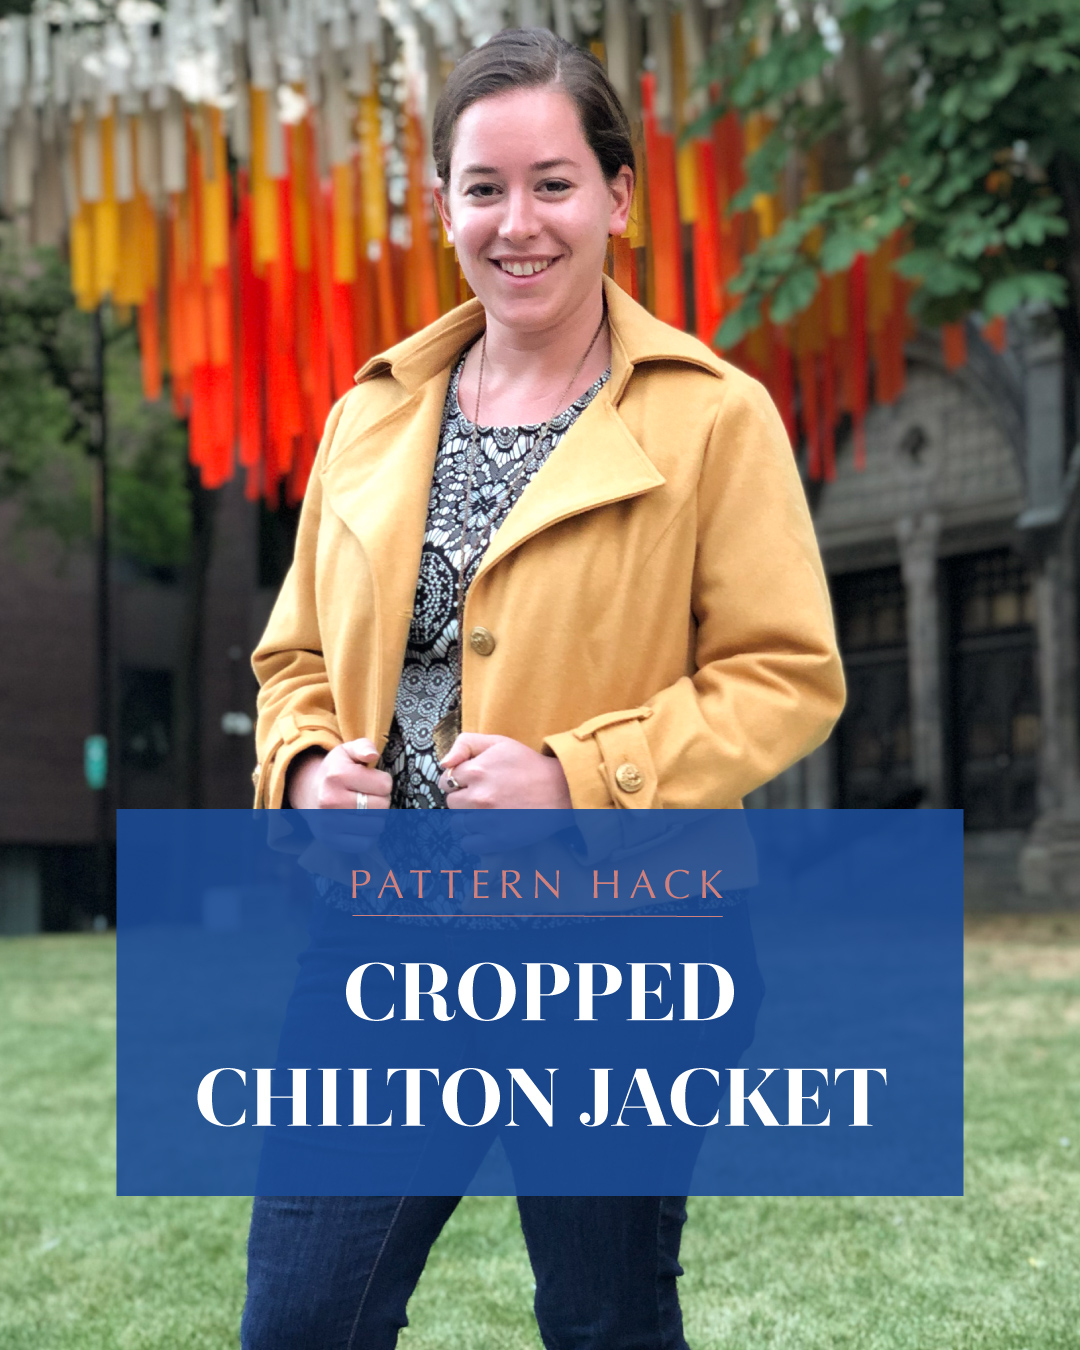
Hi everyone! Ayelet here and I’m back with another fall-friendly pattern hack: a Chilton Trench Coat hacked into a cute cropped jacket.
Are you focused on cool-weather sewing right now? As much as I hate to say goodbye to summer, there’s something really nice about fall sewing. All those cozy sweaters and fun layering pieces—yum.
I’ve been sewing for a few years now, but my outerwear sewing experience going into this project was fairly limited. I was so excited when we released the Chilton Trench Coat, and then was immediately intimidated to try it for myself. A lining, AND all those bells and whistles?
But just like with any other project, sewing this jacket was just a matter of following a series of steps, none of which was particularly difficult or required magic. I decided to start with a cropped version to make as a muslin, but it turned out so wearable that I took it with me on my trip to Montreal last fall. (Remember when traveling was a thing we did?)

If you want to dip your toes into outerwear, there’s no better place to start than the Chilton. Our detailed illustrated instructions walk you through ever step of the process—and if you leave off most of the bells and whistles like I did, it goes even faster. The Chilton includes cup sizes C-H so you know it’s going to give you a great fit in the bust, and you’ll be able to add cozy layers underneath with no problem.
Okay, let’s get started pattern hacking!
Prepare Your Pattern Pieces
For this cropped Chilton, I started by putting away all of the pieces that I knew I wouldn’t need. Because I cropped it to my high hip, I didn’t feel like the belt was necessary, so I set aside that piece as well as the belt loops. I also left off the epaulettes (those are the bits that sit on the shoulders), chest shield, and cape, because I wanted to be able to wear a backpack over my jacket and not have those bits get in the way. Finally, I omitted the pockets (a rare occurrence for me—usually I’m adding them on!) because there wouldn’t be room for them with how short I was cropping.
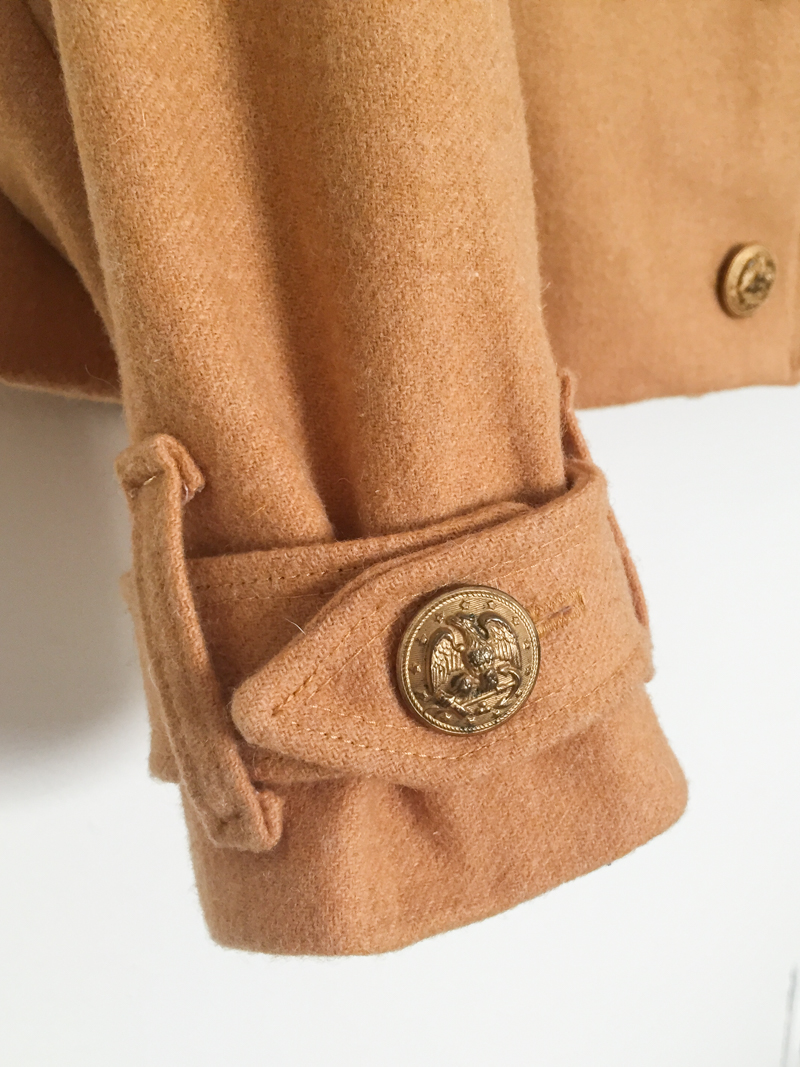
I did, however, leave the cuff latch in. This seemed more functional than decorative, plus it would be good practice for all the other bits when I make the full Chilton in the future.
Let’s talk about how the Chilton is constructed. The back is sewn with a single center seam, and the front has a single princess seam. The sleeve is composed of two pieces—an outer sleeve and an inner sleeve. It may seem like a lot of pieces when you’re looking at your pattern, but in reality, it’s those main pieces plus a lining for each, and then your collar and facings.
To get the cropped look, we’re going to shorten the front and back main pieces, the front and back linings, and the front facing. The rest of the pieces (sleeve, collar, back facing) we can use as-is.
I wanted my Chilton to hit at my high hip, so I started by taking the center front pattern piece and holding it up to my body. I decided to the crop it at the lower pocket notch, but ended up cutting off an additional two inches once I tried it on. So for this look I cropped it two inches above the lower pocket notch, which for me was 16 inches (41 cm) from the View A cut line.
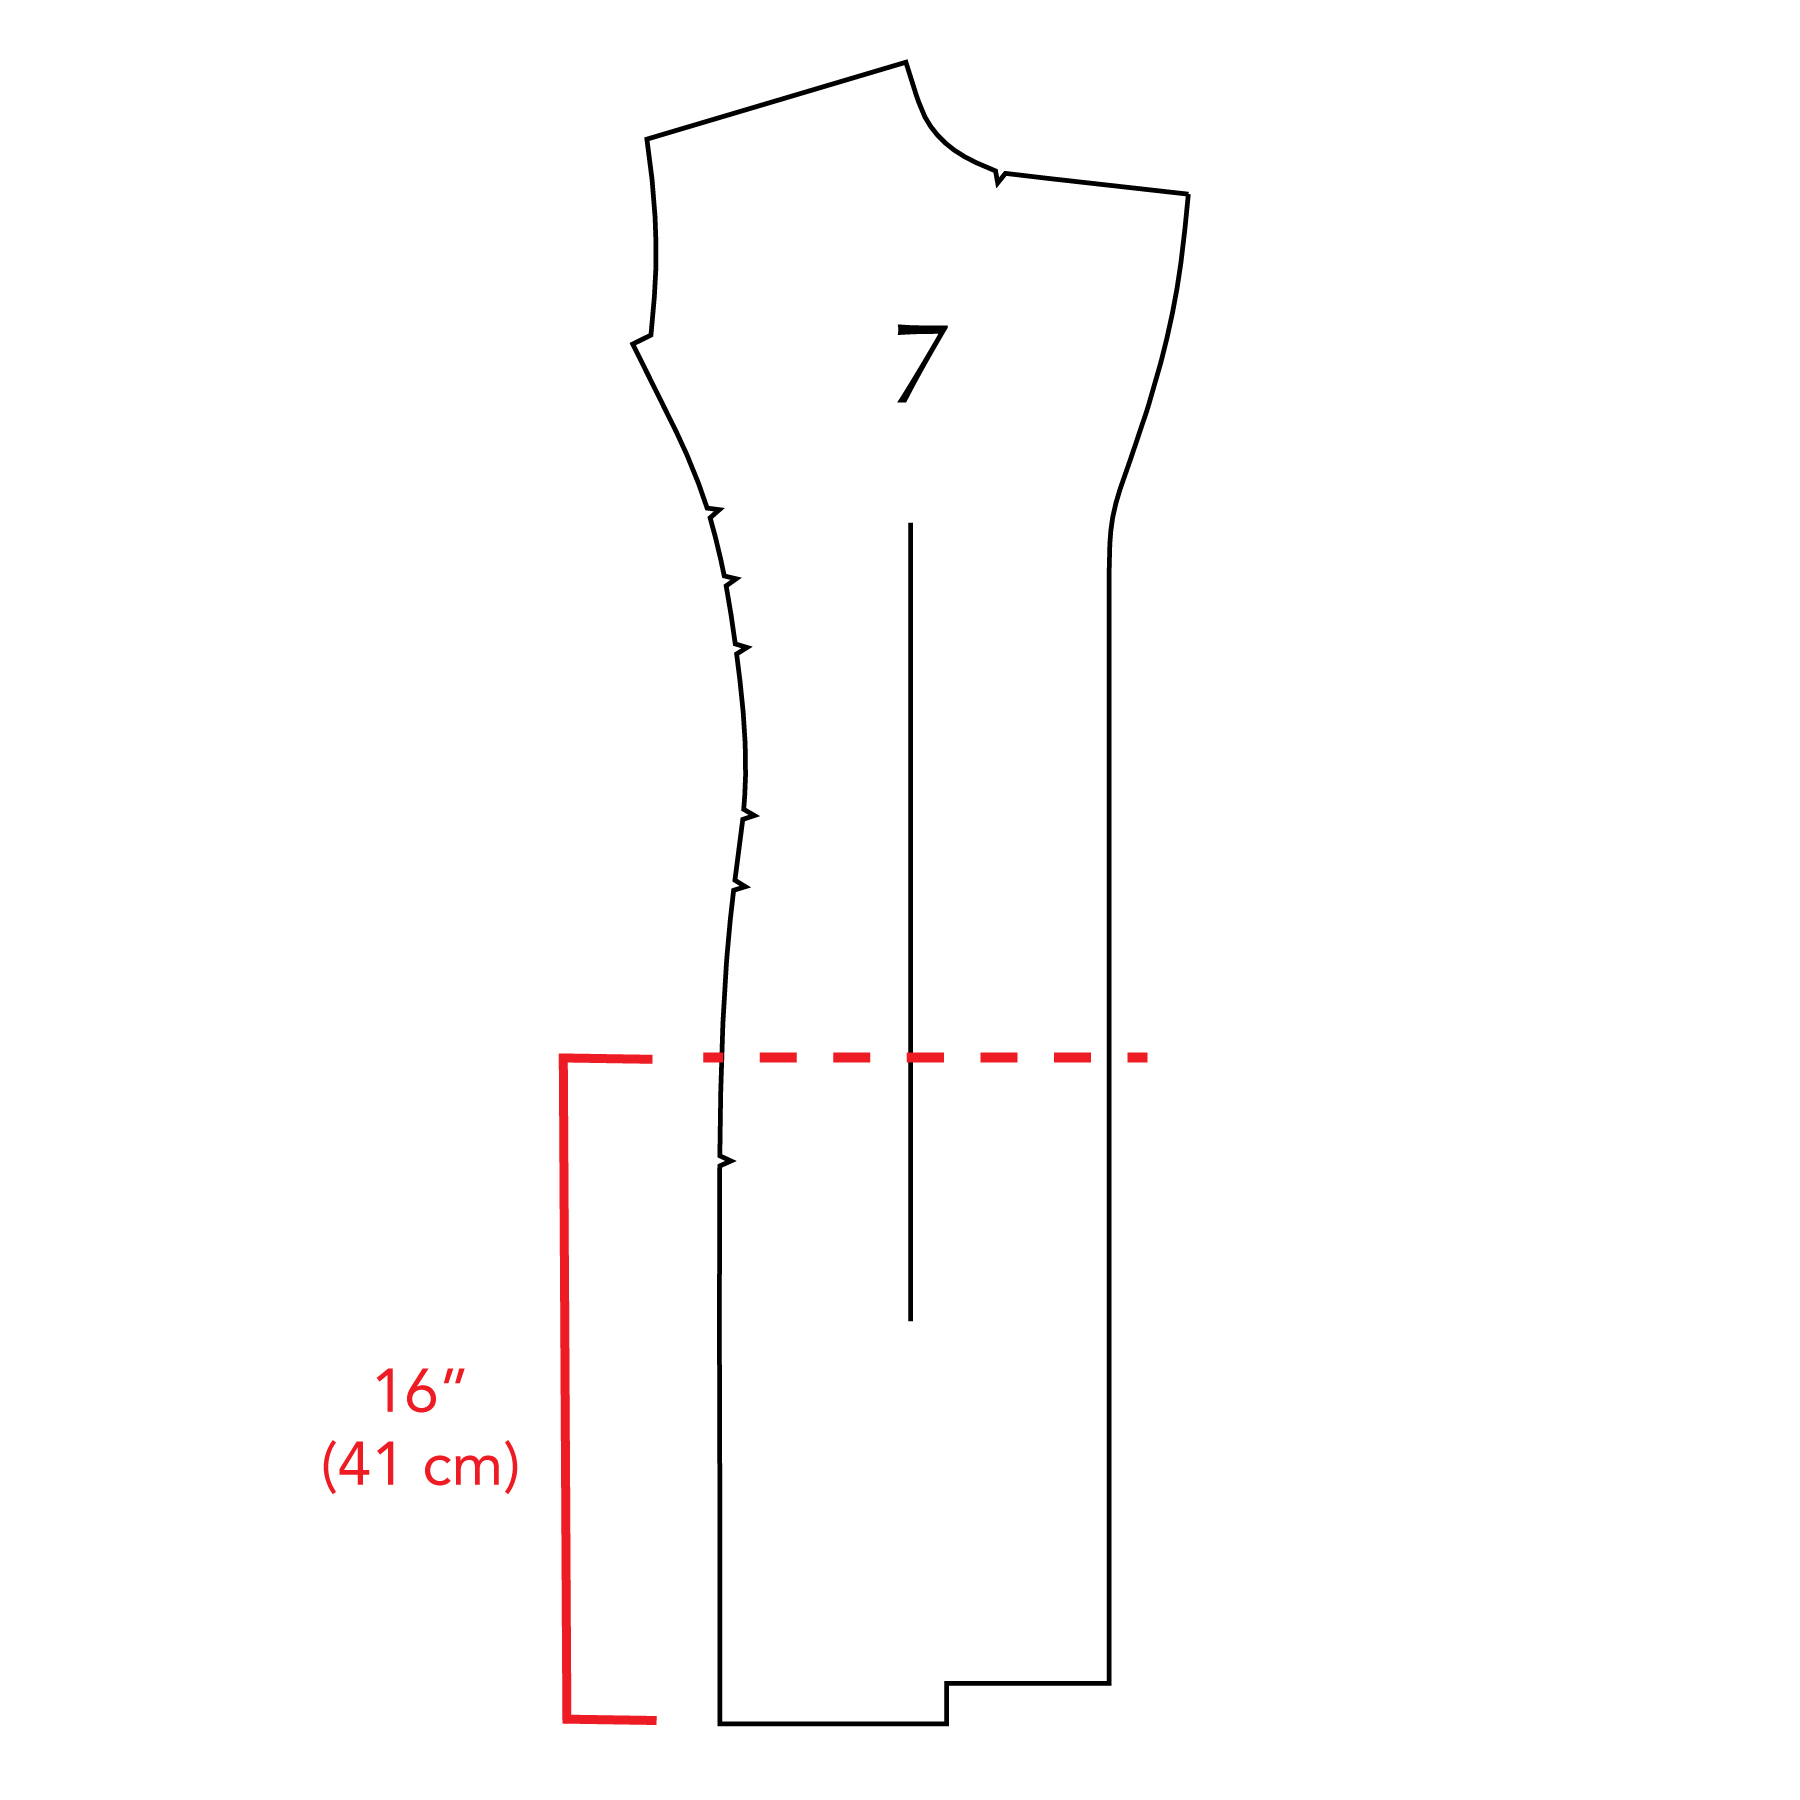
I then shortened the side front and back pieces by the same amount, as well as the front and back linings and facings.
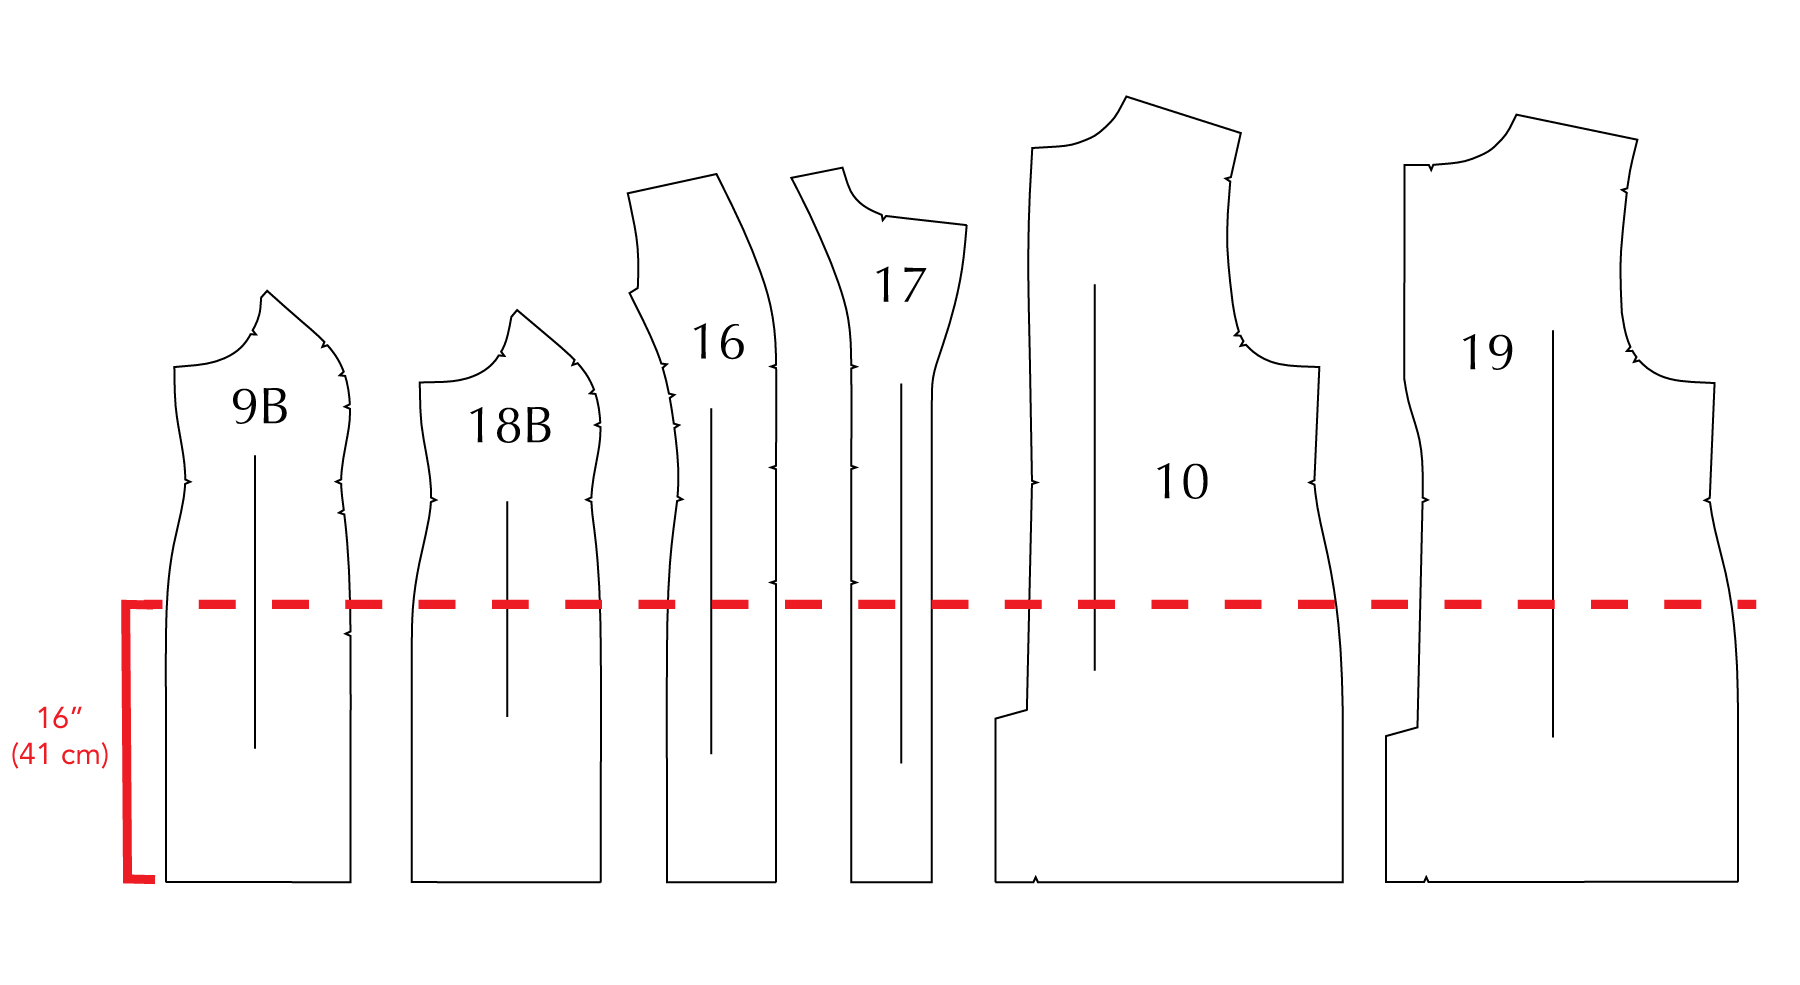
You’ll notice that I’m cropping the Chilton from the bottom rather than using the lengthen/shorten lines. The reason for this is that I’m reducing the length for style purposes rather than for fit purposes.
Once you have those pattern adjustments made, you can start cutting into your fabric! I definitely recommend making a muslin first—nice coating fabrics can be expensive, so it’s worth checking the before cutting into the good stuff.
Sewing the Chilton
Once your pieces are ready and you’ve cut out your fabric, the construction is exactly the same as if you were sewing the full Chilton. But you get to skip many of the steps, you lucky duck!

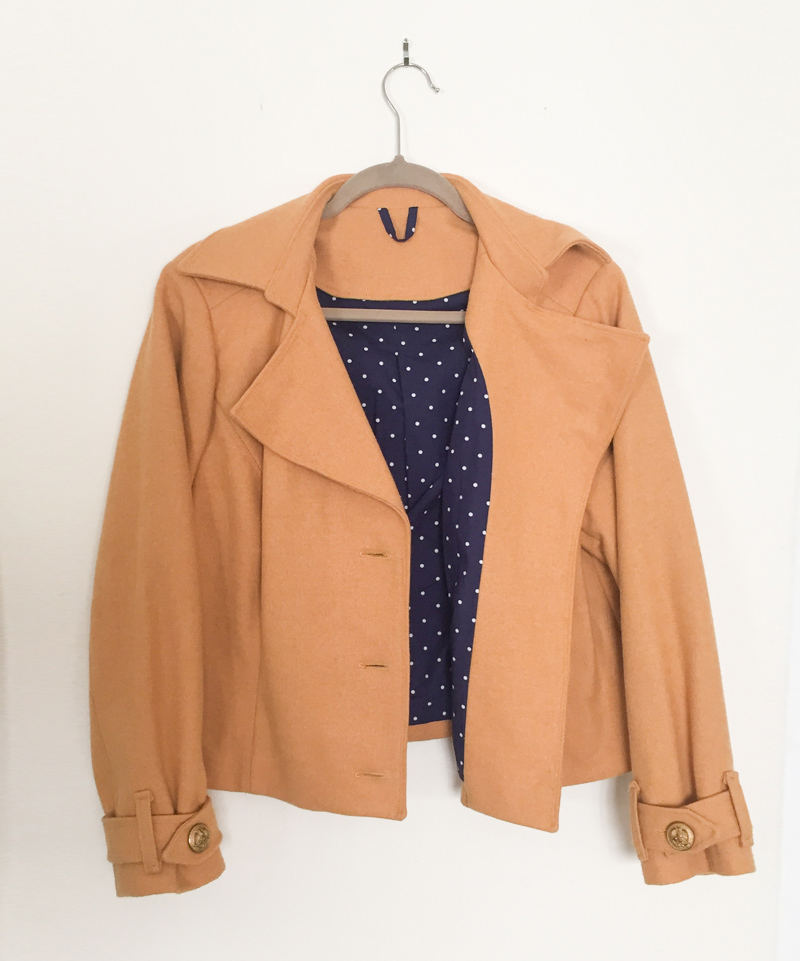
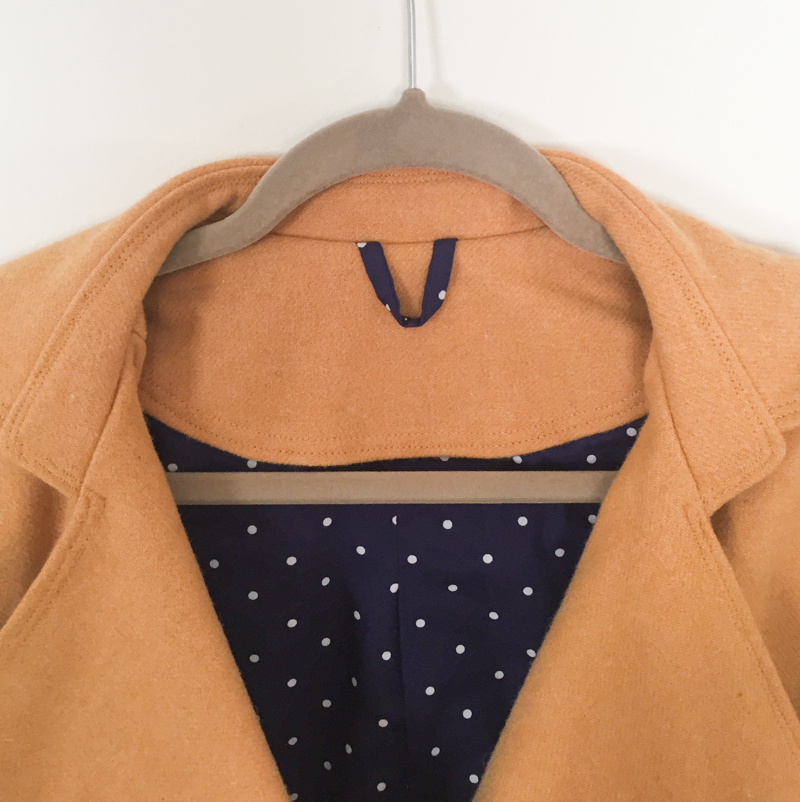
For my Chilton, I used a mustardy wool blend for the outer shell and a navy polka dot cotton lawn for the lining. Synthetics are usually better as linings because they don’t cling to the layers underneath, but I fell in love with this fabric pairing and decided to go for it. The buttons came from my favorite second-hand craft store, Make & Mend.
I made a size 12 E/F. At the time, my measurements were 37″ high bust, 41″ full bust, 32″ waist, and 42″ hip. I’m wearing my Chilton layered over a Cedar Dolman Top and Ames Jeans.

I love that this take on the Chilton is more casual and faster to sew. It’s perfect those in between temperatures where you need a little something to keep you warm, but don’t want a full-on trench.

Now that I’m not traveling, I’ve been wearing my Chilton closer to home. How fun is this mural I found not far from where I live?

Here’s a photo where you can see the fun polka dot lining I chose. I used a scrap of the lining to add a loop at the back of the neck for hanging the jacket on a coat hook.
What do you think? Is this a hack you want to try? I’d love to hear your thoughts in the comments below. And don’t forget to tag your makes with #ChiltonTrenchCoat on social media so we can marvel at your beautiful me-made outerwear.


Love love love it!
Oooh that is awesome. I am now seeing possibilities of hacking this into a moto jacket.
Have you done it?
I was having the exact same thought!
What a fabulous and Practical idea!
I think I have some bright pink wool I bought when I was much smaller with a coat in mind
Absolutely love this, thank you for inspiring me, and I have the perfect fabric in my stash – a couple of meters of Linton tweed (I’m in the UK)! I love my wool Chilton which I made nearly 3 years ago so this will be a fabulous spring addition to my Cashmerette collection. Thank you for sharing.