It’s the last day of Cashmerette Swim Week! We’re wrapping things up with a a brand new tutorial where we show you how to sew swim shorts using the Belmont Leggings & Yoga Pants pattern.
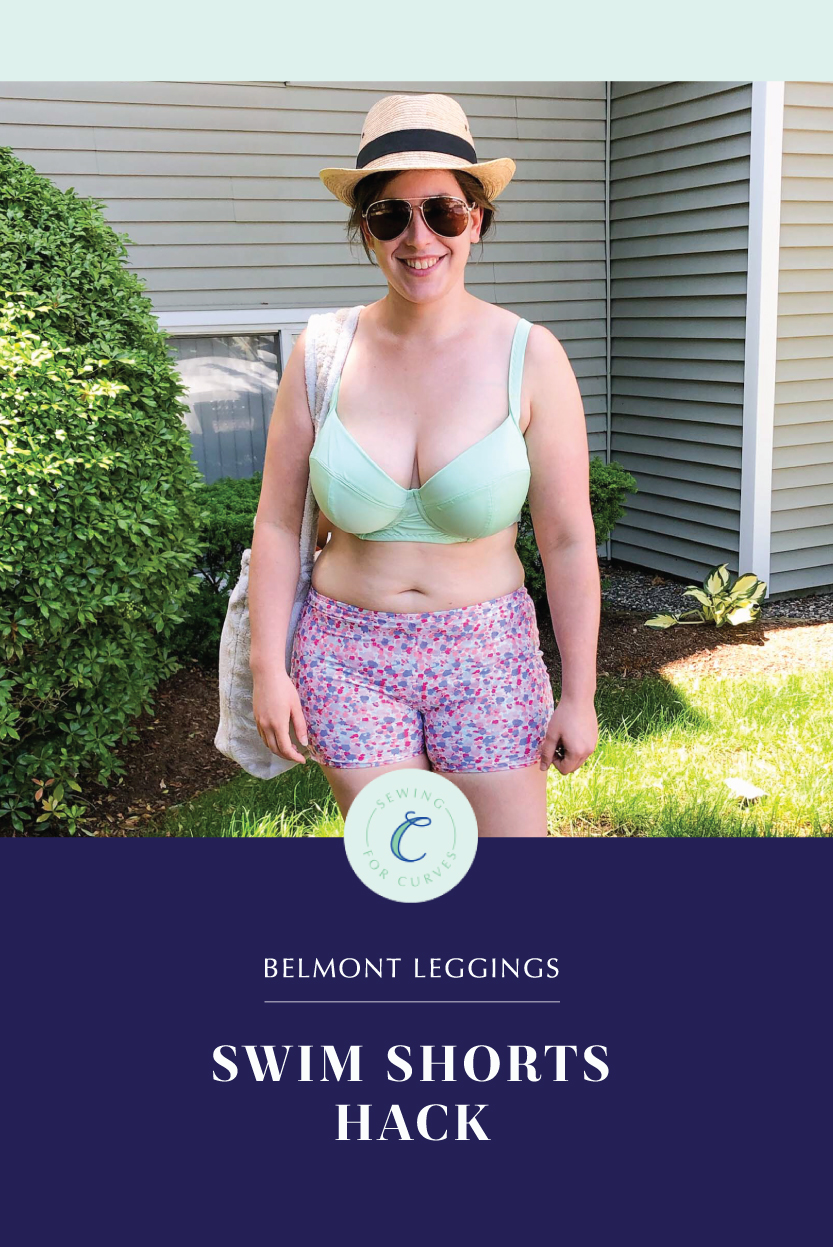
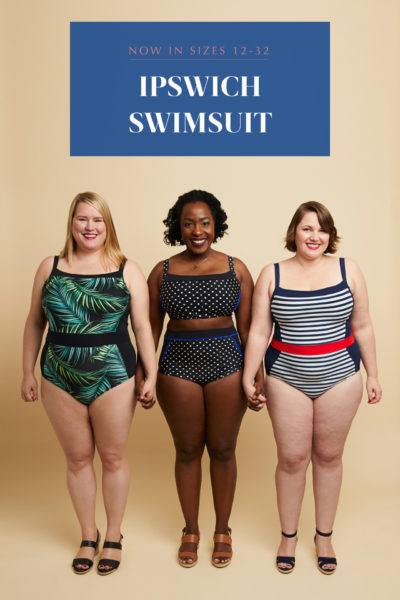
Wearing a swimsuit can feel a lot like wearing underwear in public. (Isn’t it such a weird double standard? It’s frowned upon to wear a bra and panties in public, but if it’s made out of lycra, it’s fair game.) Some of us like to show off a lot of skin, while others prefer a little more coverage.
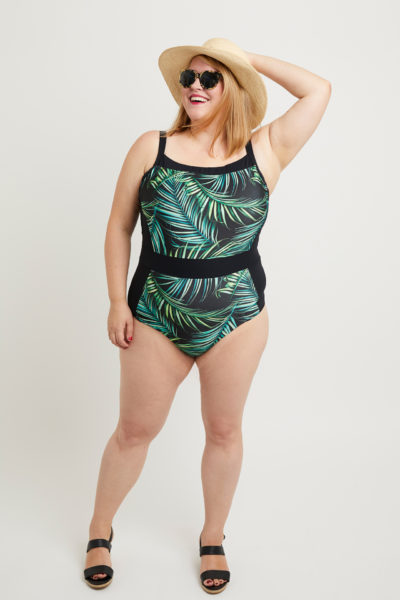
After I made my first Ipswich Swimsuit, I realized that the underwear-style bottoms weren’t my jam. When I wore them to our local pool, I found myself feeling more worried about what was peeking out than feeling proud that I’d made them. I knew that I would feel much more relaxed and comfortable with swim bottoms that had a little more leg coverage.
So I set my sights on making a pair of swim shorts! I looked around a bit for swim shorts patterns, but I can’t resist an opportunity for a good pattern hack, so I set off to make a pair using the Belmont Leggings pattern. Today, I’m sharing my process with you so that you can make your own swim shorts, too!
The shorts that I made were fairly basic, mostly because I wasn’t sure whether it would work out like I imagined. But don’t let that limit your imagination—you can add fancy color blocking to match your Ipswich bikini or top, or even a pocket or two!
Okay, let’s get started.
Prepare Your Pattern Pieces
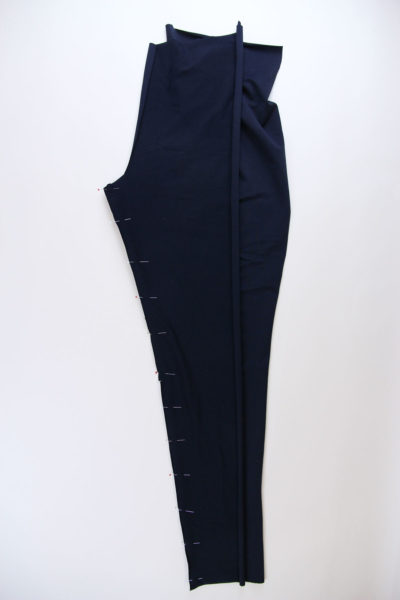
If you’ve ever turned pants into shorts, you know how easy it is: decide how long you want the legs to be, and then chop off the rest.
For my Belmont swim shorts, that’s what I did. I decided I wanted about a 4” (10.1 cm) inseam, plus a 1/2” (1.3 cm) hem allowance.
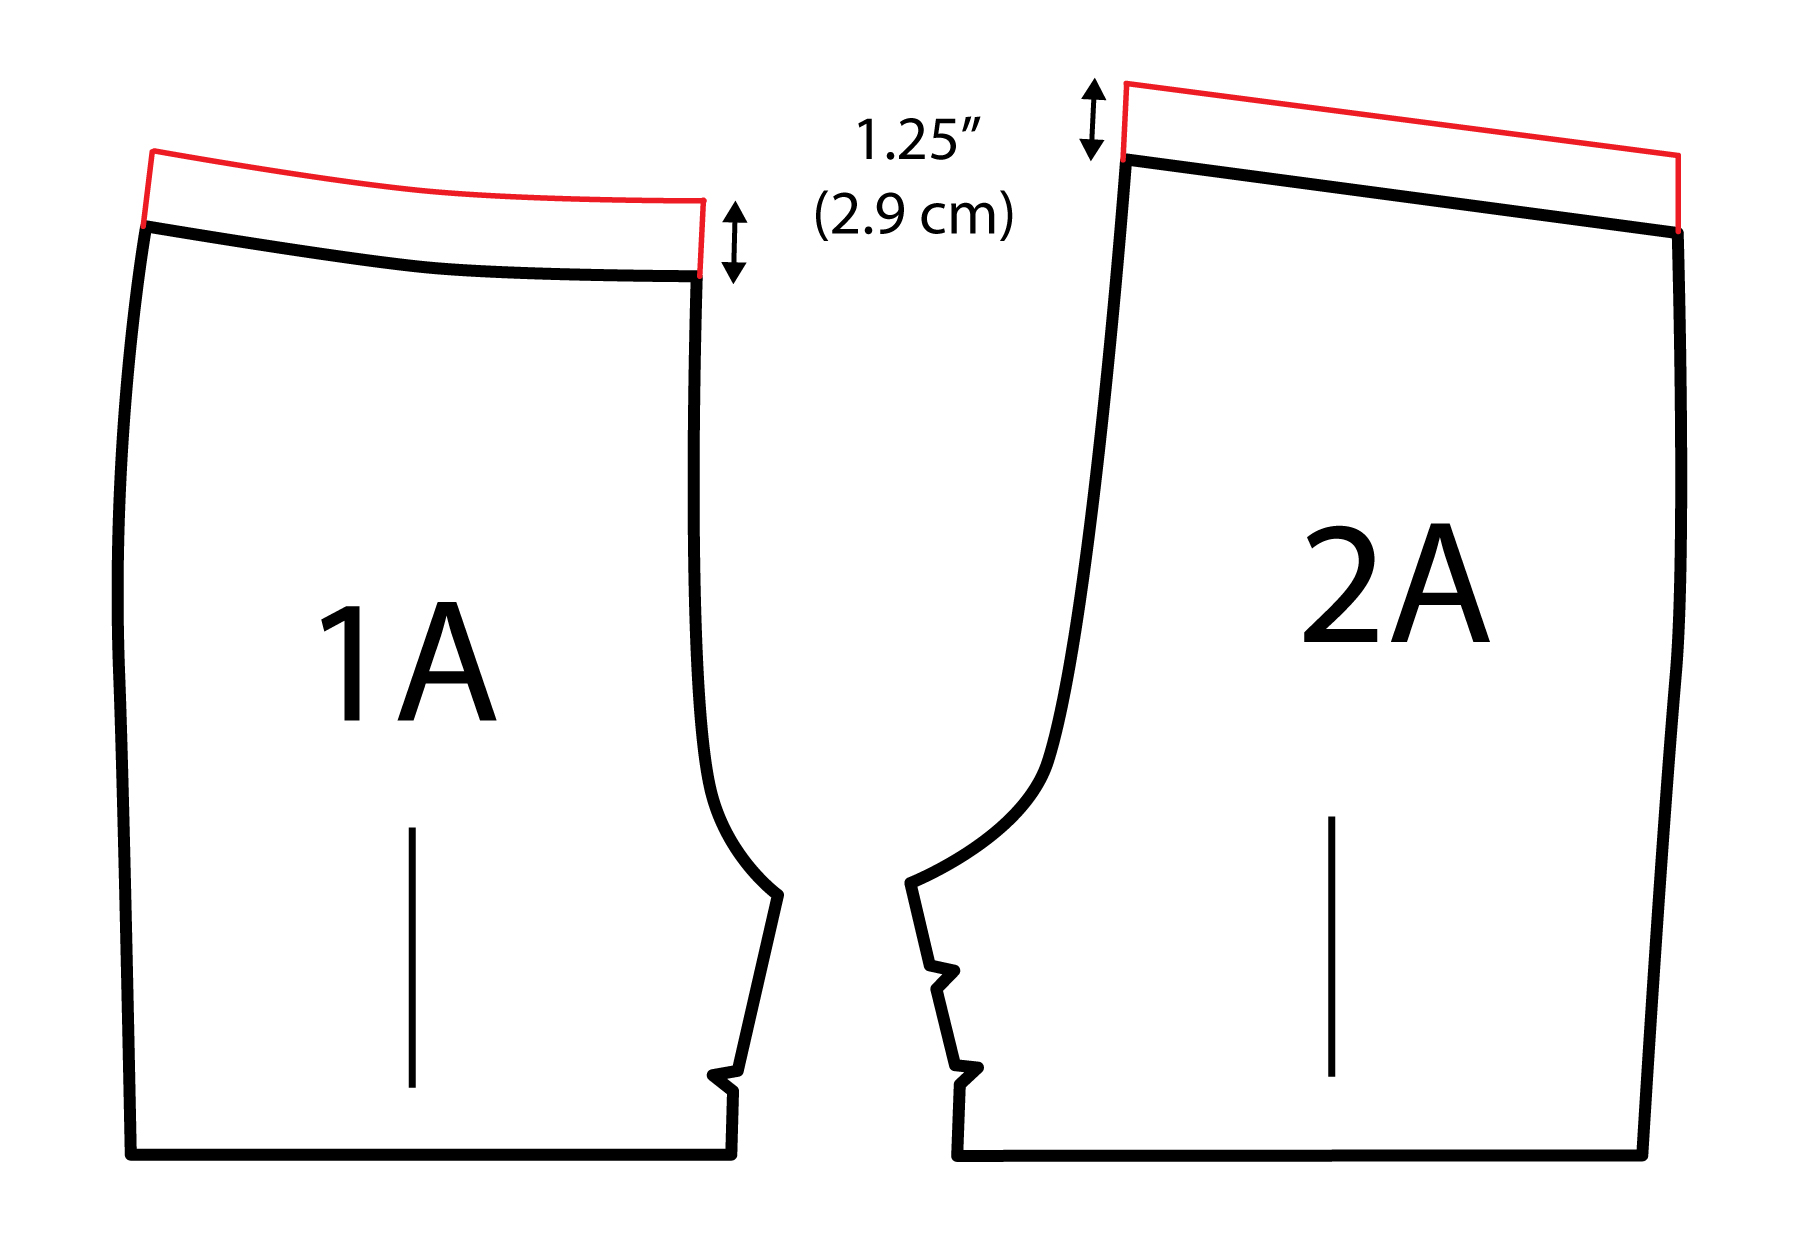
Using the leggings view of the pattern (although you could use the yoga pant view if you prefer) with the gusset option, I trimmed both the front and back leg pieces so that the inseam measured 4 1/2” (11.4 cm).
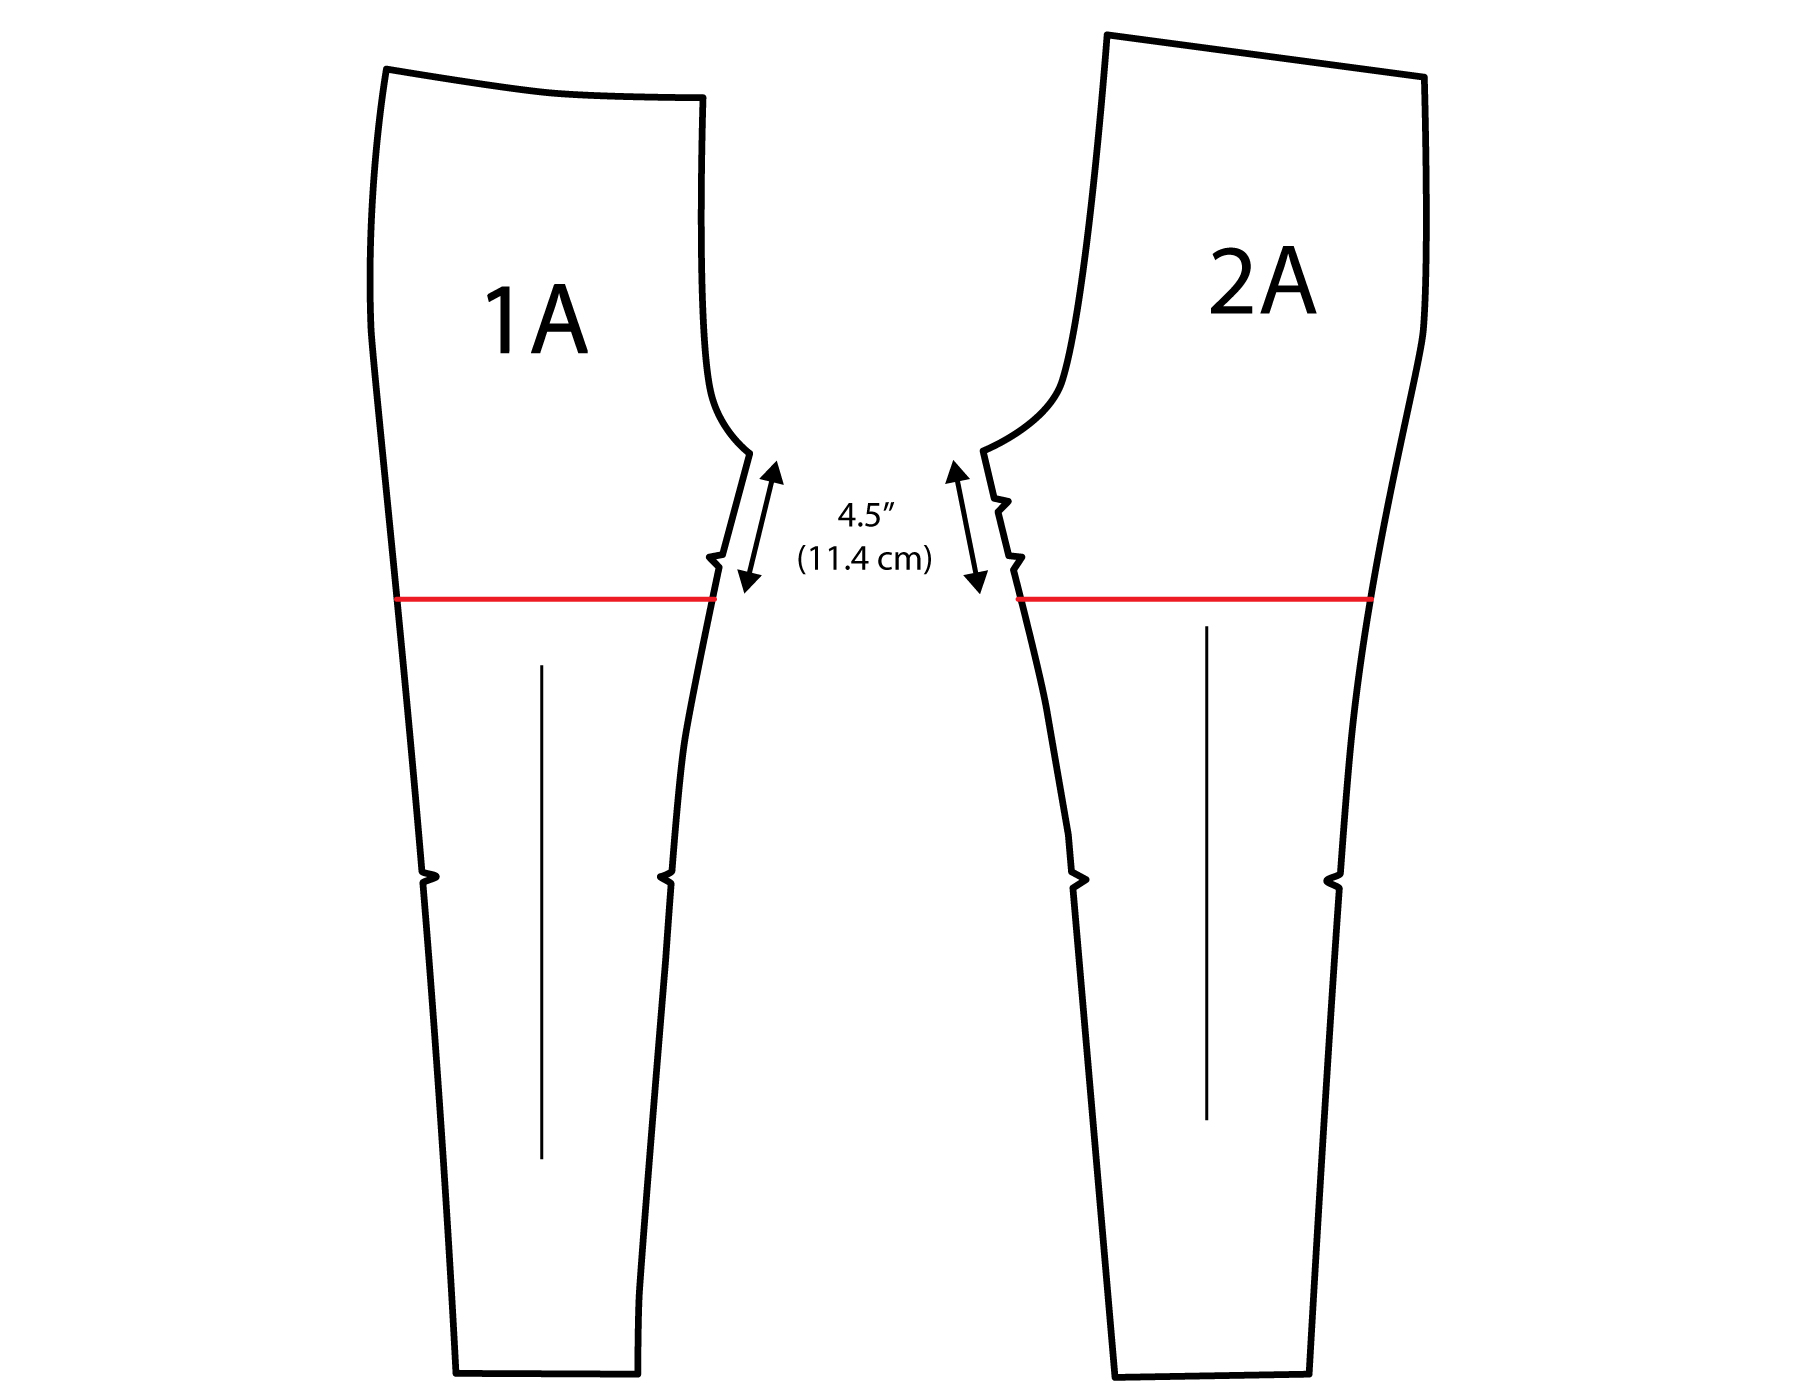
I also recommend straightening out the side seam below the crotch. When we sit, our leg mass spreads out and gets wider, and we don’t want the hem to dig in or be uncomfortable, since there is less stretch there due to the stitching.
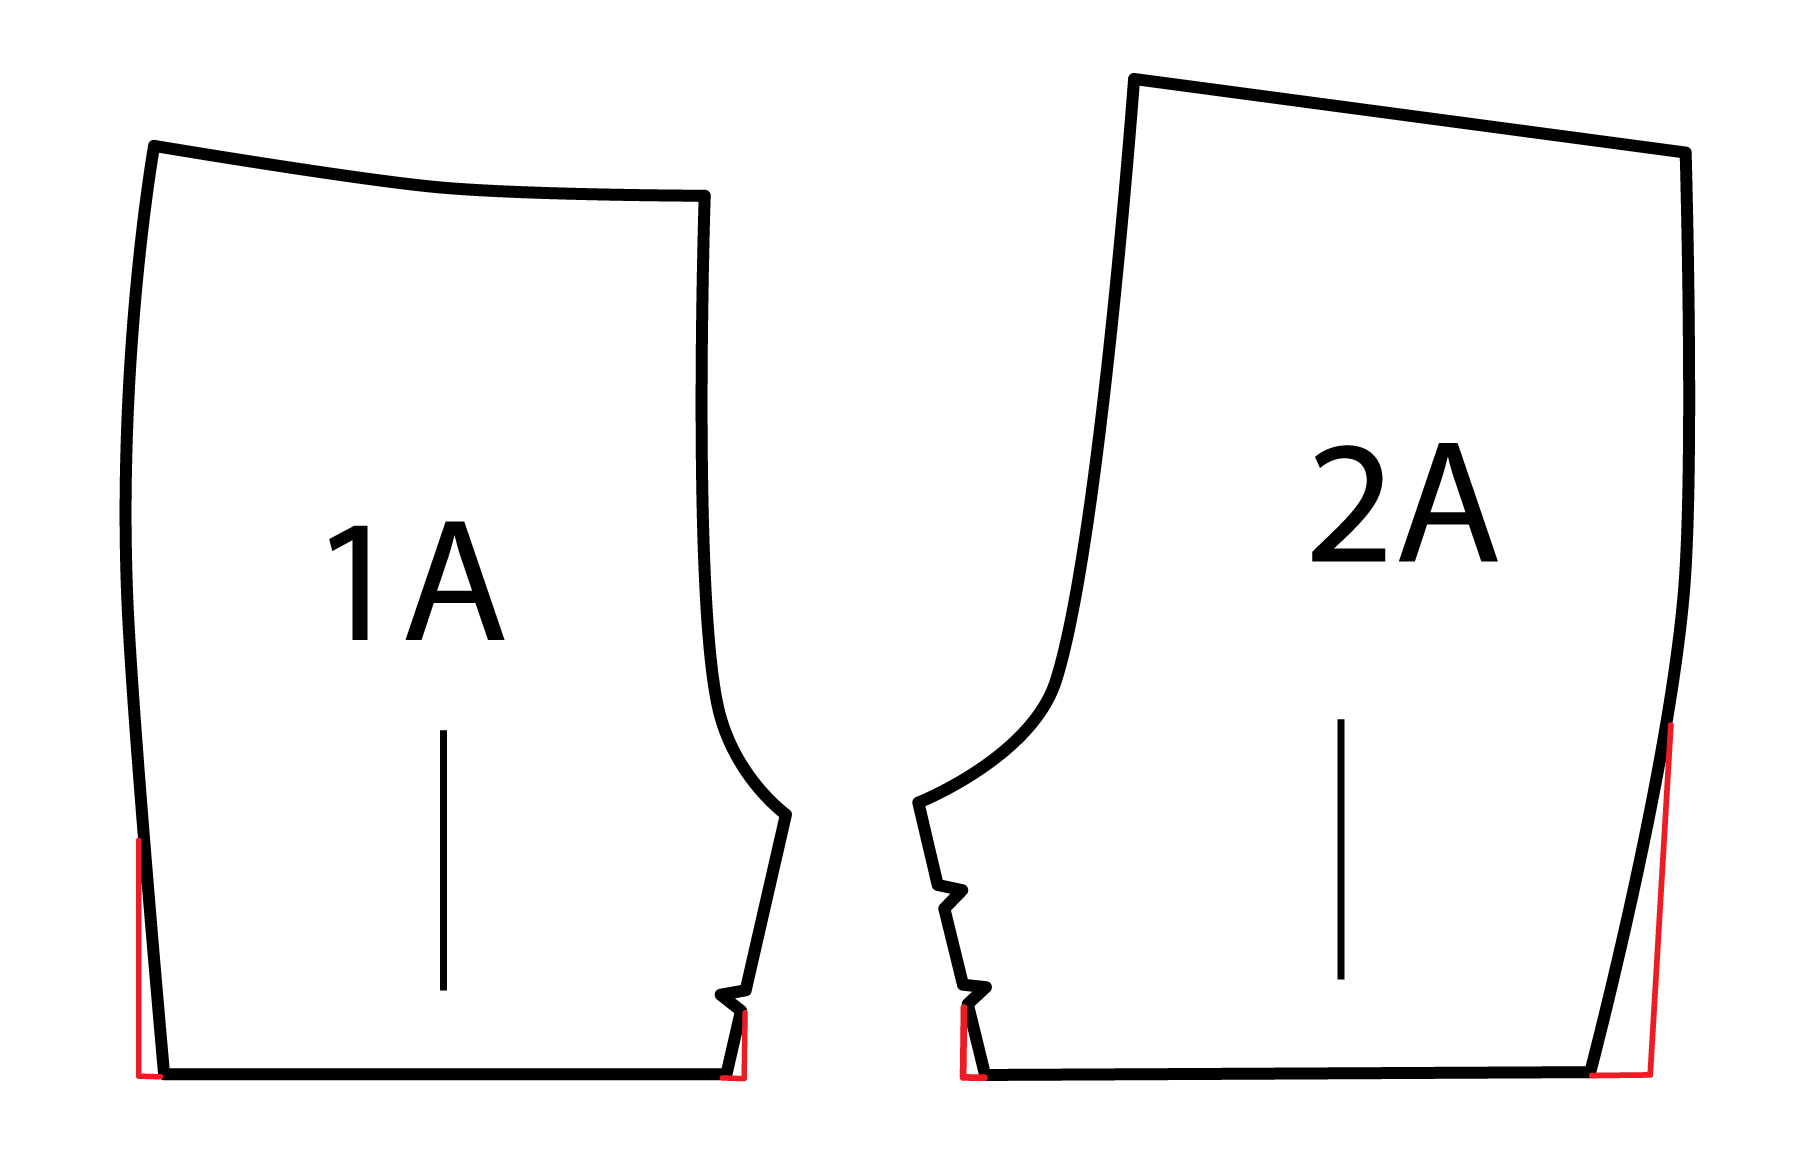
And just like that, the outer shell pieces of my swim shorts are ready to cut out.
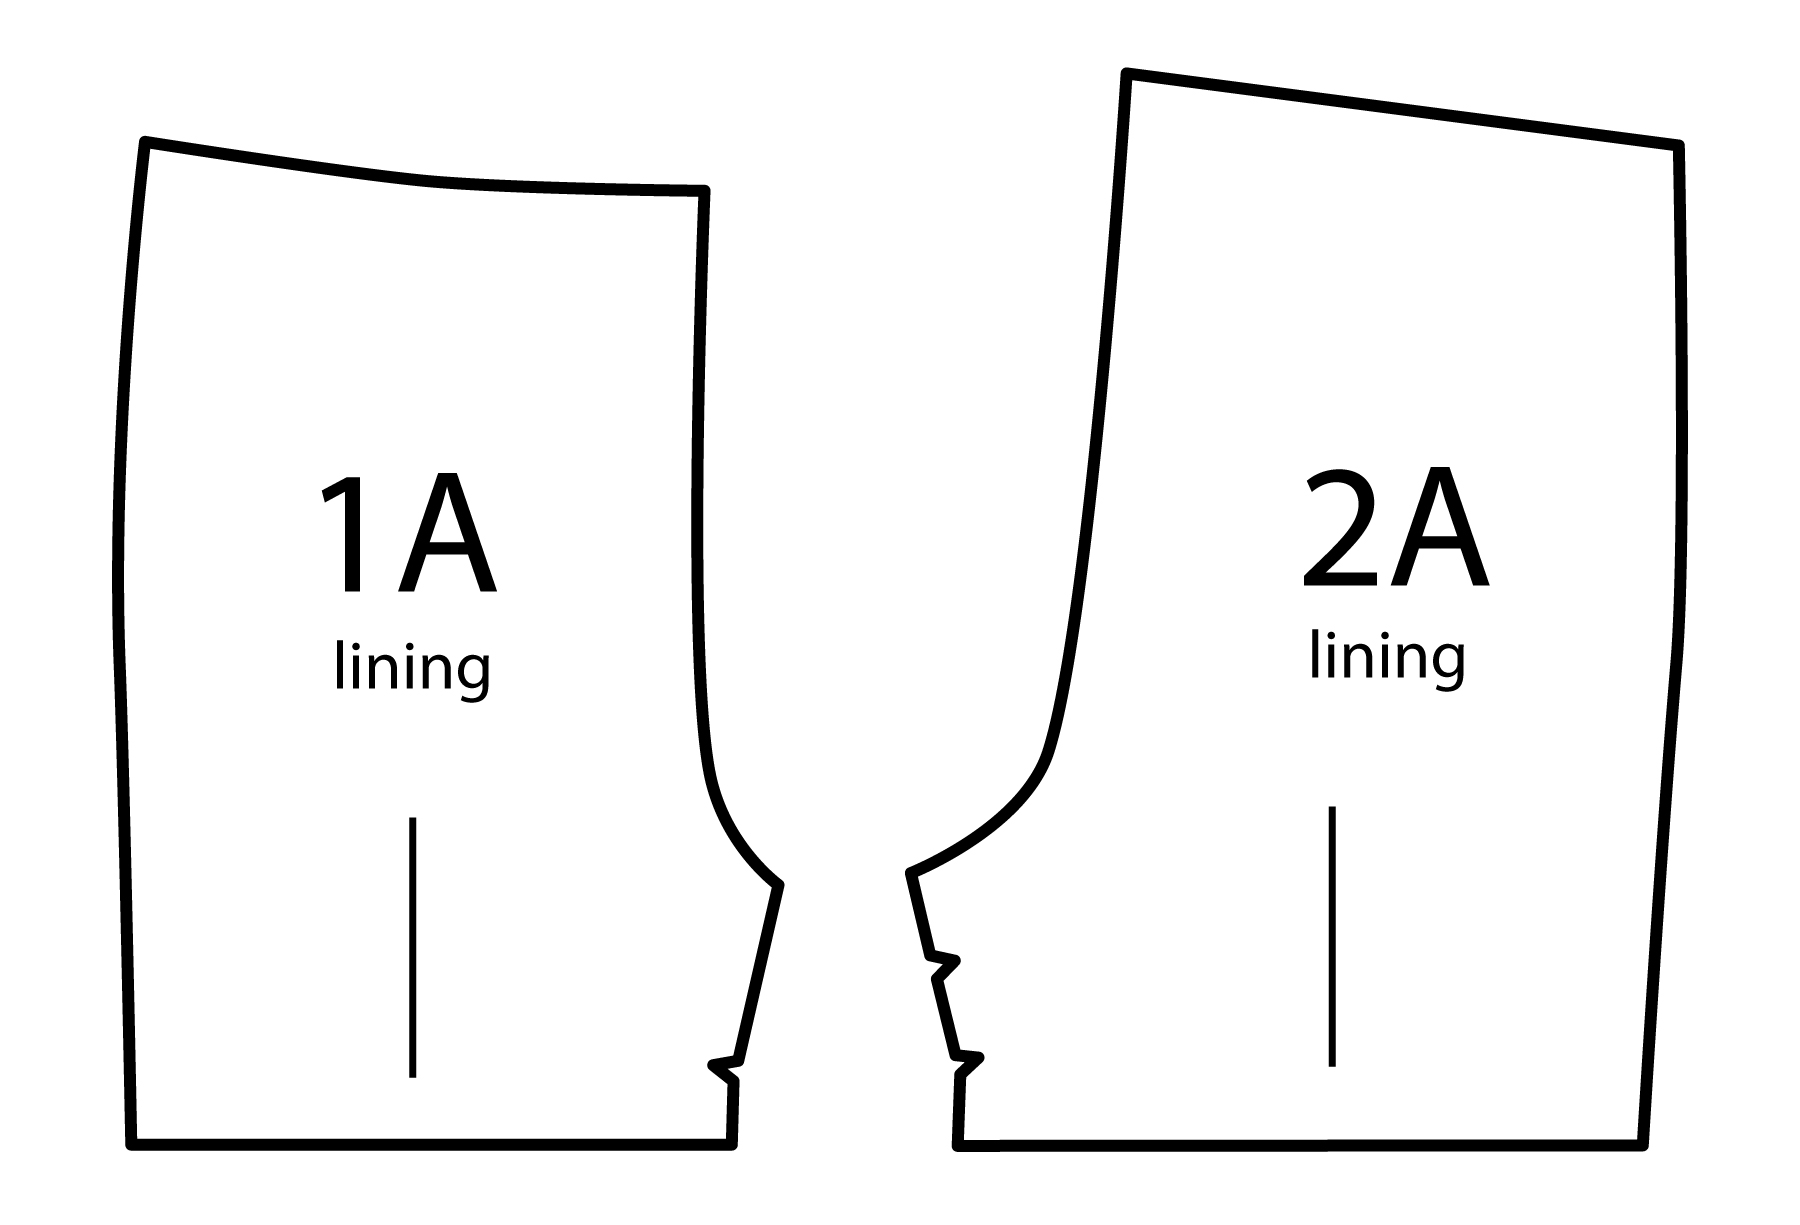
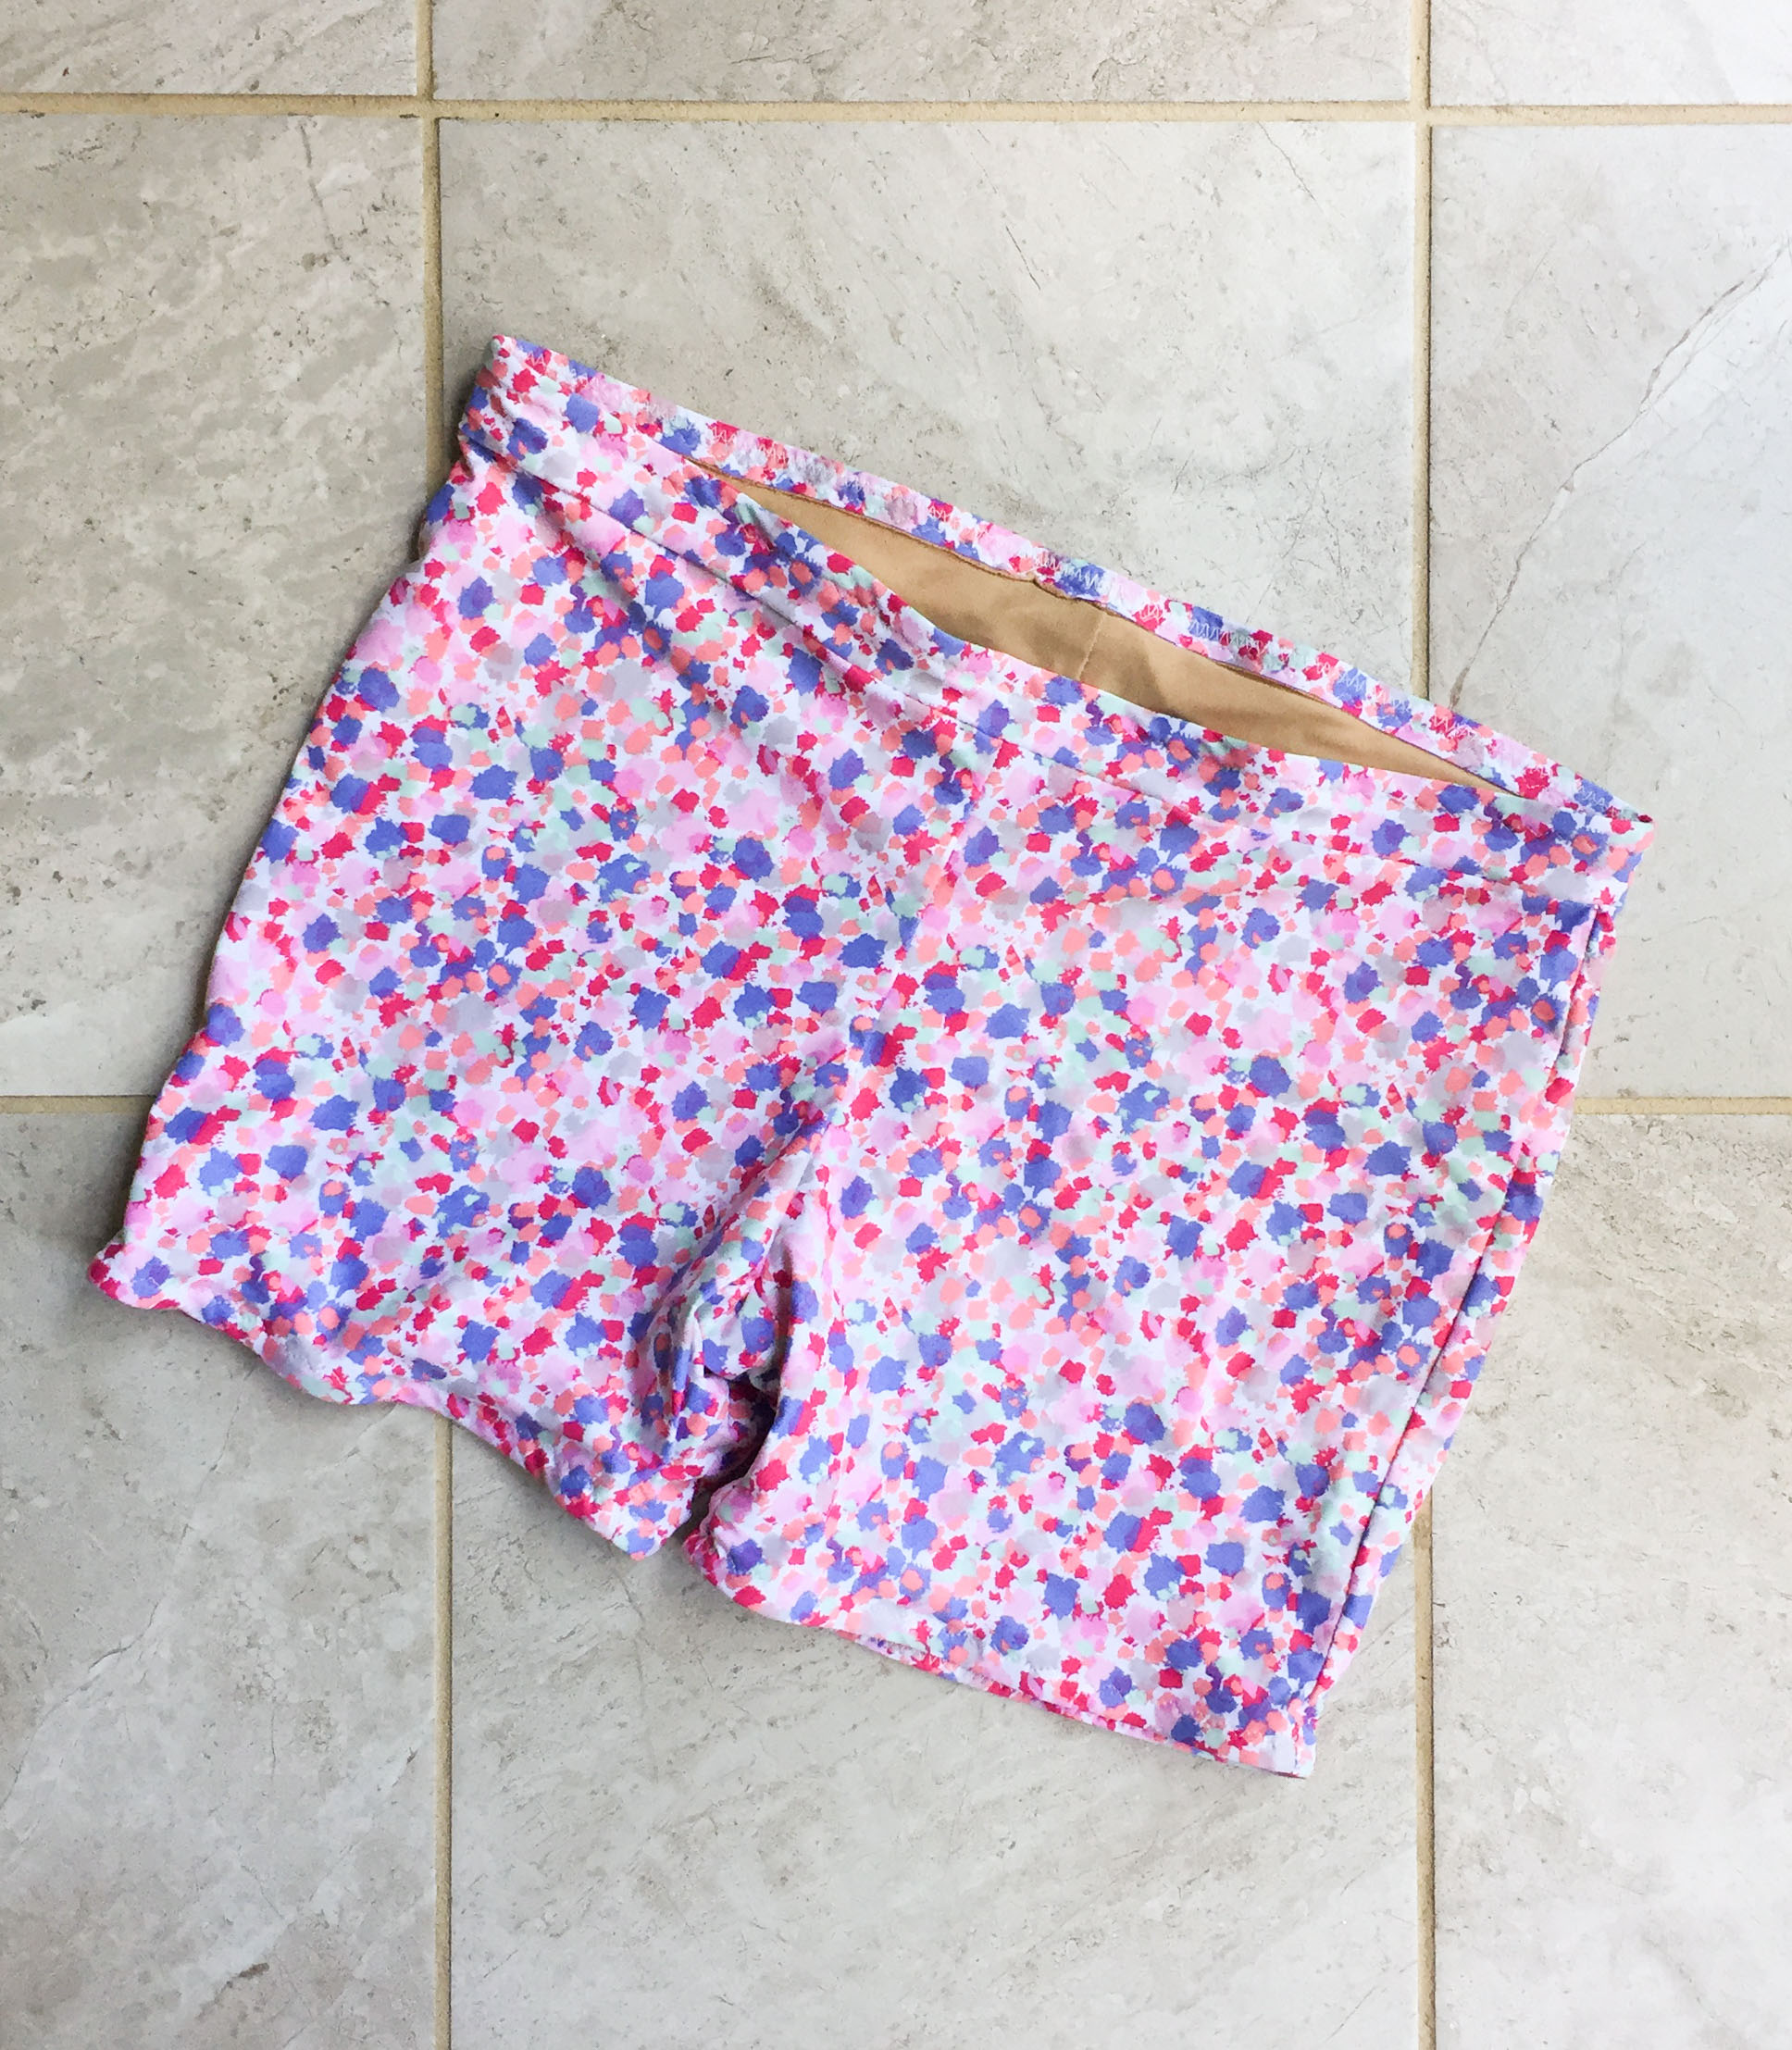
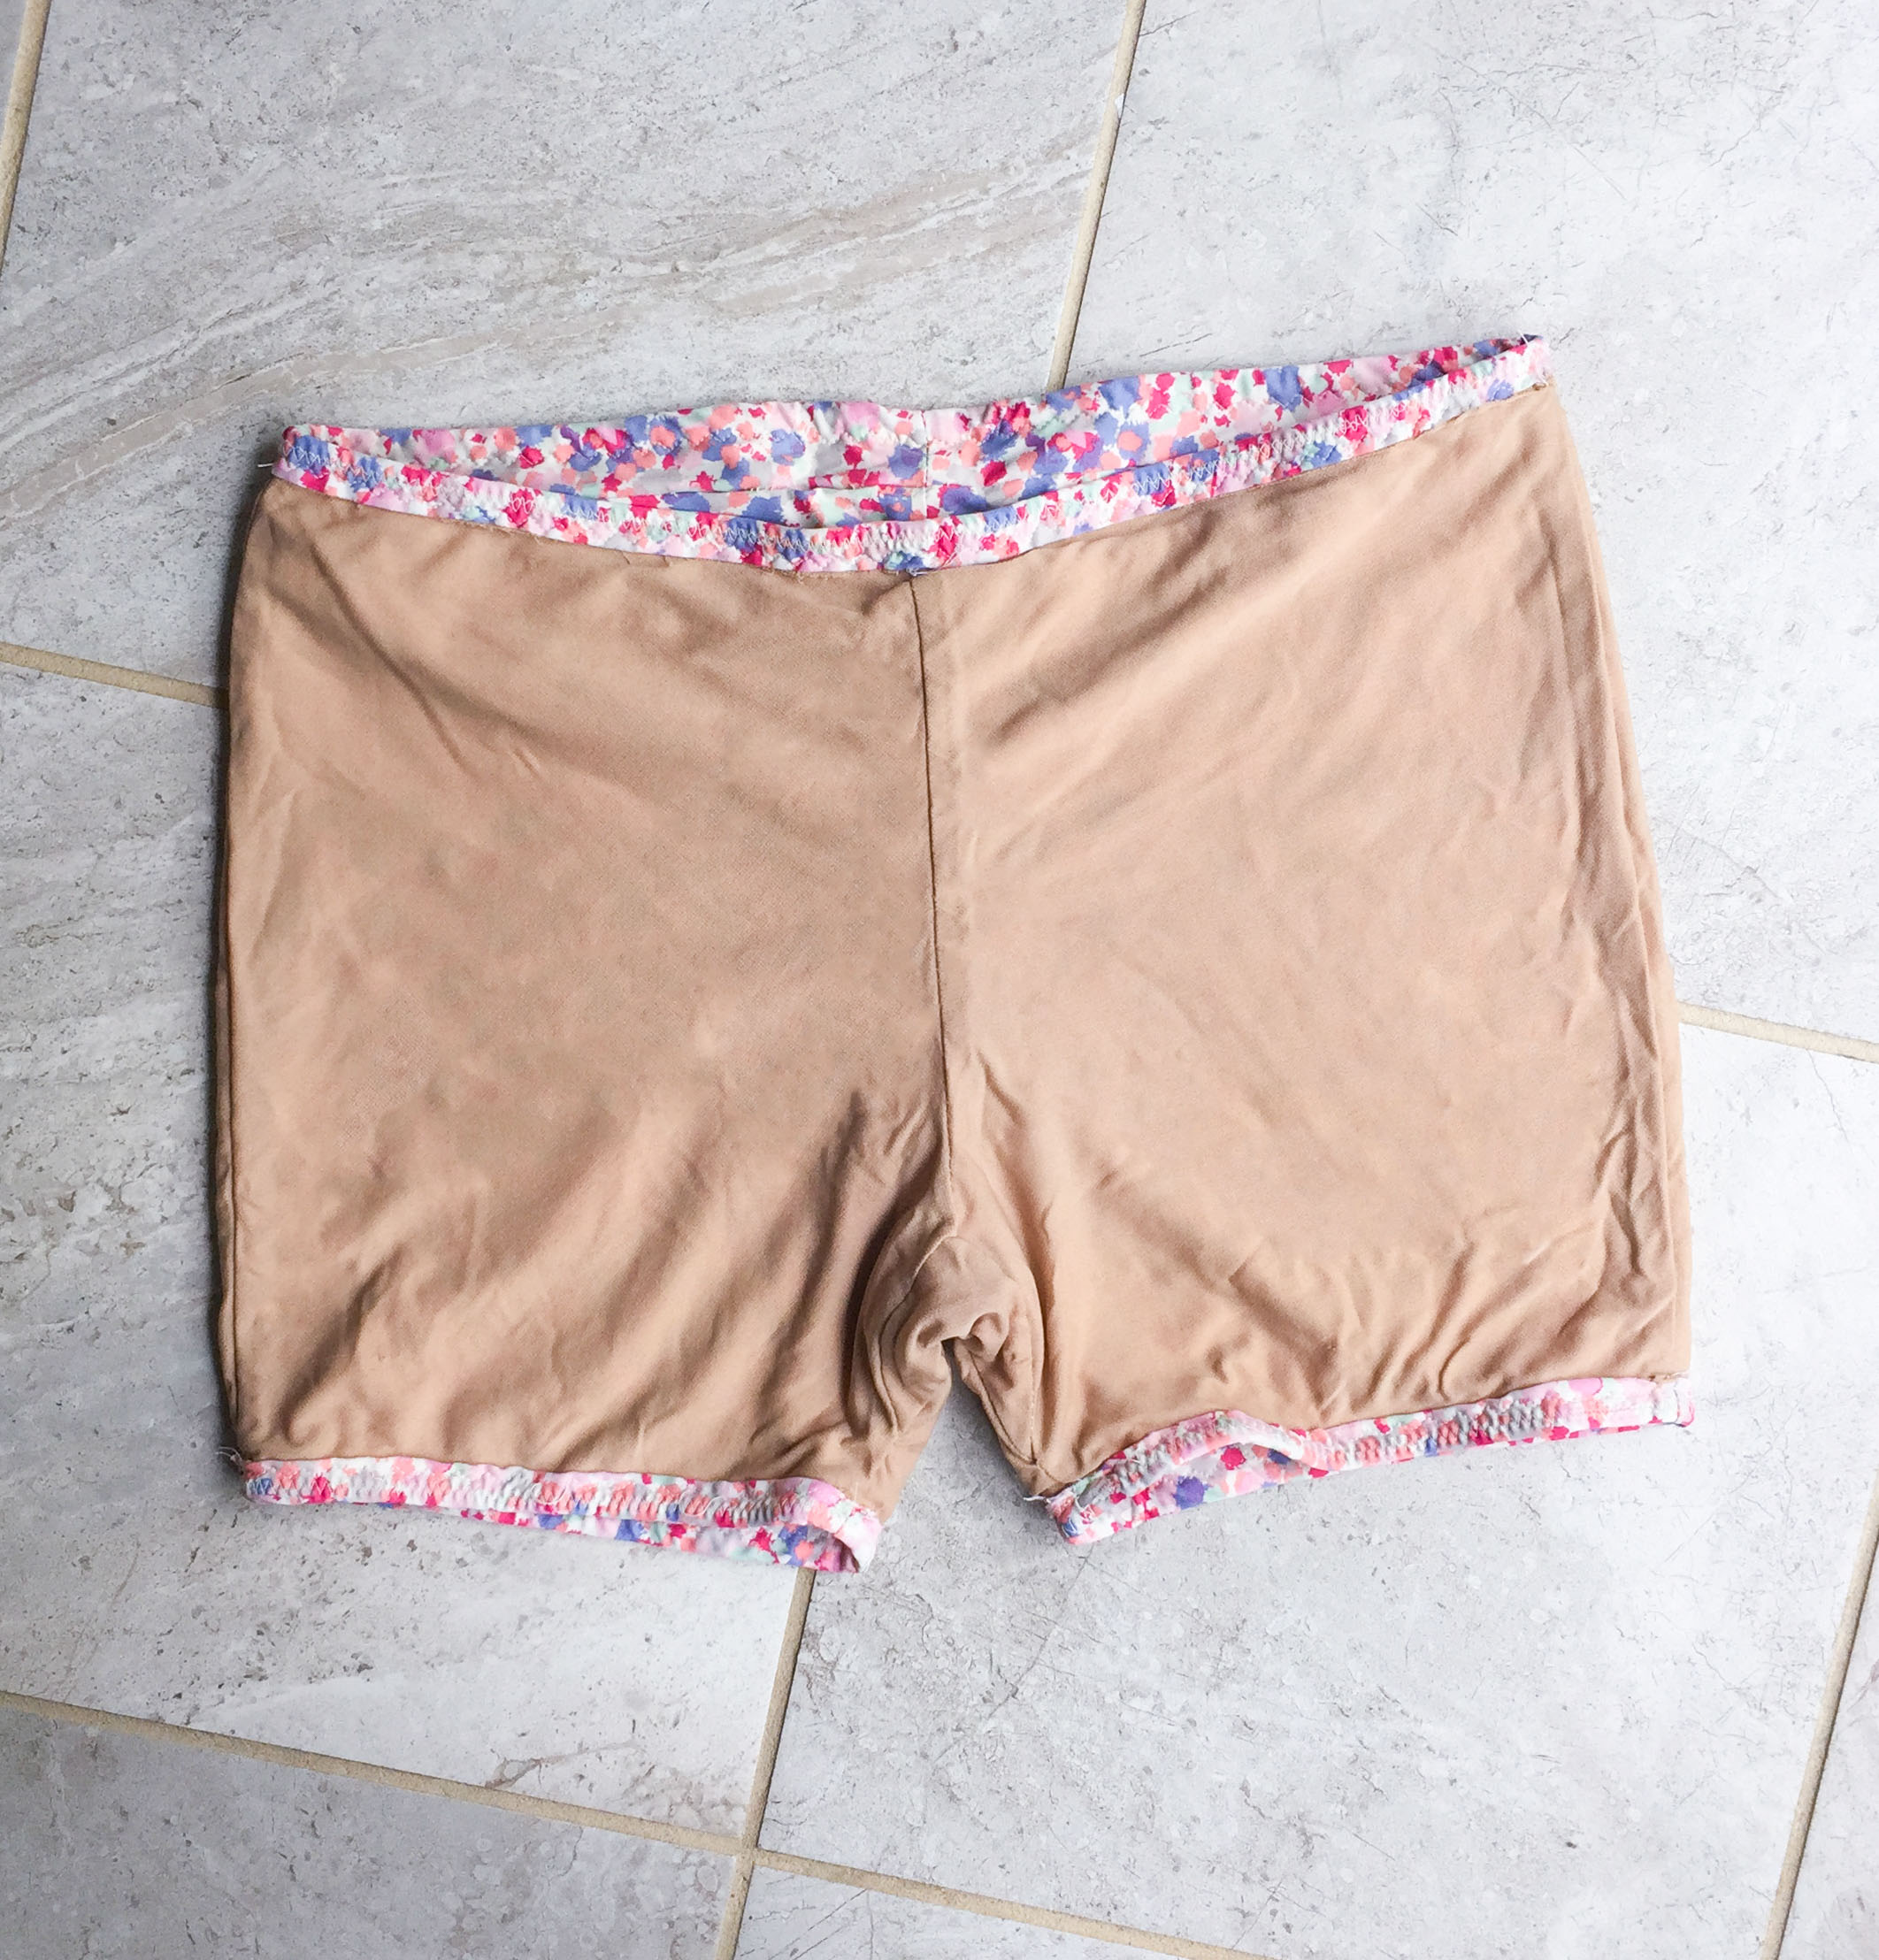
Now let’s talk lining. Swimsuits are much more comfortable to wear when they’re lined, plus they’re less likely to be see-through when wet. The fabric I picked for my swim shorts had a white background to it, so lining was crucial.
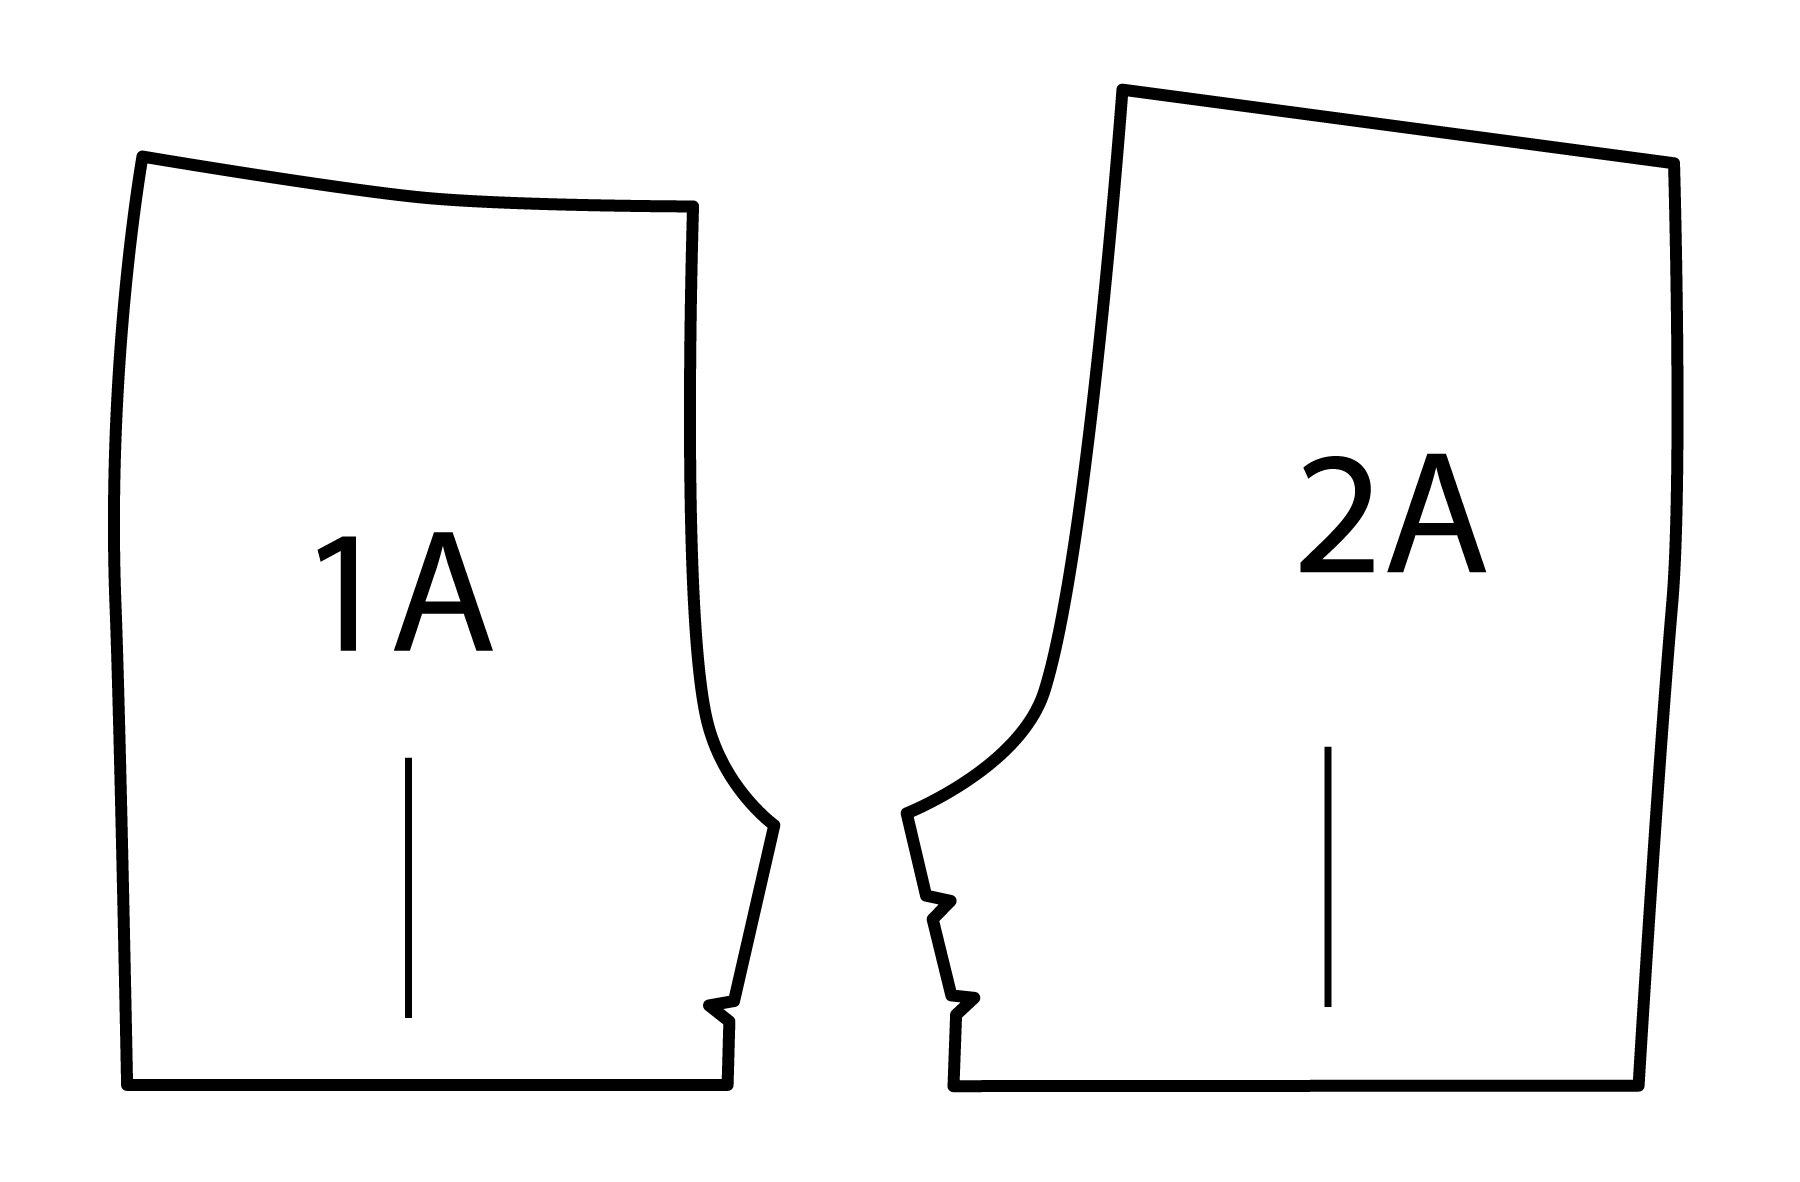
In the Ipswich Swimsuit, the waistband of the outer shell of the bottoms is a separate piece, but it’s all once piece for the lining. To achieve the same thing with my Belmont shorts, I lengthened the side seams upward by 1 1/4” (2.9 cm). That’s because the waistband is 2” wide (5 cm), and I’m subtracting two seam allowances where the waistband and shorts overlap (3/8” + 3/8 = 3/4” / 1.9 cm).
And there are our lining pieces!
Cutting Out Your Swim Shorts
Here’s what we need to cut out for our swim shorts:
- From the fashion fabric (our outer shell), we need to cut 1 waistband, 2 front legs, 2 back legs, and 1 gusset.
- From our lining, we need to cut 2 front legs (with waistband height added in), 2 back legs (with waistband height added in), and 1 gusset.
- We’ll also need 1/4” or 3/8” swimwear elastic.
Sewing the Swim Shorts
To construct the swim shorts, follow the steps for sewing the legs and inserting the gusset as shown in the Belmont instructions. (Or check out our free sewalong here.) Also attach the waistband to the outer shell of the shorts by sewing the waistband closed at one end to form a loop, and then attaching it to the shorts.
Follow the same steps to construct your lining, sewing the legs and inserting the gusset. Since our waistband is built in to the lining, we can skip that step.
What we have now are the two shorts constructed—the outer shell from the fashion fabric, and the lining. To put them together, place the lining inside the outer shell WRONG sides together and baste around the waist and the two leg holes.
Finish the waist as you would the Ipswich bottoms: cut a piece of elastic the length of the waistband, then sew elastic to upper edge of inside waistband, gently stretching as you stitch, leaving a sliver of fabric showing at waistband edge. When you get to the end, trim any excess elastic, then flip elastic to the inside of the shorts so that the elastic is enclosed in the swim fabric and topstitch from the outside. (I like to do a triple zigzag stitch here—so professional looking!)
Repeat these same steps with the leg openings, but don’t stretch the elastic. If you’re not planning on doing anything super active in your swim shorts, you may even be fine without elastic in the legs.
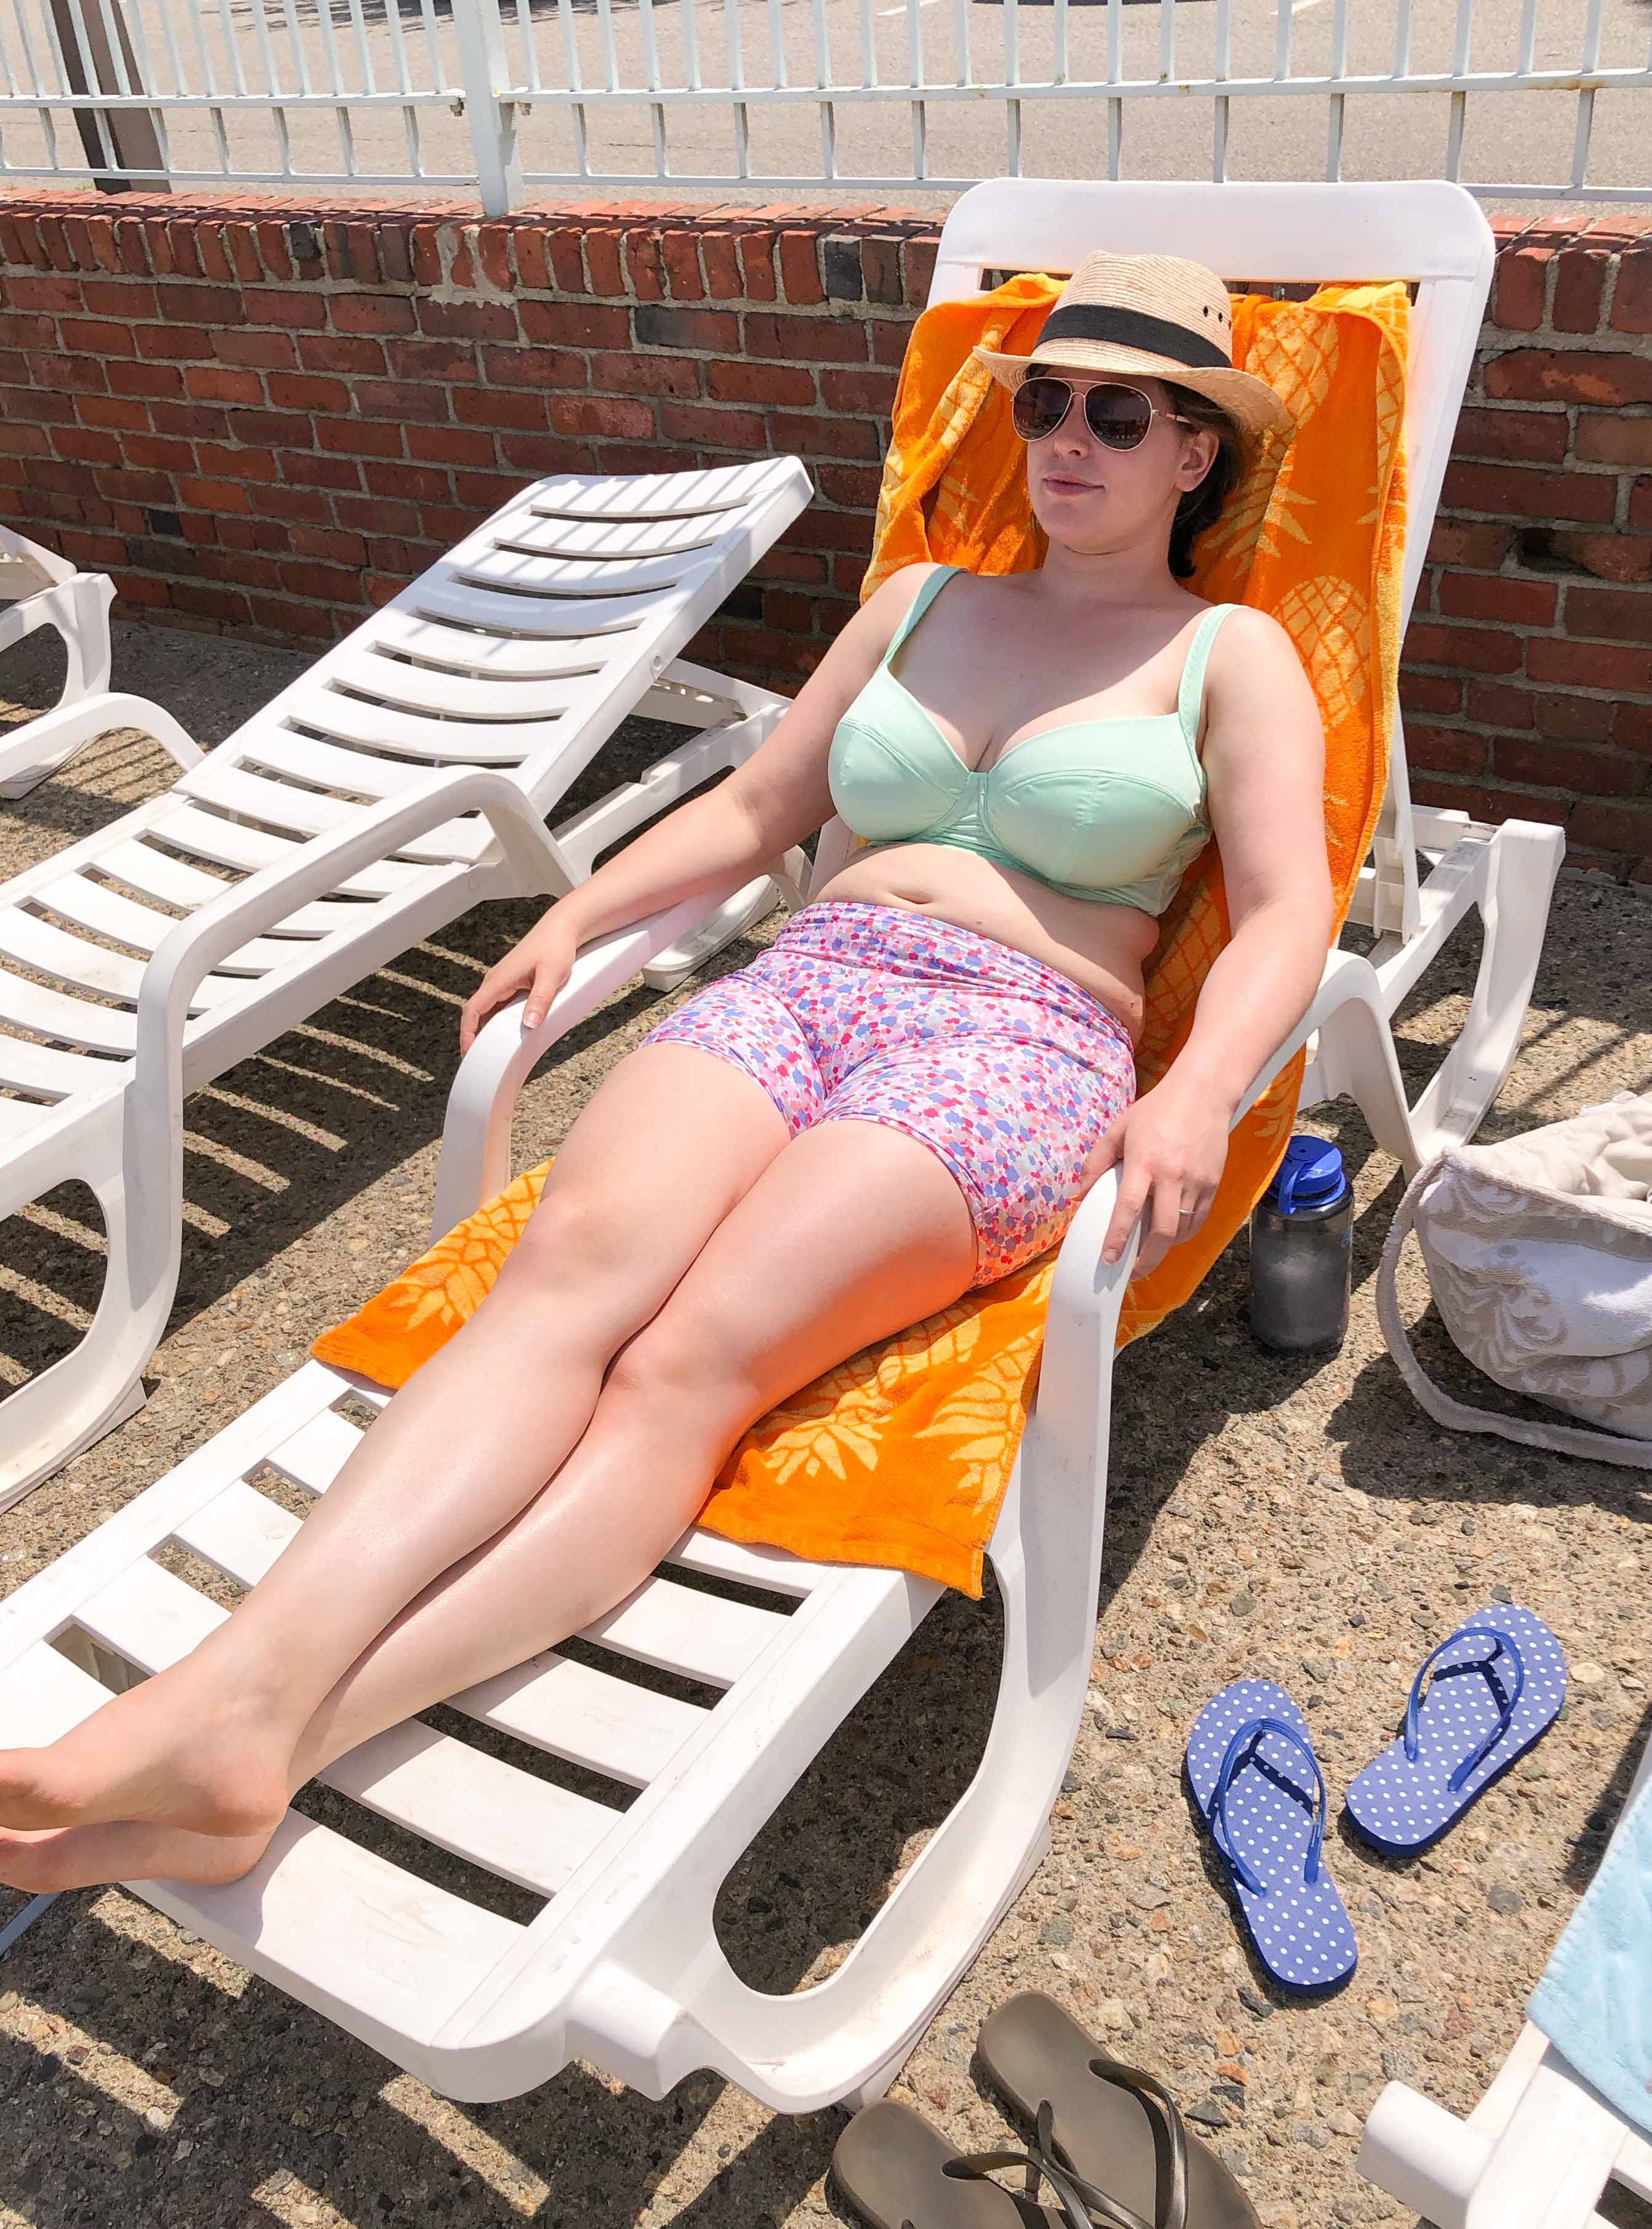
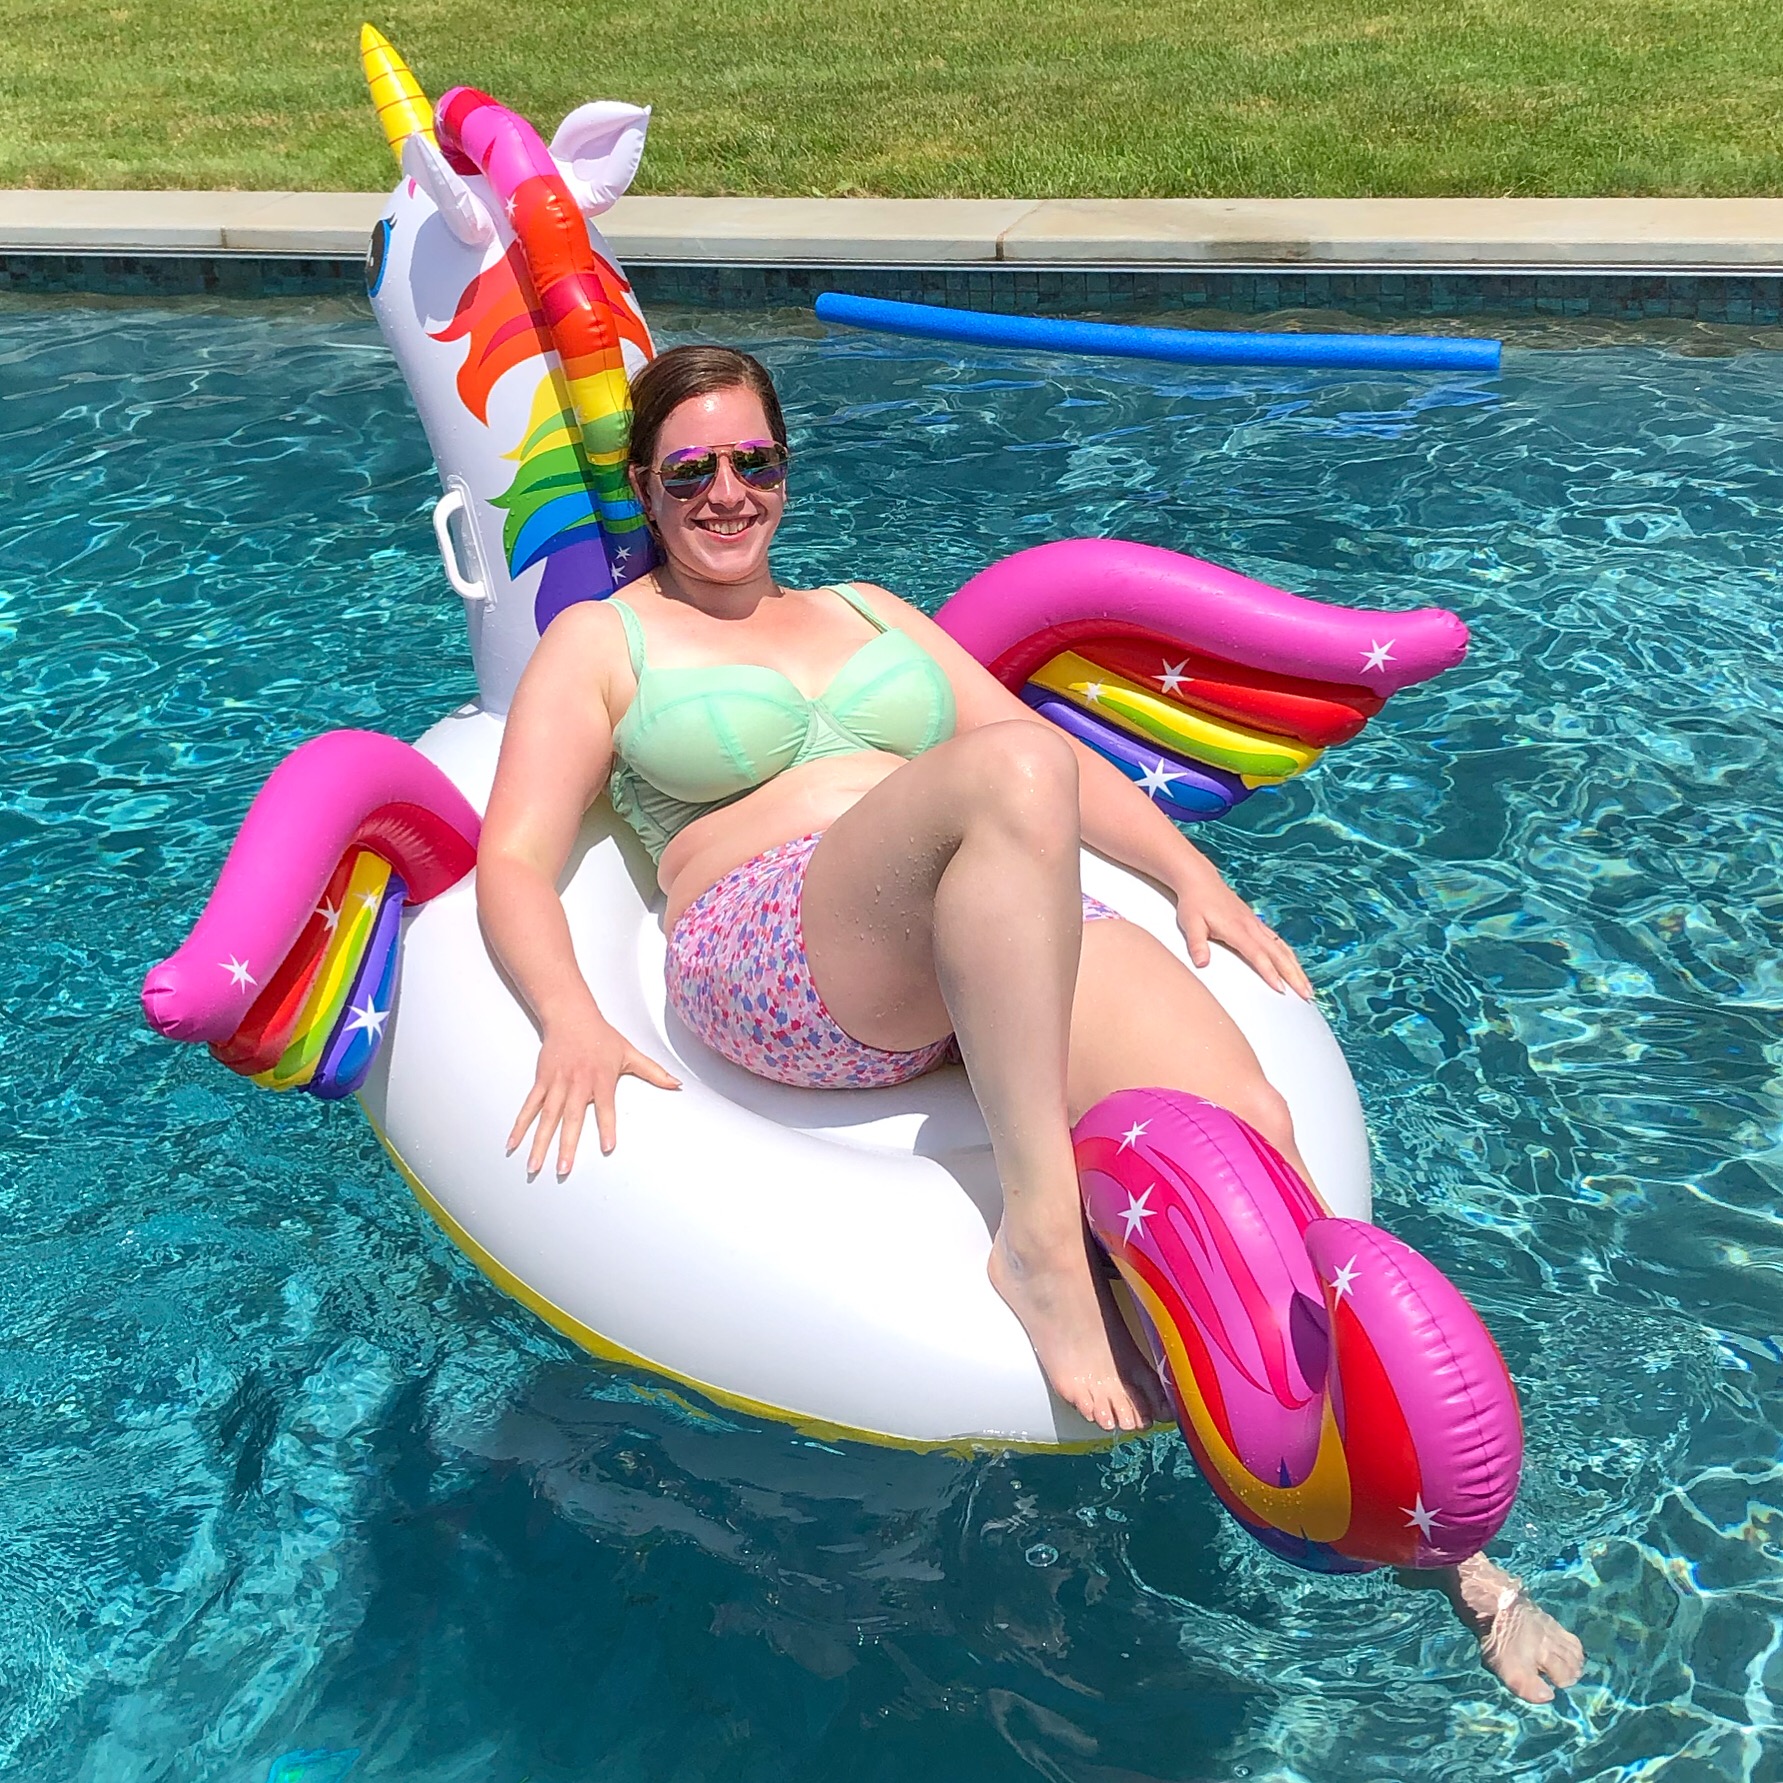
And there you have it! A fun and sporty pair of swim shorts that go great with your Ipswich bikini top and provide that extra leg coverage you’ve been wanting.
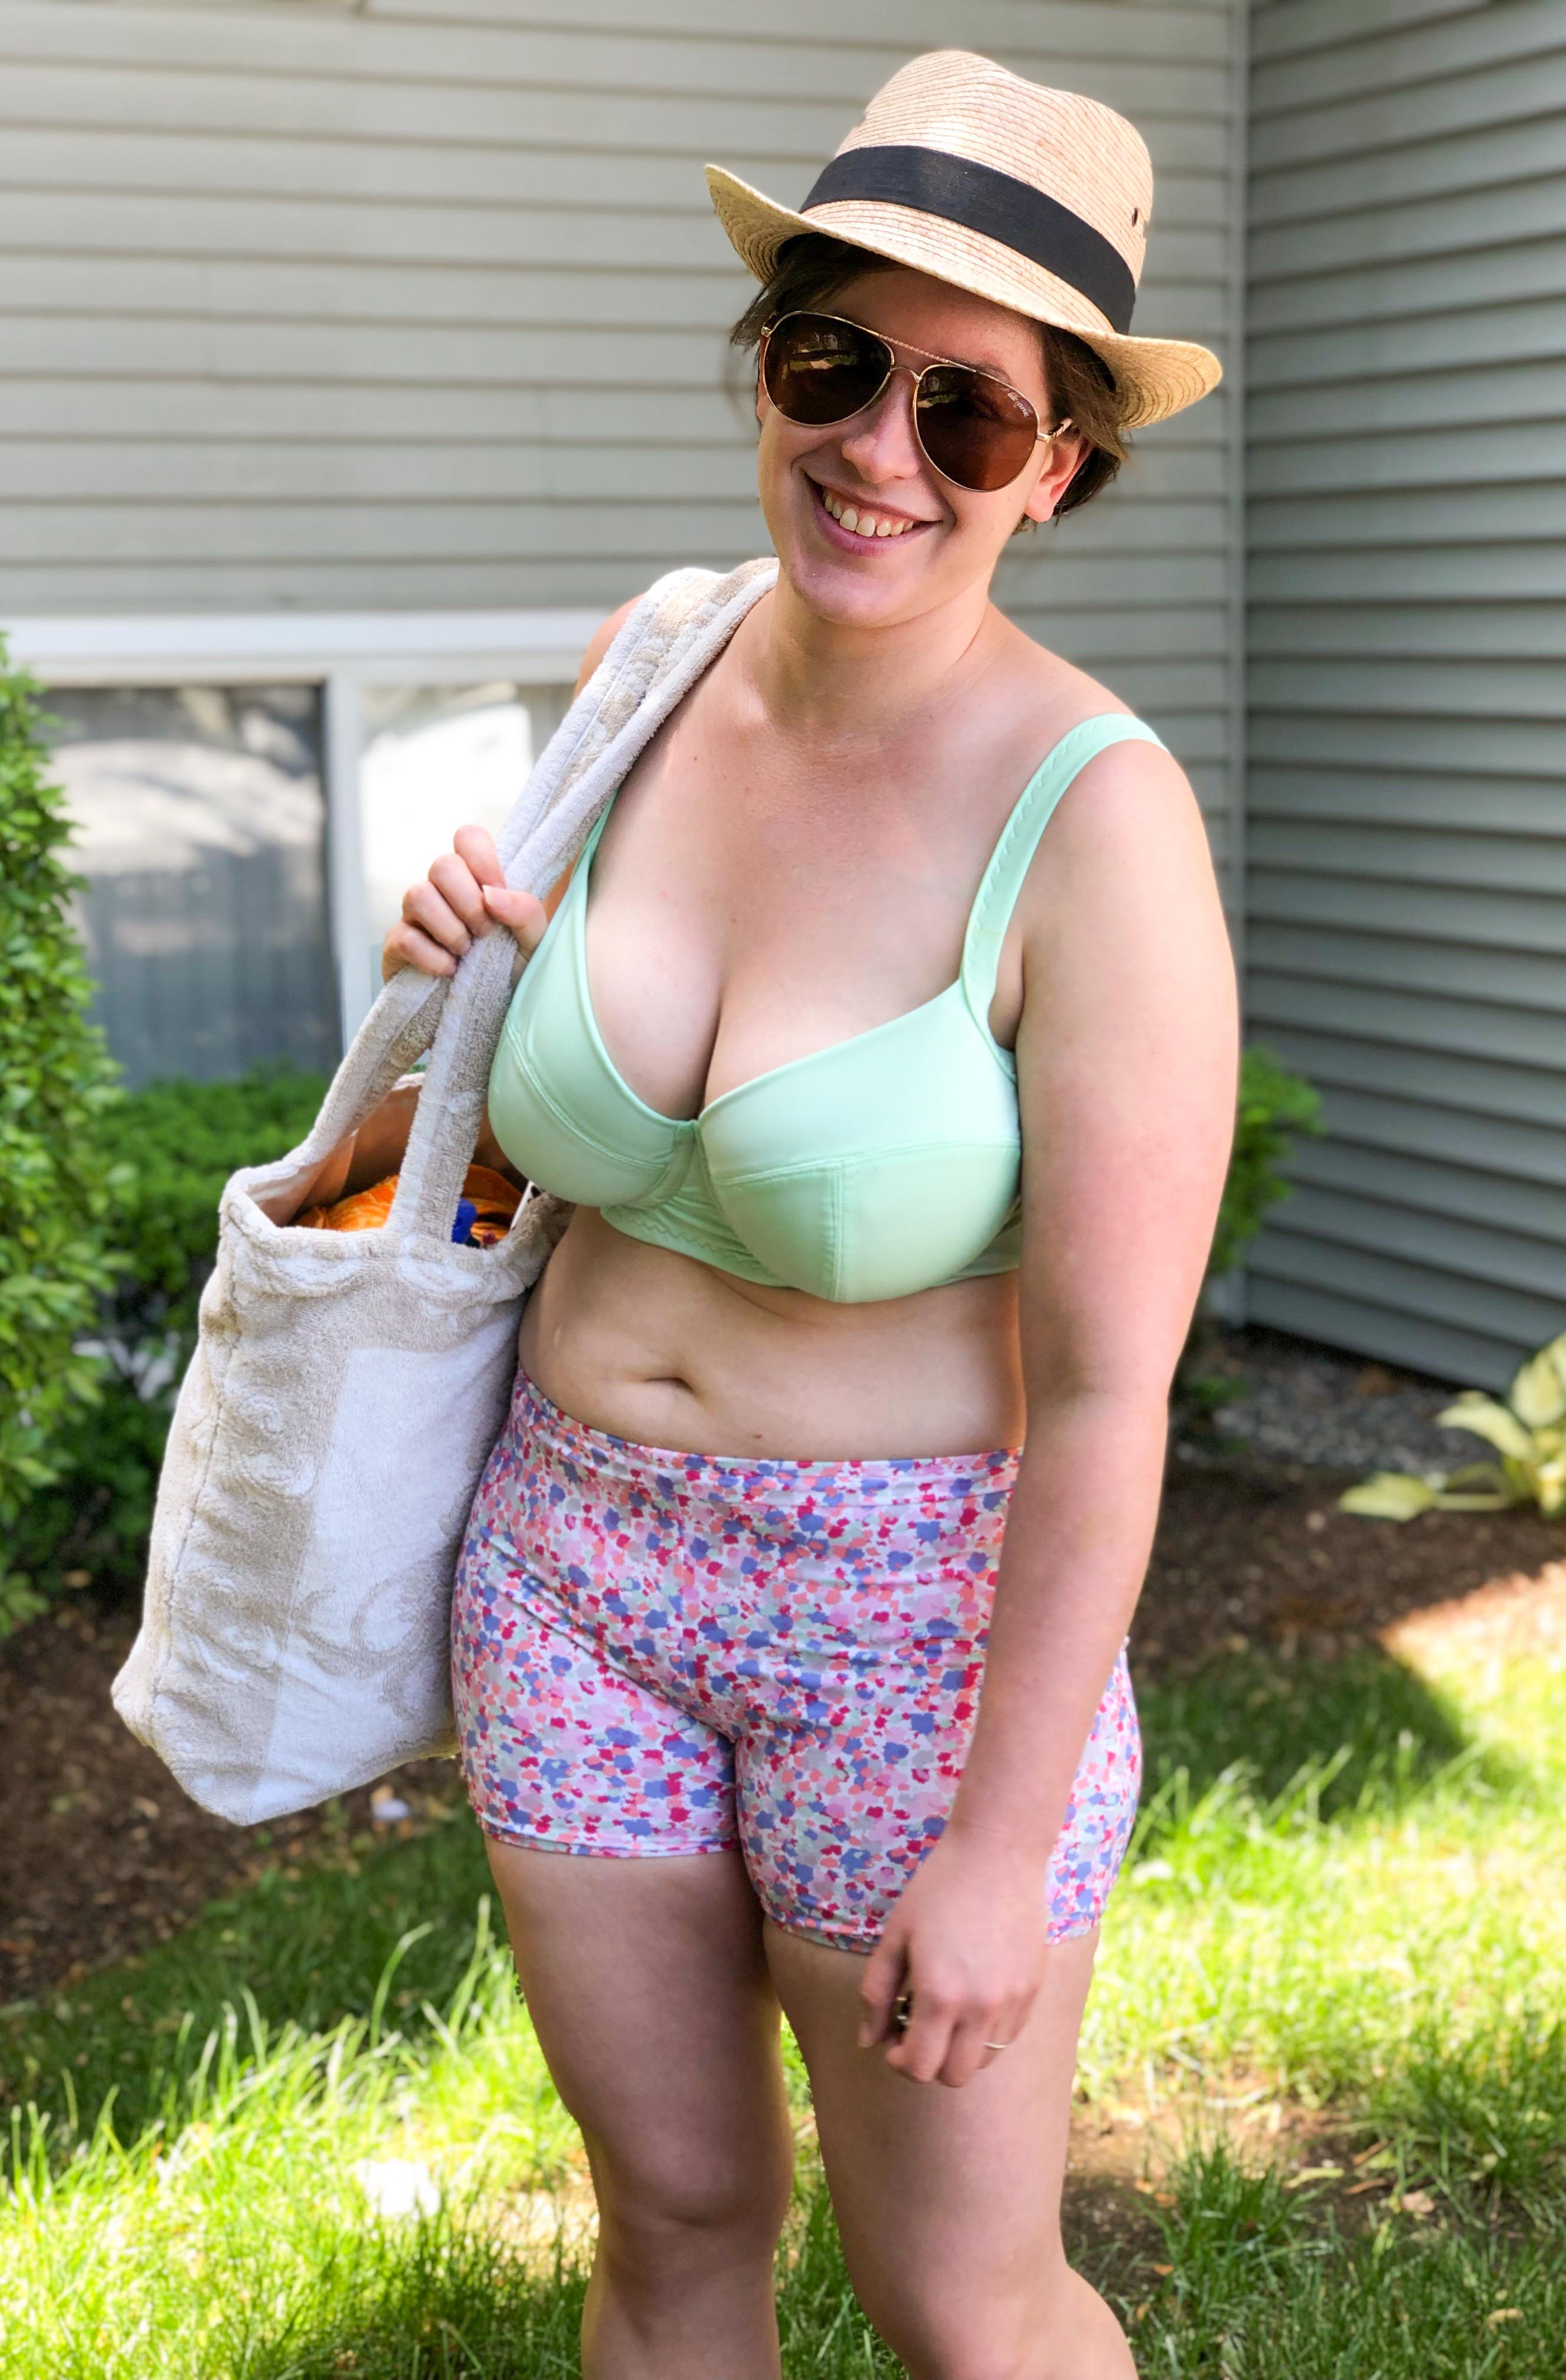
I’m wearing Belmont swim shorts in a size 12 with swim lycra I picked up at my local discount fabric shop. These swim shorts require very little fabric—less than a yard will do!
In these photos I’m also wearing a bikini top that I hacked together, using the Orange Lingerie Boylston Bra for the front and the Ipswich Swimsuit bikini for the back and straps. I used scraps from my swim shorts to cover the bra cup seam on the inside! (Isn’t sewing just the best?!)
These photos were taken last summer when pools were open and there were giant floating unicorns and we had not a care in the world.
I hope you’re inspired to give this hack a try! Don’t forget to share your makes using the hashtags #IpswichSwimsuit and #BelmontLeggings so we can marvel at your fun new swimwear.