New to PDF sewing patterns? The first time you try printing a PDF pattern at home, it can be a bit intimidating. So today we’ll be showing you how to print a PDF sewing pattern at home so that you can be on your way to sewing up your new pattern in no time!
Here at Cashmerette, one of the reasons we love PDF patterns is the instant gratification—you can buy a new pattern the minute it’s released, print it out, and sew it up within a few hours. It’s magic! If this is your first time trying to print a PDF pattern at home, we’re here to take you through the entire process from start to finish, step by step.
(Want more information about what the heck a PDF sewing pattern even is? Check out our beginner’s guide to PDF patterns here.)
How to Download a PDF Pattern
Let’s start the very beginning. We need to buy and download the pattern first. (Already have a PDF pattern downloaded and ready to print? Jump on down to the next section.)
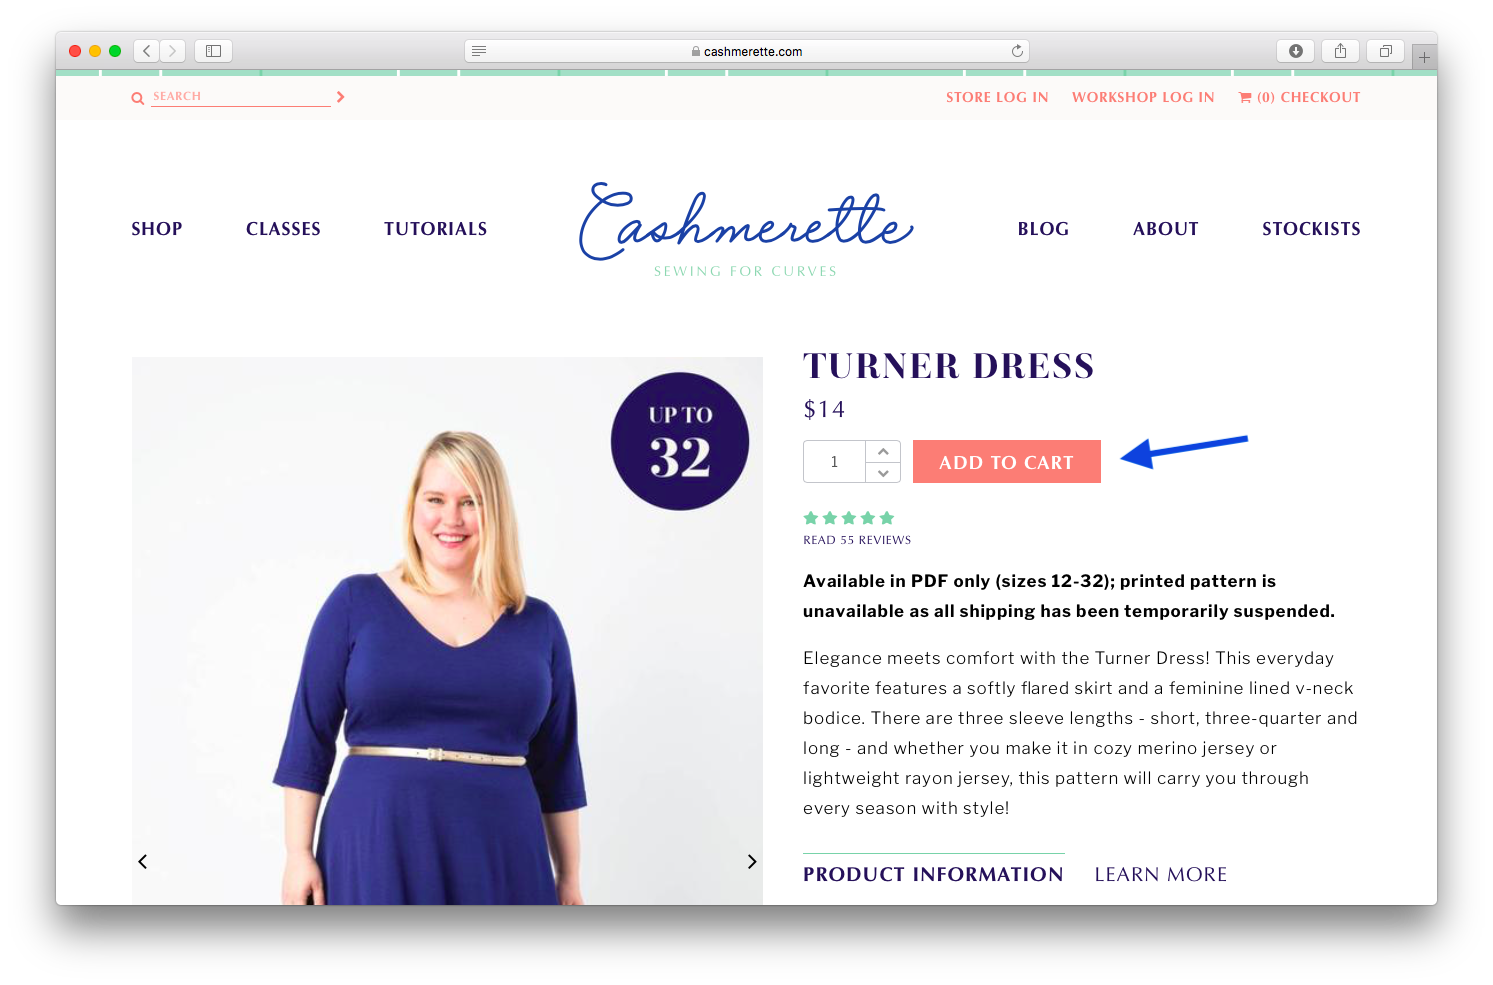
Buying a PDF pattern is the same process as buying a printed pattern, except that you don’t have to pay shipping. Simply navigate to the pattern you want to purchase and click add it to your cart (making sure to select “PDF pattern” from the dropdown if the printed pattern is also available).
You can see all of the Cashmerette PDF patterns here.
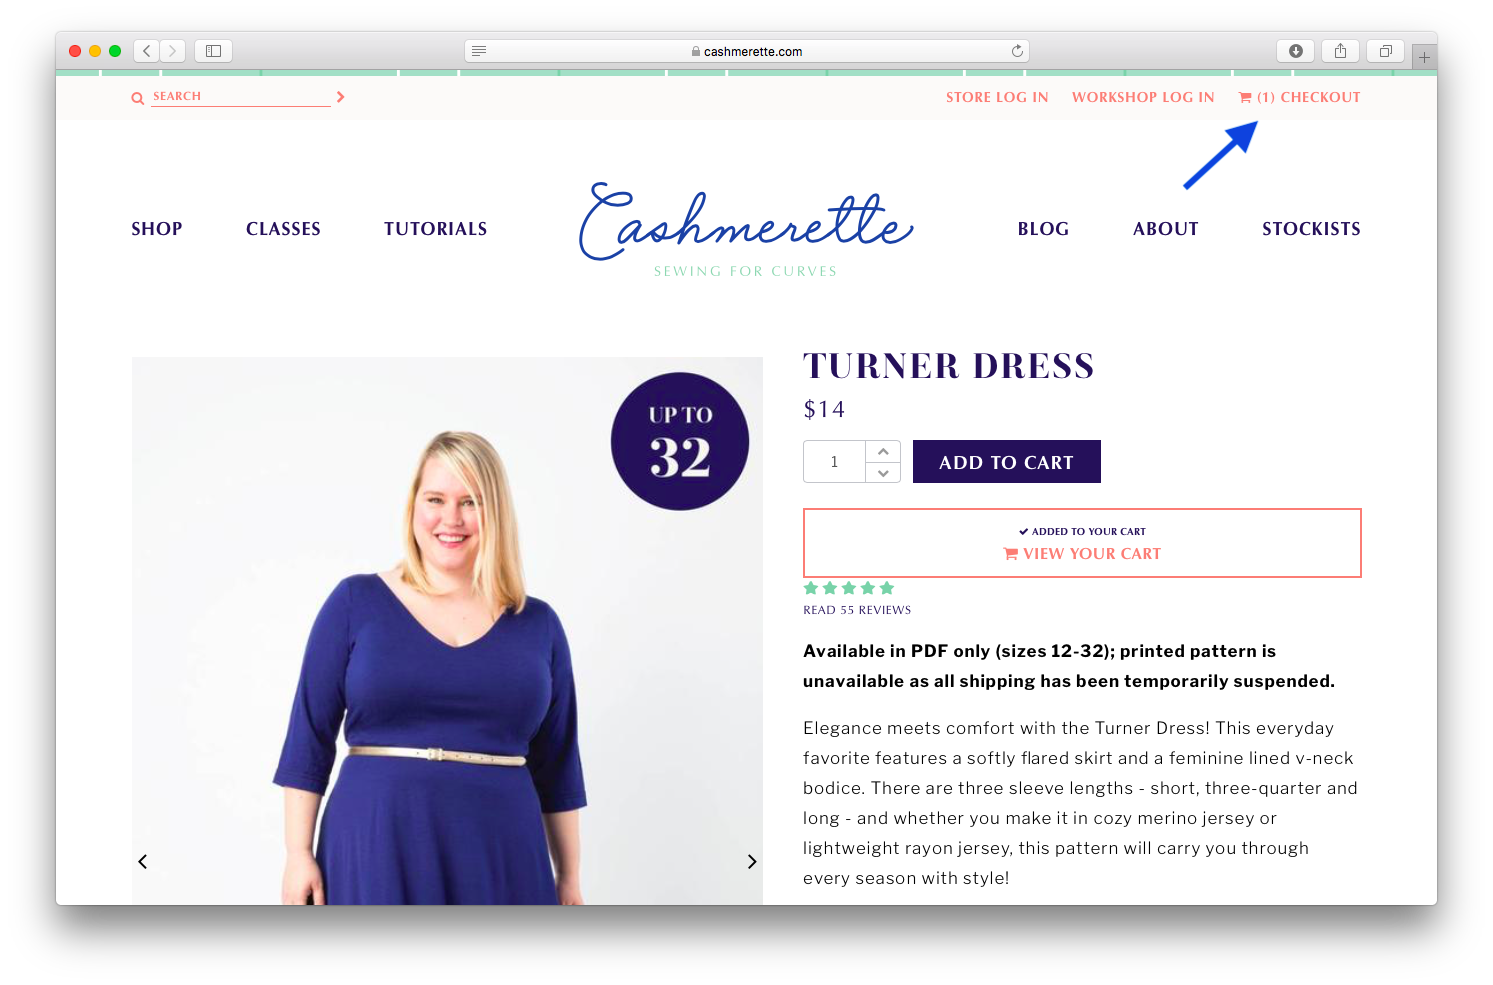
When you’re ready to place your order, click on “View Your Cart” or navigate over to the shopping cart icon in the top right corner of the window to check out. Then, follow the steps to check out as you would normally.
Once your order is confirmed, you’ll get an email with a download link, which looks like this:
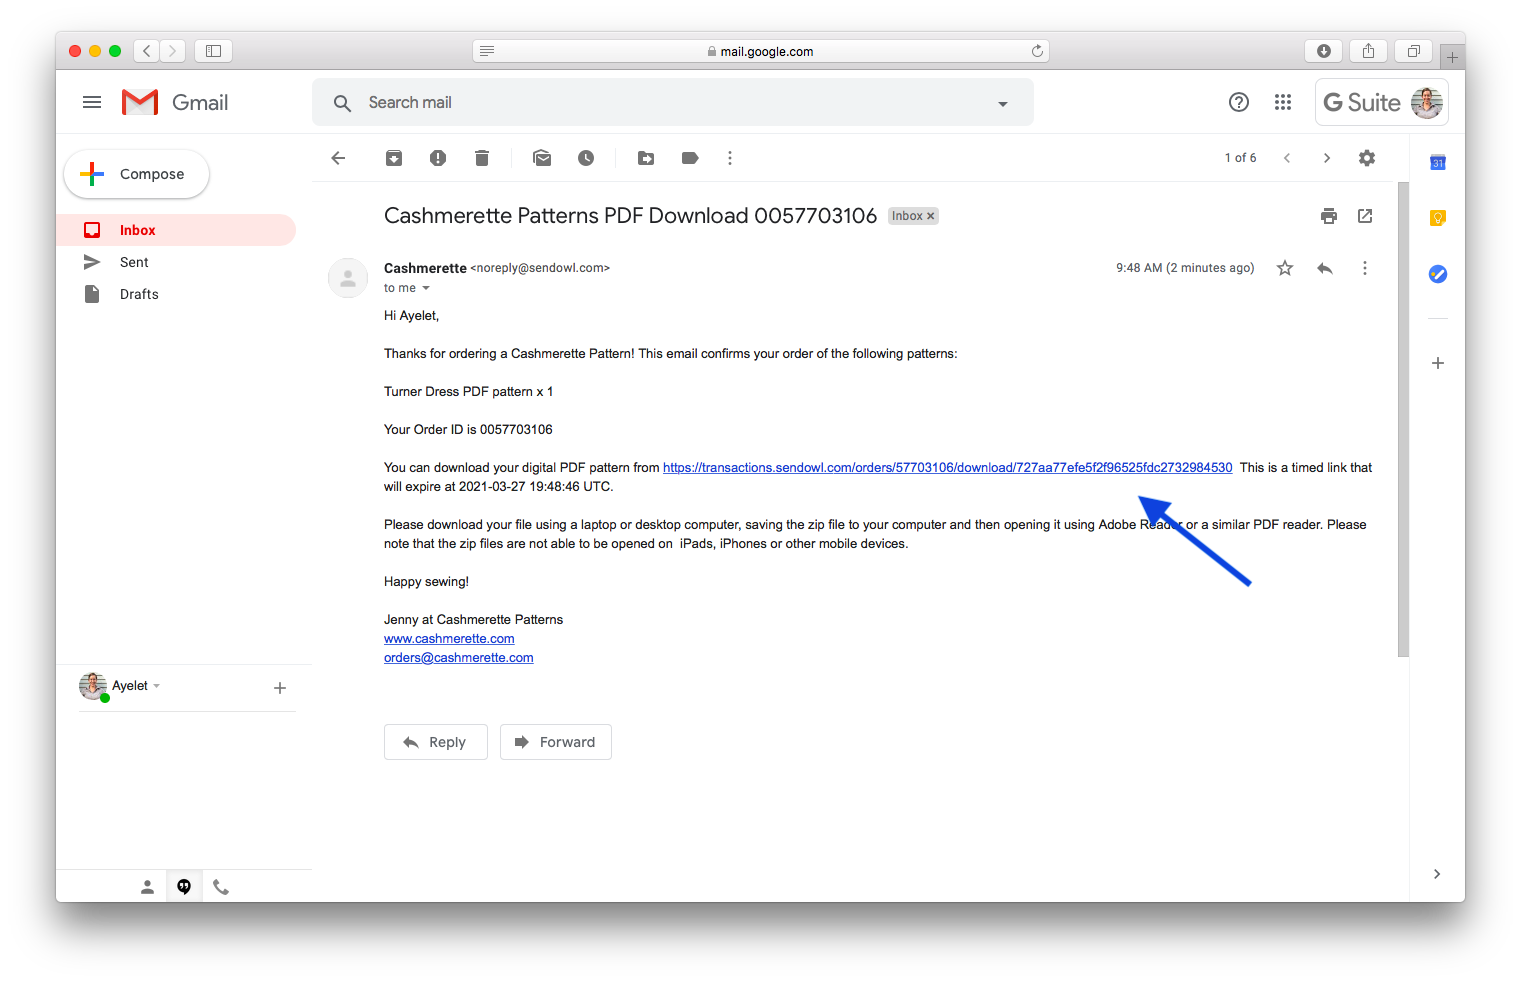
This email should appear in your inbox within a minute or two at most, so if you don’t see it, check your spam or junk folder. If you still can’t find it, try searching through your messages—the email will come from “Cashmerette <noreply@sendowl.com>”.
Click the download link and you’ll be taken to a page that looks like this:
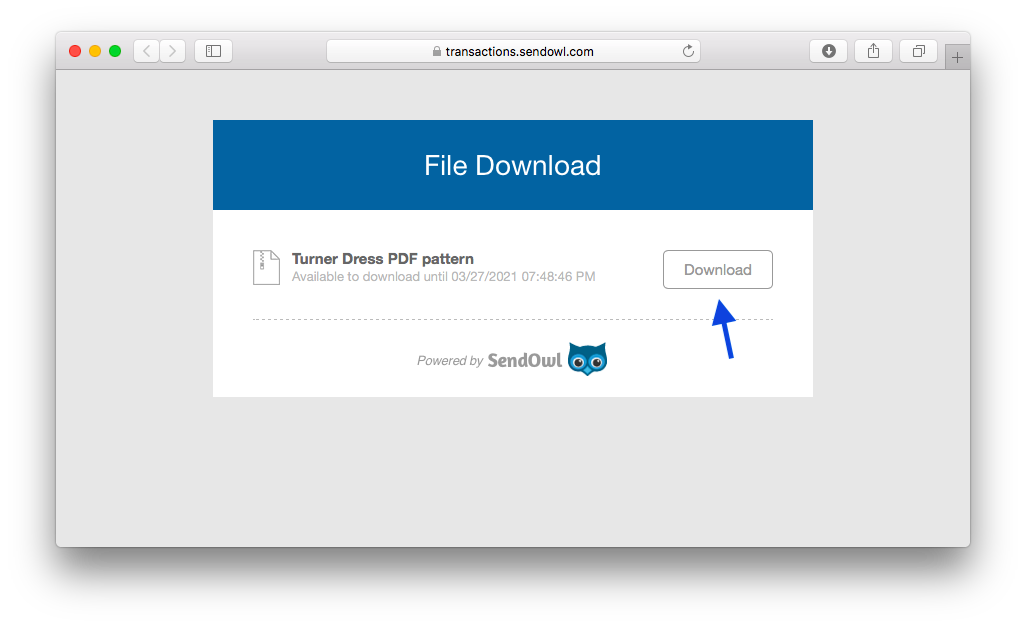
Click the download button and your file will immediately start to download.
How to Open Your PDF Pattern
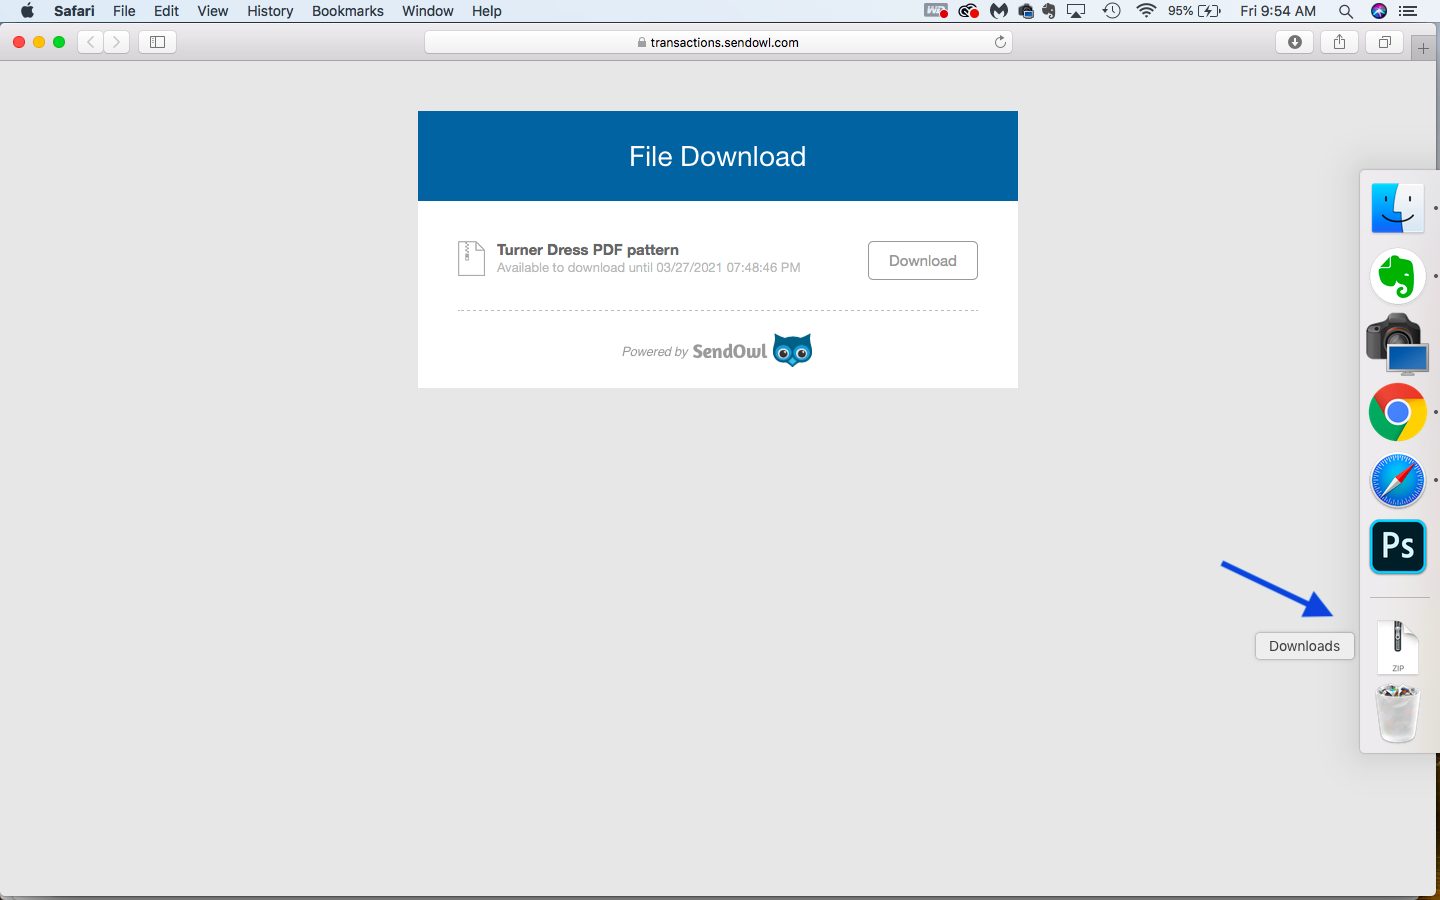
All Cashmerette PDF patterns come in a ZIP file This is a type of file that bundles other files together, like a little digital package. Using a ZIP file means you can download all of the files with one click, rather than having to download files separately.
To open the ZIP file, find where it downloaded on your computer. Usually, our files download into our Downloads folder, or onto the desktop.
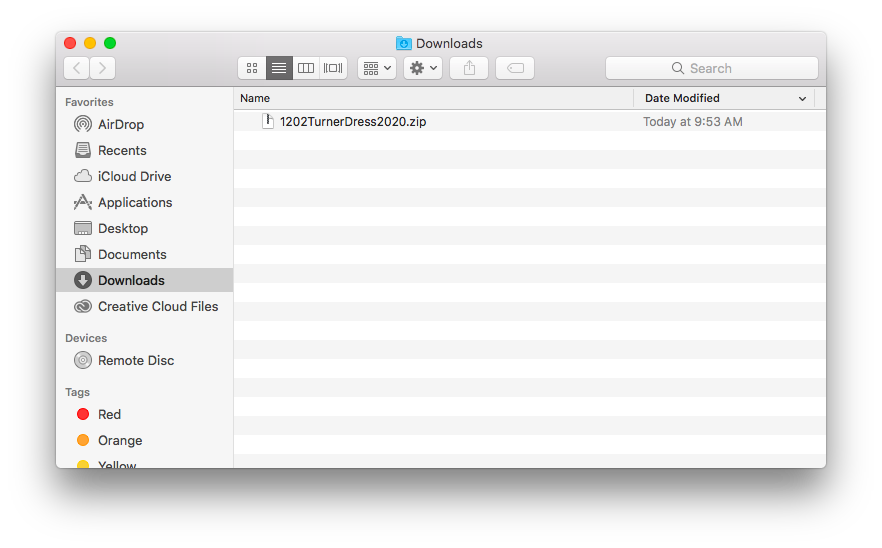
If you can’t find the ZIP file in either of those places, try searching for it in your file browser.
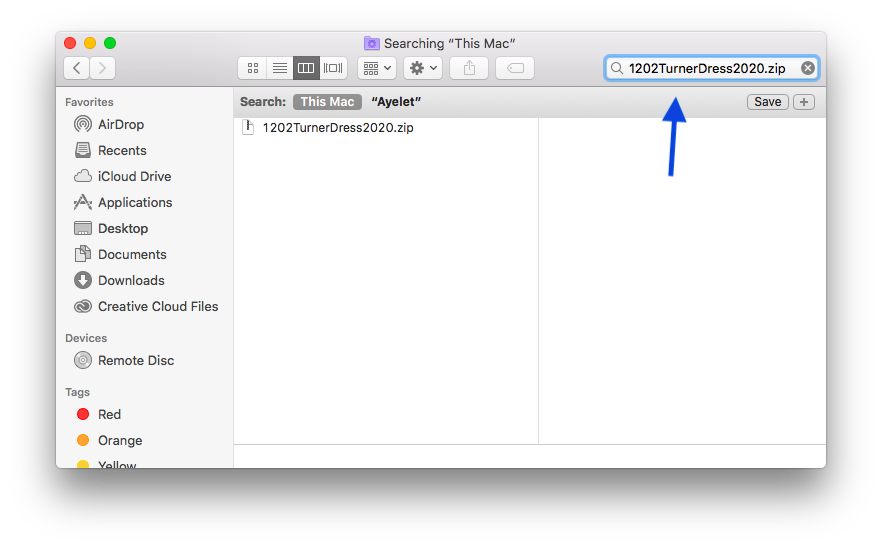
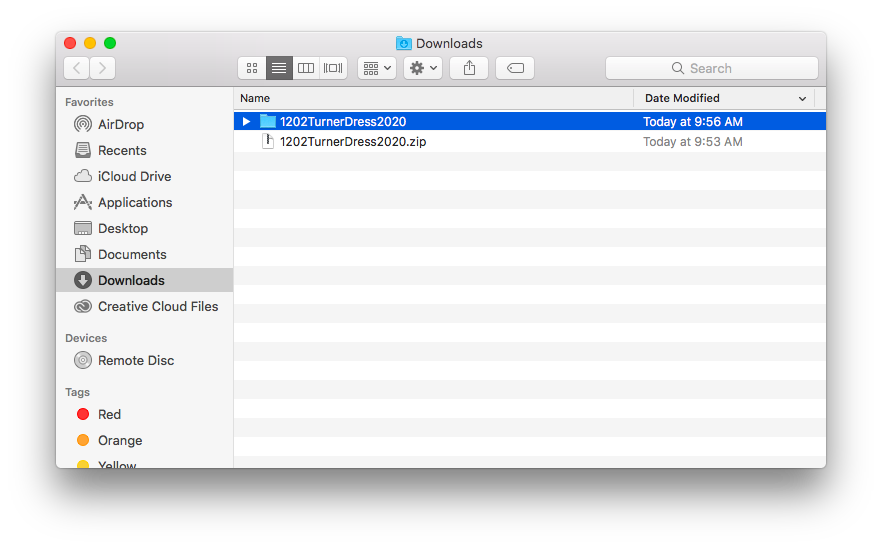
Double click to unzip the ZIP file—you’ll then see a folder pop up with several files inside it. Keep in mind that tablets and phones aren’t able to open ZIP files, so you must do this on a computer or laptop!
Saving Your PDF Pattern
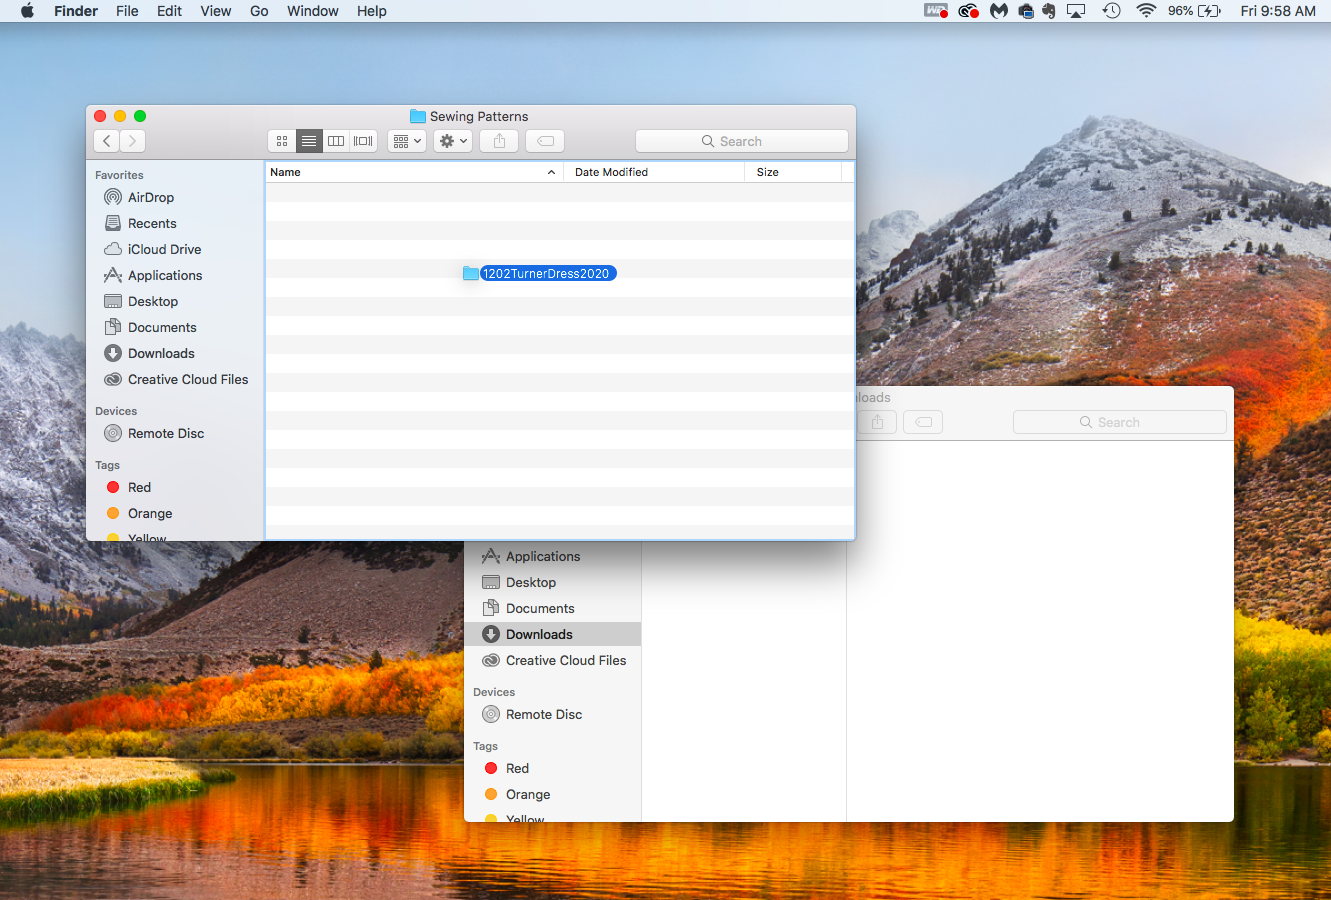
First things first—let’s get this baby into a more permanent location, so that we don’t forget about it and delete it later by accident. I recommend making a folder on your computer where you store all of your digital sewing patterns—you can call it “Sewing Patterns”.
Drag or move the folder of the pattern you just downloaded out of the downloads folder or desktop and into your special sewing folder.
We also encourage you to back up your sewing pattern files by storing them on a cloud-based storage service like Google Drive or Dropbox—that way, if anything happens to your computer at any point, you won’t lose your patterns.
What’s Inside the PDF Pattern Folder?
Let’s take a look at what’s inside our Turner Dress PDF pattern folder that we just downloaded and moved into our sewing folder.
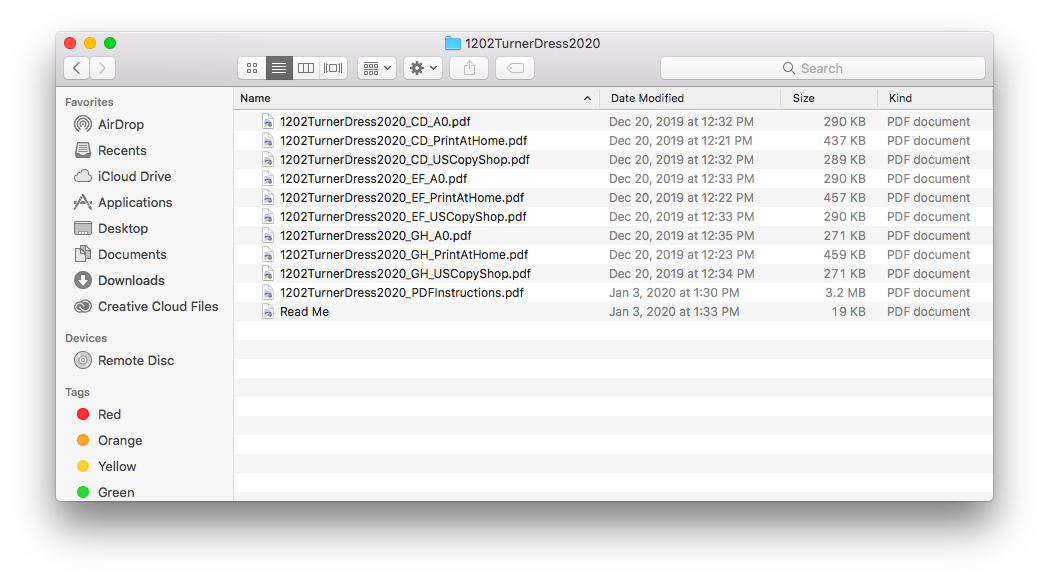
It seems like a lot of files at once, but don’t worry! You won’t need to use all of them. Let’s talk through each one, one by one.
- Read Me file: start by opening this file—this will help you understand which files you’ll want to print for which cup size and printing option (more on that below).
- Instructions file: Everything that you would find in the instructions booklet and envelope of a printed pattern can be found in this file for a digital pattern! You can choose to print it off and use a paper copy, or save a bit of paper and view it digitally.
- Print at home files: These files contain the pattern pieces, divided out into smaller pieces of paper that your home printer can handle. You’ll notice that there are three print at home files in this folder. That’s because this dress, like with all of our patterns, comes in three cup size ranges: C/D, E/F, and G/H. We’re separated the three size ranges out into three separate files, so that you only print the cup size that you need—nothing extra. The print at home file is what we’ll be showing you how to print, but if you need help choosing your cup size, go here.
- Copy shop and A0 files: These files contain the pattern pieces as well, but they’re laid out on large documents designed for large-format printers. We’ll be showing you to print copy shop and A0 files in an upcoming post! You’ll notice that the copy shop and A0 files are also separated out by cup size.
Opening the Print at Home File
Pattern designers use the PDF file format because it protects the contents of the document—namely the pattern pieces, labels, markings, and so on—from shifting around when the document is opened on different computers.
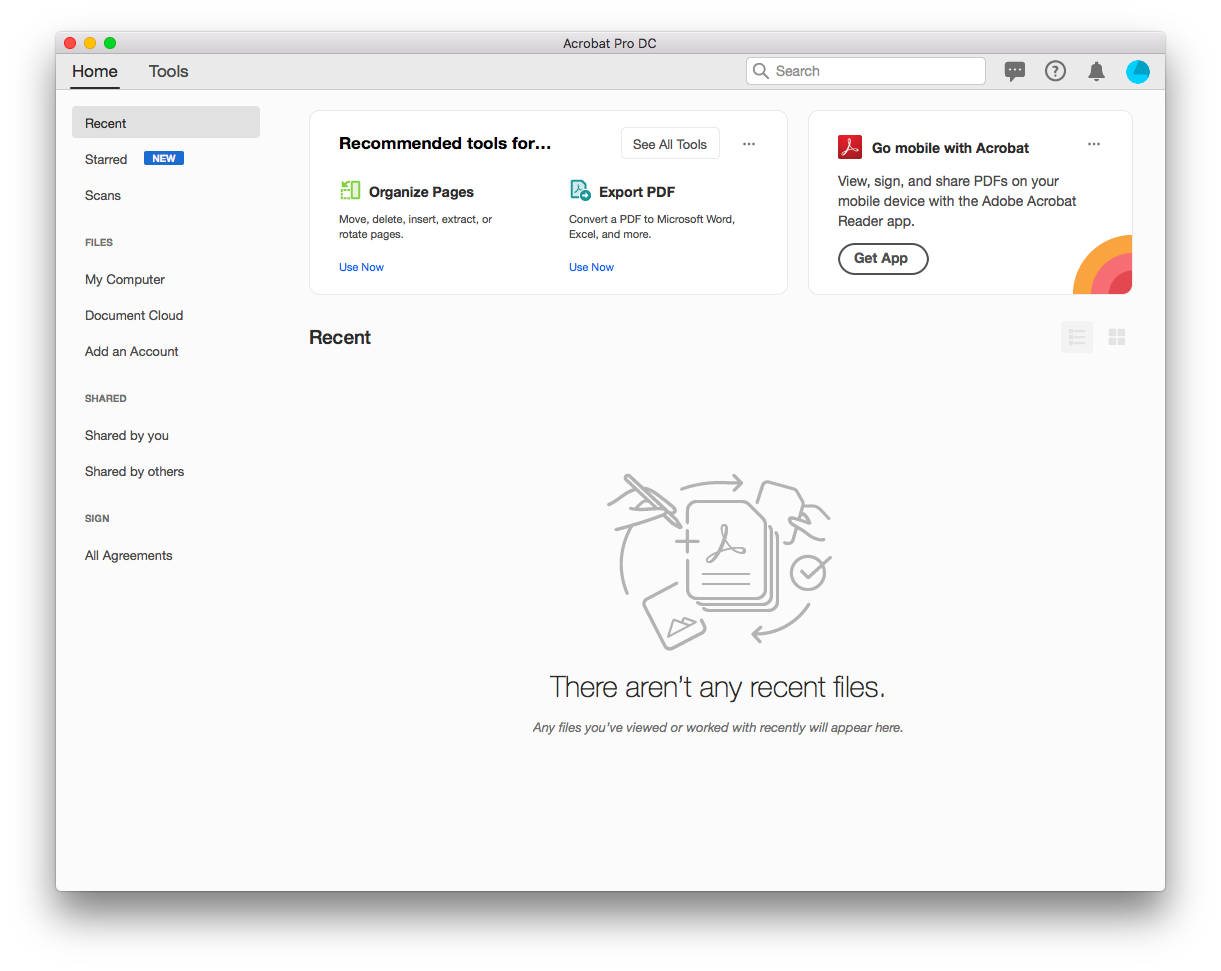
The PDF file format is widely used and can be opened by the majority of computers and devices, but we recommend using Adobe Acrobat Reader anytime you want to print a PDF pattern. This is program that you can download on your computer and use for free. It allows you to control the scale when printing as well as access a file’s layers—more on that in a bit.
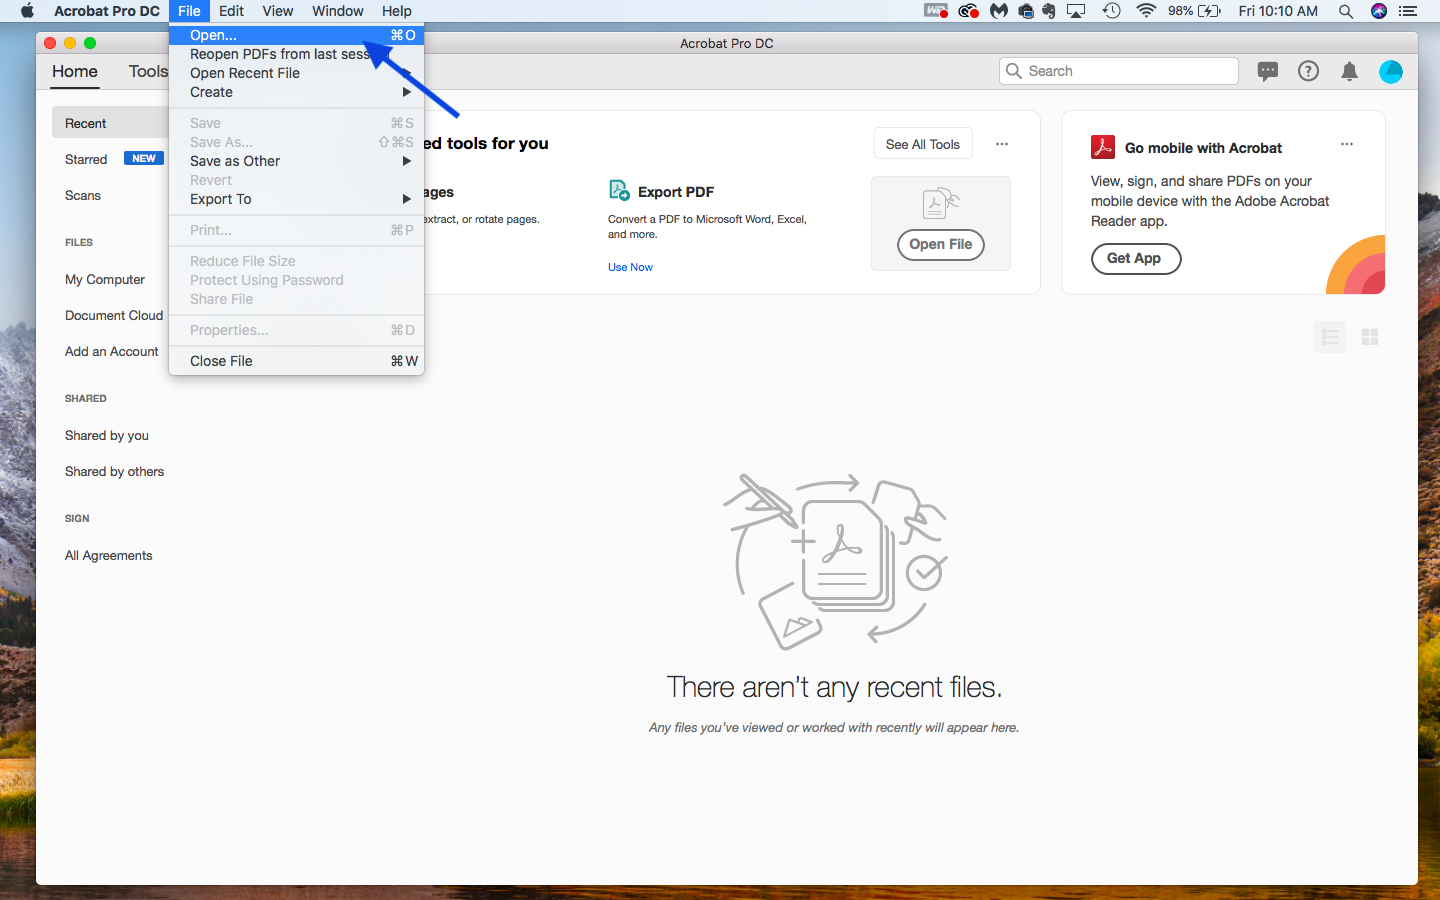
Once you’ve downloaded Adobe Acrobat Reader, click to open it.
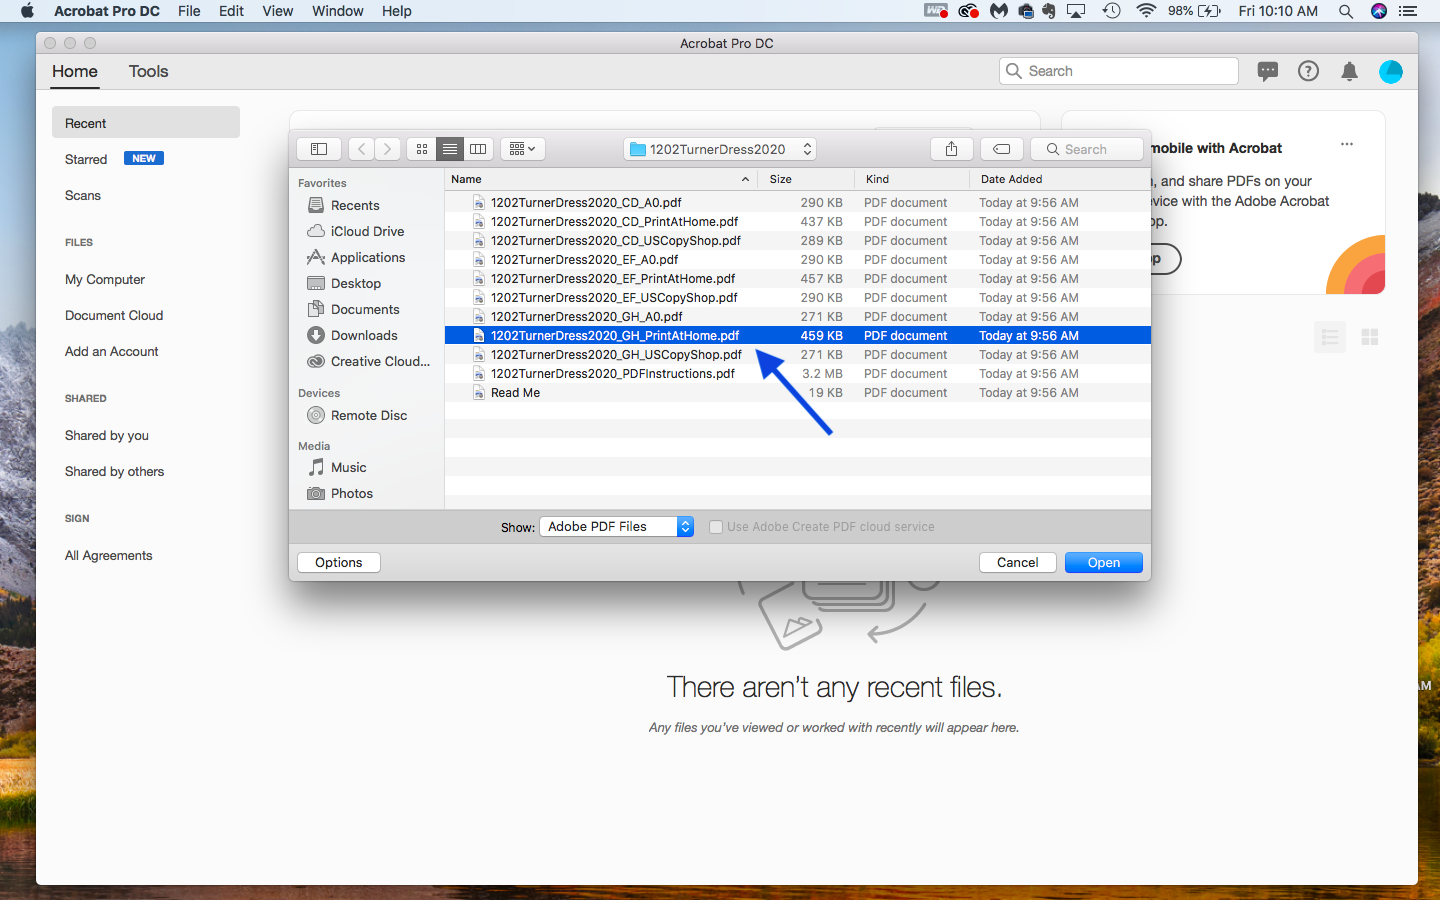
Then you can go to the menu to File > Open to open the pattern file you want to print. (Remember to select the print at home version of your cup size.)
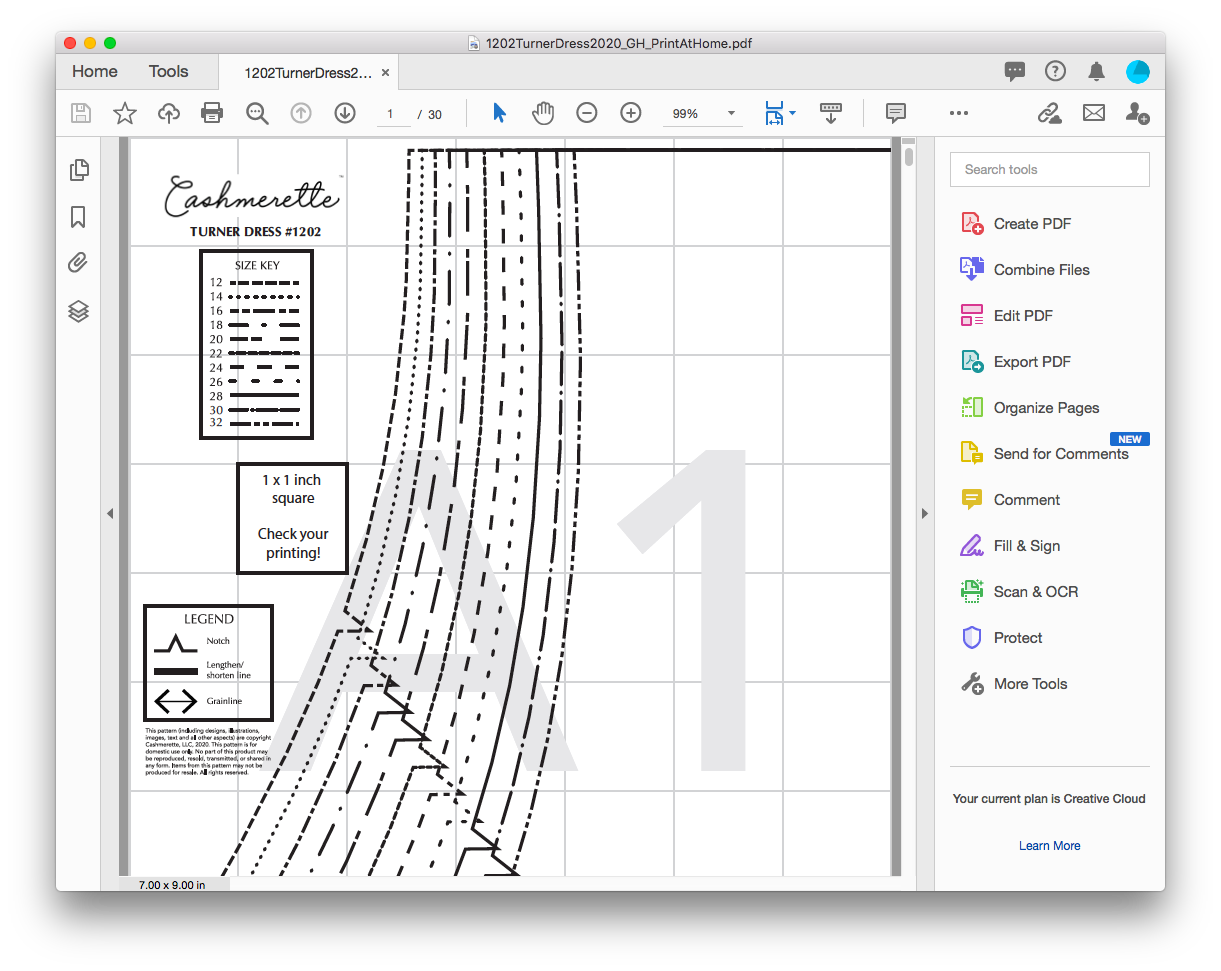
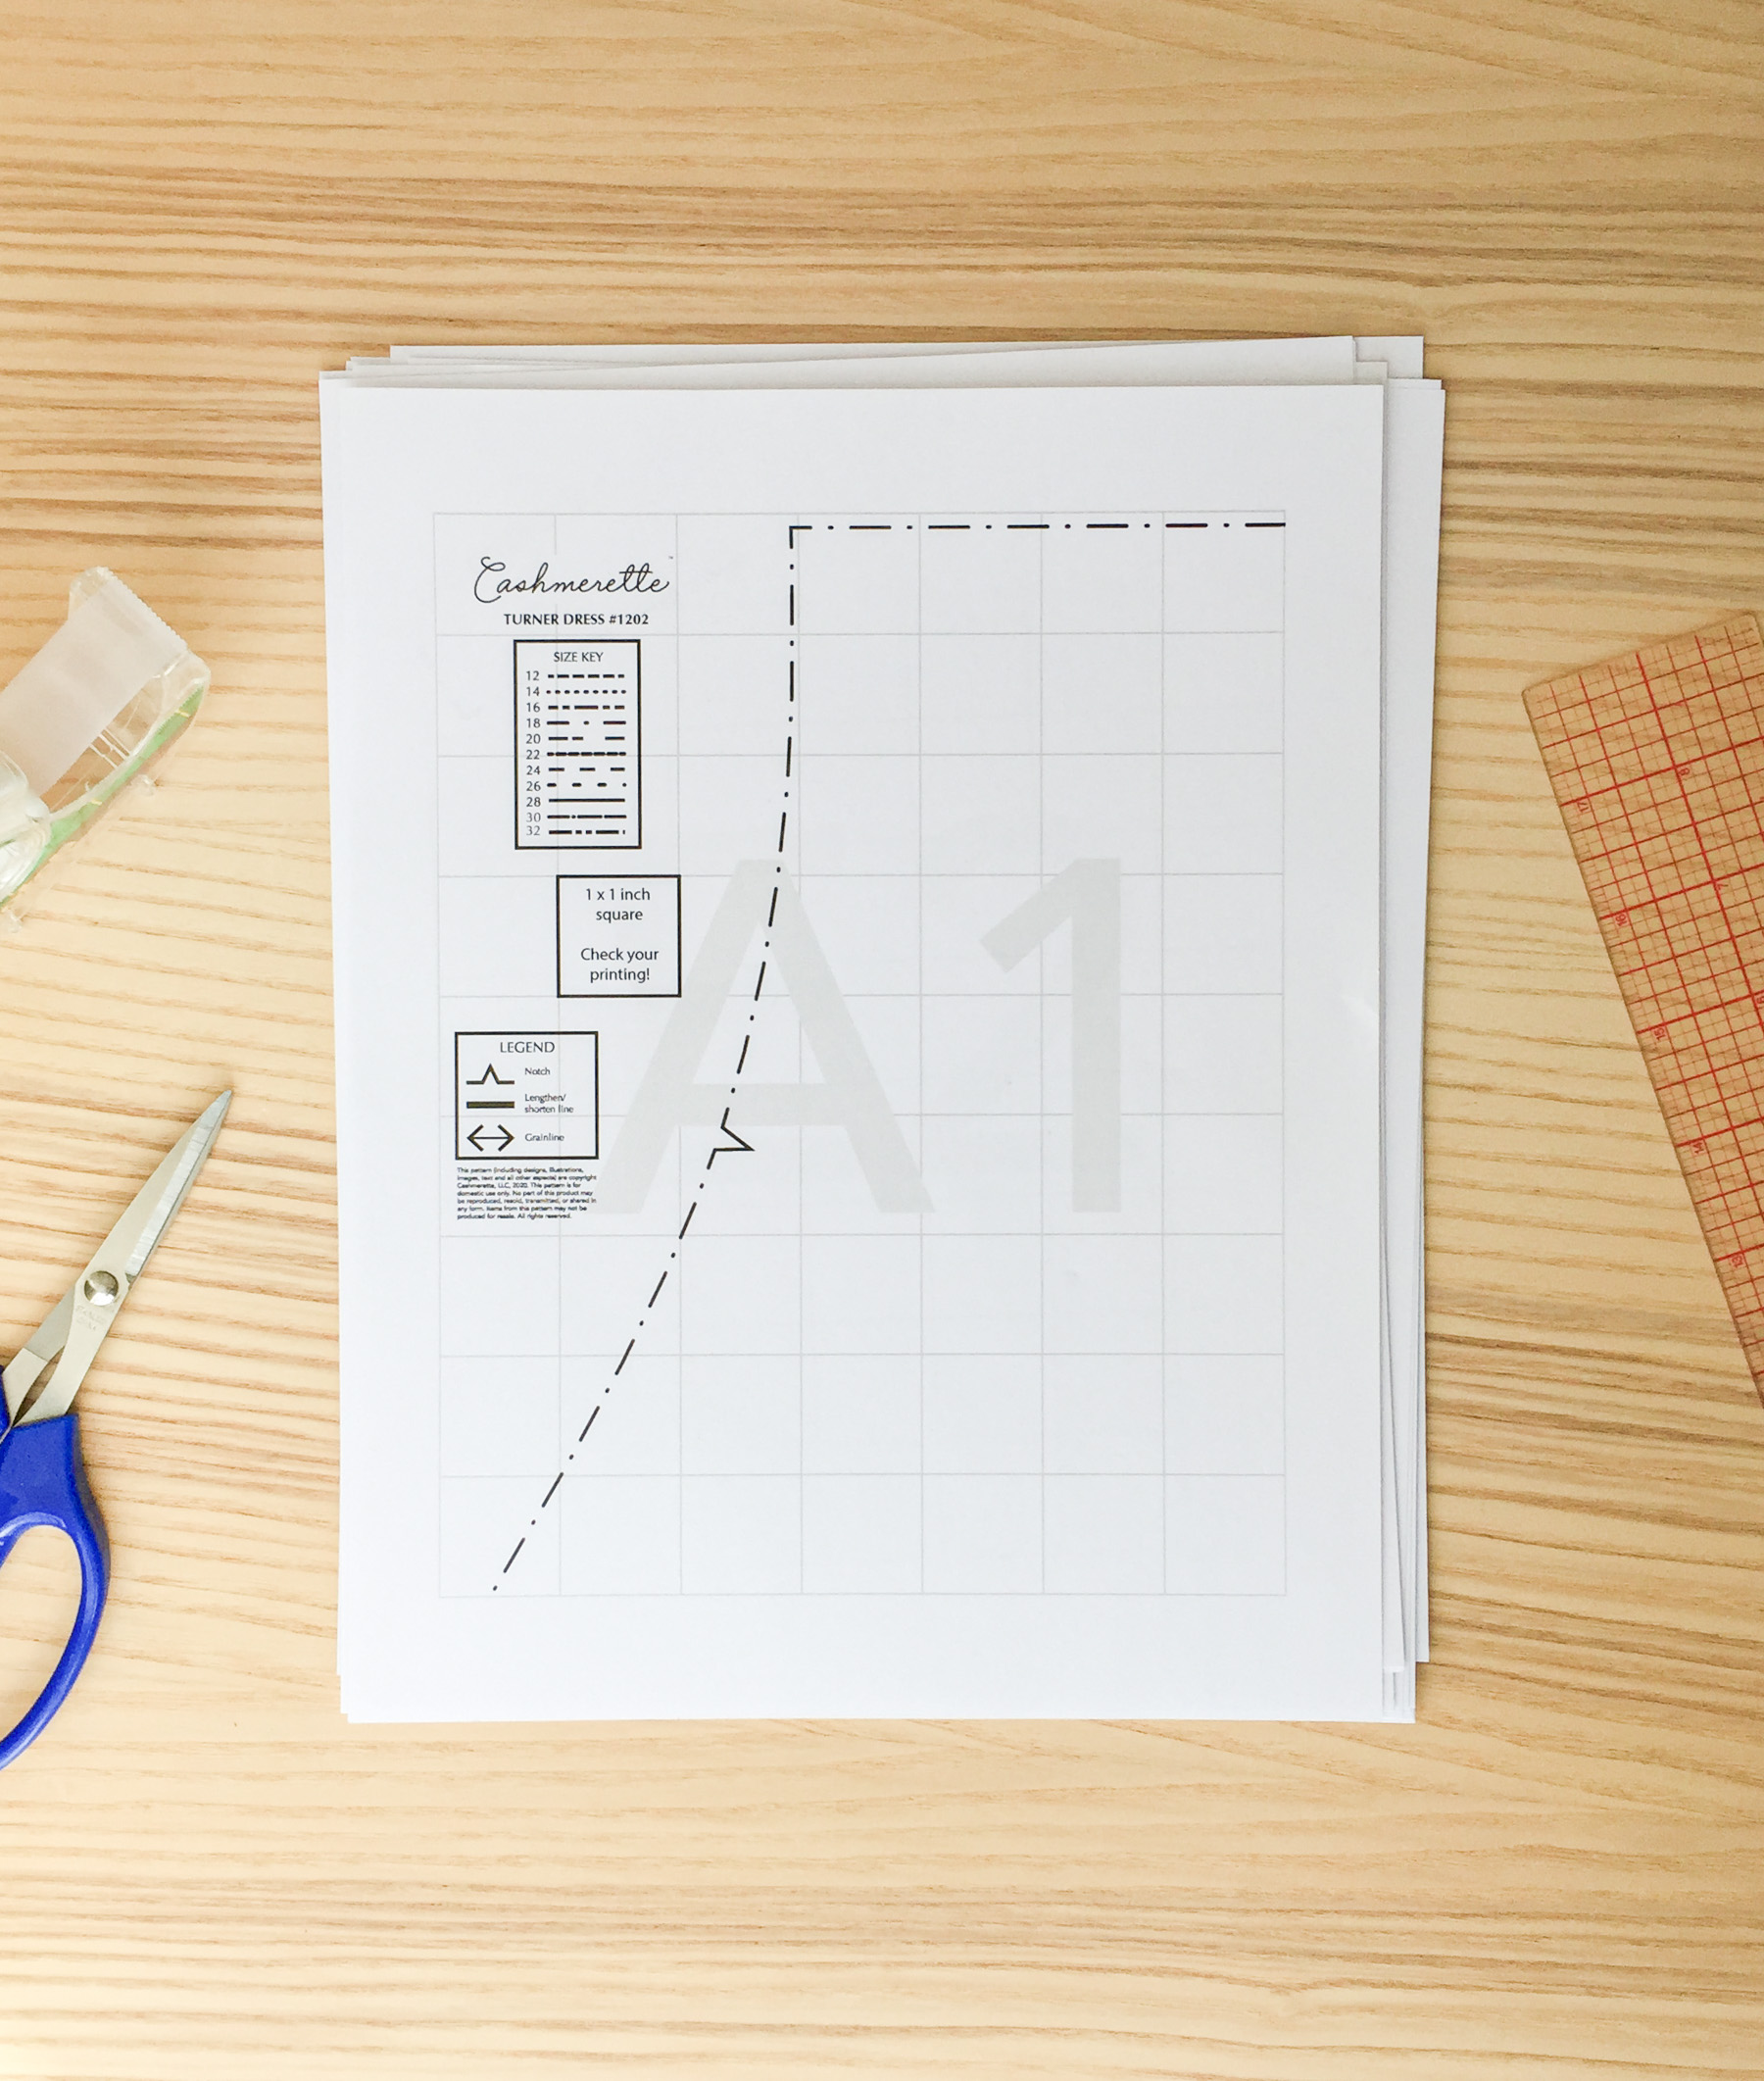
Here’s how the document will look once you’ve opened it up in Adobe Acrobat Reader.
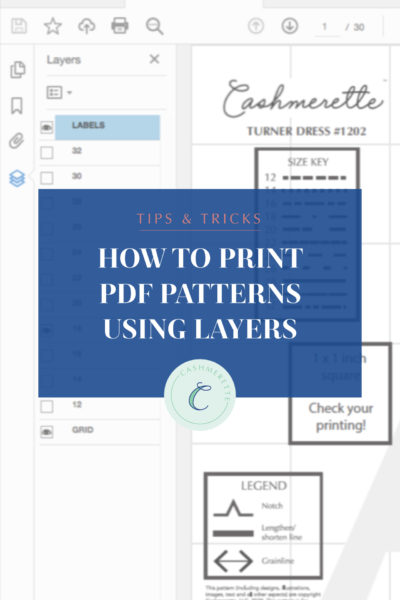
Using Layers to Print a Specific Size
Most Cashmerette PDF patterns have layers (and the rest will very shortly!). What this means is that each size is on a different layer, and you can “turn off” sizes that you don’t need. This is particularly helpful with areas that get dense and it’s hard to decipher between the size lines, like around a dart. But there’s nothing wrong with printing all of the sizes, so if you don’t want to bother with layers, you can jump ahead to the next section.
To see the layers, open the menu on the left side of the screen and click on the icon that looks like a stack of pages.
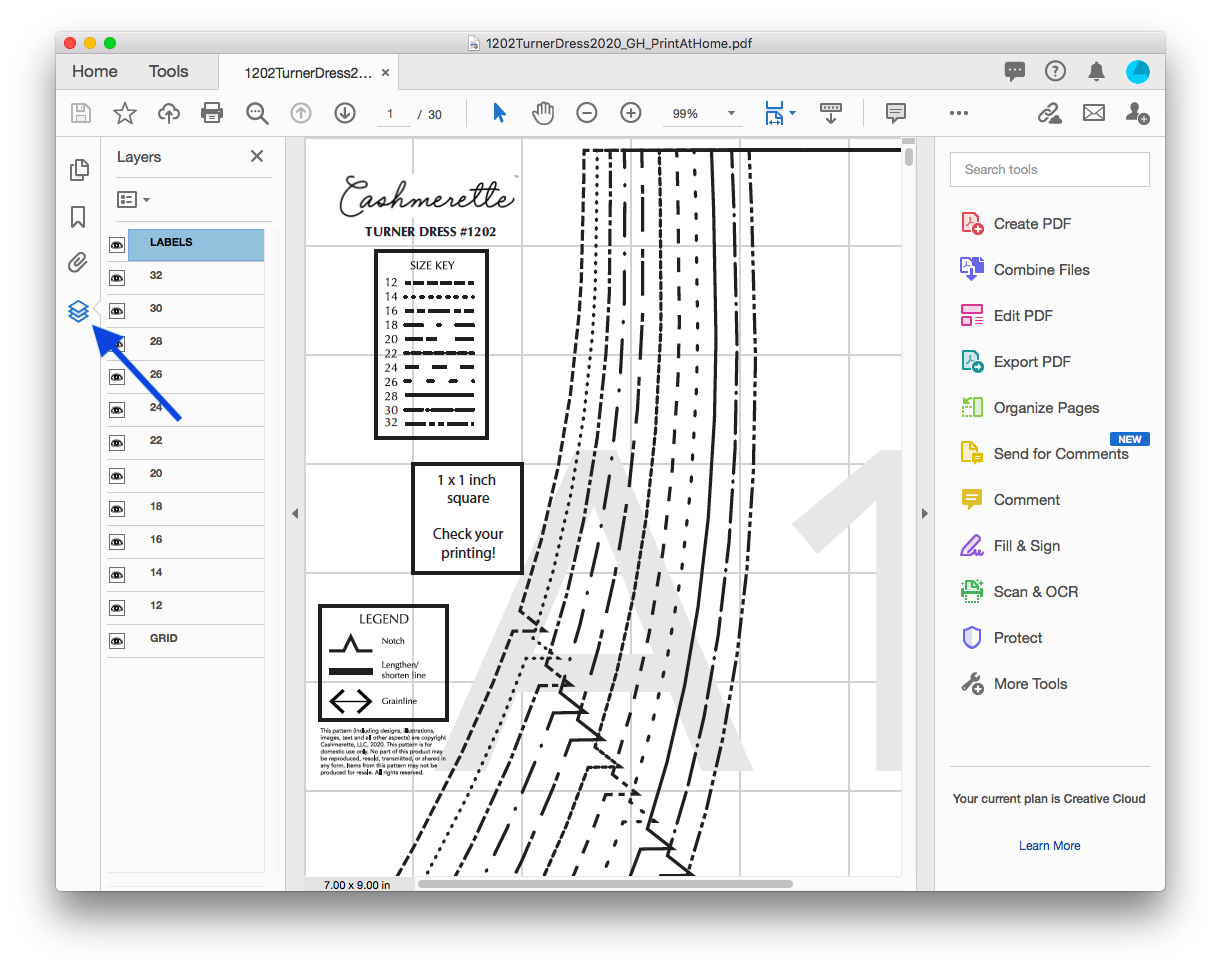
You’ll then see a list of the layers, including all of the sizes, labels, and grid. To turn off a layer, click on the eye icon next to the layer name. Make sure to leave the grid and labels layers on!
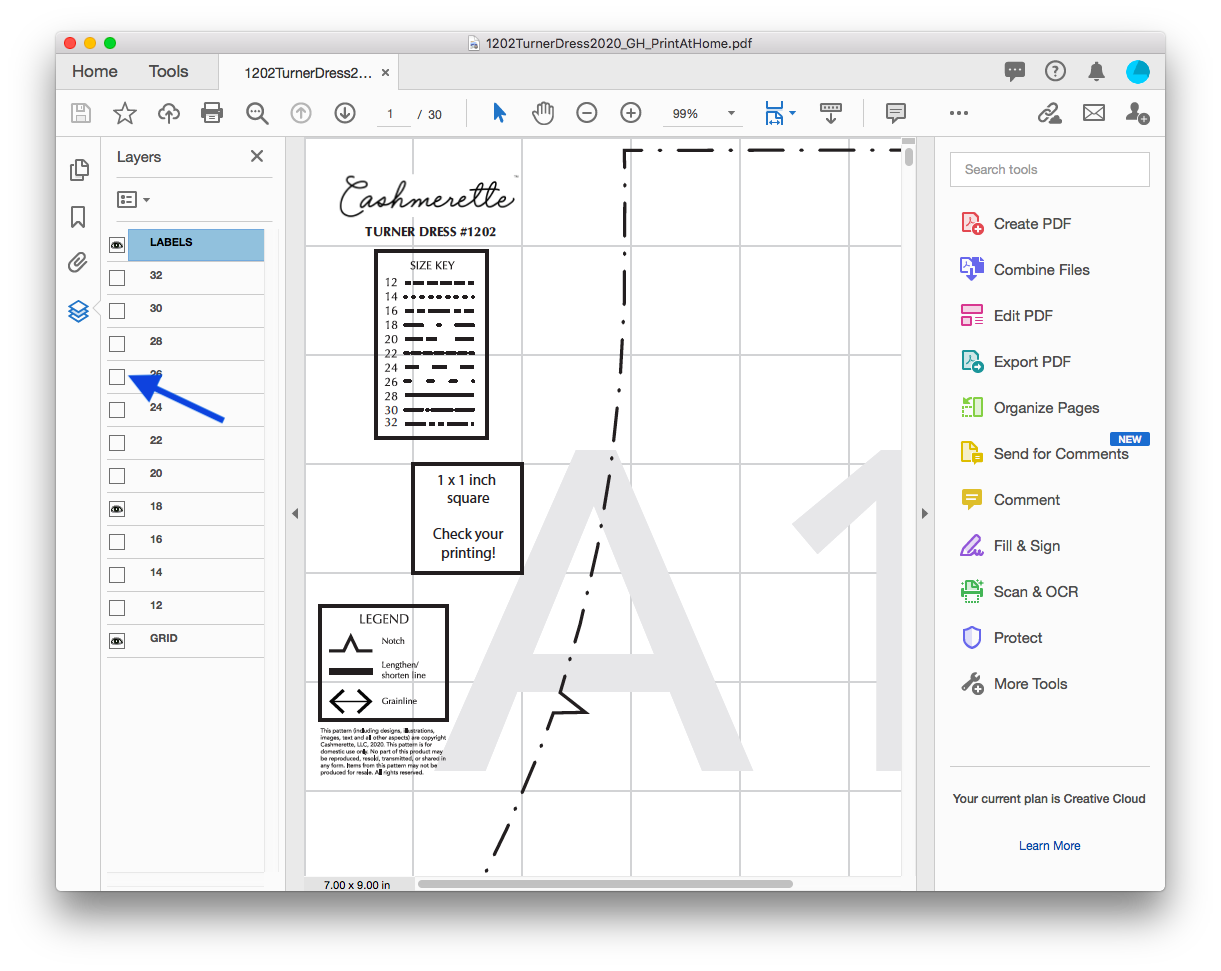
If you’re grading between sizes, make sure to leave all of the sizes you need turned on, and any sizes in between. This will help you with grading. (Learn more about grading between sizes here.)
Printing a Test Page
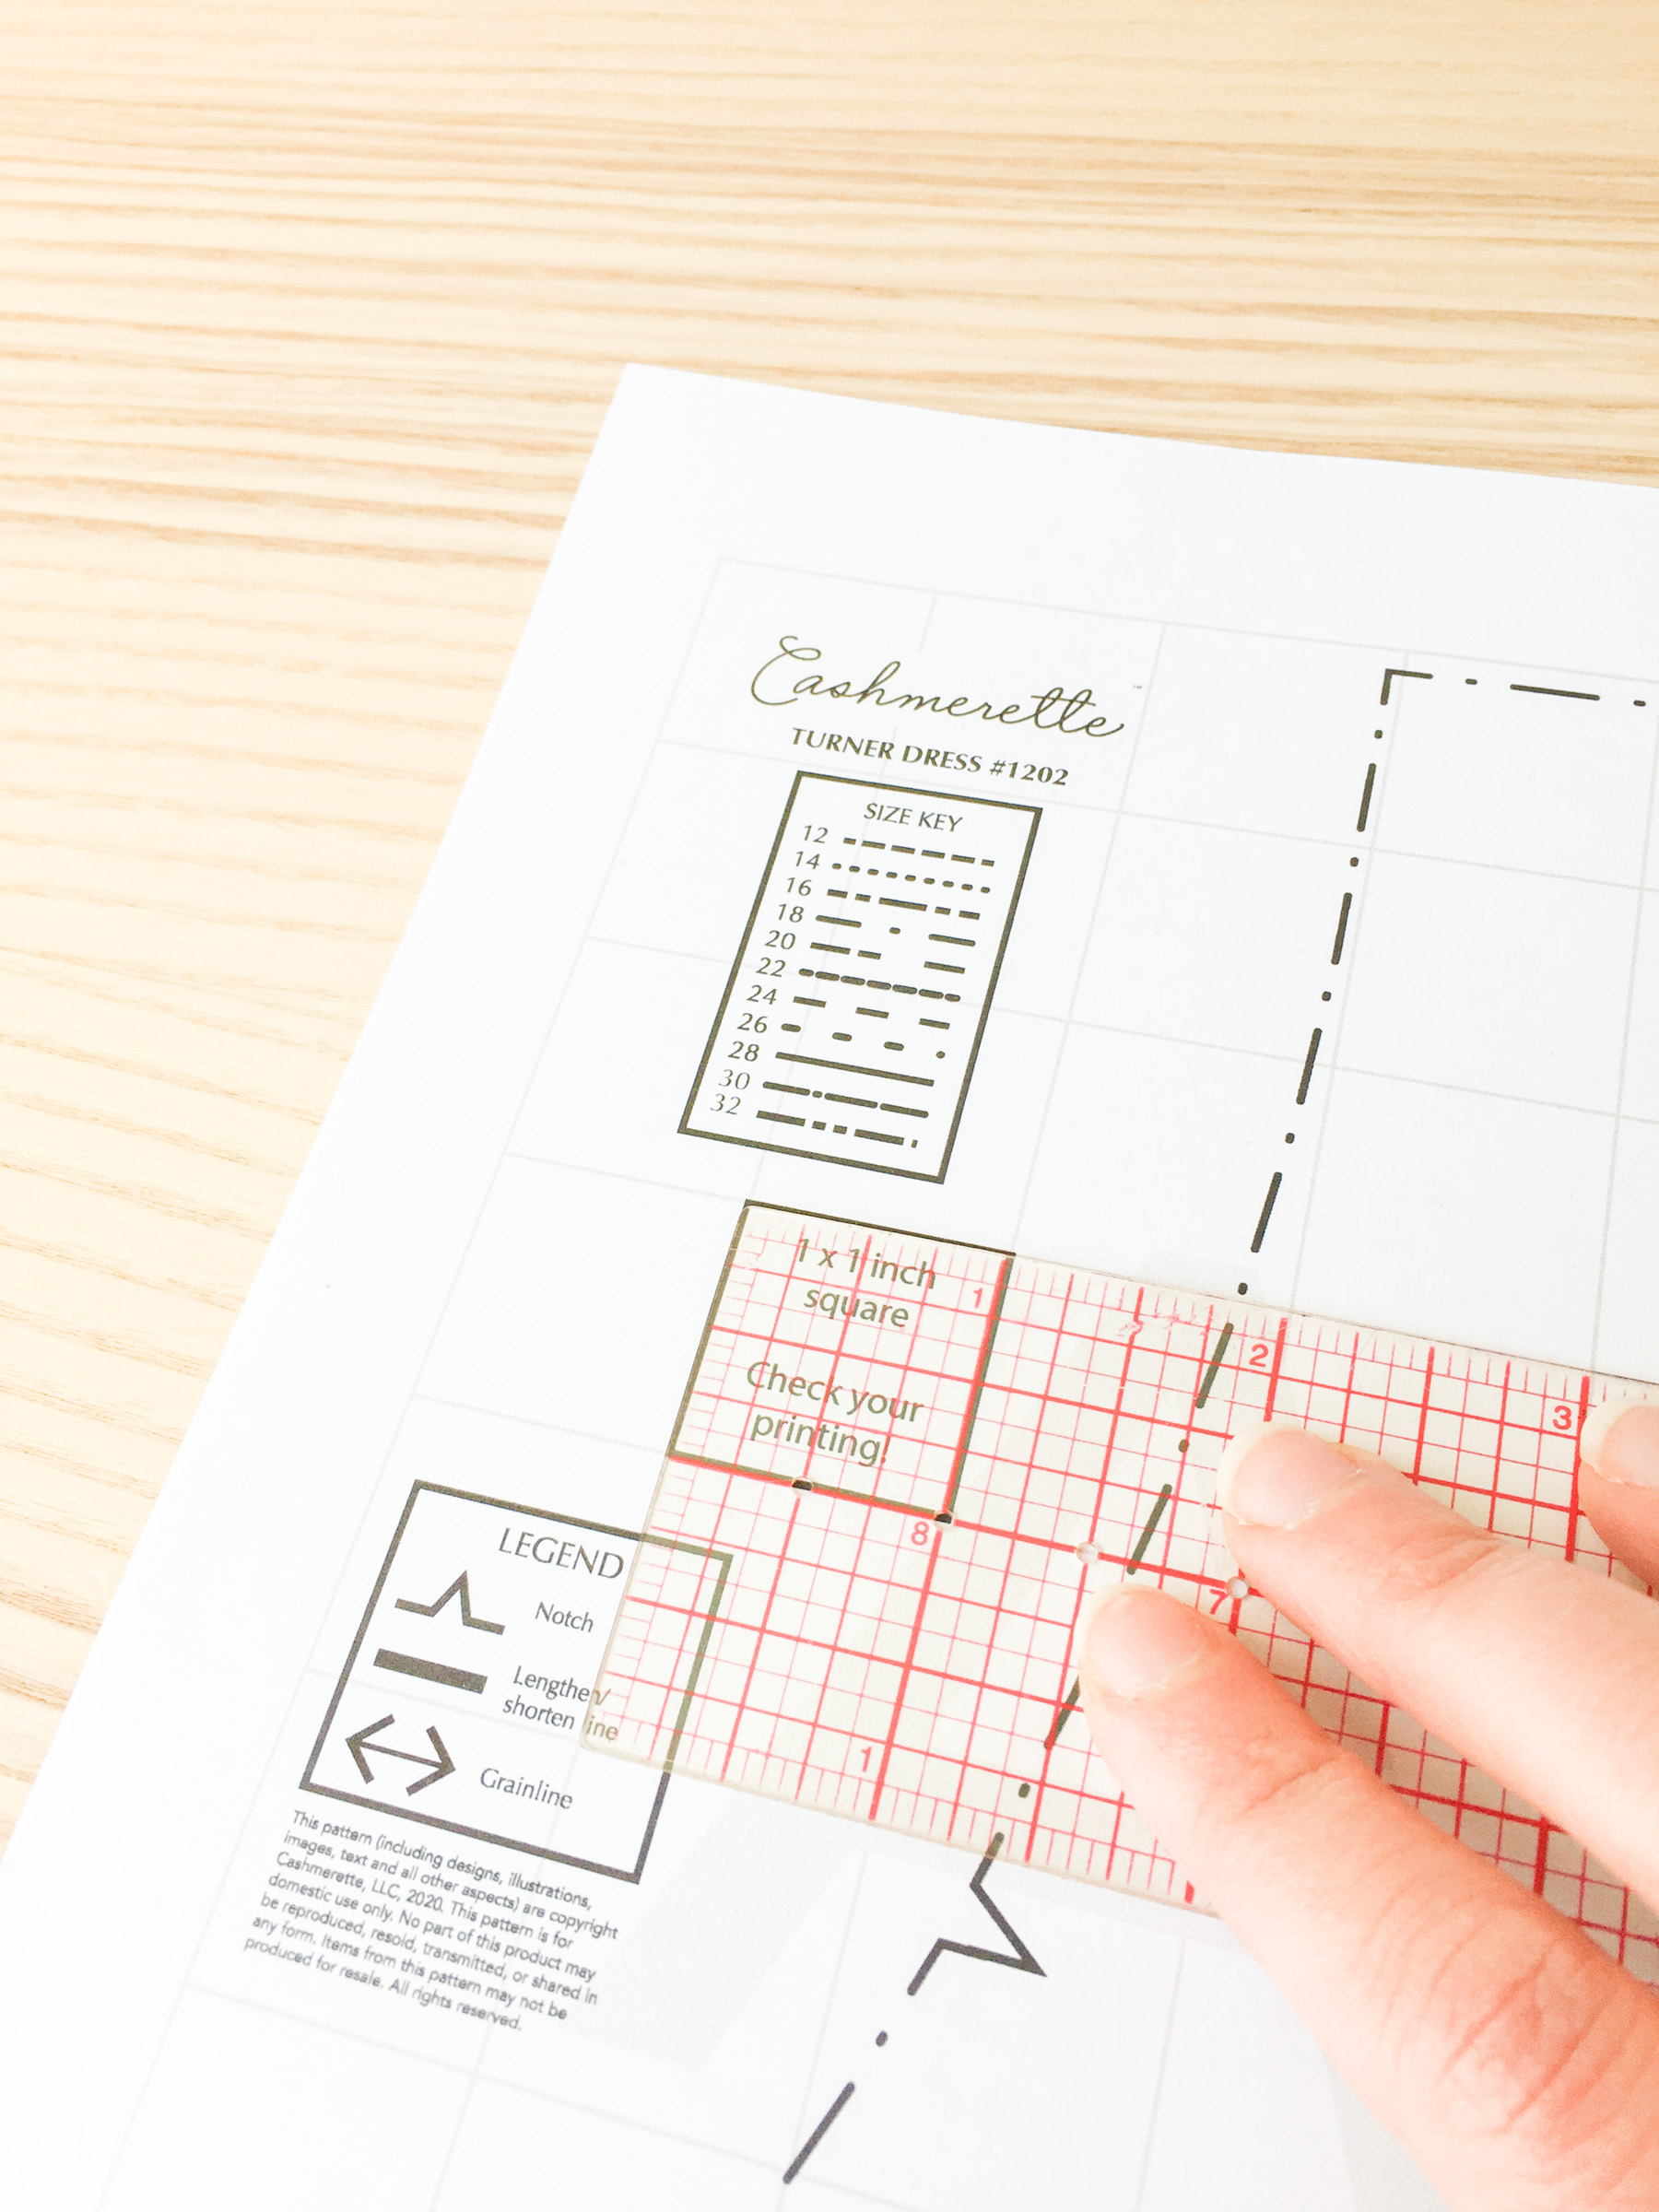
PDF patterns usually include a test square so that you can check that you’re printing at the right scale before printing off your entire pattern. On Cashmerette patterns, this test square appears on the first page of the pattern, but the grid you see behind the pattern pieces is made of 1” squares, so you could print and check any page.
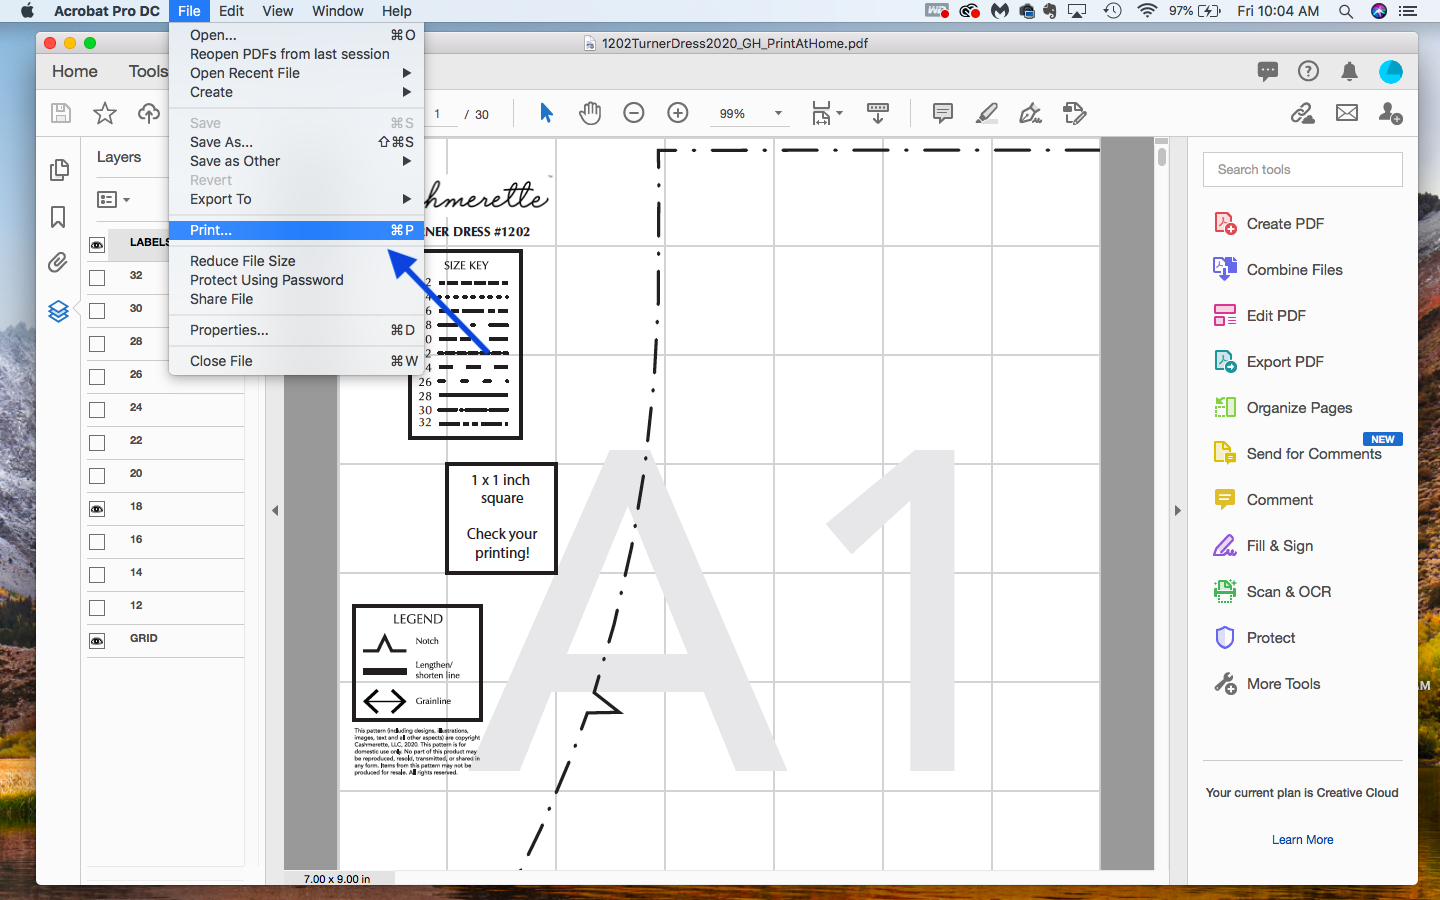
Start by clicking File > Print in the menu.
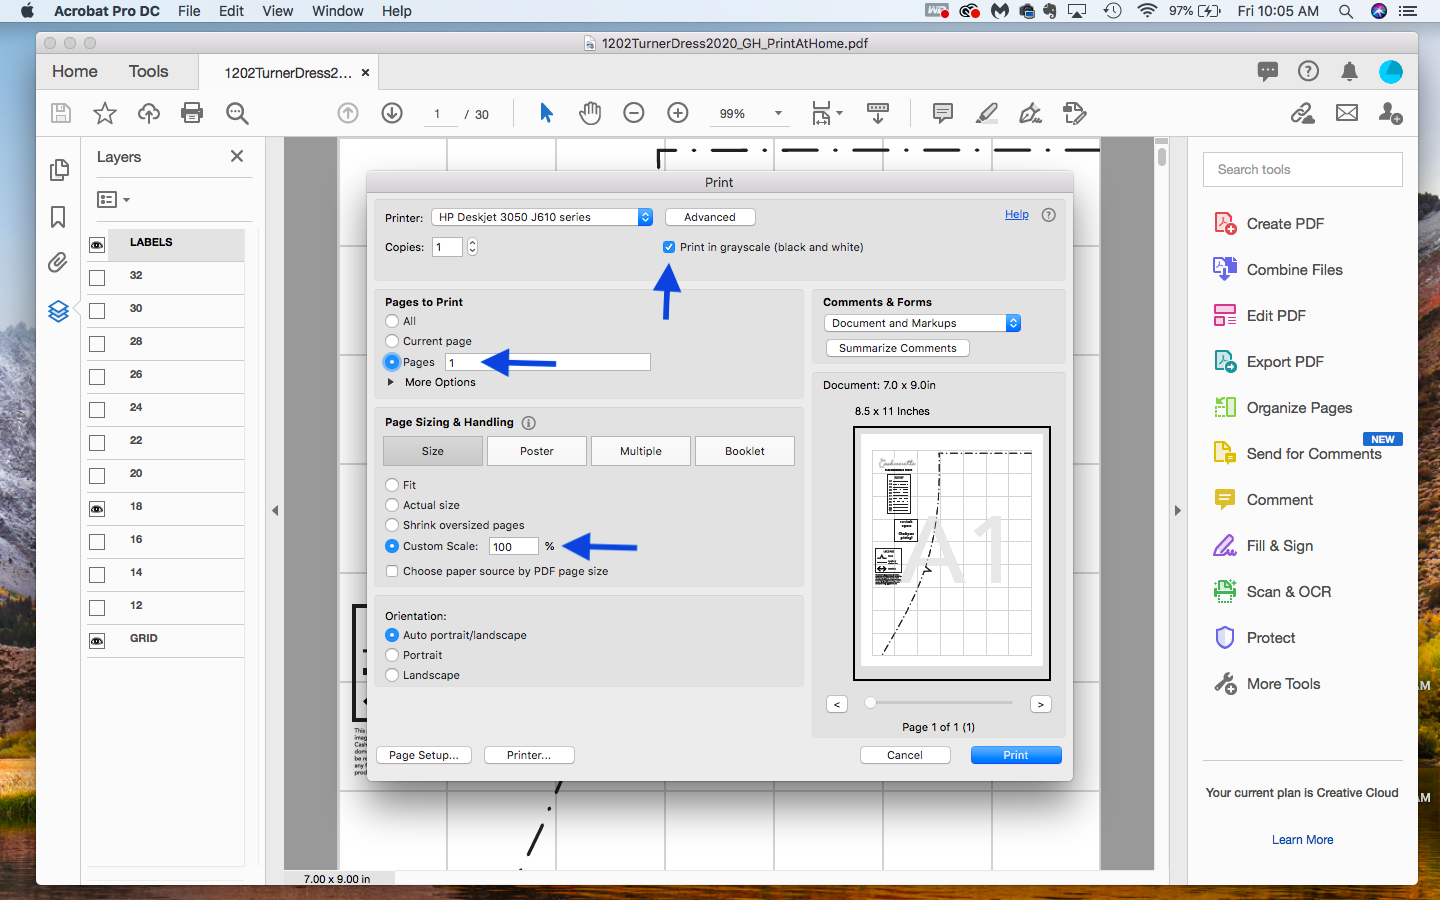
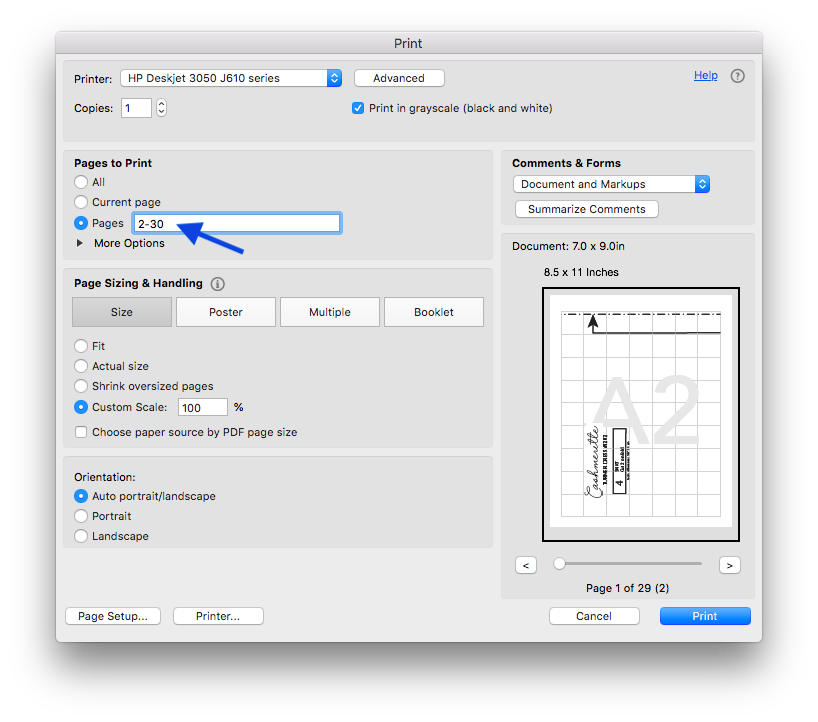
Let’s look at the printer settings we want to use. The most important thing to look for is scaling. Printers often try to “help” by resizing a document to fill the entirety of a page, but this causes distortion and we definitely don’t want that! We want to make sure all of the pieces are printing exactly to size, so that we don’t end up with extra big or extra small pieces.
The easiest way to make sure your printer is maintaining the proper scale is to select the “no scaling” or “custom scale=100%” option.
Whether you’re using US letter paper or A4 paper, you’ll use the same print at home file. Make sure the image is centered on the page, not in the corner or close to one of the margins. To do this, make sure that “Choose paper source by PDF page size” is unchecked. You can look at the print preview image in the right side of the print dialogue box to confirm that the image is centered on the page.
Under “Orientation”, you’ll want to select “Auto portrait/landscape”. I also like to set my printing to grayscale, which helps save on ink.
Finally, set your page range to “1” so that only the first page prints for now.
And let’s hit print to get that first page printed.
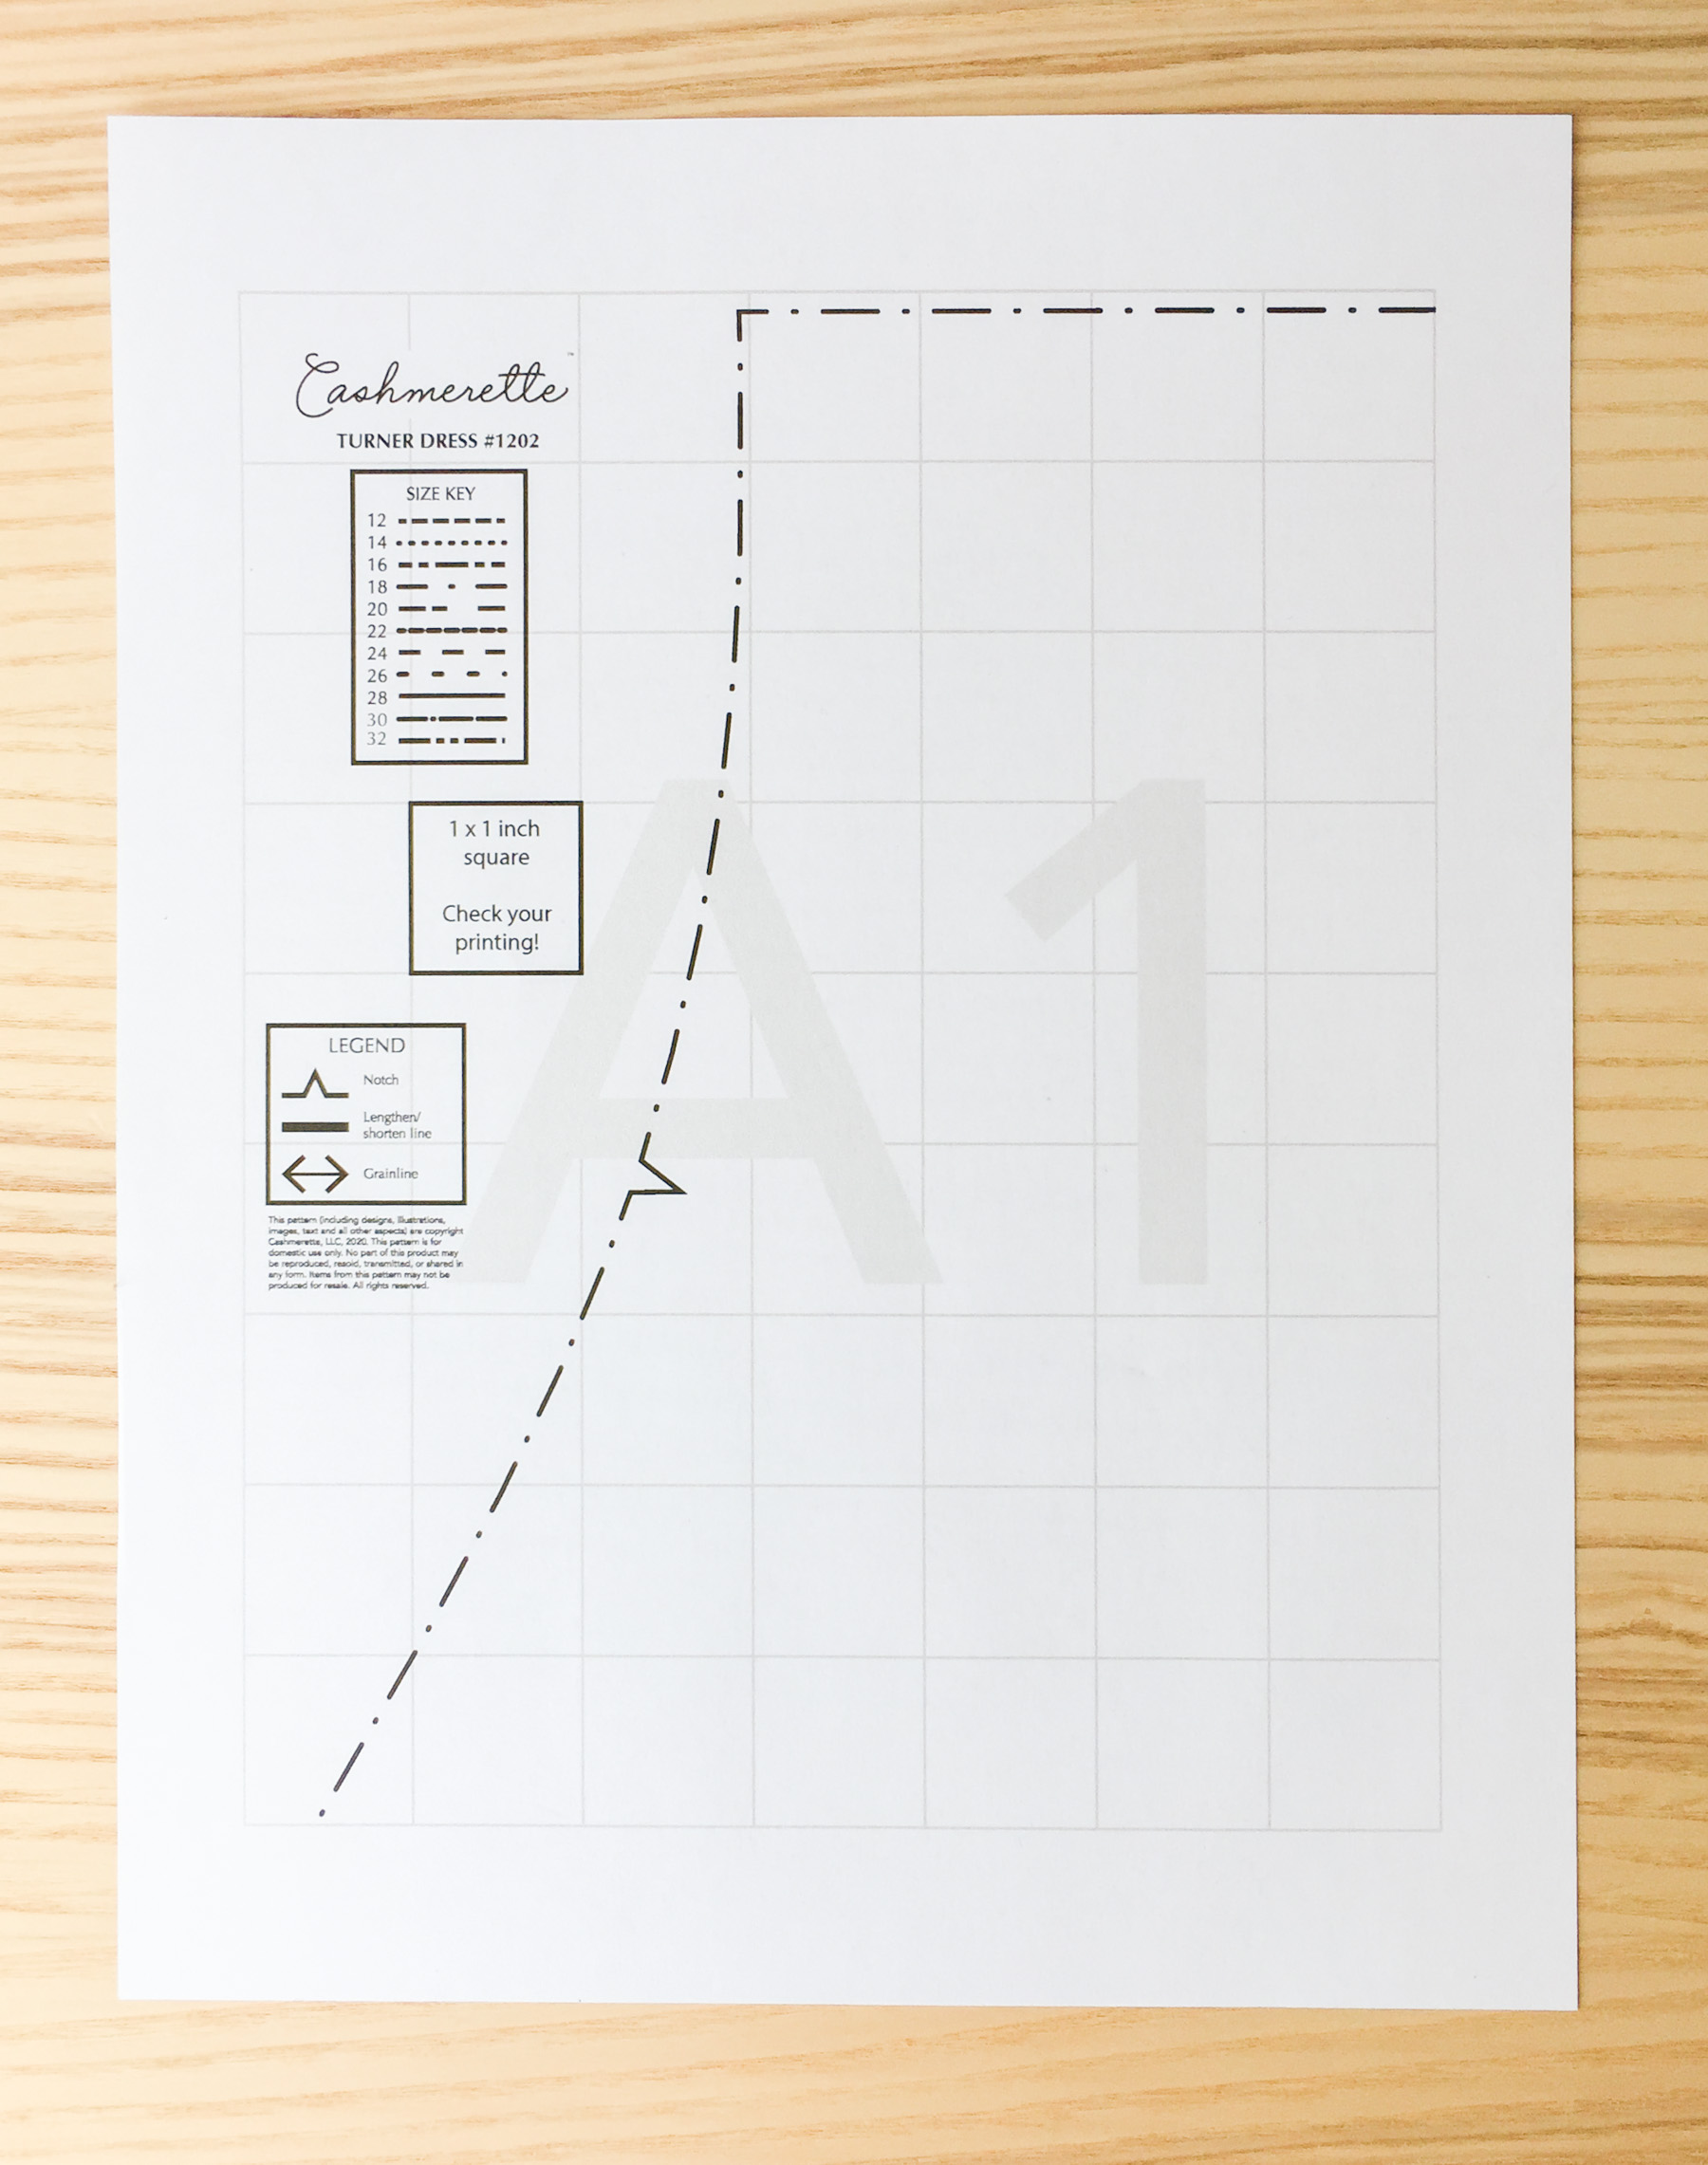
We want to check with a ruler that our test square is indeed 1” by 1” (2.5 cm by 2.5 cm). If it’s bigger or smaller than 1”, something went wrong in the scaling, so go back and check the printing settings.
Printing the PDF Pattern
If our test square printed to scale, we can use the same settings to print out the rest of the pattern. The only thing we’ll do differently this time is to set our page range to start at 2 through the last page in the document (in this case, that’s page 30).
And now we wait for the rest to print out!
Assembling the PDF Pattern
Once all of the pages are printed out, we’ll need to tape or glue the pages together. We’re essentially assembling the equivalent of a printed tissue page. Look for the guide in the instructions file for how to do this.
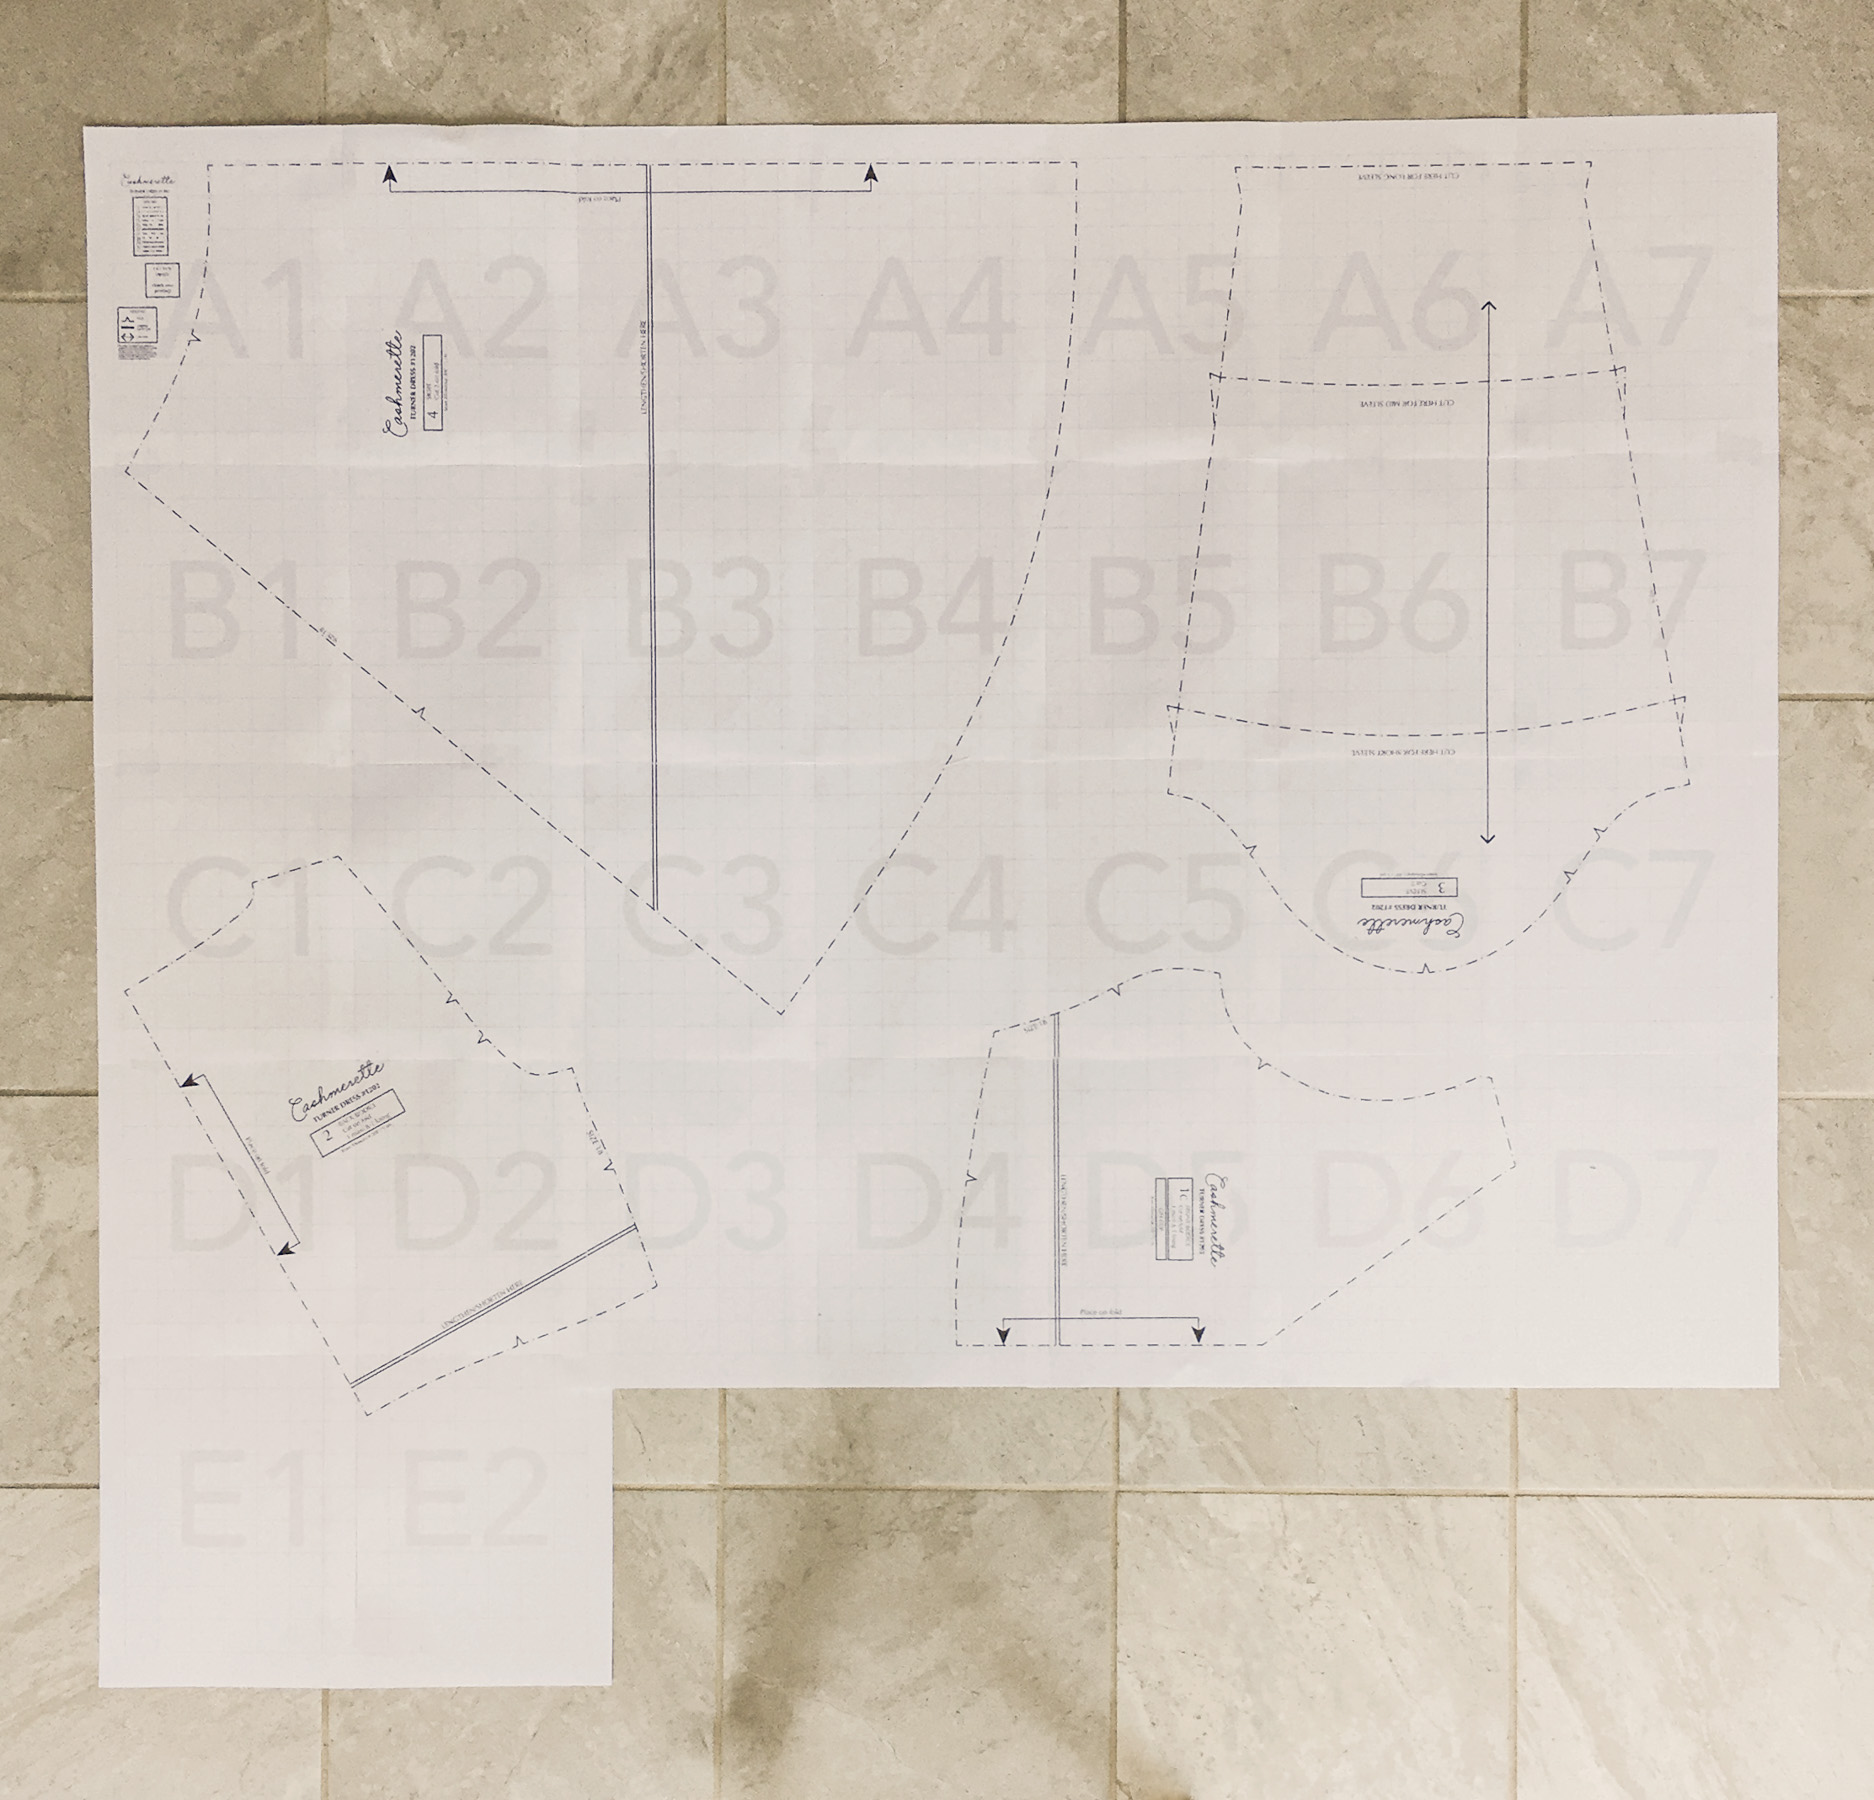
Here’s what the guide looks like for the Turner Dress:
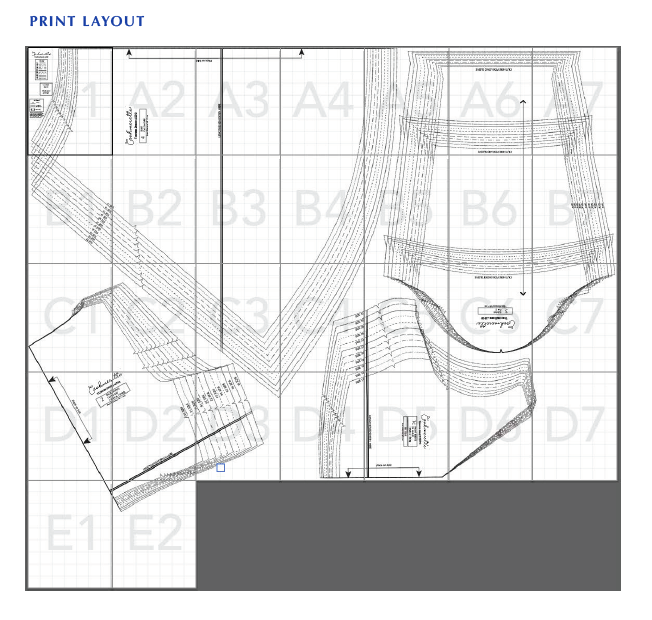
For all Cashmerette patterns, we use a system where each column of pages has a number (1, 2, 3…) and each row of pages has a letter (A, B, C…). Even if you don’t have the print layout in front of you, the page labels will clue you in as to how the pages should be laid out.
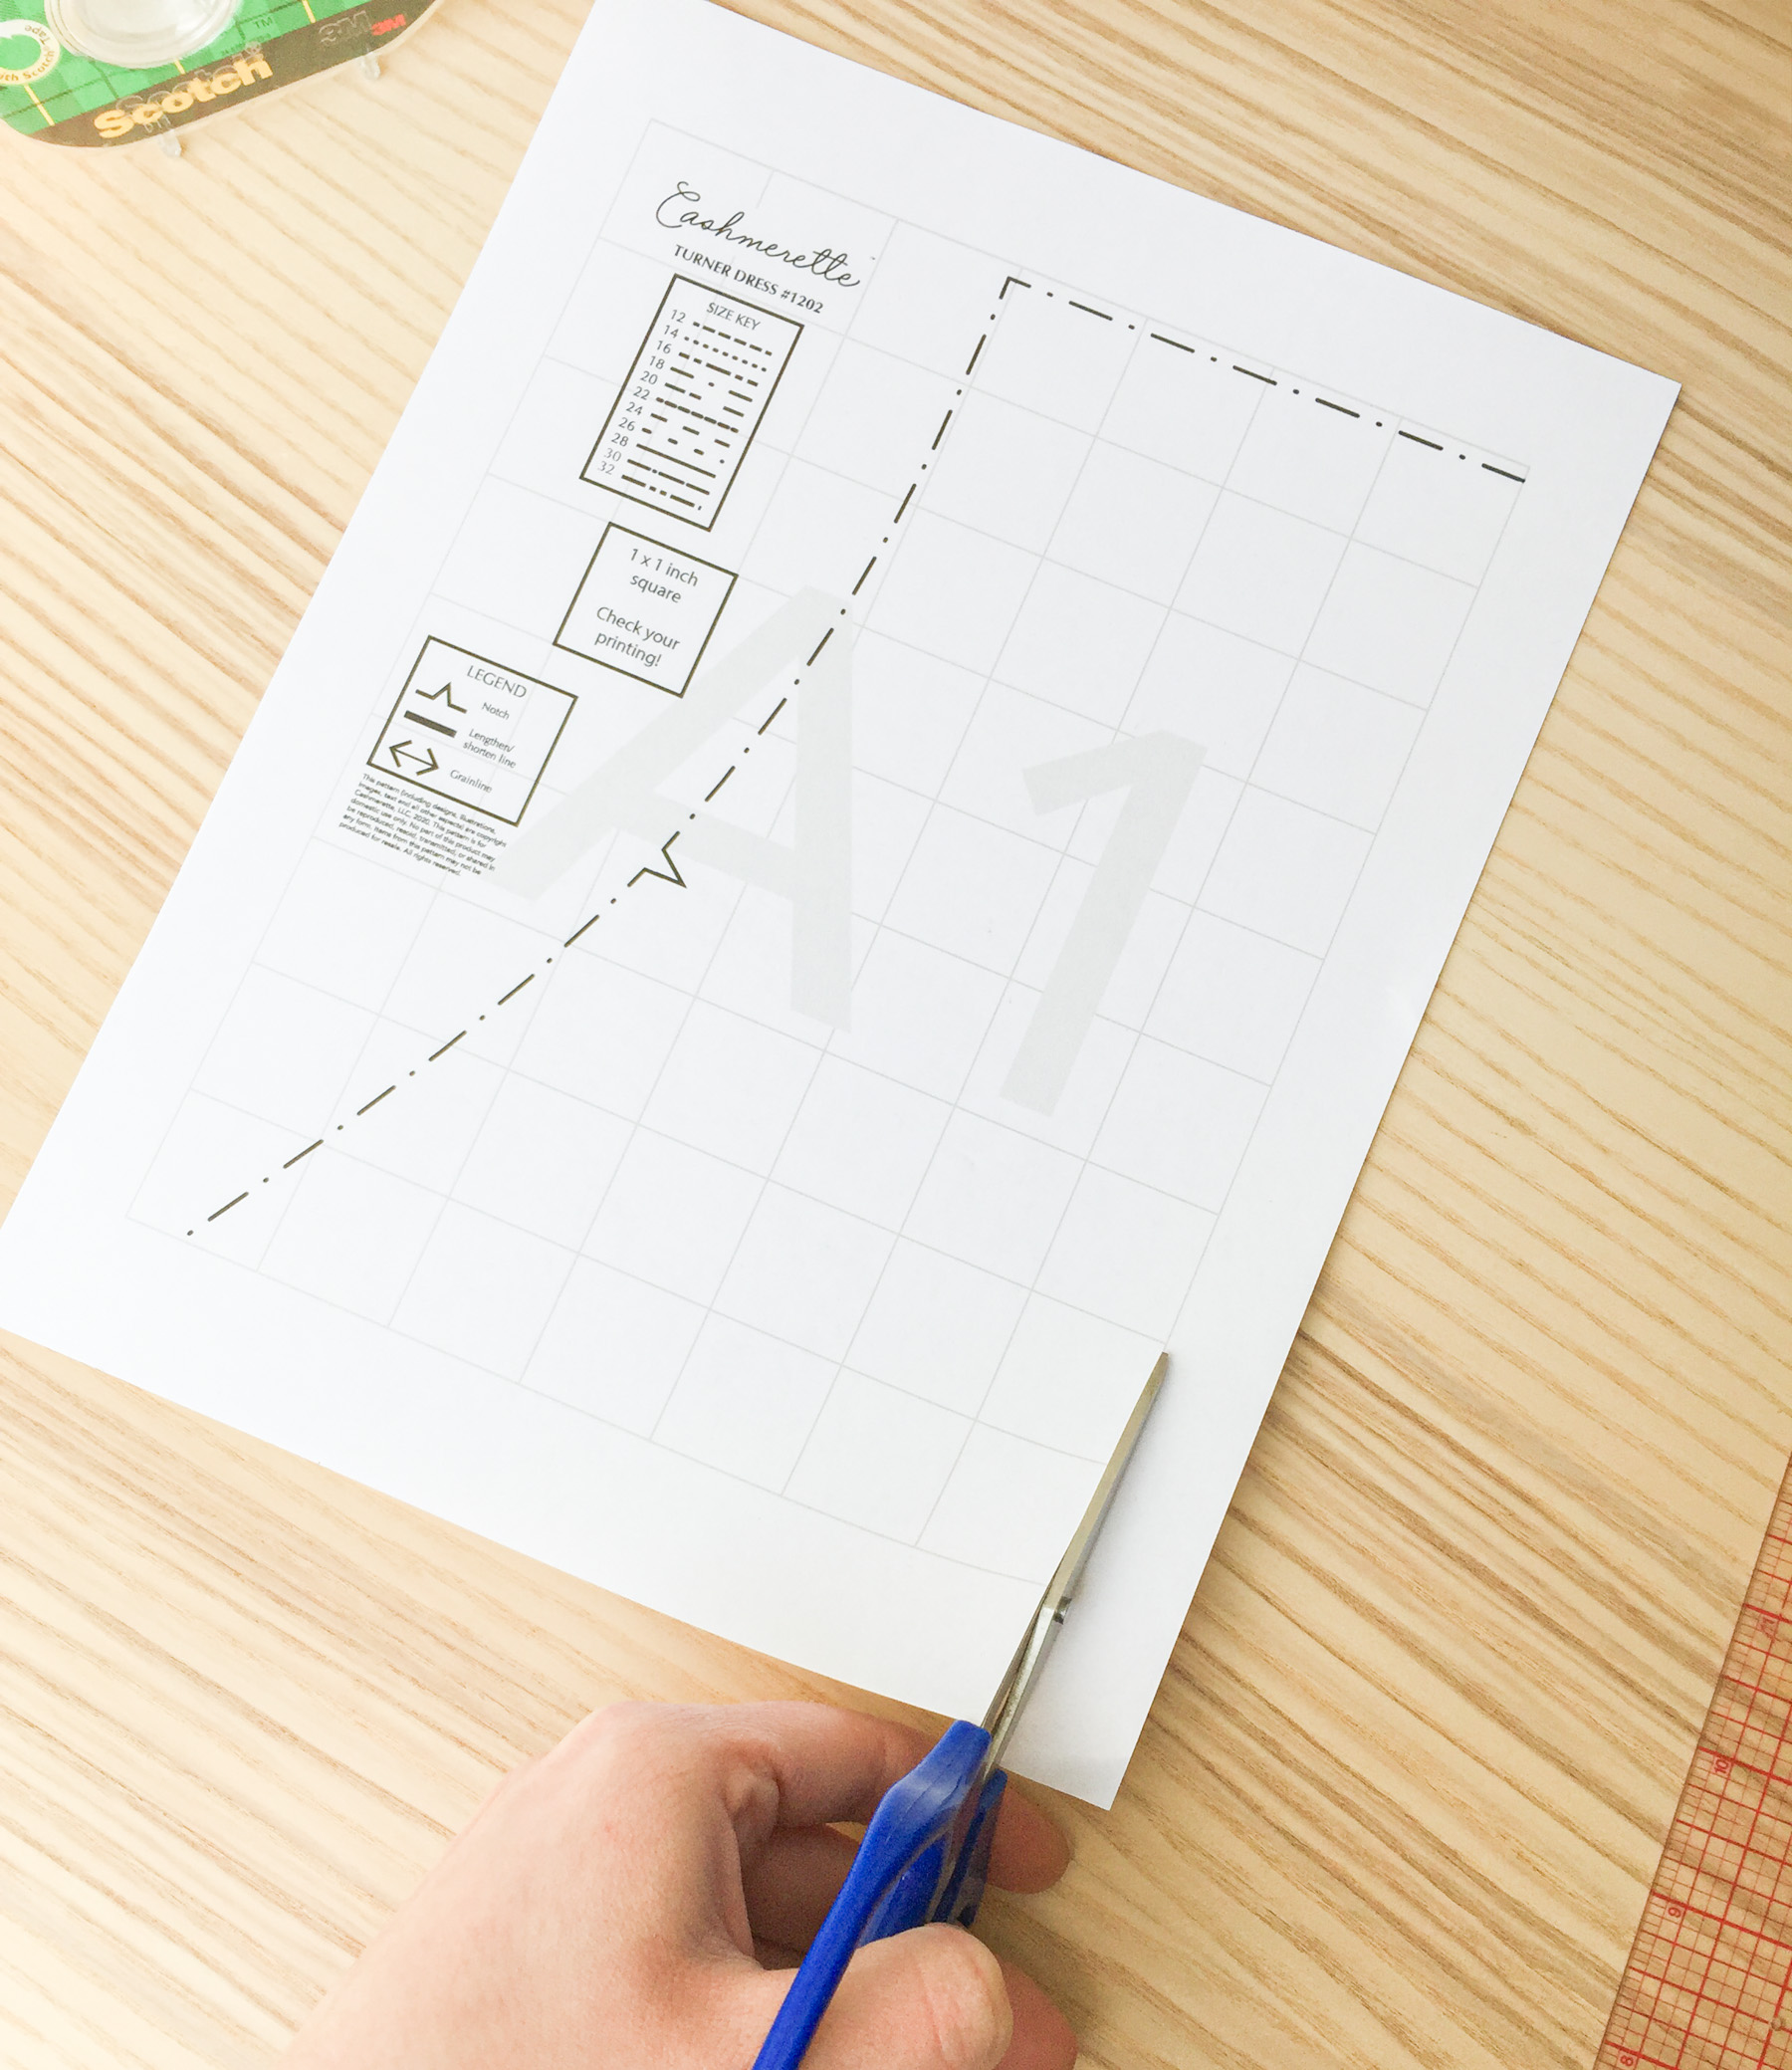
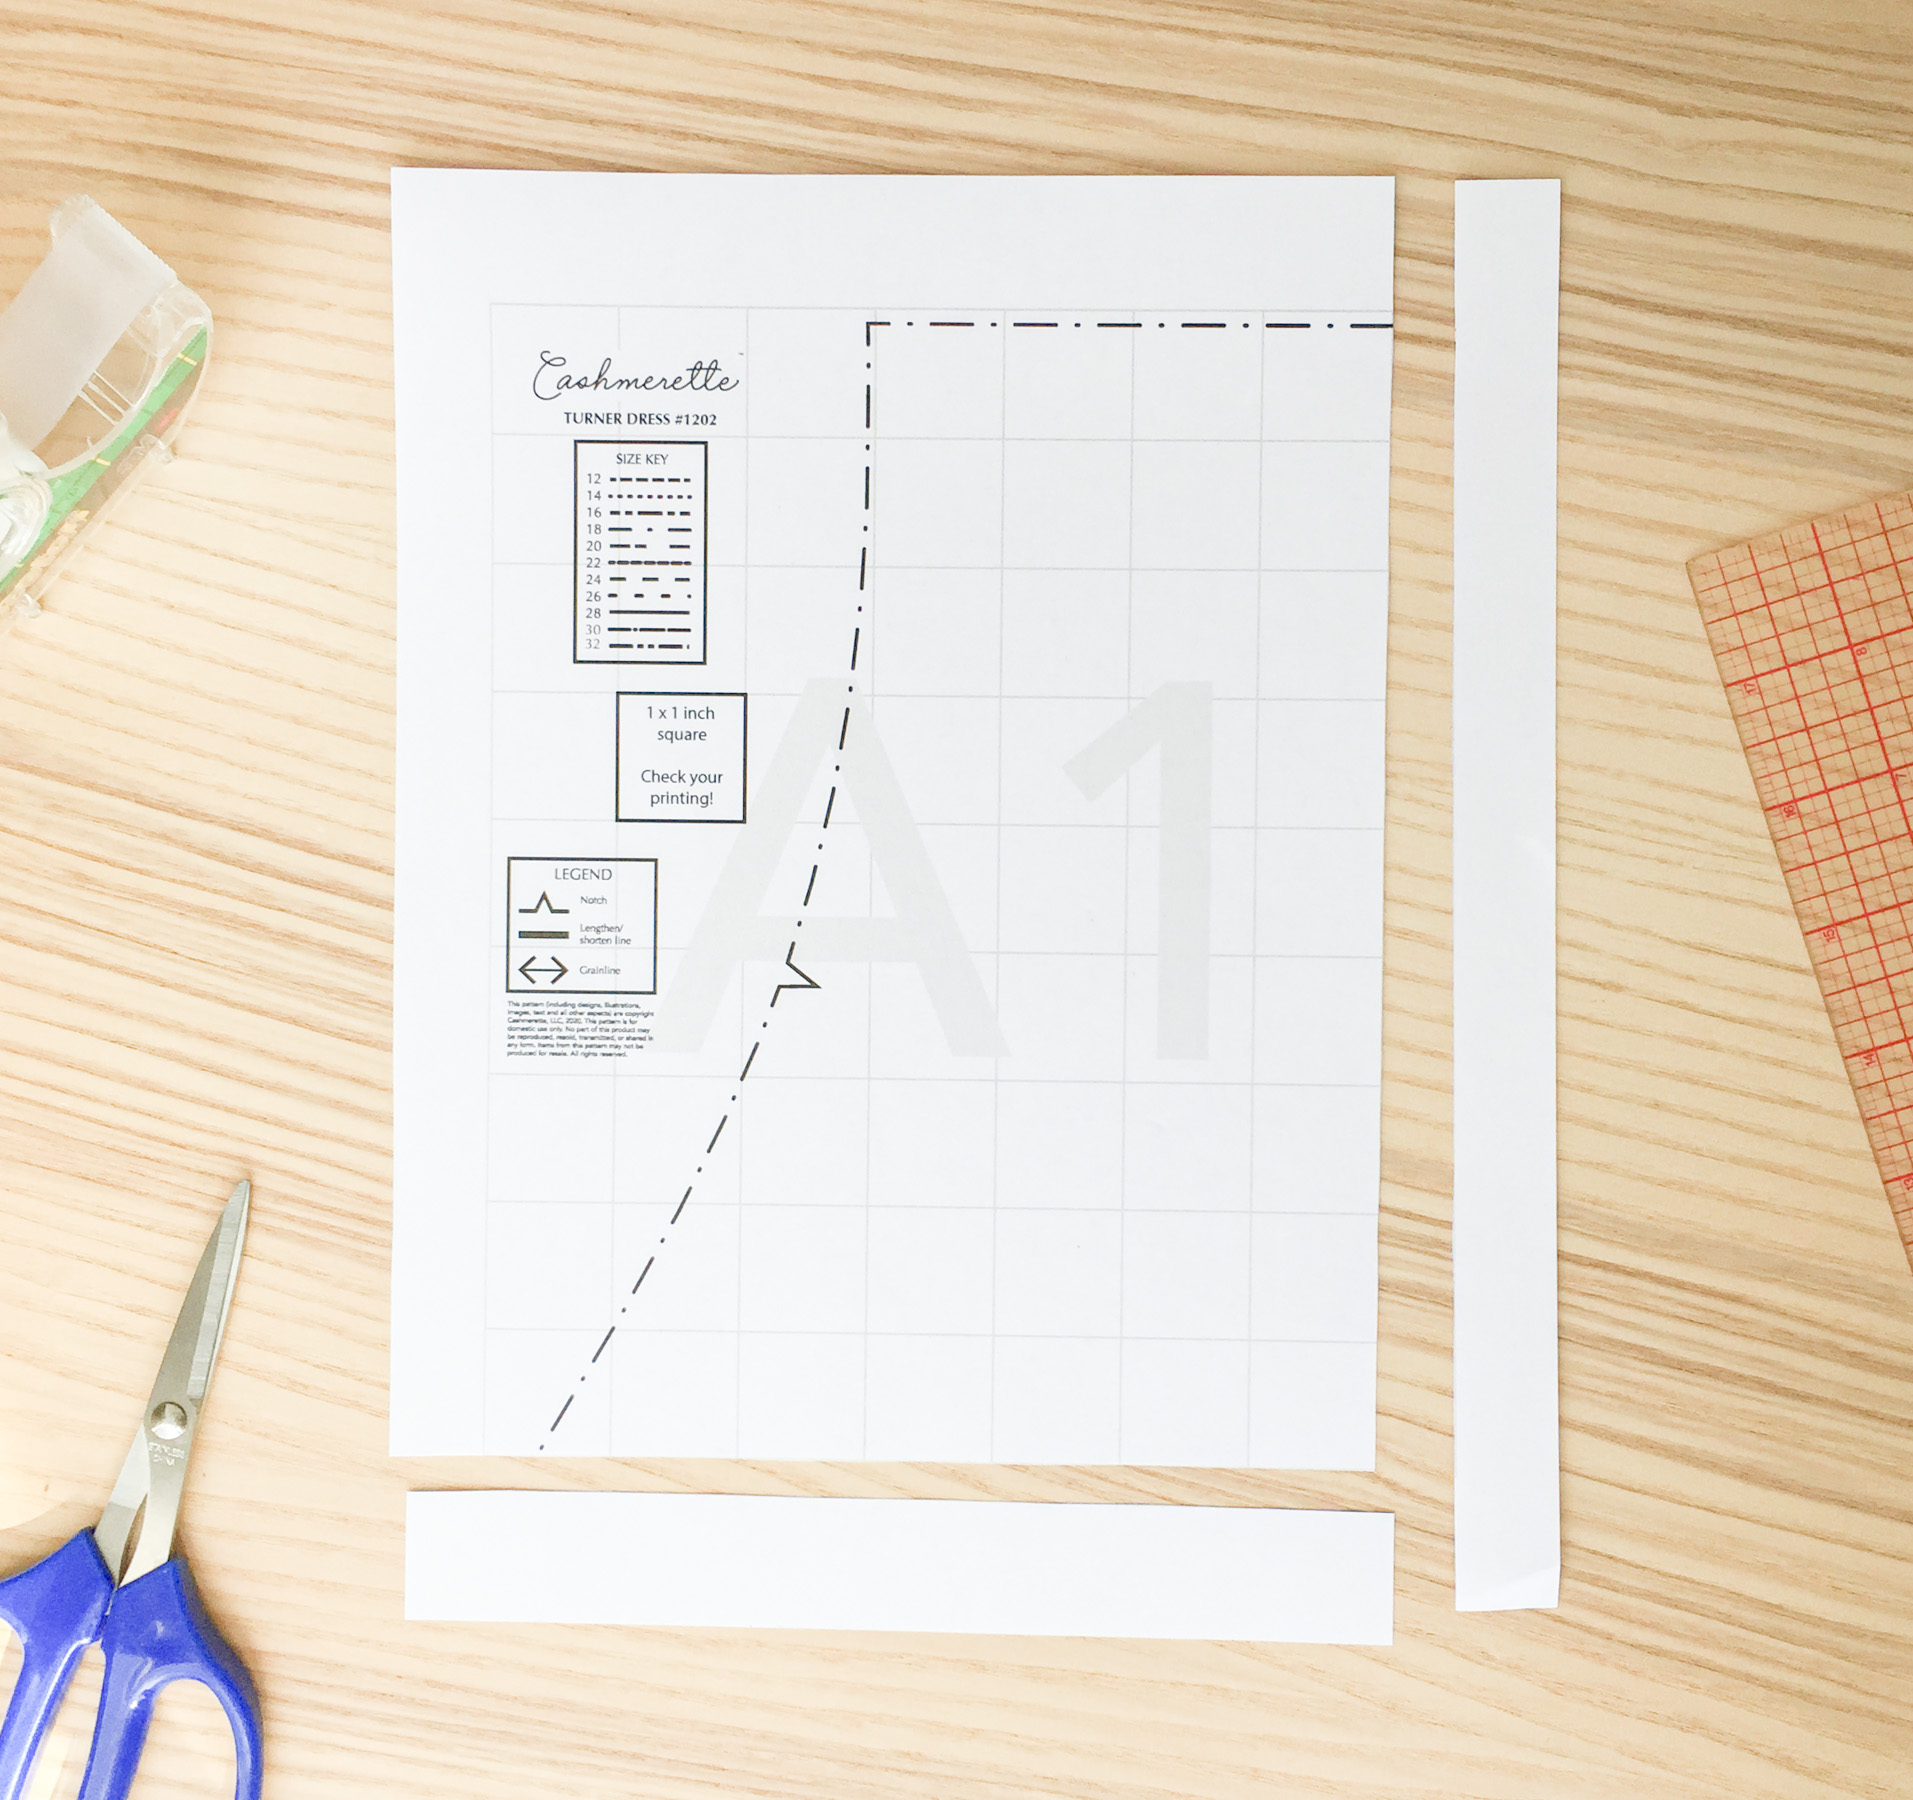
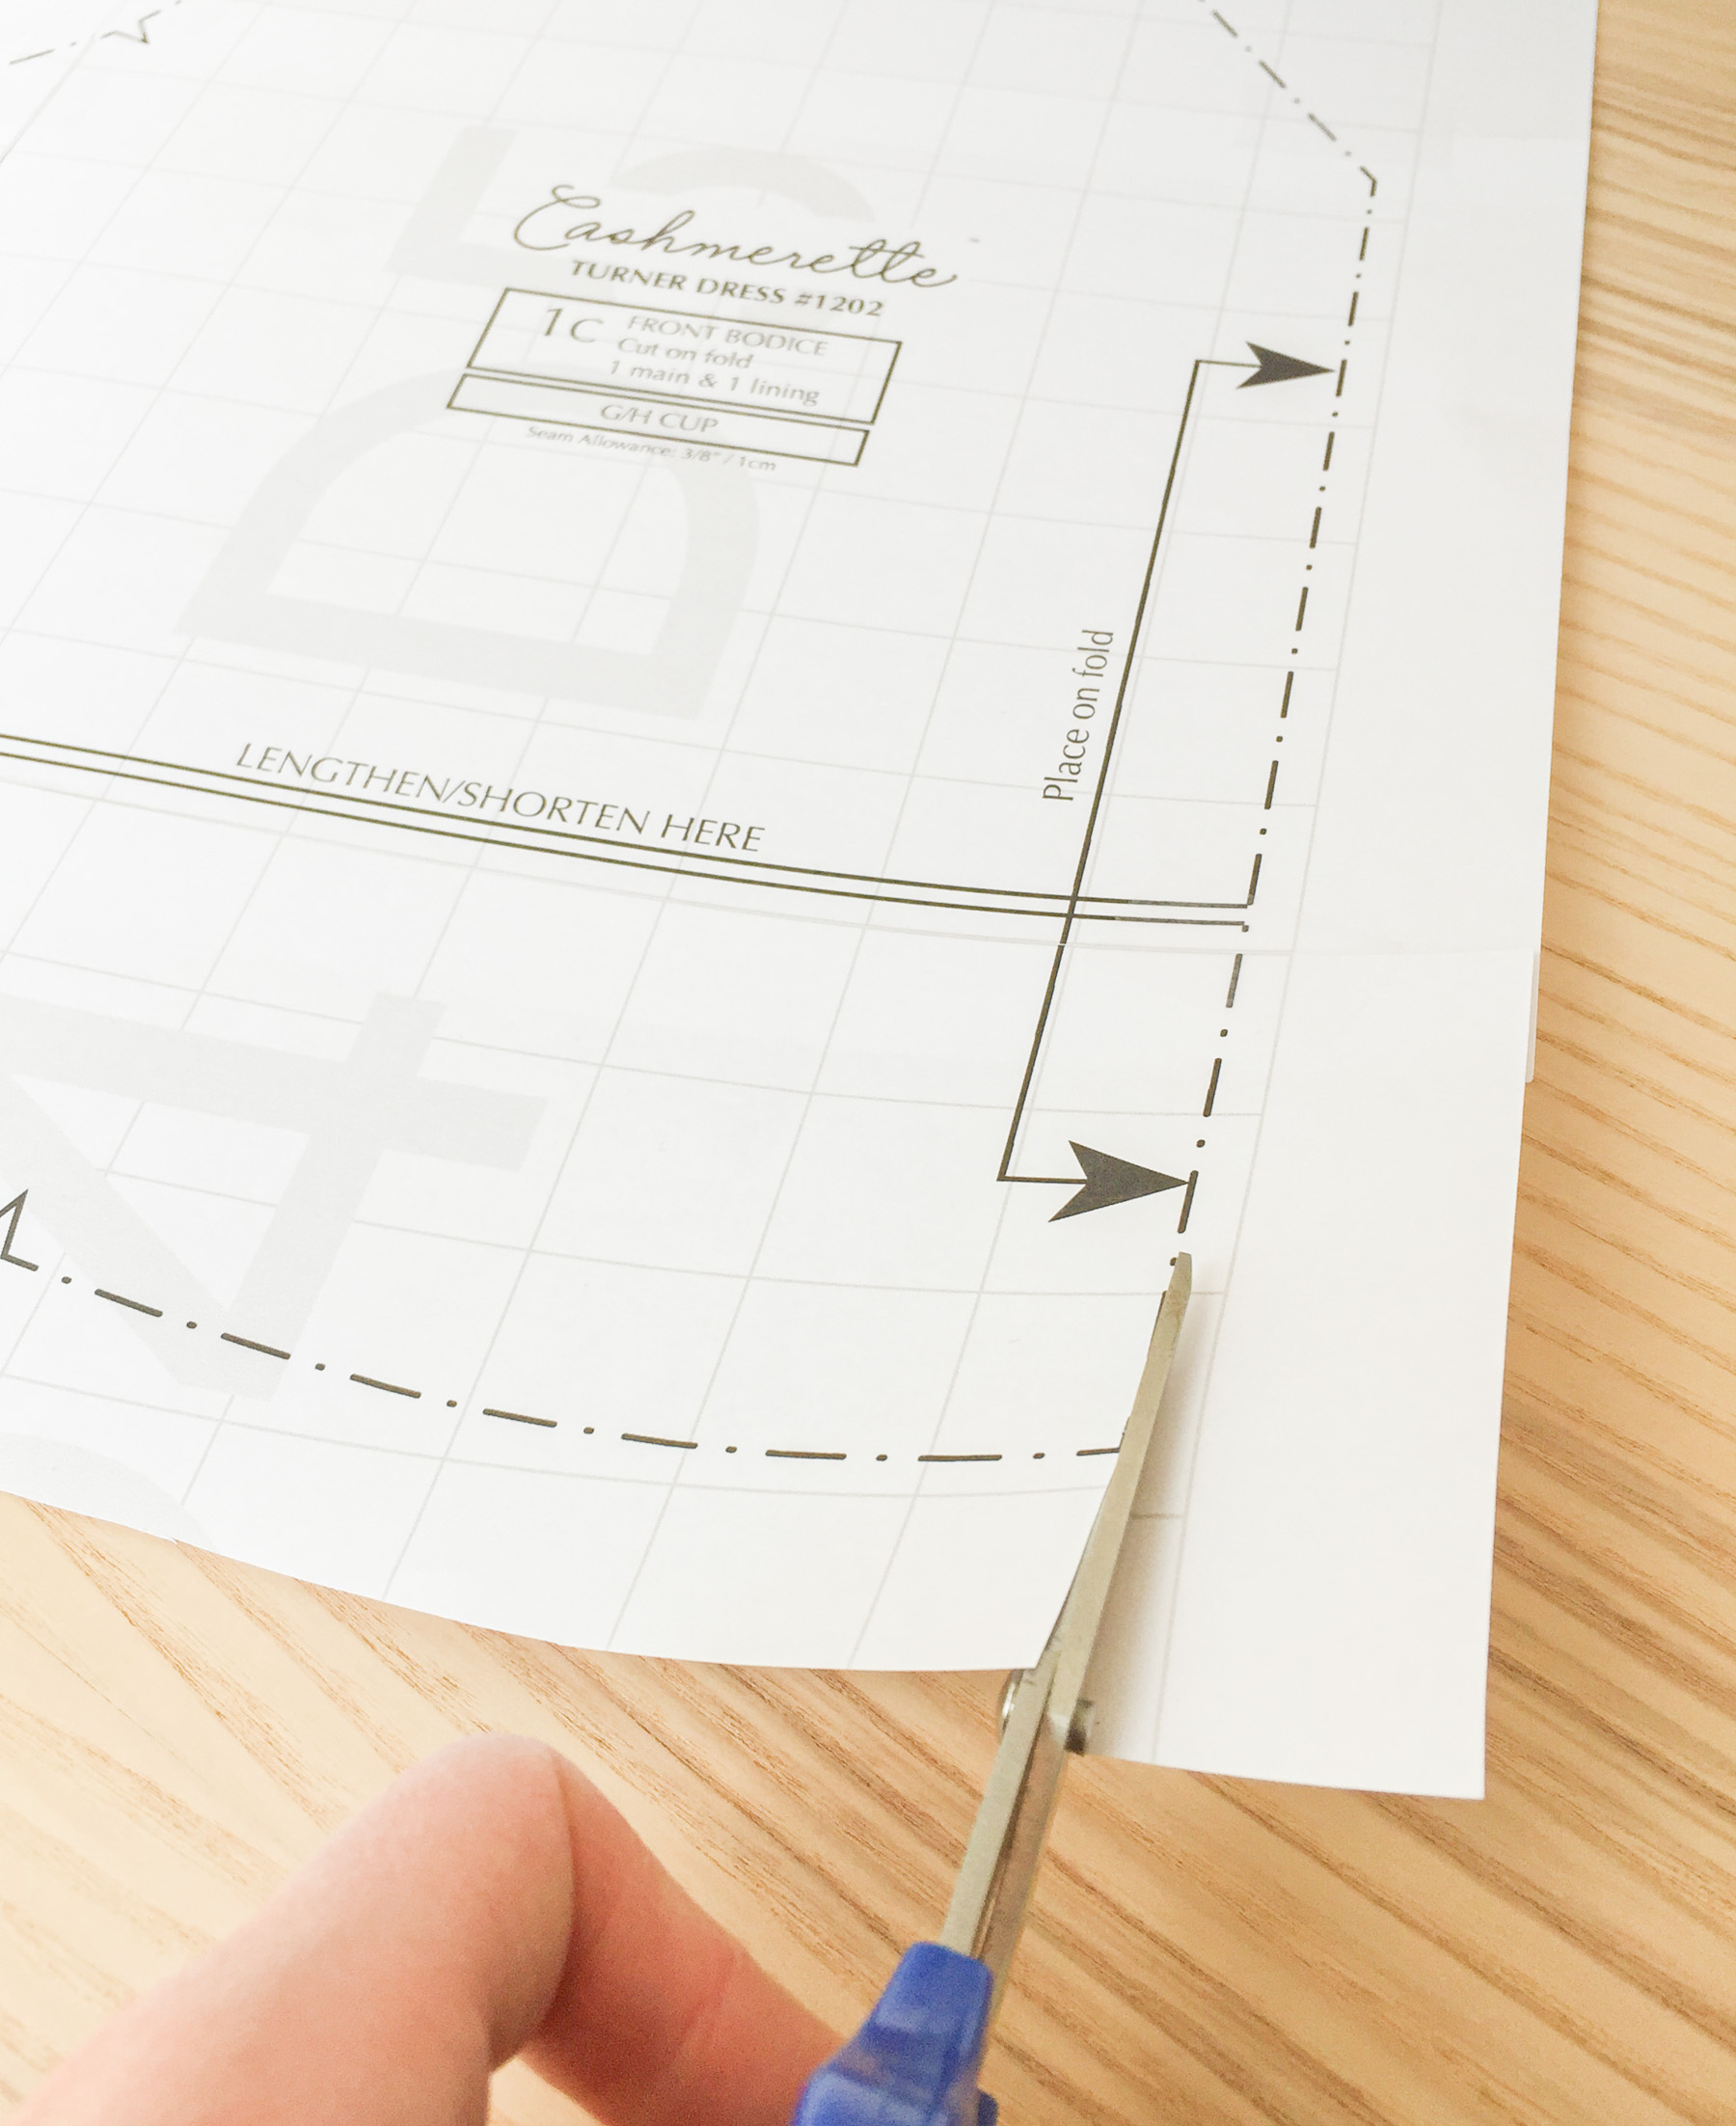
You’ll notice that on each page that printed out, there’s a bit of margin around the grid. You may think that you need to trim all of the margins off, but we can actually do it by trimming fewer than half of the margins. Just trim off the right and bottom margins on all of the pages, except for the last column (only trim off the bottom margin) and the last row (only trim off the right margin).
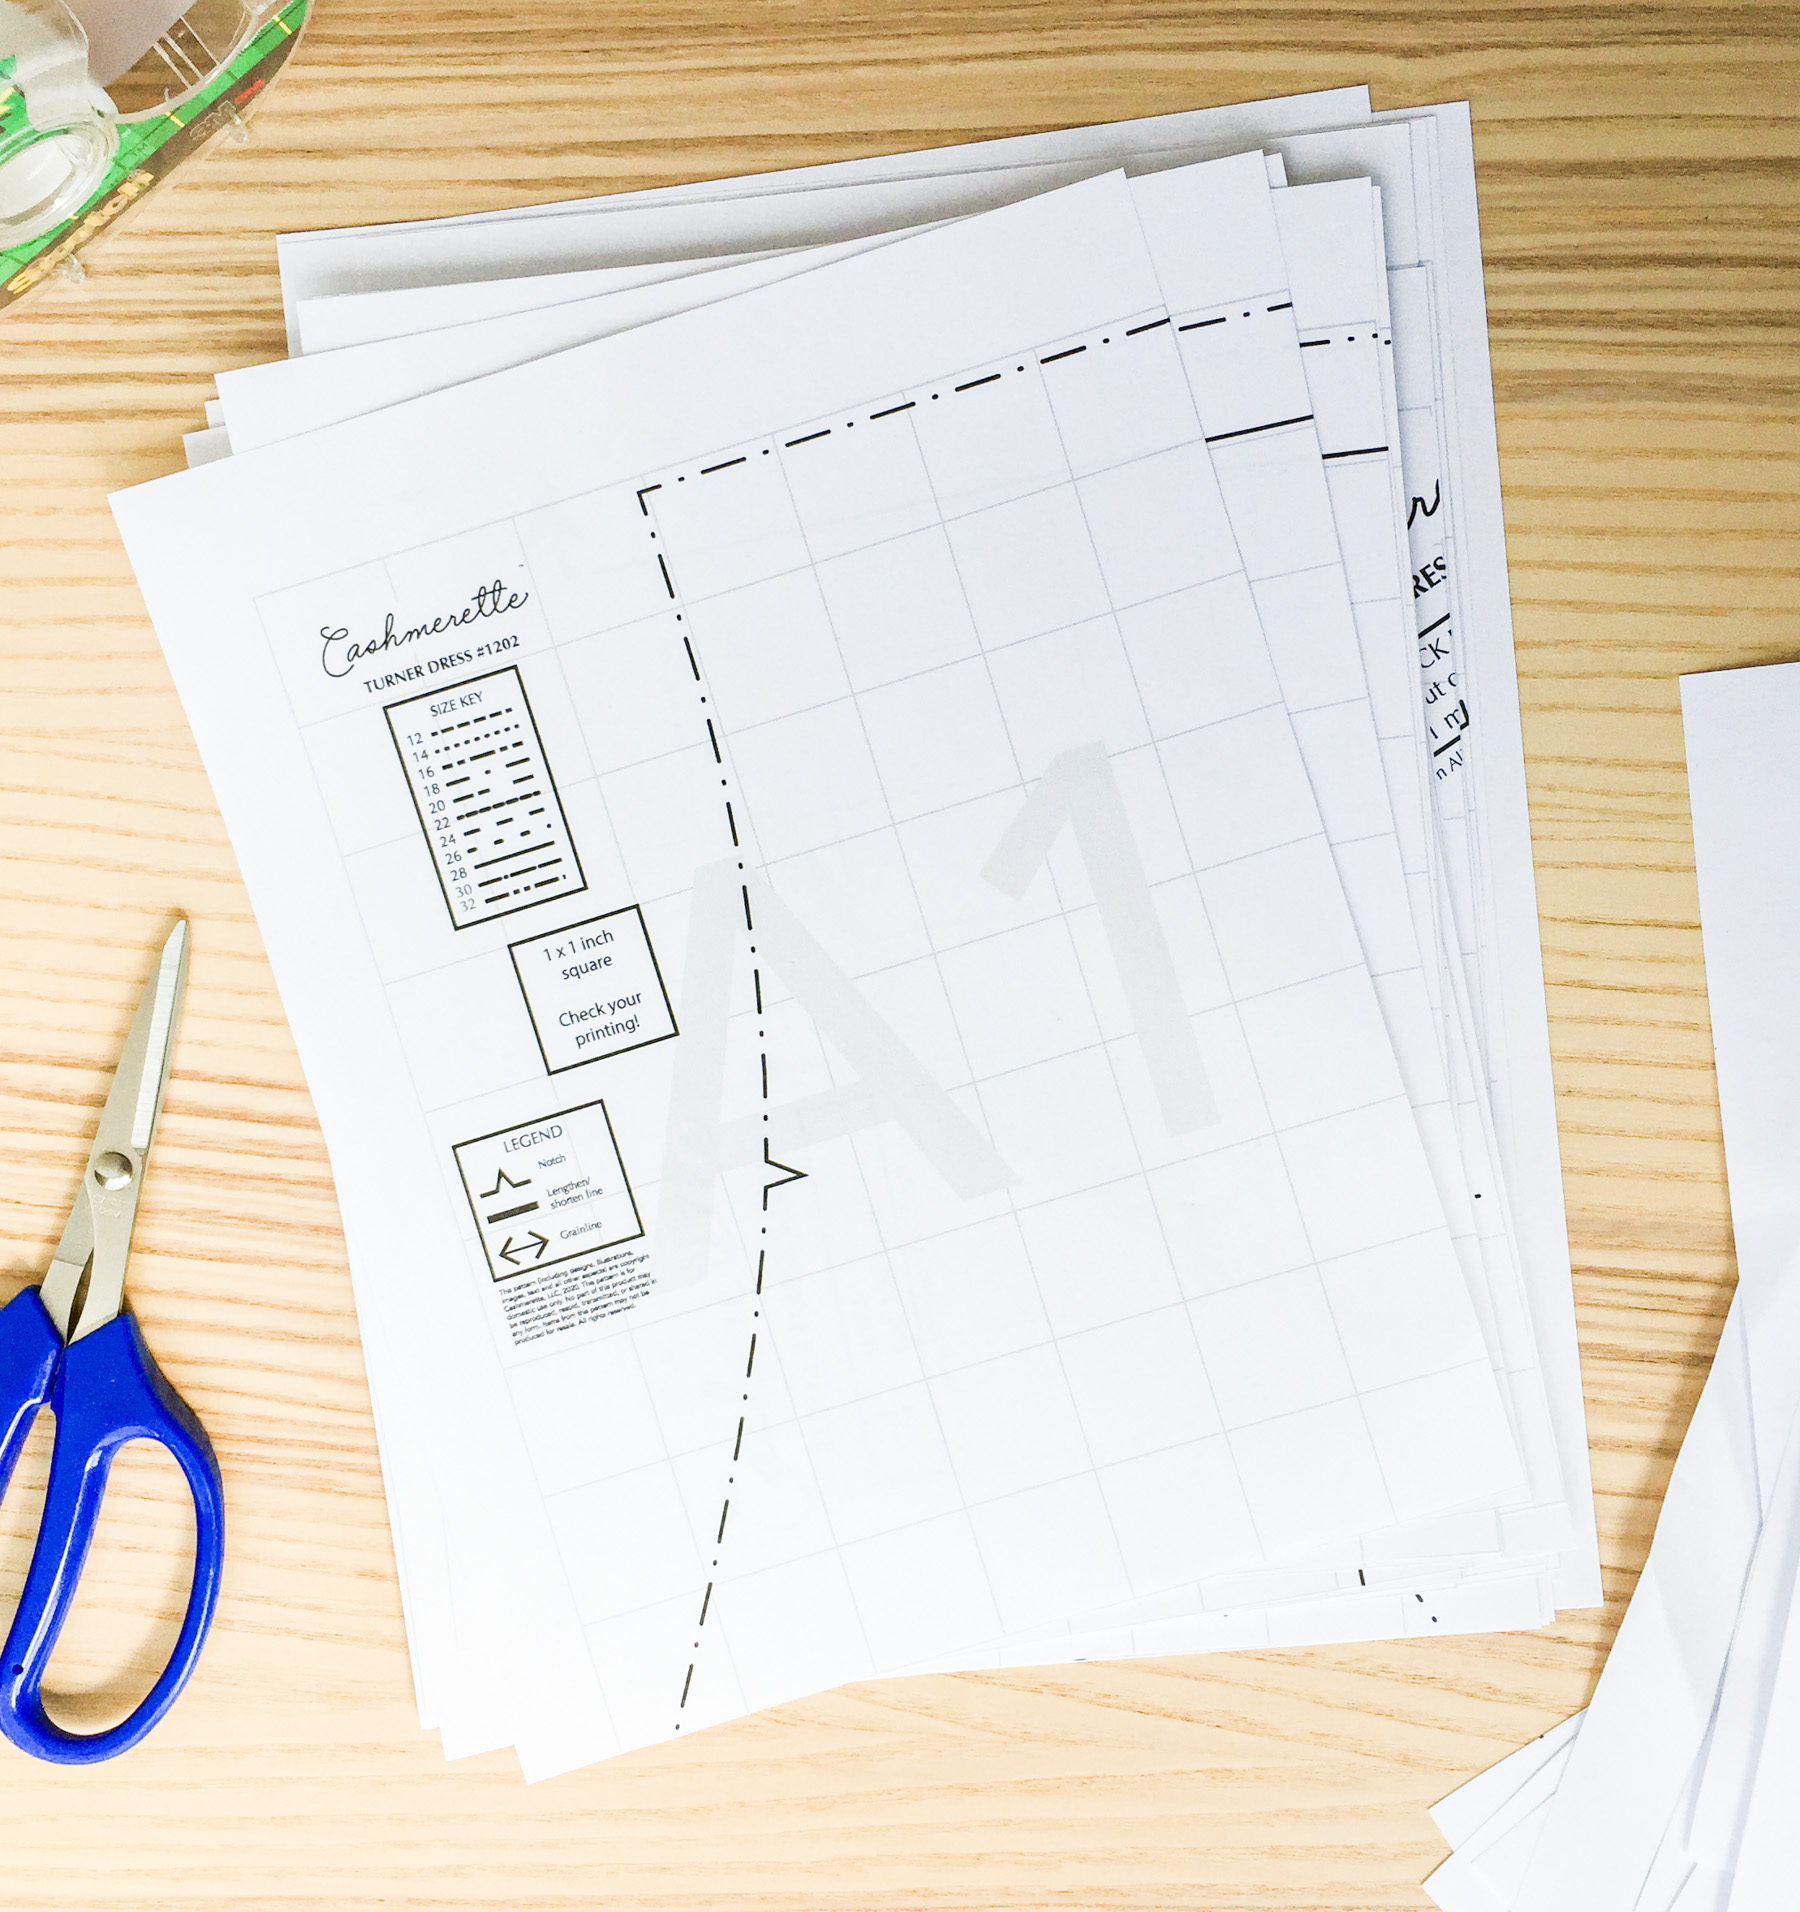
Now we need to tape or glue the pieces together. When I first start using PDF patterns, I thought that you need to tape all of the sheets into one huge piece of paper, and that you then needed to keep it that way (and trace off the pattern pieces to use them). You can do it that way, but you definitely don’t need to! If you don’t have a huge workspace, you can tape together the pages that make up each pattern piece separately—just make sure to follow the guide so you know what goes where.
With the Turner Dress, I see that the way the pieces are laid out, I can’t tape them up separately. So I’ll go ahead and tape it all up as one big sheet.
At Cashmerette, we’ve included a light-gray grid in the background. All of the squares of the grid should be 1”. This is SUPER helpful when tiling, because it lets you see easily when your taping might be a little off. If your pattern piece doesn’t look quite right once you’ve taped it up, check the grid!

Once you’ve taped up your pieces, you can cut them out. (There’s no need to trace since you can always print out another copy, but you’re also welcome to trace if you’d like.) If you’re grading between sizes, make sure you do so before cutting out your pieces.
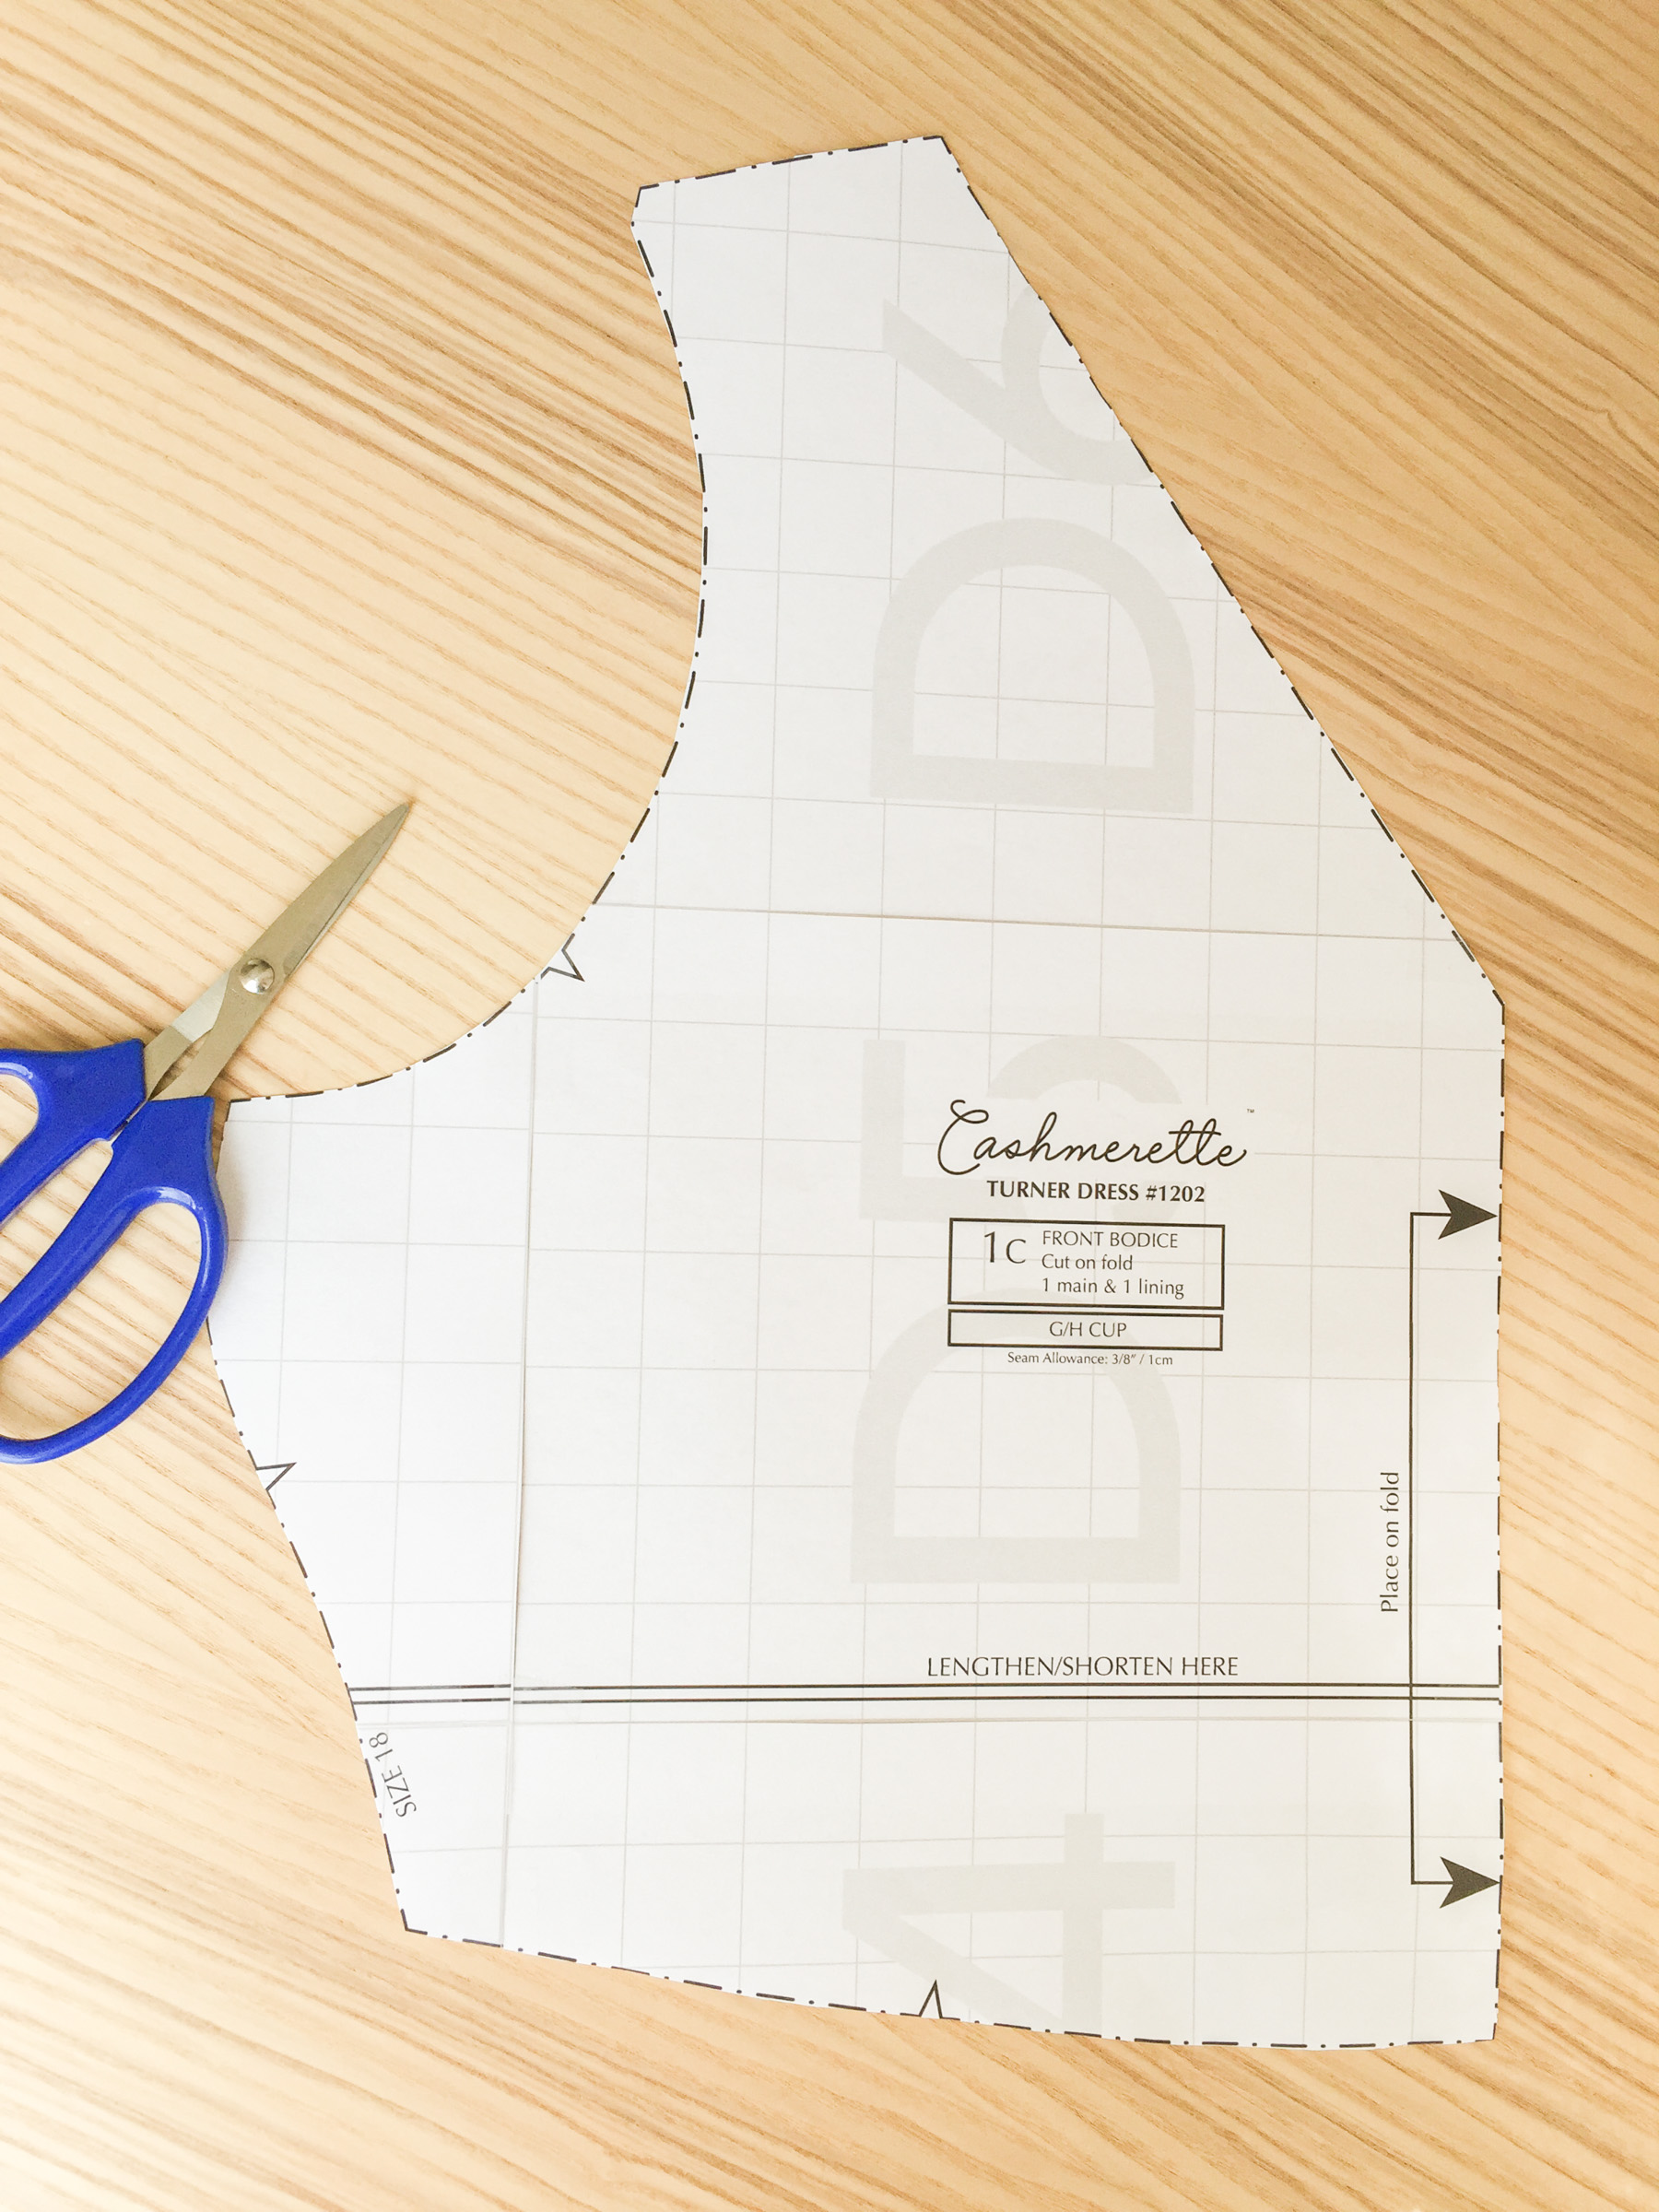
And there you have it! Your pattern pieces are ready to go, and you’re ready to start your project.
Got questions?
We hope this answered most of the questions you have about printing PDF patterns at home, but if not, drop us a note in the comments below and we’ll be happy to help! If you’re ready to start sewing your first PDF pattern, you can find all of the Cashmerette patterns right here.

SewBrooke had a printing hack to shift the printed page up and over to the upper corner, so that you could eliminate trimming sheets (you lose a little line in the overlap, but only 2mm or so). I cannot find it, but I know someone has it to share.
https://www.instagram.com/p/BqVkC0zHSsv/ This is the post she did on it on her Instagram account. It might not work for you, but if it does, it’s a game changer.
We don’t recommend this as it leads to the pattern being less accurately put together, and often leads the grid not printing correctly.
I recently ordered a Lenox PDF pattern. I have not been able to print the Labels and Grid. I have Acrobat Reader DC\Reader\AcroRd33. I have the Acrobat printer set at custom scale 100%, Orientation – Auto, Documents and Markups, PDF page size is deselected. I have tried to print several different pages. I have left ally the layers on. I even went to a different size and printed a page to make sure I didn’t change something but I can’t get the grid and labels to print. Please help if you understand what my problem is.
Many Thanks.
My printer did not print a grid. I have my printer set to save ink. Do I have to change that? (I wonder how I do that!) If that’s the prob, I’ll figure it out.
That might be the problem yes. You may also need to make sure it’s printing in black and white instead of grayscale.
-Ayelet at Cashmerette
I printed using ALL of these settings, but the squares are slightly smaller than an inch. Now what??
Sometimes we hear from folks that the printer they’re using is causing the issues—they try another printer and it comes out fine! Or even weirder, the cartridge is throwing off the scale.
You can try increasing the scale by 1-2% each time and reprinting to see if the background grid is exactly 1″x1″ all the way across.
-Ayelet at Cashmerette