It’s been a little while (babies get in the way of the best laid plans!) but I’m thrilled to be back with the second installment of the Cashmerette Fit Clinic, this time working on one of our best-selling patterns, the Montrose Top. If you’re not familiar with the series, in the Cashmerette Fit Clinic I work one-on-one over email with someone to help them refine the fit of their Cashmerette pattern – and then we share it here so everyone can learn and benefit.
(Would you like to be considered for a future fit clinic? You can apply here.)
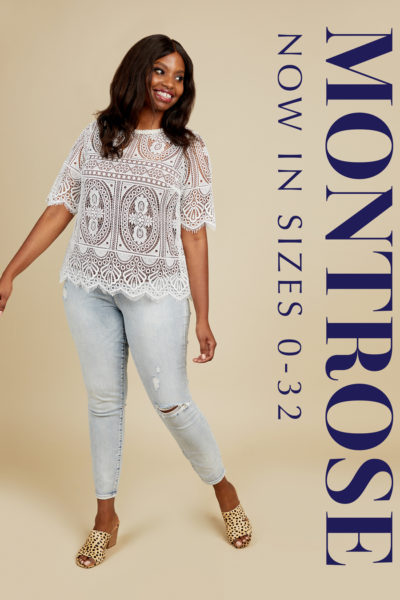
Fitting the Cashmerette Montrose Top
This time round, I worked with Meaghan, who you can find on the ‘gram here. When she applied to the Fit Clinic she’d tried a few muslins already and wanted help nailing the fit.
Meaghan’s measurements:
- Full bust: 45.5″
- Waist: 37.5″
- Hip: 44.25″
- Height: 5’4″
- Bra size: 36 G/H
Where Meaghan’s Montrose Top started
When she applied for Cashmerette Fit Clinic, Meaghan had made two muslins and quite a few pattern adjustments along the way.
For muslin 1, she made a 16 C/D graded to 14 hip, shortened by 1″, and did a 1″ swayback adjustment.
 \
\
For muslin 2, she did a 16 E/F graded to 14 hip, shortened 1″, swayback adjustment, rounded back adjustment and forward shoulder adjustment.

At this point, she found the bust and back were too tight, with a fold at the armpit/bust area, the forward/rounded shoulder adjustments didn’t have the desired outcome, excess fabric in the back sleeve and too tight at the hips. So some fit issues to address!
Round 1: getting the base size right
Although Meaghan had already made two muslins and done a bunch of adjustments, the first thing I wanted to make sure was that she had the base size right. Sometimes people end up making lots and lots of adjustments when in fact, they’re simply in the wrong size!
With a 45.5″ bust, Meaghan was right between the 16 E/F and 16 G/H sizes, but given the bust tightness I suggested that she start with the 16 G/H as a new base size. It’s certainly not surprising that the 16 C/D muslin came up too small, given her measurements.
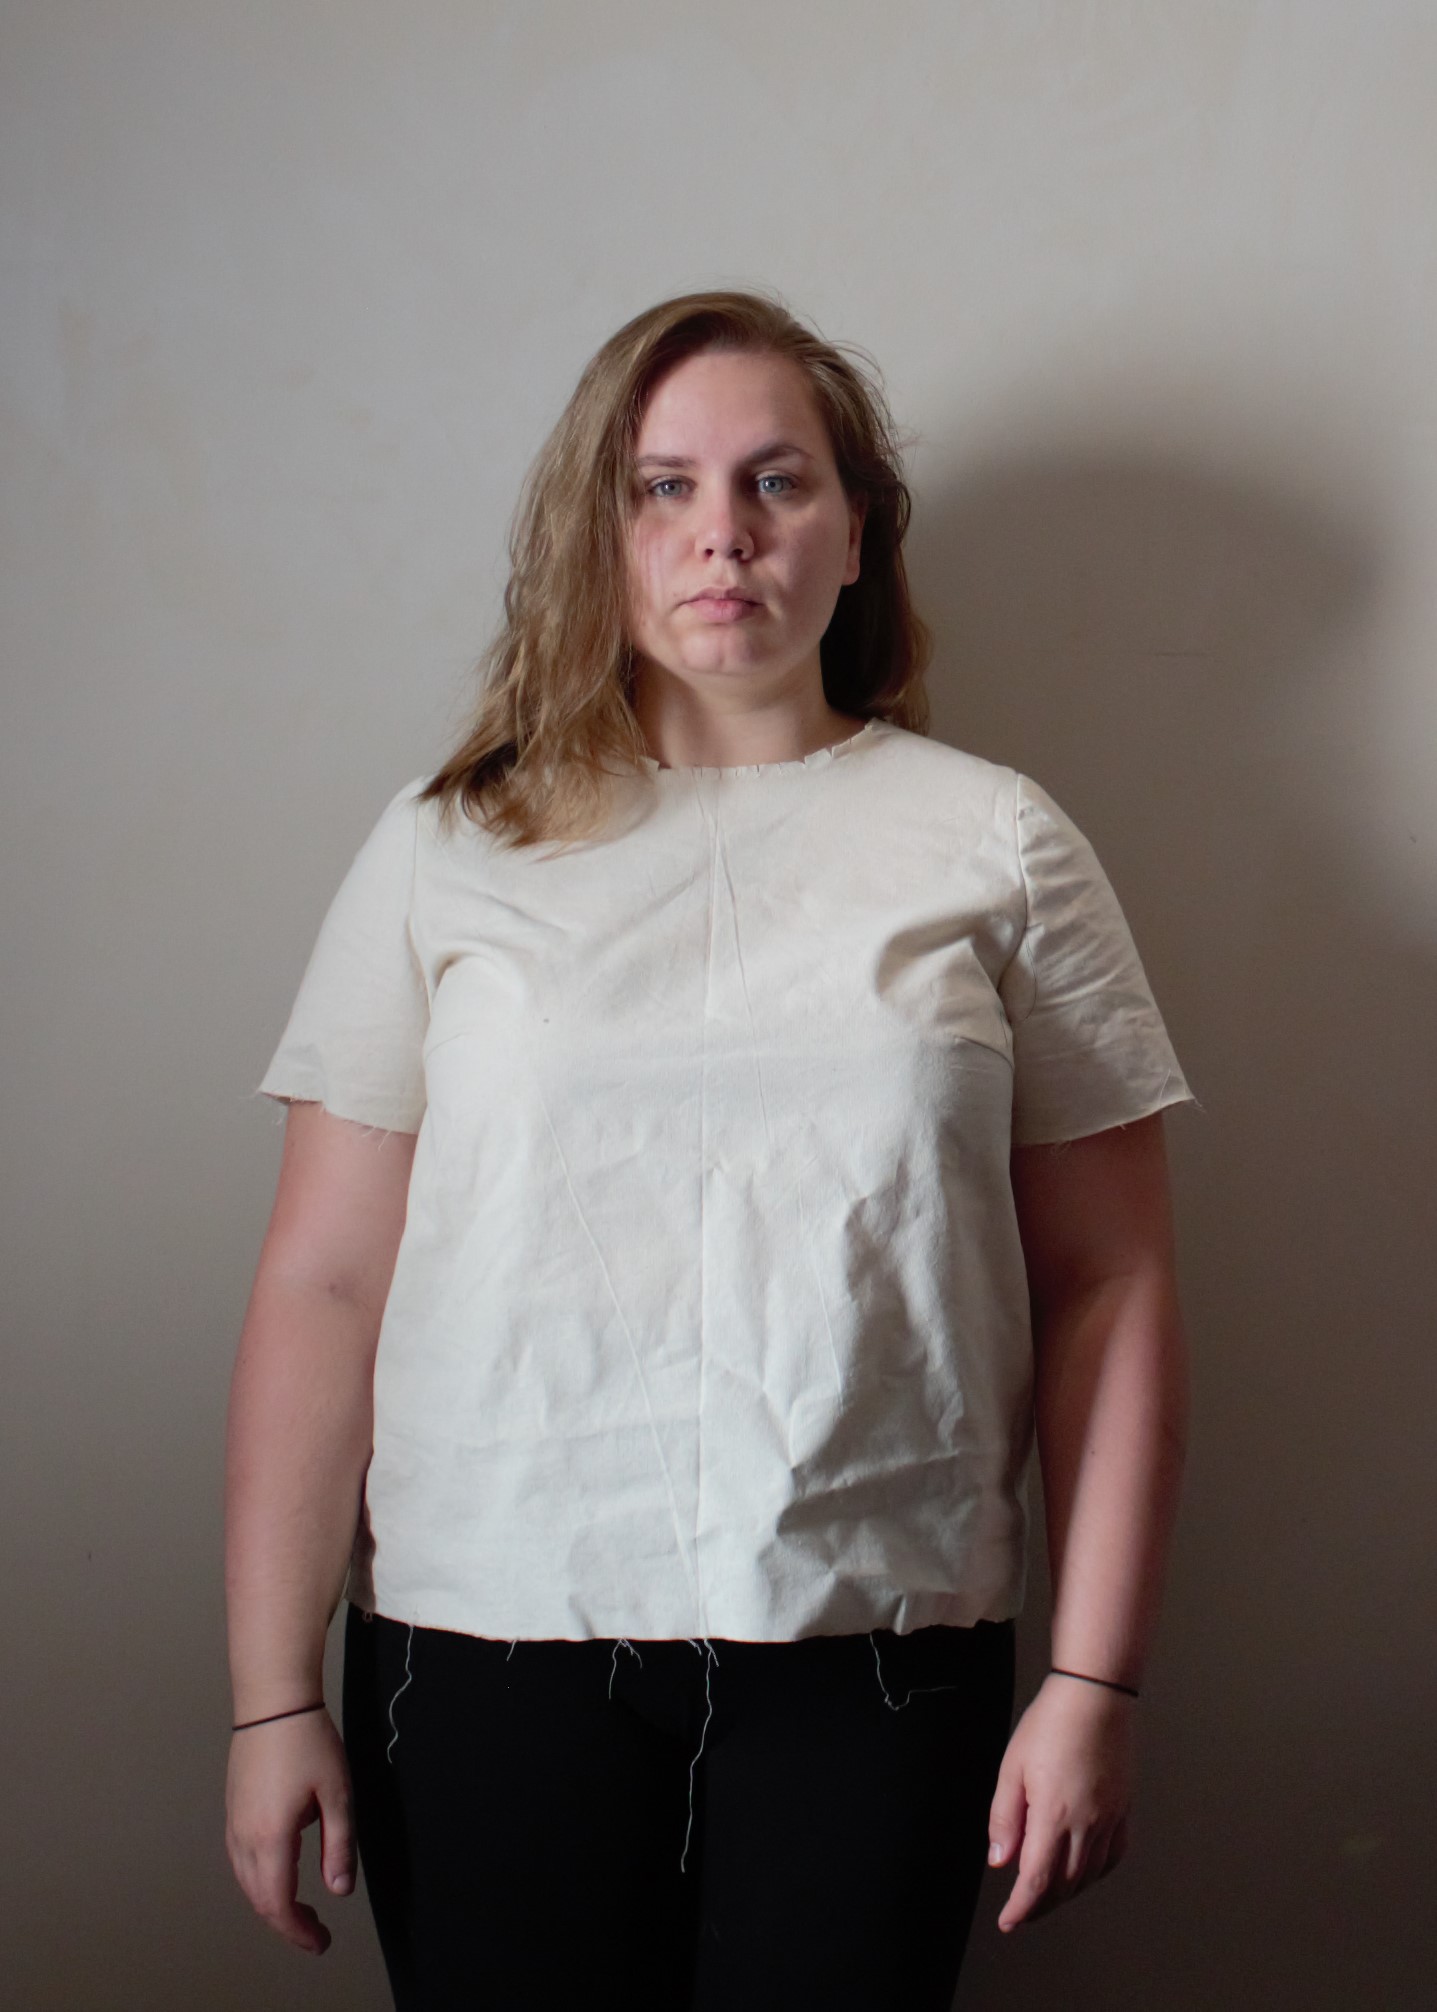
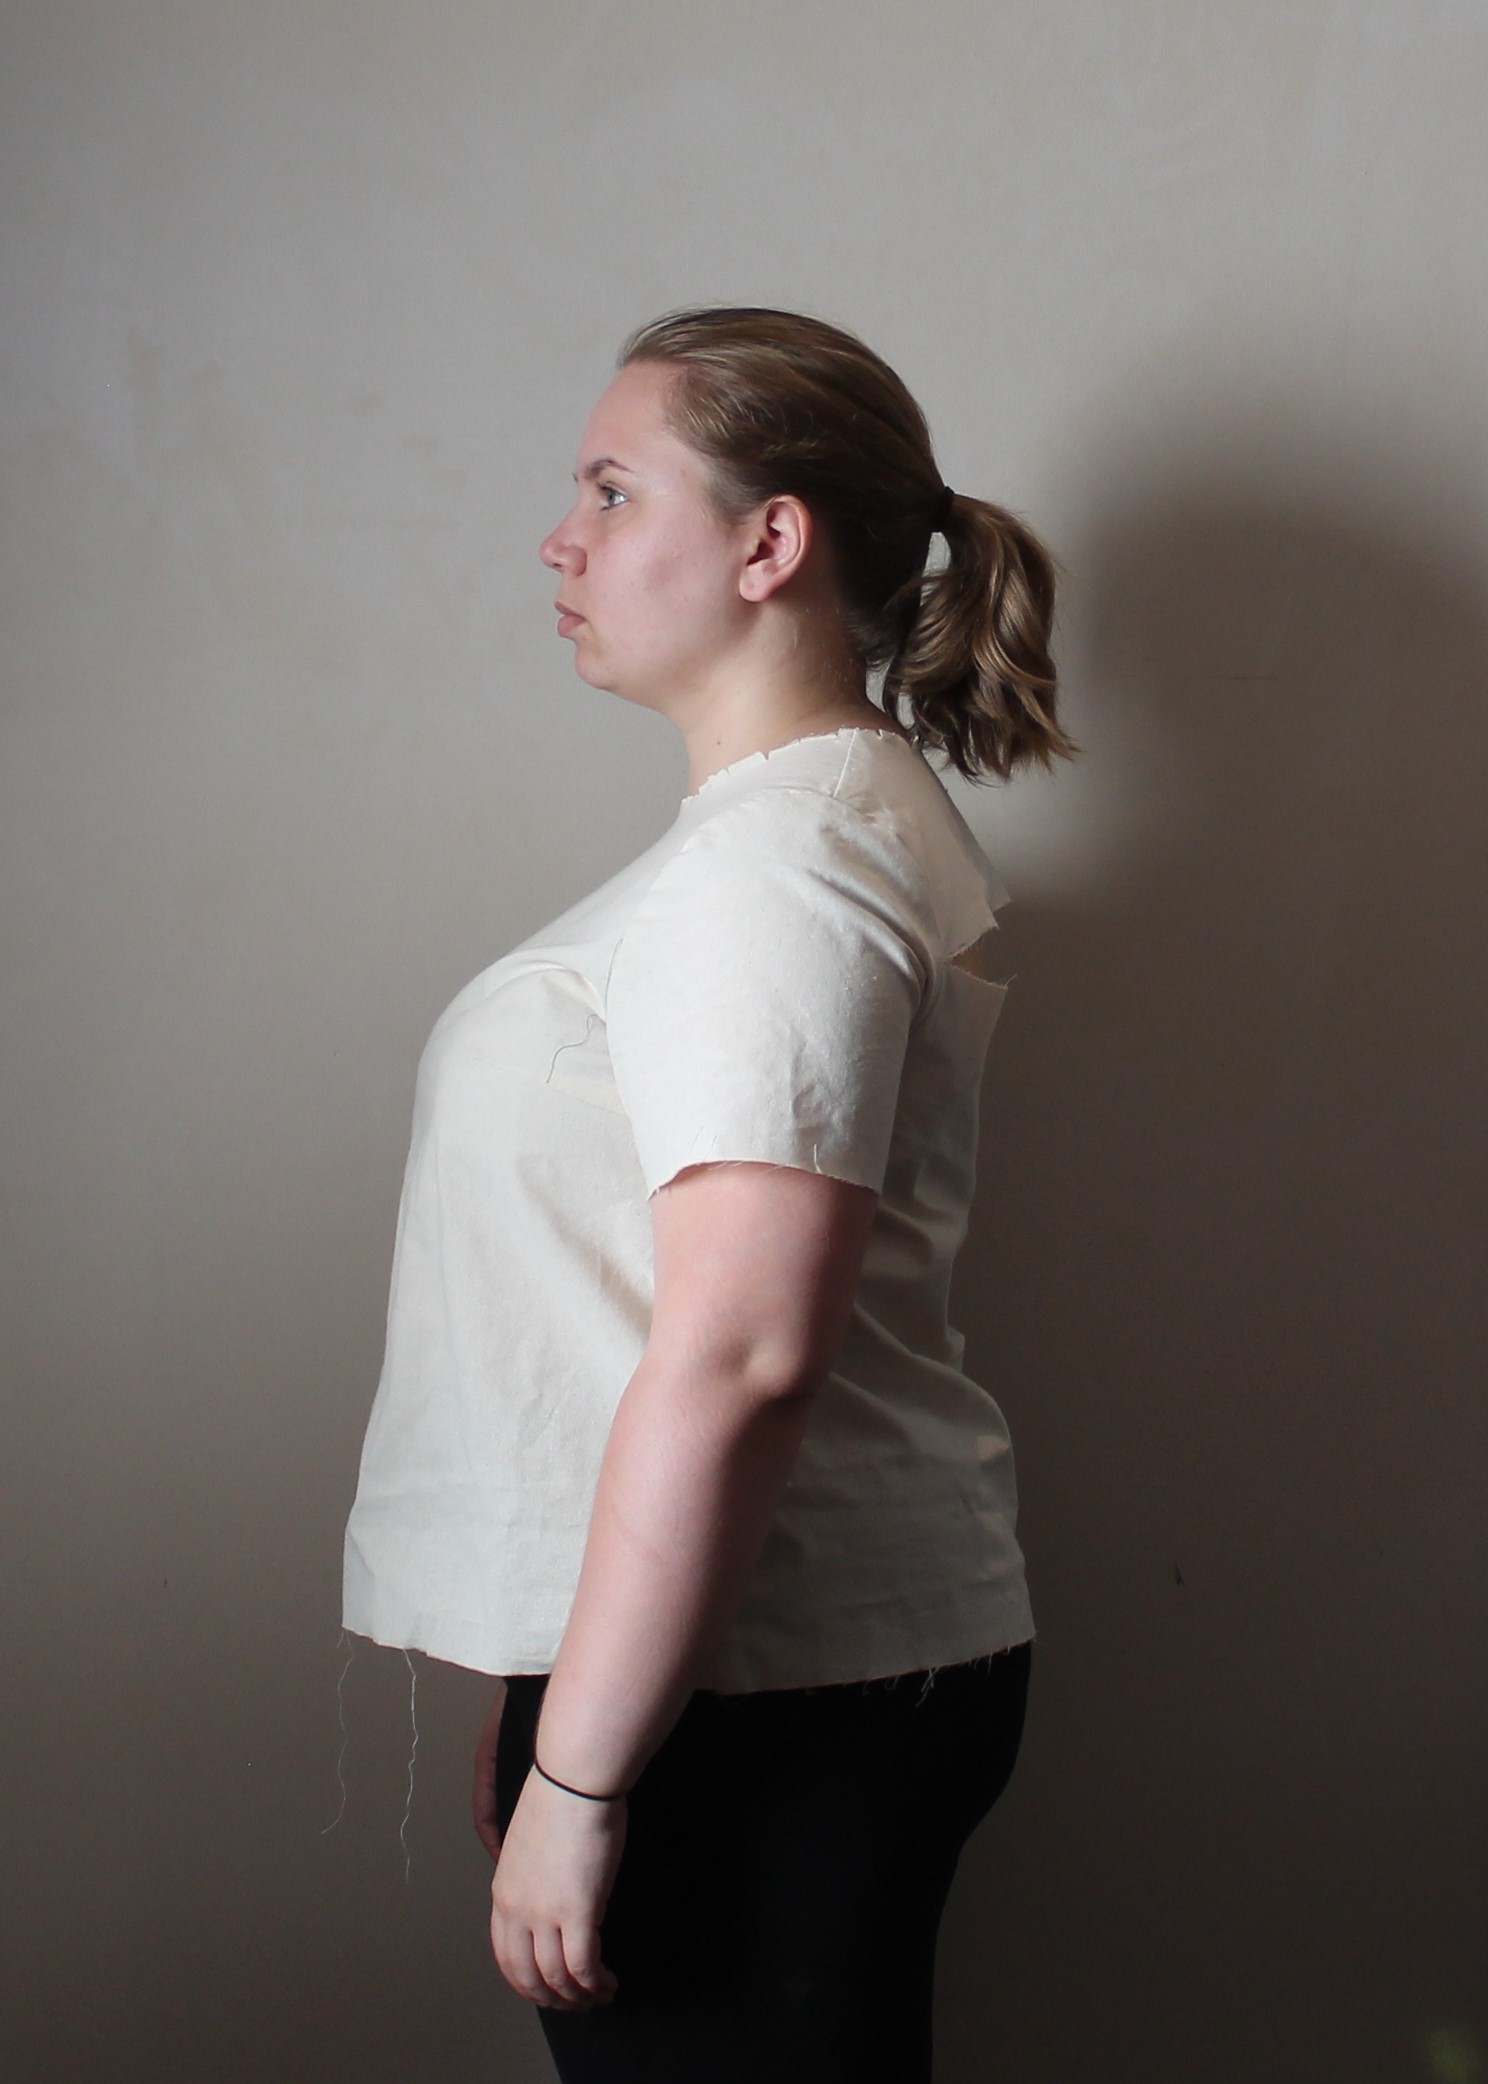
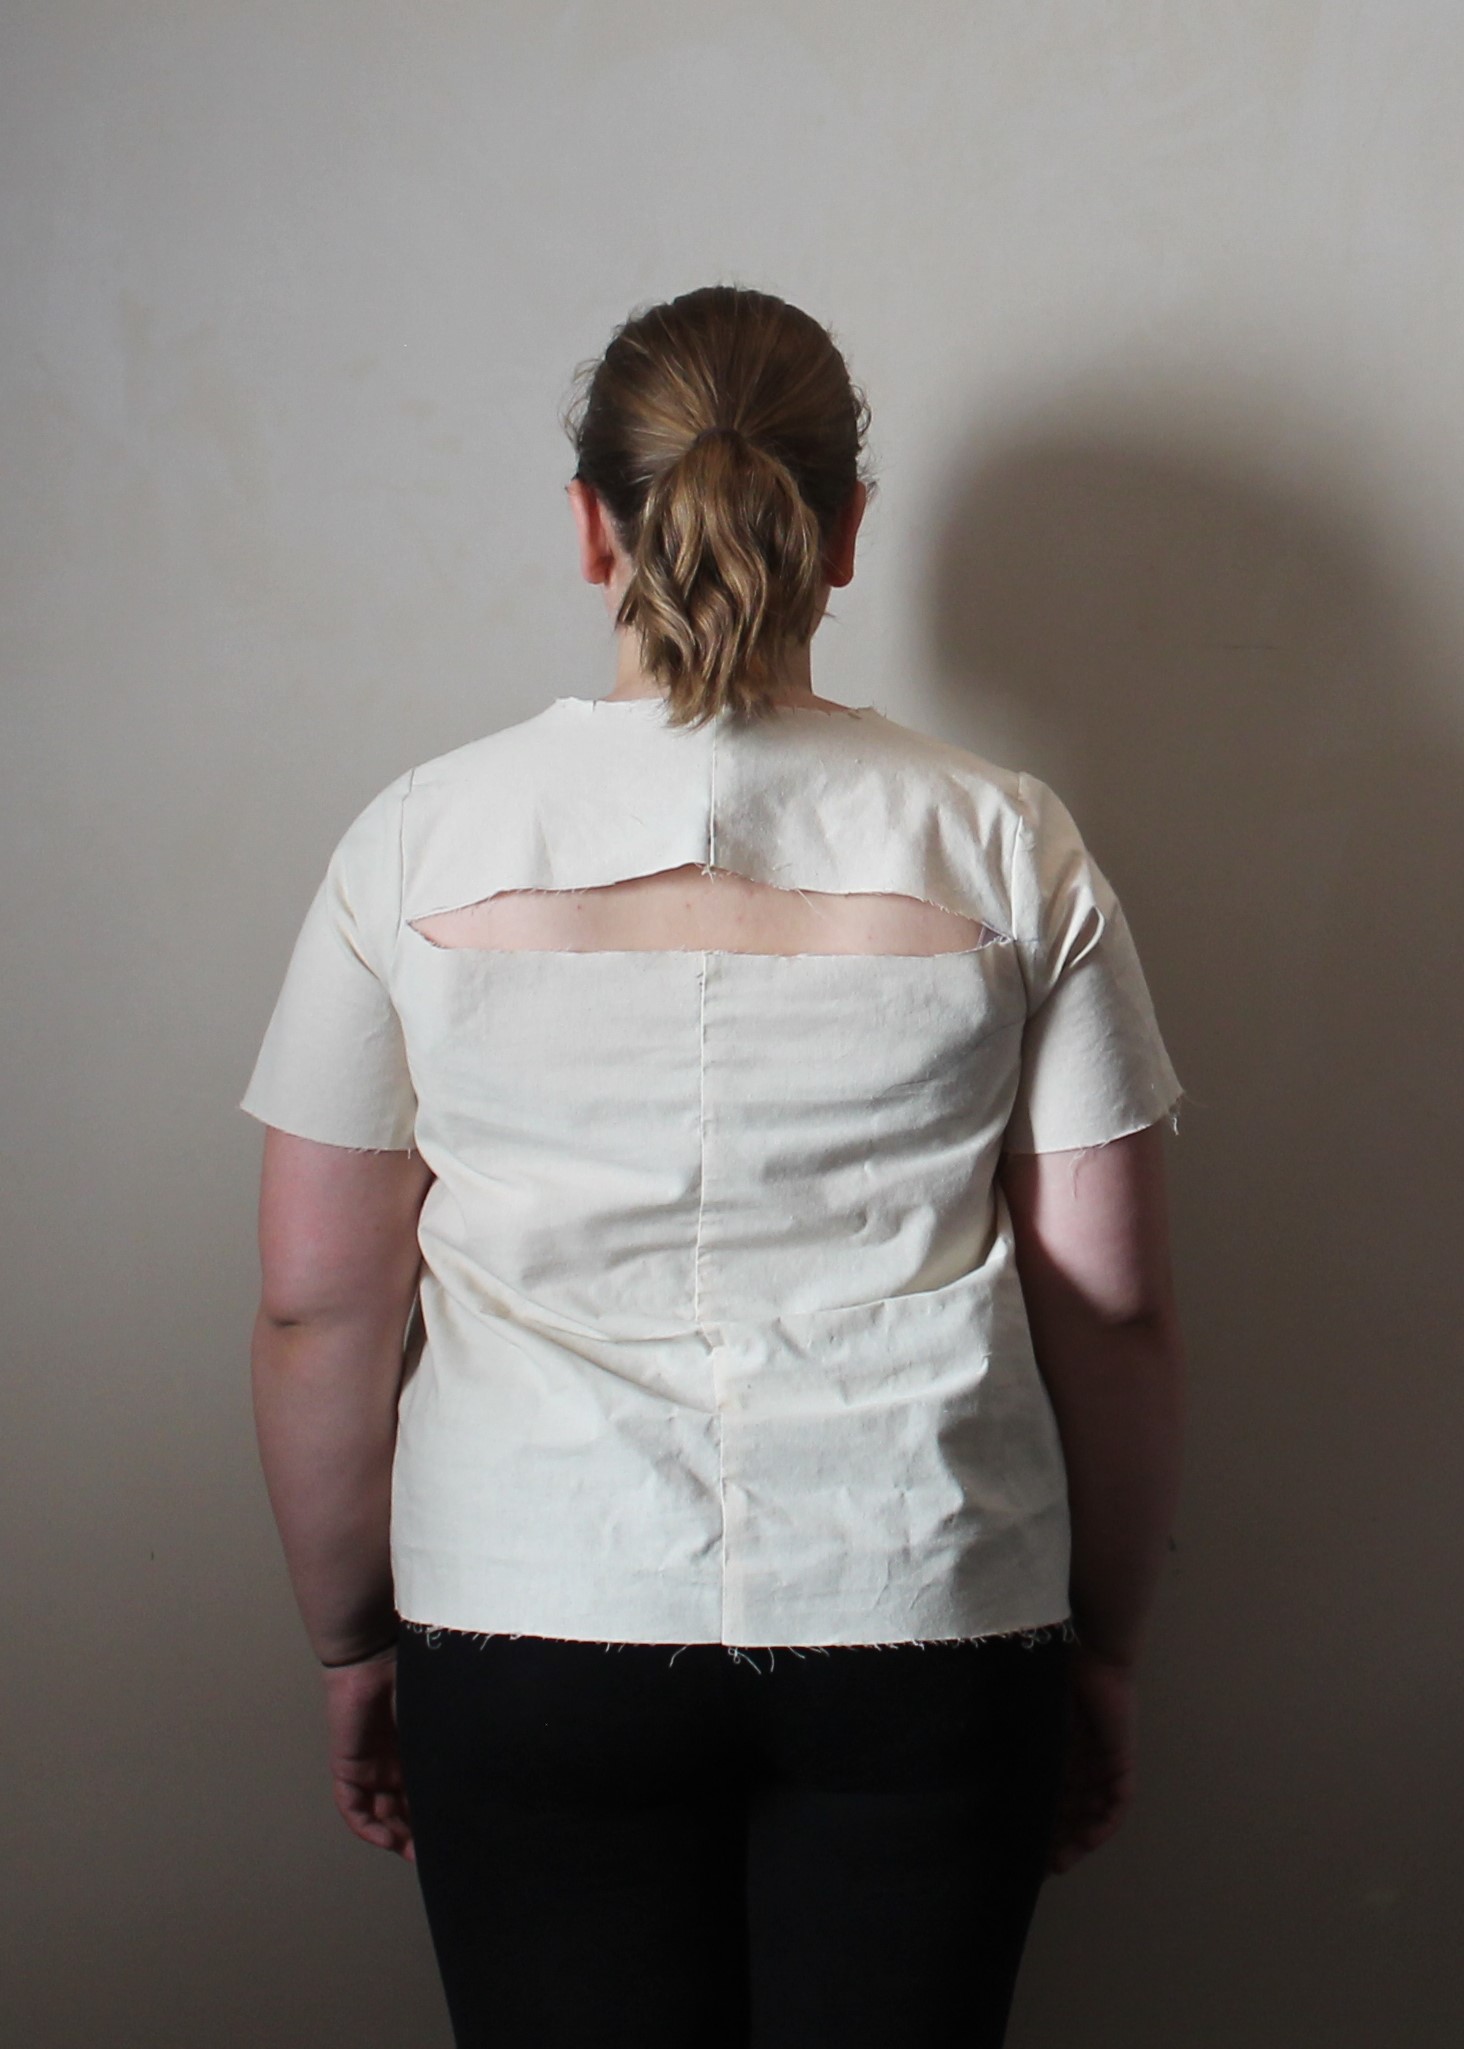
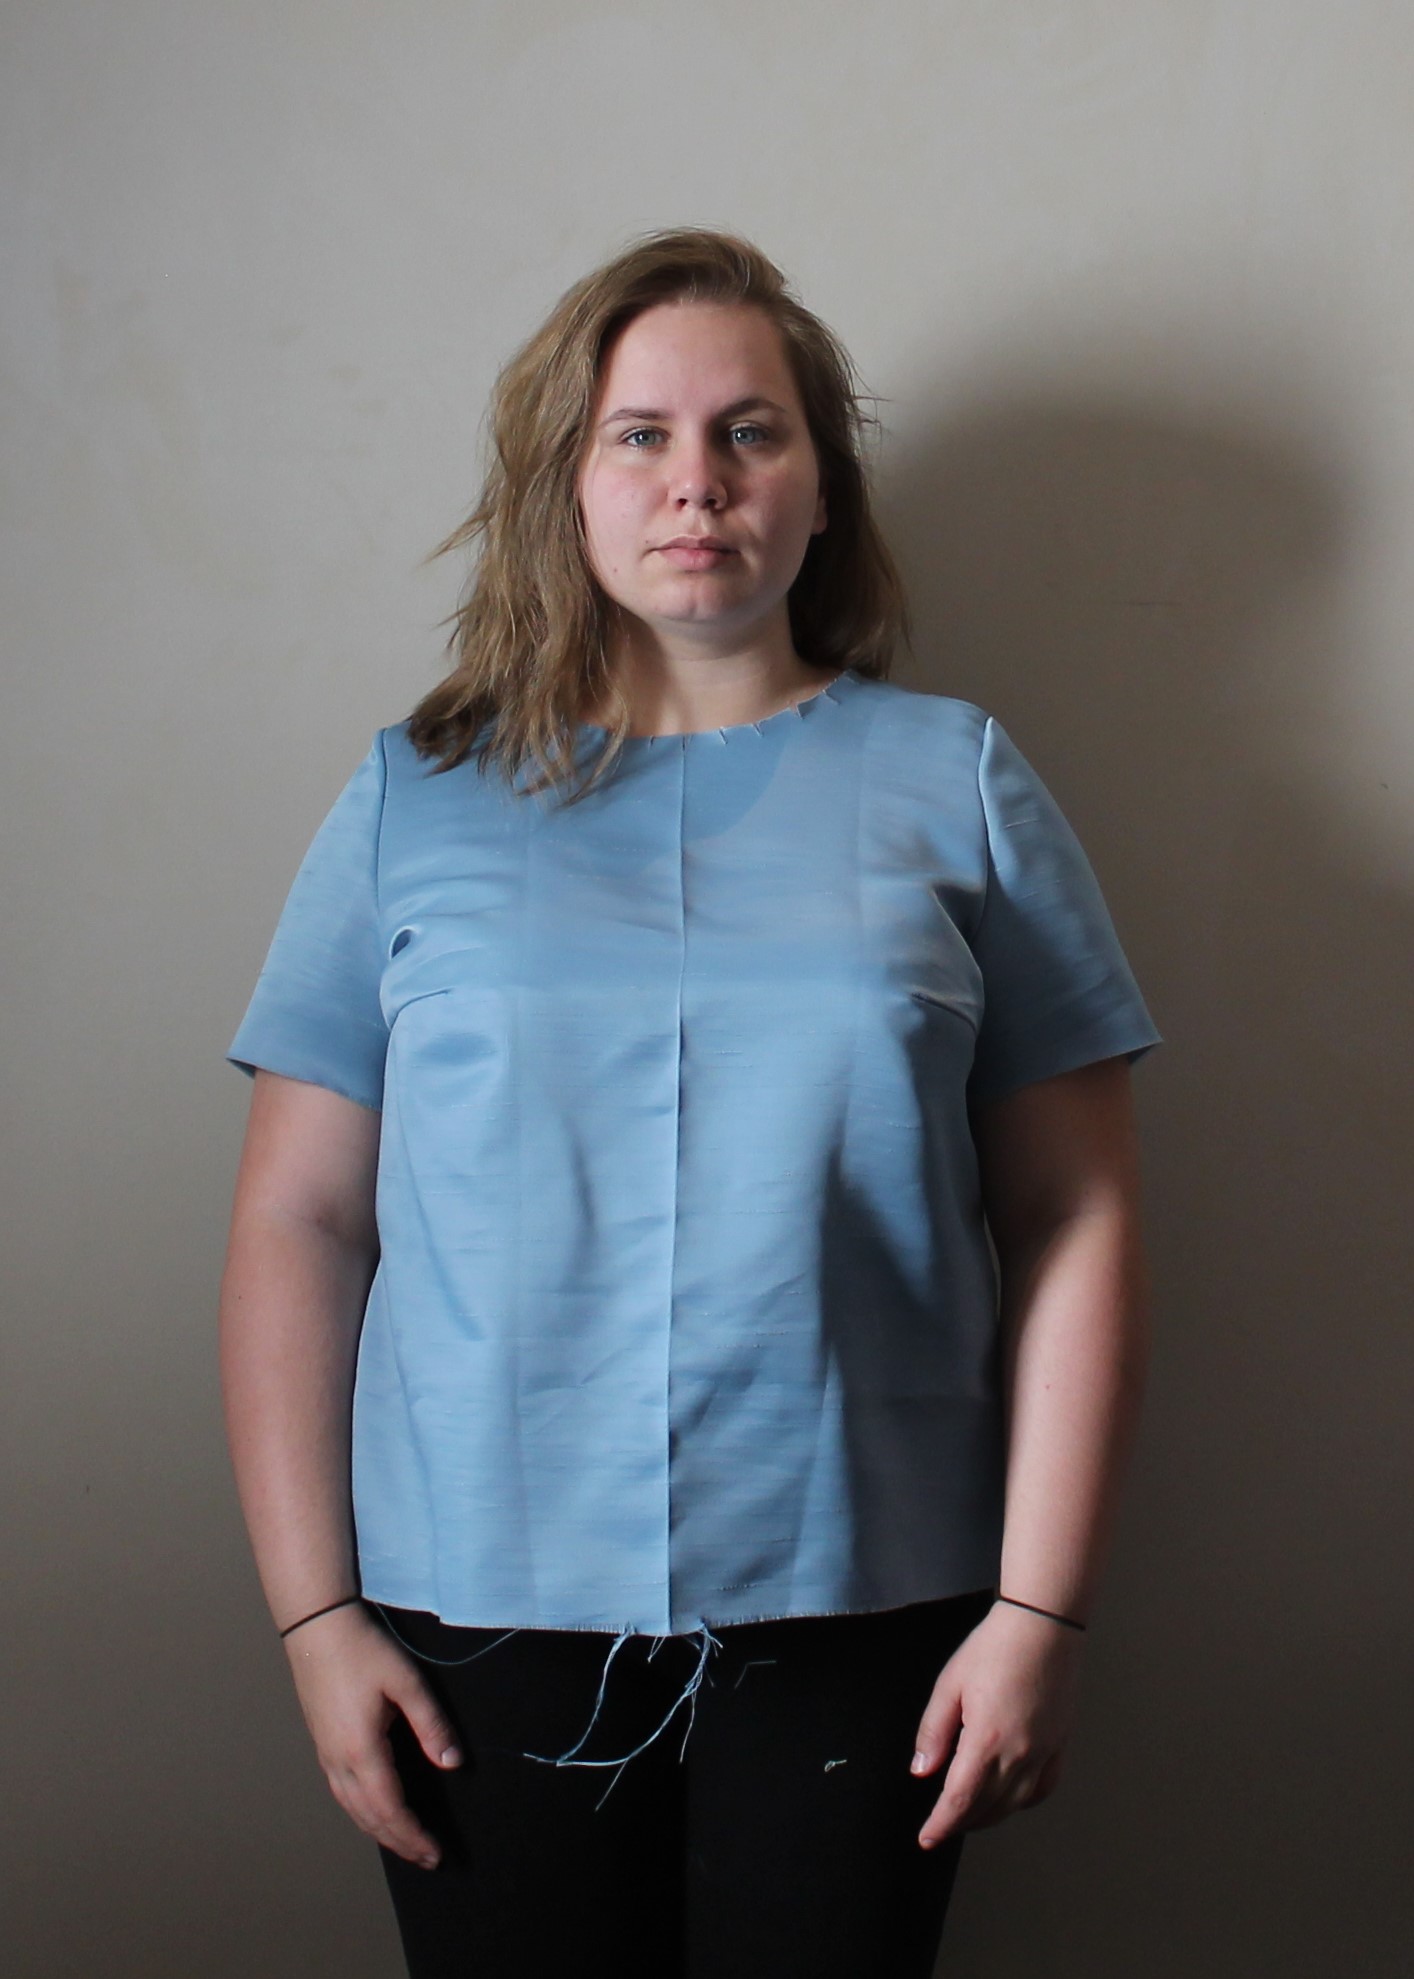
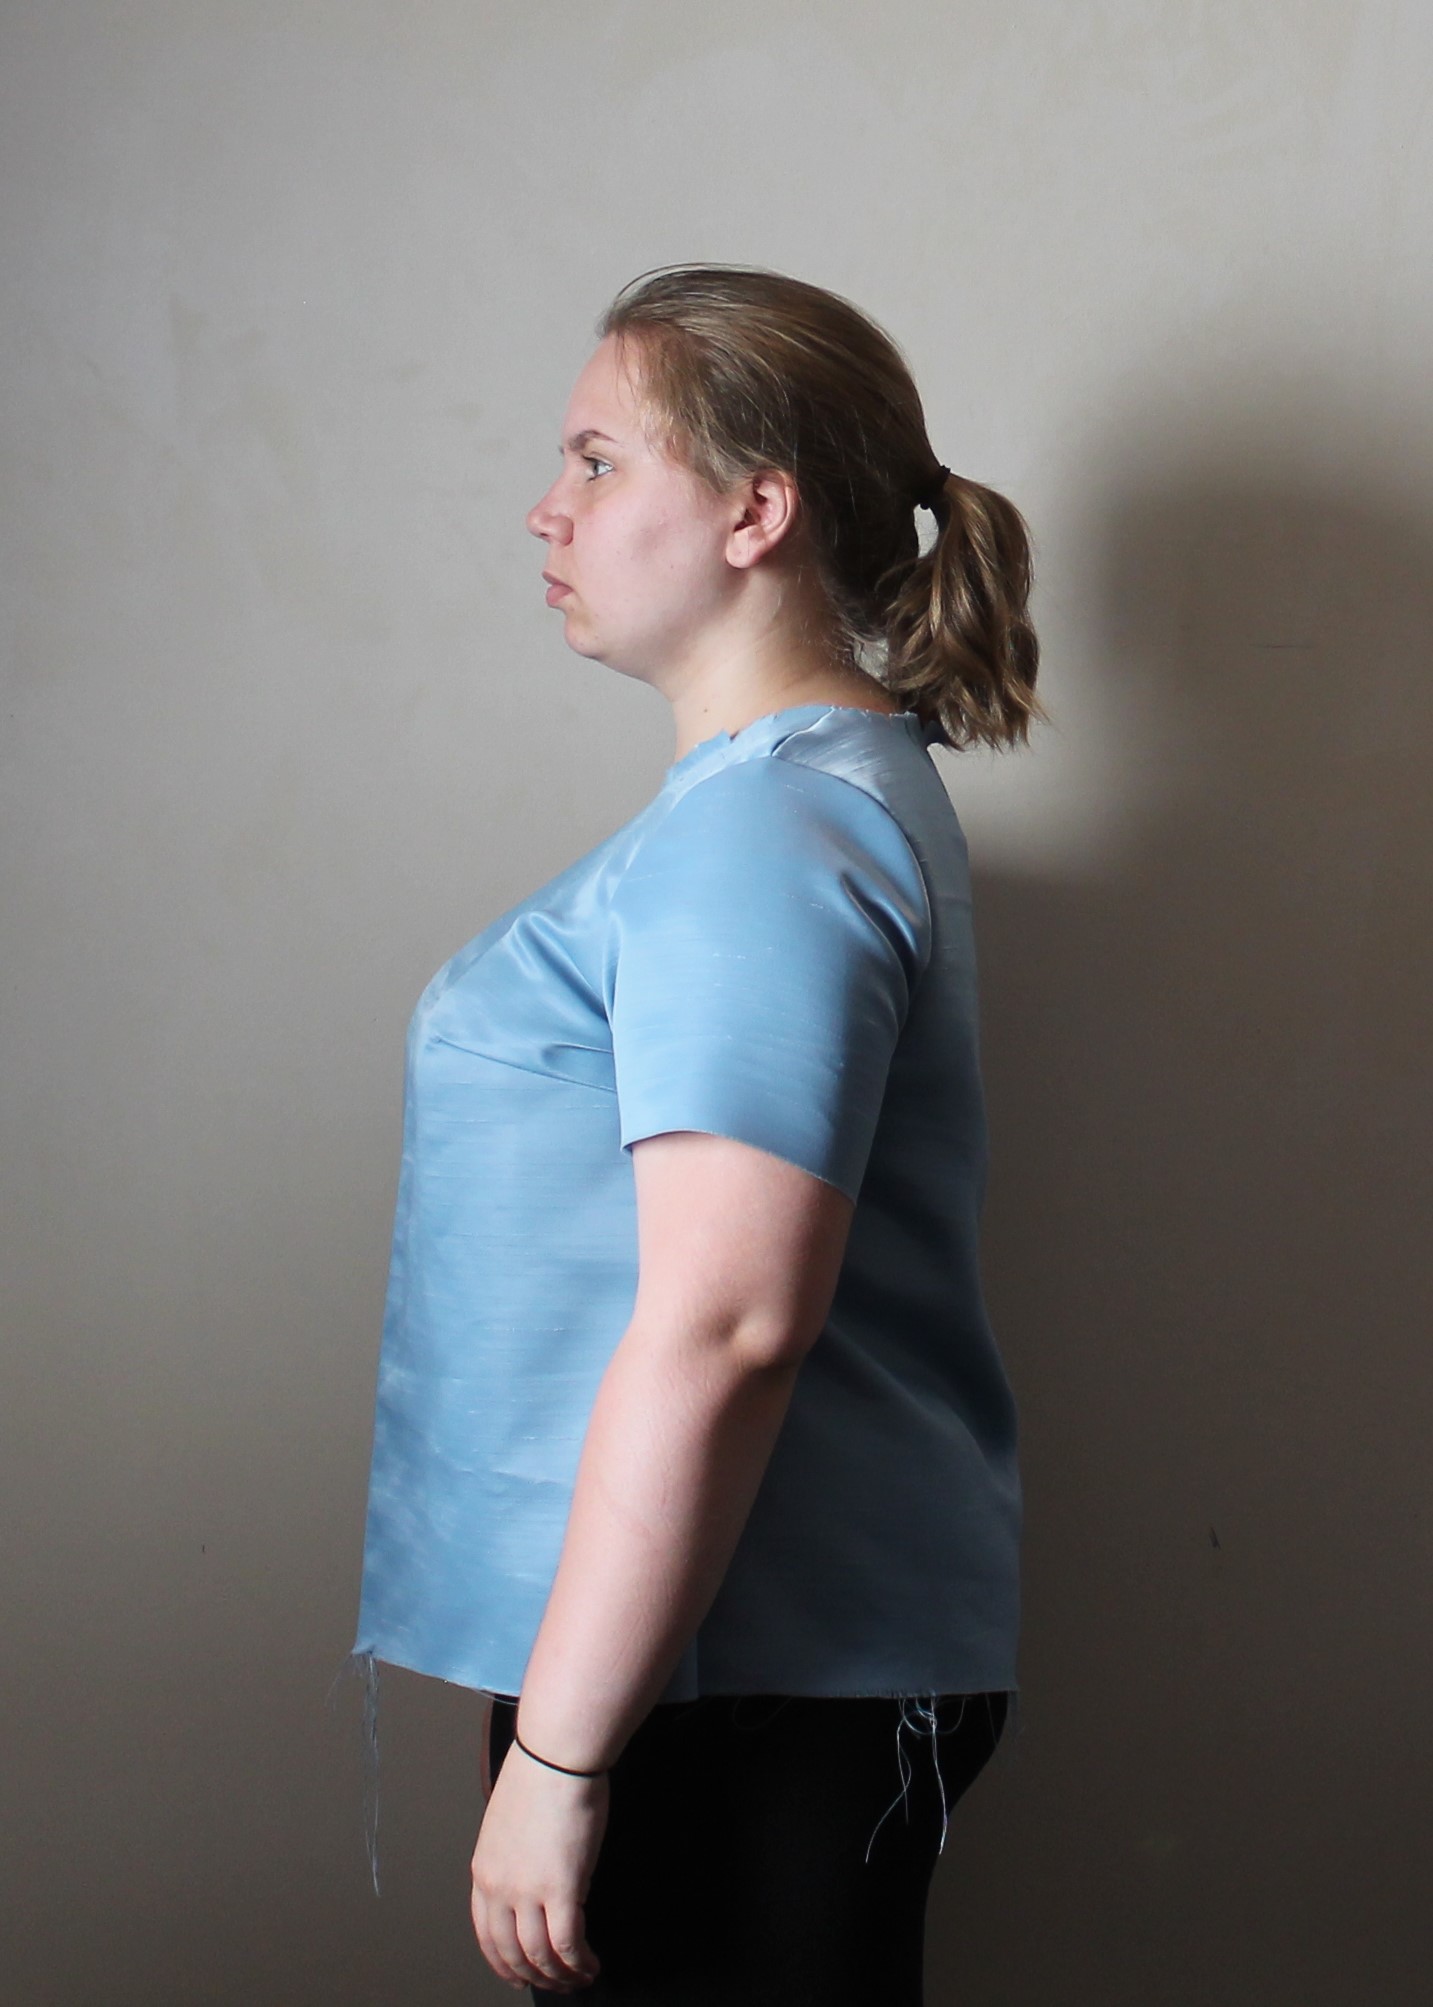
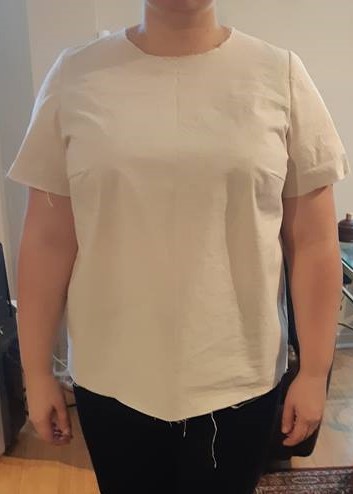
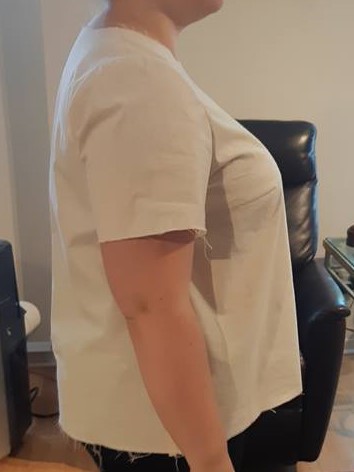
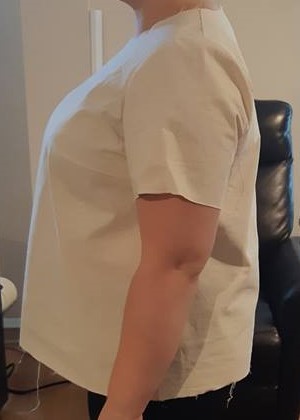
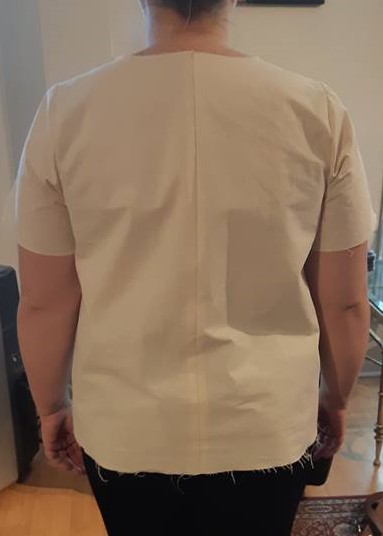
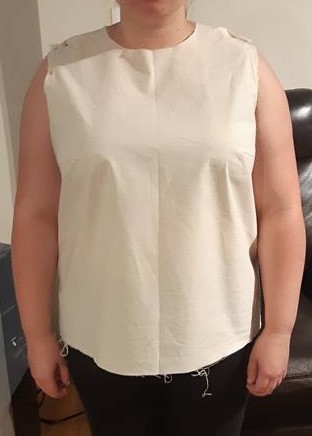
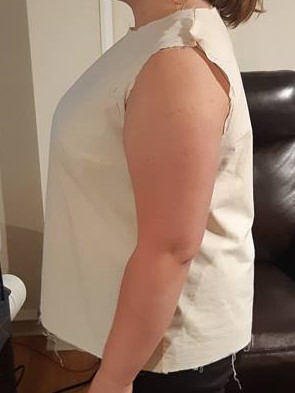
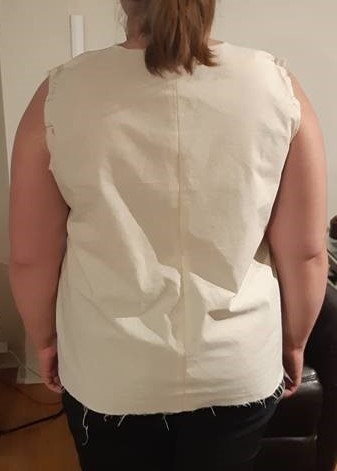
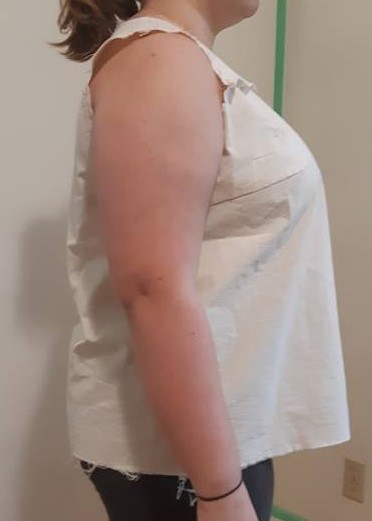
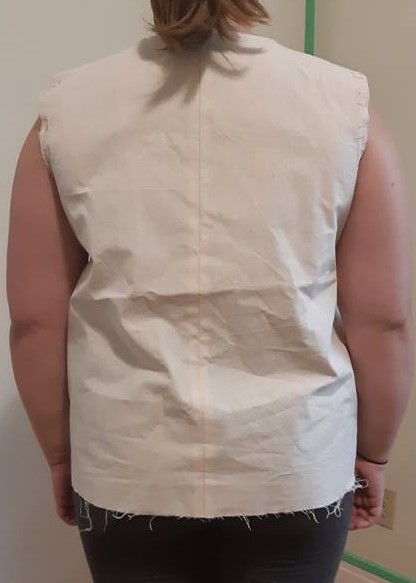
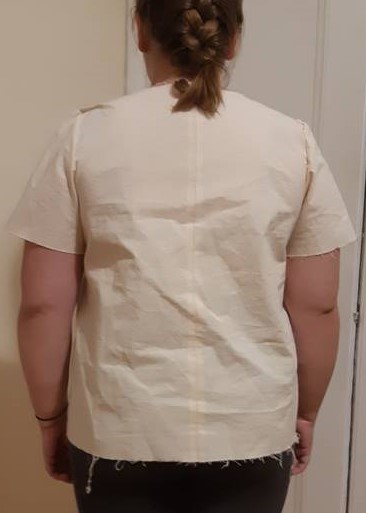
Here was Meaghan’s “straight” 16 G/H.
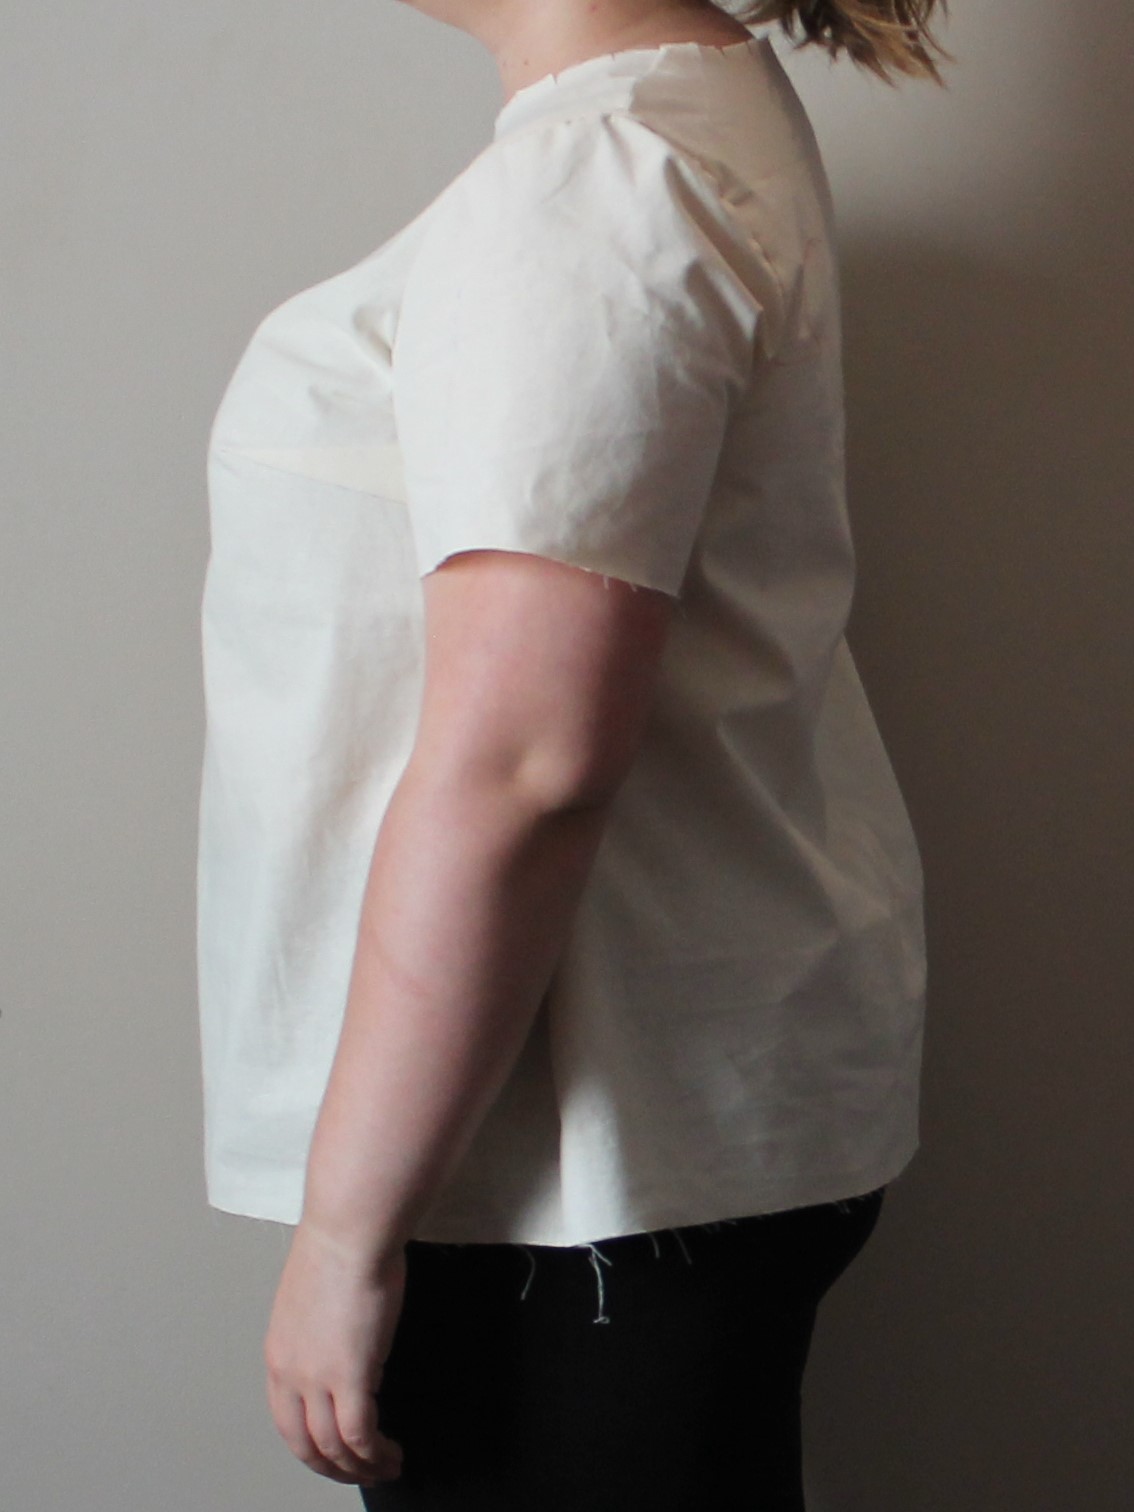
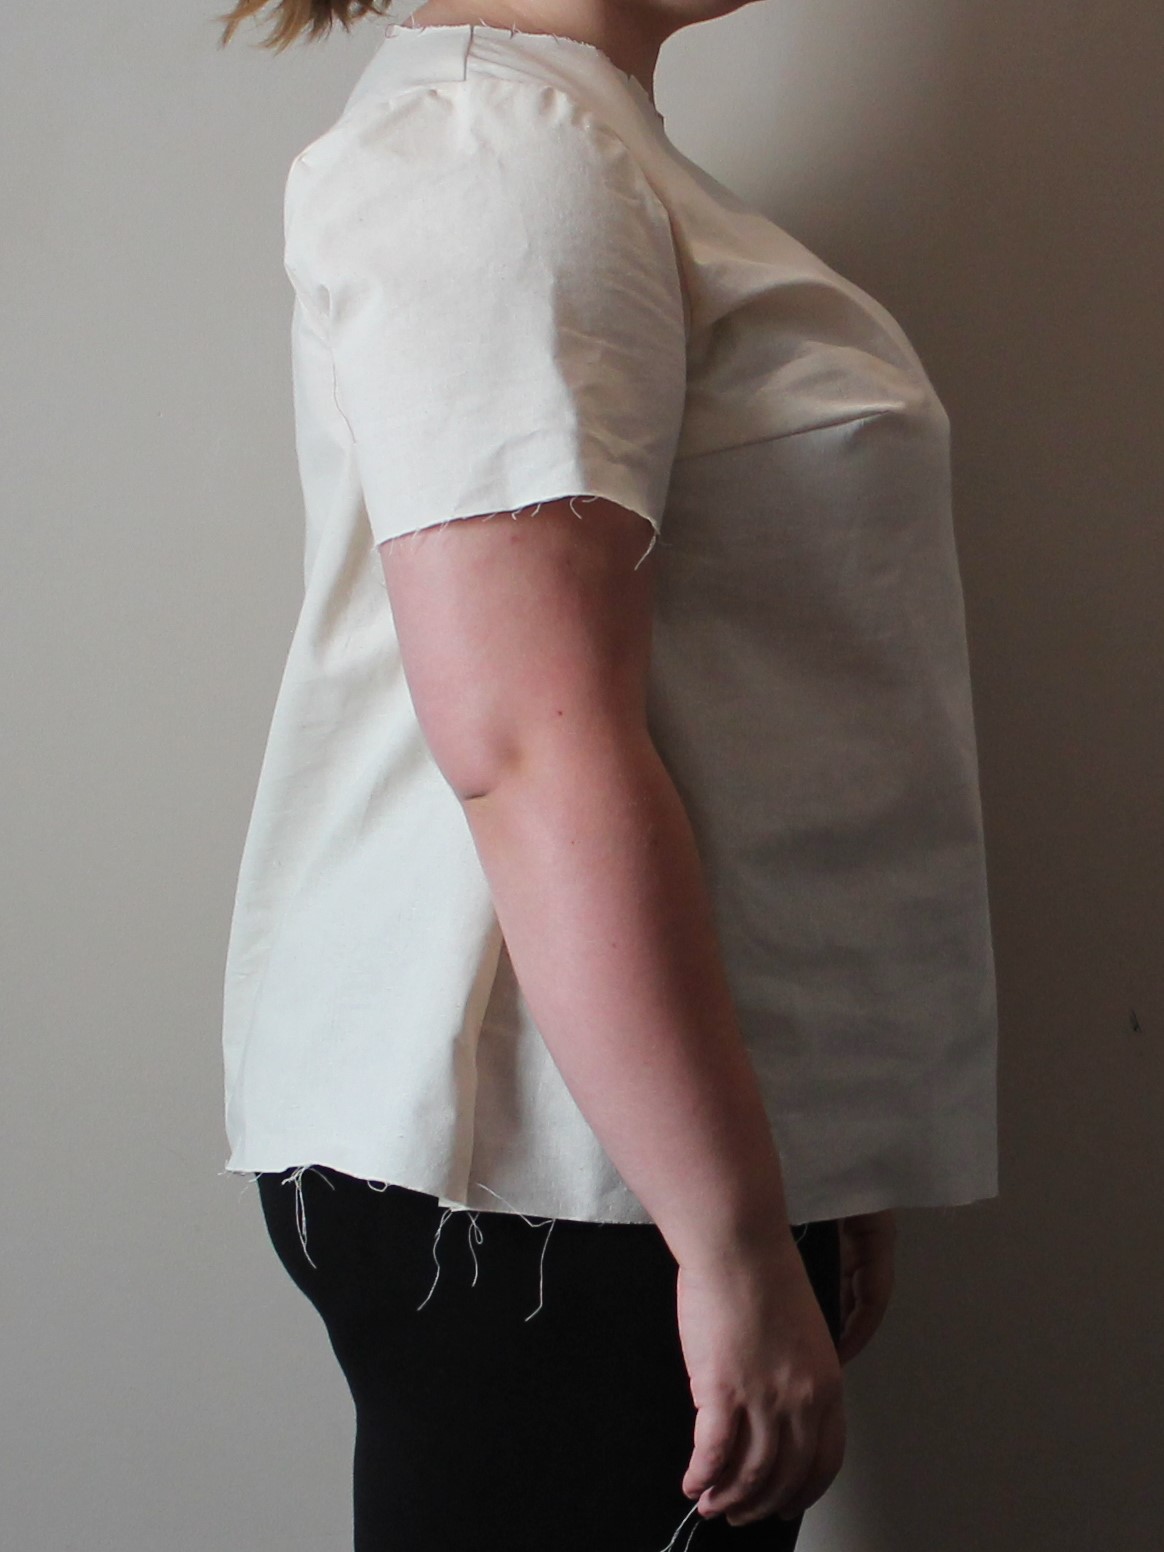
An improvement, but clearly some work to do. The bust and back were still somewhat tight (but better), but there were nasty folds above the bust, bunching at the back and some sleeve puffiness at the back.
Then, a classic issue arose! I asked Meaghan to re-measure her bust because I had a sneaking suspicion the measurement might be wrong: and indeed, on re-measuring she got from 46″ – 47″, which would actually likely make her bigger than the 16 G/H in the bust. Making sure your measurements are accurate is so important before you start a pattern – I recommend taking them every time, wearing the bra you’ll be wearing with the final garment, and sitting down to take your waist and hip measurement.
Here’s the guidance I gave Meaghan on round 1:
- We would take one adjustment step at a time, because if you do too many things at one time it becomes hard to analyze what’s working and not.
- The bust was too tight, causing the top to slip up to accommodate the bust, and also causing it to pull forward across the armholes
- The shoulder fit however was OK, and didn’t need to be any wider.
- So the next round was to grade between the 16 shoulders and the 18 E/F bust (with the possibility of going up to the G/H) and then grading back down to the 14, as shown in the diagram below. It was possible we might also need to alter the dart height, but again I wanted Meaghan to try this first, then we’d see.
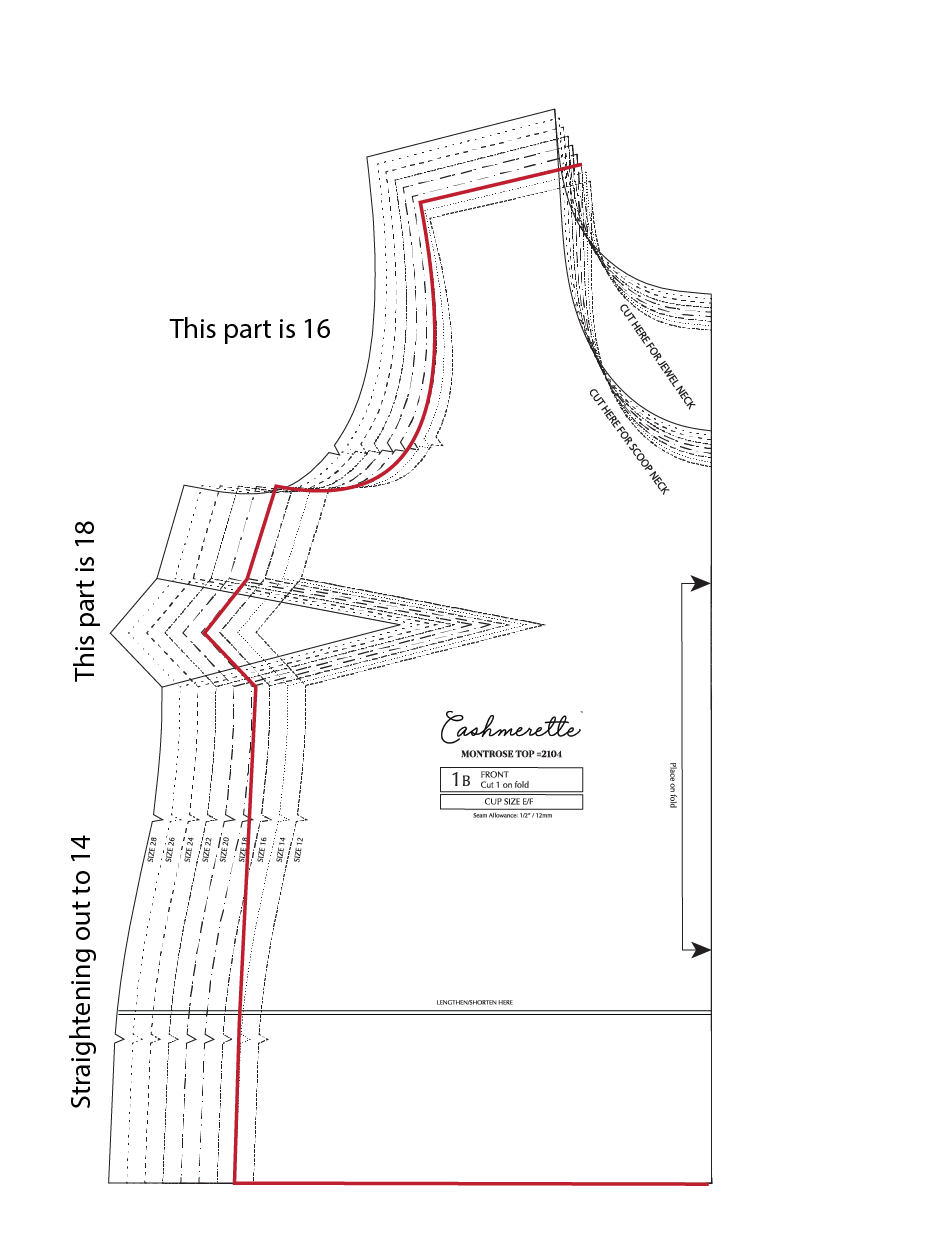
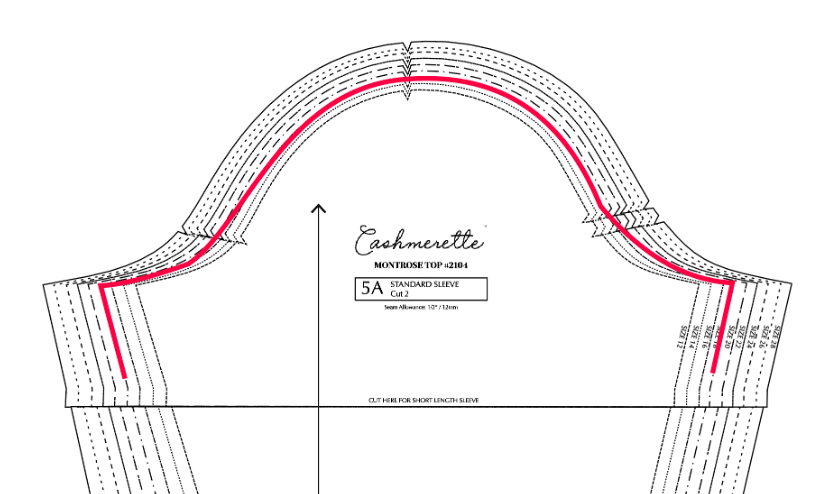
You may notice that this would require a change to the sleeve, because we made the armscye longer by grading from the 16 to the 18. I suggested tracing the 16 sleeve cap, going out to the 18 line at the sleeve side seams.
Round 2: Fixing the bust folds
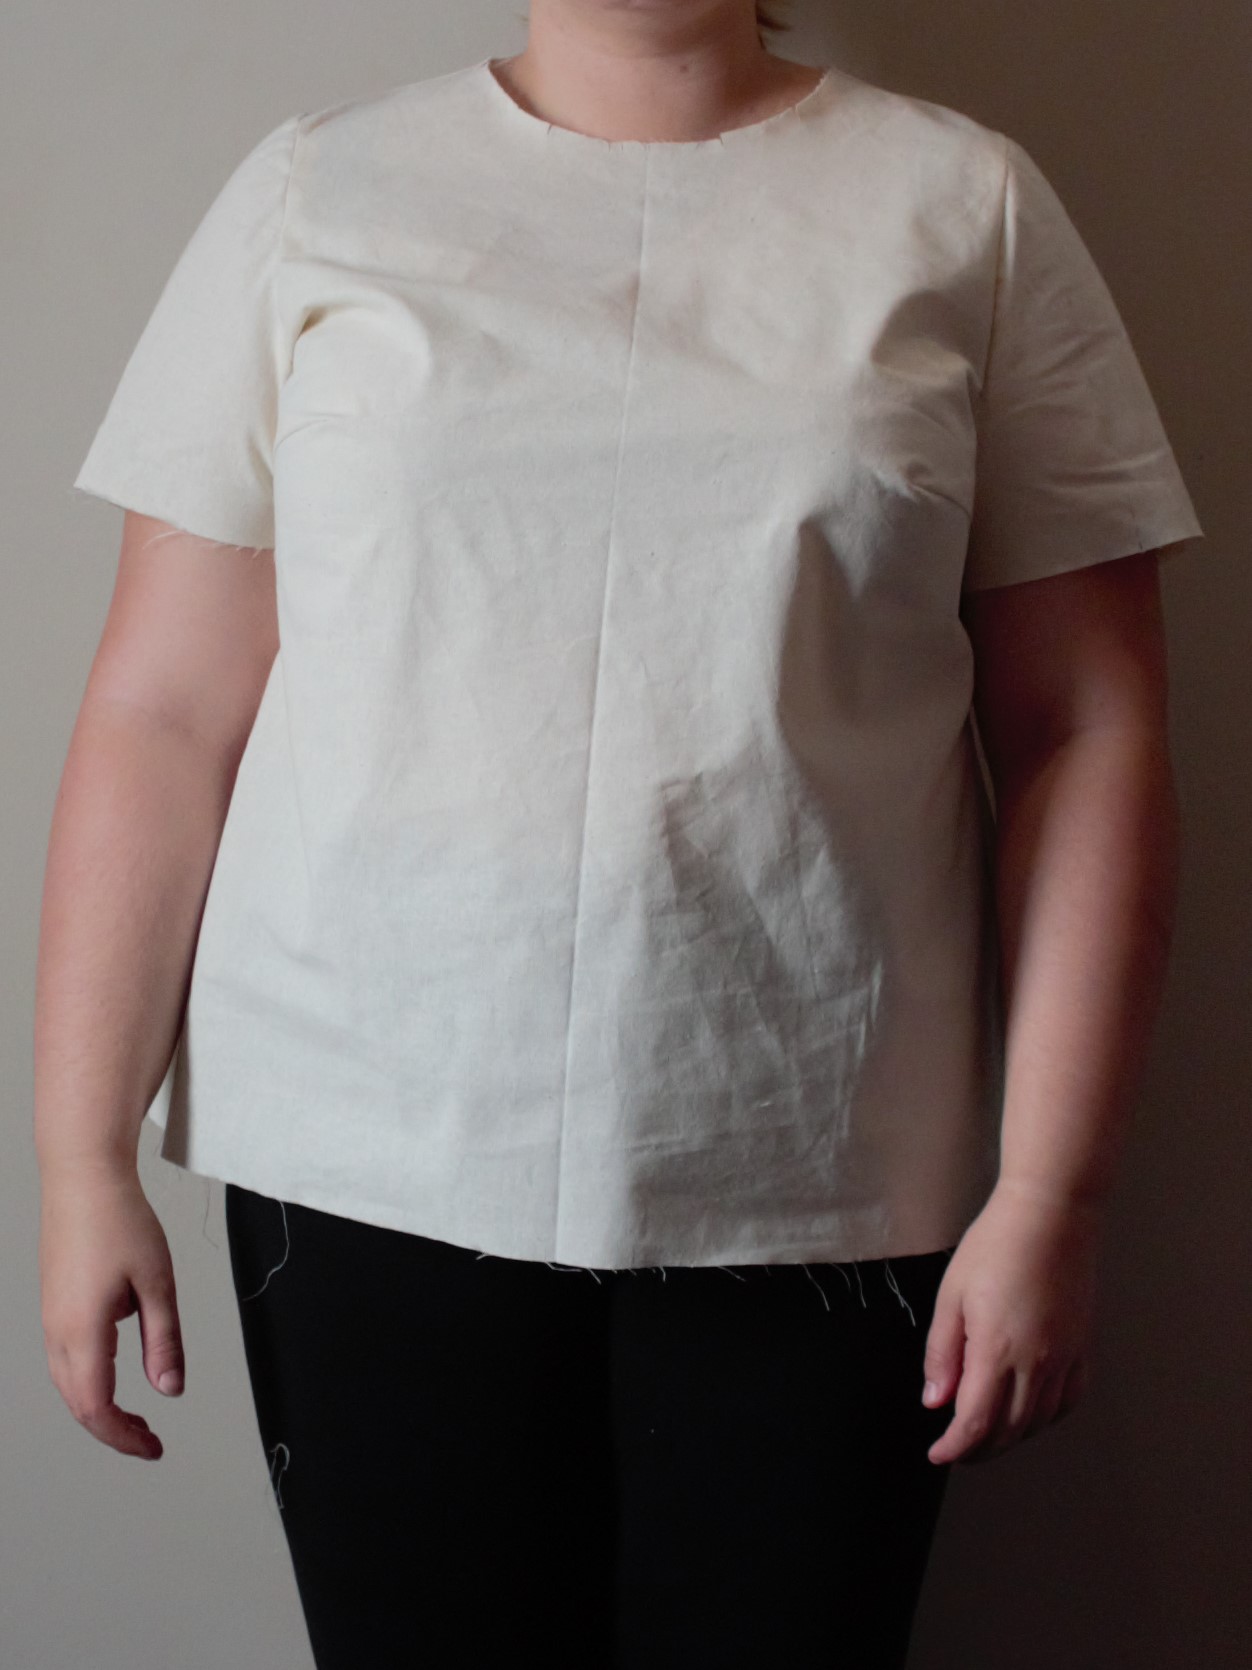
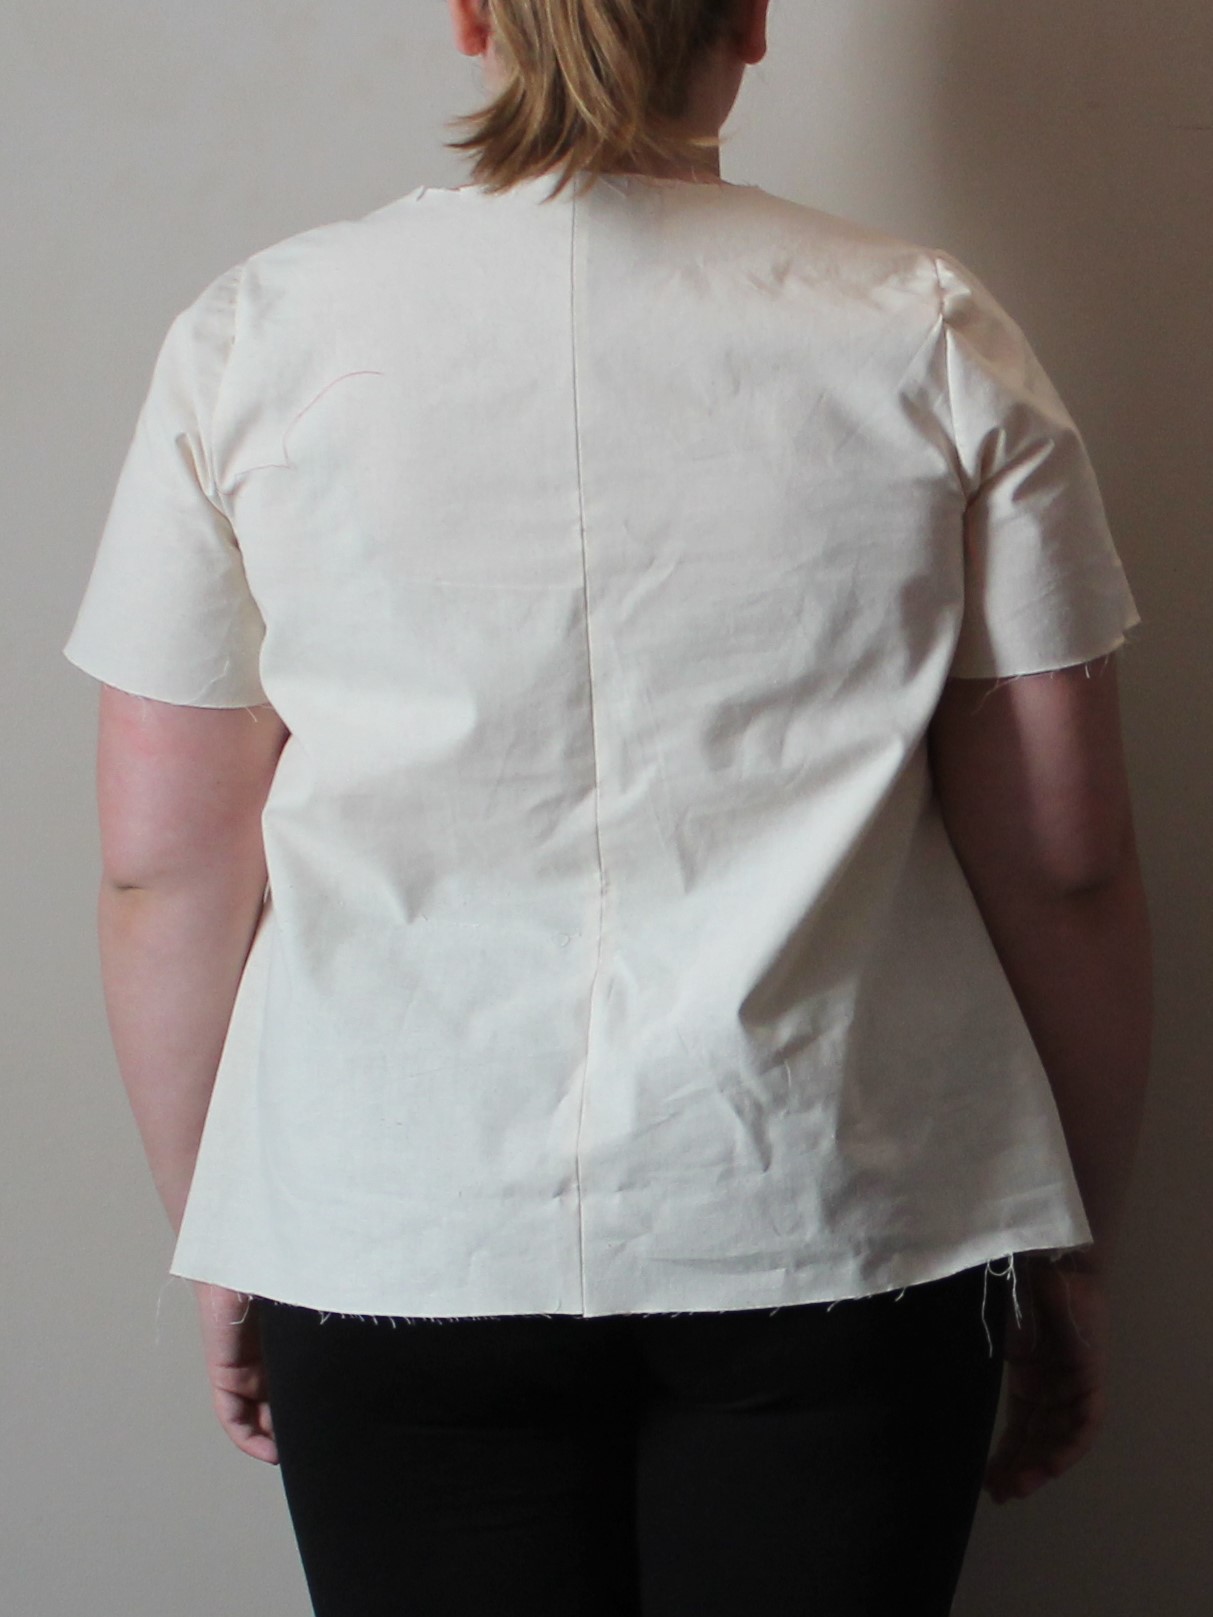
Here’s the second muslin that Meaghan made, implementing these changes:
Moving in the right direction, for sure! The bust fit improved, but there were still some folds, which I wanted to tackle before moving on. One thing to note is that because Meaghan was using actual muslin for her muslin (i.e. the fabric muslin to make her trial garment!), it was quite stiff – many of the folds would likely disappear in a flowier fabric.
I wanted to try out two theories, which Meaghan could try by ripping and pinning, but not having to sew anything new. Before starting these, I had her remove the sleeves (a reason why basting together your muslin is a good idea! Quicker seam ripping).
- It could be that the armscye is too long at the front and/or Meaghan had sloped shoulders. So, I asked her to pinch the shoulder at the outer edge and pin it, to see what happened to the crease (note this is a common adjustment to the Upton if you have some gaping in the armscye!).
- It could be that she is shorter in the upper body (shoulder to bust) than the pattern. So, I asked her to pin a horizontal tuck all the way across the front, at underarm level. This would shorten the armscye but also the entire front.
Here is what those adjustments looked like on Meaghan:
- Pinching the shoulder and pinning:
2. Pinning a horizontal tuck:
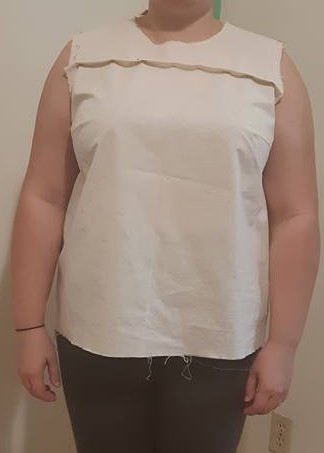
I think it’s clear to see that both were a big improvement! I noticed that the shoulder adjustment tightened up the back armscye, which could be too much for the sleeve which requires some ease. Meaghan said that she agreed that the horizontal tuck felt better, also raised the bust dart as needed, and kept the shoulder seam in the right place. Success!
Round 3: working on the sleeves
Now we had the upper chest/bust area looking pretty good, we moved onto the sleeves and in particular getting rid of the excess at the back shoulder. My guess was that the shoulders needed to be rotated forward for Meaghan’s shoulder angle, so I asked her to baste them, moving the sleeve cap notch forward about 1/2″ from the shoulder seam, and also trying 1″ forward (if that worked, we’d then move the shoulder seam too).
Here’s what it looked like, rotated forward an inch and basted in:
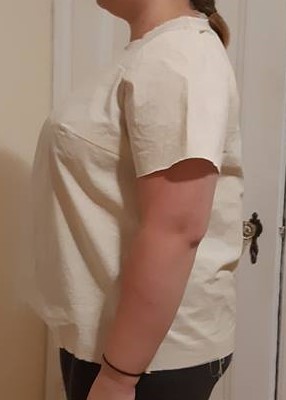
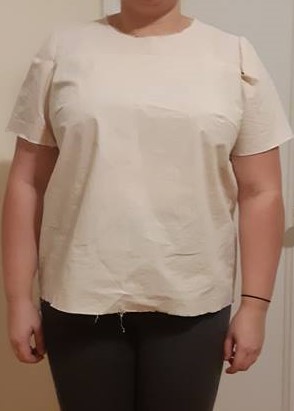
More improvement! Note that Meaghan took a little tuck in the sleeve to account for the horizontal tuck in the bodice (which we will later remove from the pattern). Also, the slight above bust buckle on her right hand side (as worn), seemed to be from shoulder asymmetry and my theory was that in a drapier fabric it would probably disappear.
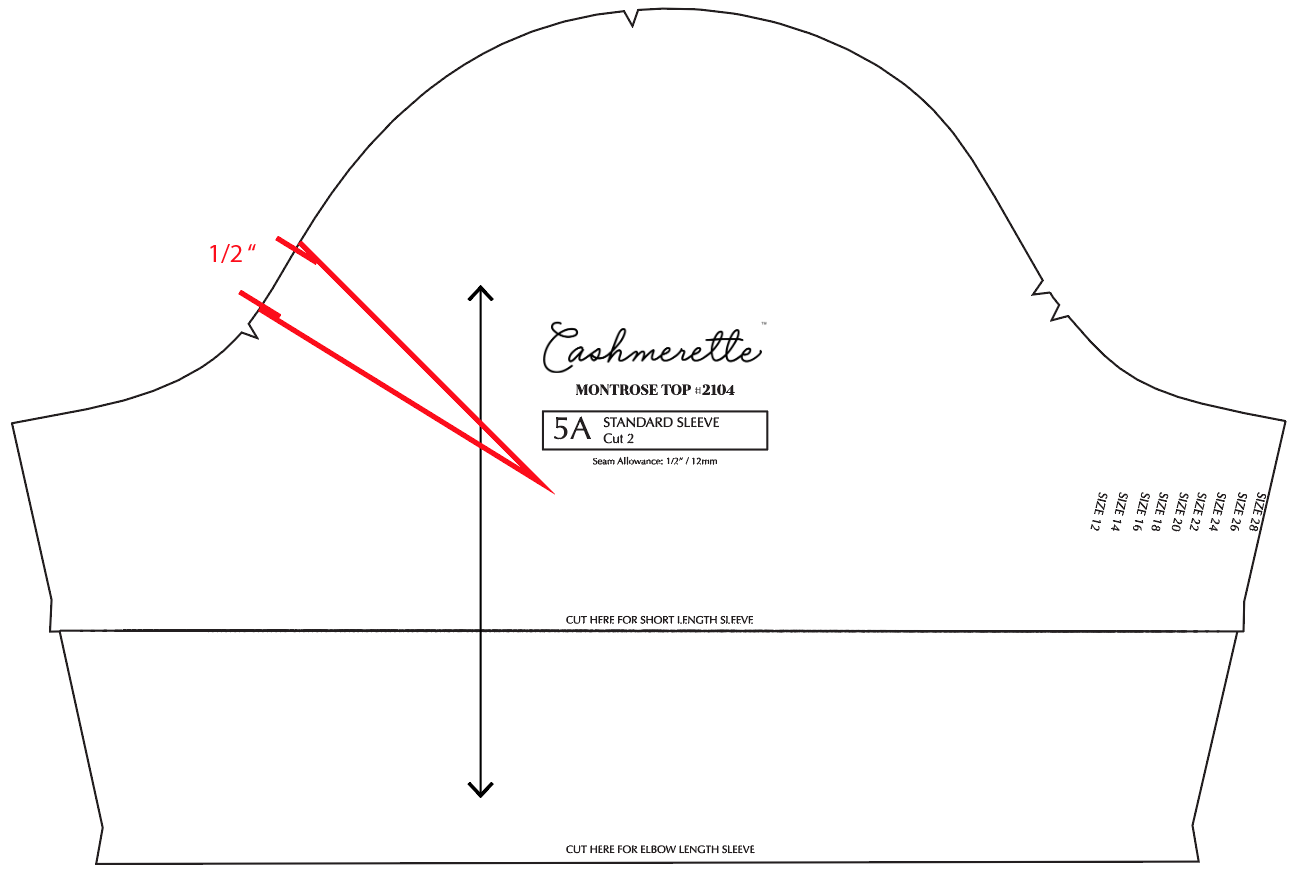
Based on the improvement from the rotation, I suggested a 1″ forward shoulder adjustment, and then to remove the tucked length from the sleeve. To do that, start by measuring how big the tuck was (remember it’s the fabric on both side of the tuck). Then measure how far up from the armhole the tuck was. Now, measure that far up the front sleeve cap, mark it, and then mark the same distance (in this illustration I’m just assuming it’s 1/2″). Draw a dart as shown here, and then “fold it out” – which is basically folding the paper, and smushing it closed (don’t actually sew a dart there).
Meaghan implemented this change, and also shifted the sleeve cap forward by 3/4″, lowered the dart a little. To remove the horizontal tuck, she simply cut across the pattern piece at that level and overlapped them by the 3/4″ she had removed.
The final result!
I always remind my students that its possible to drive yourself bananas trying to fix every tiny fold and drag line – sewing’s meant to be fun, so do a good job, then relax and enjoy your garment which is going to fit WAY better than anything you can find in a store! Also, muslin (or a similarly stiff fabric) will show up every single minor issue, many of which will disappear in a top like this once you use the recommended fabric type.
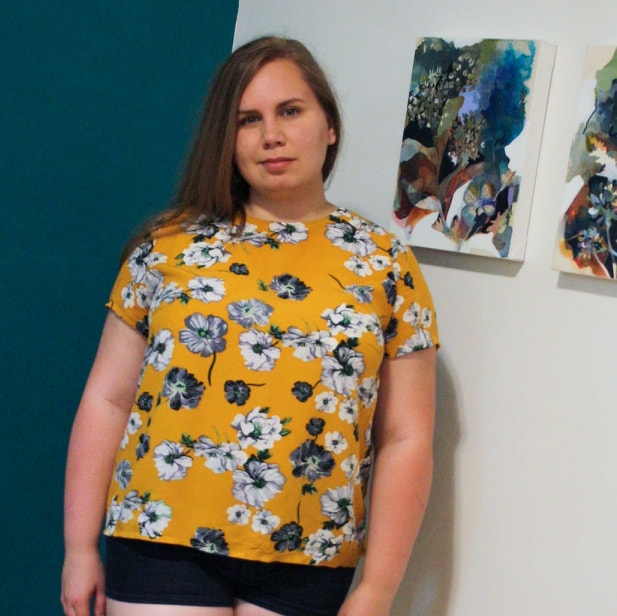
Here are Meaghan’s final Montroses which I’m sure you’ll agree are such an improvement over her first muslins. She’s going to add a bit more ease into the back hip, to stop it catching on her bum.
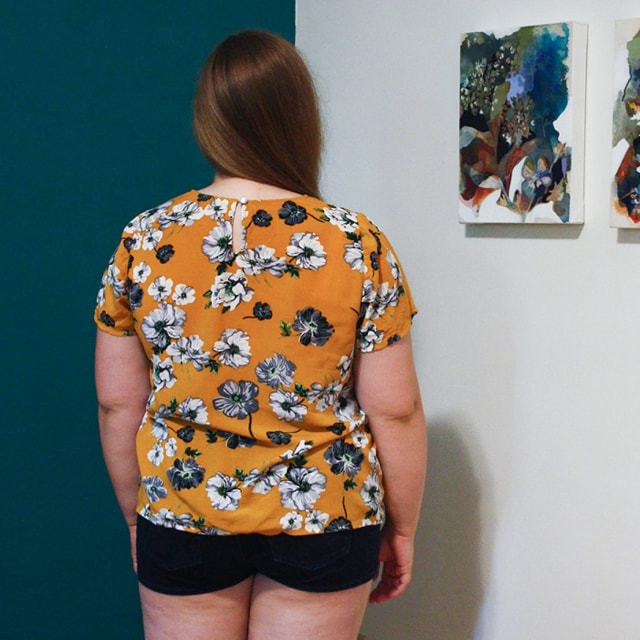
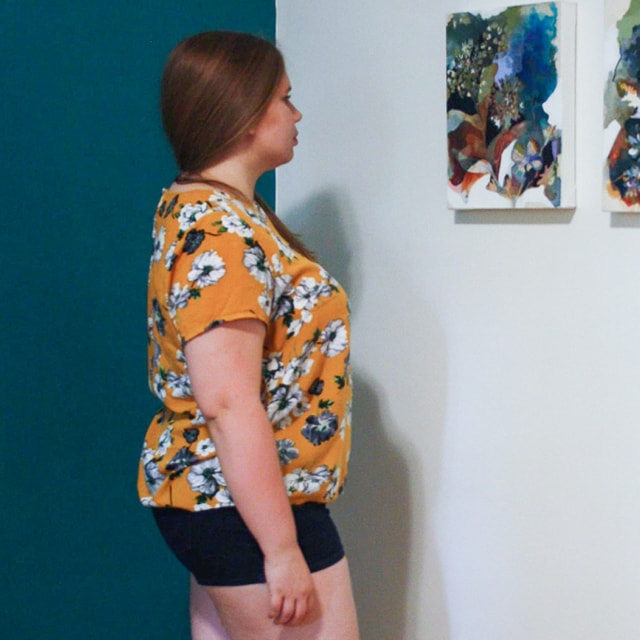
First up, here’s her awesome mustard rayon version, which she ties at the waist with a hair elastic (so clever!) and wears with high waisted shorts.
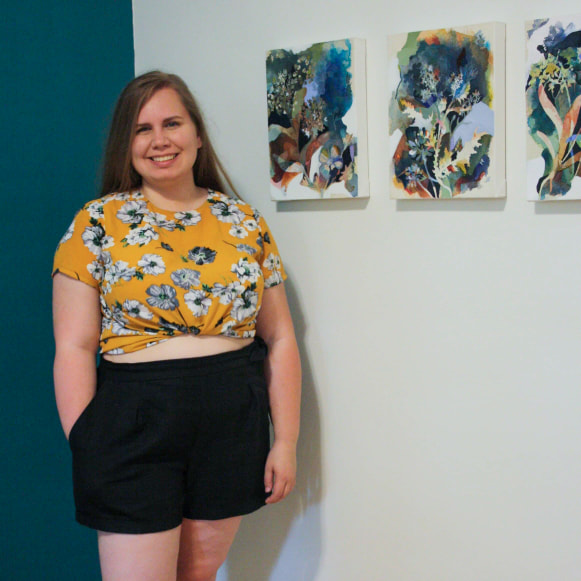
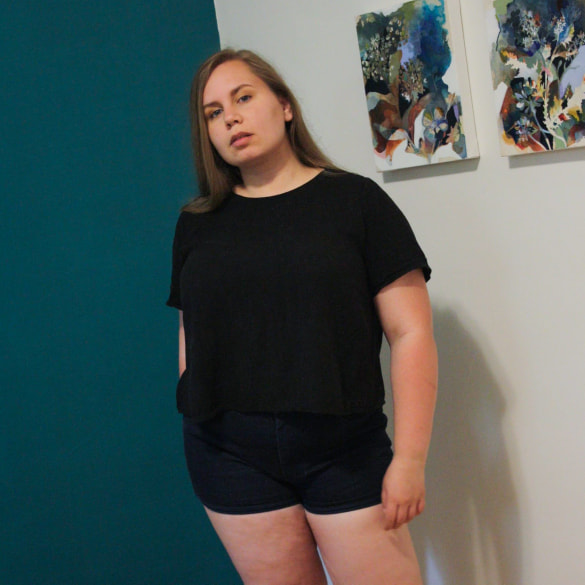
And, she made a black linen/viscose noil version, and cropped it at the lengthen/shorten line which makes it an awesome pair for high waisted jeans.
I asked Meaghan how she felt about the process of being in Cashmerette Fit Clinic, and here’s what she told me:
“I am so happy I had the opportunity to participate in the Cashmerette Fit clinic! I was hesitant at first to apply, but I was stuck in alterations paralysis and needed some help. Before this I had tried to fit a few top patterns but never quite made it through the mock-up phase. I would make muslin after muslin of a pattern, have it nowhere close to fitting correctly, and promptly toss my latest failure in the scrap bin.
This process taught me to not overthink fitting too much and to not try fixing a million pattern adjustments all at the same time. Jenny is the most patient person to work with and walked me through every step of the fitting process. I even learned how to transfer armscye adjustments from the bodice to the sleeve pattern!
I’m really happy with the fit on the finished product and have made two versions of the Montrose top so far.
Participating in the Fit Clinic has given me the confidence to tackle other fitted bodice patterns, knowing I’ll be able to properly diagnose the fit wrinkles and create beautiful, well fitting garments. I highly recommend you apply!
Thank you so much to Meaghan for her patience during the process (fitting over email isn’t always easy!).
Have you had any “aha” moments reading Meaghan’s journey? Are there any garments you’d like to see featured in the future? I’d love to hear from you!

Meaghan what a beautiful job! And so awesome how you hung in there to see it through. Great determination that resulted in gorgeous tops that fit you so beautifully!
Jenny – how I LOVE your fit clinics. It’s such a brilliant idea. I will be referring to this on in particular as I move on to my next top/dress project. It’s super hard sometimes, but taking it step by step as you advise – and not panicking lol – we’ll get there. Love! <3
YES. A+ fit clinic, I found this incredibly useful to read and watch via the photos.
Wow. That was a huge amount of adjustments to get it to fit. I have big bust so that’s always tricky and was interested to see this. but sway back what’s that ? No idea ! then Shoulder & sleeve that’s made me think about all that too. I’d have to be guided through that as wouldn’t know where to start. I know once you nail it it’s fab but on your own you’d never see all those angles to tweek so much to do. Looked good once done.
This is a great example for all of us, thank you! Great work Meaghan…I envy you your totally customized Montrose. Even if we have different fit issues (although I think some of mine are similar to Meaghan’s) what strikes me is the ultimate value of 1) going slowly and taking the long view, 2) documenting, 3) making one change at a time, 4) having another set of eyes. When I try tops on in the store now, I just can’t buy them because I’ve learned that nothing fits me properly…so off to the sewing machine and my trusty Cashmerette patterns!
This was an interesting and informative read. May I add a couple of suggestions. Now the Montrose top is fitting well, why not use this basic pattern as a reference to check fitting issues on other patterns? You can make a basic BLOCK from this and make a note of the adjustments that were required. This would then speed up the process in the future. Just a suggestion from one who never fits any ready made pattern! I’m learning how to draft at present. It’s fascinating.
Thank you so much for sharing. I found this information invaluable. My AHA moment was even I could try alterations instead of just making do. You explained them so clearly and backing up with the photographs. Fantastic!
This is absolutely helpful for me, because my next sewing project is a montrose top and my measurement is very similar to Meaghan’s. I think I will start with a muslin too, it’s the first in my life, but it really seems to be a great way to get a perfect result. I have got one question: I compared Meaghan’s measurement with the sizing chart in the pattern and I wonder why you did not start with Size 18 C/D, because Meaghan’s waist and bust measurements are nearer to the 18 C/D than to the 16 E/F.
Sorry for my English, I come from Germany and I don’t write and speak very often in English.
Can you explain more about rotating the sleeve forward? My Montrose sleeves are funky, being tight around the back of my arms even though the measurements would say there is plenty of fabric. It looks to me like Meaghan had the same problem in earlier muslins but not so much after rotating the shoulder.
Thanks!
I noticed that she made a round back adjustment but you didn’t explain how that worked. Could you comment on that?
Hi Ruth, here’s a tutorial on how to do a round back adjustment: http://curvysewingcollective.com/tutorial-how-to-do-a-high-round-back-adjustment/
-Ayelet at Cashmerette
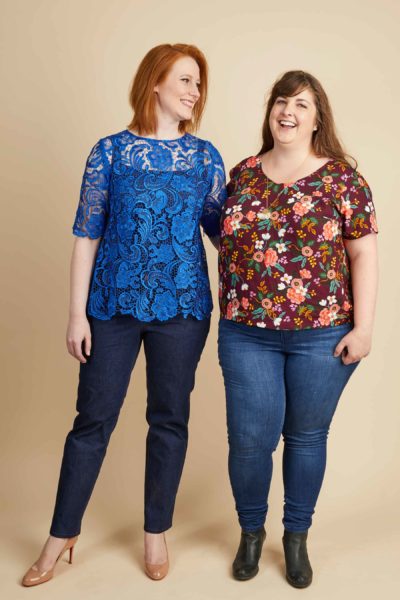
Can you please explain how to eliminate the diagonal (curved) drag lines from under the bust to the side seam? You can see it in the last picture with the floral blouse. I have this problem and don’t know how to eliminate it.
Thank you,
Ilana, Did you ever find a solution for the diagonal curved drag lines under the bust to the side seam? I have this issue as well. I am searching for a solution as well.
It was interesting that fixing the fit issues in the top front of the bodice fixed the pooling fabric in the lower back. A good reason to work “top down” when fitting. An excellent post. Thank you!
When I made the Montross the back of my sleeve had quite a bit of extra fabric. How do I take it out of my next garment? I need to do a narrow shoulder adjustment which should help some, but it’s not going to fix the problem completely. Thanks!
I only wear knits but so many have the full crease above the bust. I have a steep shoulder slope and wondered if I needed to adjust it. LOTS of food for thought. Many thanks.