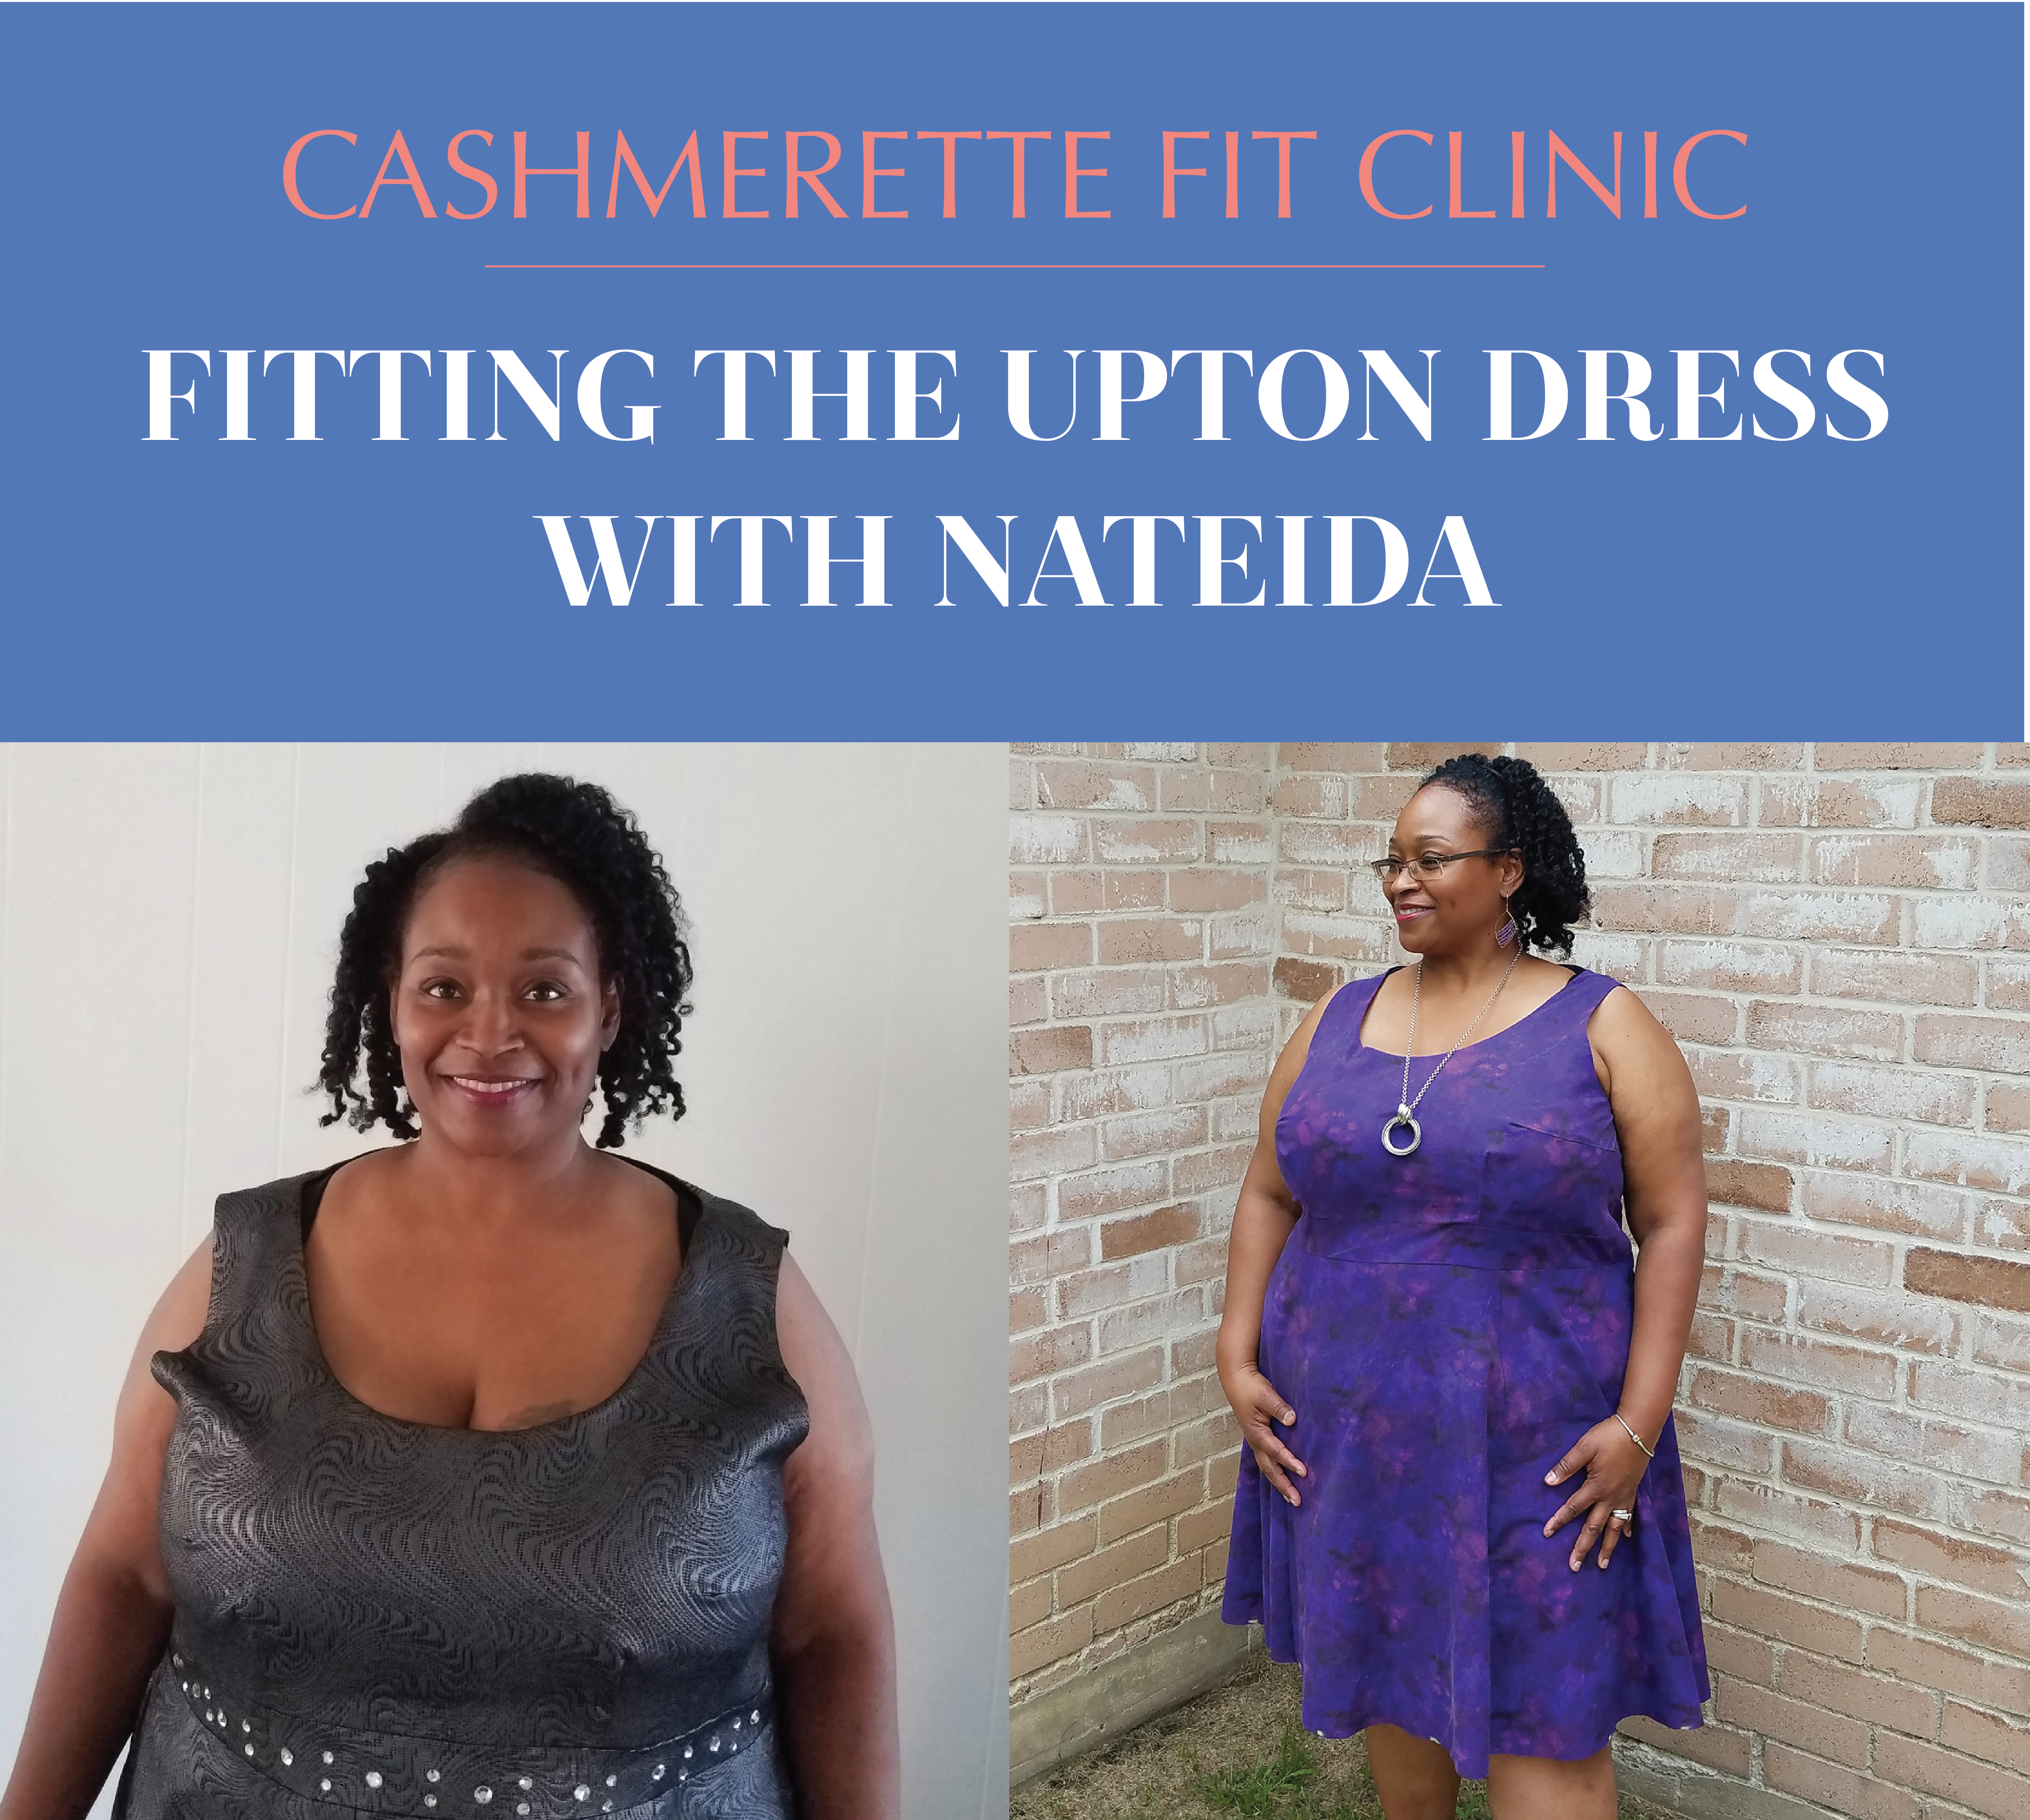
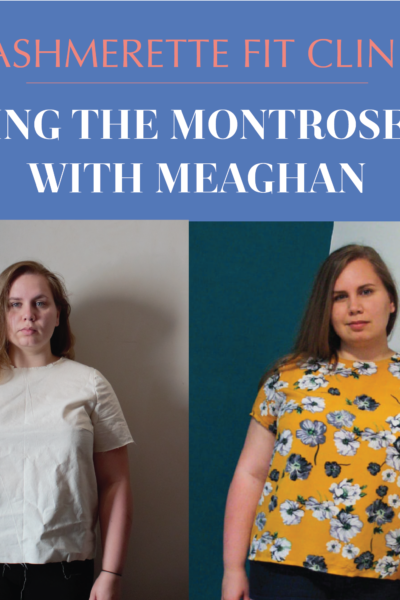
Today I’m excited to share the first installment of the Cashmerette Fit Clinic, Upton Fitting with Nateida! I decided to start this new project to bring the in-person fit workshop experience online, not only helping individual sewists to improve their garment fit, but also to benefit everyone else who’s following along (often people say they learn the most from seeing other people’s fit journeys in my classes).
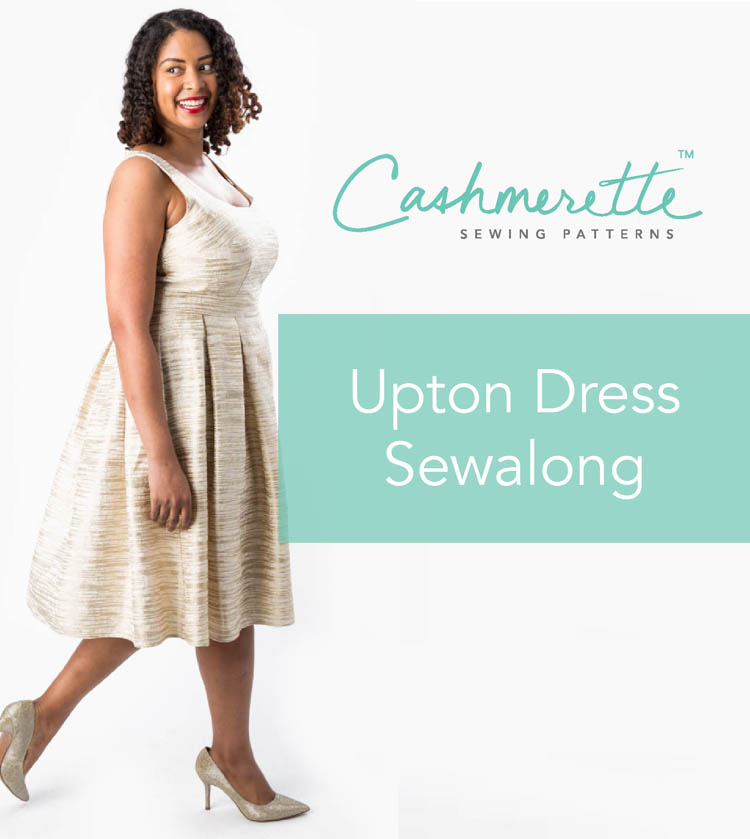
I decided to jump right into the deep end, with one of our trickier patterns to fit: the Upton Dress. The Upton Dress is more challenging than other patterns for a couple of reasons. First, it’s a woven, which means you don’t get the benefit of stretch which can hide a multitude of fitting issues (that said, you can use a stretch woven for it if you like). Second, it has a fitted bodice, which again means there’s not much room for shortcuts: it’s very clear if it fits or not! If you have a large bust, getting a fitted bodice to look fantastic is often a challenge. That said, it’s also one of the most satisfying garments to help people fit, because when you get it right, it transforms the appearance of the garment. As a result, this fit clinic report is on the longer side, so grab a cup of tea and a slice of cake, settle in, and enjoy!
Fitting the Cashmerette Upton Dress
Our first Cashmerette Fit client is Nateida, who has a great YouTube channel and is on Instagram. She wrote asking for help with the Upton: “The Upton is my absolute favorite dress and to nail the fit on it would be a dream come true”. We worked over email during May and June 2018.
Nateida’s stats:
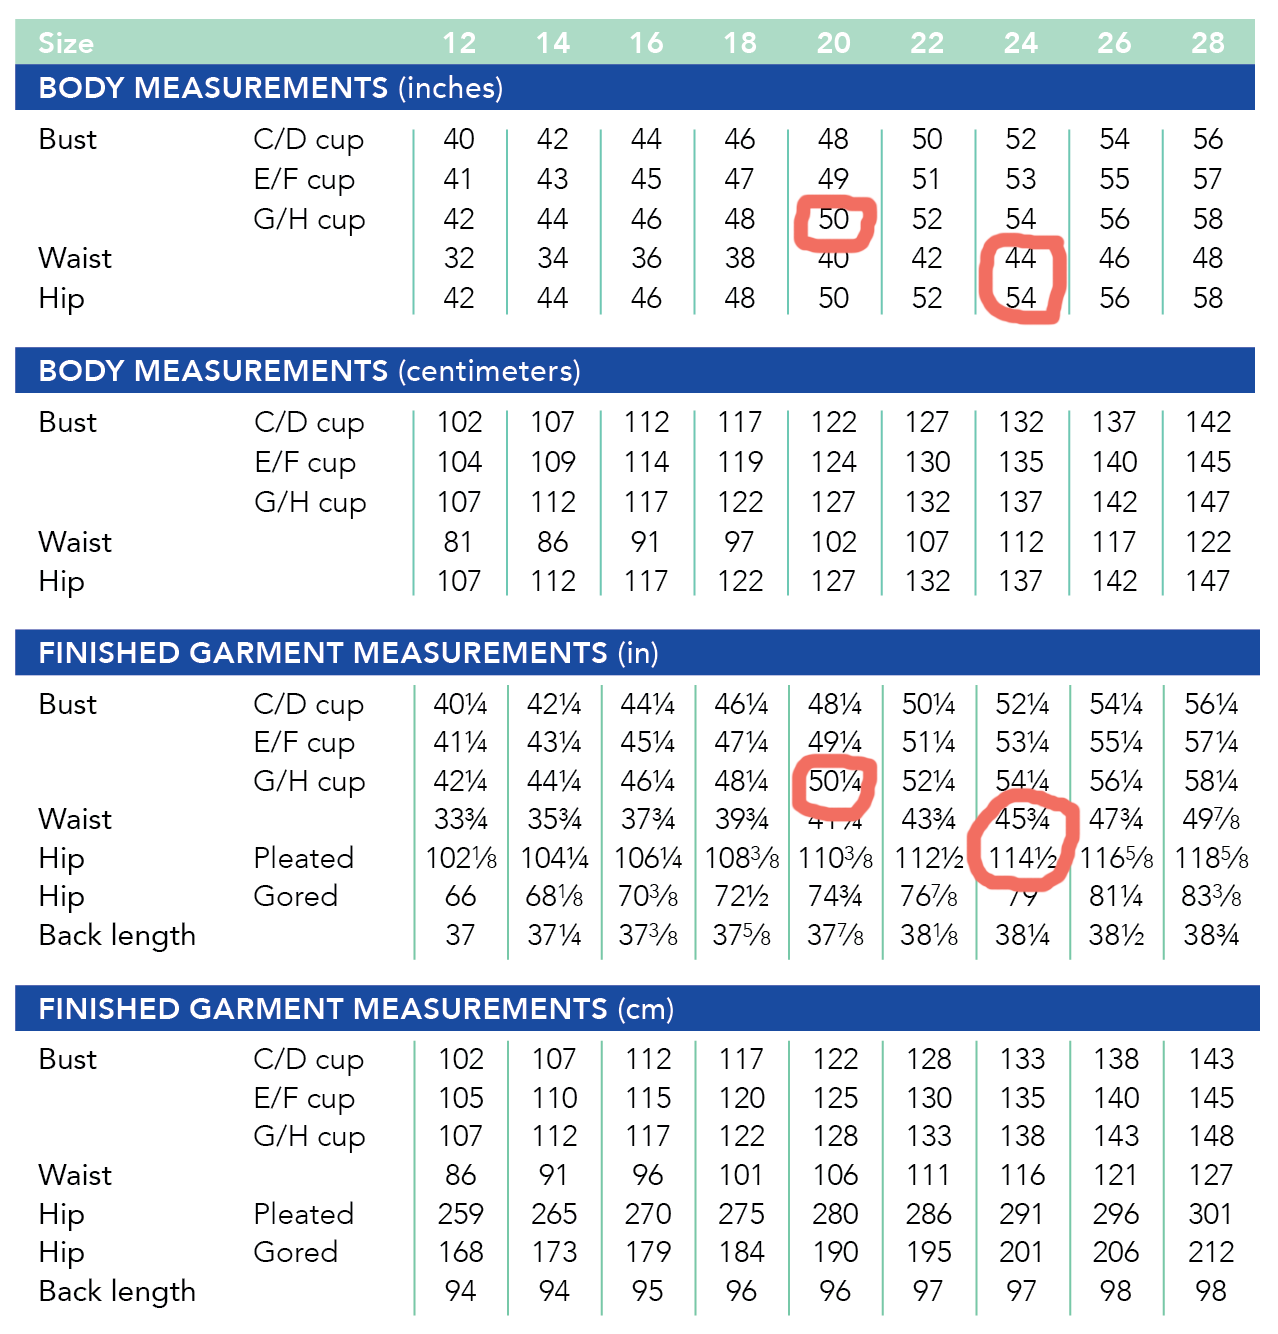
Full bust: 49 – 51″ (depending on bra)
Waist: 45″
Hip: 55″
Height: 5’7″
Bra size: 44 DDD
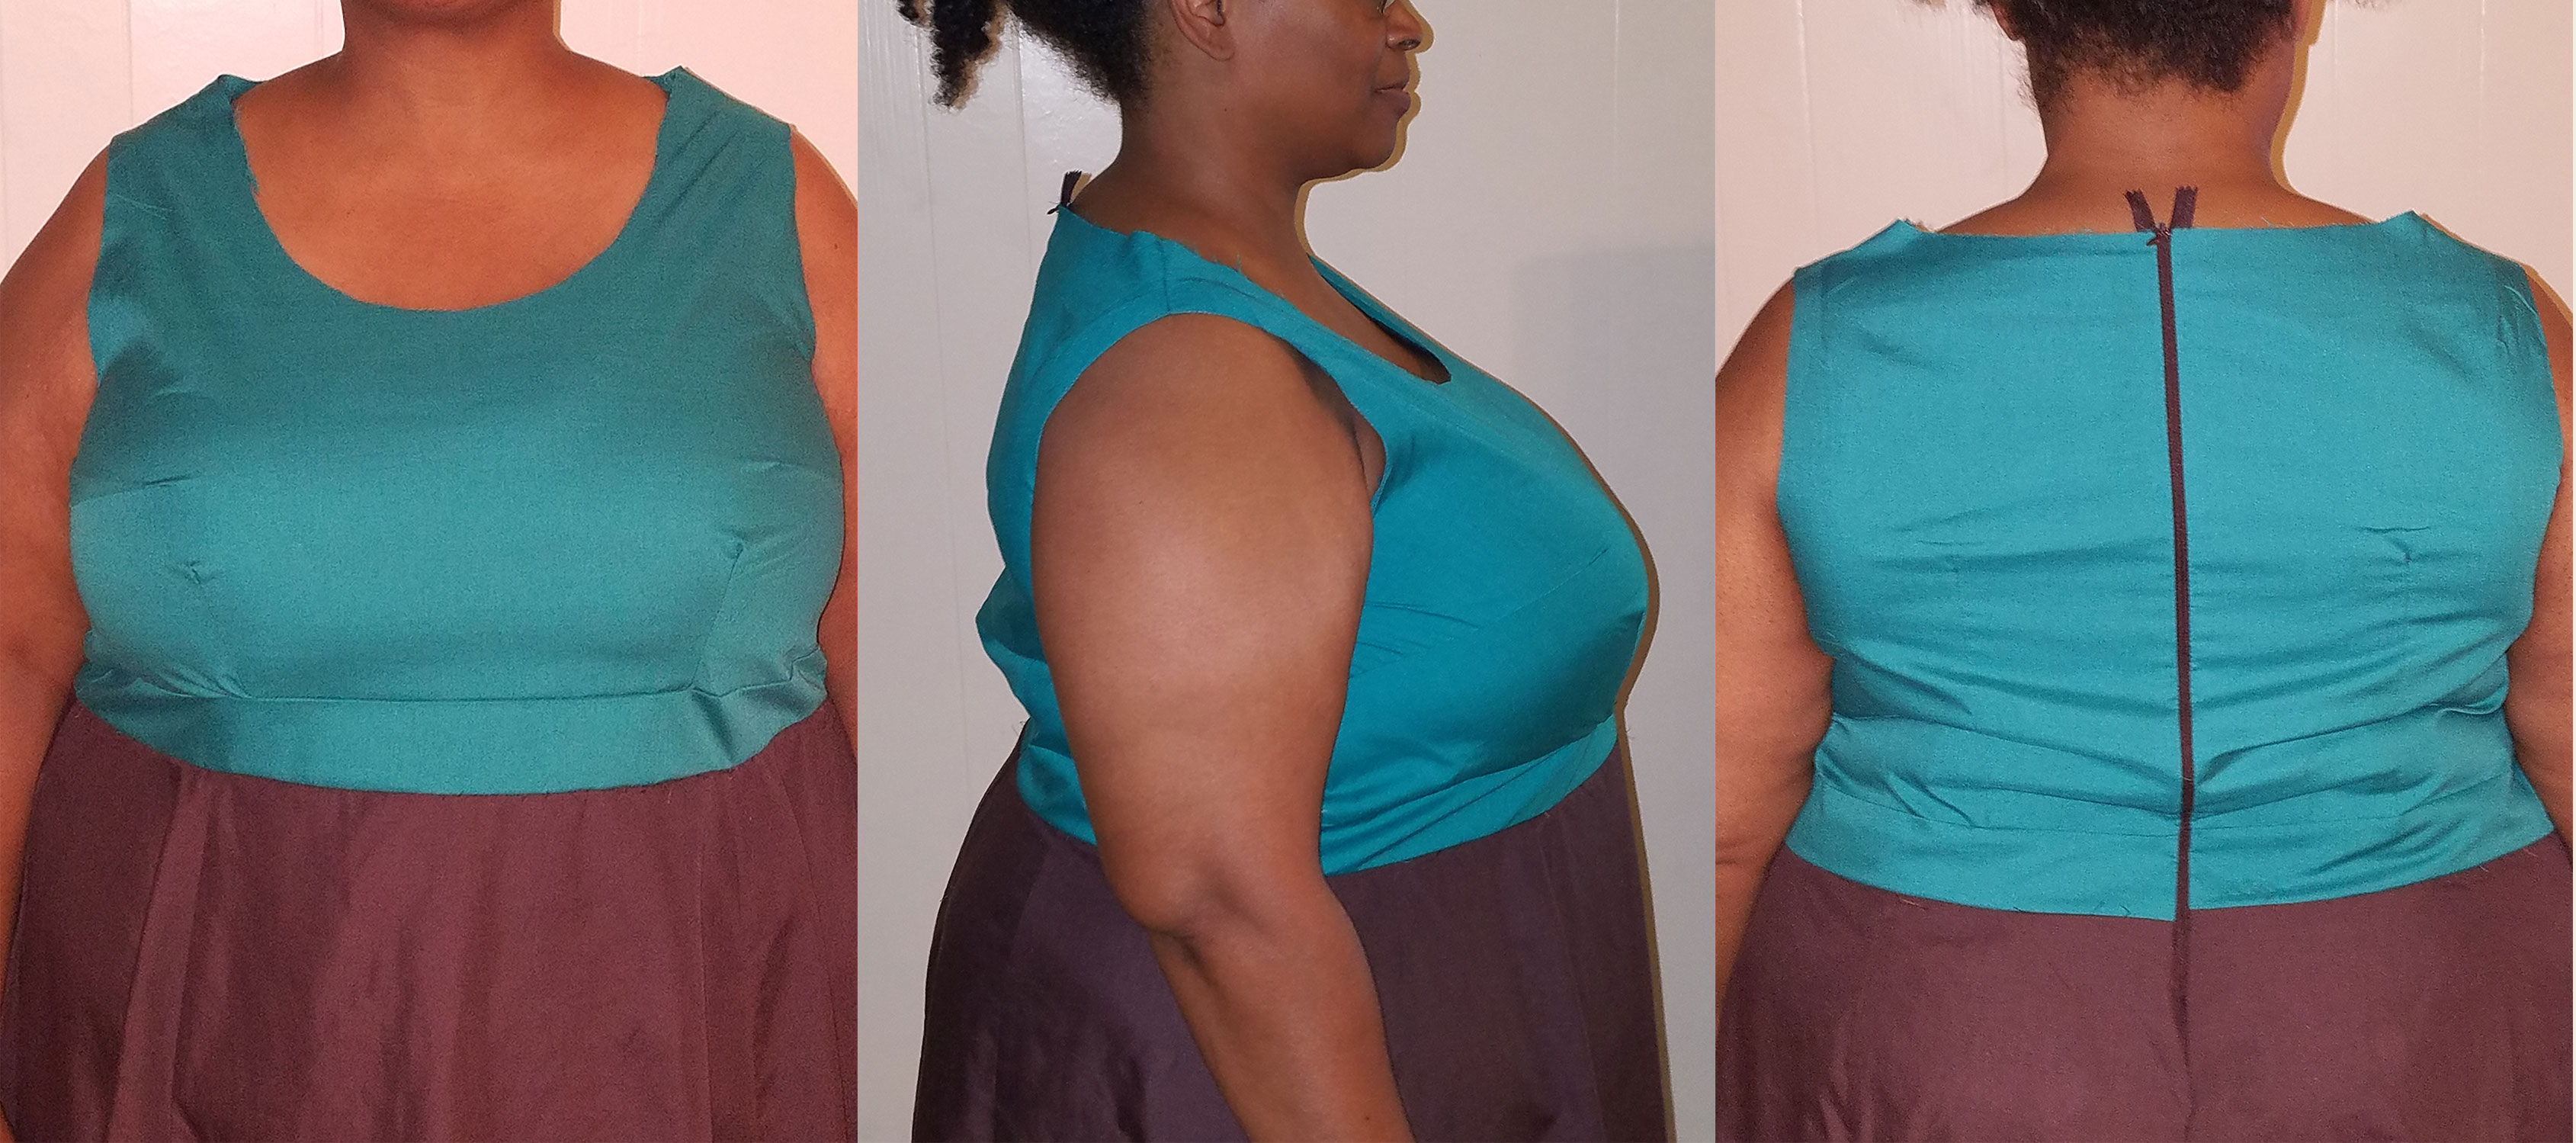
Where Nateida’s Upton Dress started
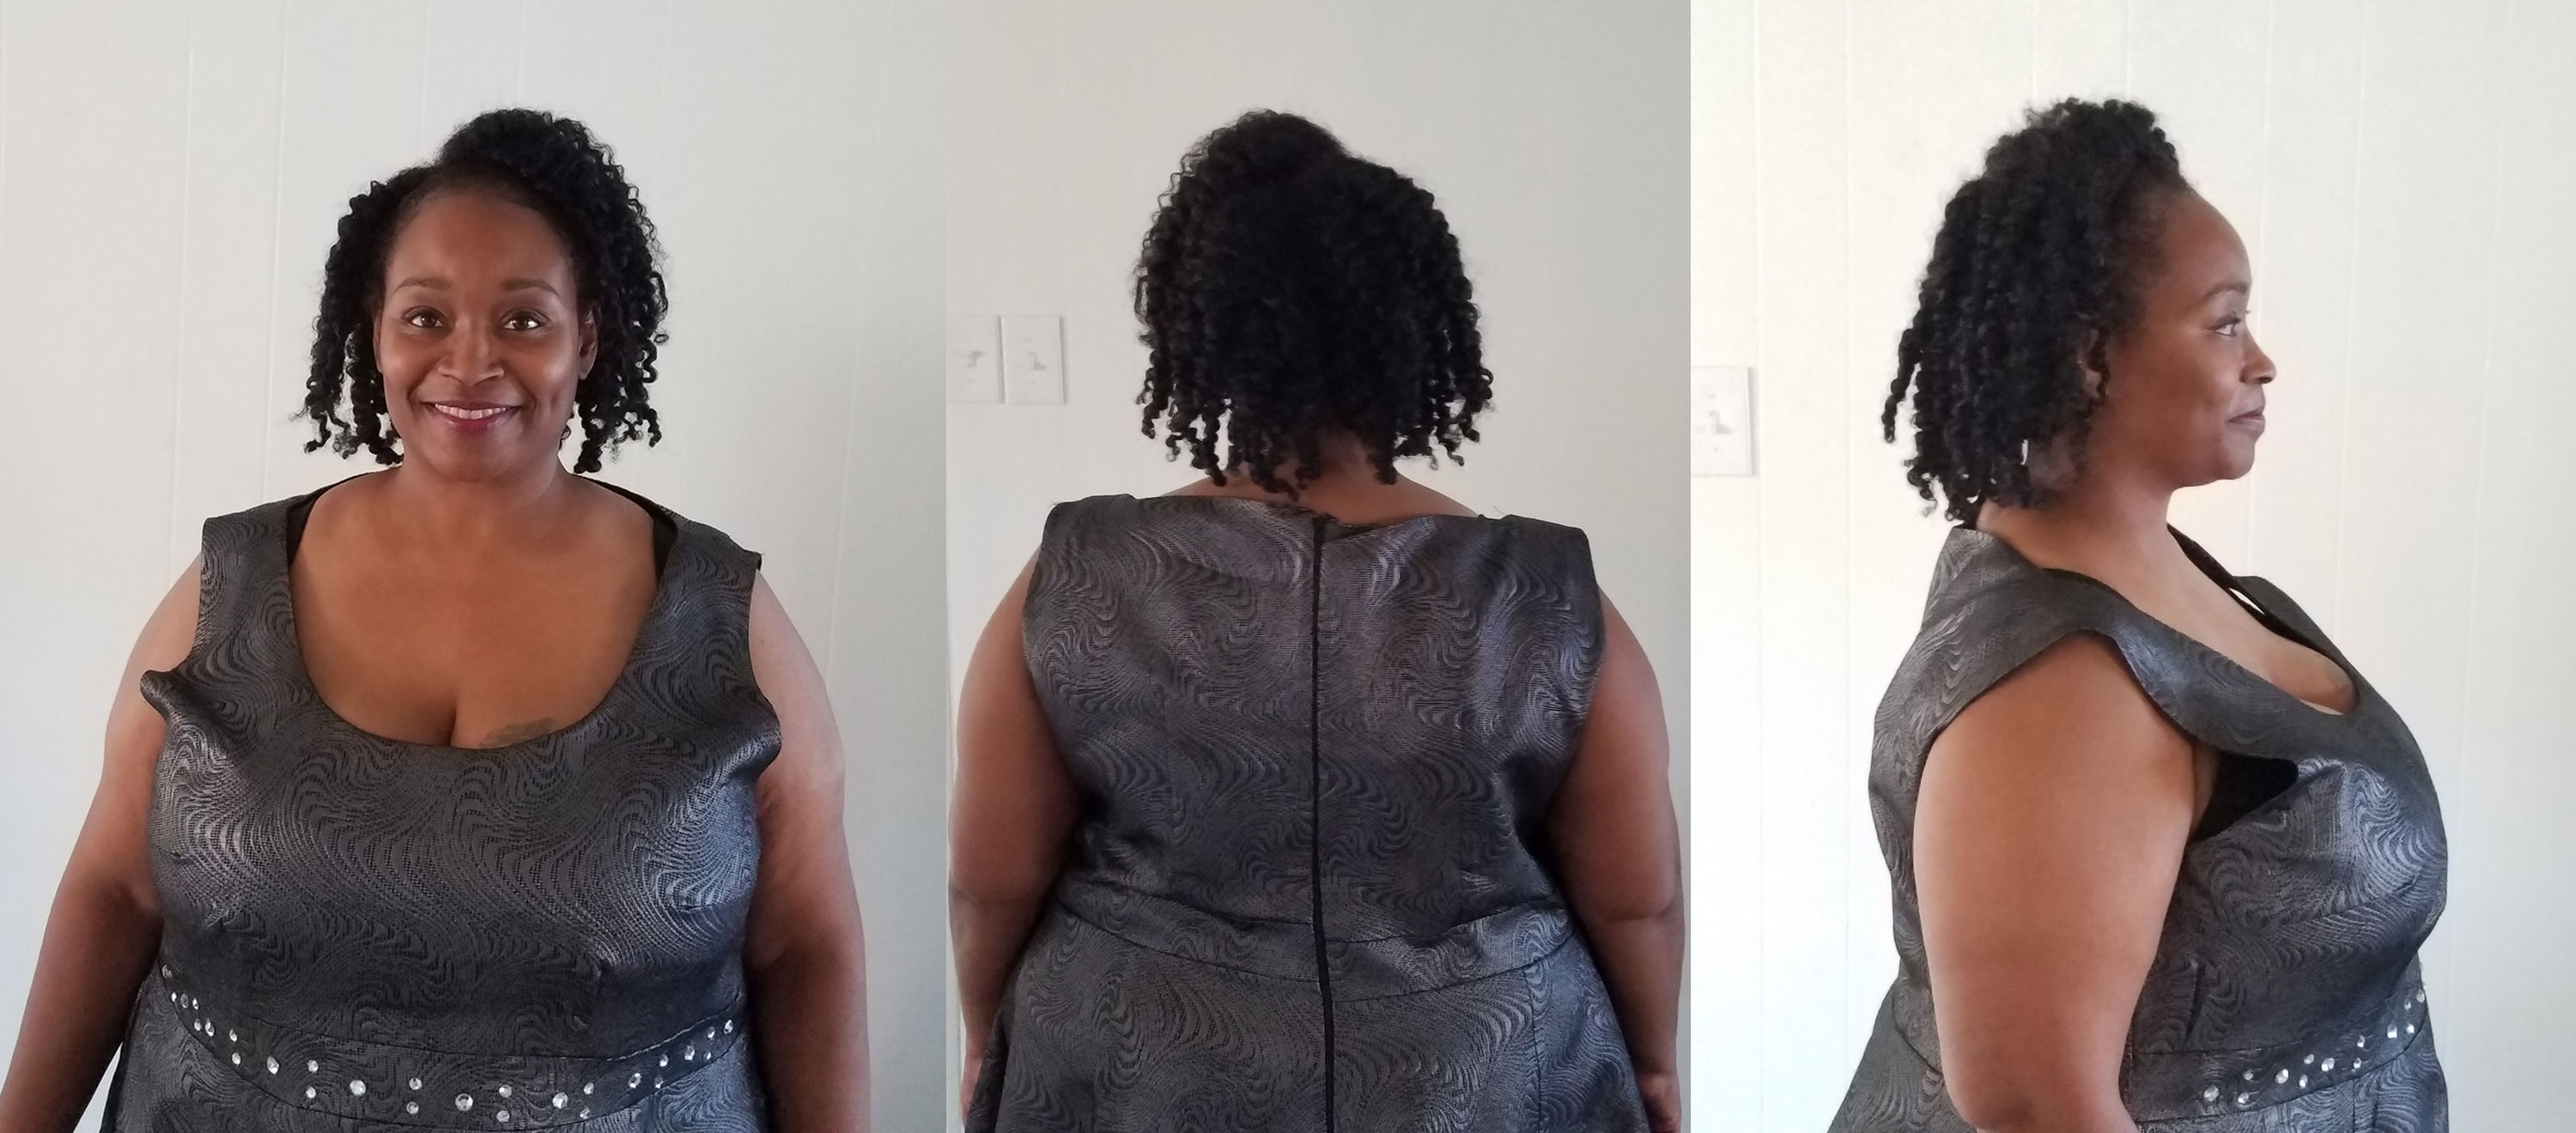
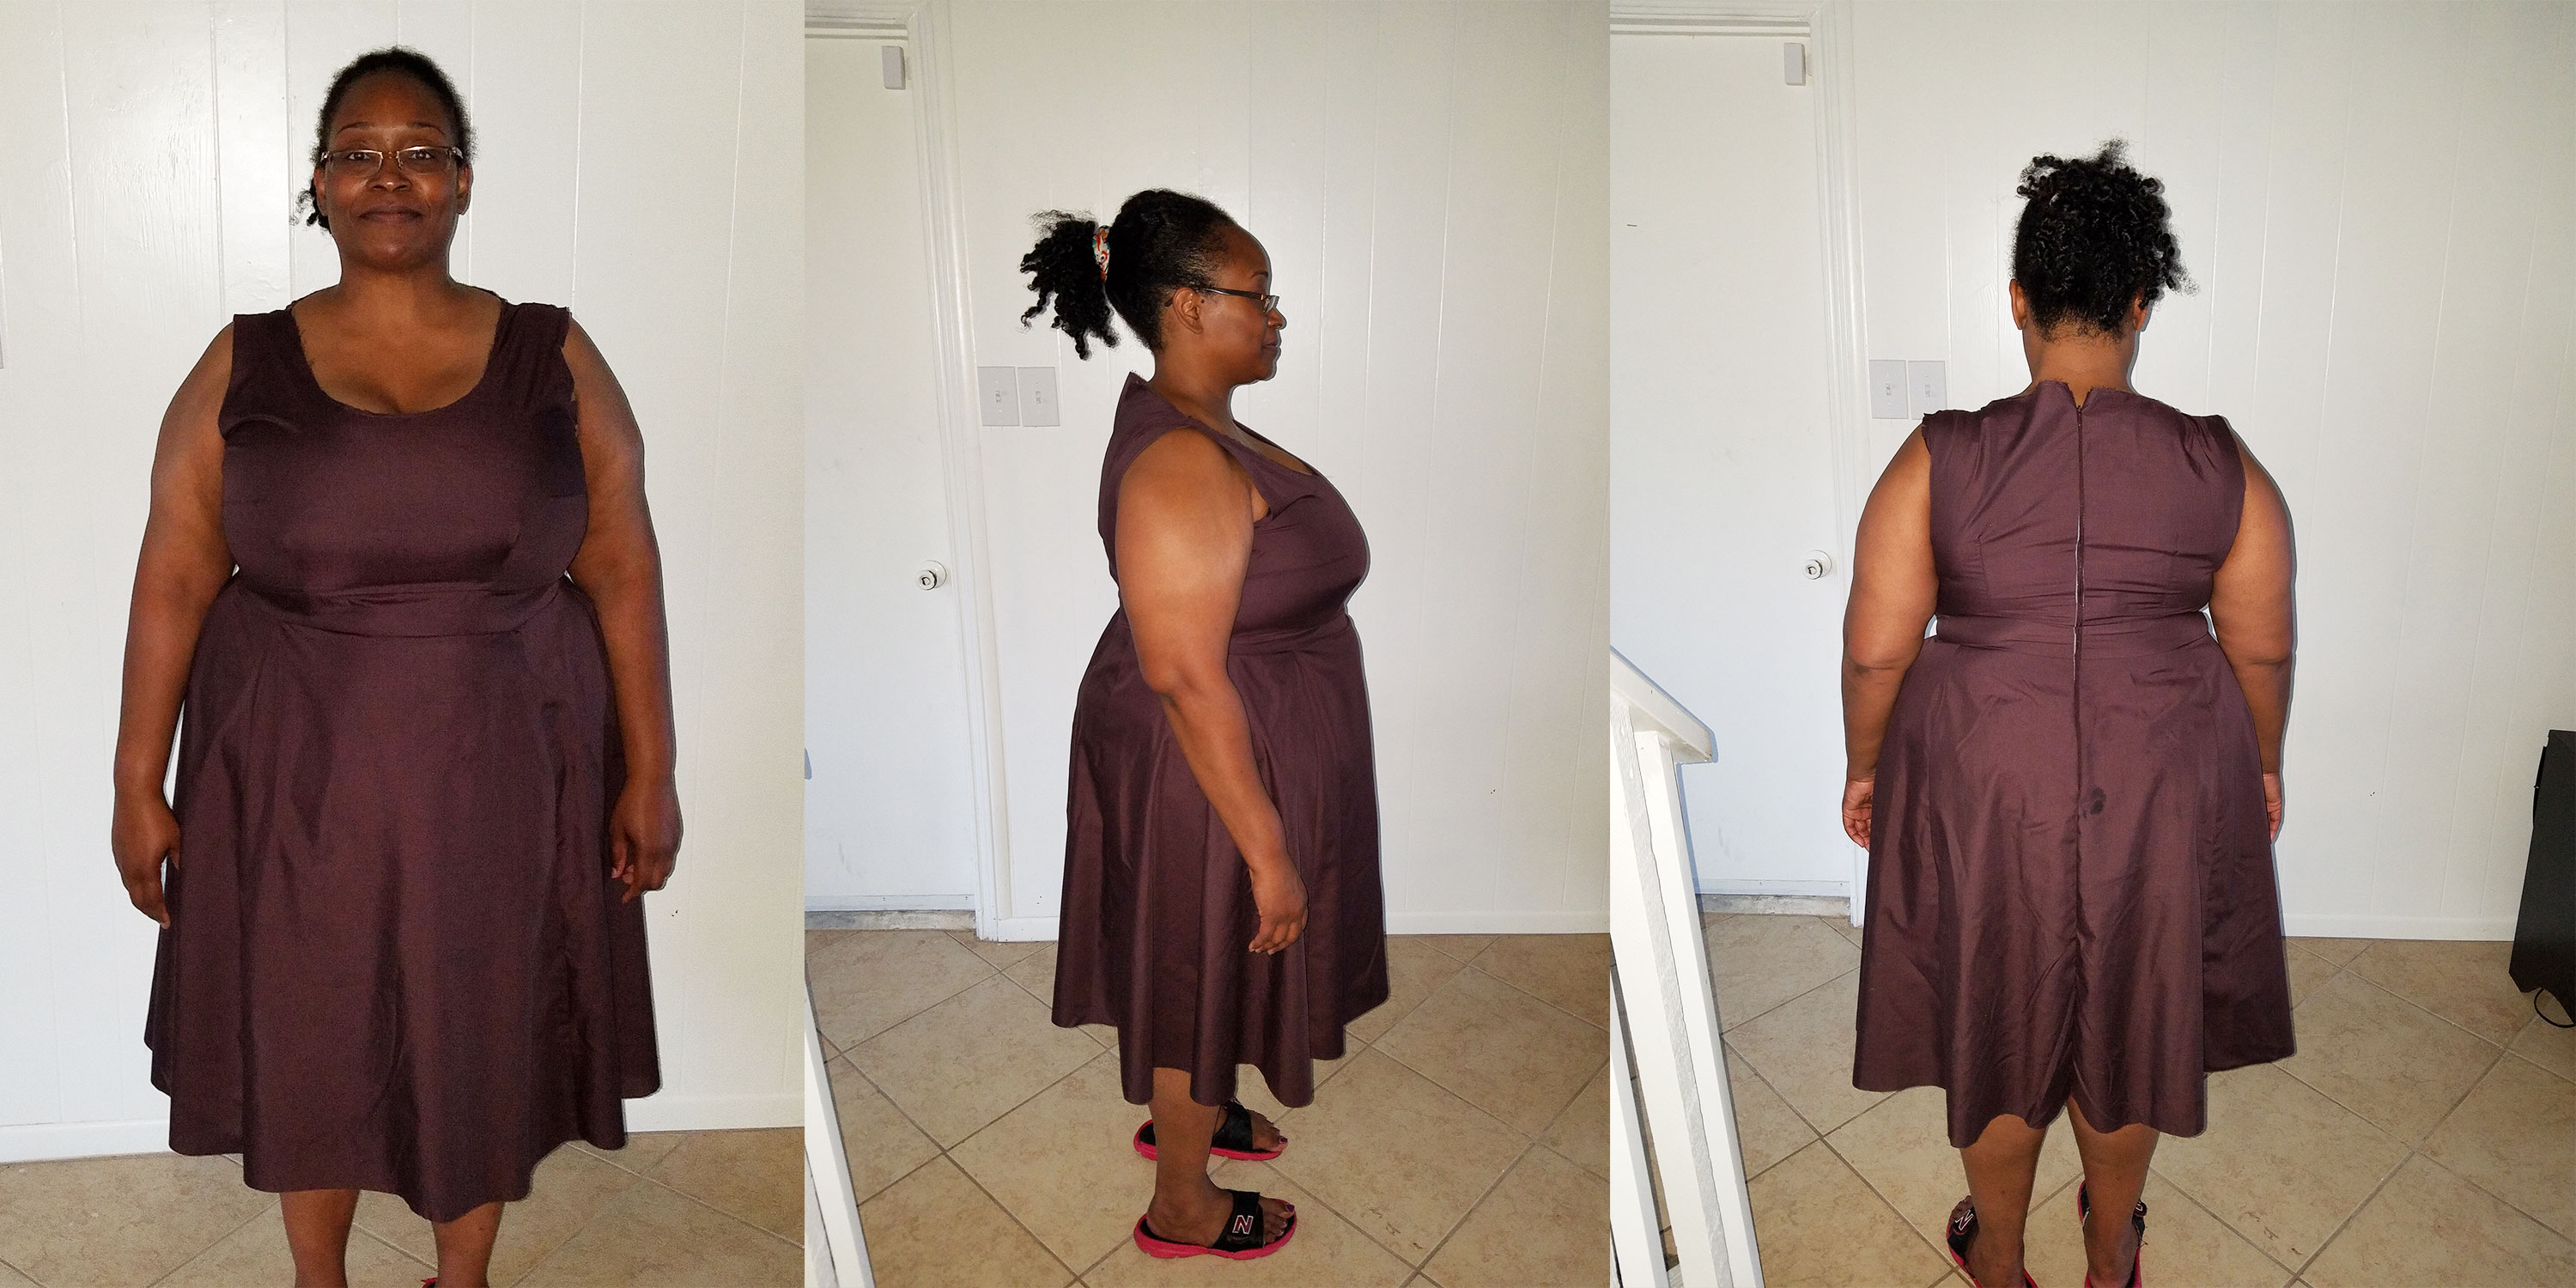
Nateida had already made two Upton Dresses when she applied for fit clinic.
The first dress she made for a gala, in size 28 E/F.
The second dress was a 22 C/D, graded to a hip of 26.
As you can see, her main issues were around the bodice: significant gaping at the armscyes and back neckline, ripples of excess fabric down the back, and a poor shoulder fit.
Round 1: getting the base size right
Before you make any fit adjustments, the first thing to do is check you are starting with the right size.
Immediately looking at Nateida’s measurements and the photos, I could tell she was starting in the wrong size. From the photos, the bodice is much too big in the upper body around her shoulders and back, although the 22 bust was closer to looking OK.
Based on Nateida’s measurements, she actually needed to start with a 20 G/H bust graded to a 24 waist and hip (she was slightly between sizes – i.e. 20/22 and 24/26, but we started smaller given her gaping issues, and because I suspected she had a smaller shoulder/upper body area). I’ve seen a lot of women instinctively try to size up in our patterns because that’s often necessary in other pattern companies, but I always recommend starting off by trusting the measurement charts!
I added the following guidance for her first muslin:
- Make sure to add the skirt, because the weight affects how the bodice fits.
- Don’t line the bodice for a muslin, but sew around the armholes at a 1/2″ seam allowance, clip the seam allowances, and press to the inside. This significantly changes armhole shape & fit, and shows you what it will look like once the lining is added.
- Put a zip in the muslin – because the bodice is fitted, just pinning it won’t give a good sense of fit.
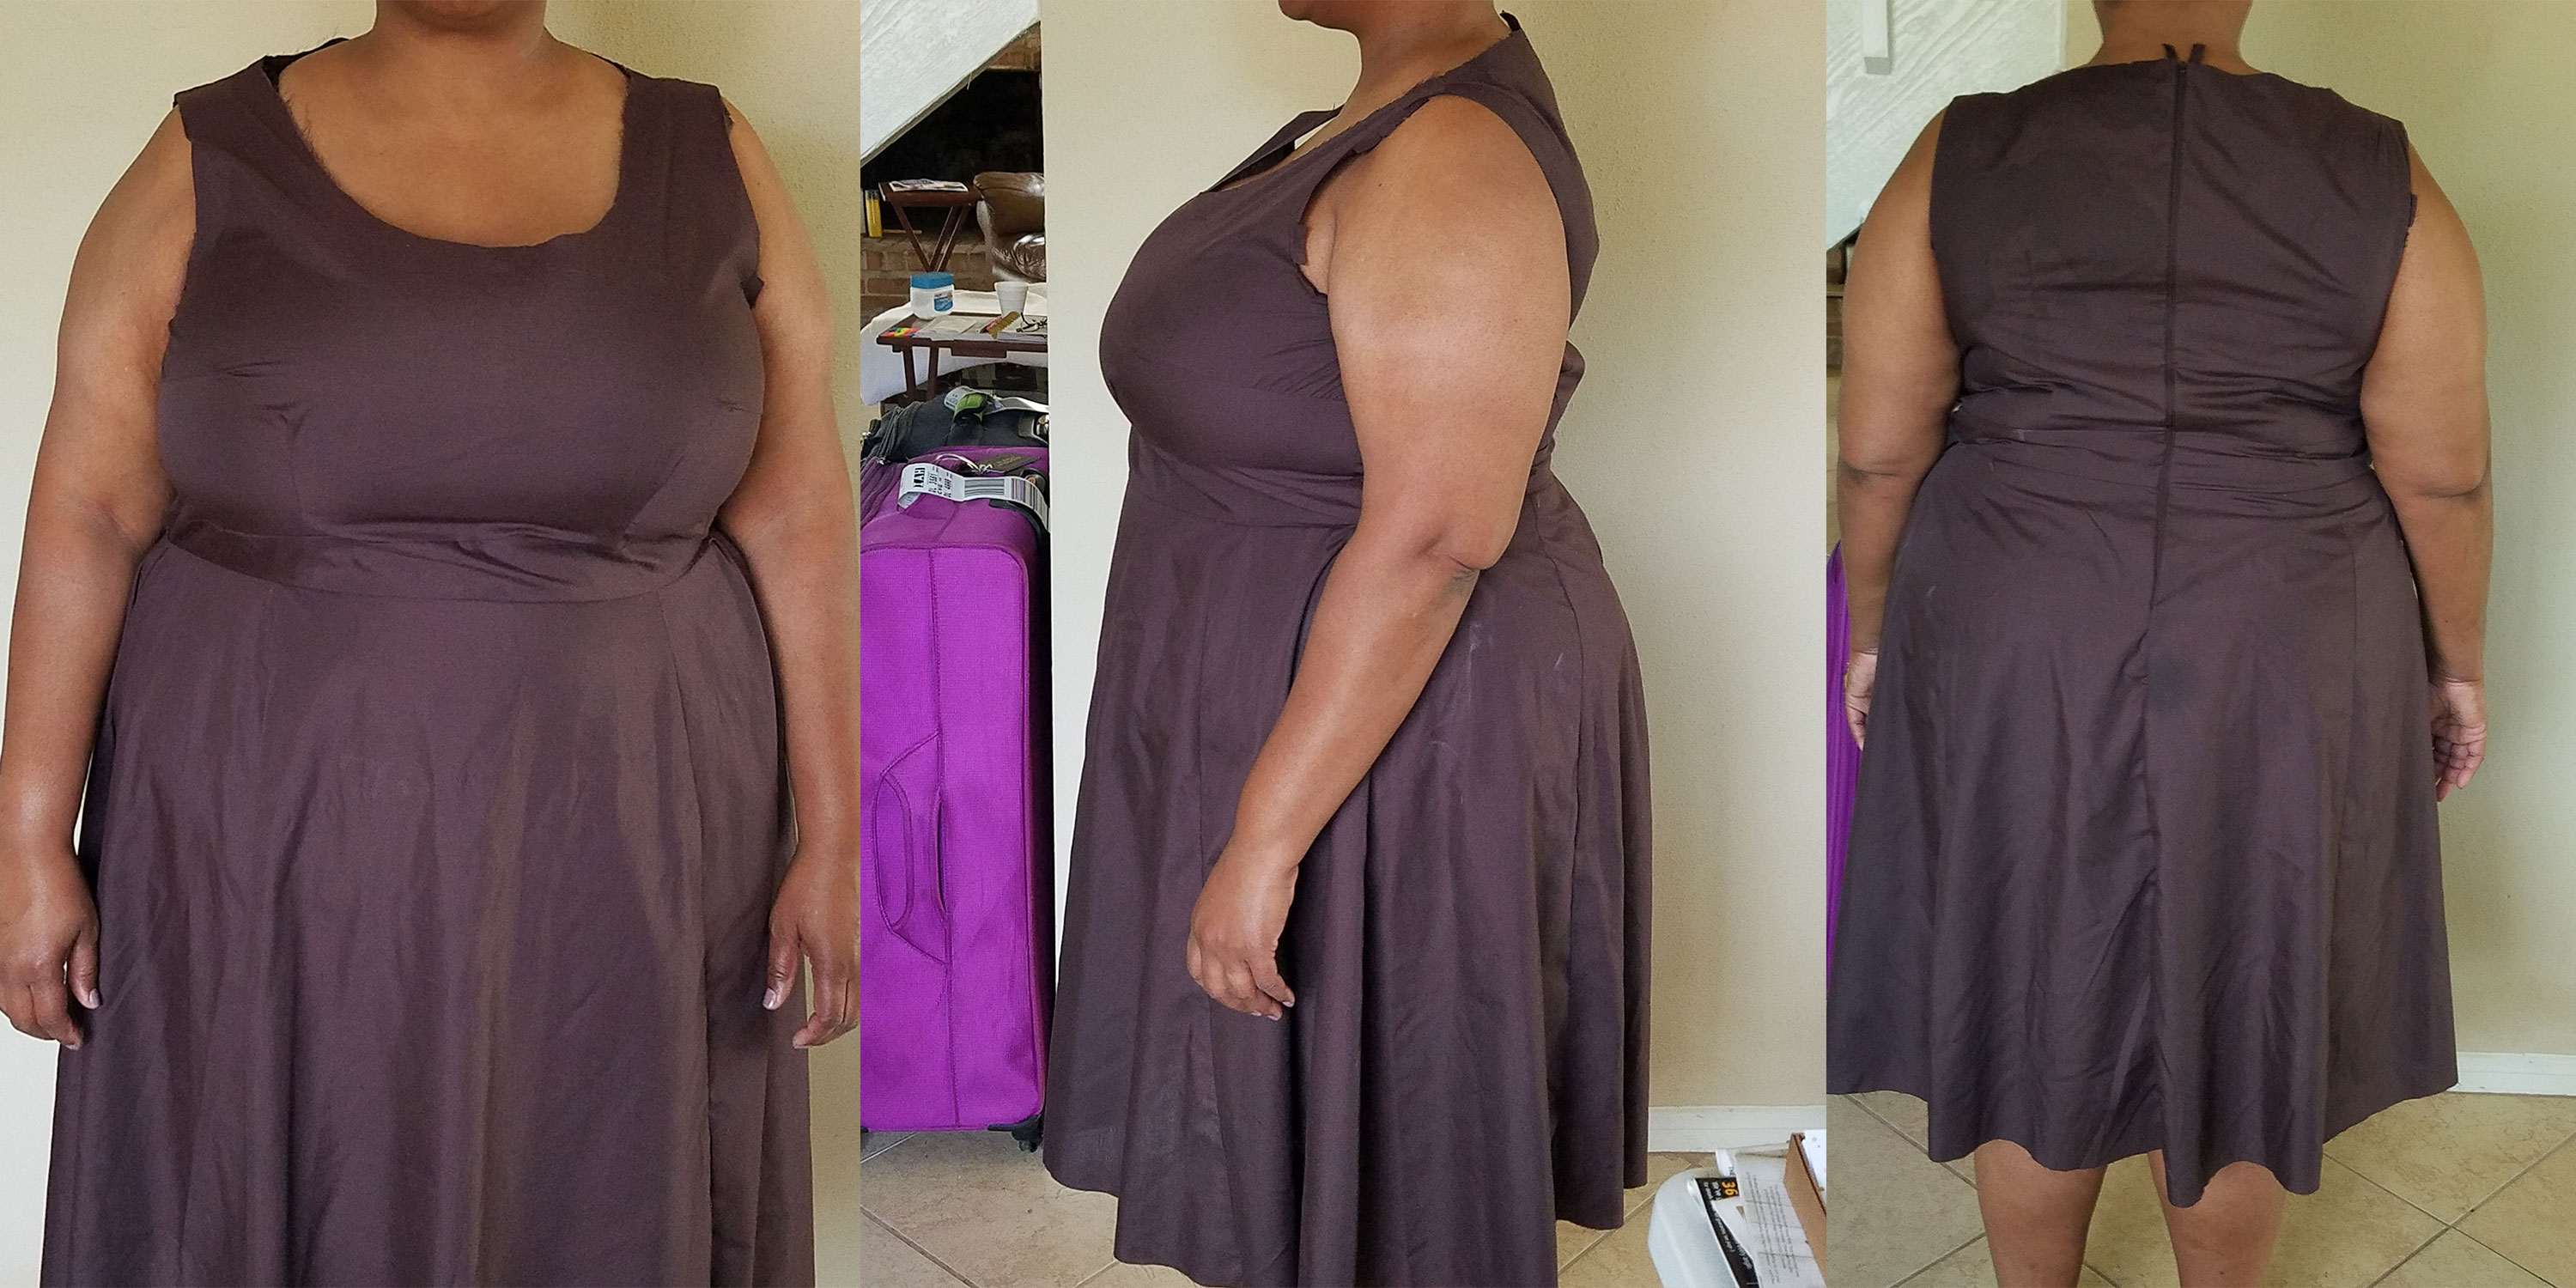
Here’s the first round of fit with the 20 G/H graded to the 24 waist. Nateida mentioned that she’d had a challenge with grading to the waist, and I realized that hadn’t been done right – more on that in a second. The shoulder/armscye fit looked a lot better, but I could see there were still lots of issues, both with the back (which we’d get on to at a later point), but also that the bust looked a little tight still.
So, the next step was to use the size 20 shoulders, grading to the 22 bust, and then the 24 waist. To help, I sent this diagram on grading between sizes. If you want more help on grading between sizes, we have a whole website section here including a page on grading between sizes on the Upton Dress (and other dresses/tops with darts).
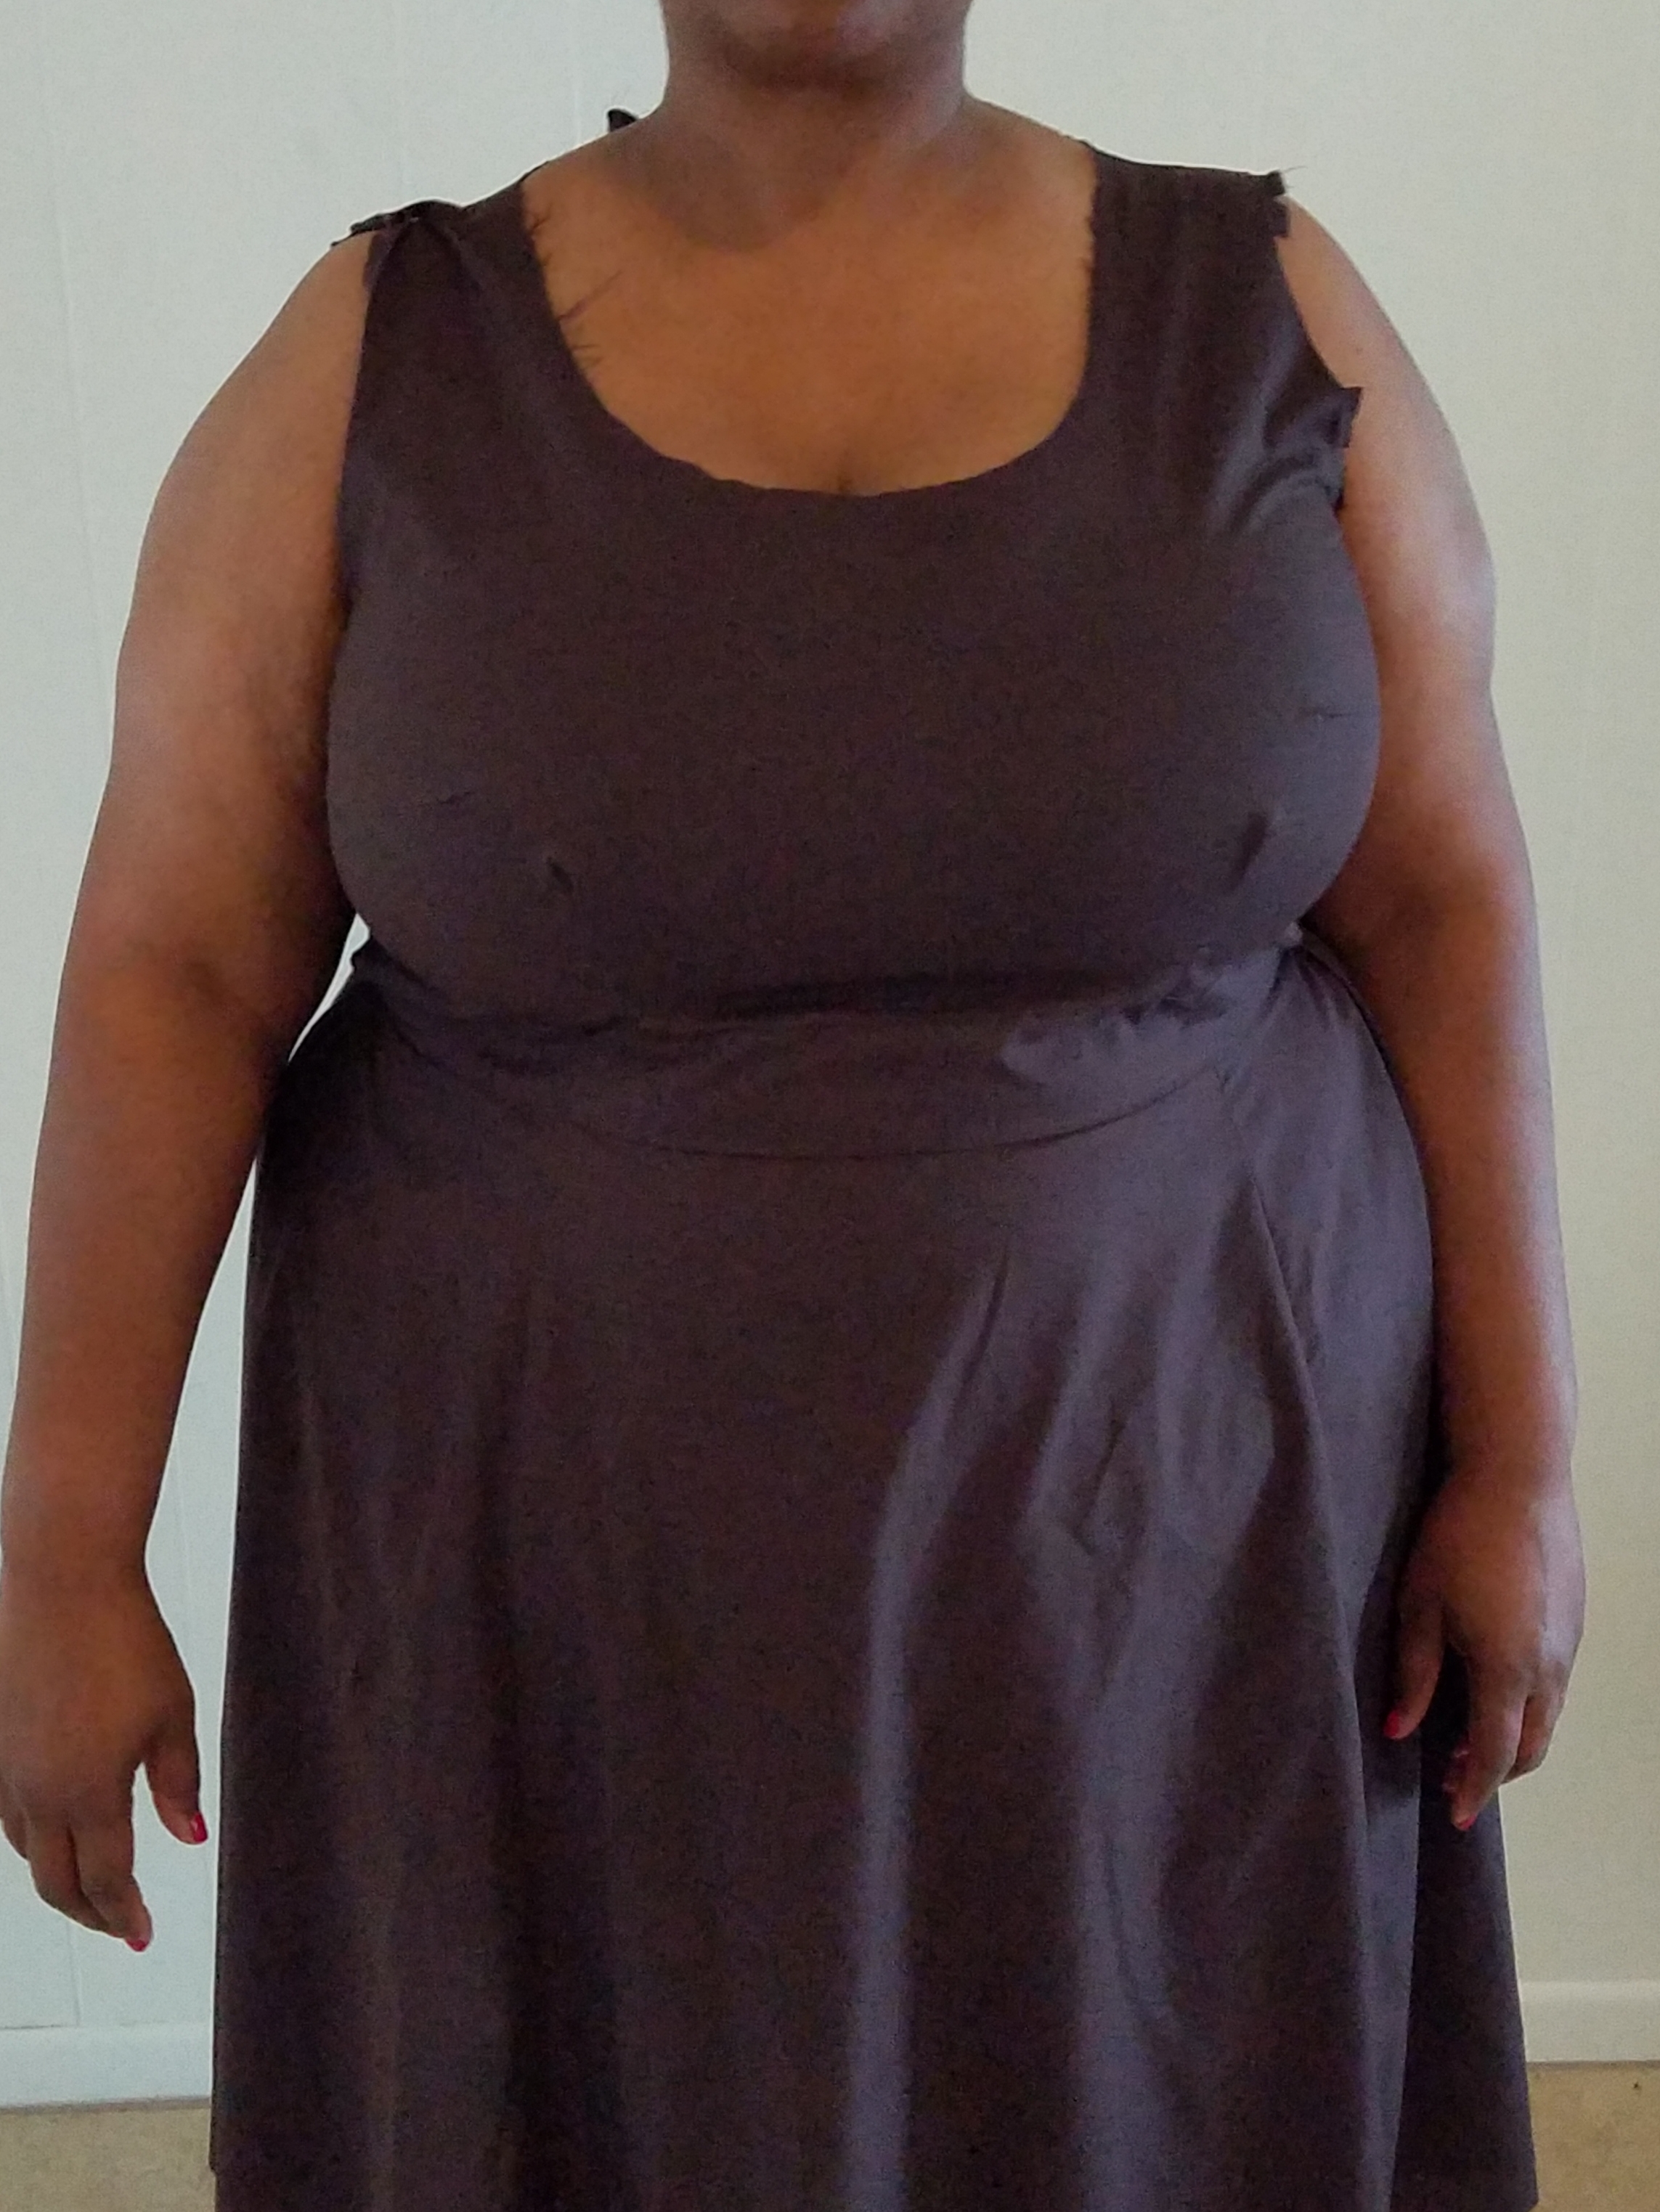
And here was Nateida’s next muslin:
A big improvement from where we started! Nateida noted the shoulders now fit pretty well, most of the upper back neckline gaping was gone, though there were still back issues (I knew that this change wasn’t going to fix that yet).
Round 2: Pin Fitting
Now we had the right starting point, I asked Nateida to do some pin fitting. This involves pinching bits of fabric on your muslin and pinning them, to see how it affects the fit – it’s like testing fitting theories! Then, you can see which adjustments you need to make, and by how much.
I asked Nateida to pin in three places:
- Looking at the photos and the remaining (more minor) armscye gaping, I hypothesized that Nateida might have more sloping shoulders than the patterns’ designed for, so I asked her to pinch the outer shoulder, and pin a wedge, starting at the outer shoulder, going to nothing at the neck, and see what happened
- For the excess fabric at the back neckline, I asked her to pinch out the excess evenly on either side, and pin little darts in.
- For the back, I felt confident that her back length was shorter than the pattern back length, hence all the buckling fabric. So I asked her to pinch out a horizontal diamond wedge across the small of her back, pinching out the excess fabric – this would lead to a swayback adjustment.
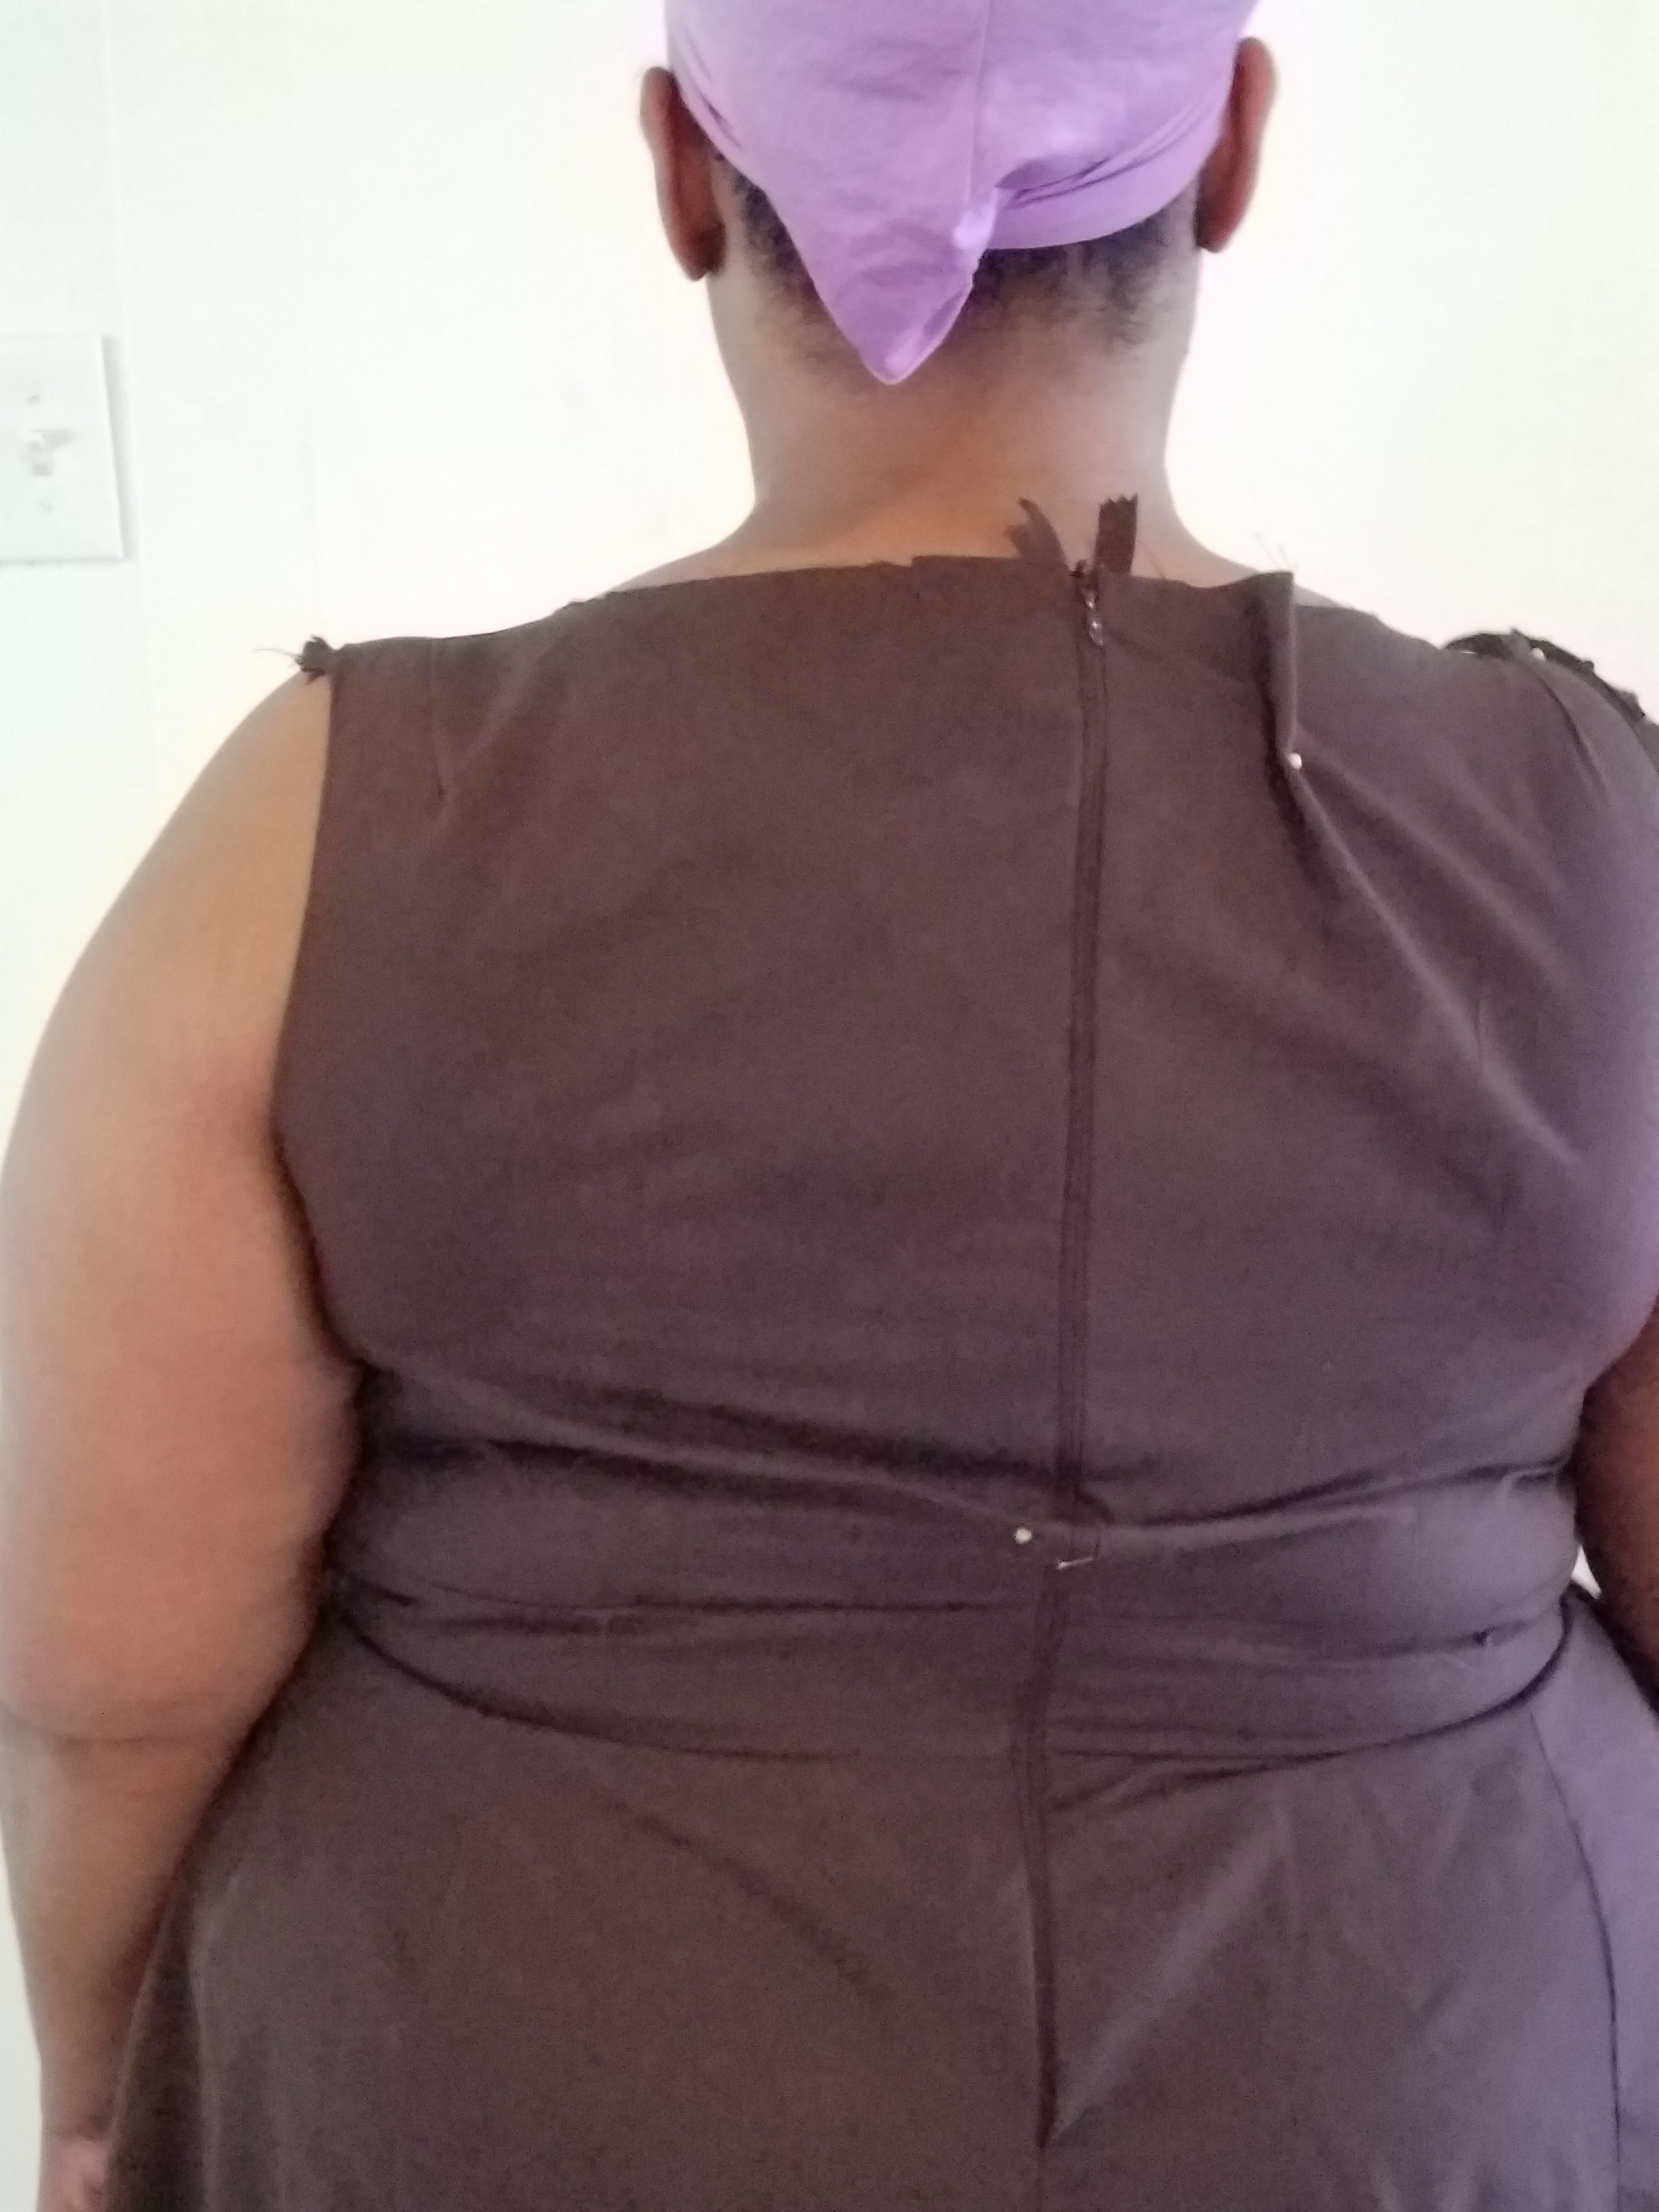
So on the shoulder: check out the difference! Nateida had pinned her right shoulder (left as you’re looking at the pic) and both the shoulder and armscye fit were significantly improved. So I knew that we’d be doing a sloping shoulder adjustment.
On the back, for the neckline, although she only pinned on one side, you can see how much flatter the neckline ended up lying, so we’d want to take out the excess there. The swayback pinning didn’t really work – it didn’t seem to improve. However, this is a hard thing to pin, and I was still pretty convinced this was the adjustment needed.
Round 3: Making adjustments
Based on these pictures, I recommended the following:
- Due to the slight ongoing tightness around the bust and waist, I suggested going up to grading from 20GH shoulders to 24 bust and 26 waist – I don’t think Nateida would have to do this in other patterns, but in the Upton because it’s so fitted, and because her bust size varies, I thought she would find this more comfortable.
- Do a sloping shoulder adjustment, to remove the amount pinned out.
- Remove the back neck gaping using the “overlap” method, again removing the amount pinned out.
I decided to have Nateida do these steps first, and then we’d tackle the sway back – in an ideal world, you want to do your adjustments gradually because each adjustment can affect other parts of the bodice, potentially changing what you’ll do next.
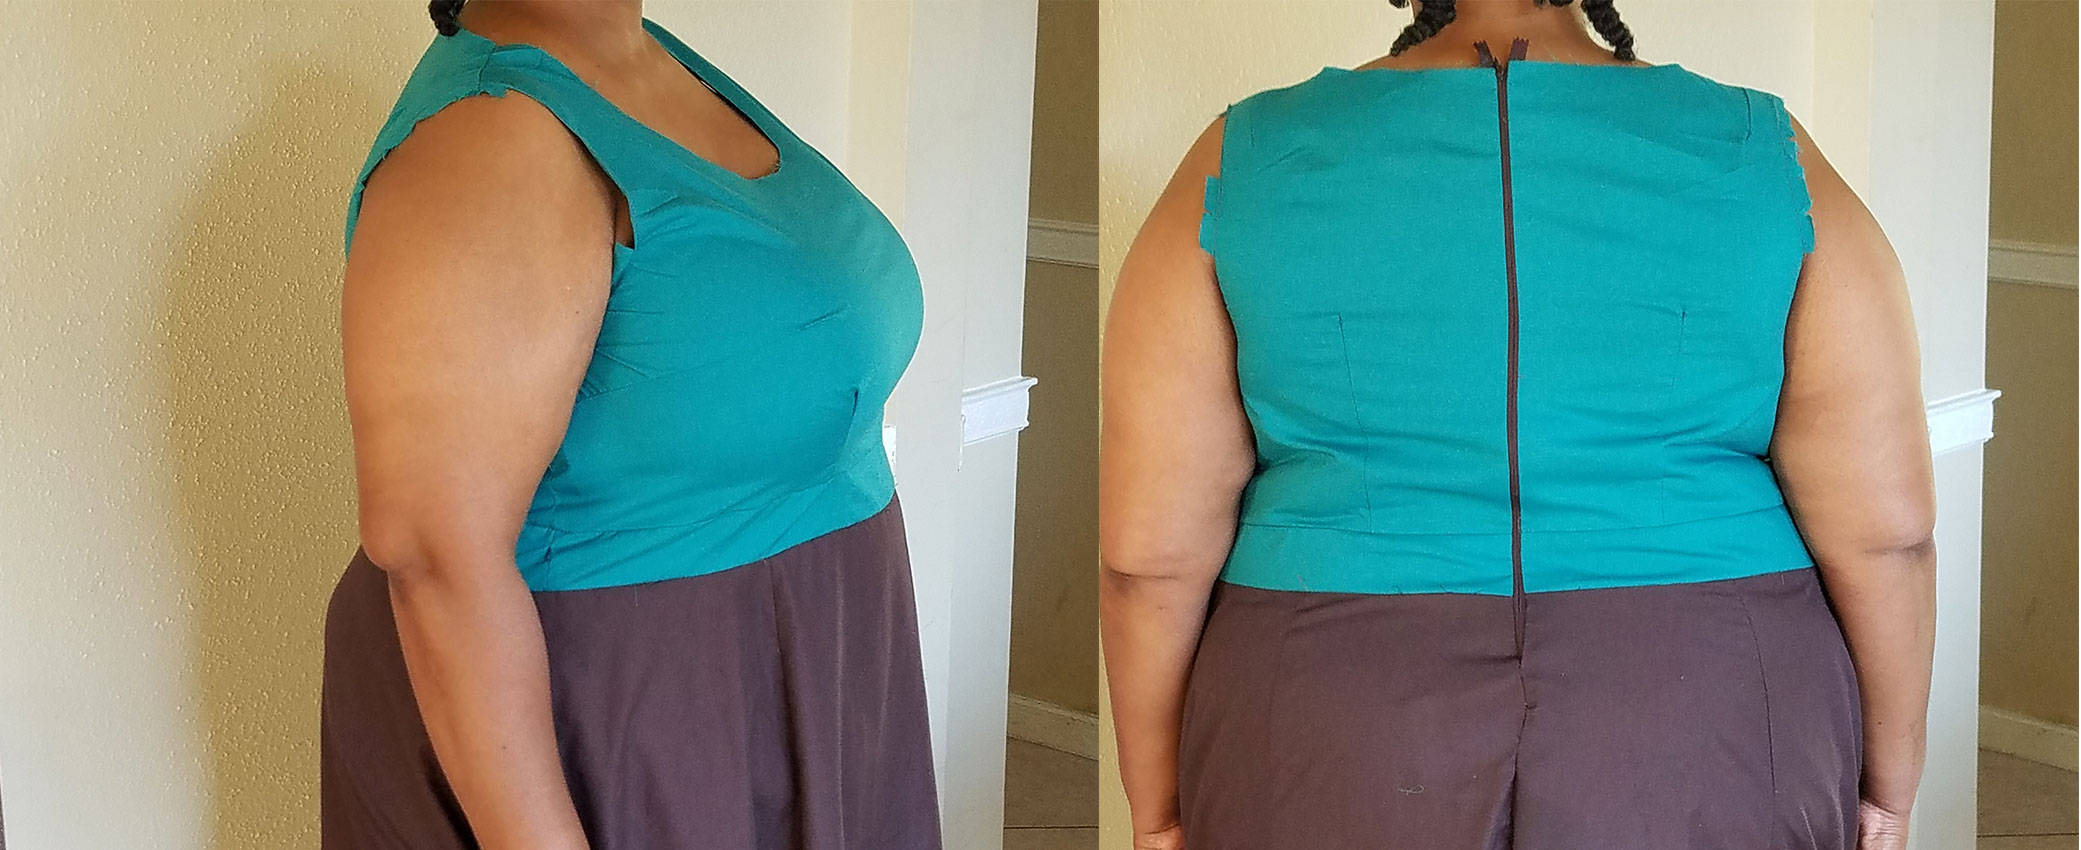
Here are the results – again, a significant improvement! As you can see, the bust/upper back were looking better, the upper back neckline looked gorgeous, and the shoulders were looking better though maybe a *touch* over-adjusted.
Round 4: Final refinements
The final round of feedback was to do the following:
- Drop the waistline by 3/8″ – Nateida mentioned she often does this with garments, and while the Upton waistband is meant to fit pretty high under the bust, it was a fraction too high for her.
- Do a sway back adjustment on the back bodice piece – instead of pinning, I suggested she have her husband pinch out the excess at the back and measure it, then follow these instructions.
- Move the shoulder seam forward, because it was tipping back rather than sitting on the top of her shoulder. I asked her to measure how far back it was (I estimated 1/4″ but better to be sure!) and then do a forward shoulder adjustment.
Look at how much better the back is! I suspect that Nateida will want to do a sway back adjustment on a lot of her patterns in the future. The shoulder seam also looked much better.
The final result!
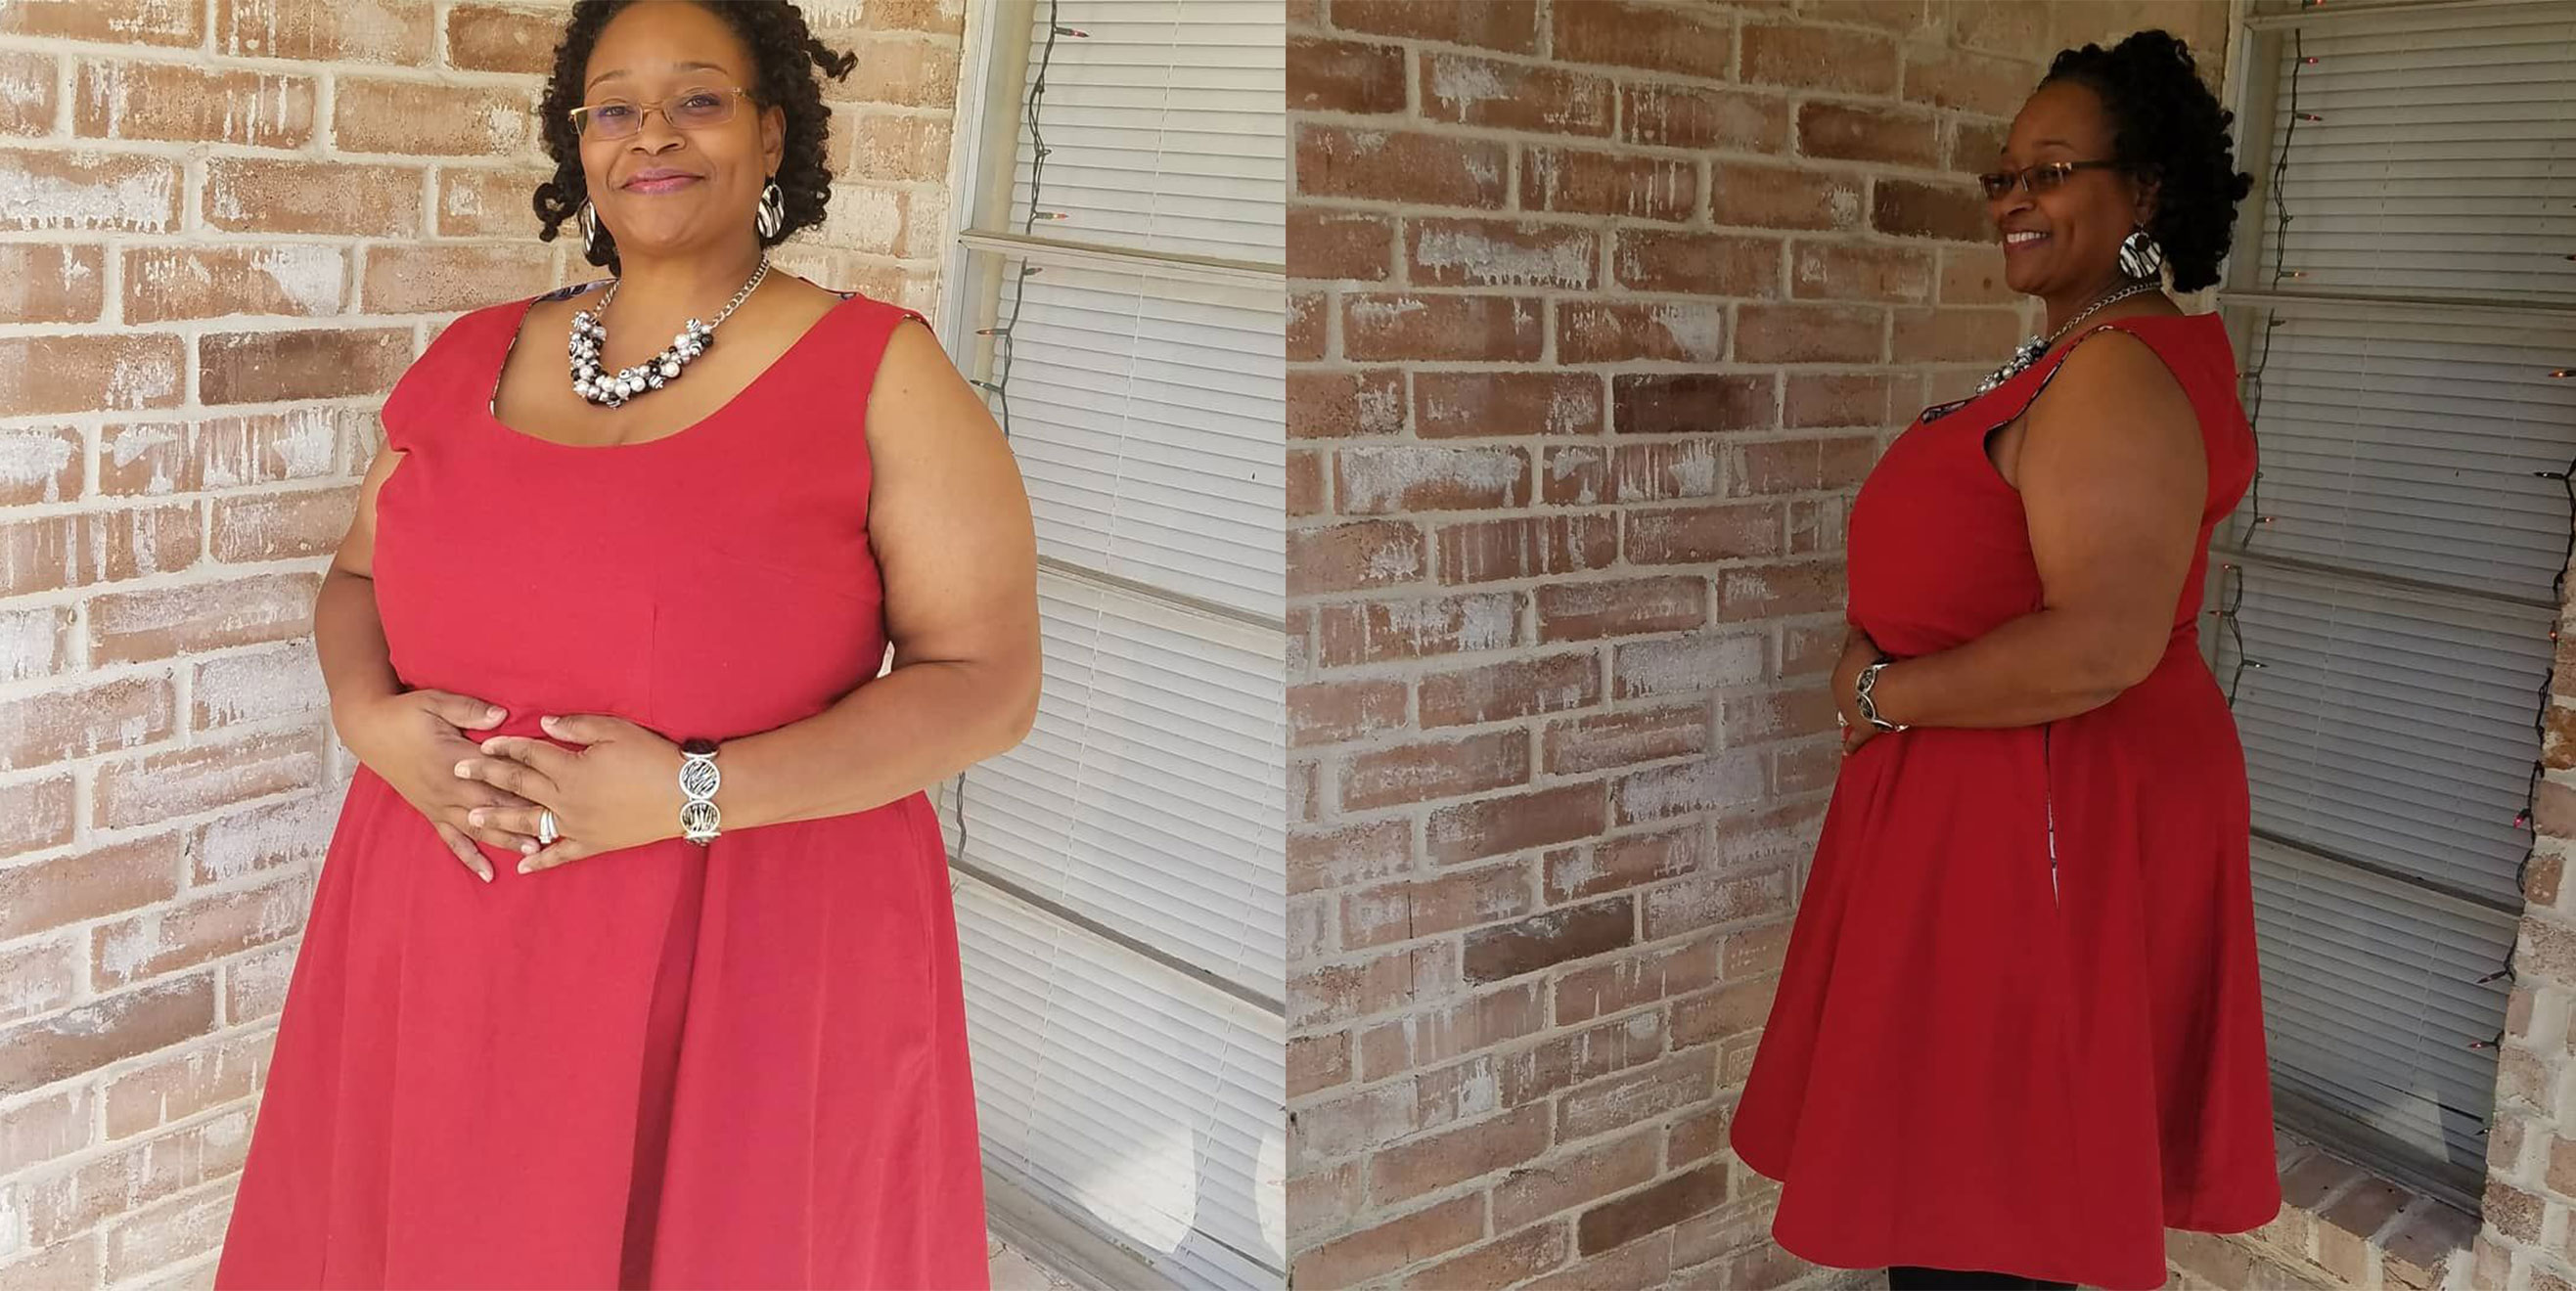
You can end up driving yourself crazy doing endless adjustments on a garment, but at this point, Nateida and I agreed that there was a really big improvement vs. where we started, so Nateida made her final garment with all these changes applied to her pattern pieces. And here it is!
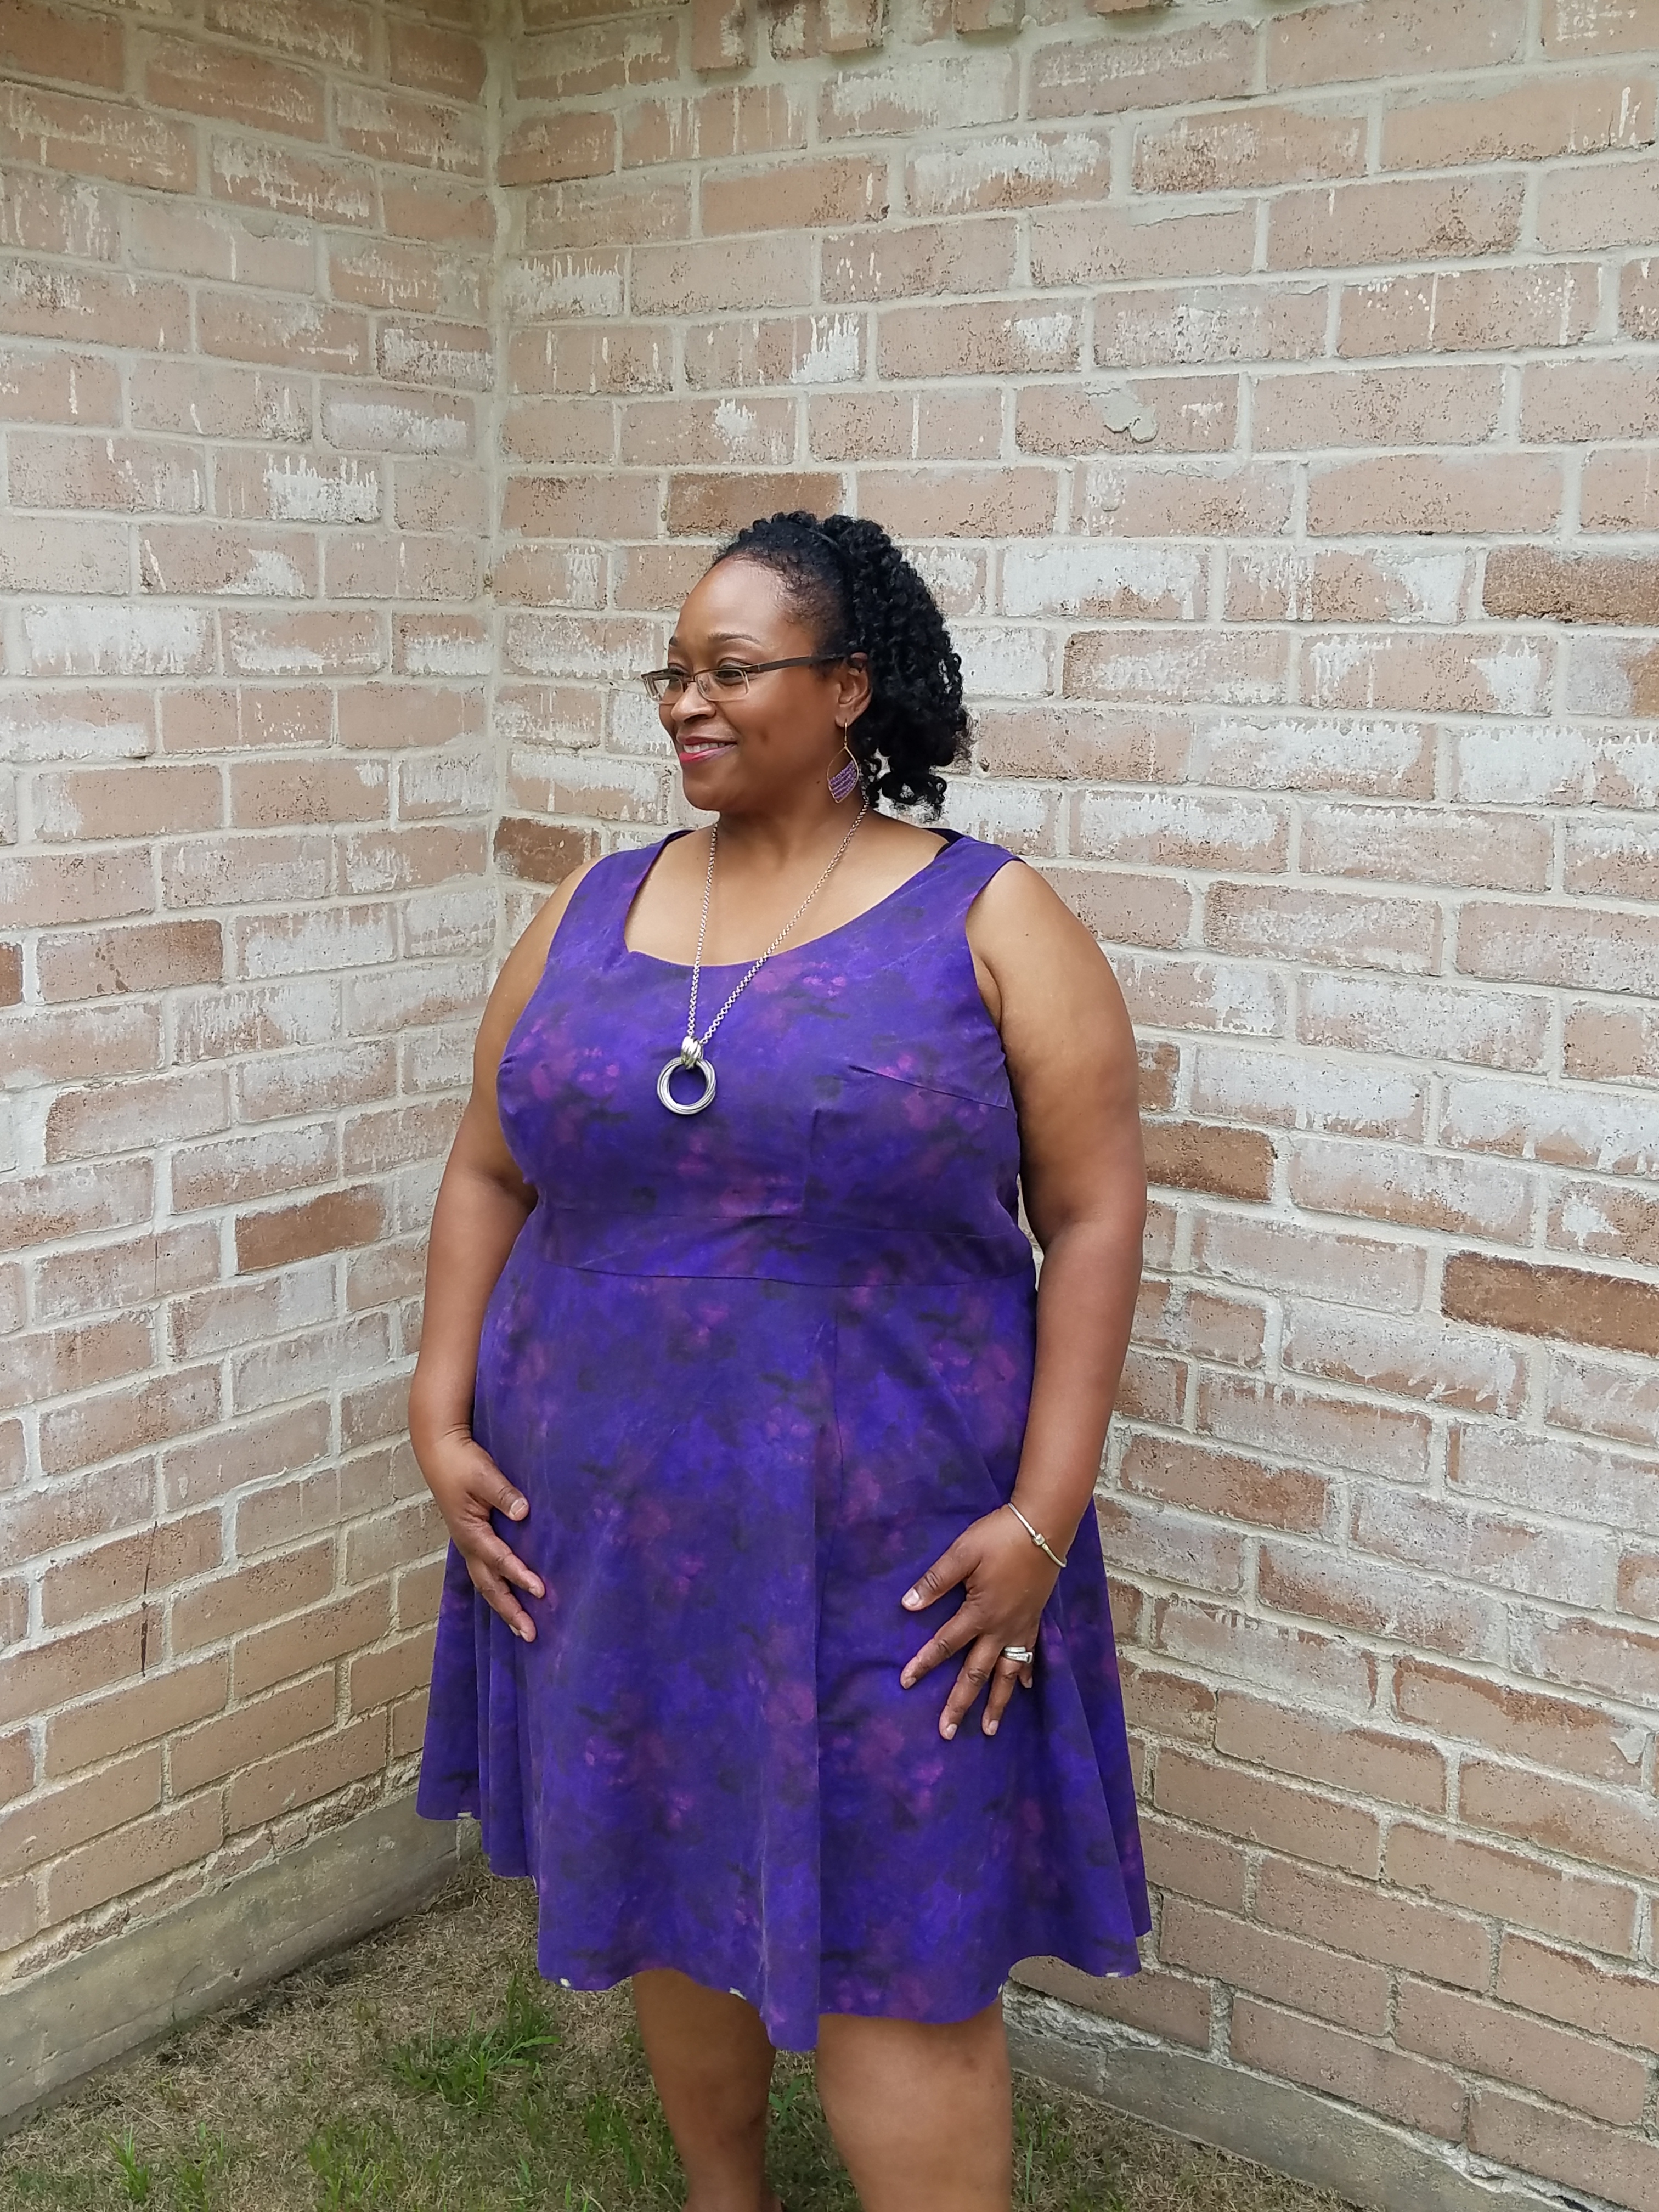
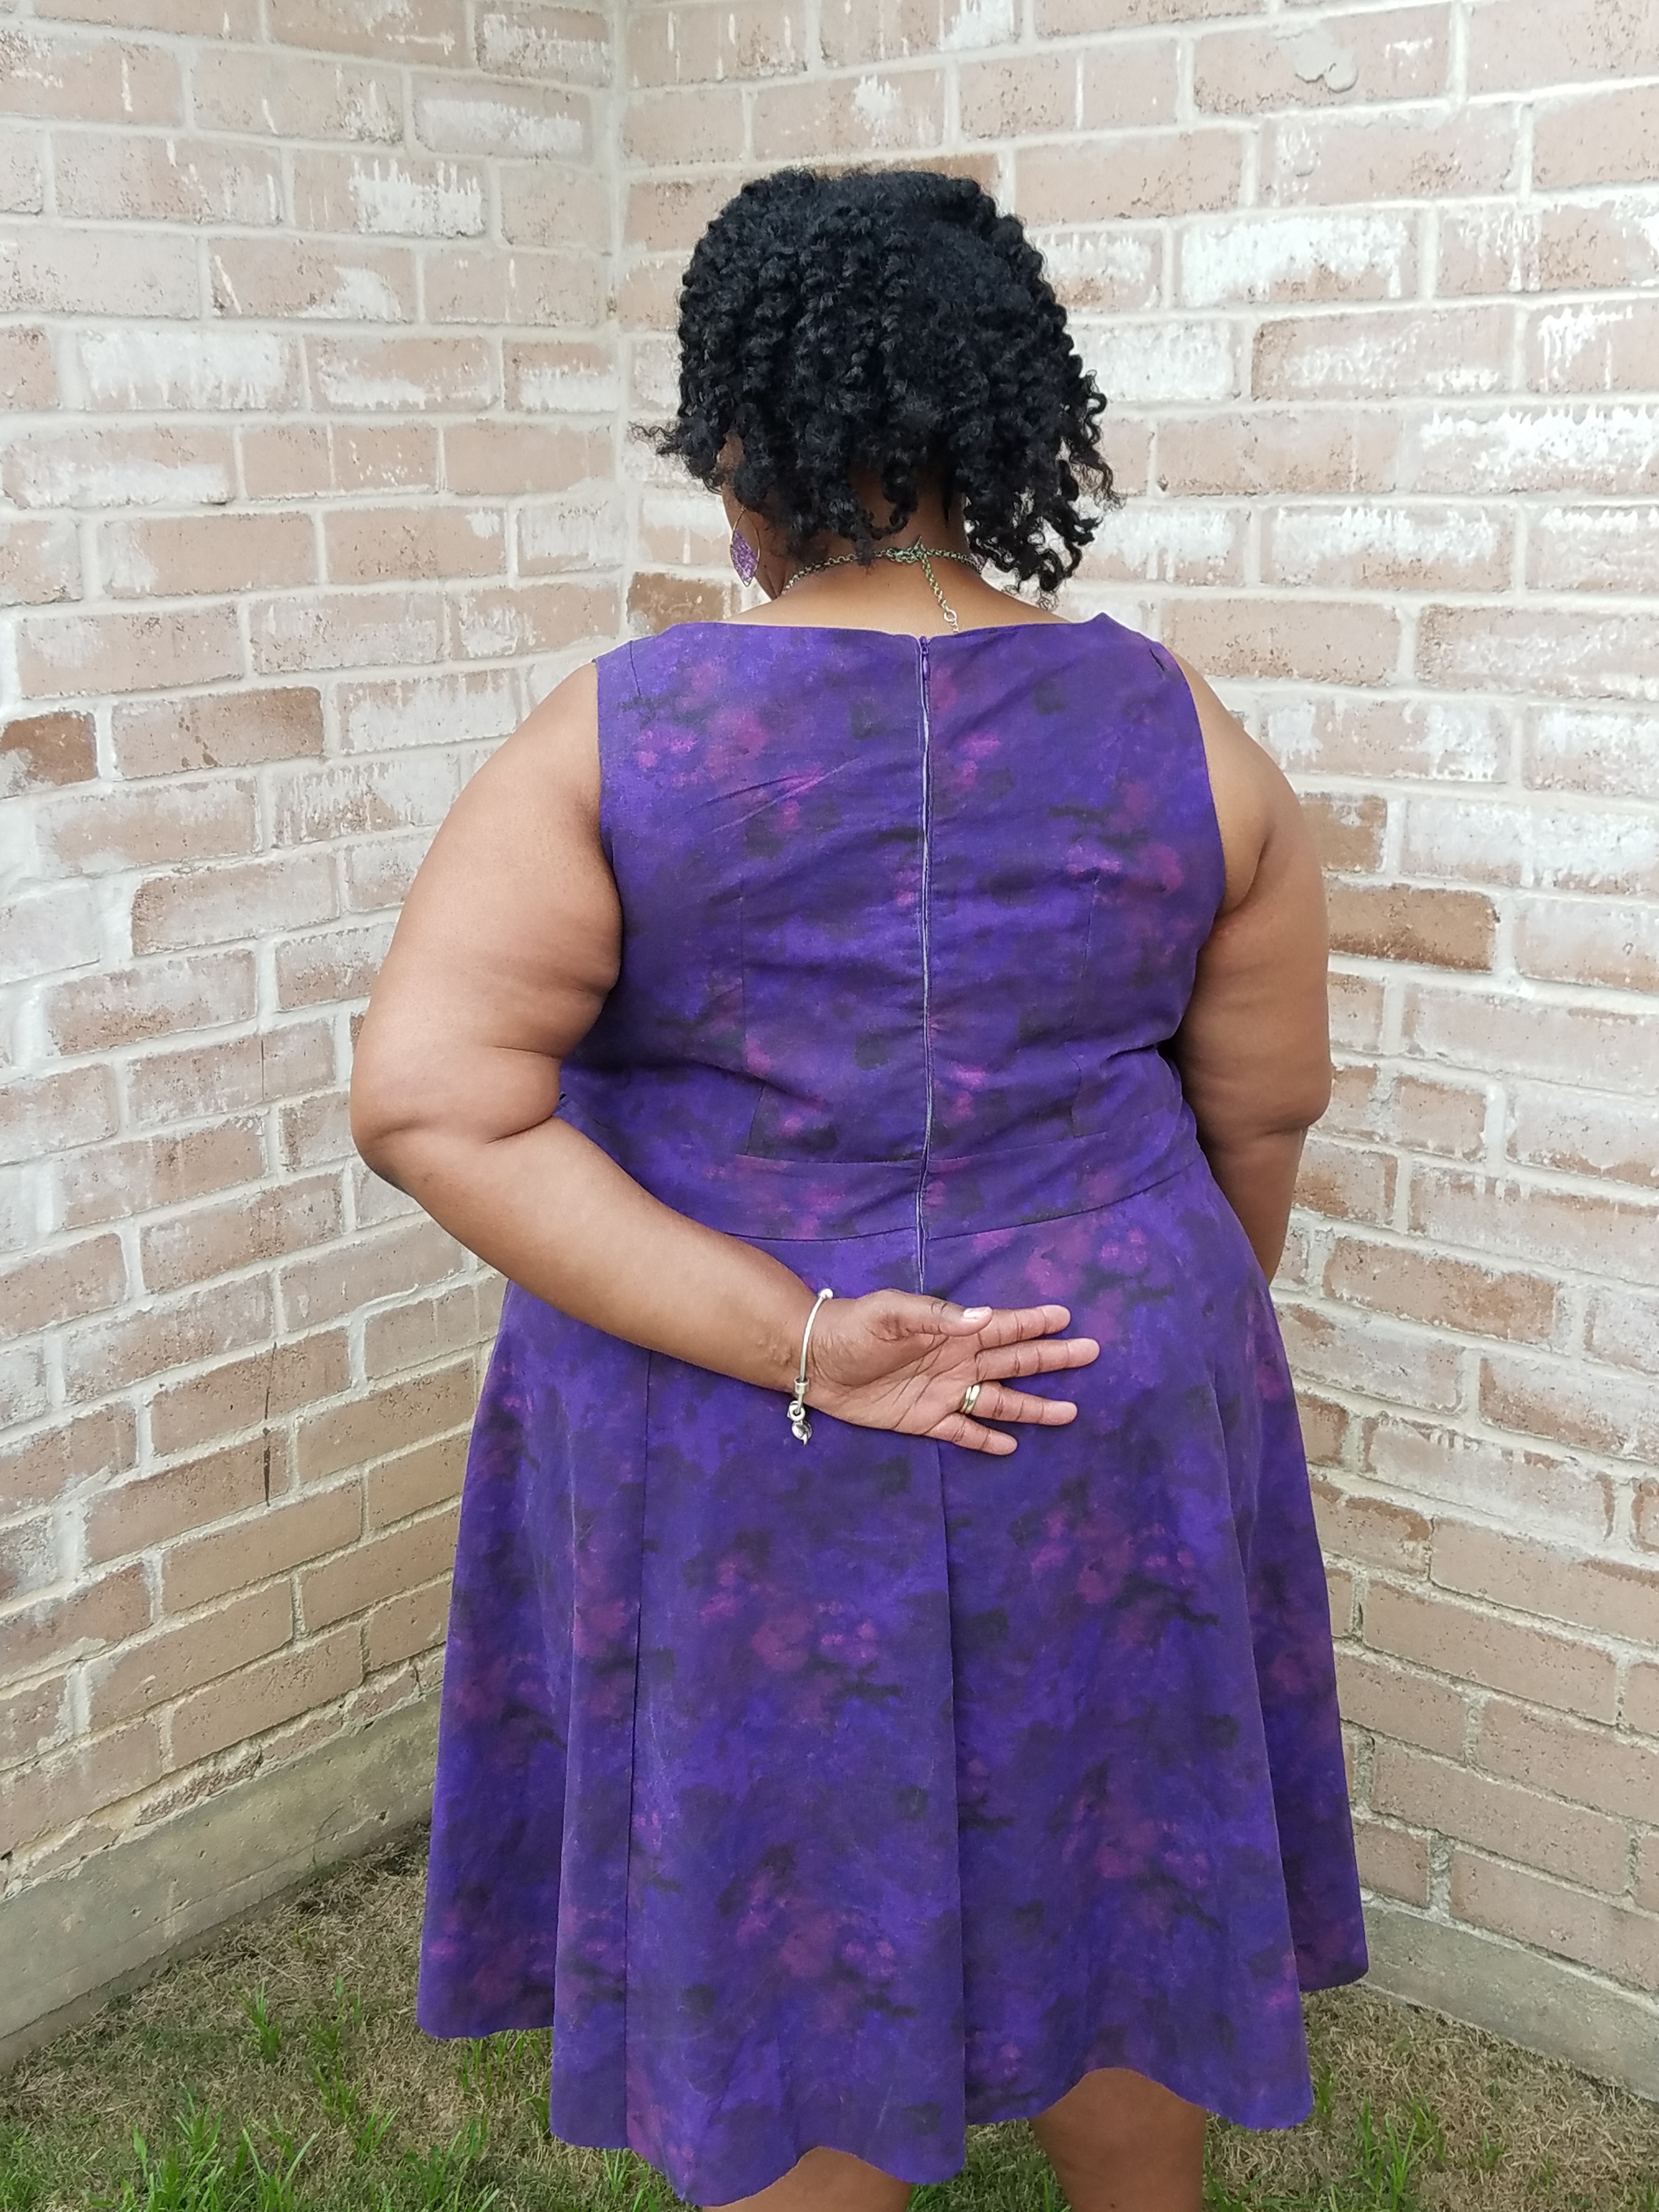
Such a big improvement over where we started! Nateida was so patient through the process – fitting over email is definitely a LOT harder than doing it in person, but I’m so pleased with the result she got. Of course, no garment’s ever perfect, and Nateida could continue making small tweaks on future versions, but it’s a beautiful dress that fits her well, and of course no non-sewist would ever notice anything wrong at all 😉
I asked Nateida to share a little bit about her experience and here’s some of what she said:
“When Jenny of Cashmerette announced the opportunity to submit to be possibly selected to participate in the Cashmerette Fit Clinic, I was ecstatic!! My goal for 2018 was to learn to work on the fit of the garments I was making and not continue to just sew up a bunch of ill-fitting garments. I absolutely love the Cashmerette pattern line and my favorite sewing pattern is the Upton Dress because it reminds me of a RTW dress I loved wearing.
The fitting process was a little daunting for me. Since my goal for 2018 was to begin to work on my sewing techniques and fit of my garments I knew there were probably some areas I needed help in, but I just didn’t know exactly what or how to do it.
I’m very happy with the process and the invaluable skills and techniques I picked up throughout the process. I knew I needed some of these adjustments, but I just couldn’t wrap my mind around the “what” and the “how” and so I’m grateful to have been part of this Fit Clinic. This has allowed me to incorporate what I’ve learned in the Cashmerette Fit Clinic and apply it to other garments I create for myself and that excites me! The Cashmerette Fit Clinic gave me the confidence and boost I longed for to learn to grow in my garment construction and fit journey and knowledge base.
My final Upton in my chosen fashion fabric turned out absolutely beautiful and the fit is perfect.”
In addition, Nateida has made a YouTube video about the whole process. She talks about all the steps, and you can also see her final Upton Dress in action. You can view it here.
I hope you enjoyed this first installment of Cashmerette Fit Clinic! Let me know if you found it useful, or if you have any suggestions for changes we could make in the future. And, if you’re interested in signing up to be a participant, fill out this form here.
This is amazing! It is so helpful to see how you choose the size and to follow the fitting journey. Seeing the issues and having them explained is so beneficial and then seeing the alterations is like having the light bulb go off. So often I make a muslin but am not sure what to do do next but this just clarifies the whole process. Even though the issues are not the same as mine the explanation is so valuable in helping future identification. Can’t wait for more of these! Thanks to you both.
This is SO helpful! I have some of the same issues so having your suggestions for “fixes” will be very useful to me in my future sewing. Thank you!
I agree with a comment above – even where her fit issues are sometimes different than mine, it was really helpful to read how you approach adjustments, the order in which you make them, etc. And I love that even the final dress has minor imperfections, which is a reminder that the journey is as important as the process. I found this post incredibly motivating. (I was also relieved to hear that the Upton Dress, which is one of my first patterns, is harder than some of the other, seemingly effortless patterns floating around! Although I think the payoff of a fitted woven dress will be worth it.)
Oh my goodness! I have sloping shoulders!! I knew that in theory (damn slipping bra straps), but I had always just made do with narrow and forward shoulder adjustments. Adding a sloping shoulder adjustment should be the perfect addition to get my fit spot on. Thank you so much for this. And thank you Nateida for sharing the whole process with us. It can be so daunting for us sewists to share imperfect makes online, but this is how we share our knowledge and grow together. The Fit Clinic is a winner!
This is excellent and I learned so much that I can apply to my own fitting adjustments. Thank you Nateida for your incredible patience to go through so many fittings!
This was an amazing process. I learned so much, thank you again Jenny for all your help!
This! This is the type of teaching that I love and wish for more often. I didn’t give the upUpton. Second look and now I want the pattern! Truly invaluable to me, and I suspect many others. Thank you, Jenny!
Very, very useful, thanks! The finished dress is gorgeous too, and suits Nateida beautifully .
Thank you. Nateida you look gorgeous! What a worthwhile effort.
Nateida, you look really sharp! I’d say the fit looks professional. I admire your patience to get the right fit, and it paid off beautifully. You are an inspiration.
what a great lesson from photo 1 to the last what a change and done without any technical terms a non trained sewer would understand. Thank you, looking forward to more of these. Lynne Australia
Wow!! What a great post. I enjoyed reading your thorough details on fit adjustment and reading Nateida’s viewpoint of the process. I am looking forward to reading more of these.
Nateida looks AWESOME in her new dress, and you can tell she feels great wearing it from her beautiful smile. Great job, and thanks for sharing how you solved the fitting challenges with her.
Very helpful, look forward to seeing more
What a terrific post – I look forward to reading more in the series!
This is awesome! Thank you for showing how to make small adjustments in different areas to create a wonderful fitting dress!
It is very helpful to see the whole process of fitting, step by step, with explanations and photos, on an actual person, rather than just one before and after, or generic diagrams. I have yet to make the Upton but now I have a good idea of what kind of process to expect. Nateida looks beautiful in her final dress. Thanks for sharing.
What an awesome clinic!!! I love this – so helpful! the detail and instruction is wonderful. It was amazing to see the difference between the first dress and the last. Beautiful. Thanks, Jenny and Nateida!
It’s been awhile since I attempted this pattern but this makes me want to try again. Maybe I’m starting with the wrong size but I’m not clear on how to decide the size and cup combo when the same full bust number is shown in multiple sizes? ie mine is 48 – how do I know whether to start with 18 G/H or 20 C/D?
We usually recommend doing the size that’s closest to your waist/hip size – i.e. closest to your frame size. However, if you have a large bust (F+) then I’d always recommend doing the G/H, and the same if you have a narrow upper frame/shoulders, then go for the smaller size, larger cup.
Wonderful fit class, and wonderful to see how a good fitting garment can make our day. Model looks great! Would love to see a pants fitting class!
I loved reading this!!!! I can never tell what adjustments I really need so seeing it done on someone else makes so much sense!!!
This was encouraging. If I’d made that first one , I’d have wadded it and never bothered with the pattern again. When fit correctly this is a lovely dress. I wish my curves were on top. Probably a 26 shoulder, 28 bust, 32 waist and 36 hips. will you be doing any fitting clinics in that direction?
This was so interesting. I’ve read a couple of pattern drafting books, with an eye towards adjusting the fit on patterns for myself, but seeing the practices used on a body instead of a diagram is much more helpful!
This is extremely helpful! Thank you Nateida and Jenny as I’m sure this was a difficult and time consuming experience long distance. I will refer it this article many times. I am an apple, or maybe diamond, shape but have some similar issues. I’m just about to make my 3rd muslin for the Harrison Shirt and haven’t attempted my Upton Dress Pattern yet.
Can you fix the link for the image in round 1 describing the grading from the shoulders to the bust?
I’ve just tried on my Upton before adding the zip and the fit issues really resemble Nateida’s. I made a 28 E/F top, but now I’m wondering can I grade the shoulders or should I just do a 26 G/H with FBA.
Graded out to 32 at the waist/hips but I think I’l go bigger next time with that too.
I think I can fix this wearable muslin by narrowing the top of the zipper and pinching the underarm side seams.