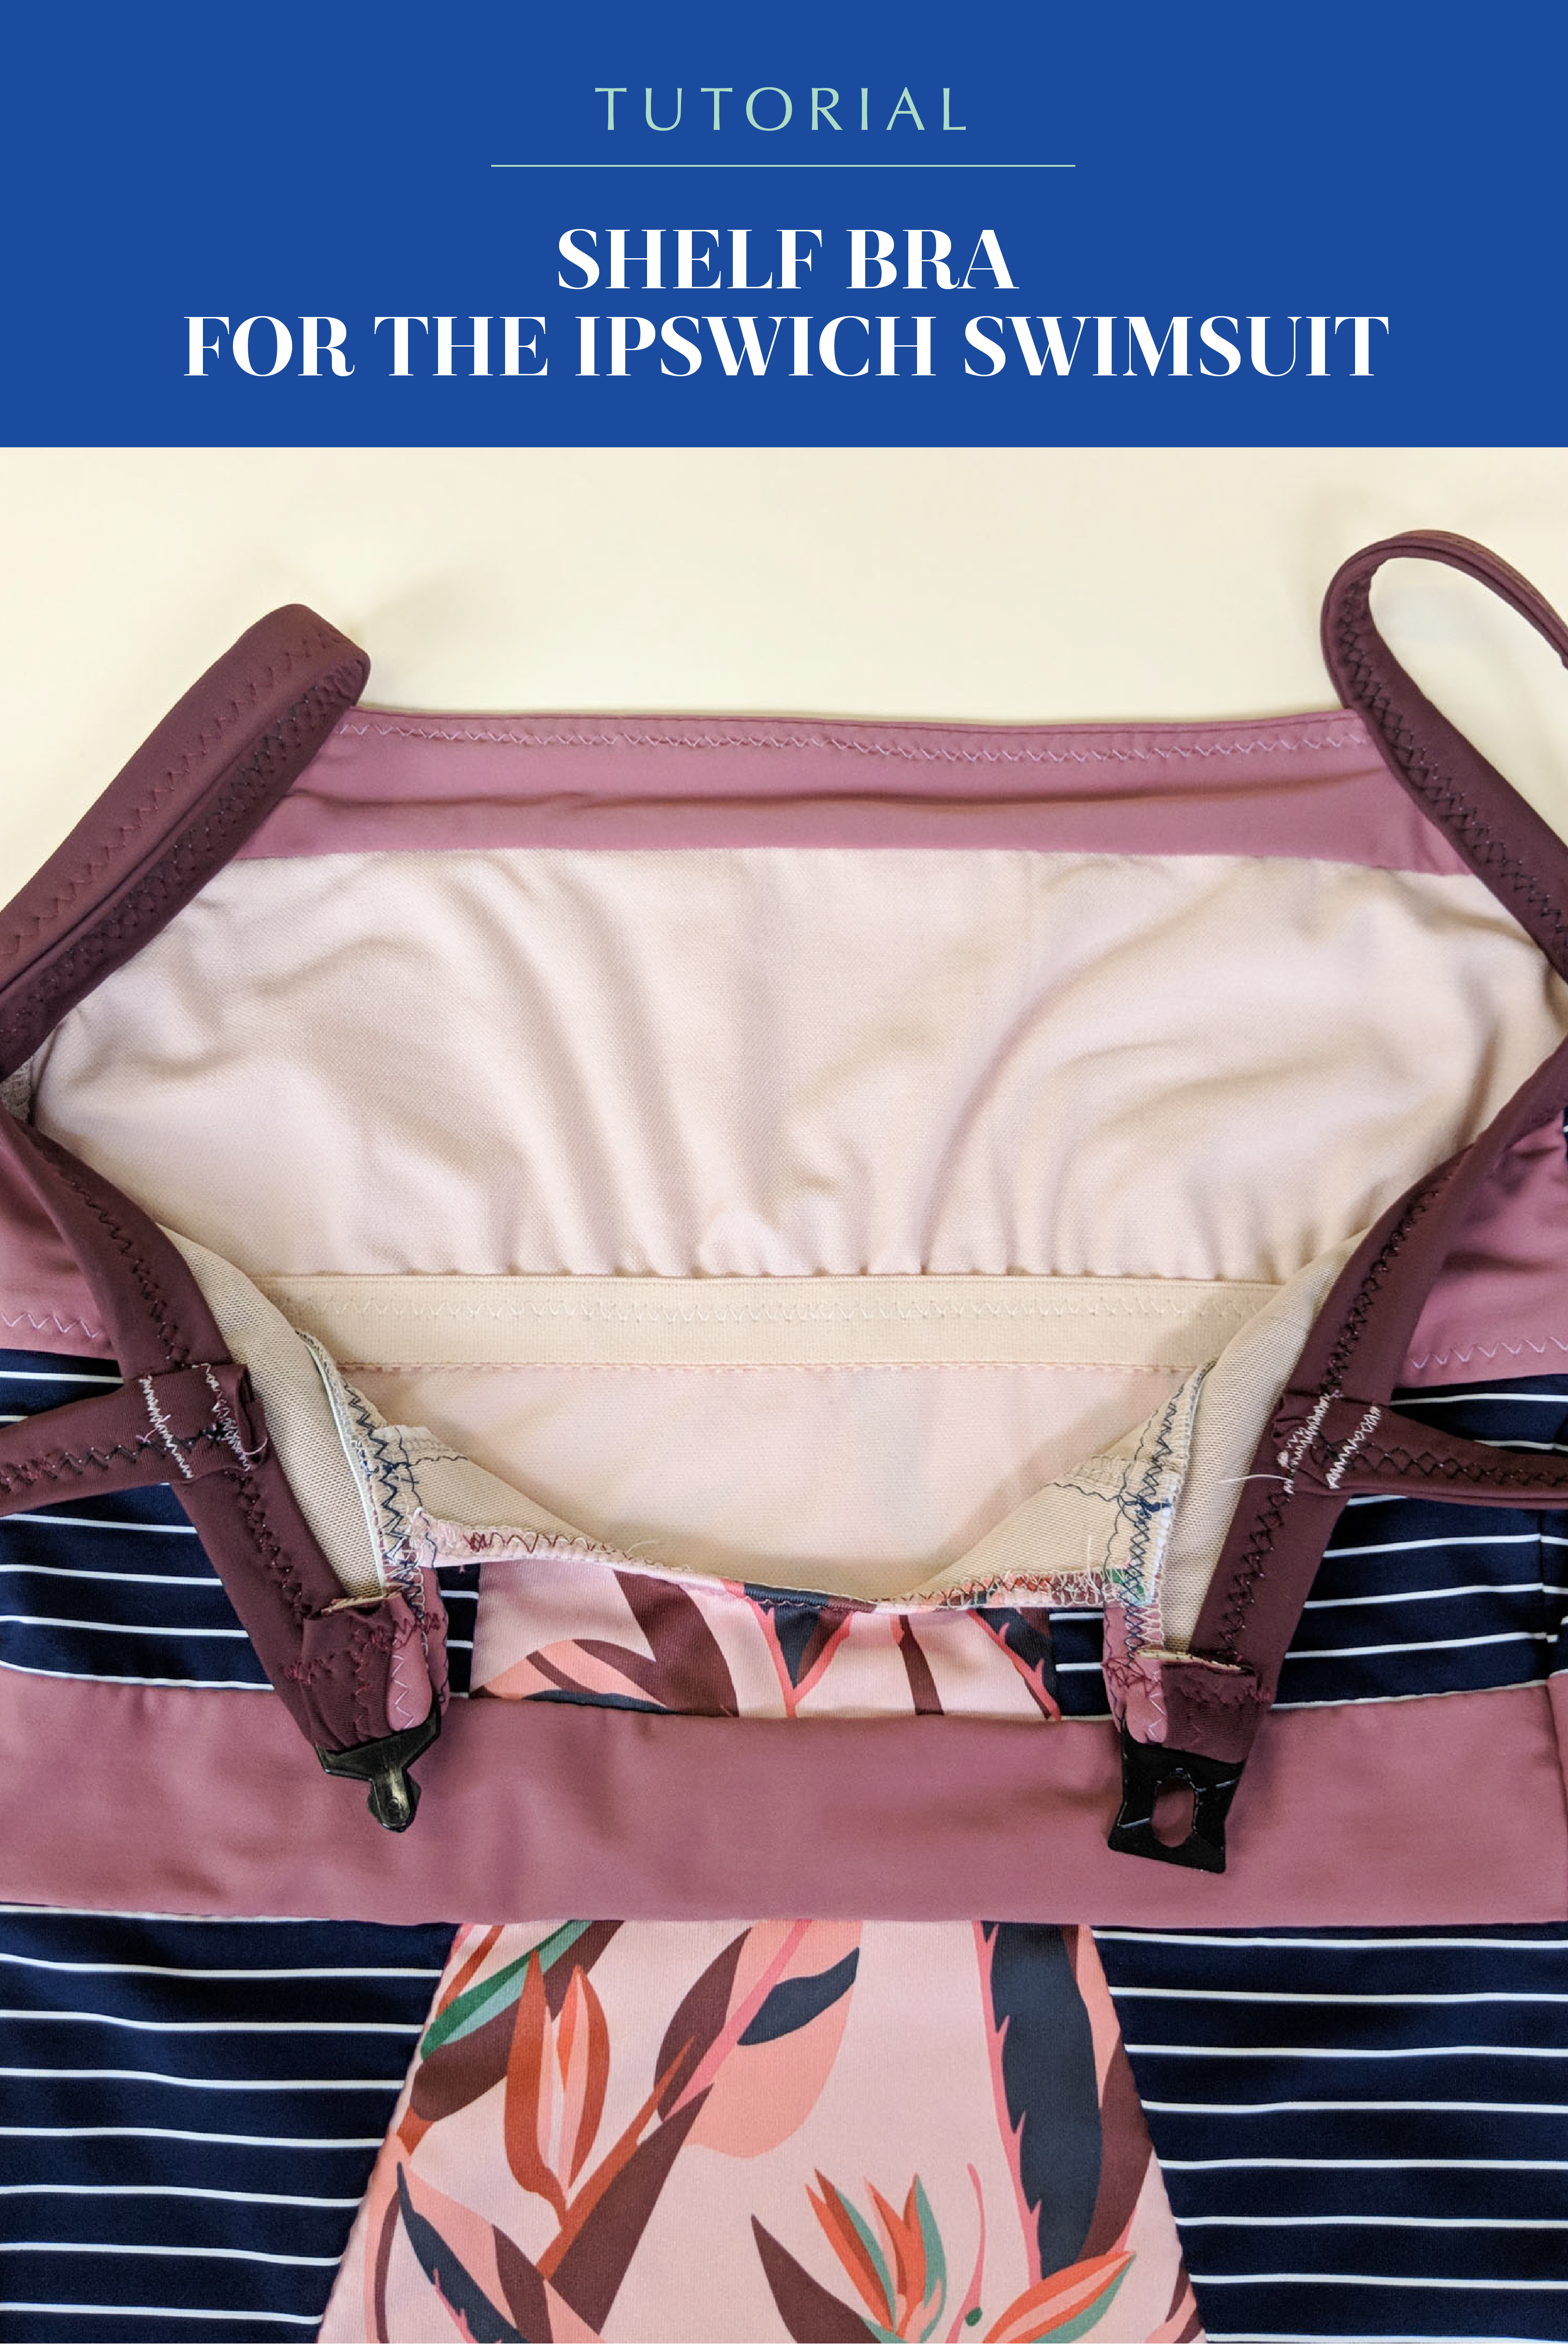
One of the great things about the Ipswich Swimsuit is how supportive it is with the underwired, foam-cupped internal swim bra, but if you don’t need or want that much support, it’s quite easy to replace it with a shelf bra. Or of course you can leave the bra bits out entirely if you’d rather, but today I’ll show you how to draft and sew a shelf bra alternative.
We’re going to draft our shelf bra off of the front lining piece. I started by lowering the neckline of my suit (after making a muslin), which is why my front lining piece looks cut off. If you aren’t including the swim bra, you can lower the neckline without worrying about showing the bra. For reference, I lowered mine by the width of the neckband and redrafted a neckband just slightly shorter than my new finished upper front.
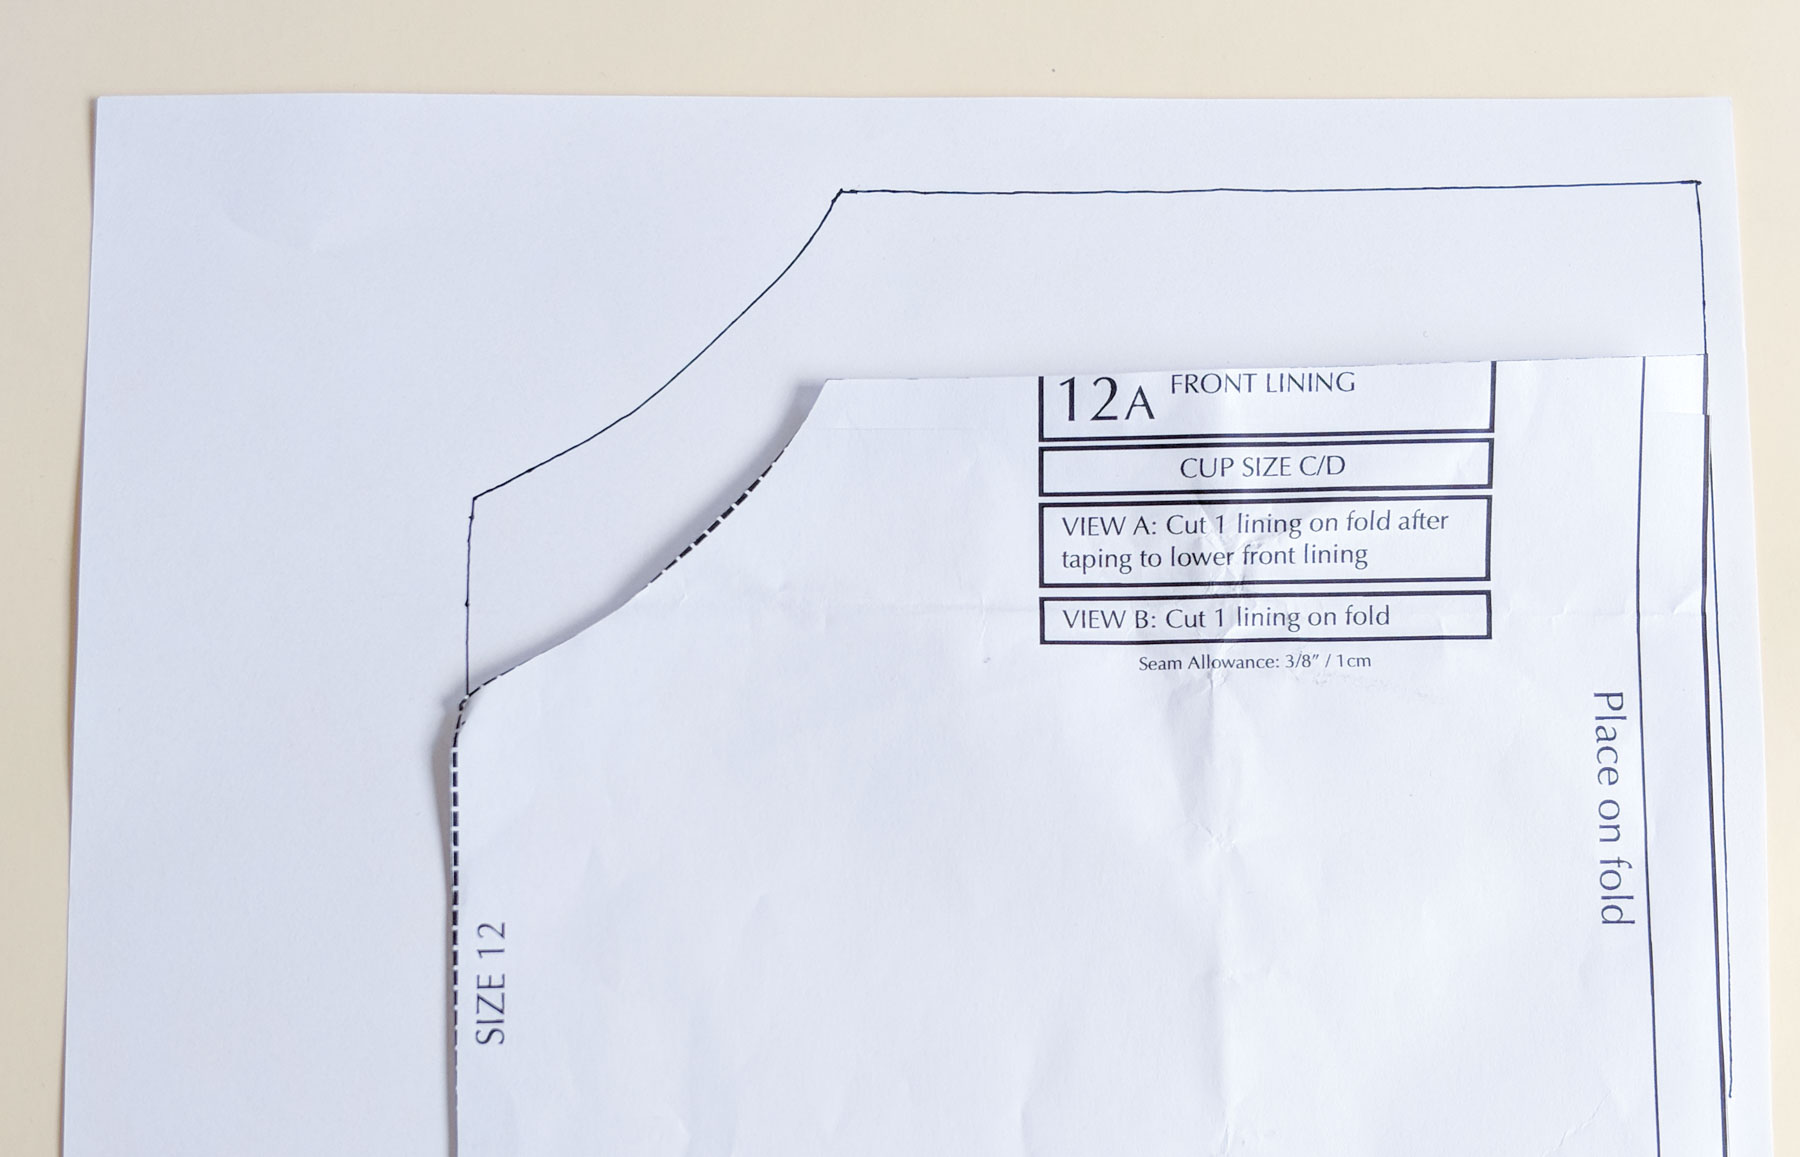
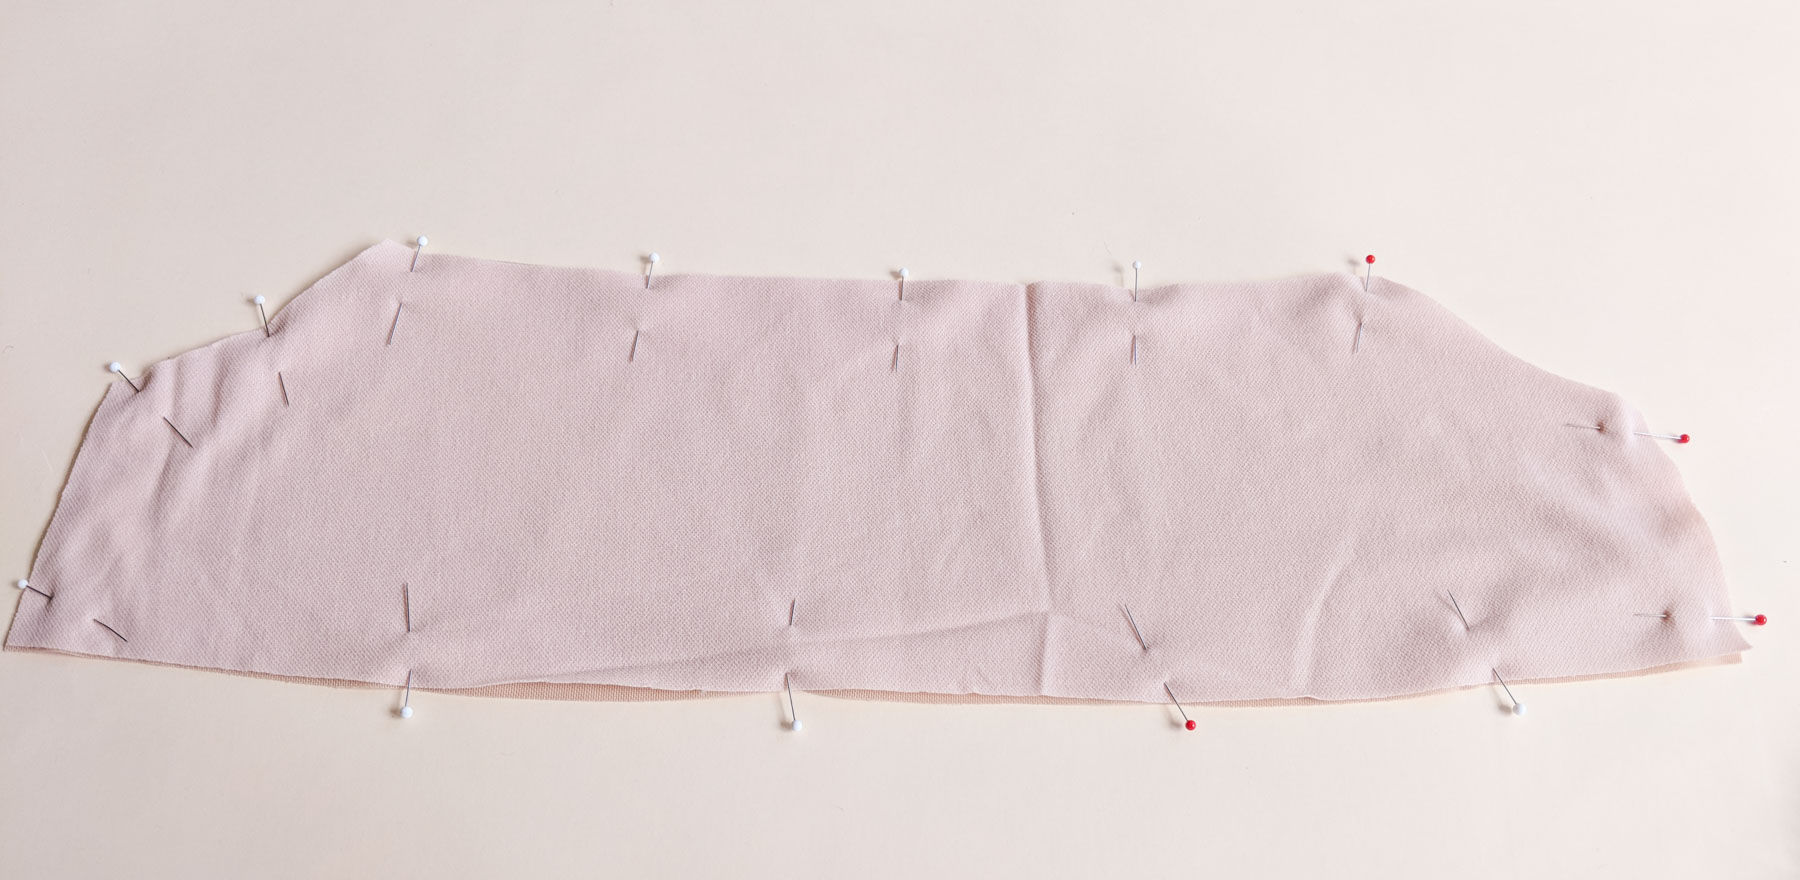
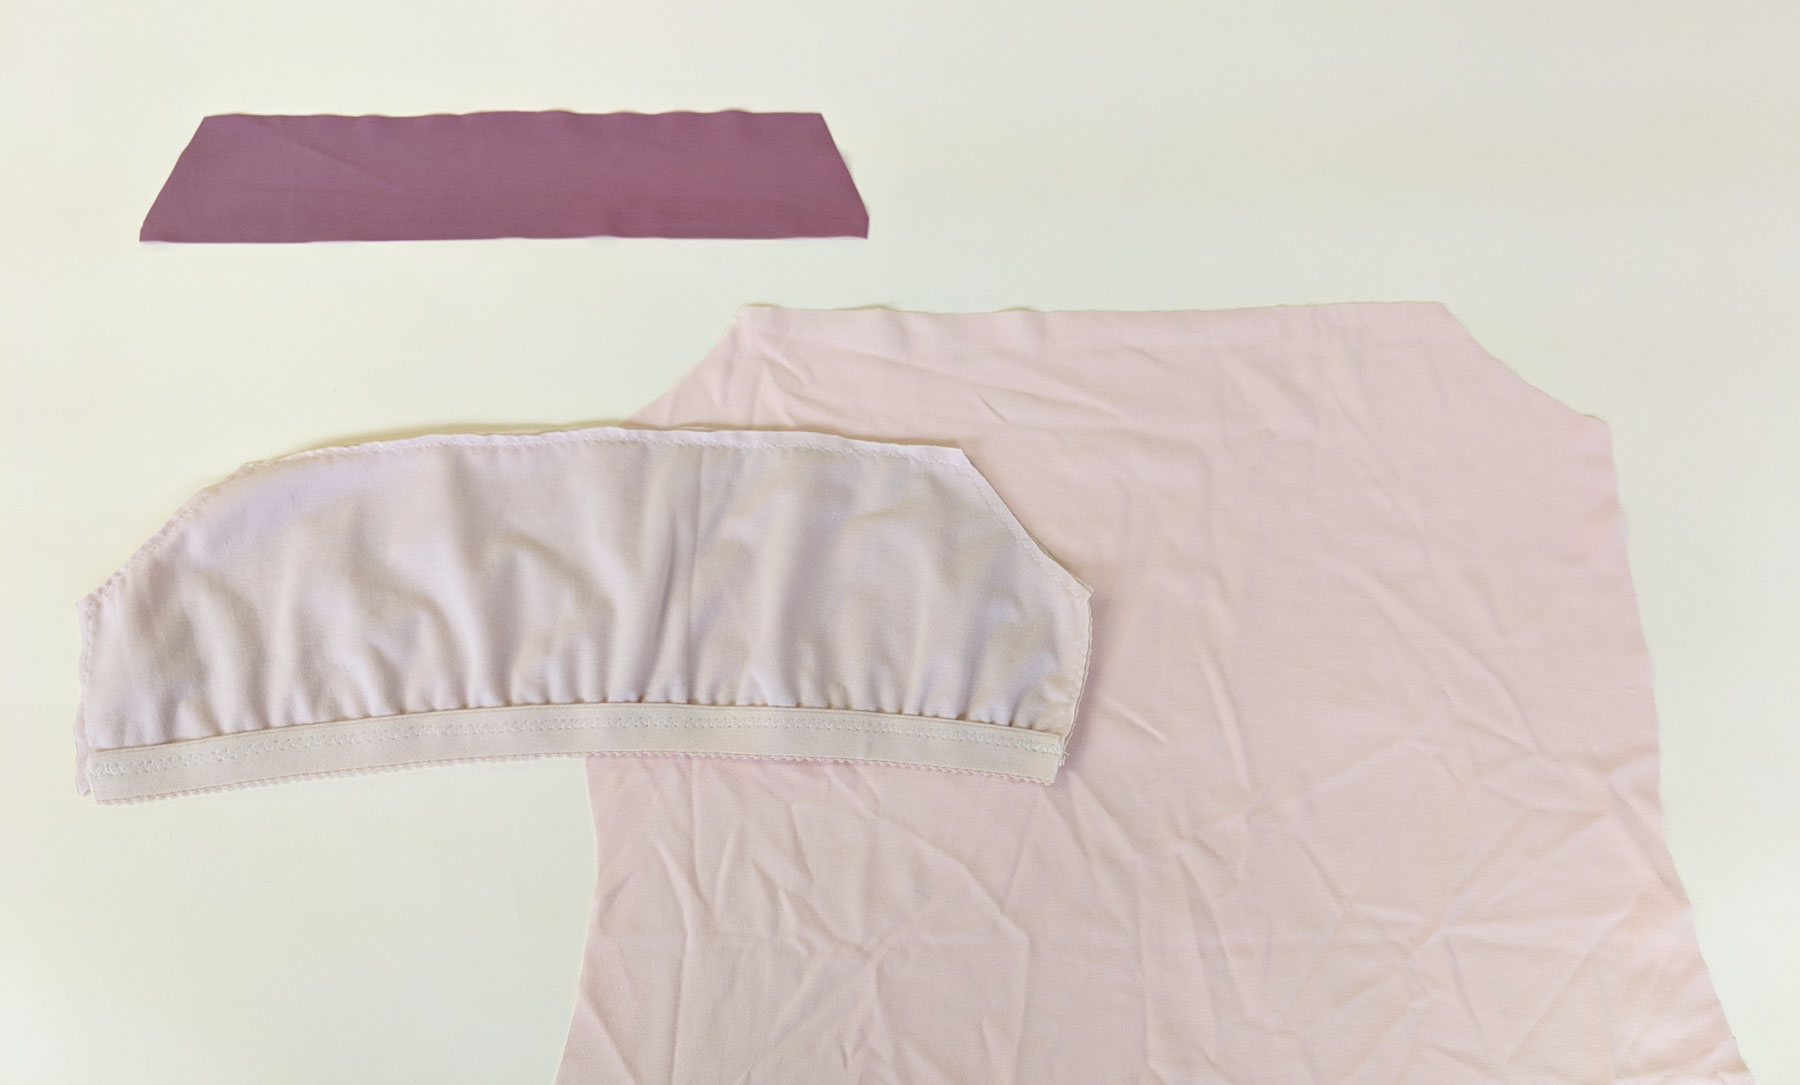
Trace the upper portion of your front lining onto a new piece of paper. Make sure you include the armscye, center front, and side seam as well.
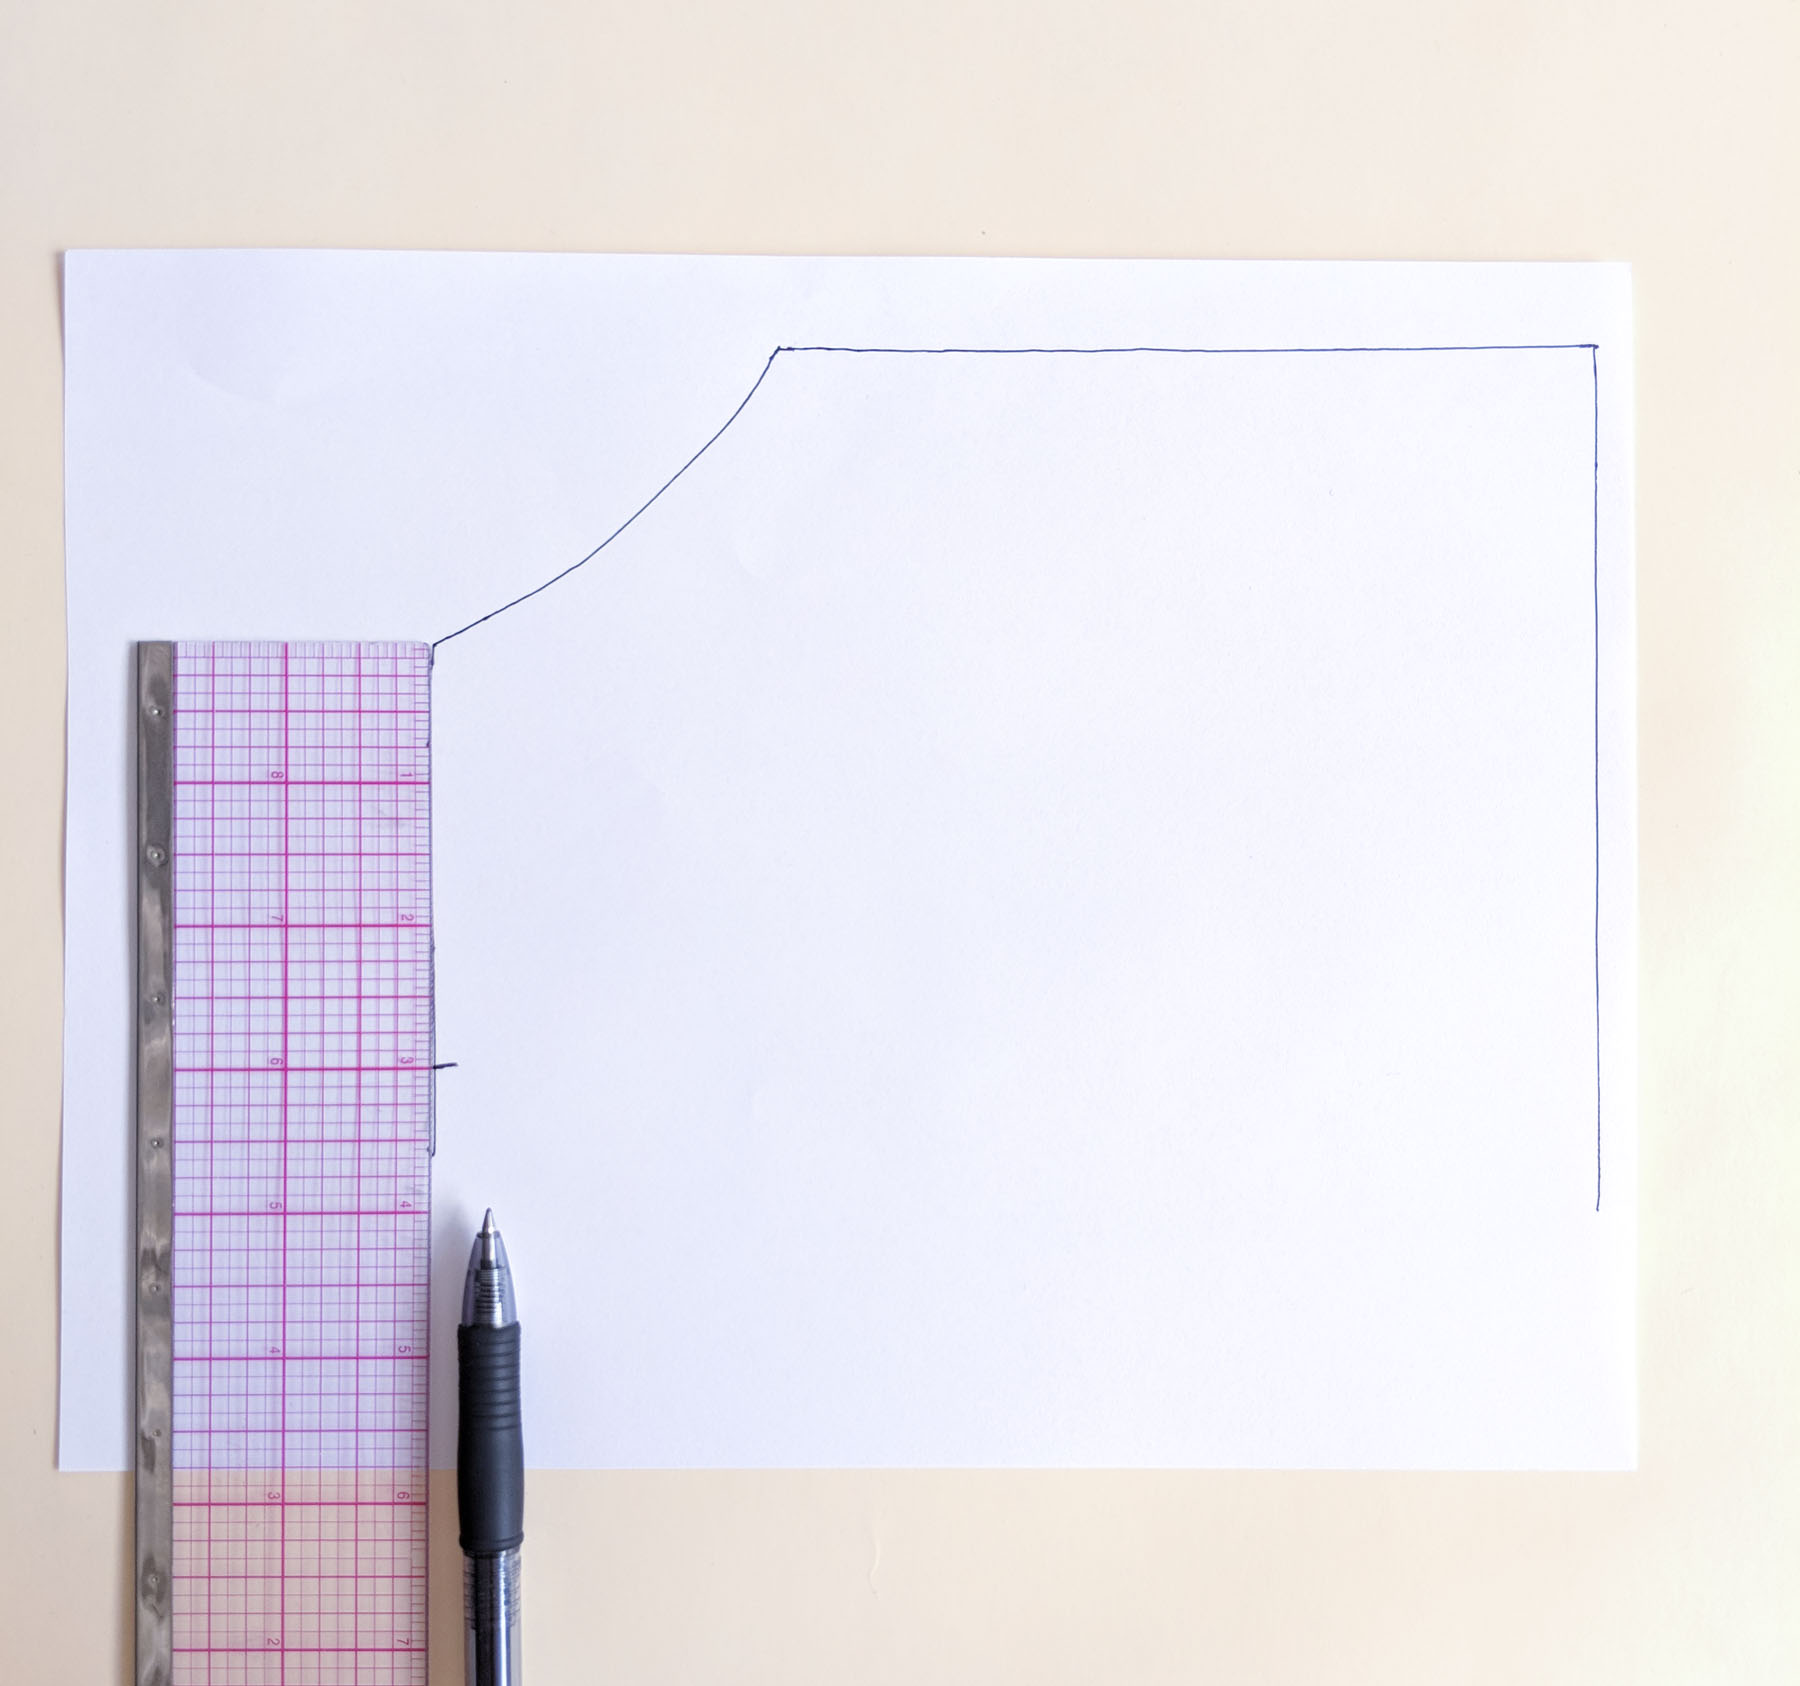
As far as the length of your shelf bra, you can either make a muslin first and measure down the side seam where you want the underbust elastic to hit, or you can use the side band piece from the bra as your reference. Mark this distance down on the side seam you traced and draw a line from that point to the center front, making sure it’s perpendicular to the center front fold.
Next, mark an approximate bust point about two thirds of the way between the center front and the beginning of the armscye. This doesn’t need to be where your actual bust is because the ease we’re adding will be distributed throughout the shelf bra.
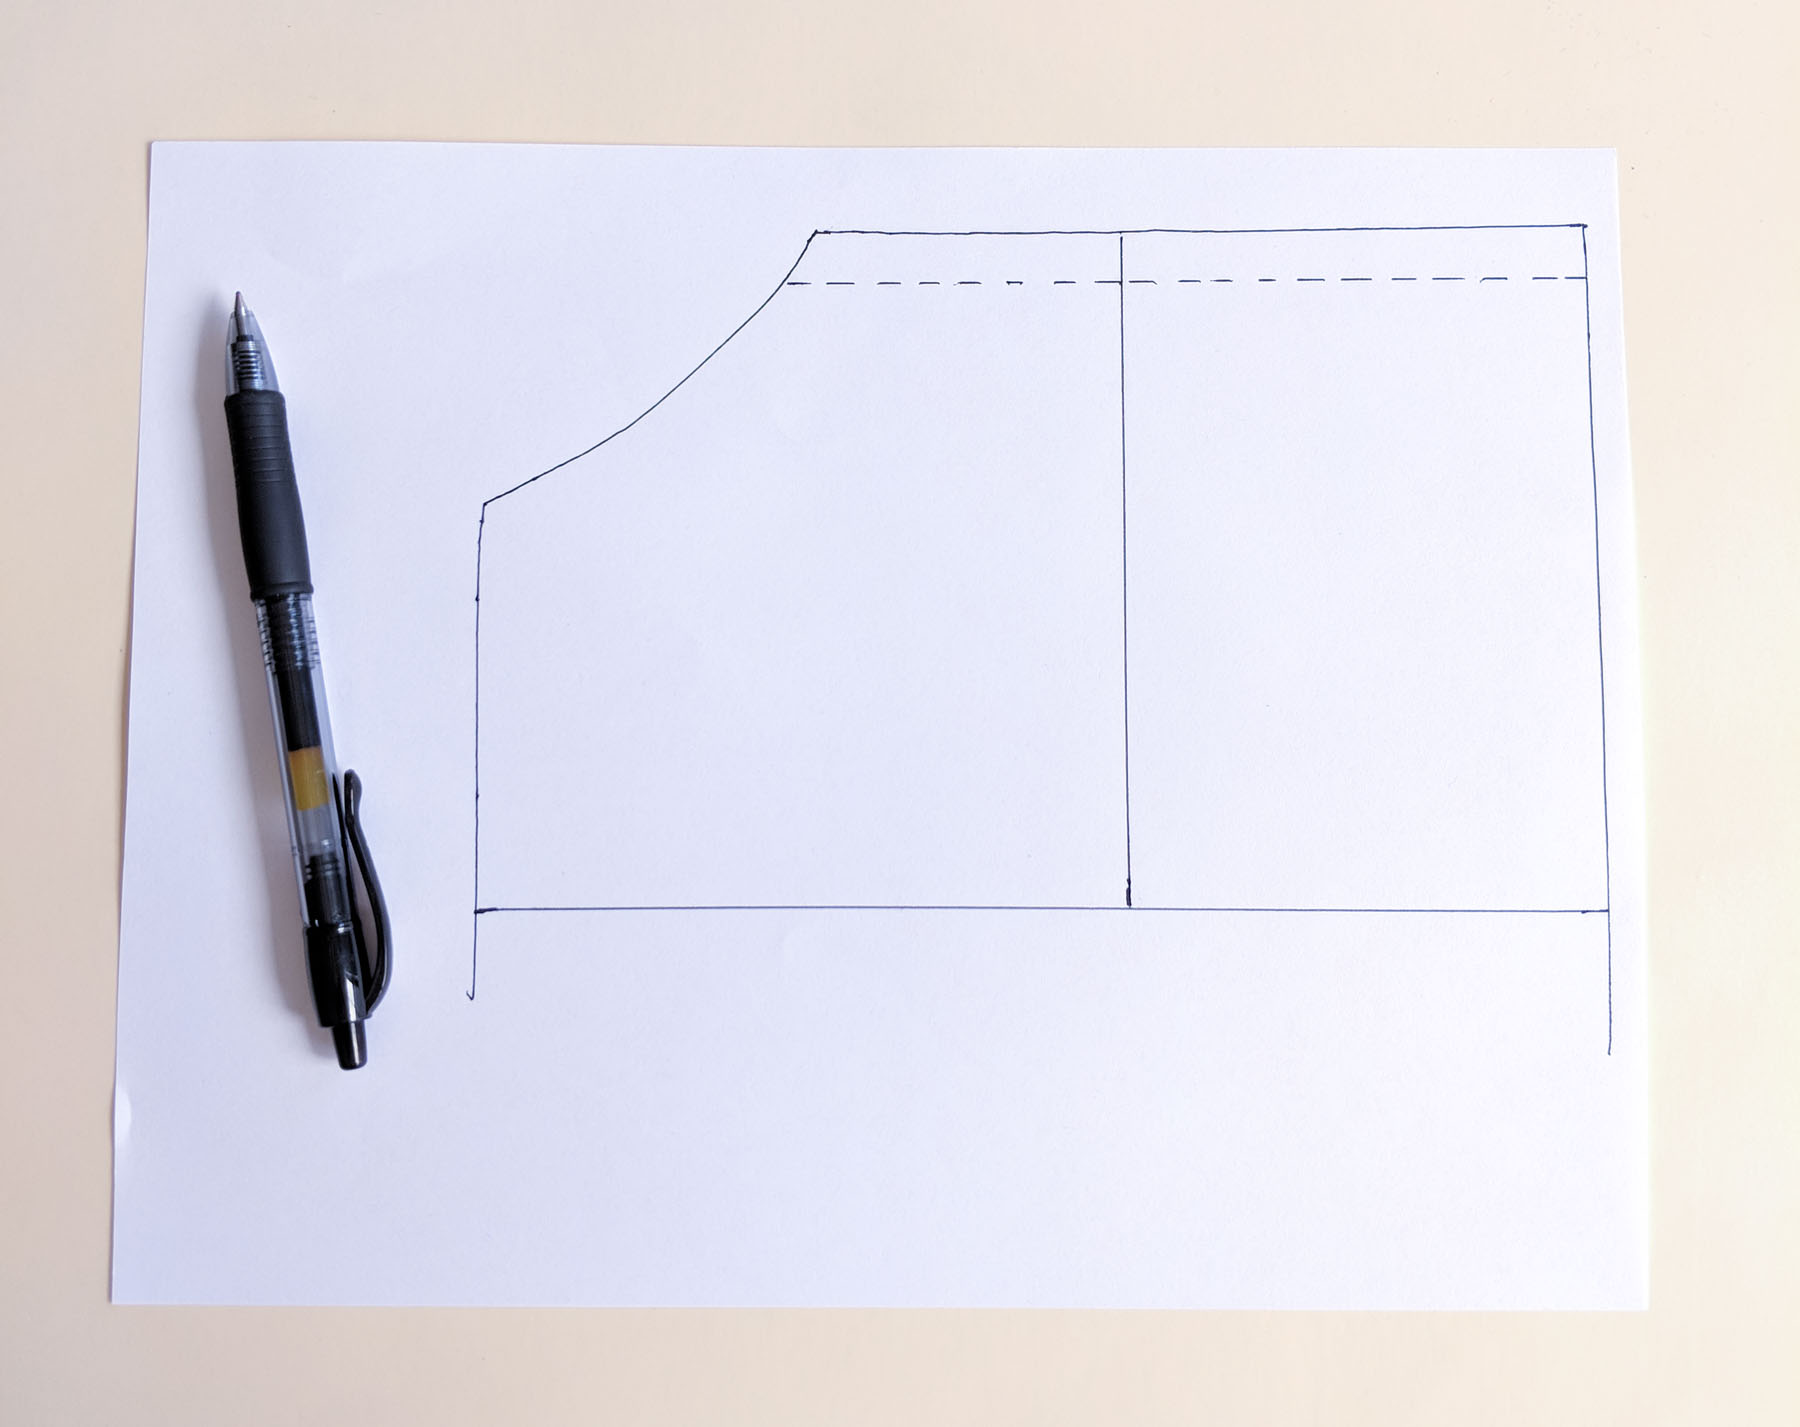
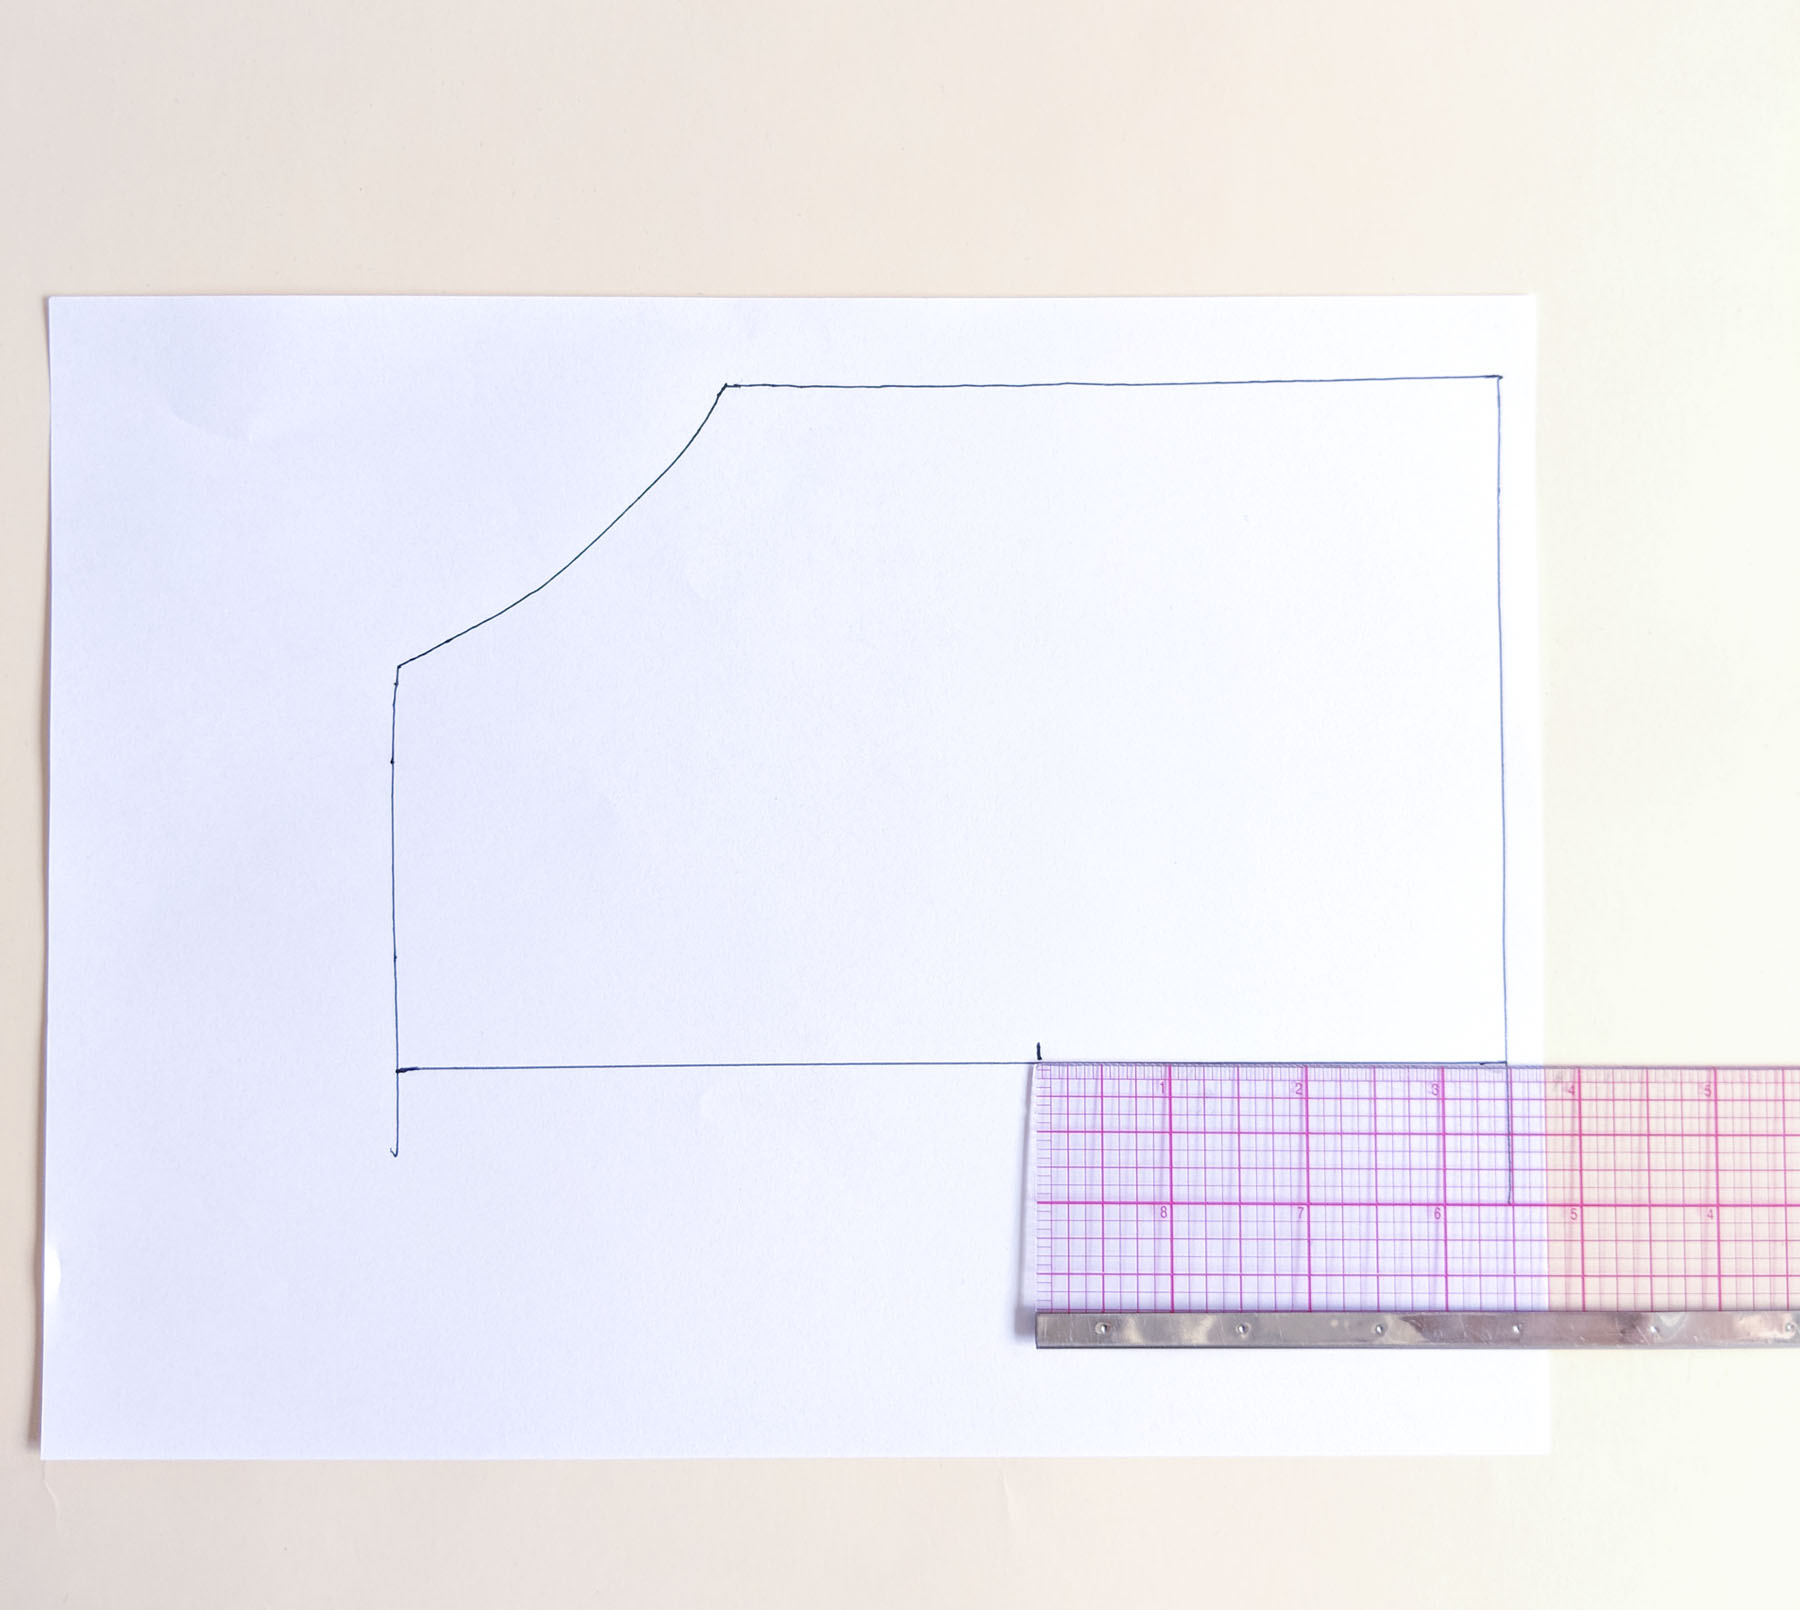
Draw a vertical line from this marking up to the neckline and mark in the seam allowance on the neckline.
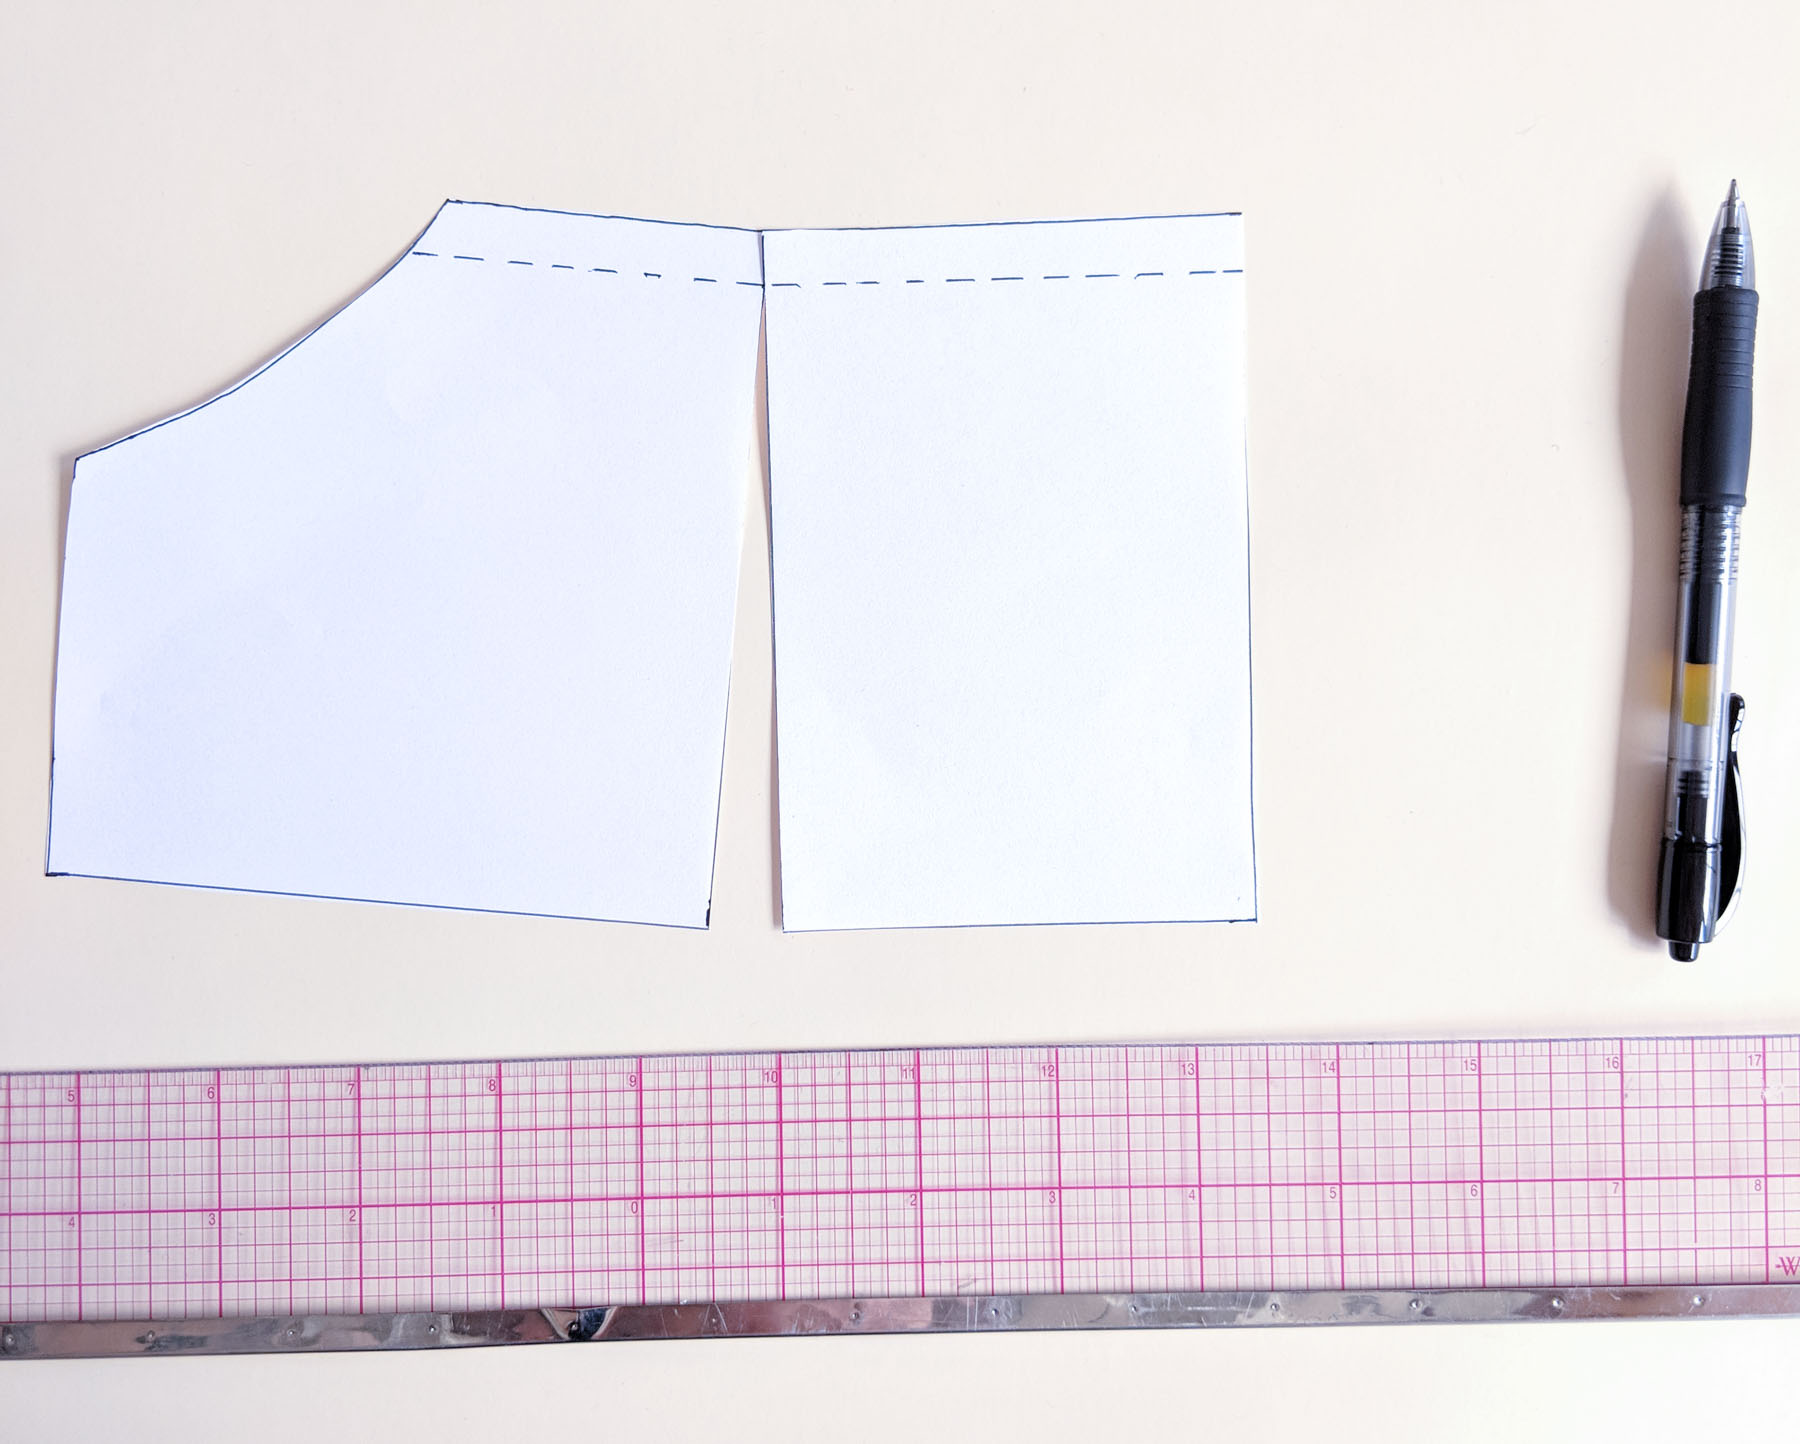
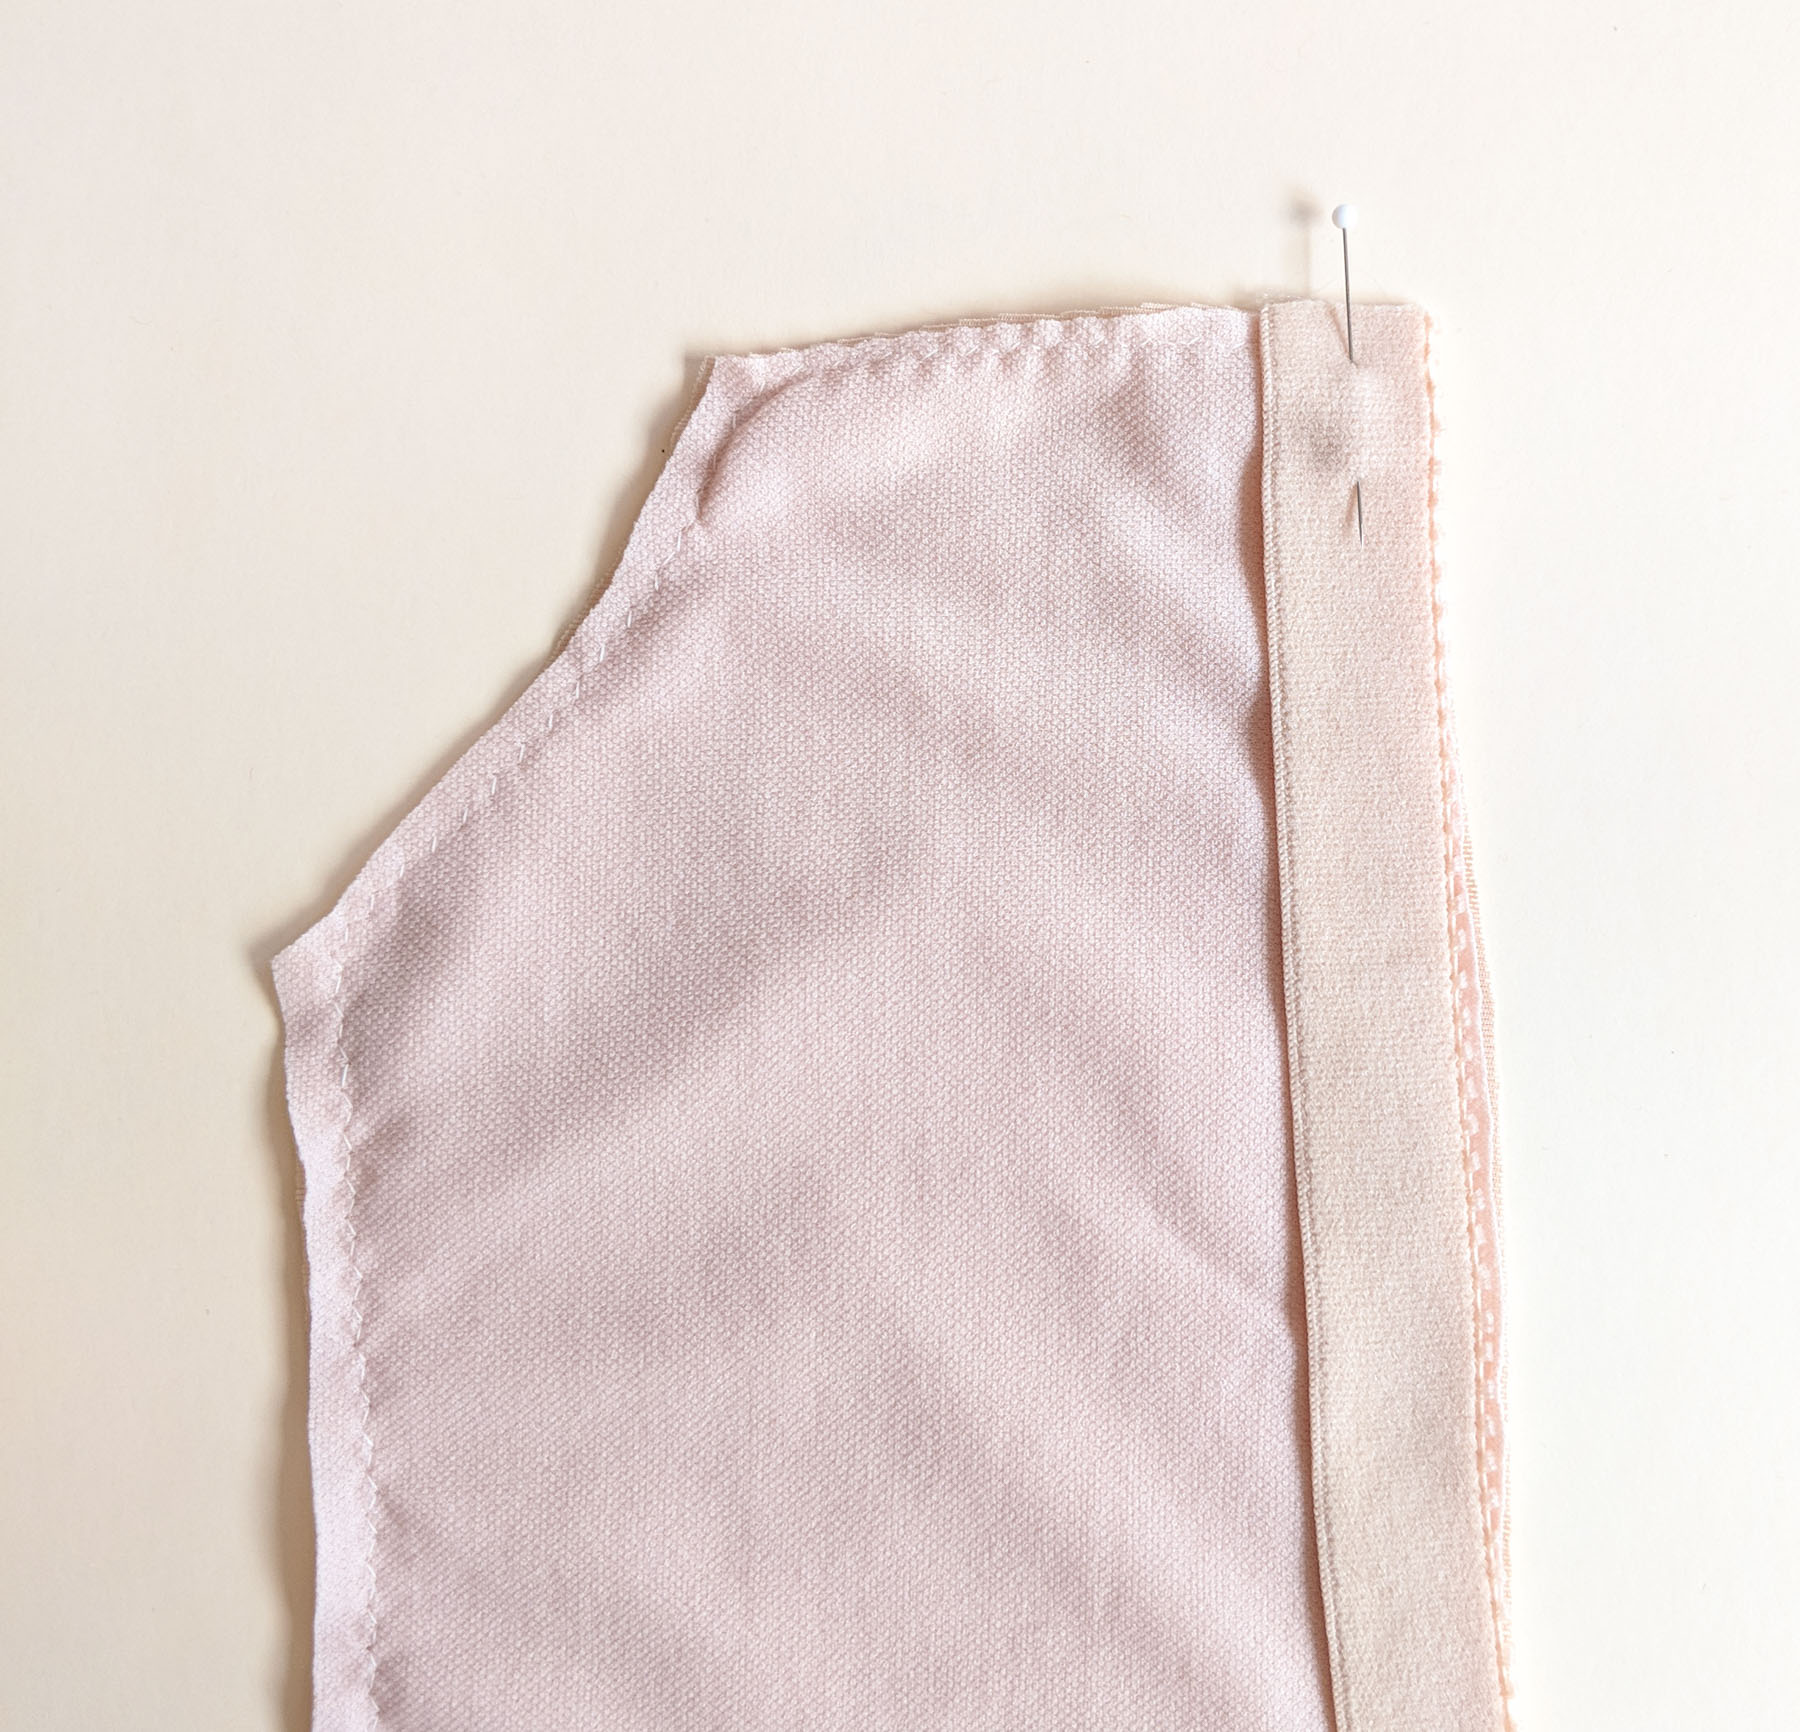
Cut out the piece you’ve drawn. Cut up the vertical line to the seam allowance line and snip in from the seam allowance to make a little hinge. Spread the bottom apart by about ½”. The reason we’re adding a little ease here is we are going to cut the shelf bra out of powermesh for support. However, powermesh is significantly less stretchy than swim fabric or lining; without extra ease, it would act as more of a binder than a shelf bra.
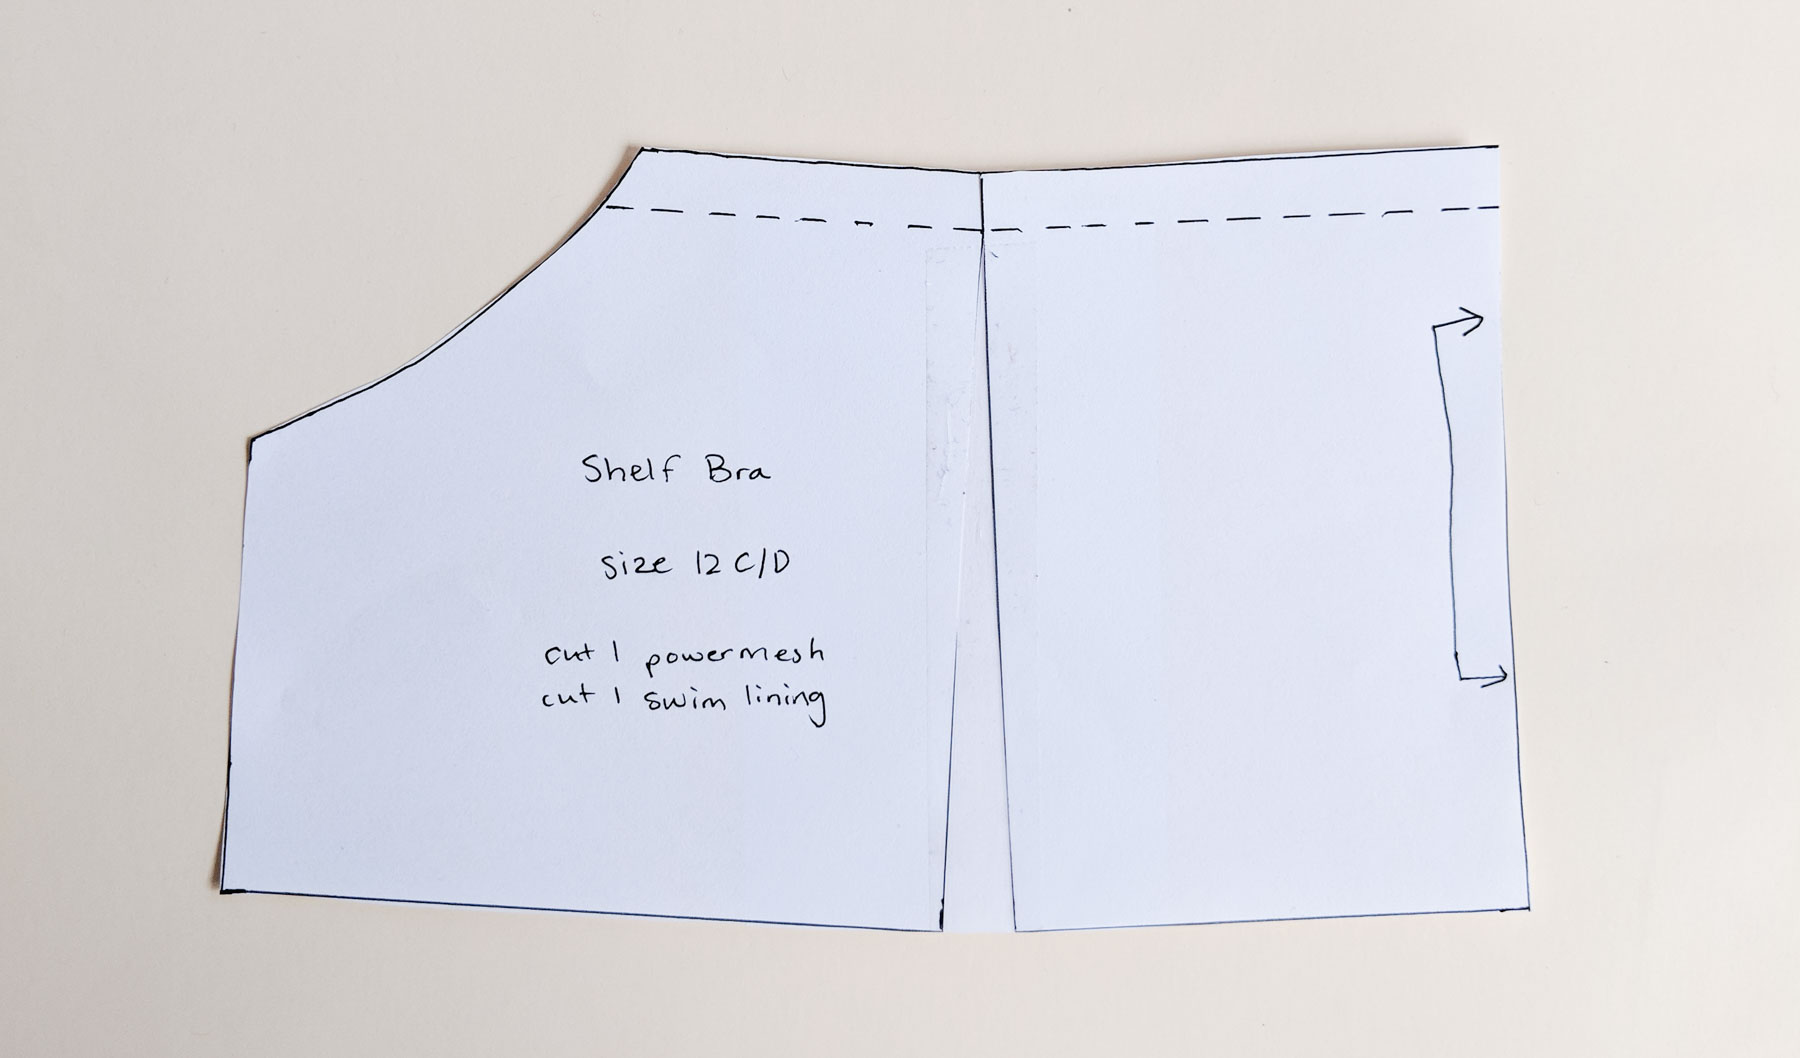
Place a piece of paper behind the gap and tape it in place. Label your piece and now we’re ready to cut.
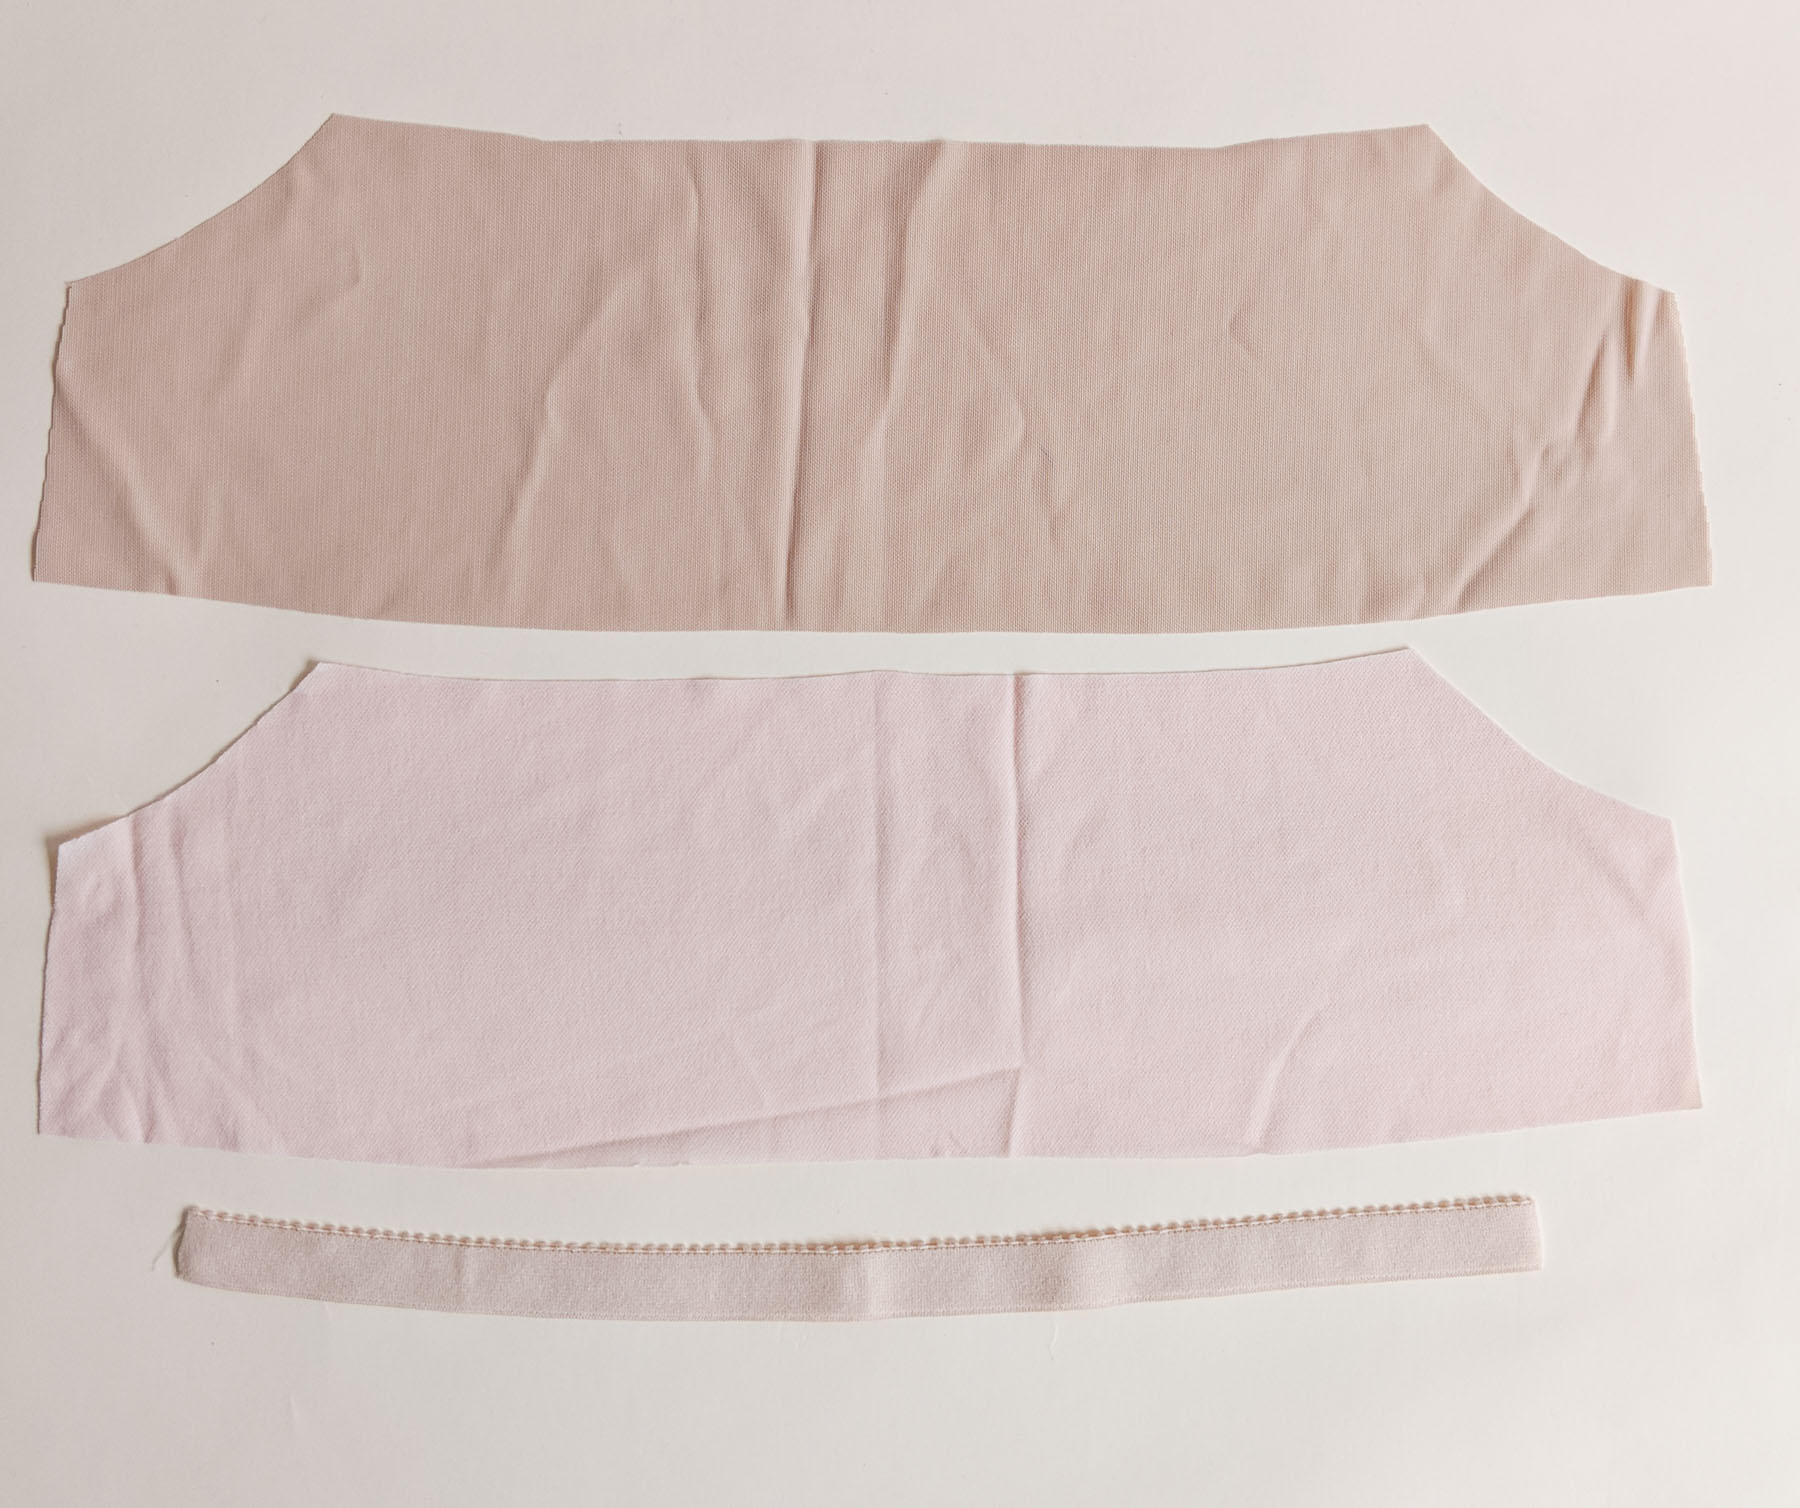
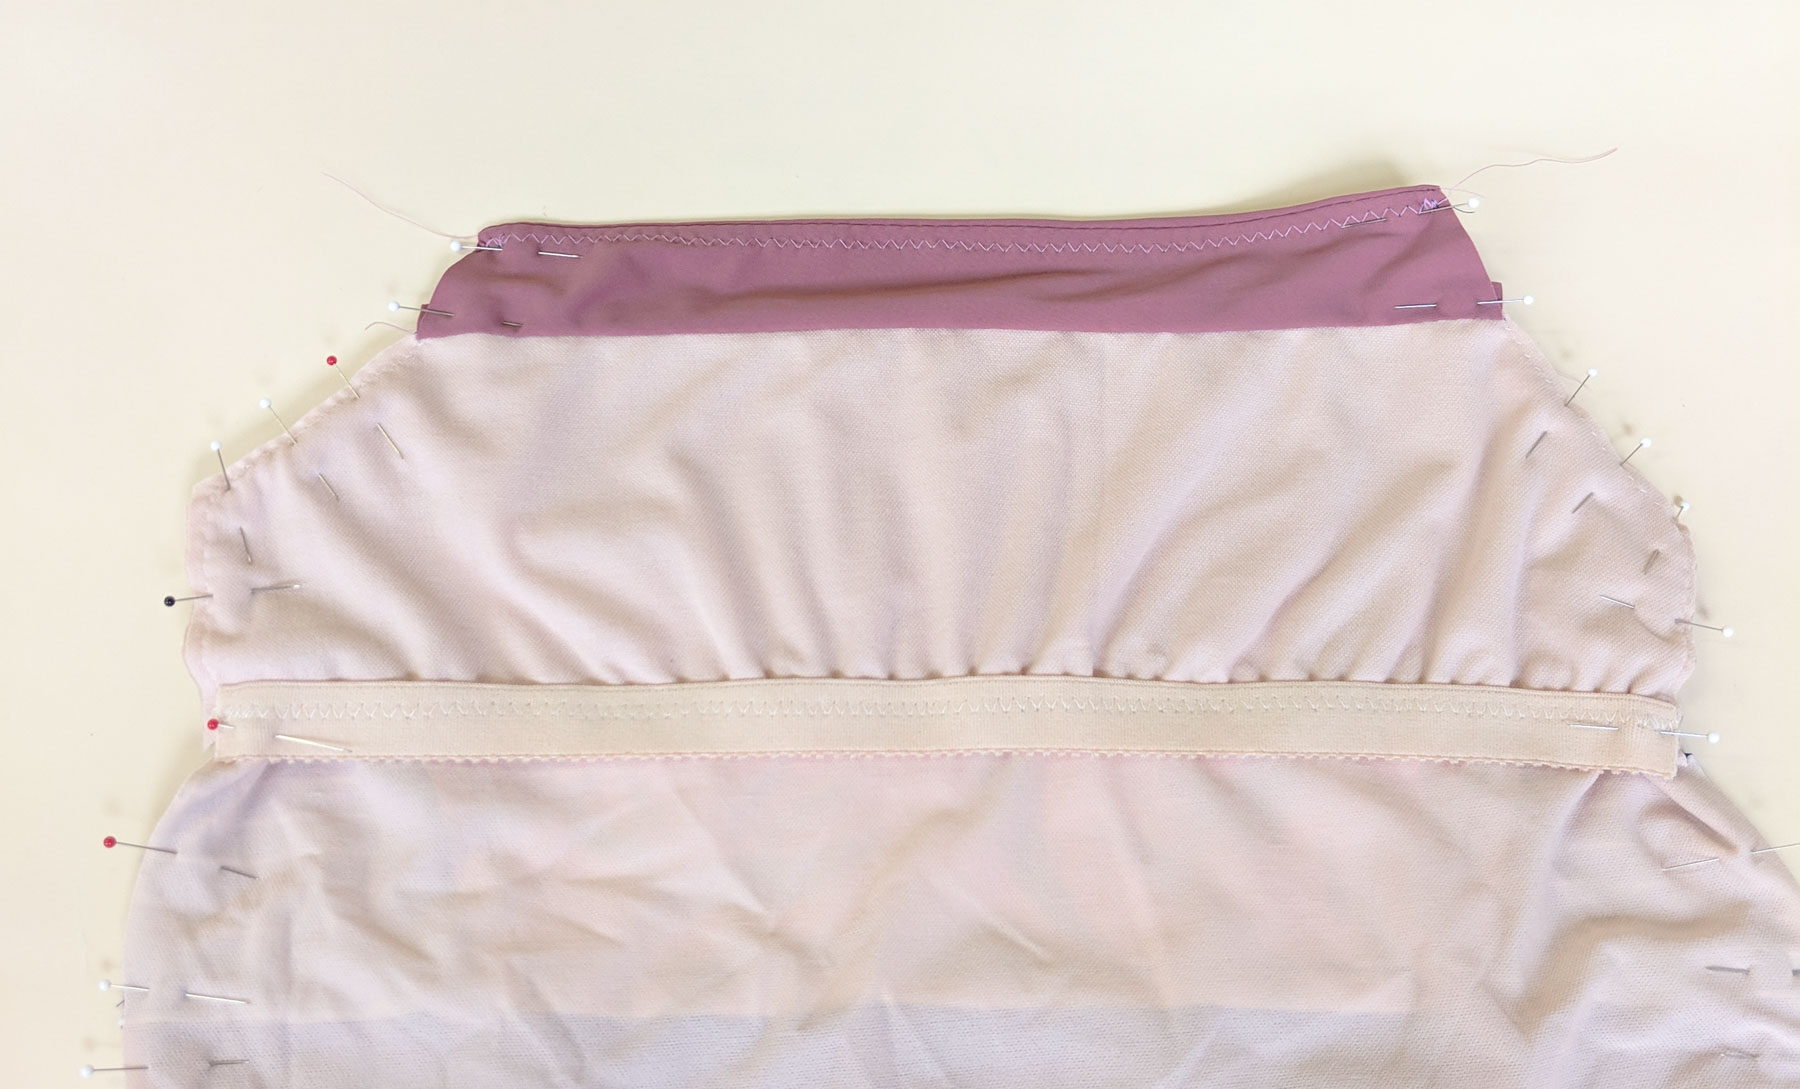
In addition to all the regular Ipswich Swimsuit pieces, cut one powermesh and one swim lining shelf bra on the fold. The swim lining piece is optional but I find it much more comfortable than having the powermesh directly against the skin in the shelf bra. For the bottom of the shelf bra, you’ll want to use a plush backed band elastic (mine is 5/8” wide). Cut the elastic about 1” shorter than the lining front piece, about 2” shorter than your shelf bra piece.
Start by basting together your shelf bra powermesh and swim lining pieces within the seam allowance.
Next, lay the band elastic plush side up, aligned with the lower edge of the shelf bra (with lining side facing up). Pin at one end and sew using a 4 mm wide by 2.5 mm long zigzag stitch, stretching the elastic consistently to fit.
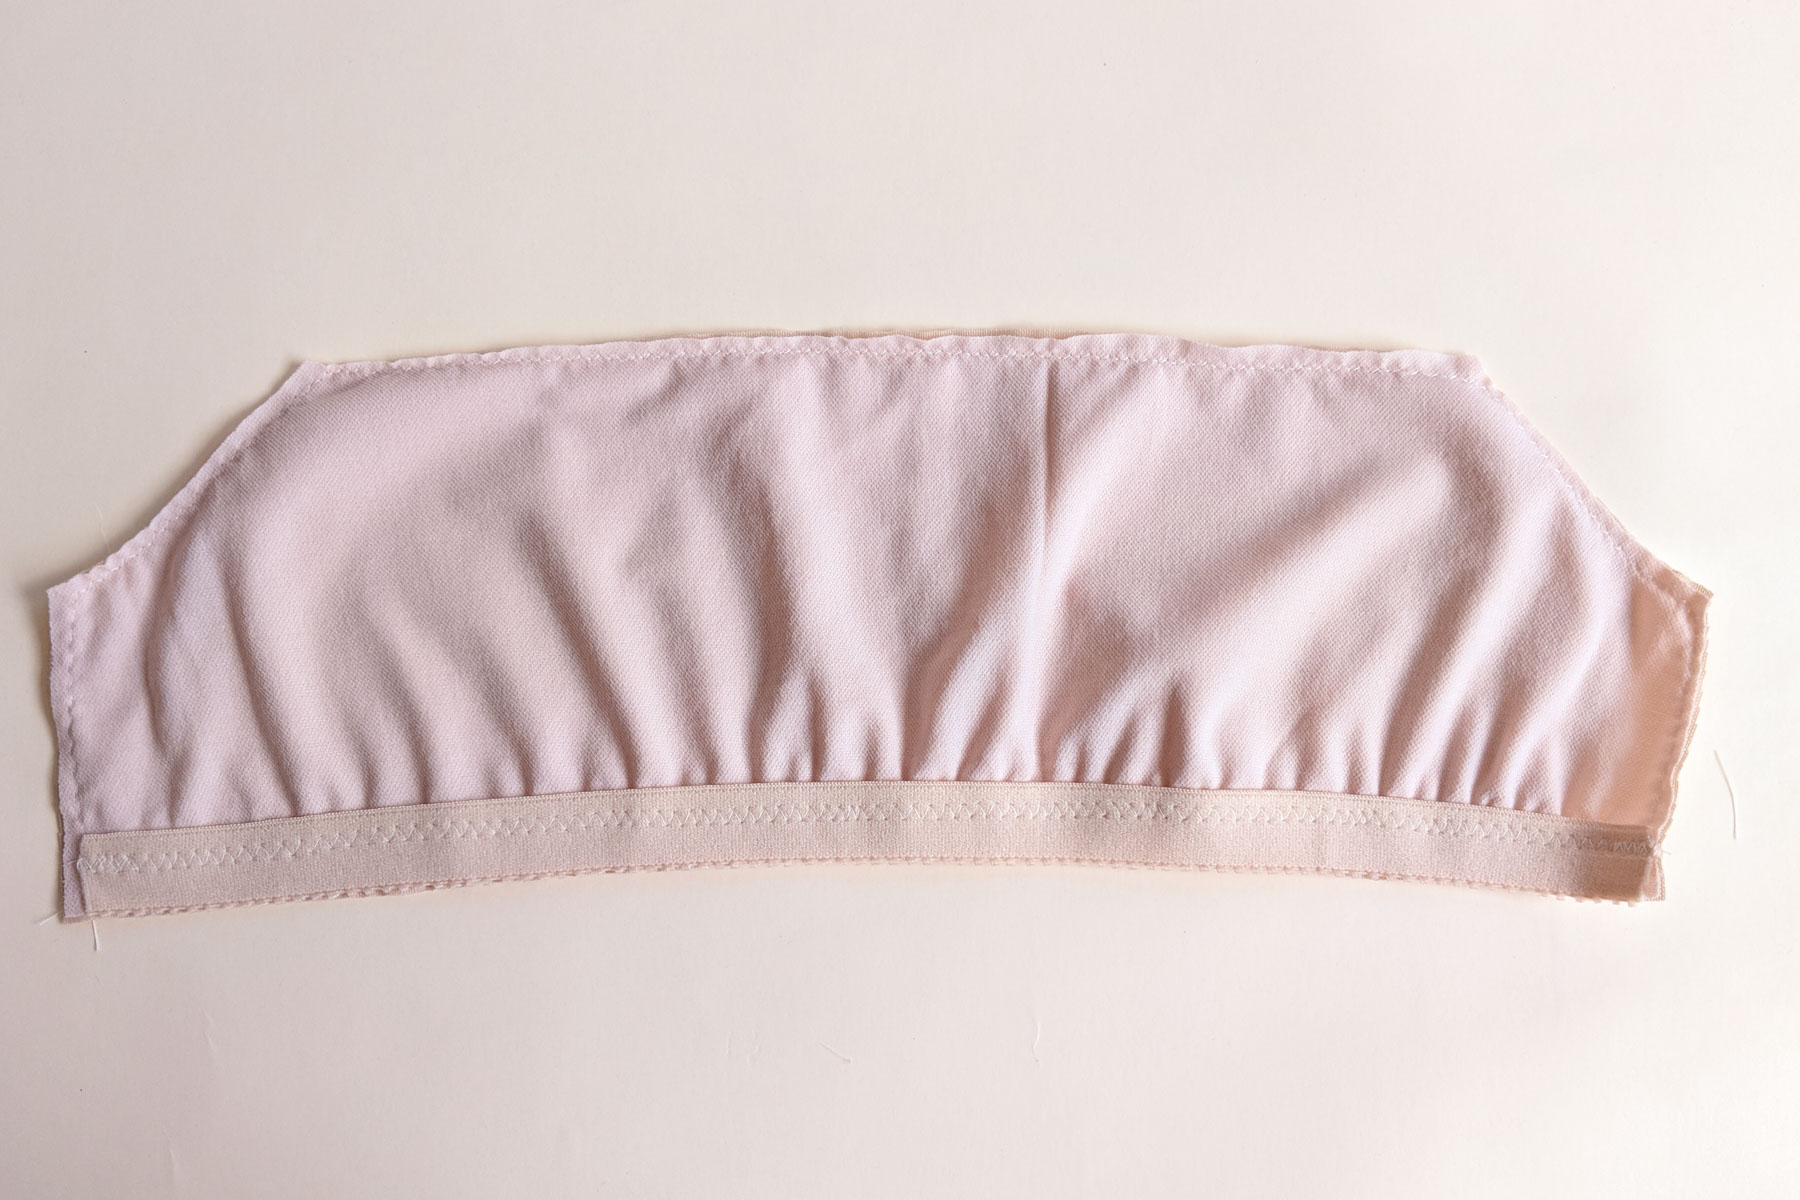
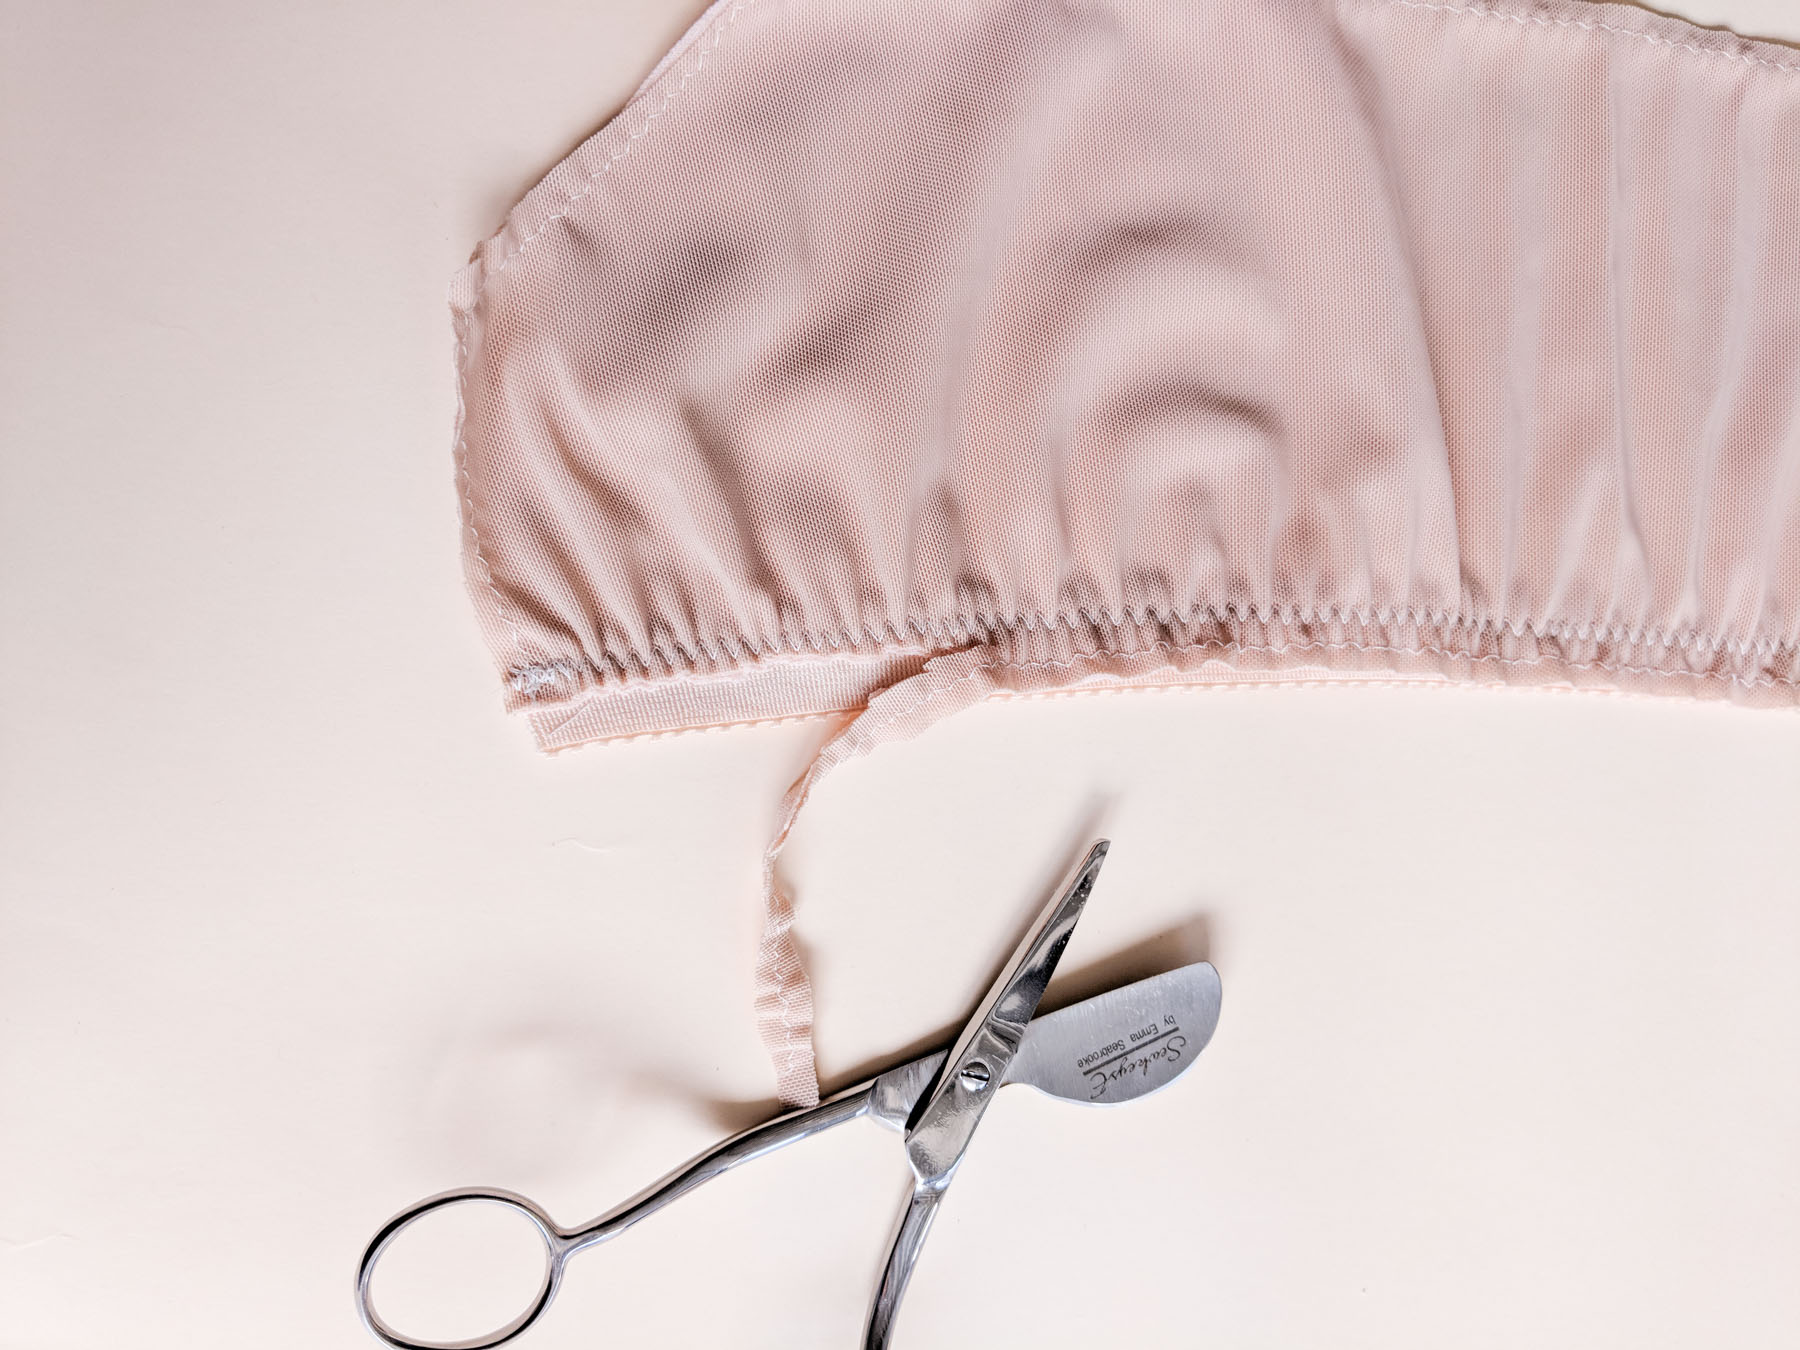
The shelf bra will be gathered slightly at the lower edge to fit the elastic. Trim off the seam allowance behind the elastic to reduce bulk (appliqué scissors are helpful but not necessary.)
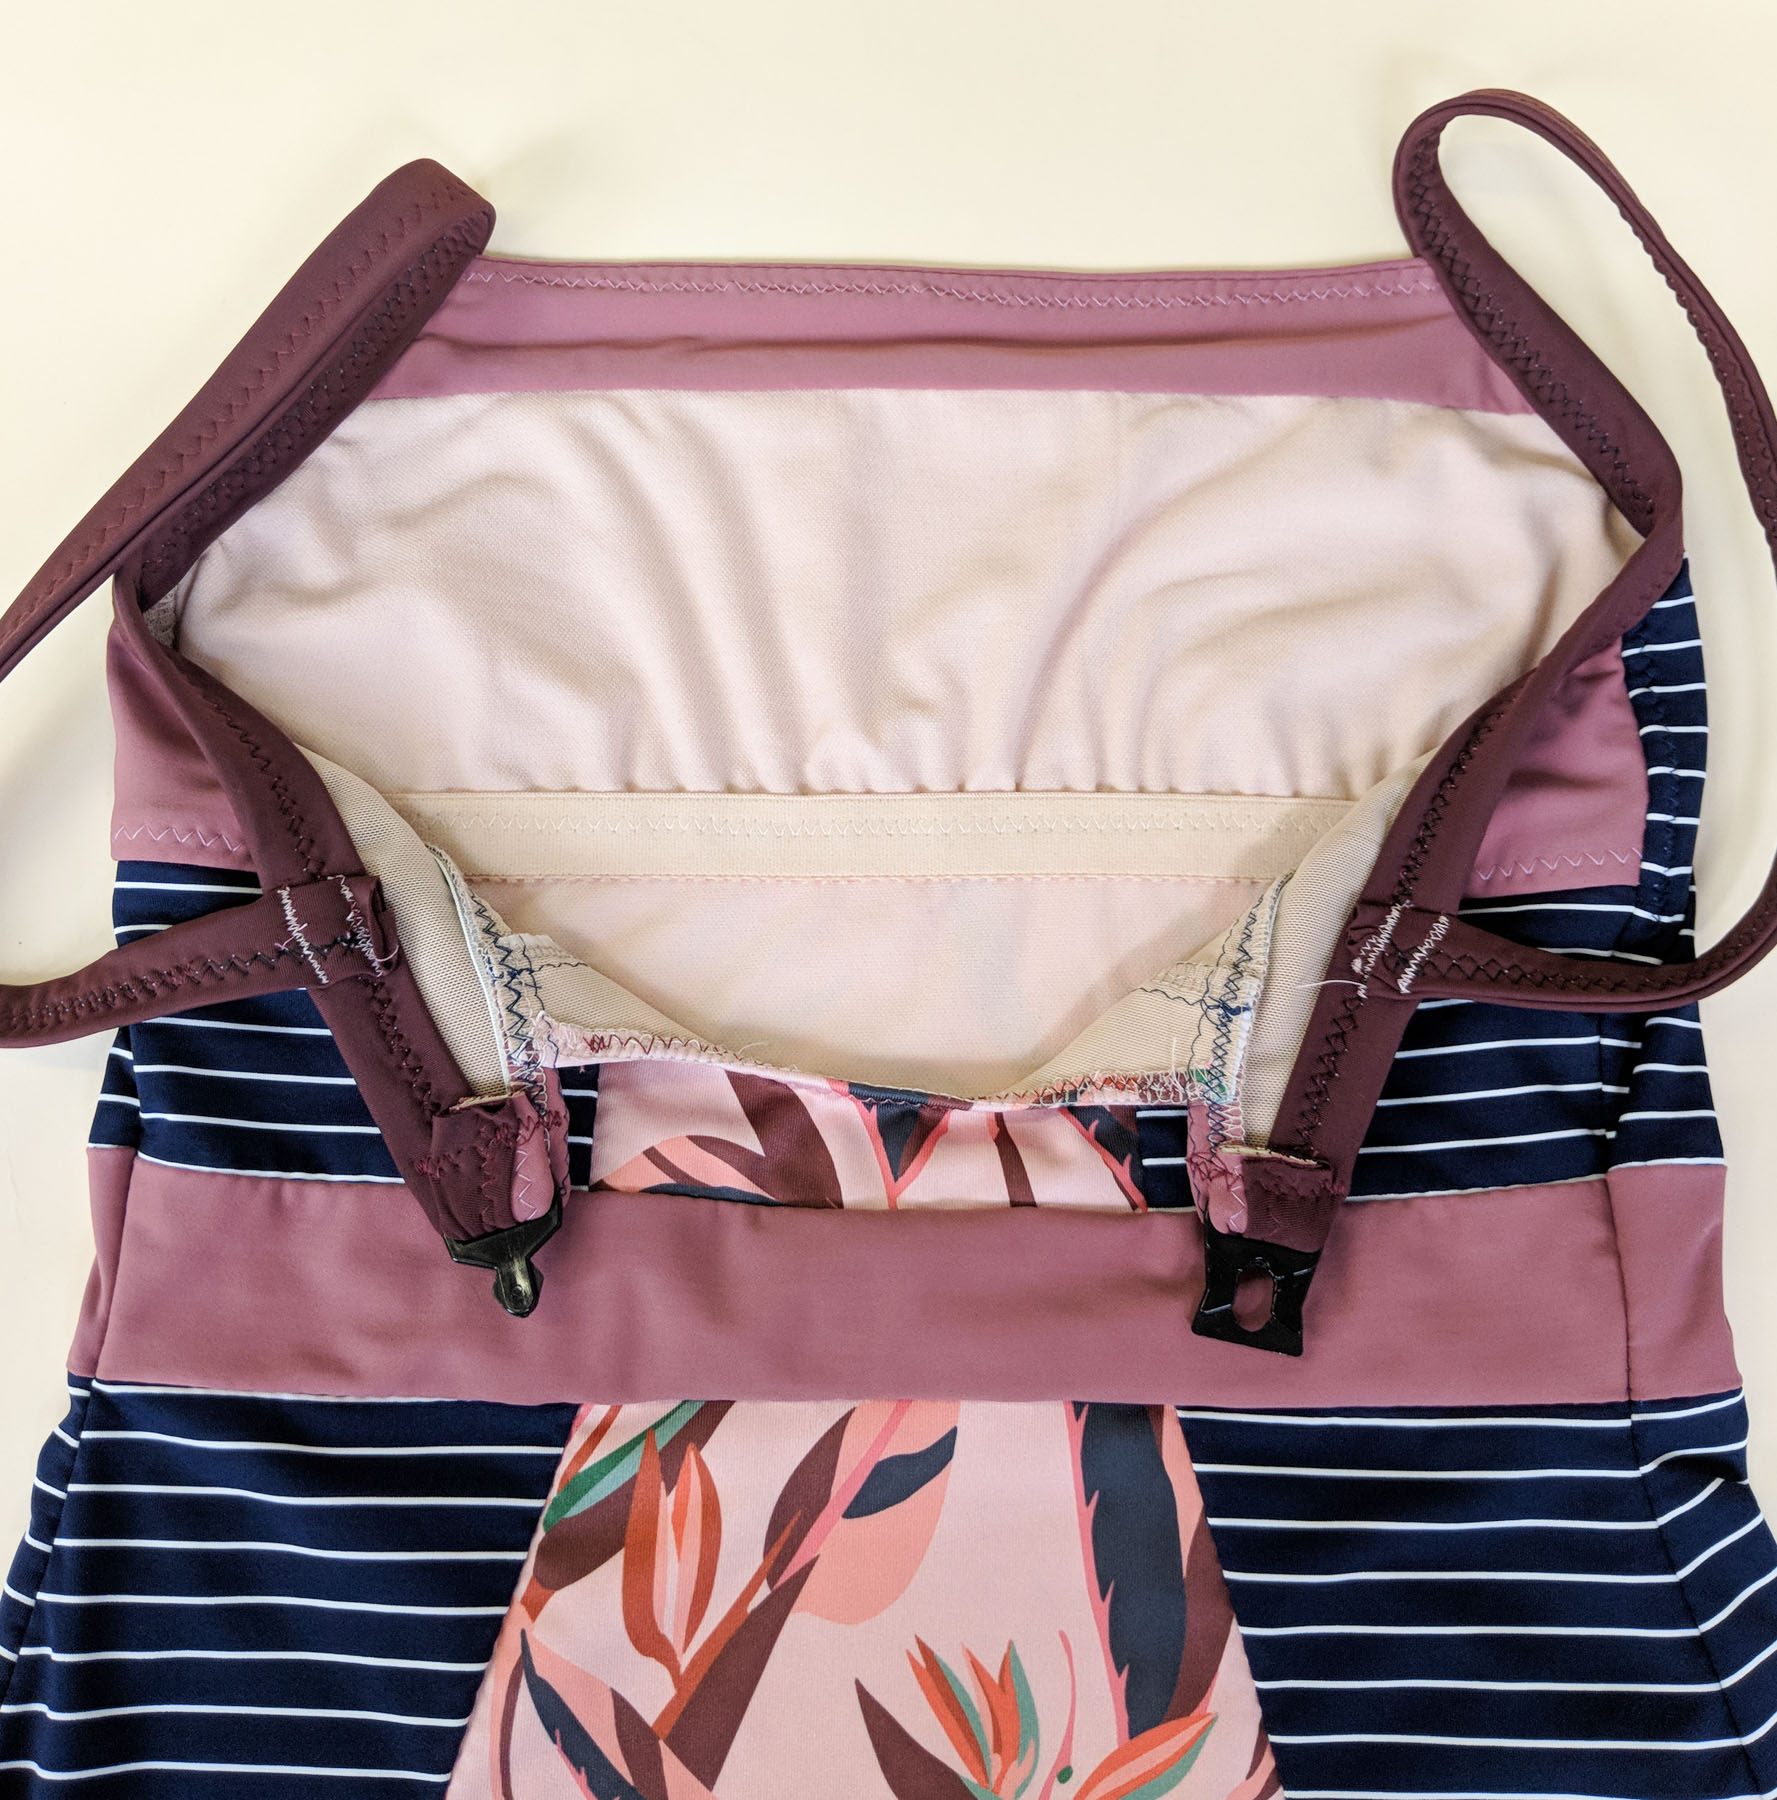
There is only one main construction change when making your suit with a shelf bra, so let’s take care of that step now. You’ll need your front lining, one neckband piece, and your assembled shelf bra.
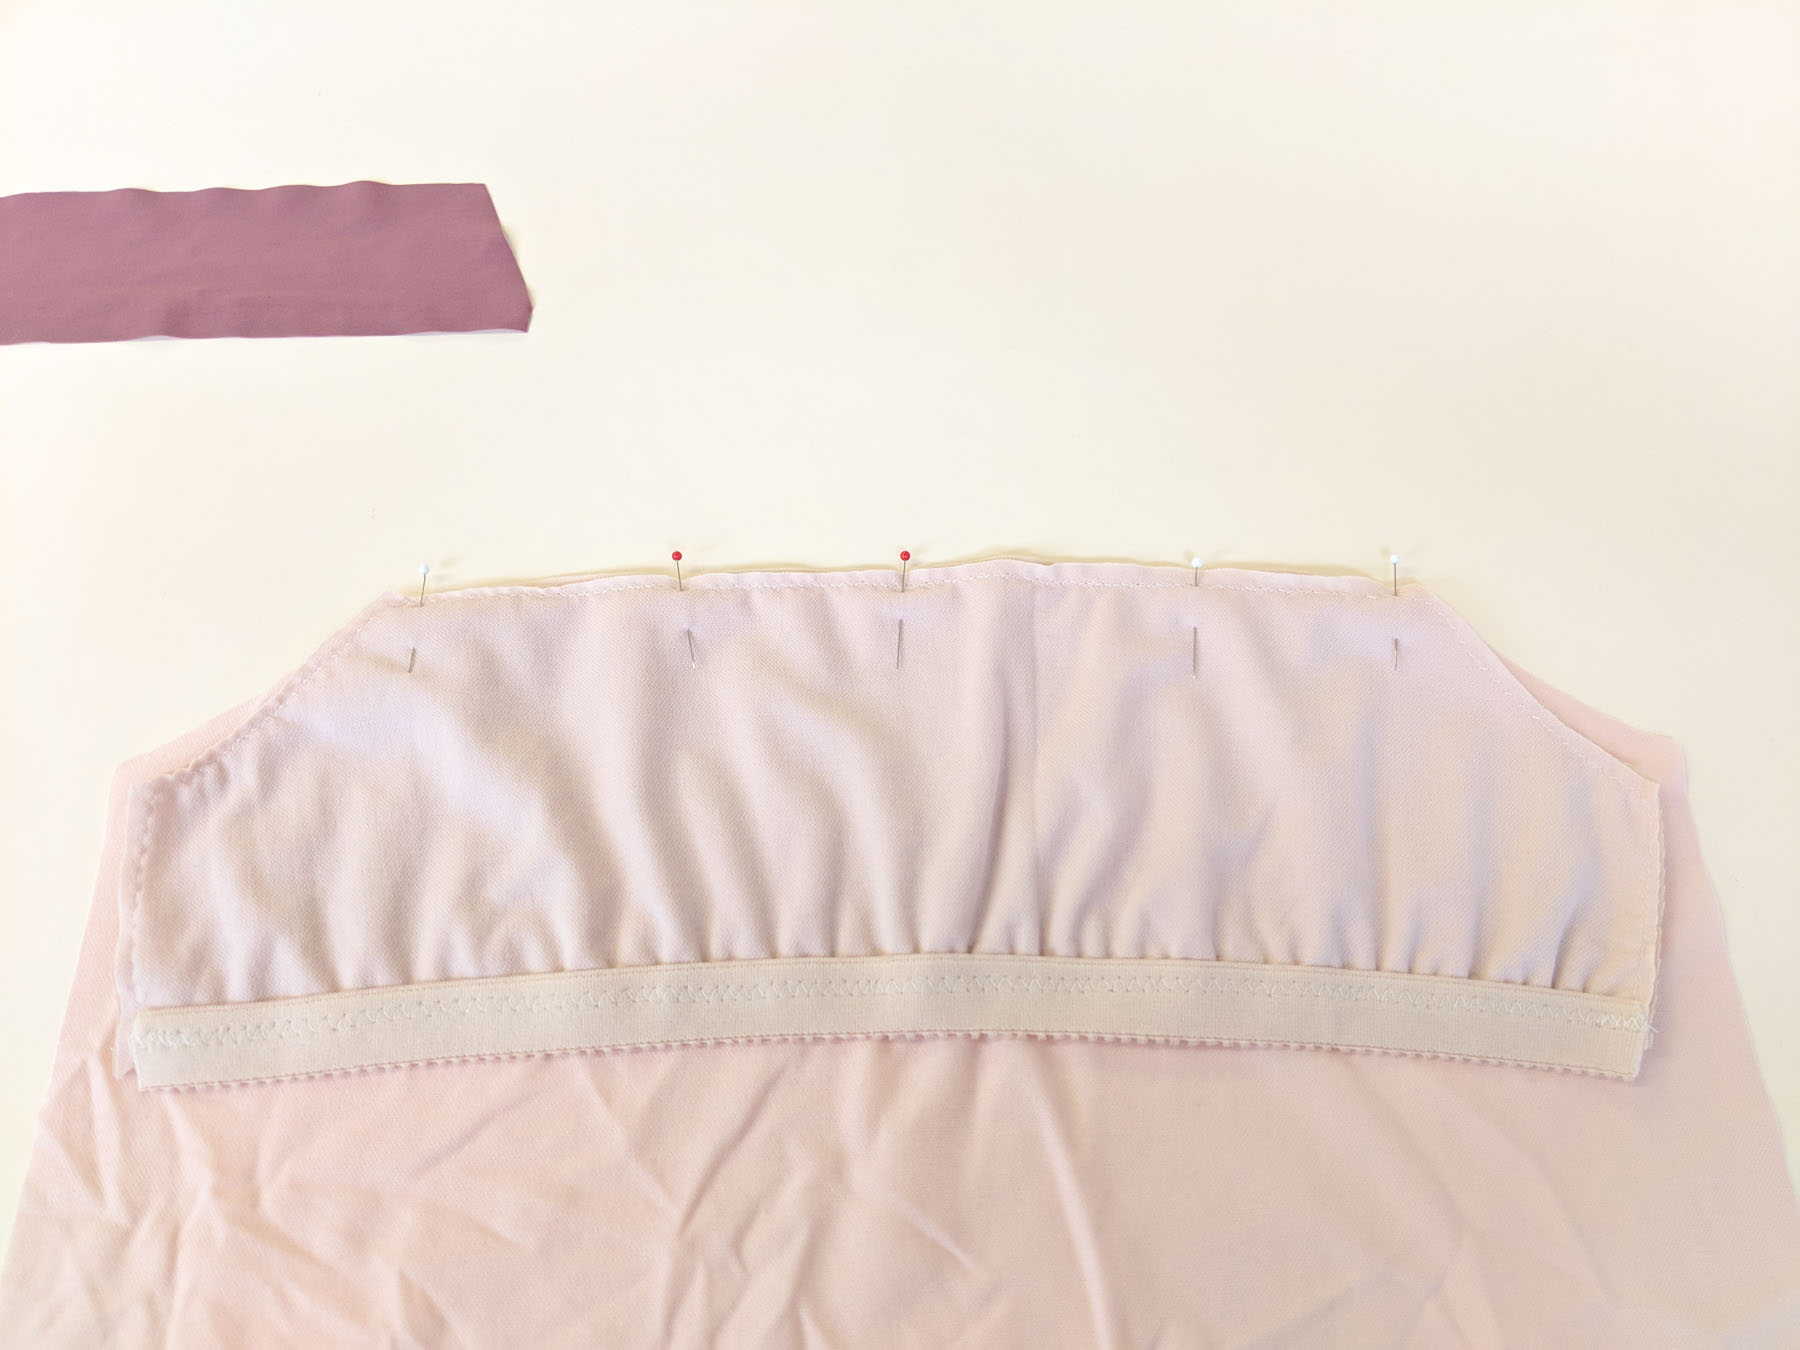
Pin the shelf bra to the lining piece at the neckline, powermesh side of shelf bra against the right side of the lining. Baste together within the seam allowance.
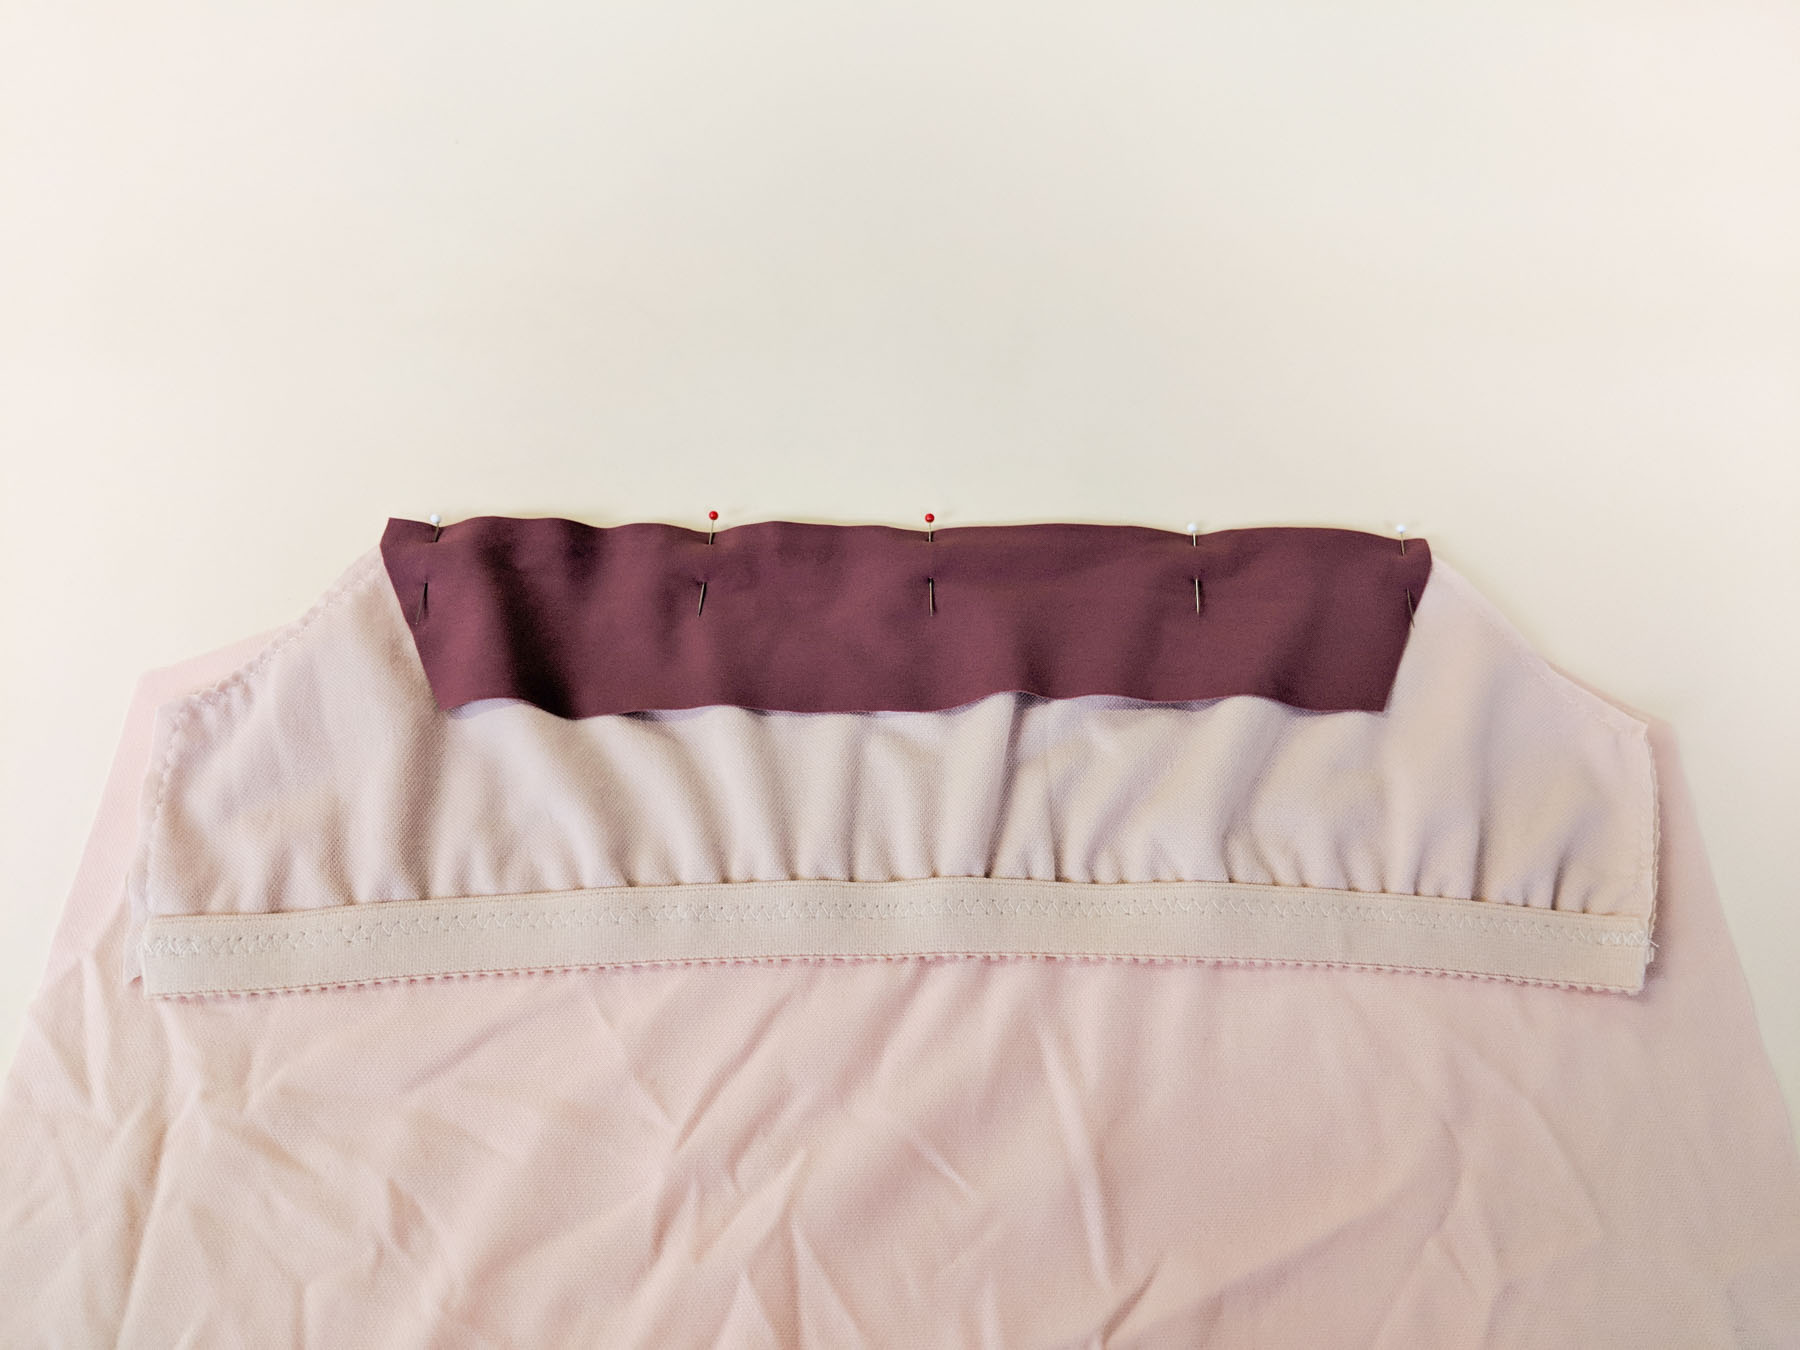
Next, pin the neckband to the neckline, right sides together, and sew through all layers (lining, two shelf bra layers, and neckband) at a regular 3/8” seam allowance.
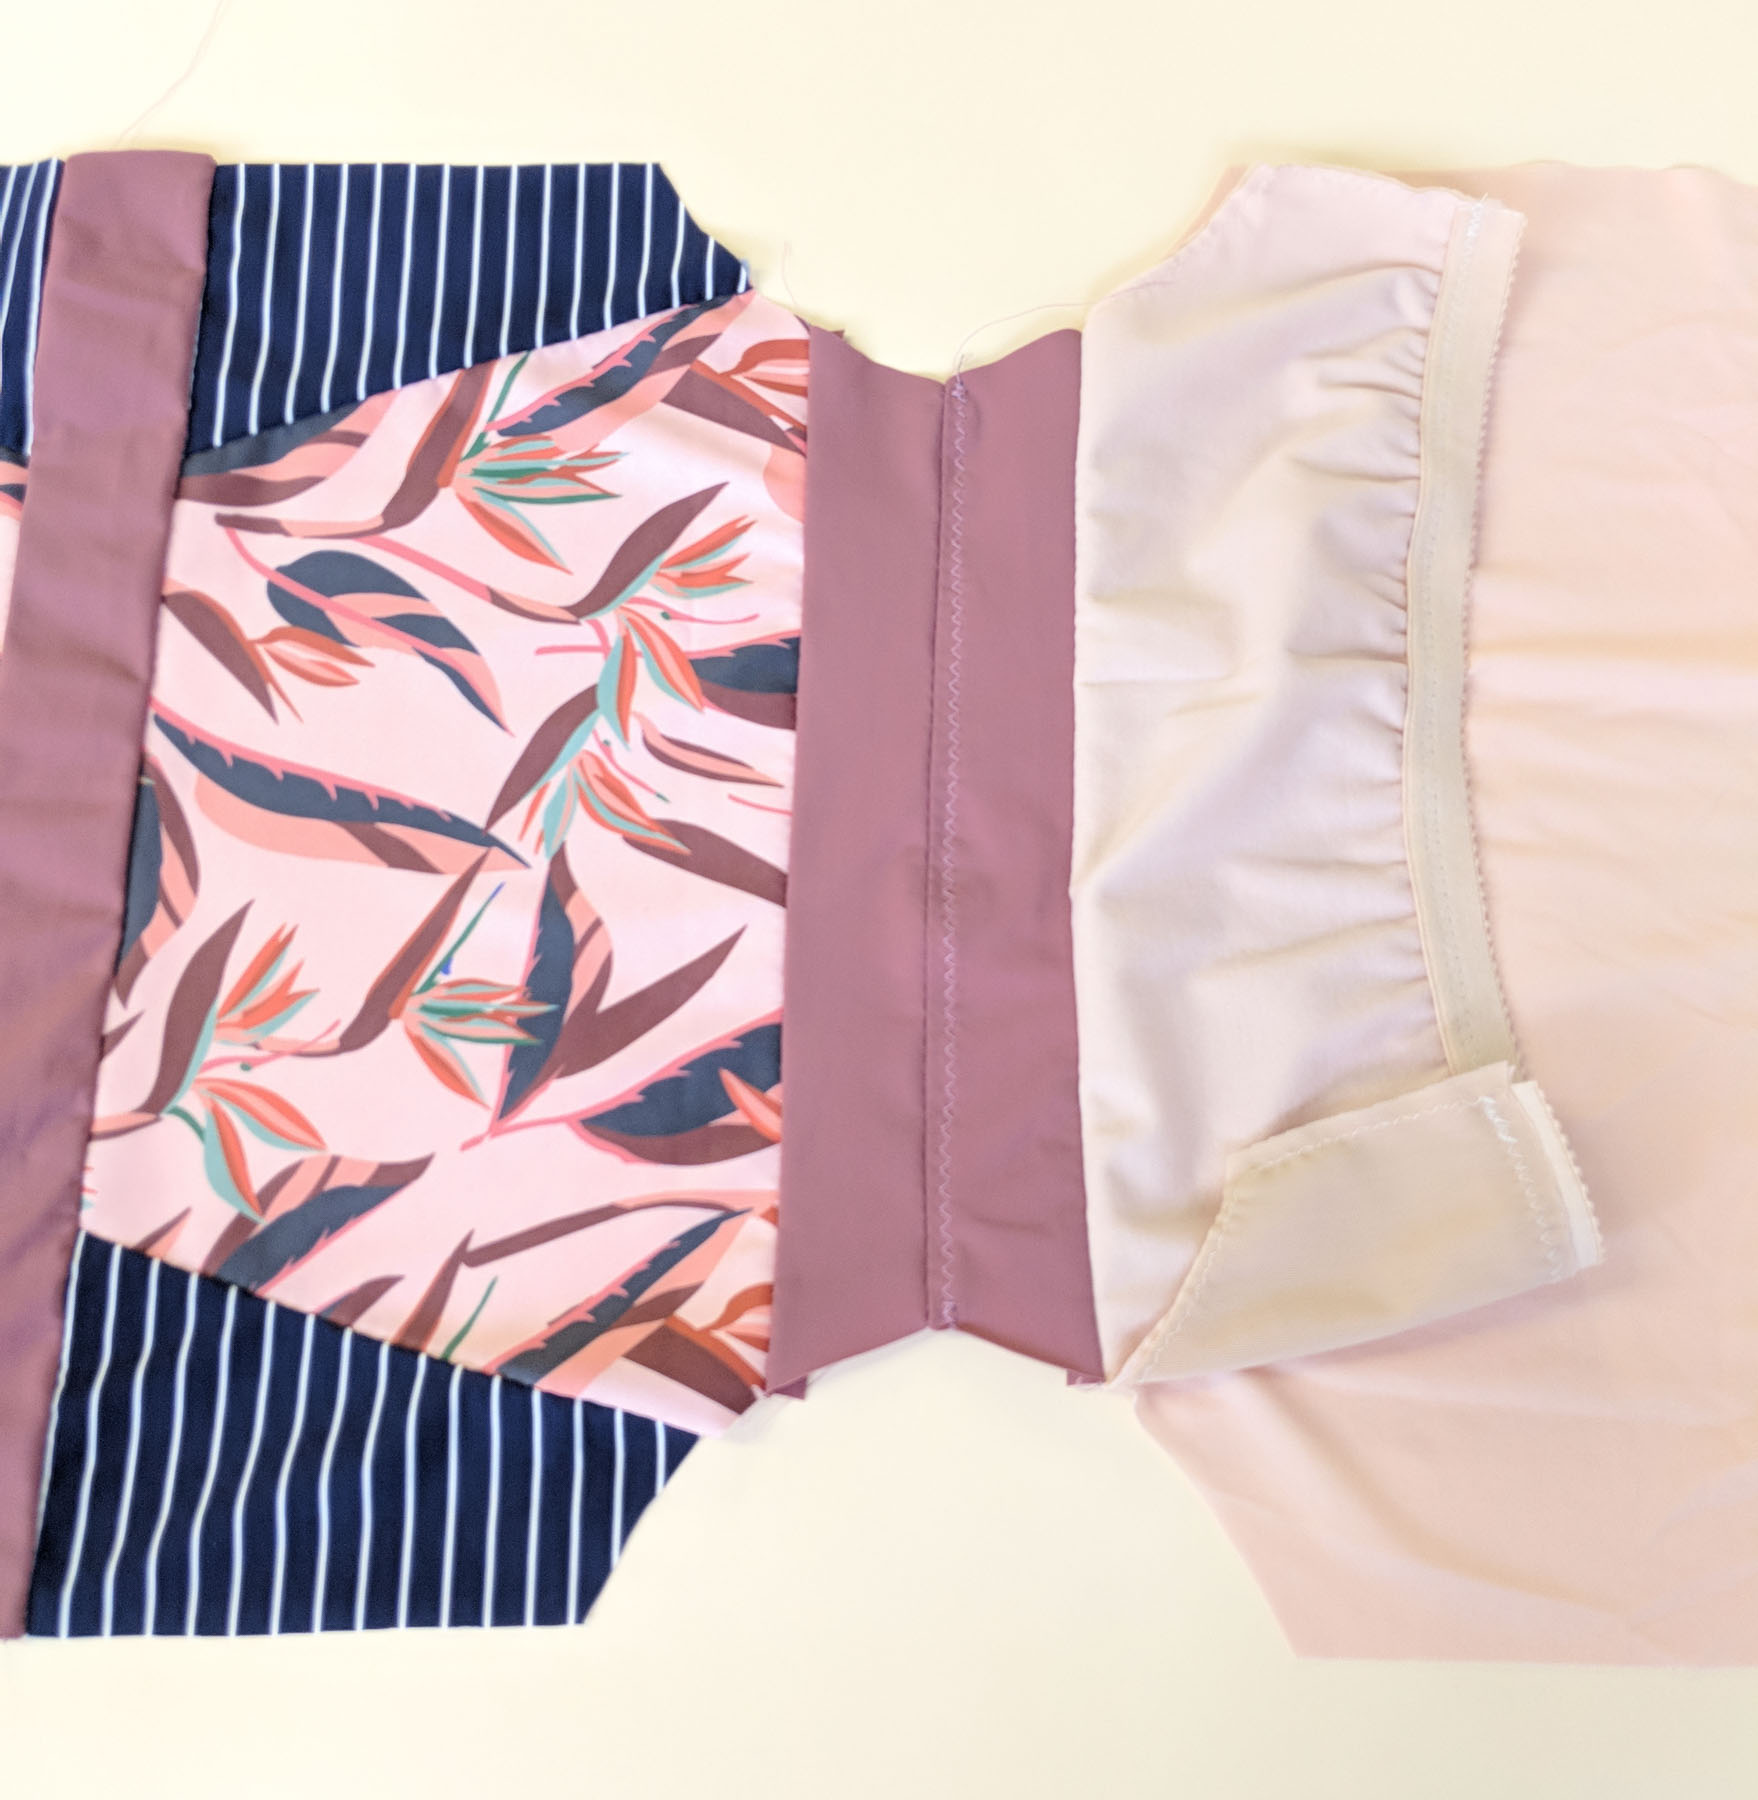
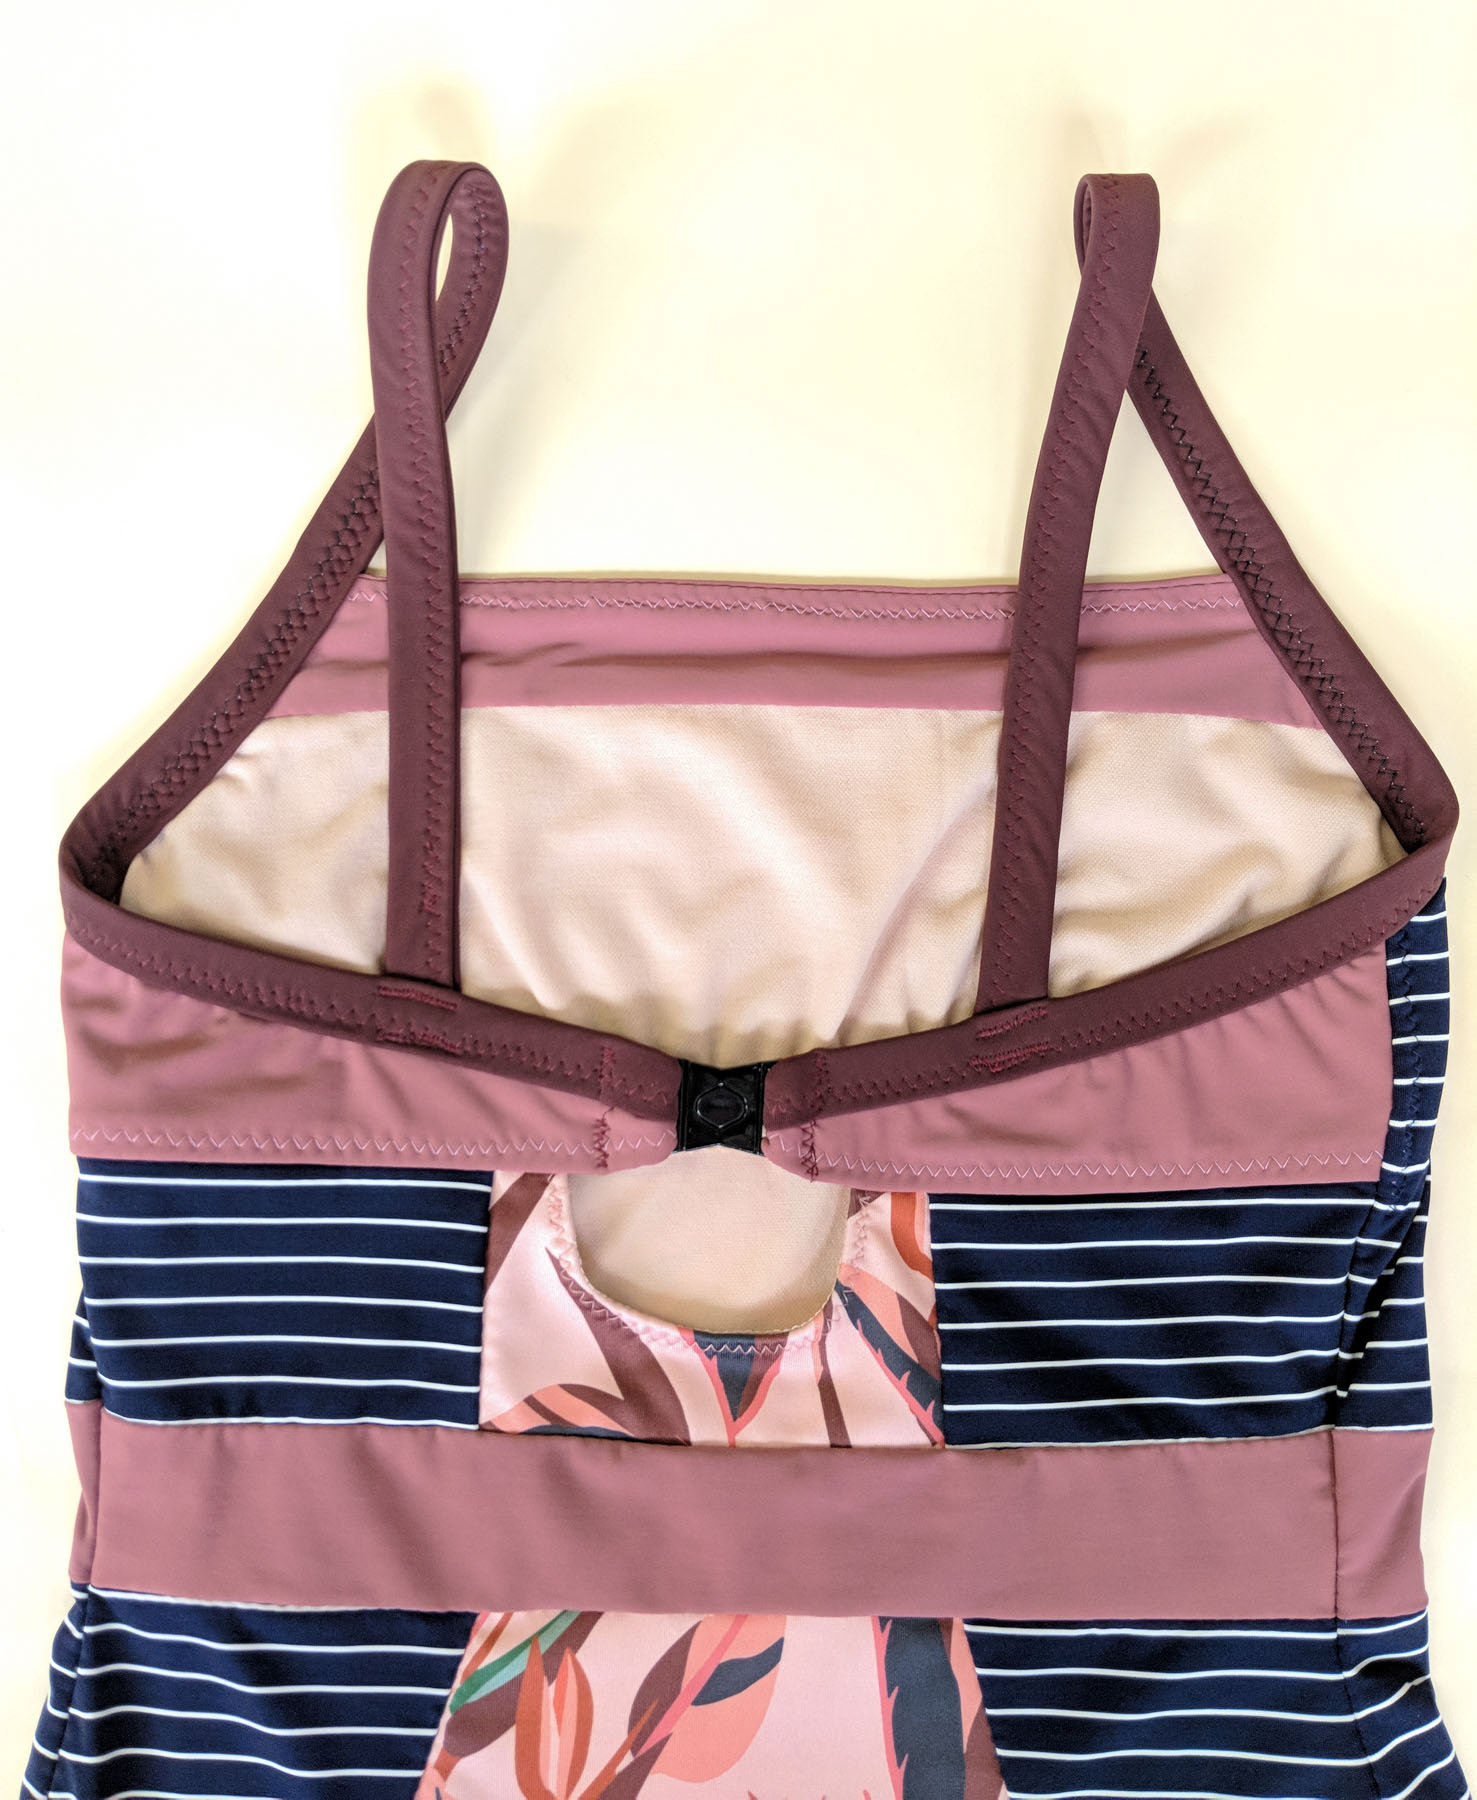
Construct the front of the Ipswich Swimsuit as directed in the instructions. Attach the front to the lining/shelf bra assembly at the neckbands and understitch the seam allowance to the lining neckband.
When basting the lining to the suit front, also include the shelf bra layers, matching the armscyes. This will make the front buckle a bit, but it will stretch to fit when worn.

Continue following the Ipswich Swimsuit instructions through sewing the side seams. Press the side seams forward. If you want a little extra support, you can add the optional boning. If you are not including the boning, topstitch the seam allowance from the armscye down to the shelf bra elastic, making sure the seam allowance is pressed forward. This helps keep all the elastics lying flat. Finish up your swimsuit following the instructions and you’re done!
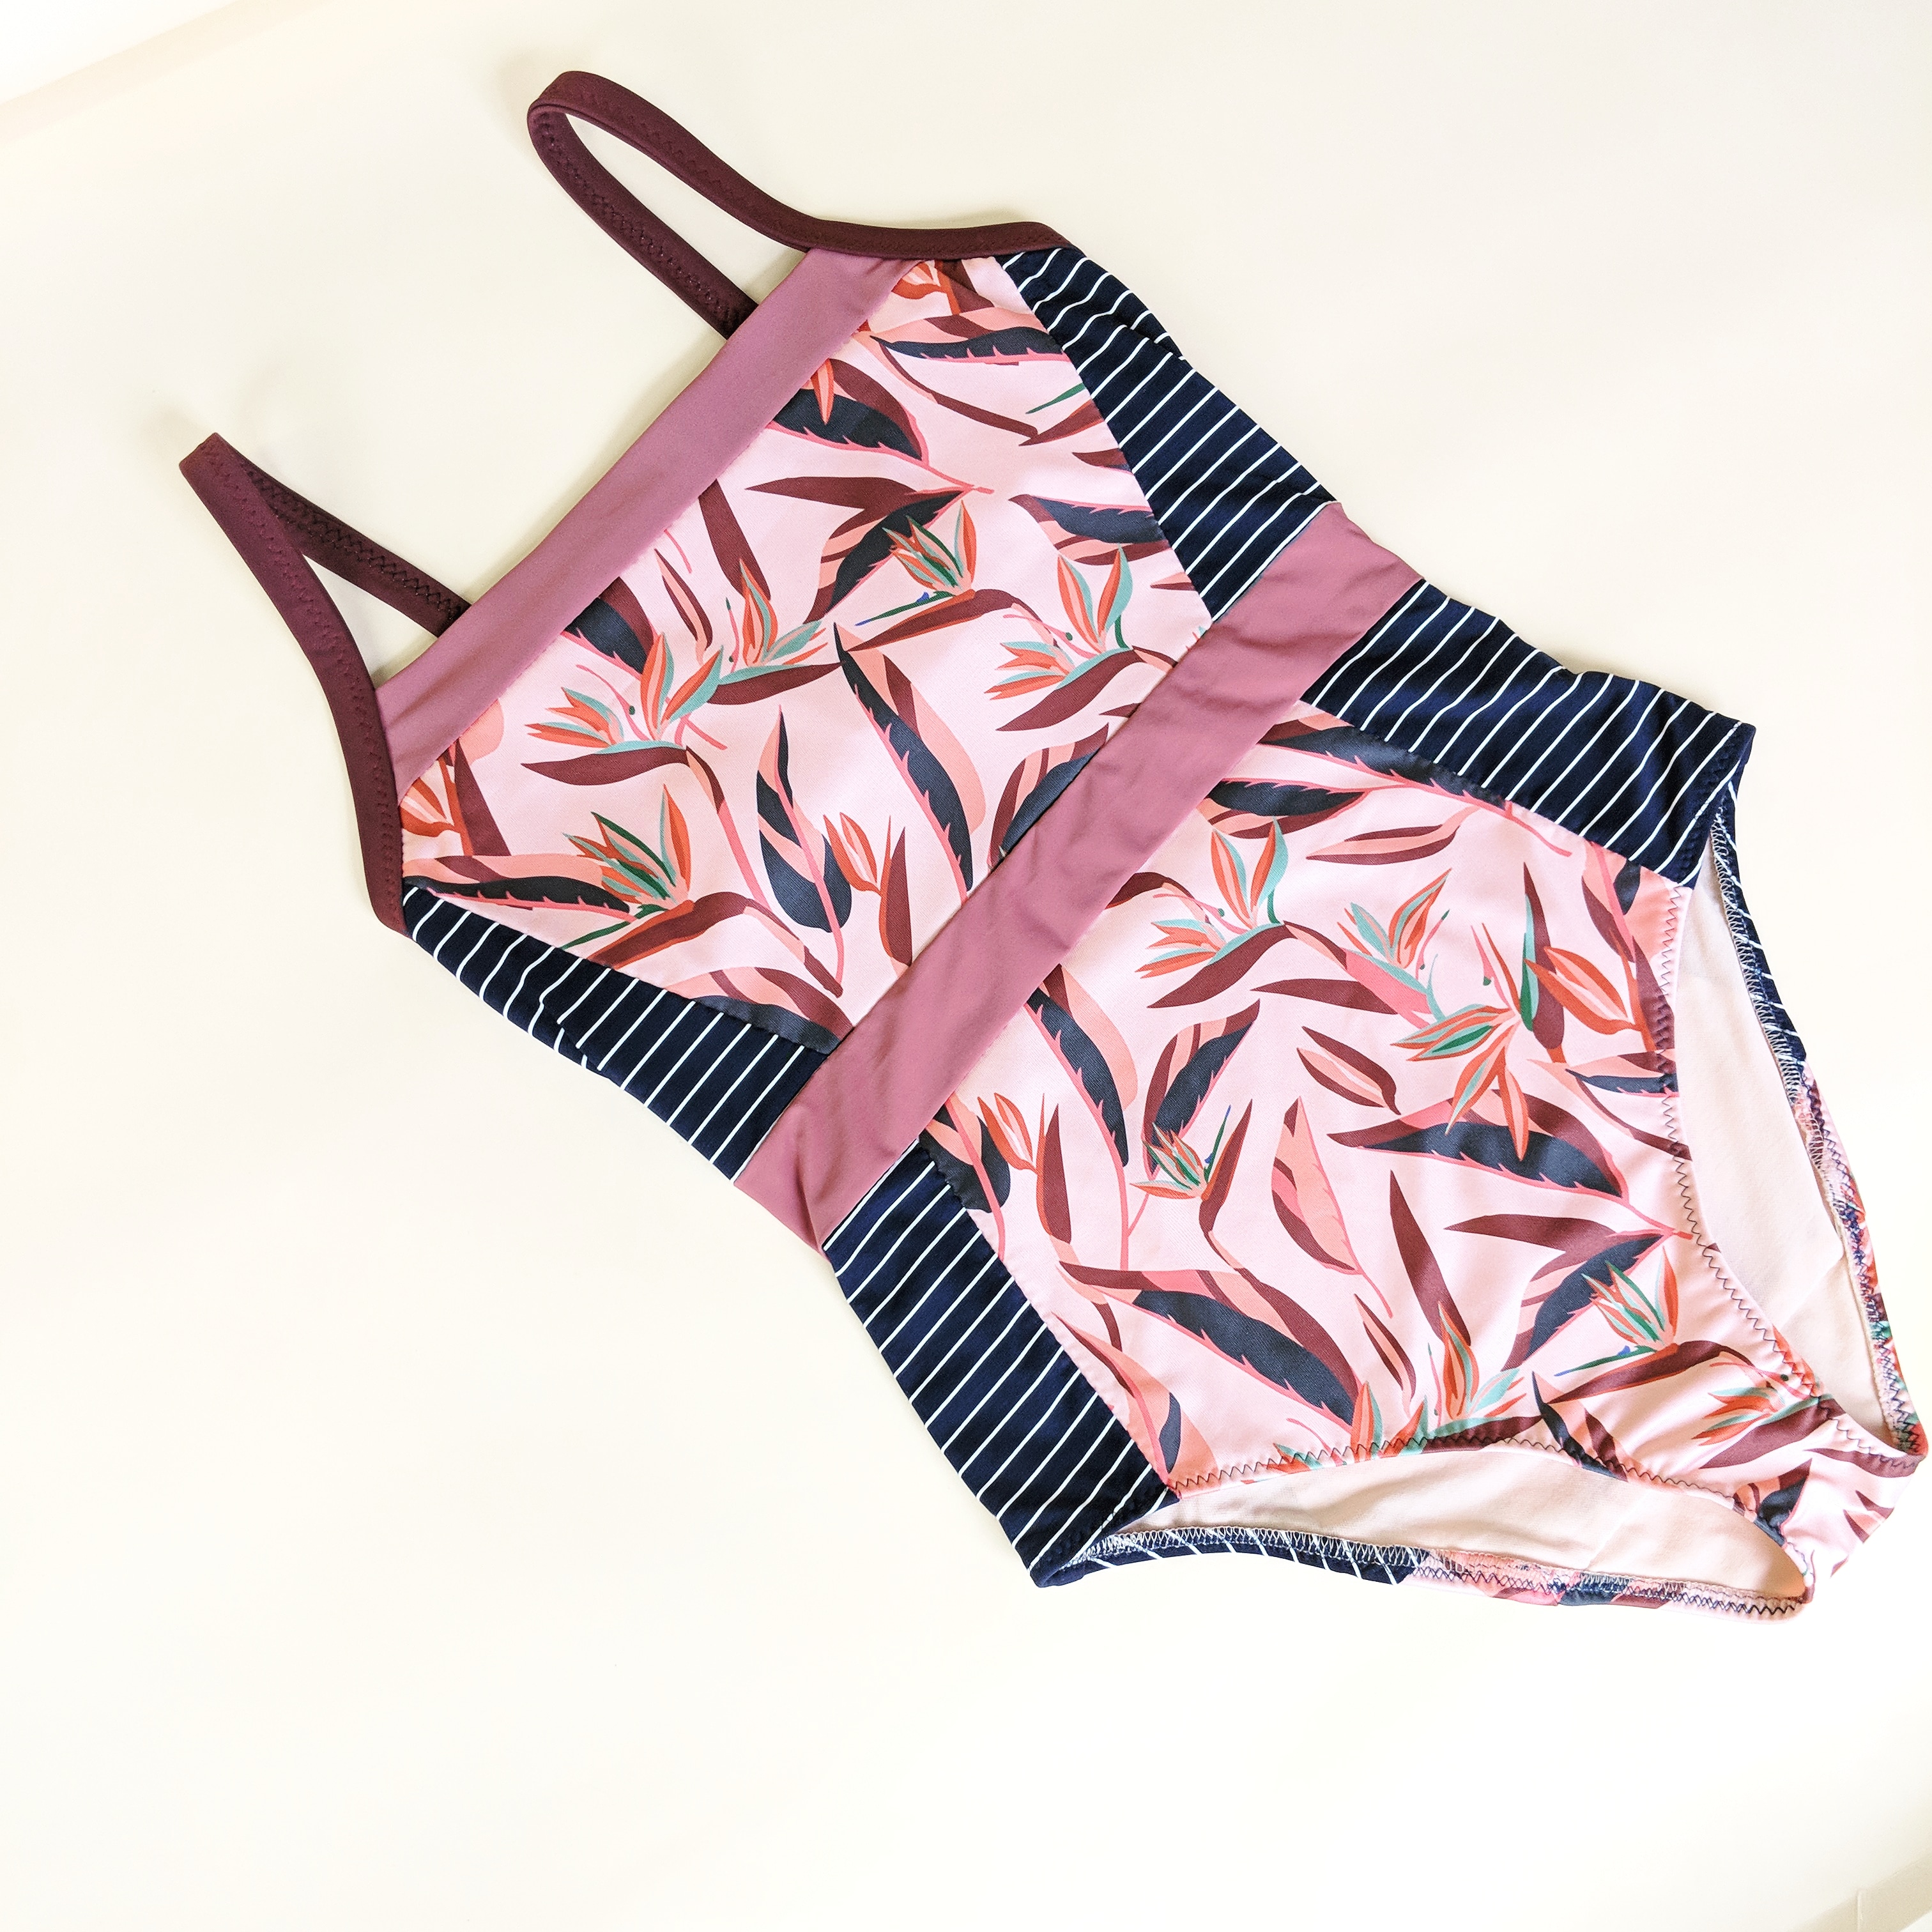
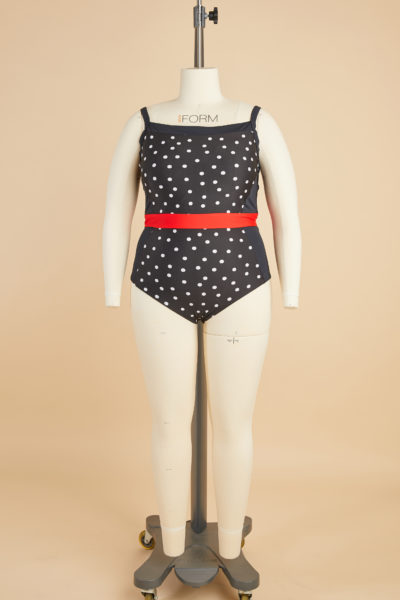
Here’s the finished suit. If Boston ever decides to feel like summer again, I’ll make sure to get photos of it on! Be sure to share your swimsuits with us on social media using #IpswichSwimsuit!

This is great. How might one adapt this to make a cami with a shelf bra, such as to go under a blouse?
I used the info. to replace a new piece of elastic for the stretched-out shelf-bra elastic in my favorite swim suit. It worked great! Thanks for the help!
What if you needed a bit more support – could you add a cup to it? How?
Hi Martha,
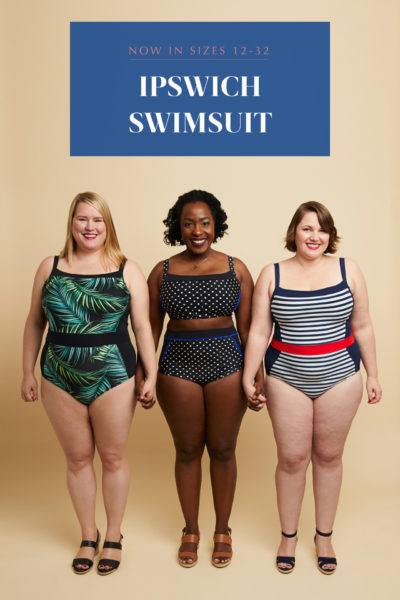
The regular Ipswich Swimsuit has built-in cups. You can see them here: https://www.cashmerette.com/collections/cashmerette-patterns/products/ipswich-swimsuit-pdf-pattern
This hack is for a cupless alternative to the foam cups. If you’d like to learn how to sew the built-in cups of the Ipswich, we have a video course available here: https://workshops.cashmerette.com/p/swimsuit-making-for-curves
-Ayelet at Cashmerette
Great instructions, thanks for sharing…now I just have to give it a go!
I learn something everyday. I am 59. I started a sewing business, sewing for the public at 28. I retired from it seven years ago. I only sew for myself now. All these years I never knew the term shelf bra. I called it bra lining with elastic on the bottom. Lol.
This is great and so helpful! So, to be clear, the shelf bra elastic is sewn into the side seam allowances. Correct?? I guess i thought that might lead to a puckered seam.
Hi Danielle, yes the elastic gets sewn into the side seam.
-Ayelet at Cashmerette