Update 2/1/2021: An updated Upton Sewalong is available here.
Let’s kick this baby off! You need to do a few things before we can start sewing in earnest.
- Pre-wash and dry your fabric.
- This is essential because lots of fabric shrinks when it’s washed (or the dye runs out a little), and you want it to shrink before you start cutting pieces for your dress. Make sure you wash and dry it exactly as you plan to with the final garment
- Cut out your pattern pieces
- Take careful note of whether you’re making View A or View B (or mix-and-matching), and use the cutting layouts to guide you. I prefer to use a rotary cutter, weights and rotary mat, but you can use pins and fabric scissors if you’d rather.
- Notch
- Notches are your friend! Use a pair of scissors to do this (not a rotary cutter, because they’re harder to control for snips). Remember, the seam allowance is 1/2″ (12mm) so the notches need to be less than that.
- Transfer markings
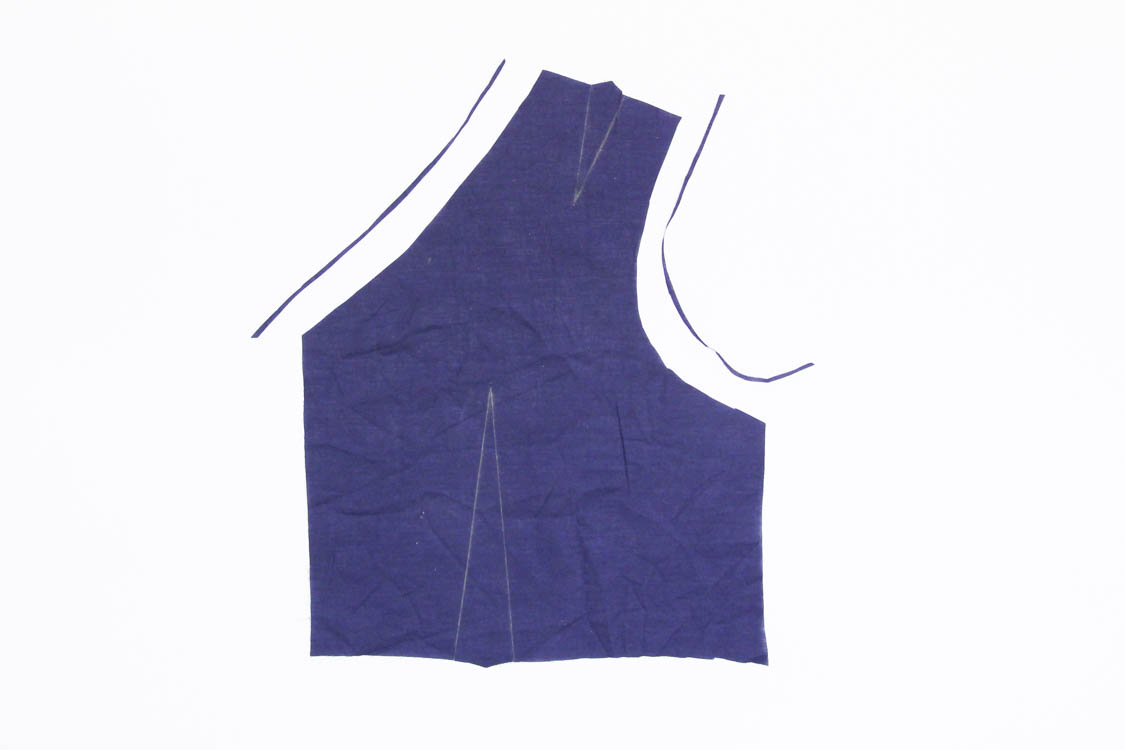
- You need to transfer the darts and pleat markings from your pattern pieces onto your fabric. There are multiple ways to do this – I clip the edges of the dart, use a pin to mark the end of it, and use a clover chalk liner and a ruler to draw the dart in. Alternatively, you can use a tracing wheel and chalk paper. For the curved waist dart, one trick is to cut the dart out of the pattern piece (once you’ve traced the pattern first!) and then use chalk to mark really easily – you can see a photo of that here.
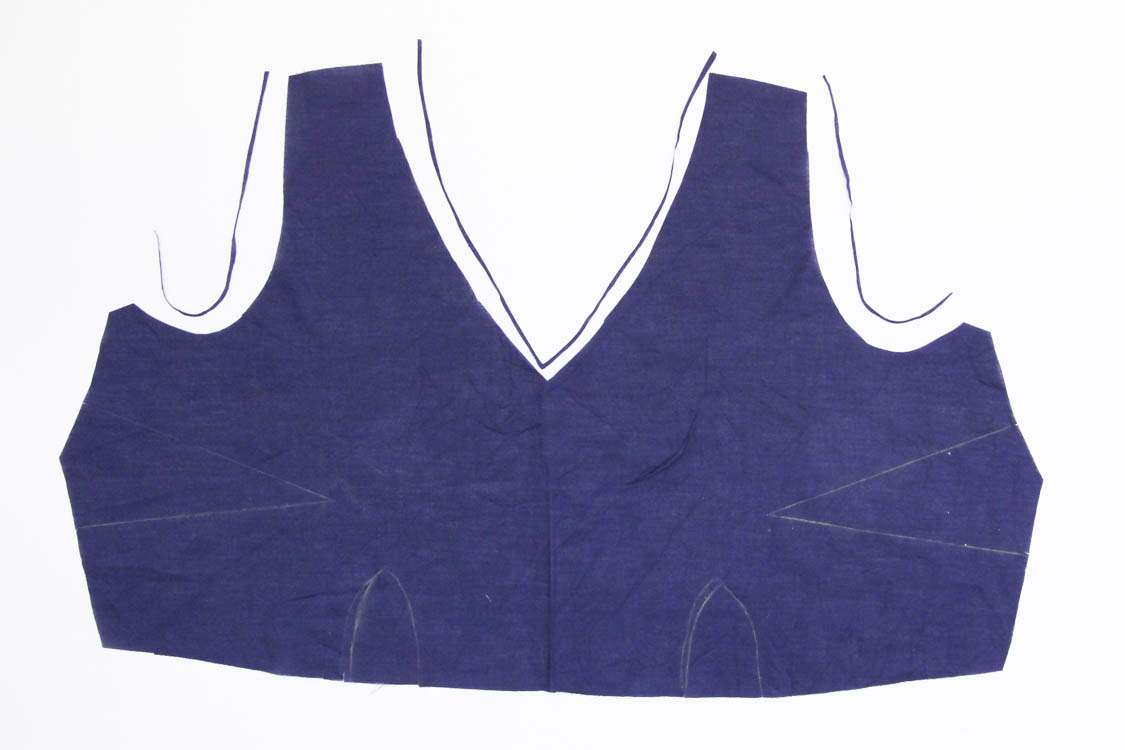
I’ll be making two dresses: one with the scoop neck/high back bodice (View A) with the gored skirt (View B) using the olive crepe Upton Dress kit, and one with the V-neck bodice (View B) with the pleated skirt (View A) using the navy Tencel Upton Dress kit. Most of the time I’m going to demonstrate with the V-neck/pleated version and the steps are the same for both variations. However, where they differ I’ll show you both!
Throughout this sewalong I have turned up the exposure and contrast of the photos to make them easier to see – just bear in mind that if you buy this Upton kit the colours are slightly darker than shown!
Prepping the bodice
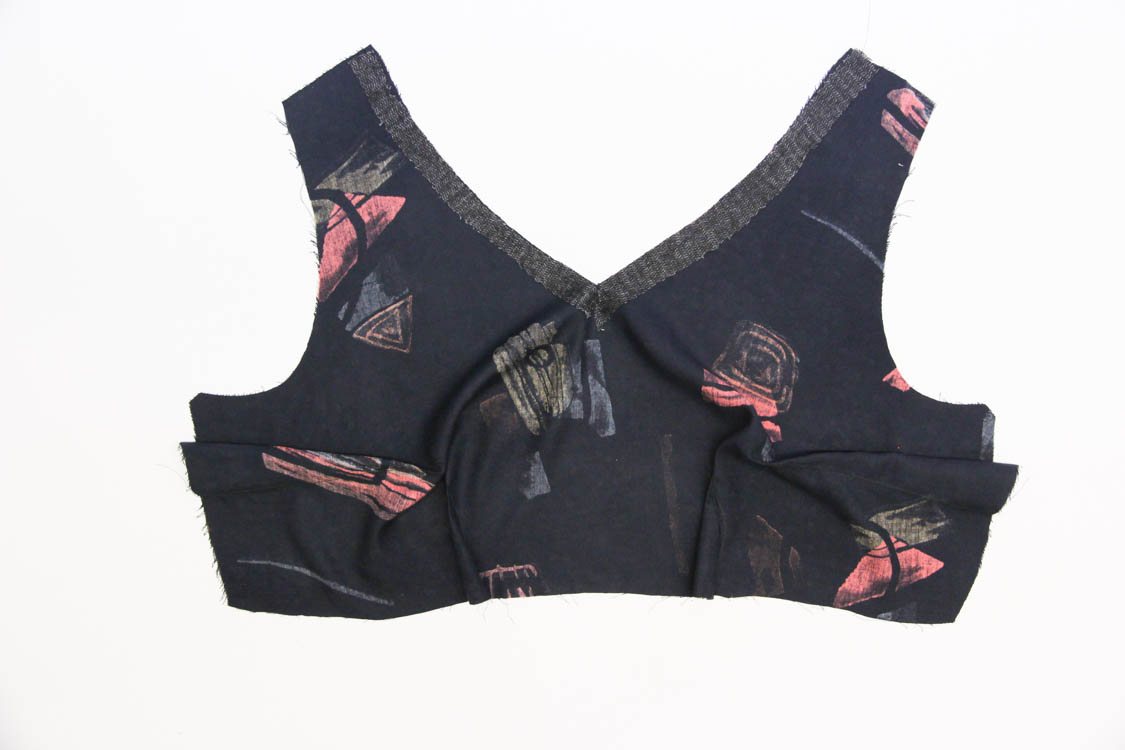
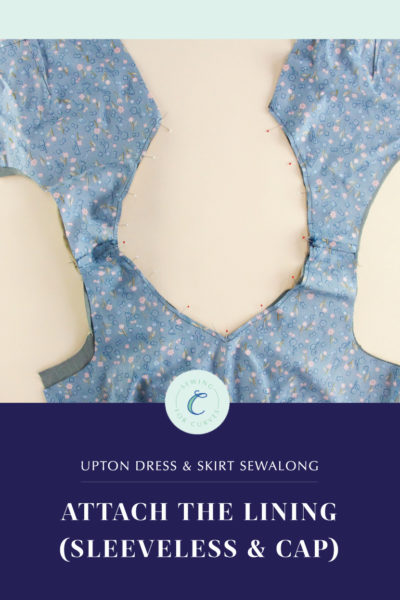
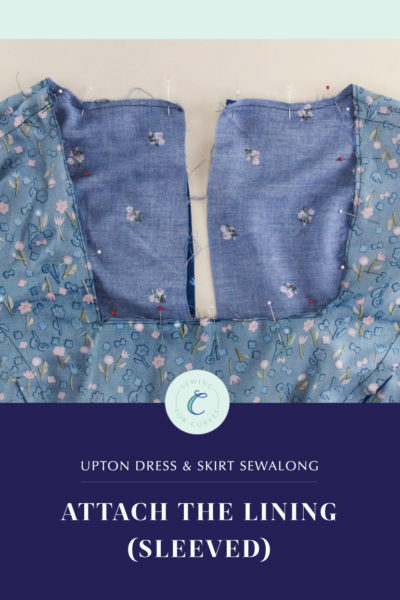
The bodice is fully lined, but we want to make sure the lining doesn’t peek out when it’s worn. So the first step is to trim a little bit off the edge of the neckline and armholes of the lining – the recommended amount is 1/16″ (1.5mm) but it can be hard to do that precisely, so as long as it’s about 1/8″ (3mm) or less you’ll be fine. This will make the seams roll slightly to the inside (lining) side.
Depending on the weight of your fabric, you may want to use fusible interfacing (or strips of silk organza selvage) to stabilize the neckline and armholes – this will give them a little more body and help prevent the dreaded stretching out. I used strips of fusible interfacing for my View B dress.
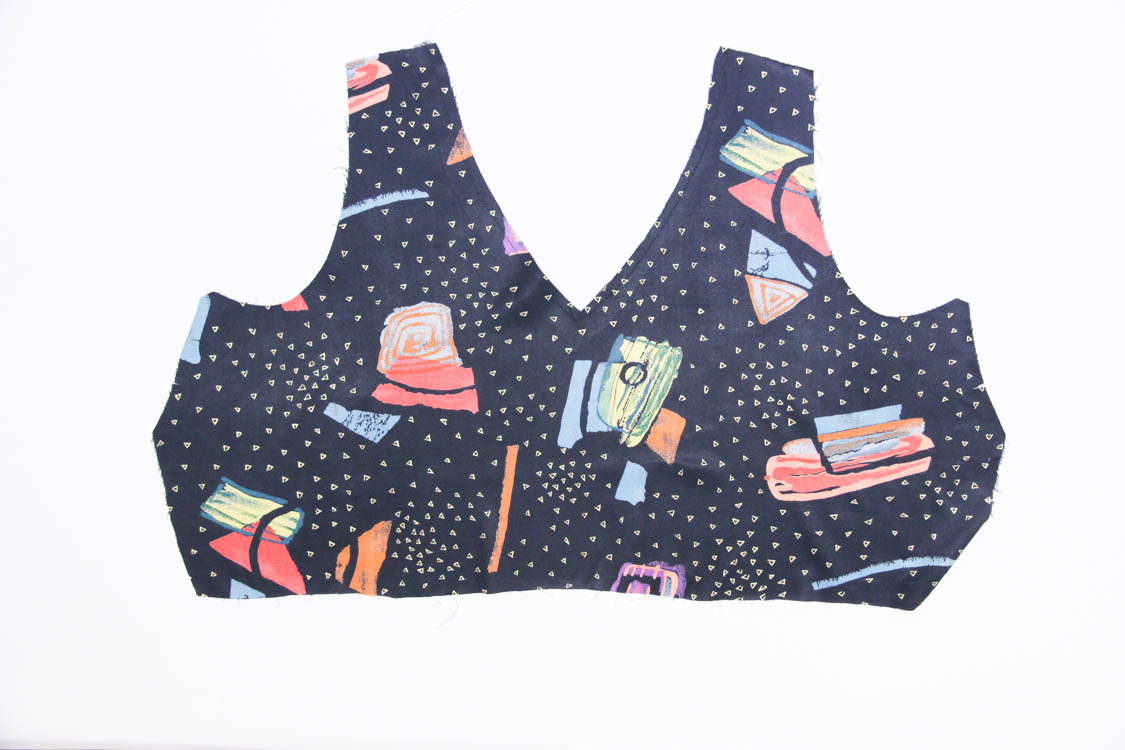
Next, we need to staystitch the neckline of the bodice shell (the main fabric) and lining, and I recommend it even if you’ve interfaced. This is especially important for View B with the V-neck front and back neckline as they really, really, really want to stretch out (because they’re on the bias). To staystitch, turn your stitch length down to a short stitch (around 1.5), and sew at a 1/4″ (6mm) seam allowance in two passes. For the front neckline, start at the shoulder and end in the center front; for the back neckline, start at the center back and go up towards the shoulders.
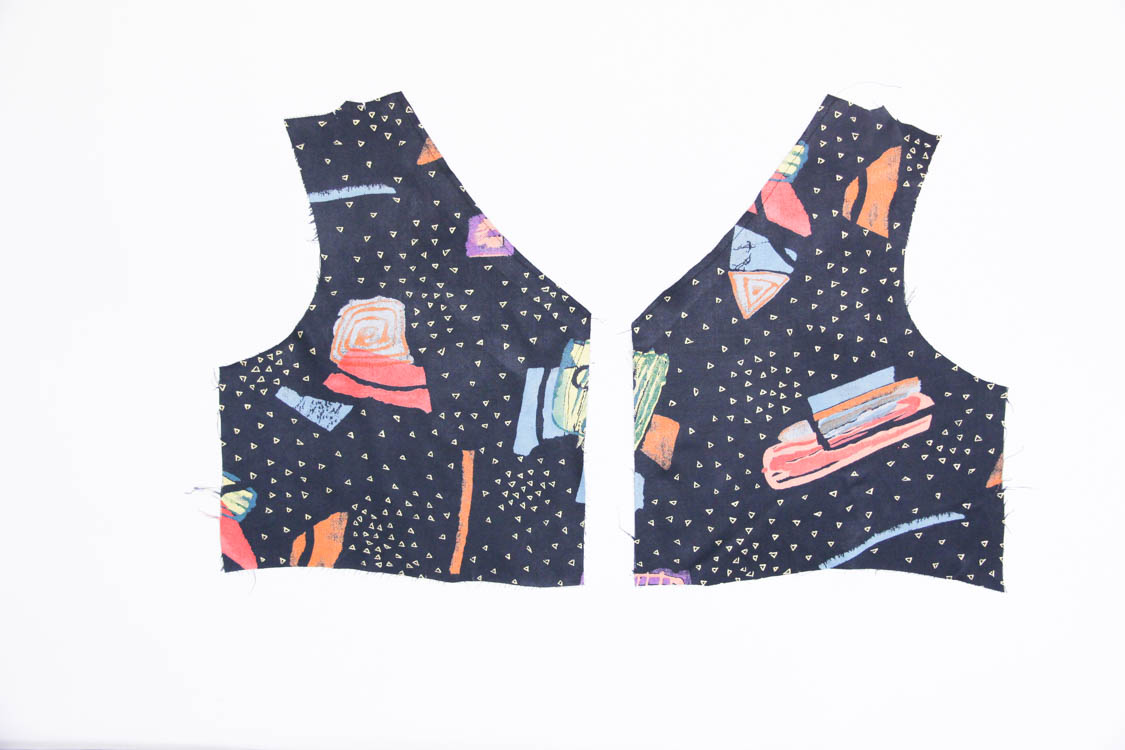
Next we’ll be assembling the bodice shell and lining. Any questions at this stage?
I am a size 20 bust but size 26 waist. Do I grade out just below the dart in the bust? I’ve never graded out a pattern before so I’m wondering where you think I should start that. There are only a few inches below the dart to do the actual grading out to size 26. I am narrowest just below my bust so that does make a little sense to me.
Hi Jen – normally I’d suggest starting grading under the dart, but because you’re going up quite a few sizes I think it would make sense to start at the top of the side seam and gradually grade up – so start at the 20 side seam at the underarm, go the 22 once you hit the dart, and then go to the 26 at the waist. As always, best to muslin first! You could also also size up a little bit if you’re OK with more ease (this dress has minimal bust ease) and start at the 22 under the arm and go to the 26. Hope this helps!
This is my exact measurement! I am so glad I went into your blog and found the answer. Thank you
Question about the pattern views – if I’m doing the bodice from View B and the skirt from View A, which set of waistbands would you recommend using?
View A waistband! The bands are actually identical they just have different notches to help line up with the skirts.
Awesome! Thank you. I’m super excited to be sewing this up!
Hi Jenny! I bought the Cashmerette Upton pattern pretty much the day it came out, because, hello, beautiful fit and flare dress!!! 😀
Anyway, I’m having a little fit trouble. I have a 51″ bust, 42″ waist, 56″ hip. I wear a 38JJ bra, so there’s a lot of bust to cover! I know those measurements on the pattern would say to cut a 22 E/F but, like I said, I have a lot of bust, so I cut the 22 G/H instead. It mostly fits well, a little snug in the back maybe, but there is pesky armhole gaping right in front. Normally, I would pinch that out in the muslin and then rotate it into the side-seam dart on the pattern, but with the different cup size options with this pattern I wonder if maybe I cut out the wrong size?
Hi Brandy, I think you probably did choose the right base size – it may be that there’s a difference in the height/projection/shape of your bust vs. the pattern design that’s causing it, in which case, I’d recommend doing your usual adjustment. Typically I’d tell people to size down and go up a cup size when there’s gaping but there isn’t a 20 I/J and I think your adjustment might have a better chance of working than doing an FBA on the 20 G/H.
Can you tell me where the waistband should sit? It says to measure your waist measurement where it creases when you bend over, but is that where the waist band will sit? I am quite short-waisted but the band is sitting higher than where it says to measure. Hope this makes sense! I don’t want to cut out the proper fabric without being sure.
The bottom of the waistband should hit your high waist
OK thanks, I’ll give it a go!
Hi there. I’m also rather top heavy beyond the pattern size. My question is this (forgive me if it’s a stupid question, I haven’t sewn a lot of woven bodices. I lengthened the bodice a few inches below the side bust dart but above the bottom dart. do I need to re-draw the bottom bust dart since it’s now several inches below the side bust dart? (ie do I redraw the bottom curved bust dart at where I started lengthening it and continue through to the bottom of the pattern? I made a fitting shell and didn’t make any changes to the darts, but I’m wondering if I should have.
Hi AJ – it depends why you added that extra length. If it’s because your torso is just longer than the pattern, but your bust is in the same place, then you will need to length the waist dart, so that it hits at the right point on your bust. However if you added the length because your bust takes up more space, you may need to leave the dart where it is if you need the extra room. Best is to make a muslin and see how it’s fitting – if you find extending it has left you with bagginess under the bust you’ll want to extend the darts to take in that excess.
Hello! This pattern is so beautiful 🙂 I’m planning on using it to make a wedding dress for myself. I’d like to use different fabric for the bodice and skirt, though. Would the bodice fashion fabric yardage needed be equal to the lining yardage? I apologize if this is covered in the pattern itself– it’s been ordered and it’s on its way, but I am eager to buy fabric as well. Thanks very much!
Yes, the bodice yardage would be the lining yardage multiplied by 2 (assuming you’re still lining it). I’m very excited you’re using it for your wedding dress! Would love to see a photo of the final dress 🙂
Thank you for your super- fast reply! I’m excited too 🙂 I will tag you on instagram when I post it- is that OK, or should I email you?
That would be great!
Assuming you want to make the pockets in the same fabric as your skirt, you would need about the *same* amount of fabric for the bodice as for the bodice lining (plus a little extra if you are planning on one of the sleeve expansions). I’m making an Upton with a print bodice and a solid skirt, but decided to leave the pockets out since it will be a floor length ballgown.
is there sleeves you can recommend i could use for the upton dress?
Yes, we have a sleeve expansion pack: https://www.cashmerette.com/products/upton-dress-sleeve-expansion-pdf-pattern
Is there any chance you could add photos of the sleeve expansions being installed?
We’re not planning that at the moment, but if you need help you can ask in our Facebook group or email hello@cashmerette.com
Thanks. I’ll soldier through with the directions from the expansion and if I’m having trouble I’ll be sure and contact either you or the FB group.
Hello Jenny
This is my 2nd try on the upton dress still coming out a mess. my bust is 48, waist 43, hip 48. I used 18 EF cup graded to a size 22 waist and down to size 18 hip. After completion the bodice back snug and gaping at the armhole and the gore skirt is tooooooo big its swimming on me. I am so frustrated i have wasted so much time and money on muslins and fabric and can’t seem to get a perfect fit.
PLEASE HELP!
Hi Pat – please email us at hello@cashmerette.com with photos and we can help you out. The skirt definitely shouldn’t be swimming on you so it’s possible there’s a printing/tracing/cutting error somewhere along the way