Today, we’re going to start our Concord T-Shirts by sewing together the shoulder seams, stabilizing them with clear elastic if you want. When making knit tops on a serger, I generally don’t use clear elastic because I find the serged seam to provide much of the same stability, but if I’m sewing a thinner knit on sewing machine, adding the clear elastic helps the top hold its shape through more wears and washings. To add the elastic, simply stretch a short piece three or four times to soften it up and place it along the back shoulder at the seam line while you sew.
Whether or not you choose to add the elastic, pin the front and back of the shirt together at the shoulders with right sides together and sew. Press the seam allowance to the back of the shirt.


The other piece of our agenda today is the neckline. There are two techniques: one for the high and scoop neckband, and one for the often-feared (but actually do-able!) V-neck.
High or scoop neckband
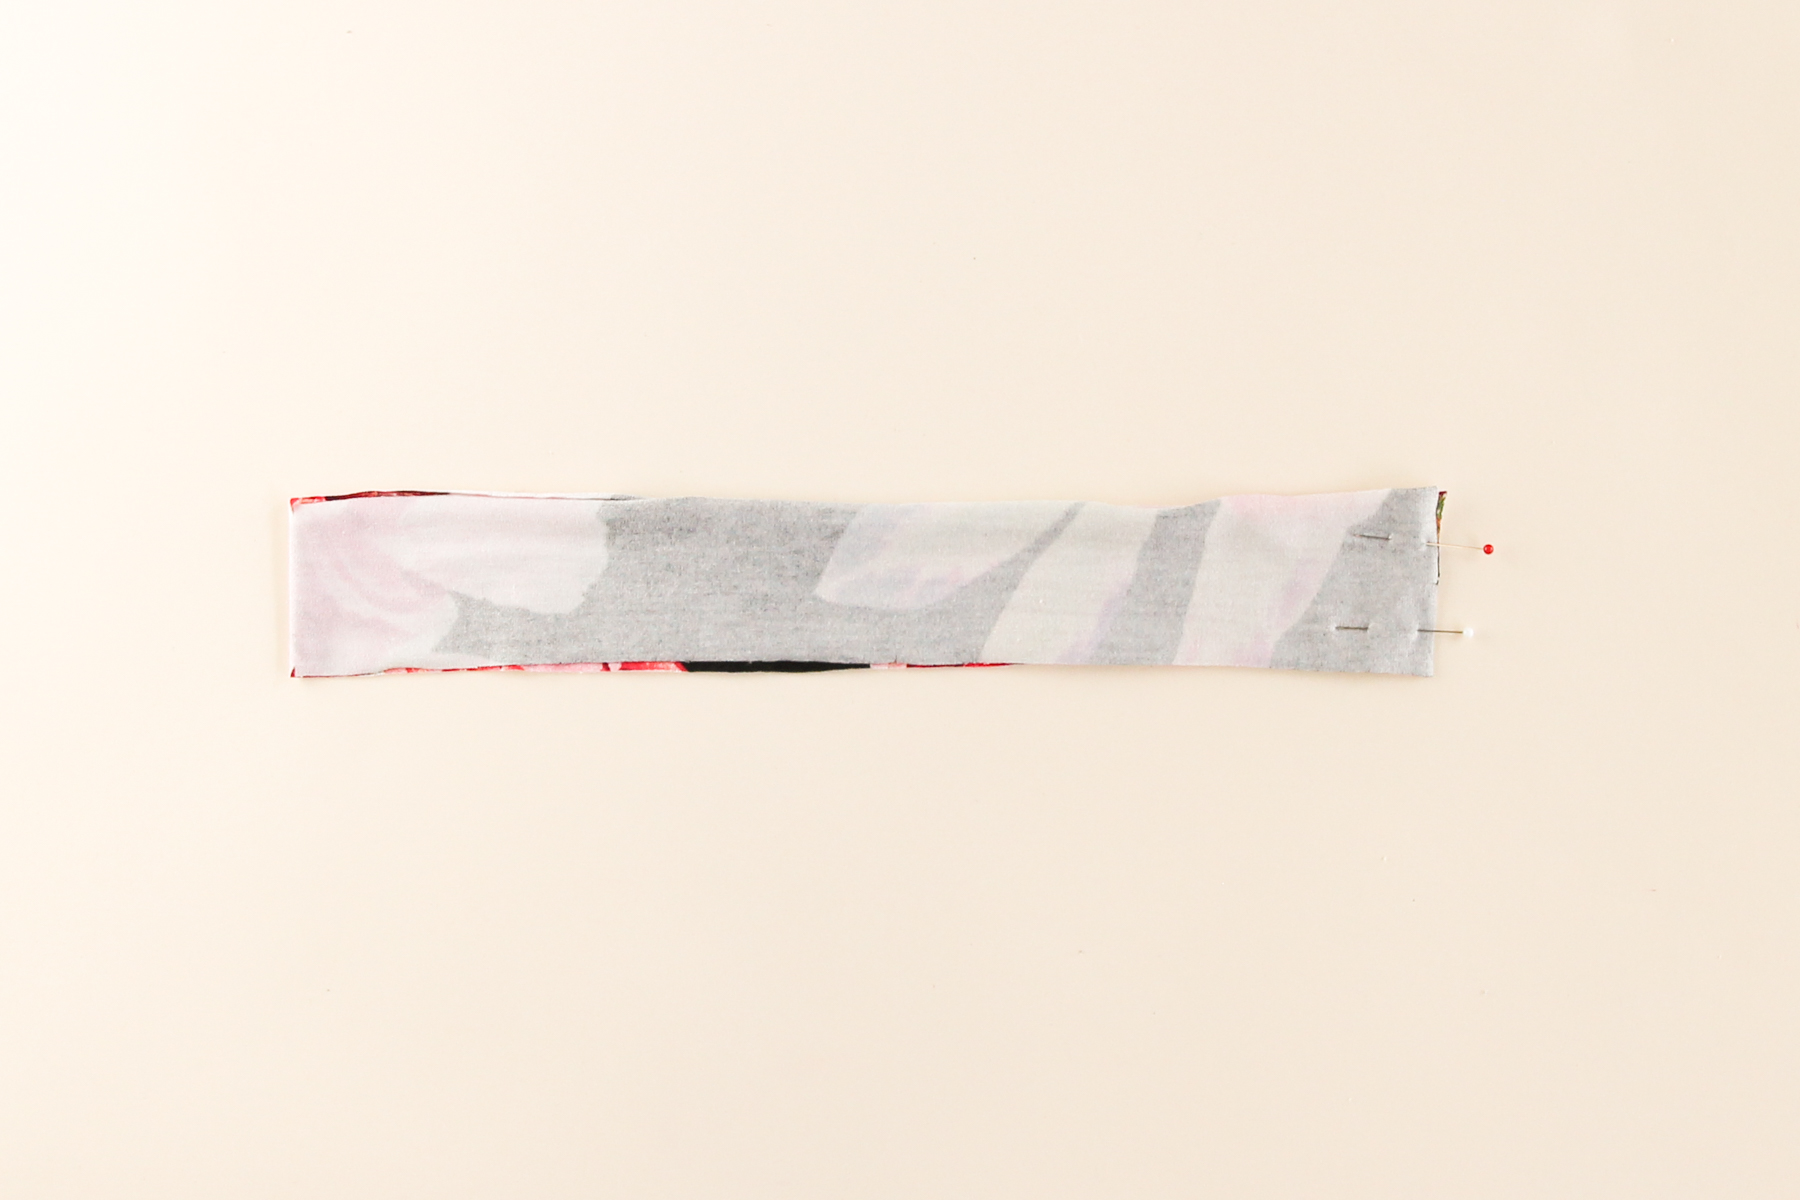
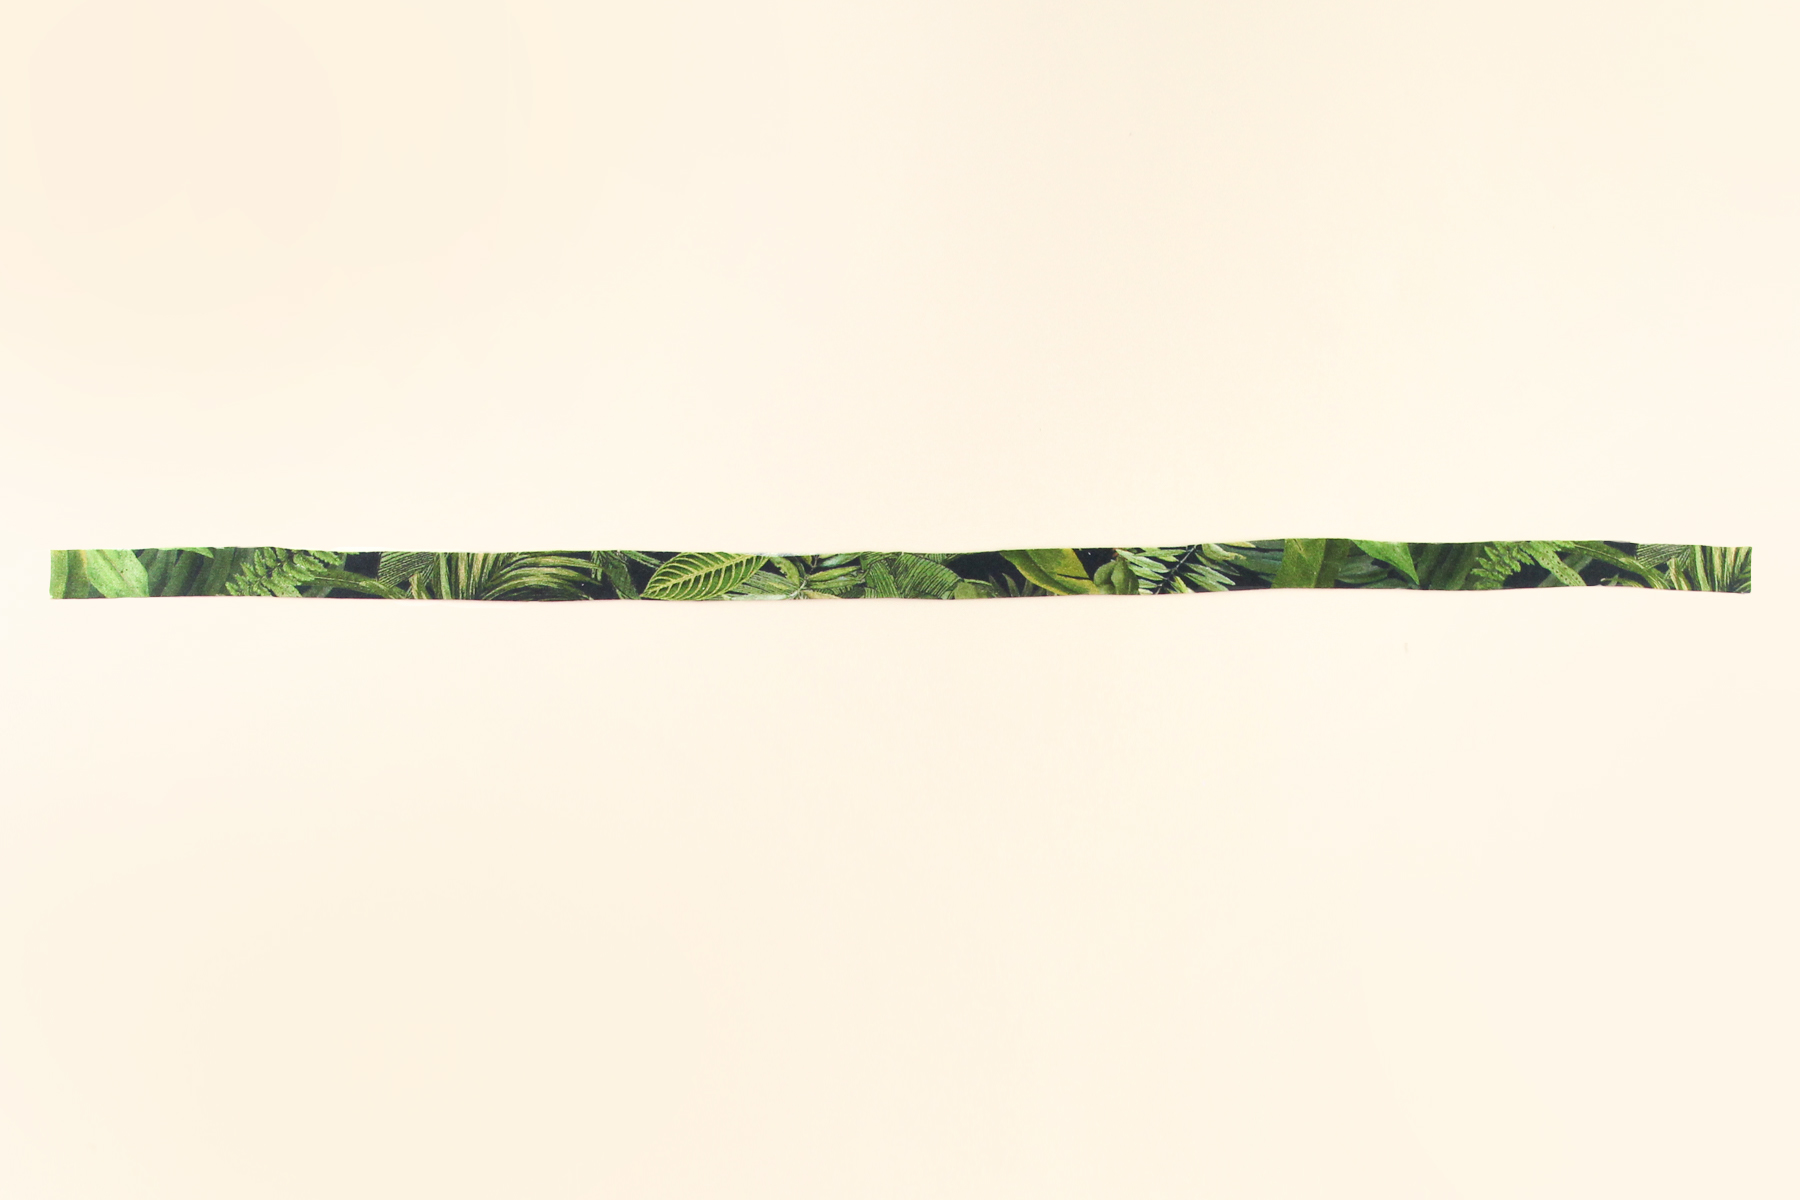
Start by sewing the neckband together at the short ends and pressing the seams open (if you are serging, it can be helpful to clip into the serged seam halfway down, then press the seam allowances to different sides). Remember to use a cool iron and a press cloth to avoid shine.
Although the pattern tells you to cut the neckband on the cross grain, when making striped shirts, I sometimes like to cut the neckband on the grain (as long as my fabric is 4-way stretch) for a little extra detail. This gives you a neckband with short stripes versus a neckband with one long stripe all the way around.
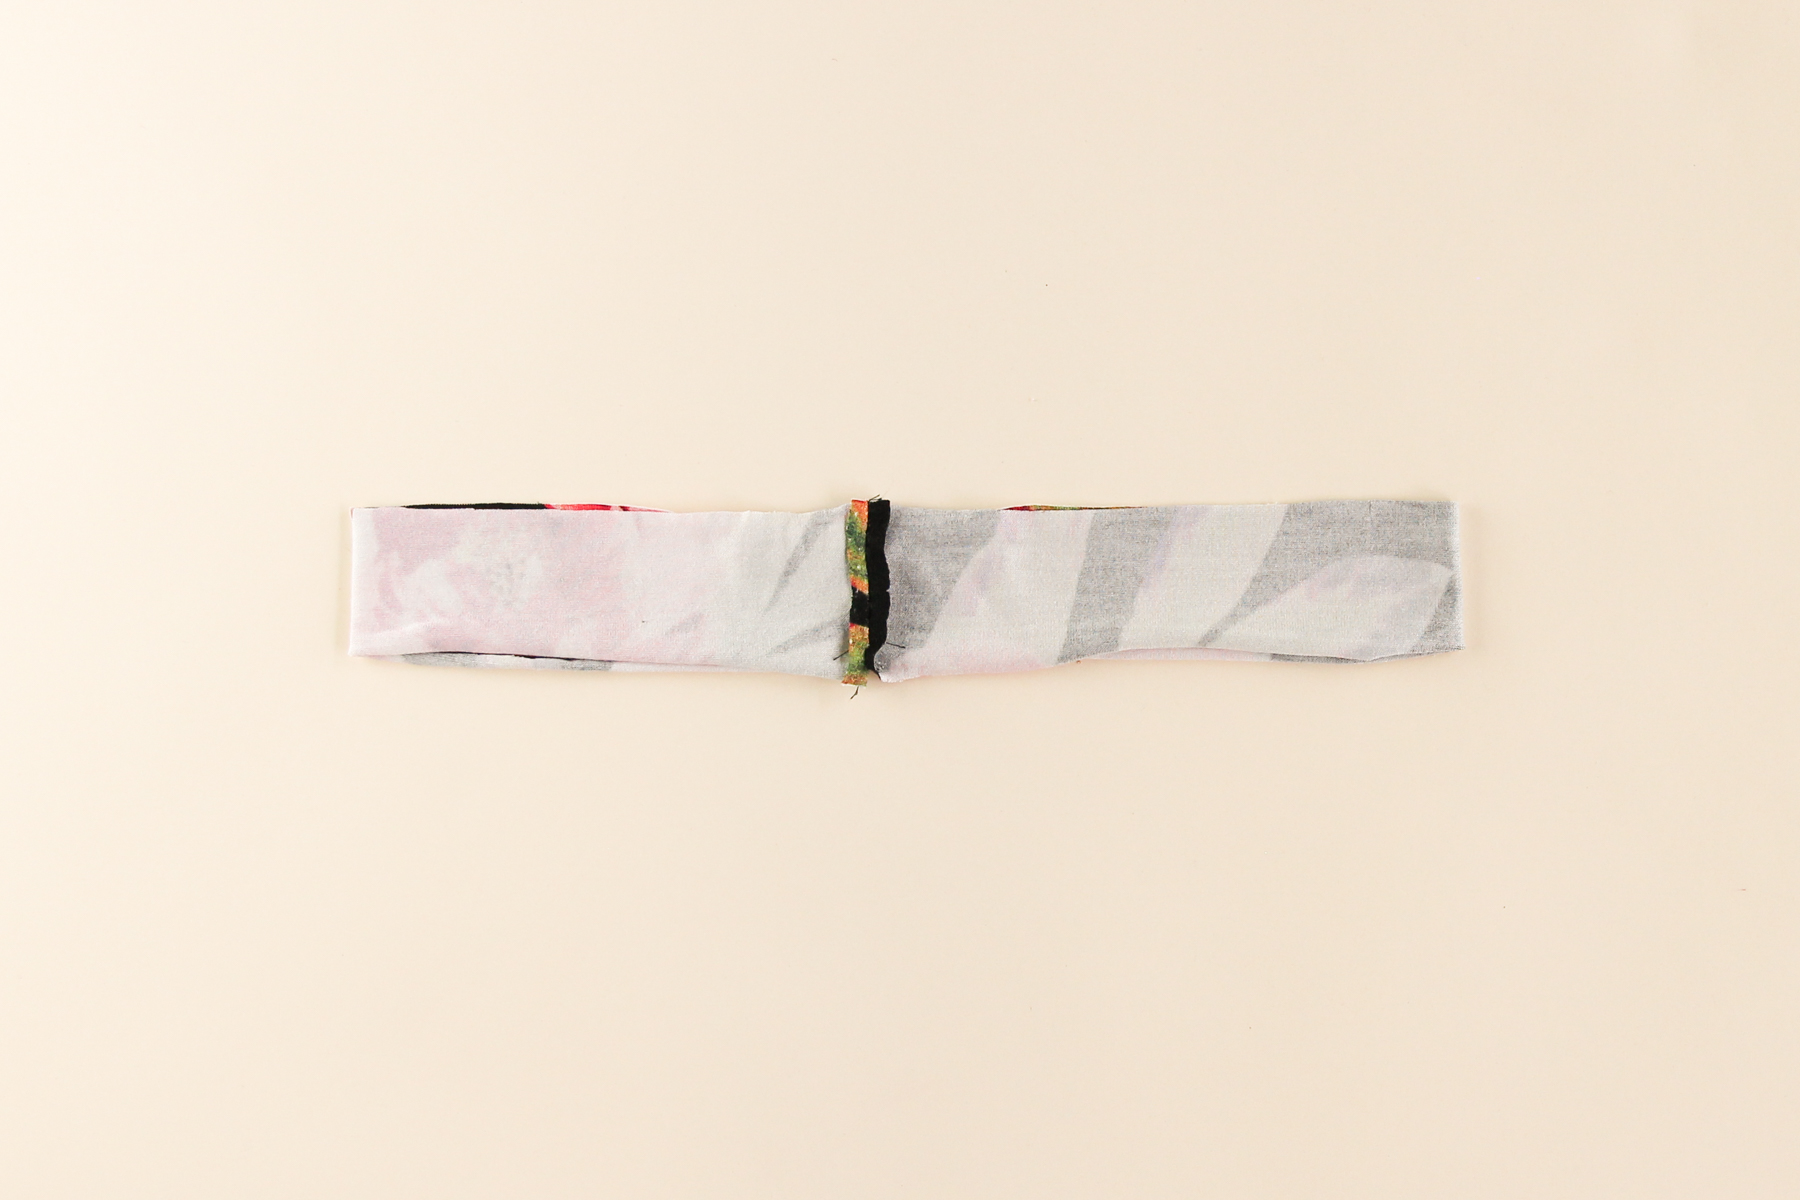
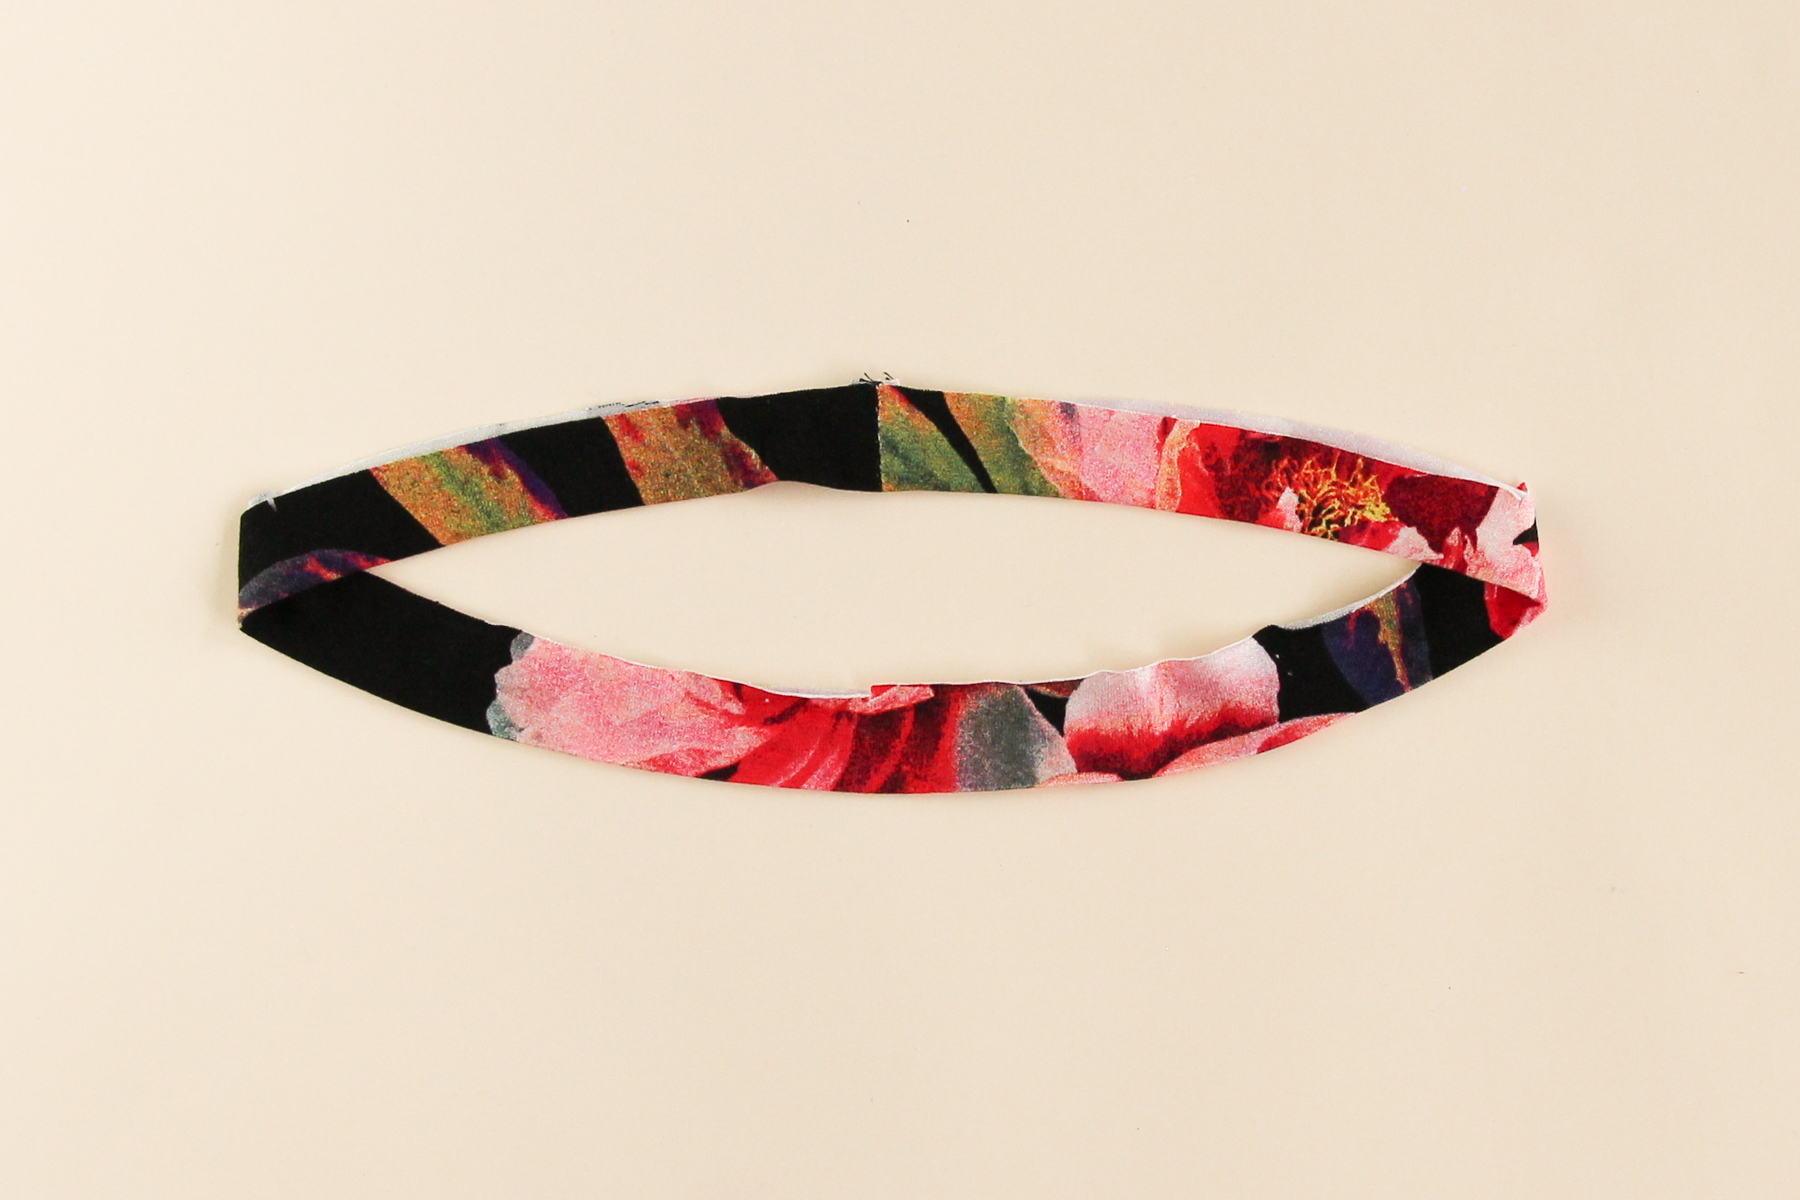
Fold the neckband in half, wrong sides together, and press.
Pin the neckband to the neck opening, matching up the back seam with the center back notch, the front with the center front notch, and the other notches with the shoulders. As we’re going to be stretching (“easing in”) the neckband as we sew, you’ll find the neckband is a bit smaller than the neckline – don’t worry! If you want a bit more control, add more pins, distributing the neckband ease along the neckline.
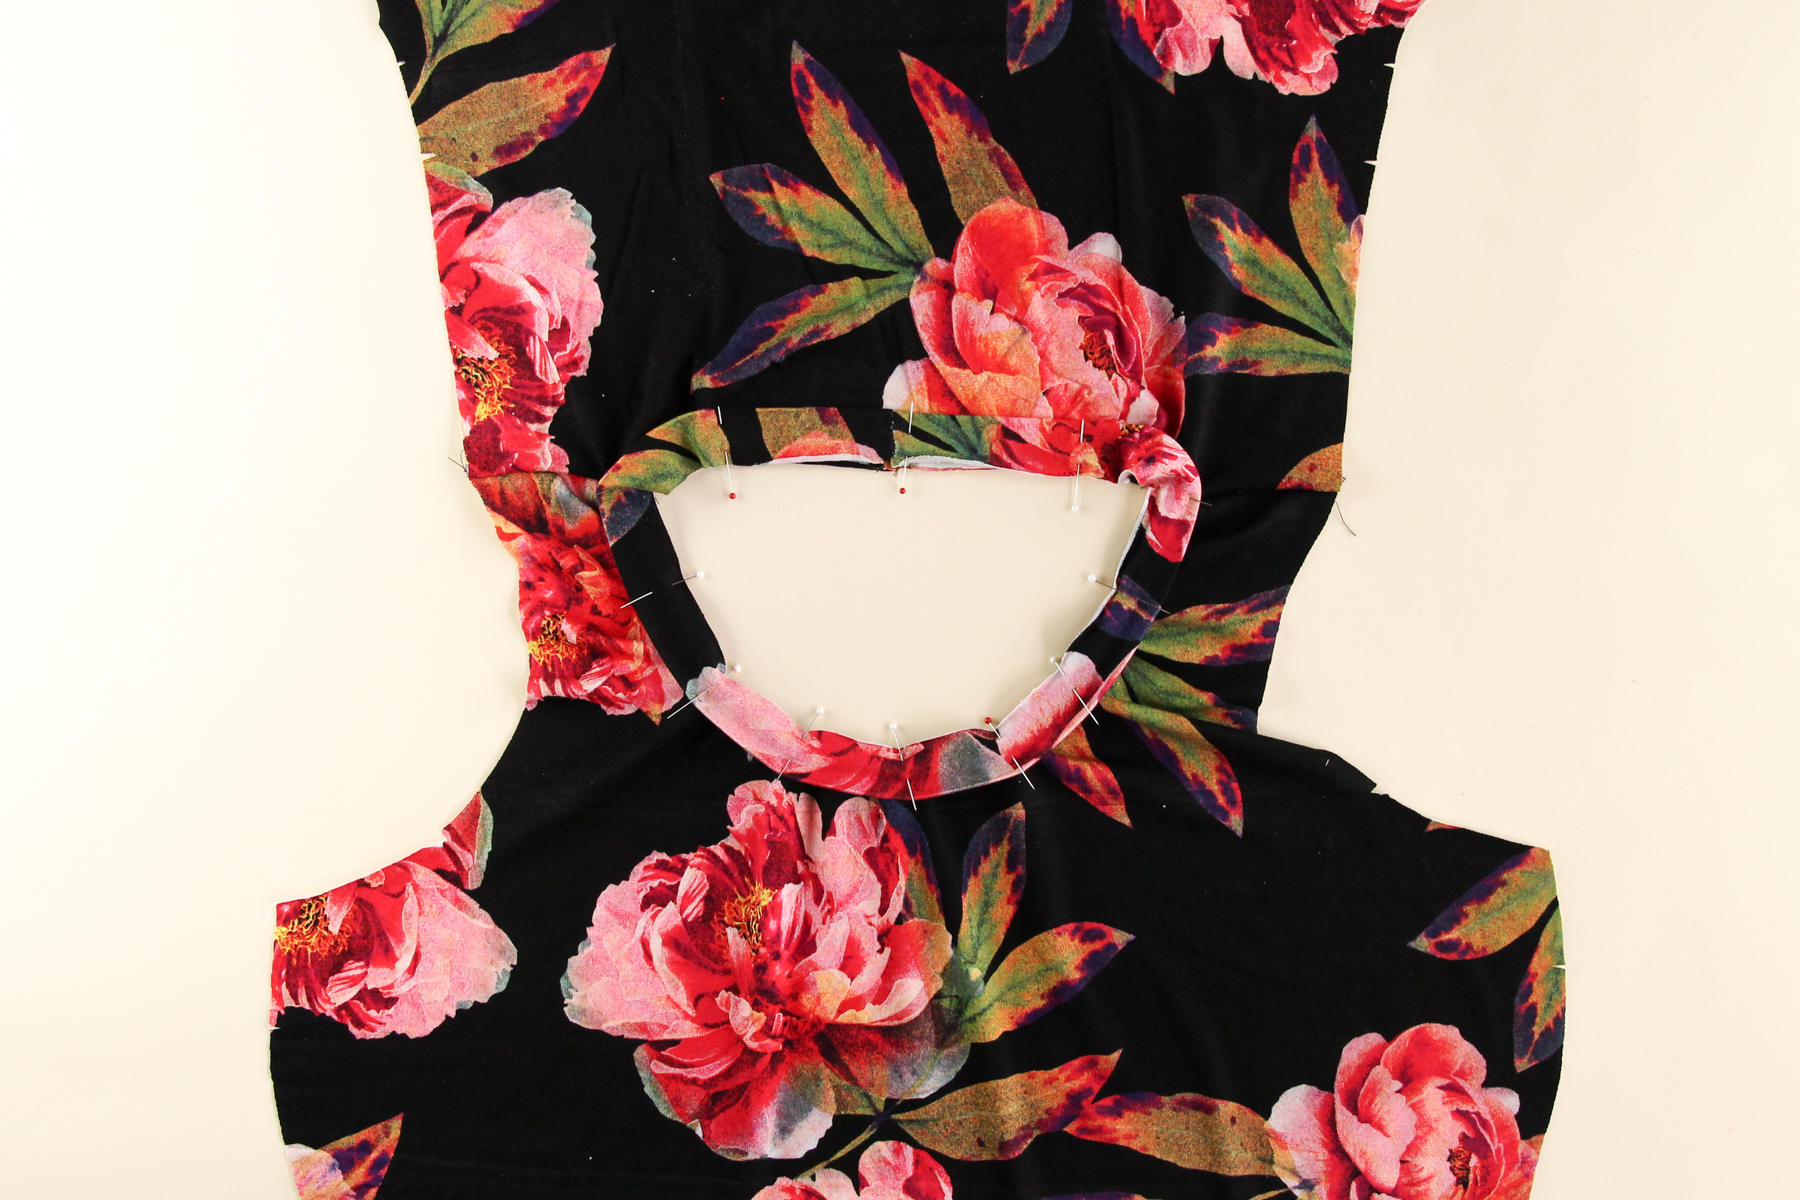
Sew the neckband to the neckline slowly, stretching the neckband to fit the neckline, and making sure you’re getting all the layers and not wobbling – this step is often a lot easier to do on a sewing machine, even if you do everything else on a serger.
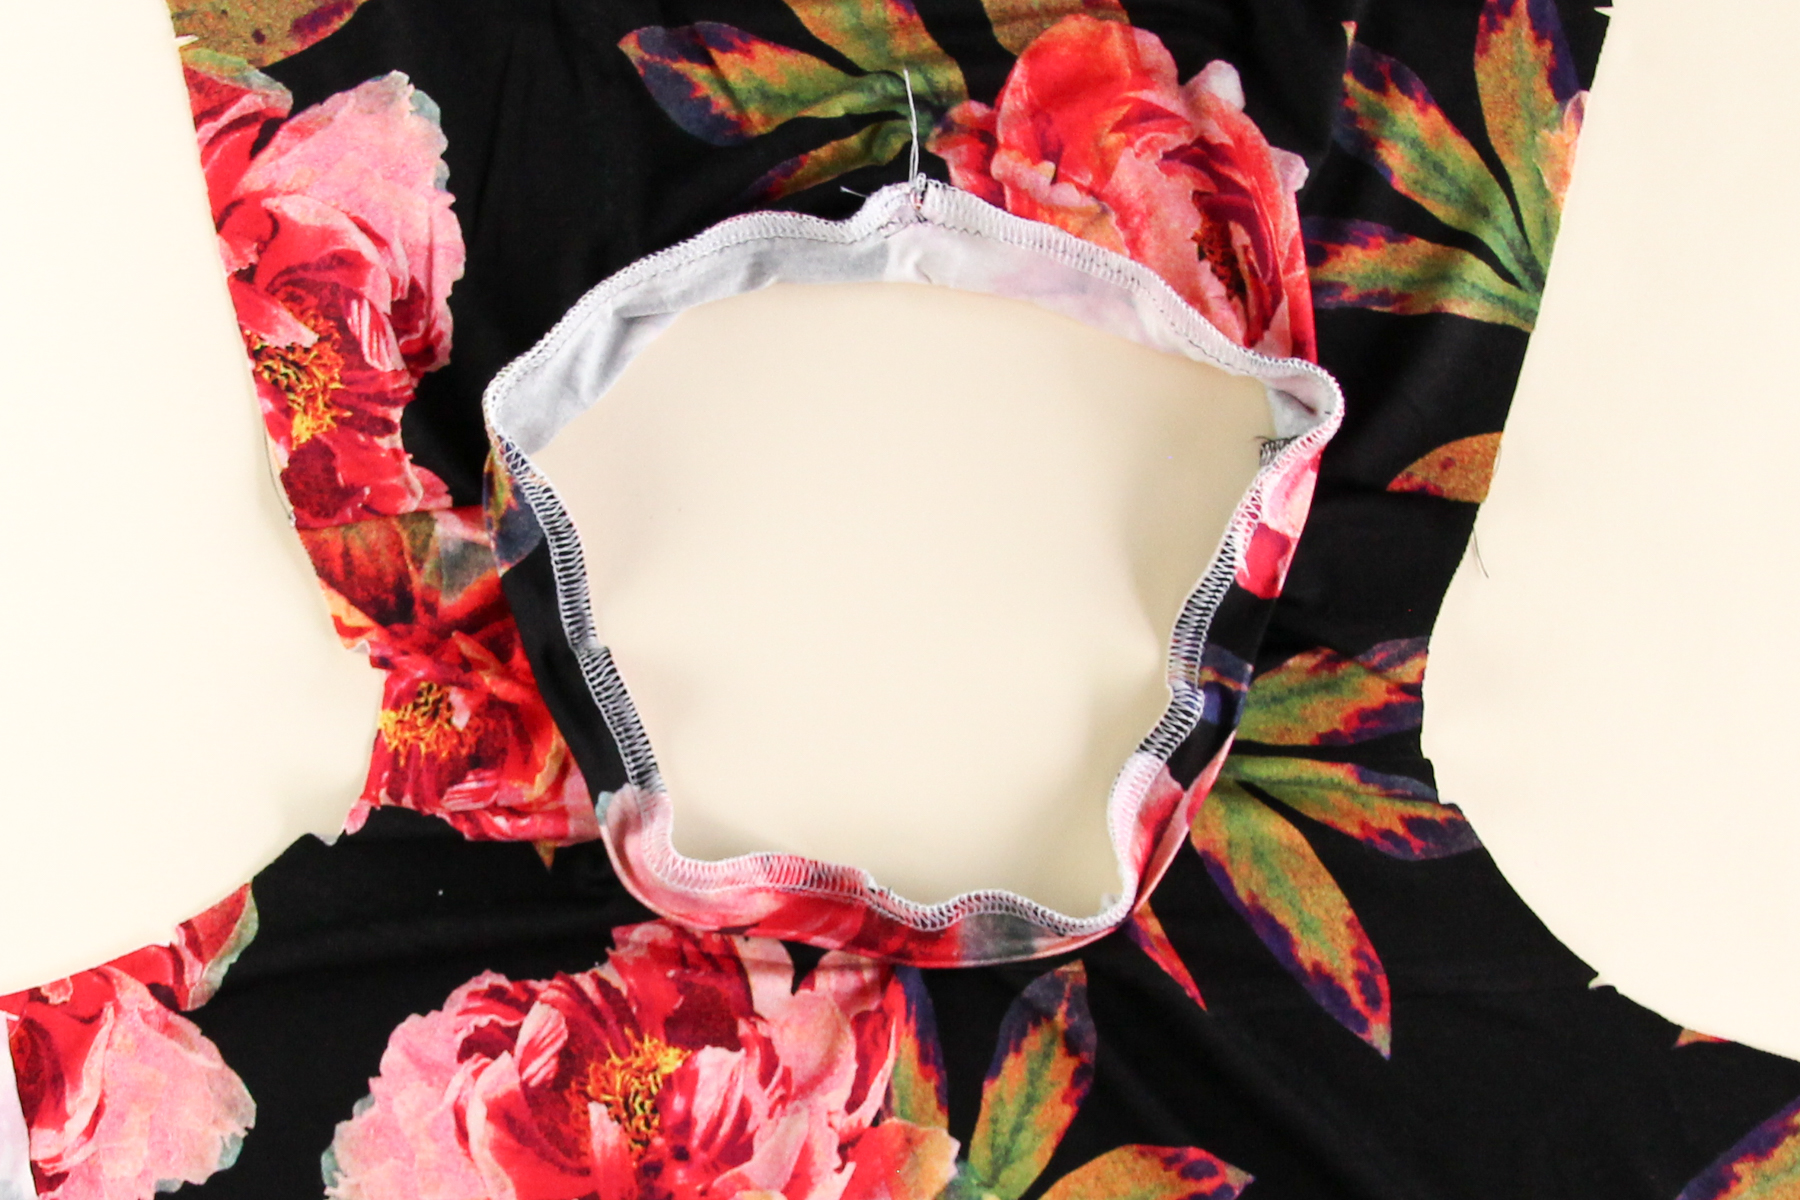
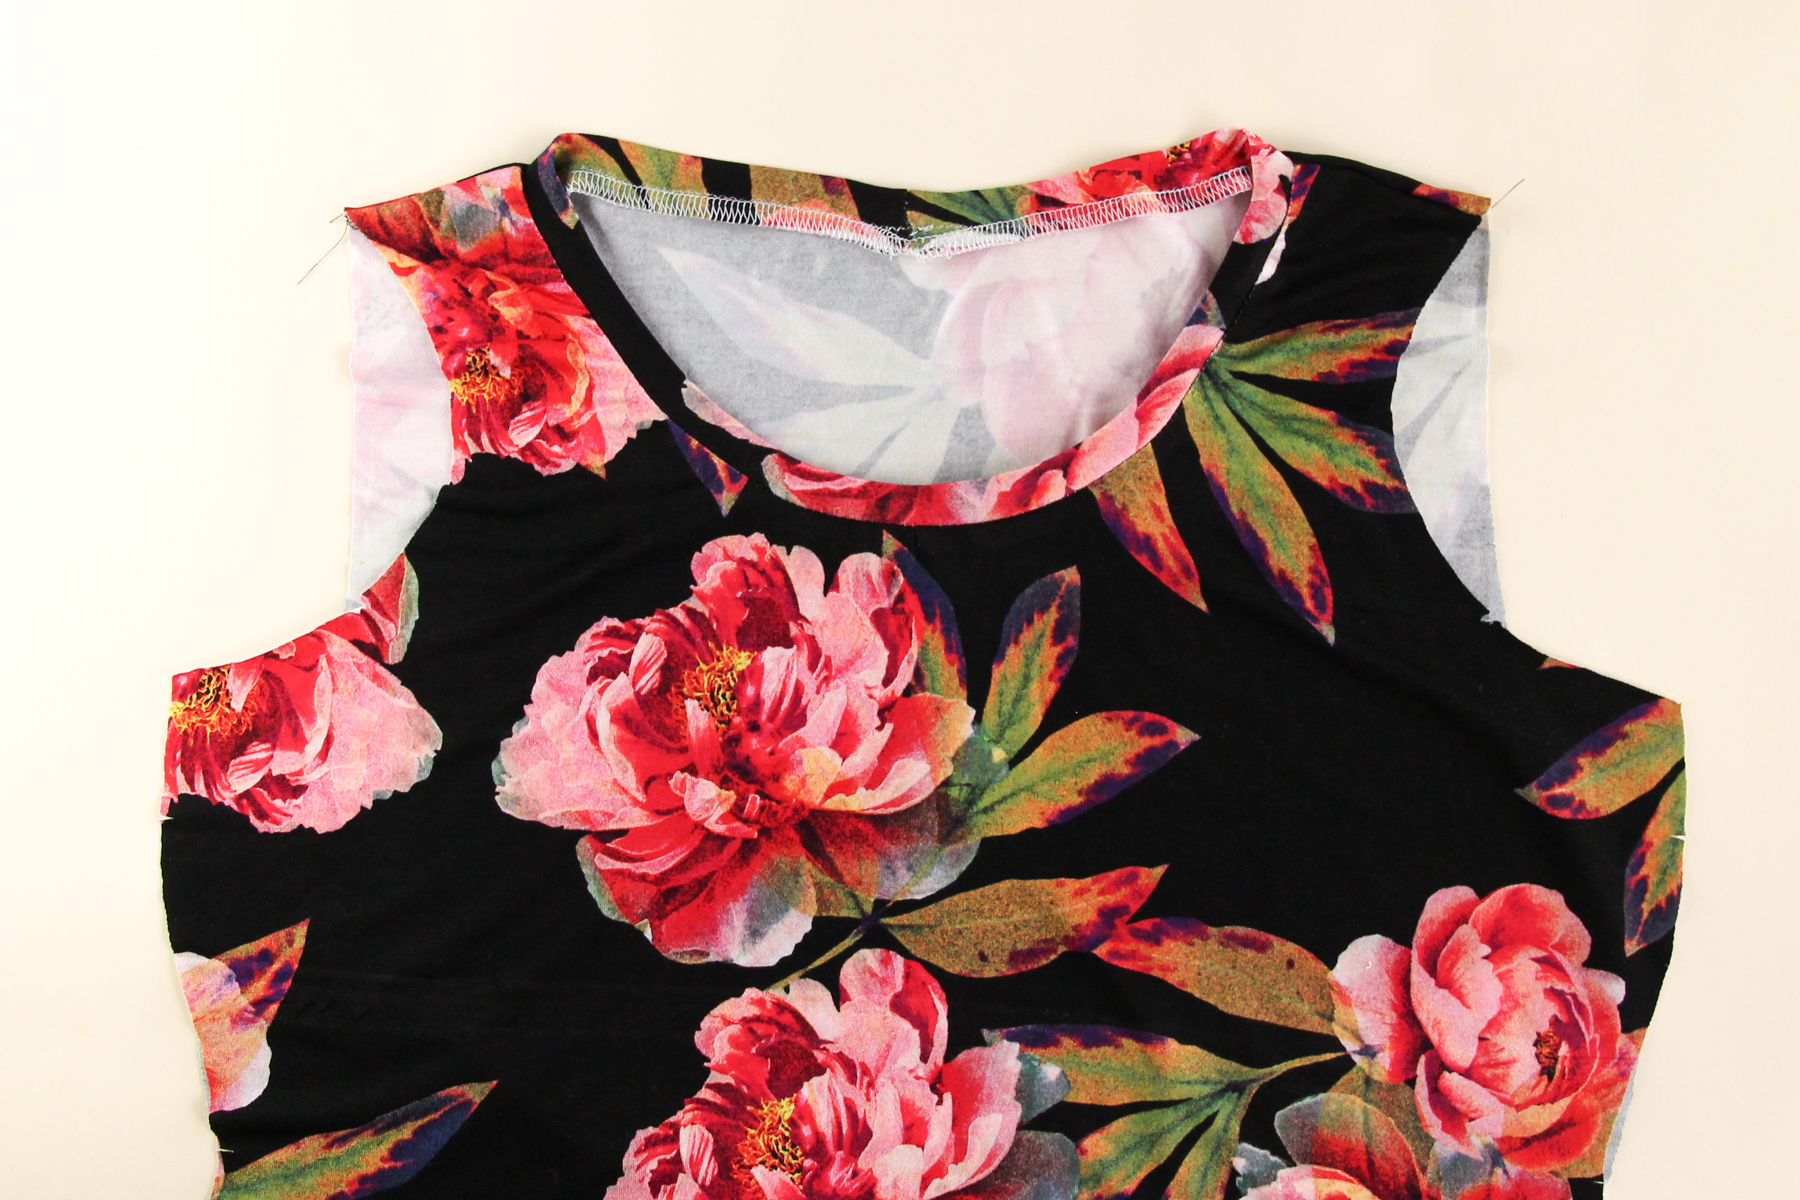
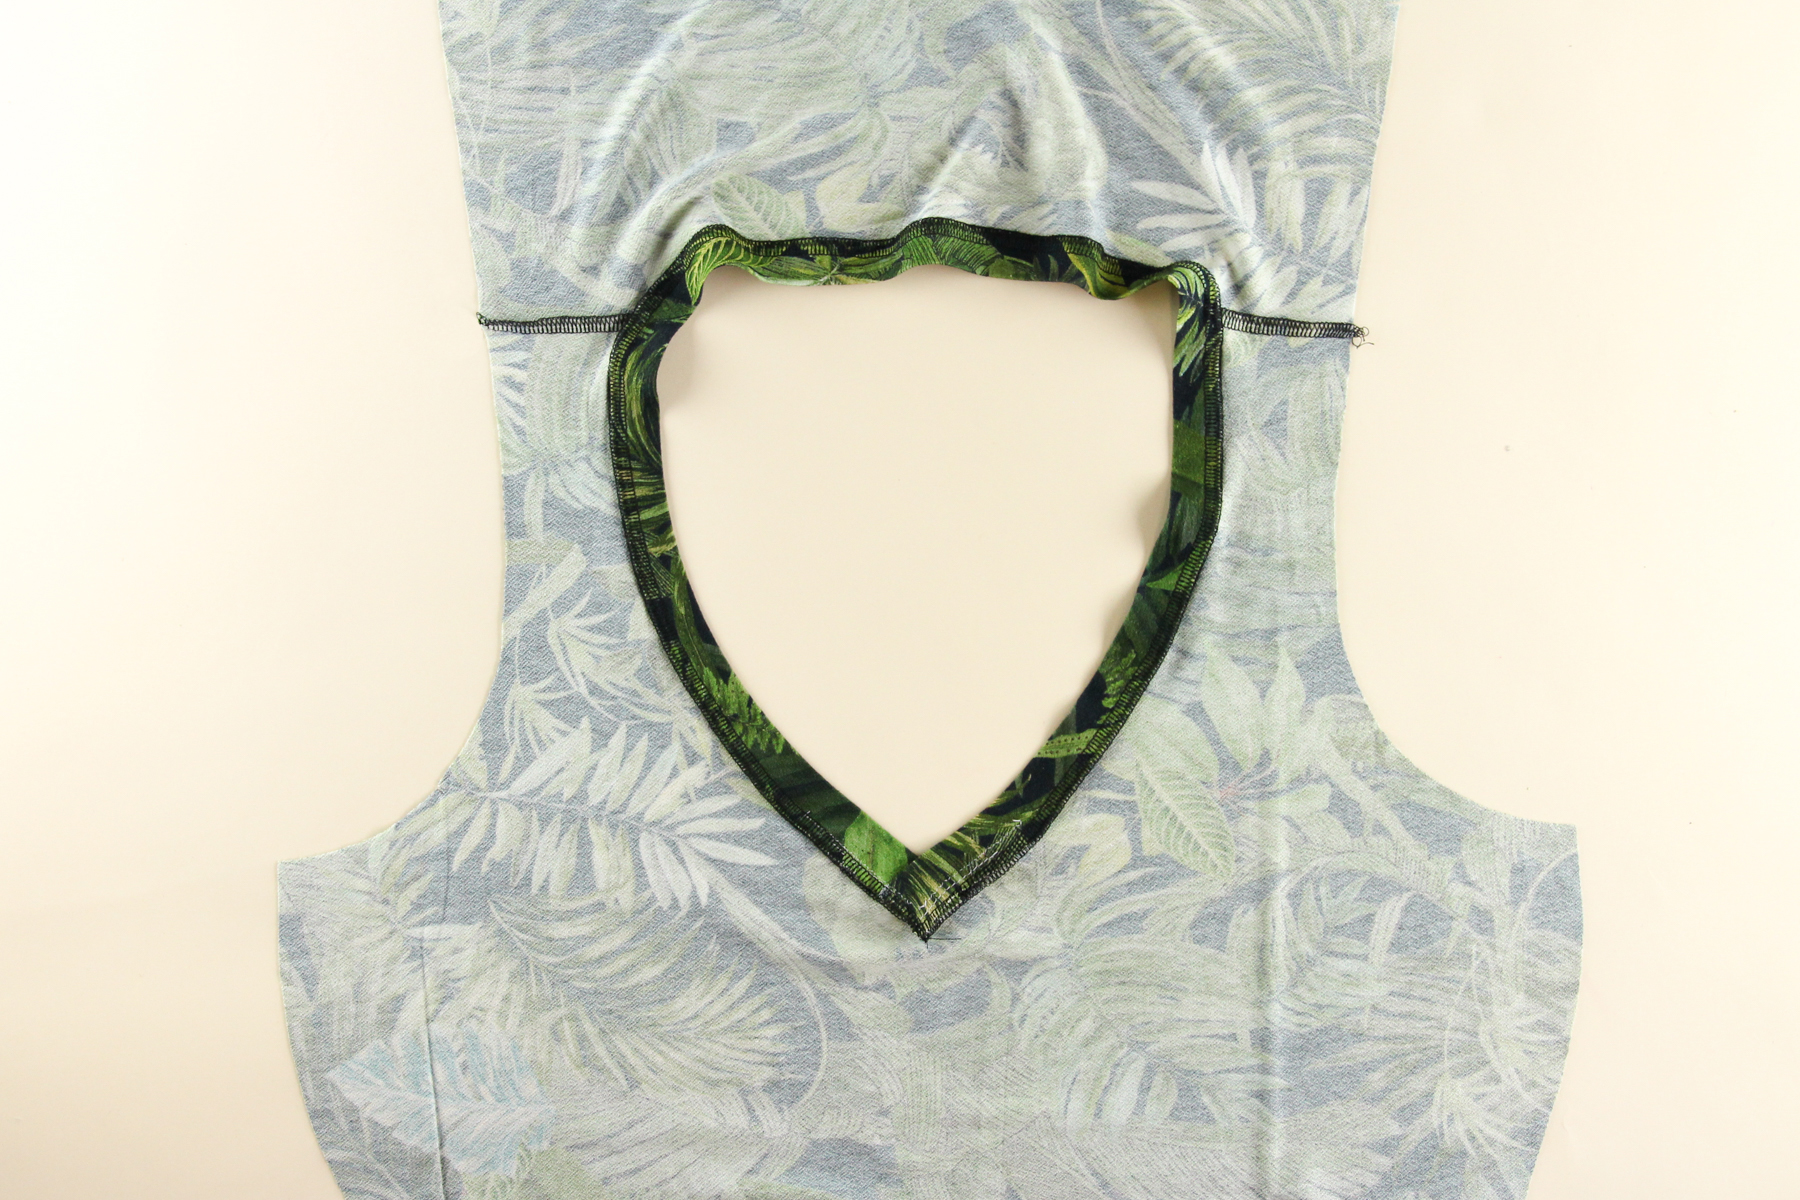
After sewing, press the seam allowance down towards the shirt and if you want, you can topstitch the seam allowance down using a twin-needle or coverstitch.
V-neck
Start by stay stitching the V of the shirt at a ¼” seam allowance and using a short straight stitch – this reinforces this delicate area so it doesn’t stretch out while you’re sewing. If you’re using a particularly flimsy knit you might also want to add a little bit of fusible interfacing tape to this area.
Snip into the point of the V right up to, but not through, your stay stitching.

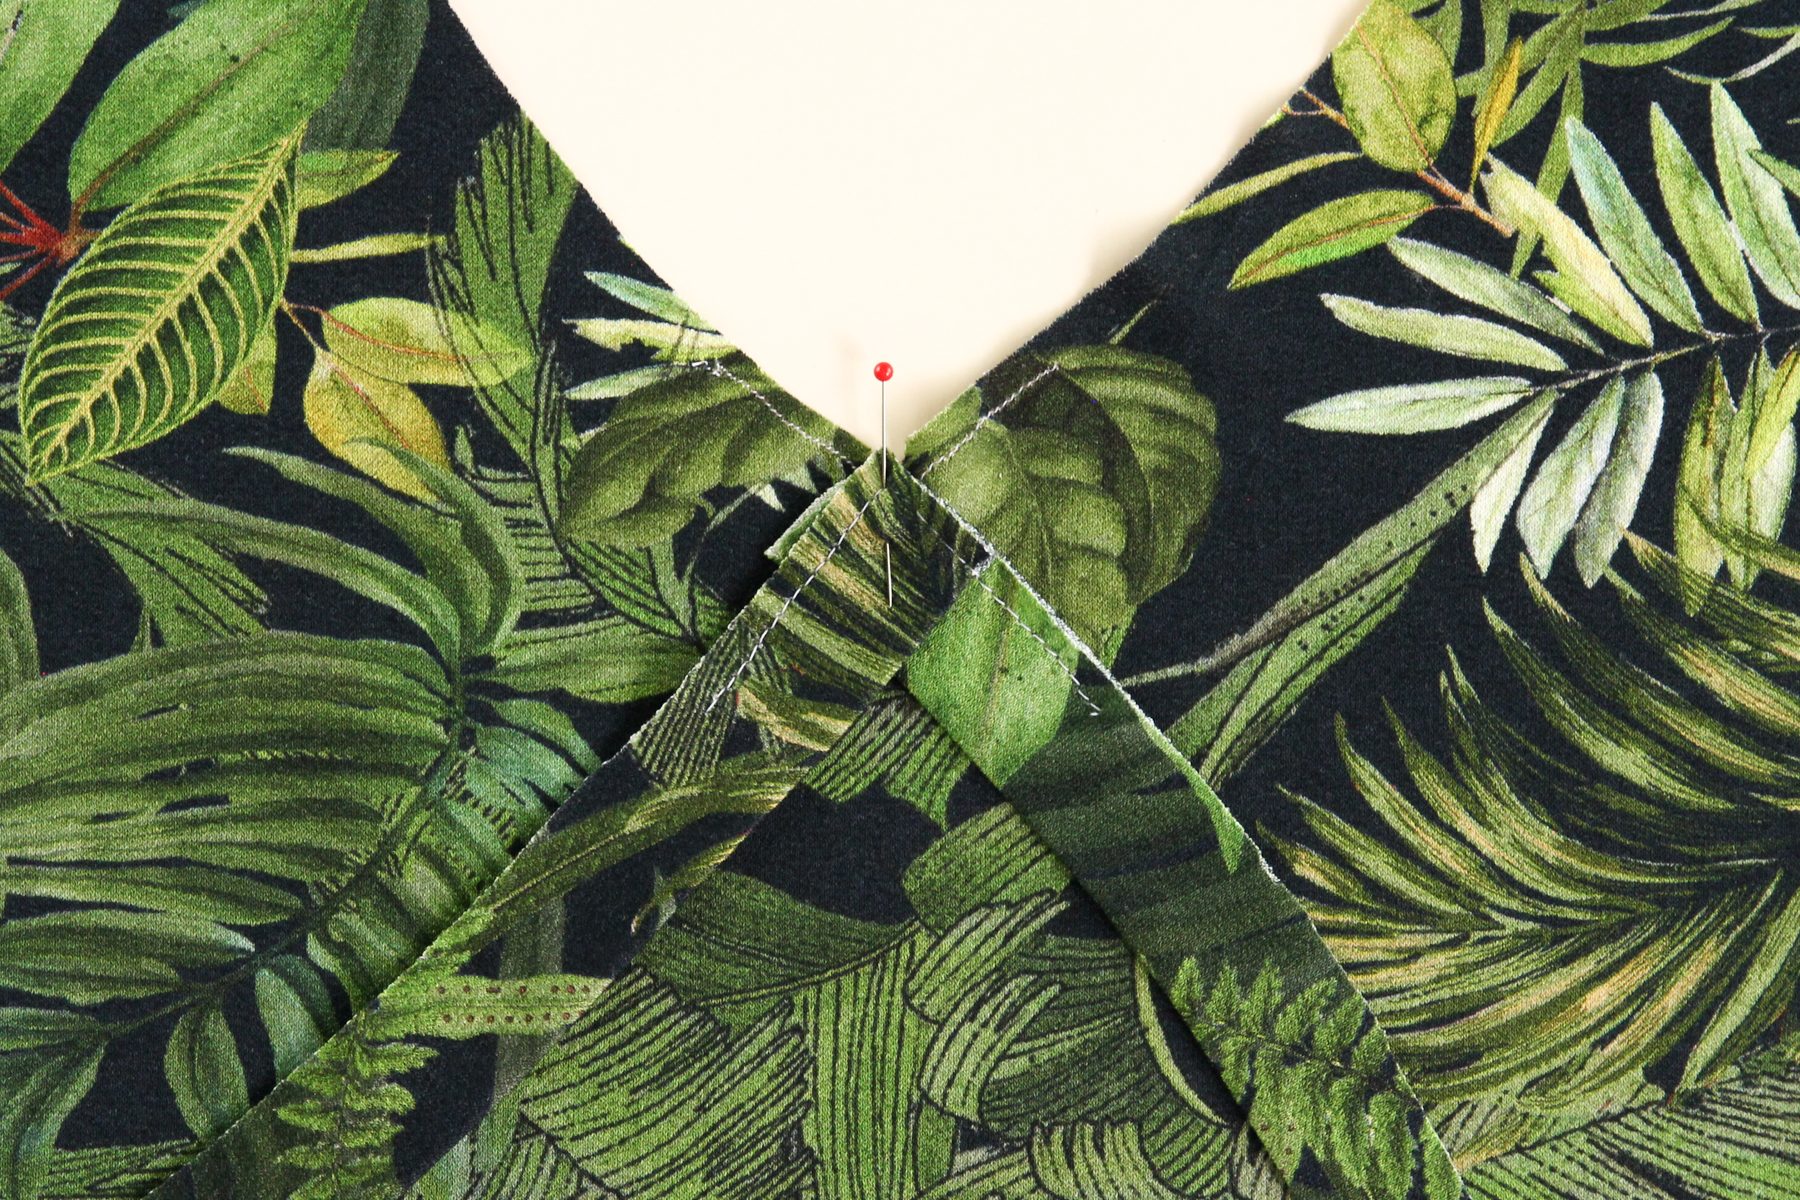
Take your neckband and fold it in half wrong sides together so you end up with a long, skinny piece, and press.
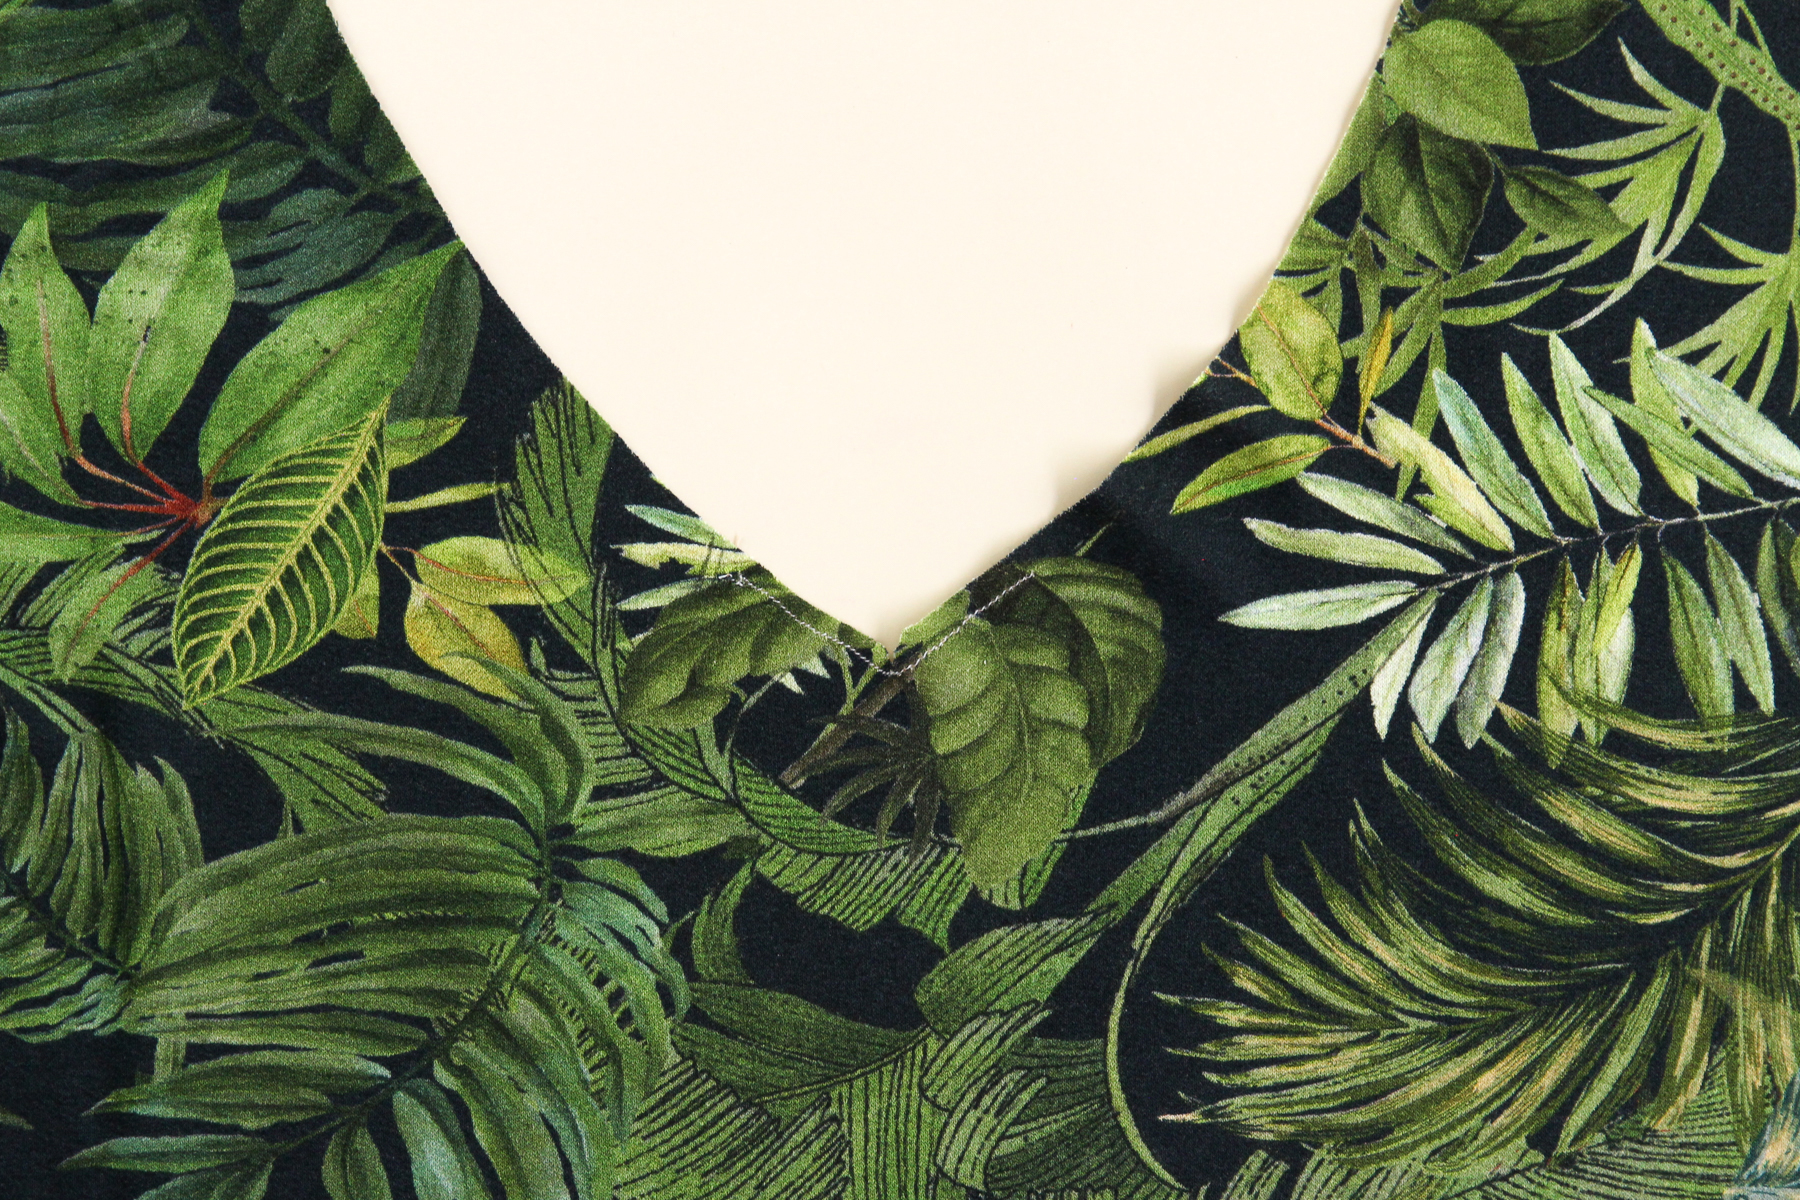
Bring the two ends together and lay one on top of the other to create a point. Baste the ends of the V together along the edges, using a long straight stitch and a ¼” seam allowance.

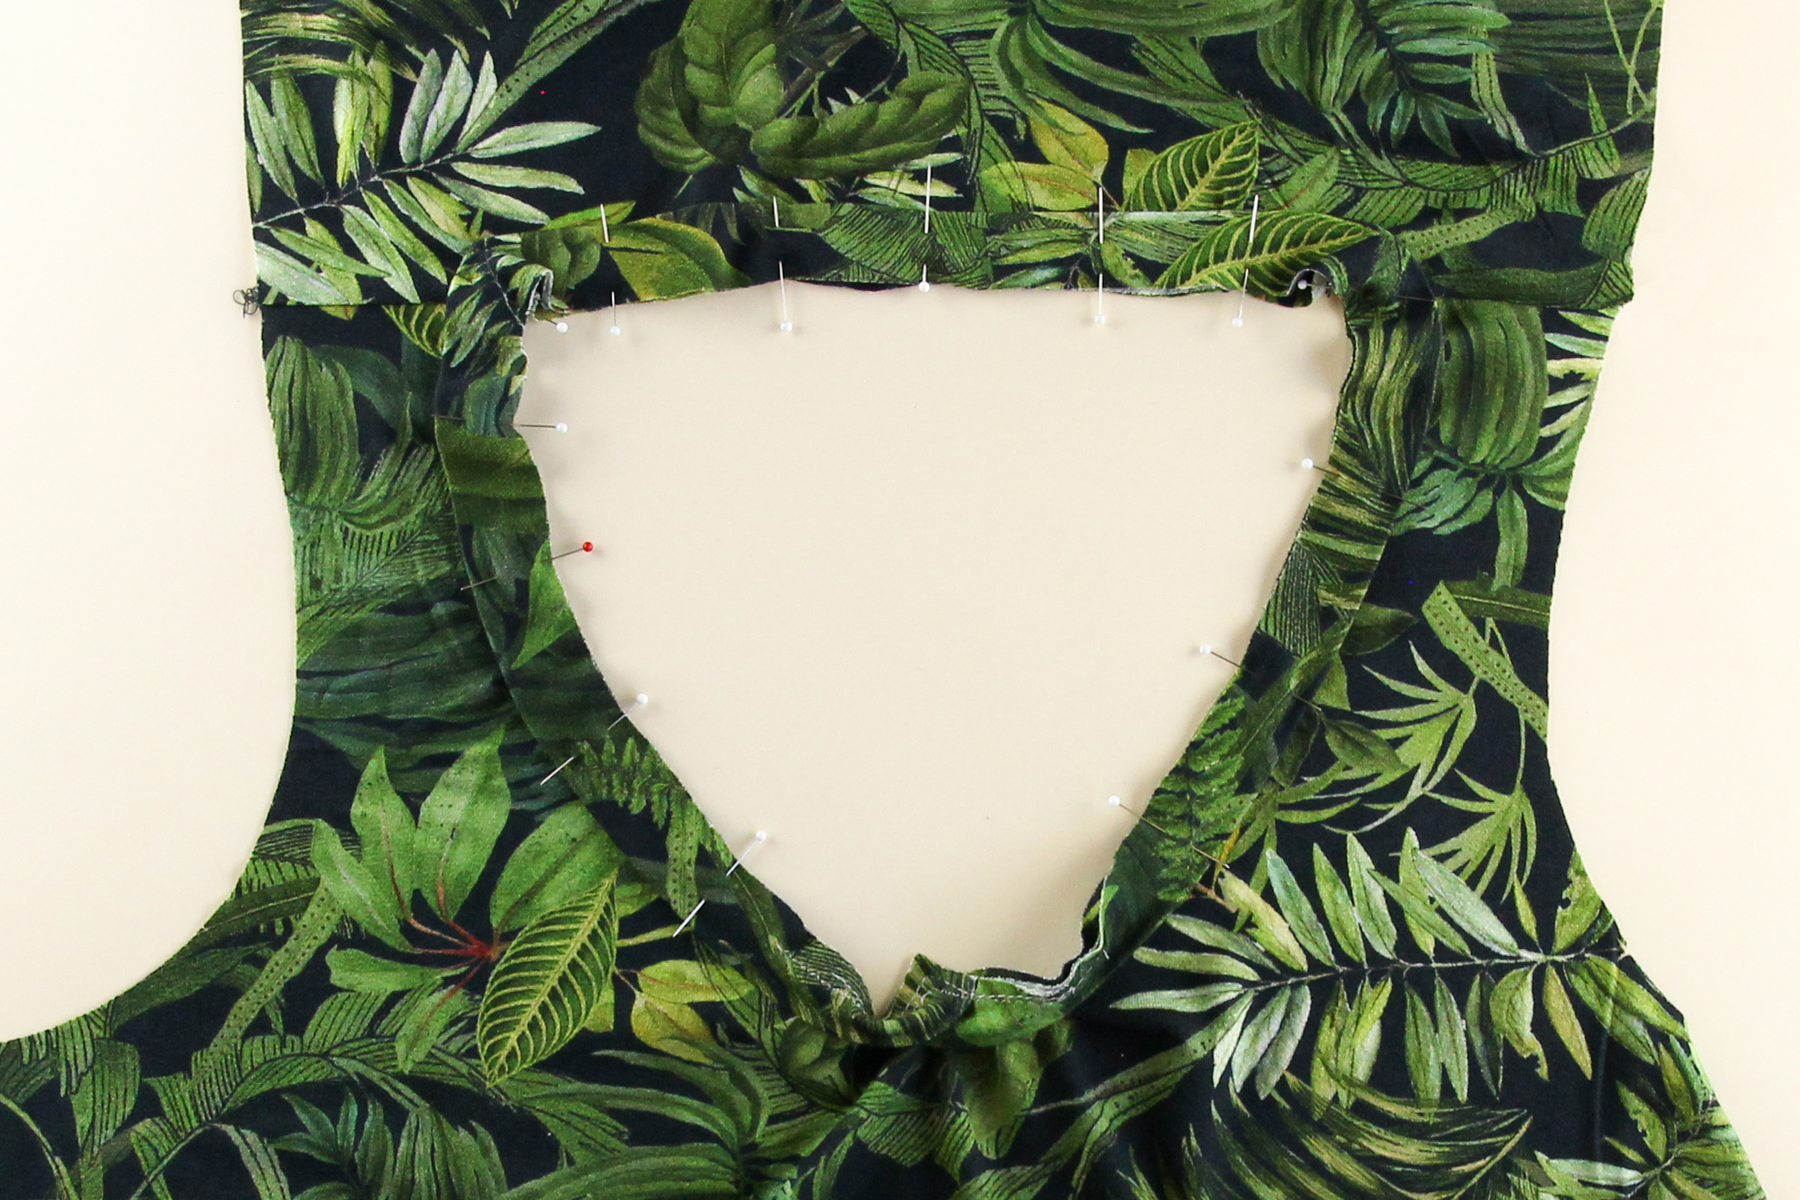
Pin the neckband to the neckline matching the points of the V and the stay stitching lines with right sides together.The stitching will form an “X”.
Now we’re going to attach the V part before sewing the whole neckband so we can get that nice and perfect (and can re-do if necessary! Happens to the best of us).
Pin the left side of the neckband up the neckline about 2 inches and sew towards the point of the V at 3/8” seam allowance using a sewing machine. Keep the needle down when you reach the point of the V. Pin the other side of the neckband up the neckline another two inches. Pivot the neckband under the needle and sew up the neckline about 2 inches.
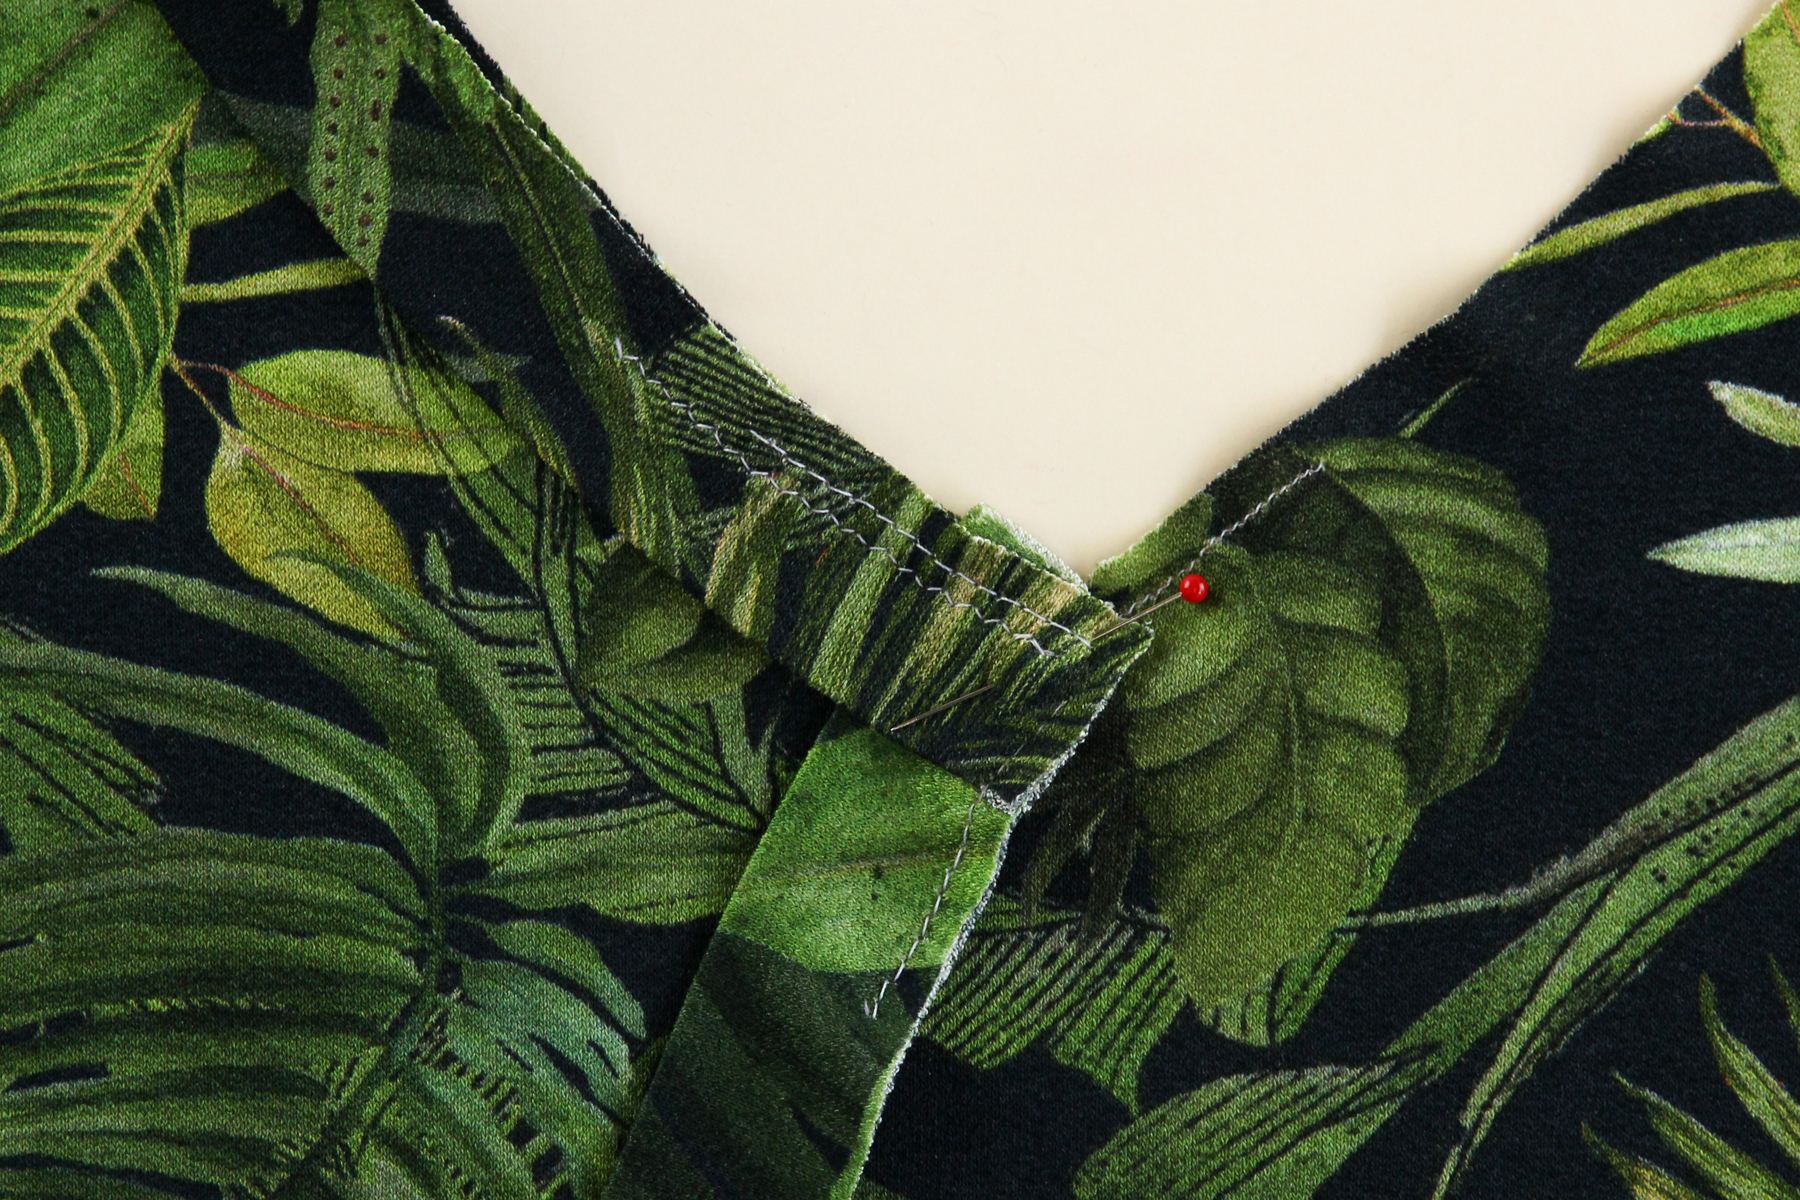
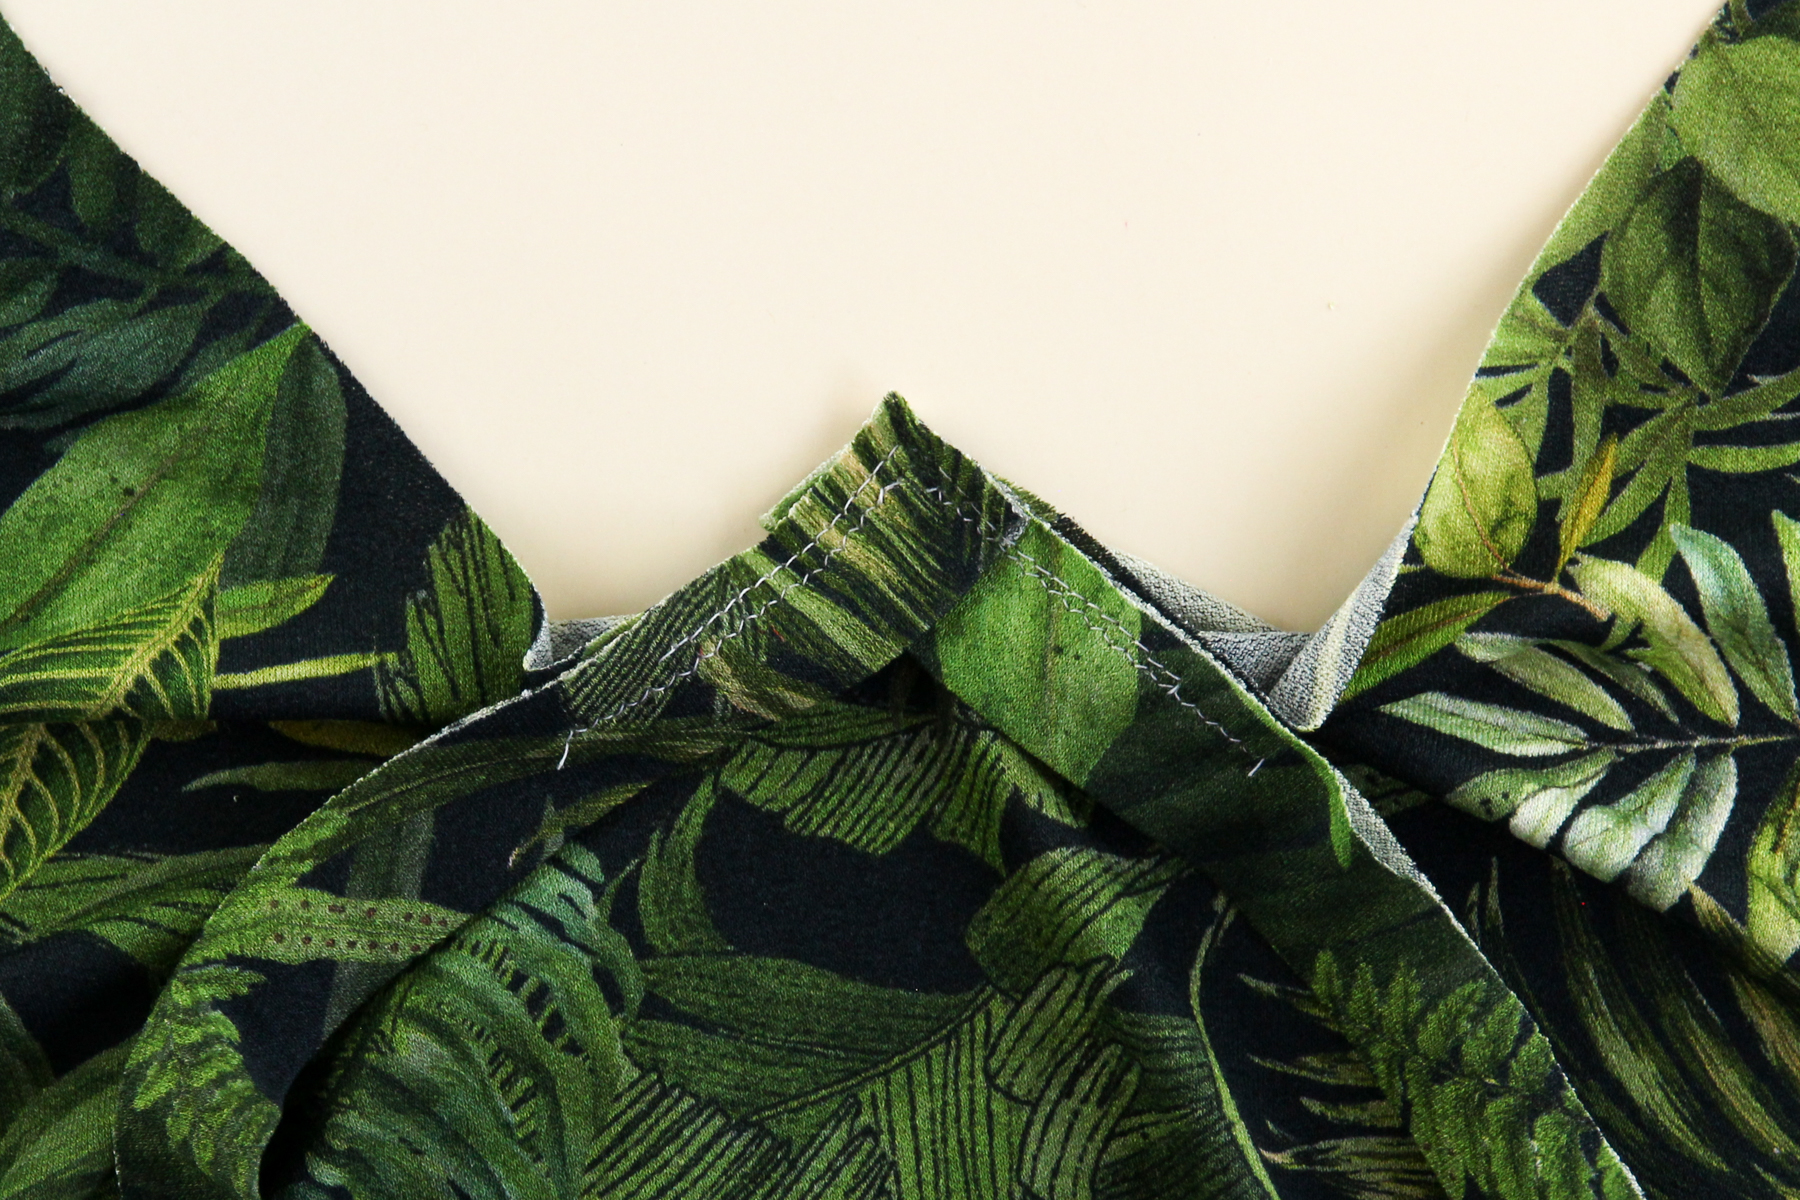
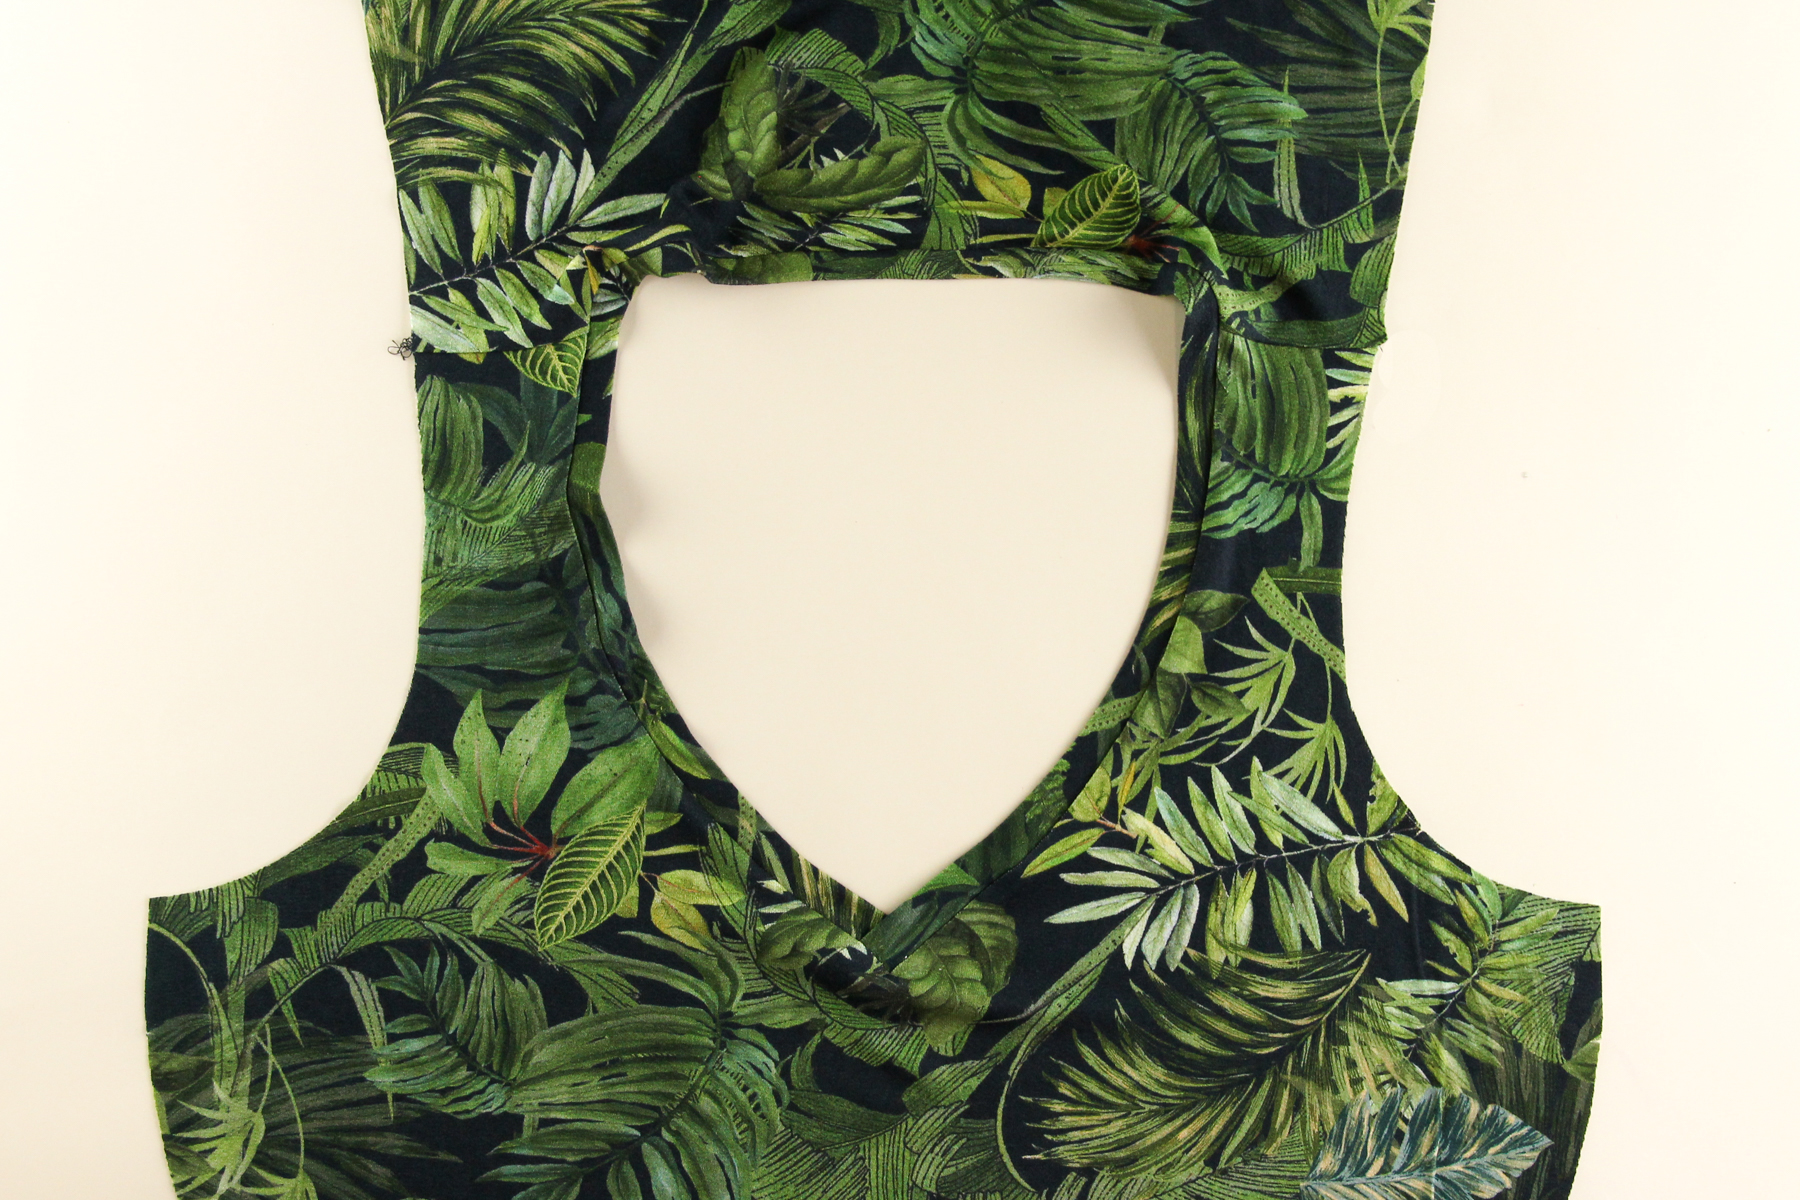
Take the shirt off the sewing machine and turn the V right side out to check and make sure it isn’t puckered.

If you have puckers, rip out those seams and try again. If it looks good, pin the remainder of the neckband to the neck opening and sew the remainder of the neckline, easing (stretching) the neckband as you go. Press the seam allowance towards the shirt (and avoiding getting a shine like I did by using a cool iron and pressing from the wrong side of the fabric, or using a press cloth).
And we’re done for today! Come back tomorrow for the next step. Do you have any questions about attaching neckbands?
I’ve always done scoops because I was afraid of the v-neck – excited to try this and then put v-necks on ALL THE THINGS.
Yeah! It requires a little patience and going slowly, but I’ve found this approach works really well. Just check how it’s looking after you do the first bit of stitching of the neckband at the point of the V – it’s easy to unpick and re-do at that stage, and you can get it looking great.
I have never done a v-neck and now that you have this tutorial, it has pushed me over the edge to wanting to buy the pattern for sure. 🙂 Love the sewalong and seeing all the T’s others have sewn up with this pattern.
I had to unpick once, but the second time I was more careful and it looks really good 🙂 Thank you!
Congrats!
So glad I came across this sewalong. I’m currently making the high necked Concord and am getting terrible puckering on the back piece once the neckband is attached. I made sure I cut out the right sized pieces, and attached it with the overlocker after matching the notches and seams, but I can’t think of that I have done wrong? The front puckered as well, but it pressed out fine. Top stitching made the back even worse. I’m not sure what to do. Help?
Really struggling to get the neck band on, it just doesn’t seem to fit even though I’m easing it in! Any tips?
The good news is that I did the v-neck and your directions worked like a charm.
The bad news is that, since I am narrow in the shoulders, the neckline is kinda wide for me.
Any hints on how to adjust the v-neck line to be narrower for my next attempt at this pattern?
Is a serger best for sewing this tee? Or can I sew it up on my standard old Singer with good results? I’m just started sewing for myself again after a looooooonnnnnggggg hiatus, lol. I’m not ready to invest in a serger just yet. I have a lot of graphic tees I want to remake. I think this pattern would be great for doing that.
Jenny, I’m loving your Craftsy FBA class! You really inspire me to jump back into sewing!…especially now that I can make my patterns fit me! Thanks!
The instructions show you how to do it on a sewing machine, but you can also use a serger. Glad to hear you enjoyed the FBA class!
Terrific! Thanks!
Oh no! The photos are no longer available. Just when I finally got around to actually sewing this…by hand in the Alabama Chanin style…which works great. I have a question about fit. I cut a size 20 C/D grading at the waist and hip out of an old t-shirt based on my bust, however, it is too tight across the bust and too big in the shoulders. The waist and hip are perfect. I thought I should try an 18 G/H next with the same grading of waist and hip. Am I on the right track? Thanks.
Sorry about the photos – they were lost due to an issue with our photo server, so we have to re-shoot the entire thing…
Given it’s tight in the bust and big in the shoulders I’d recommend grading from the 18 shoulders to the 20 E/F bust (the 18 G/H bust is the same circumference as the 20 C/D).
Thanks, I’ll try your recommendation. Bummer about having to redo all the photos. Just know all we sewists will appreciate it greatly.
Hello,
I was looking at the sew-along for this pattern to make this top (concord tshirt) for my daughter. but the pictures are missing. Will you be re-posting them again? Thank you!
Never mind. I just saw your previous response. Thank you!
Your photos/diagrams are not showing up. I click on DSC_0288 and get a file not found error
Yes unfortunately the photos for this sewalong were lost when our server went down but we are working on re-shooting them soon. Sorry for the inconvenience!
I am new to sewing knits and am curious if one should understitch facings? I always understitch for a clean seam fold for facings but don’t see that step in any of your instructions. Is there a reason why you don’t understitch facings on knits?
Hi Patrice, we generally do understitch facings even for knits to keep facings from rolling out to the outside of the garment, but in the case of the Concord, the neckline is a neckband (rather than a facing) so there’s no need to understitch. The faced hem is topstitched in place so it’s less likely to roll out to the outside. But if you prefer to understitch, you’re welcome to!
-Ayelet at Cashmerette